Assign and review inventory items
Create a separate Inventory Item for each physical asset, then assign it to an employee and location. You can review its details, warranty, visibility, and assignment history.
HR teams with Inventory access in the flair HR app in Salesforce. Employees view assigned items in the Employee Hub.
Before you begin
- Create the parent inventory asset for the model or equipment type.
Create an Inventory Item
For example, create one Inventory Item for each MacBook Air that your organization owns.
-
On the Inventories tab, click the relevant Inventory Name.
-
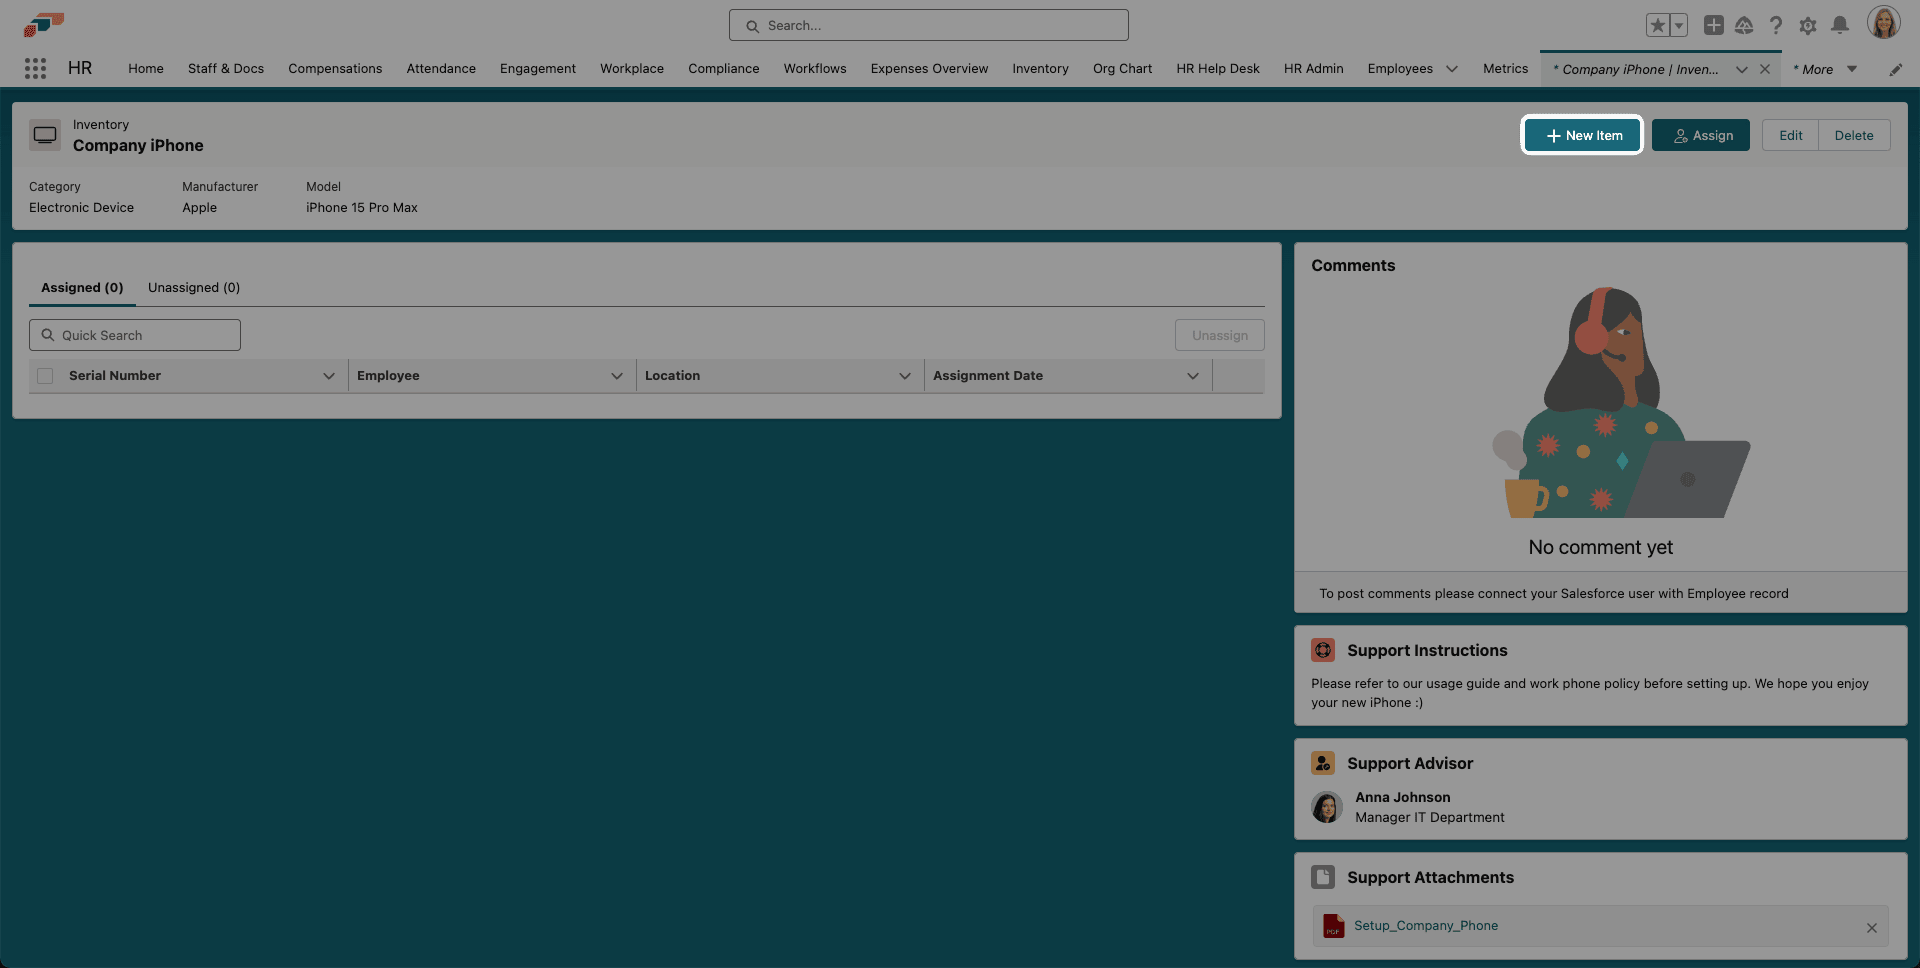
In the upper-right corner, click New Item.
-
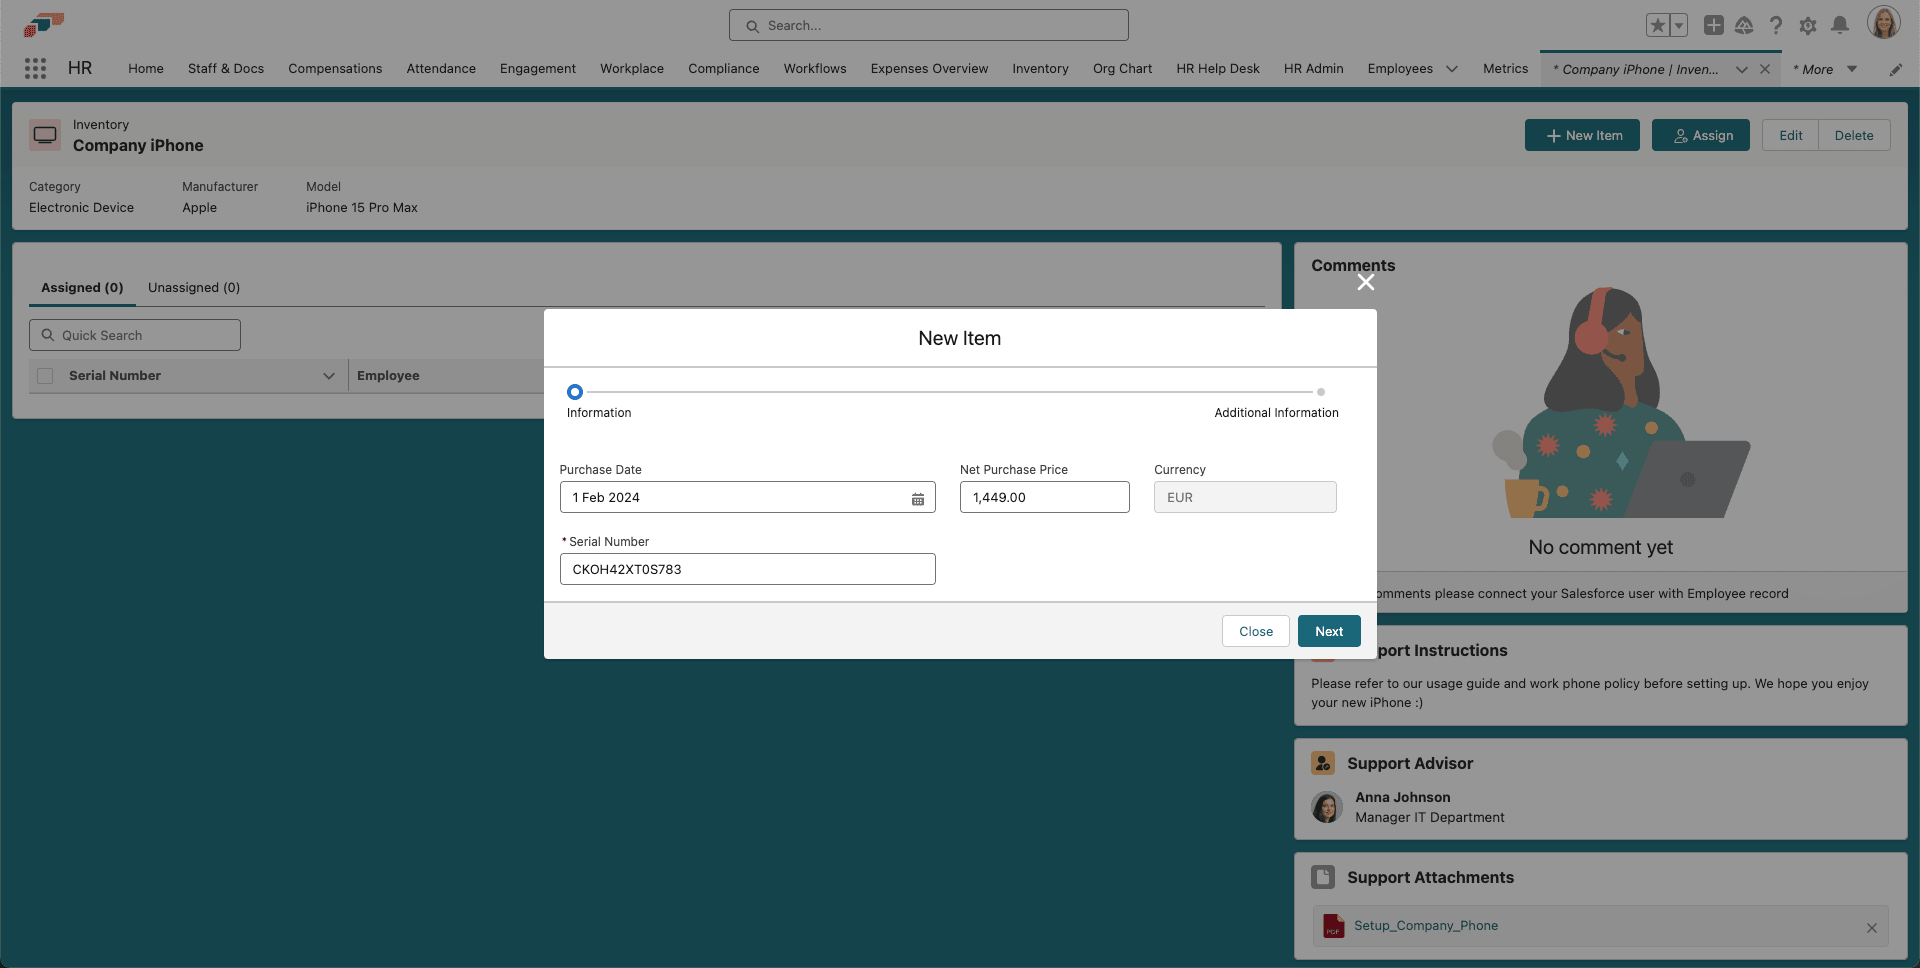
Enter the Purchase Date, Net Purchase Price, Currency, and Serial Number.
-
Optional: Select an Operating System, and enter Notes.
-
Save the item. It appears on the Unassigned tab and is sorted by Serial Number.
Assign an Inventory Item
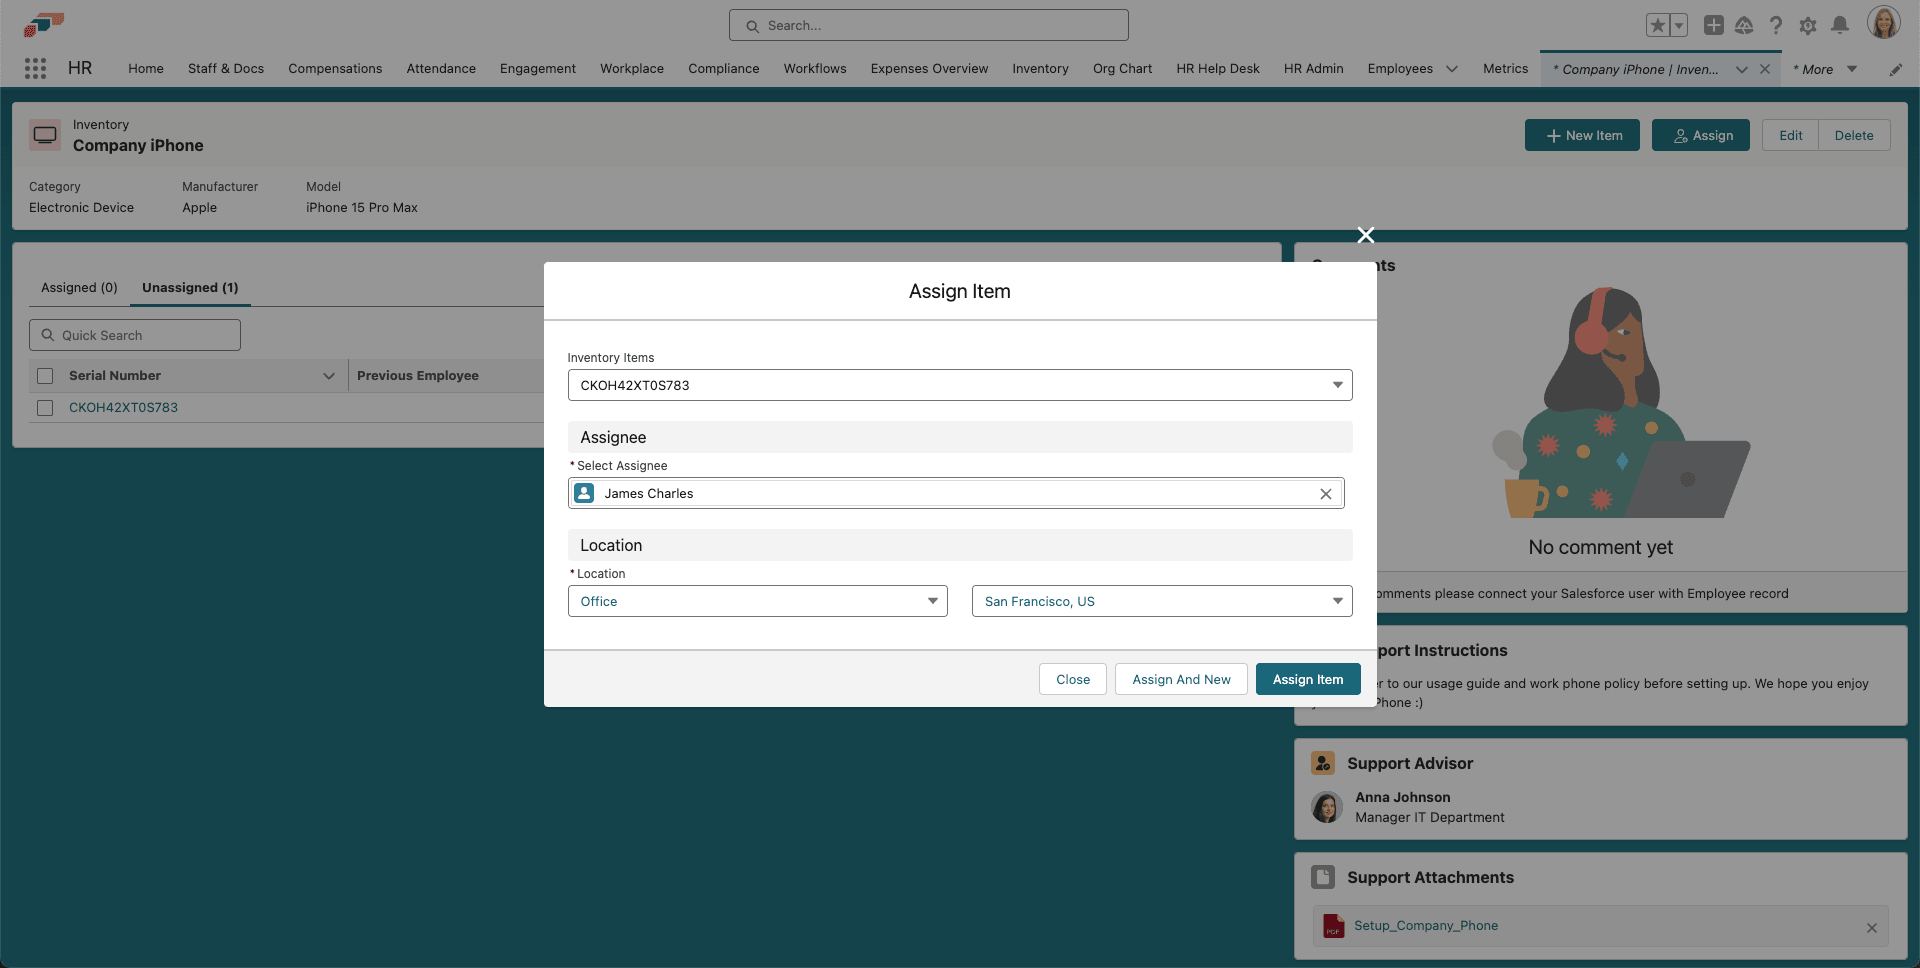
- On the Unassigned tab, open the item or click Assign.
- In Inventory Items, select the item by its serial number.
- In Assignee, select the employee.
- In Location, select Office or Home.
- If you selected Office, select the office where the item is located.
- Click Assign Item. The employee can see the item under Profile → Inventory in the Employee Hub.
Employees can leave comments and view attached support documents from the assigned item.
To assign several items in a row, open the form with the Assign button at the top of the inventory page and click Assign And New instead of Assign Item. flair assigns the item and opens an empty form for the next one.
Unassign an Inventory Item
When an employee returns an item, unassign it so it becomes available again. You can unassign from the inventory or from the employee's inventory.
Unassign from the inventory
- In Inventory, on the Inventories tab, click the relevant Inventory Name.
- On the Assigned tab, select one or more items.
- Click Unassign.
- Confirm that you want to unassign the items.
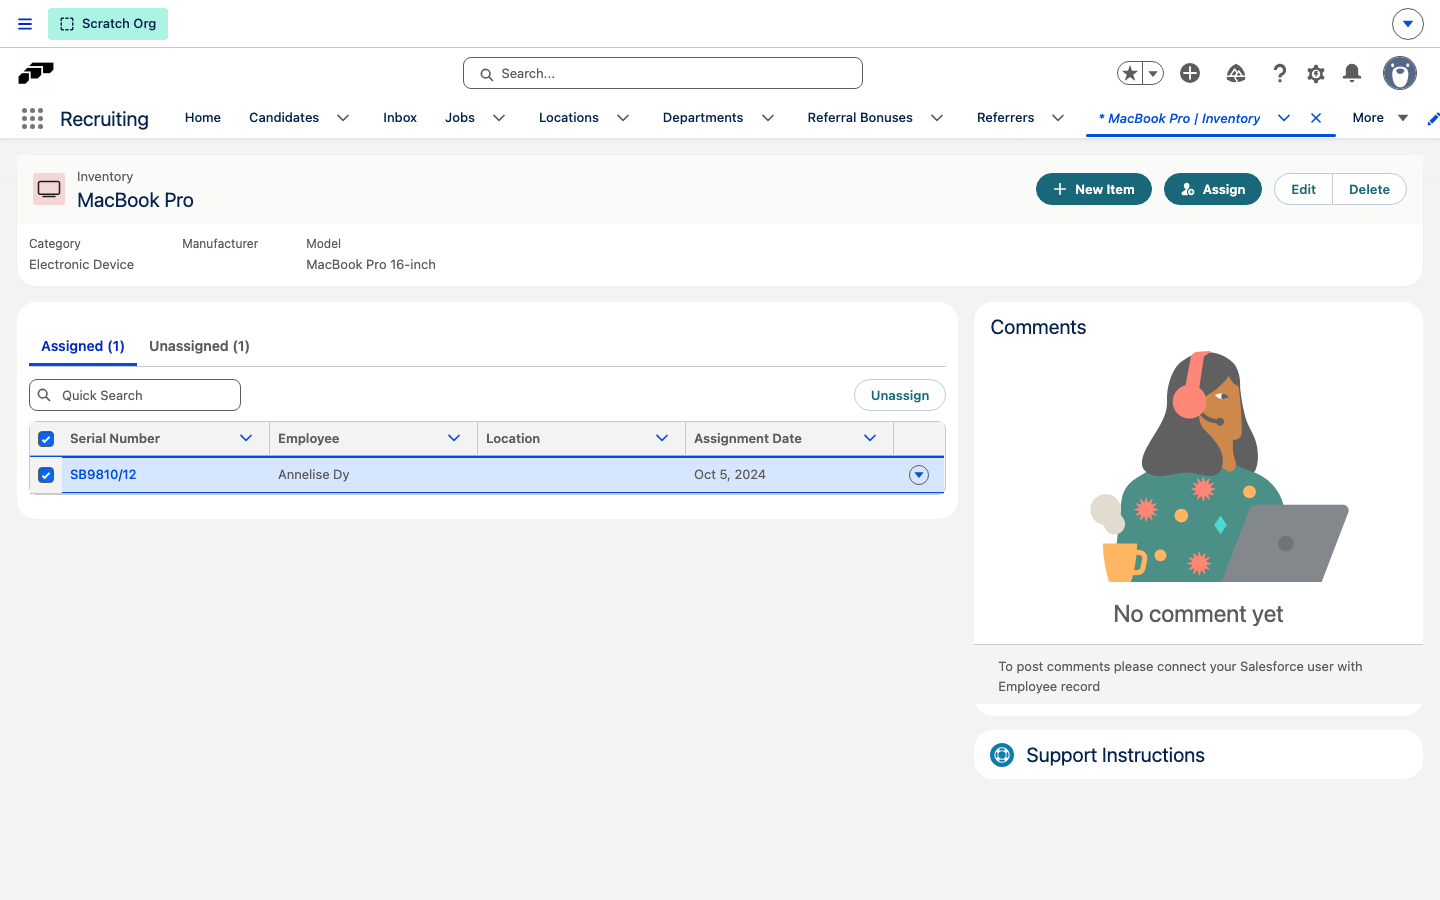
The items move to the Unassigned tab. flair clears the assignee and location and shows the Previous Employee, Previous Location, and Unassignment Date for each item.
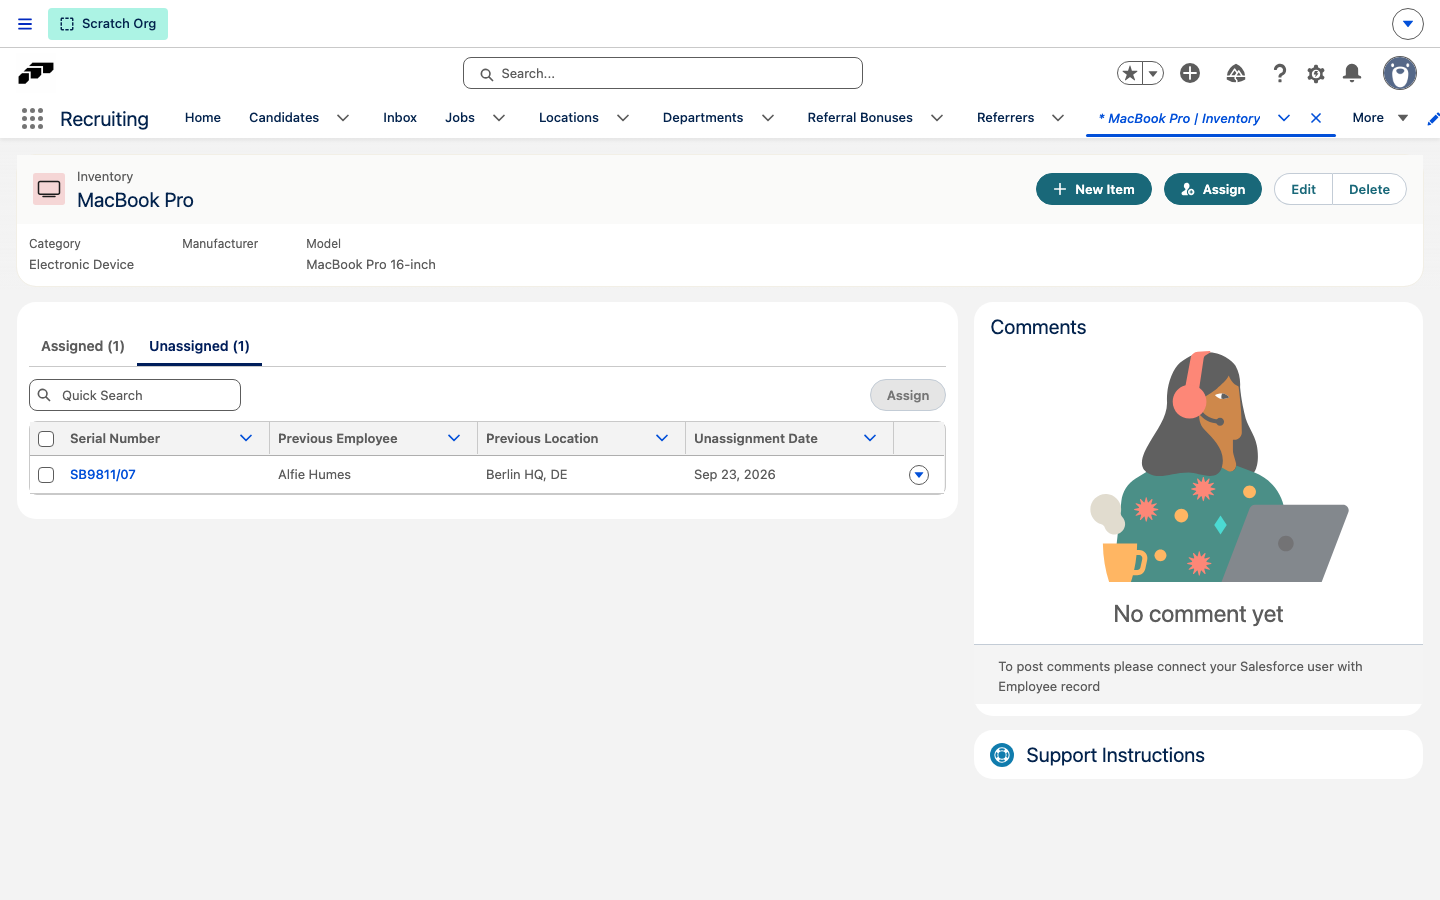
Unassign from an employee's inventory
- In Inventory, on the Employees Inventory tab, click the employee's name.
- Select one or more items, and click Unassign. To unassign a single item, you can also click the row's action menu and select Unassign.
- Confirm that you want to unassign the items.
Review item details and history
-
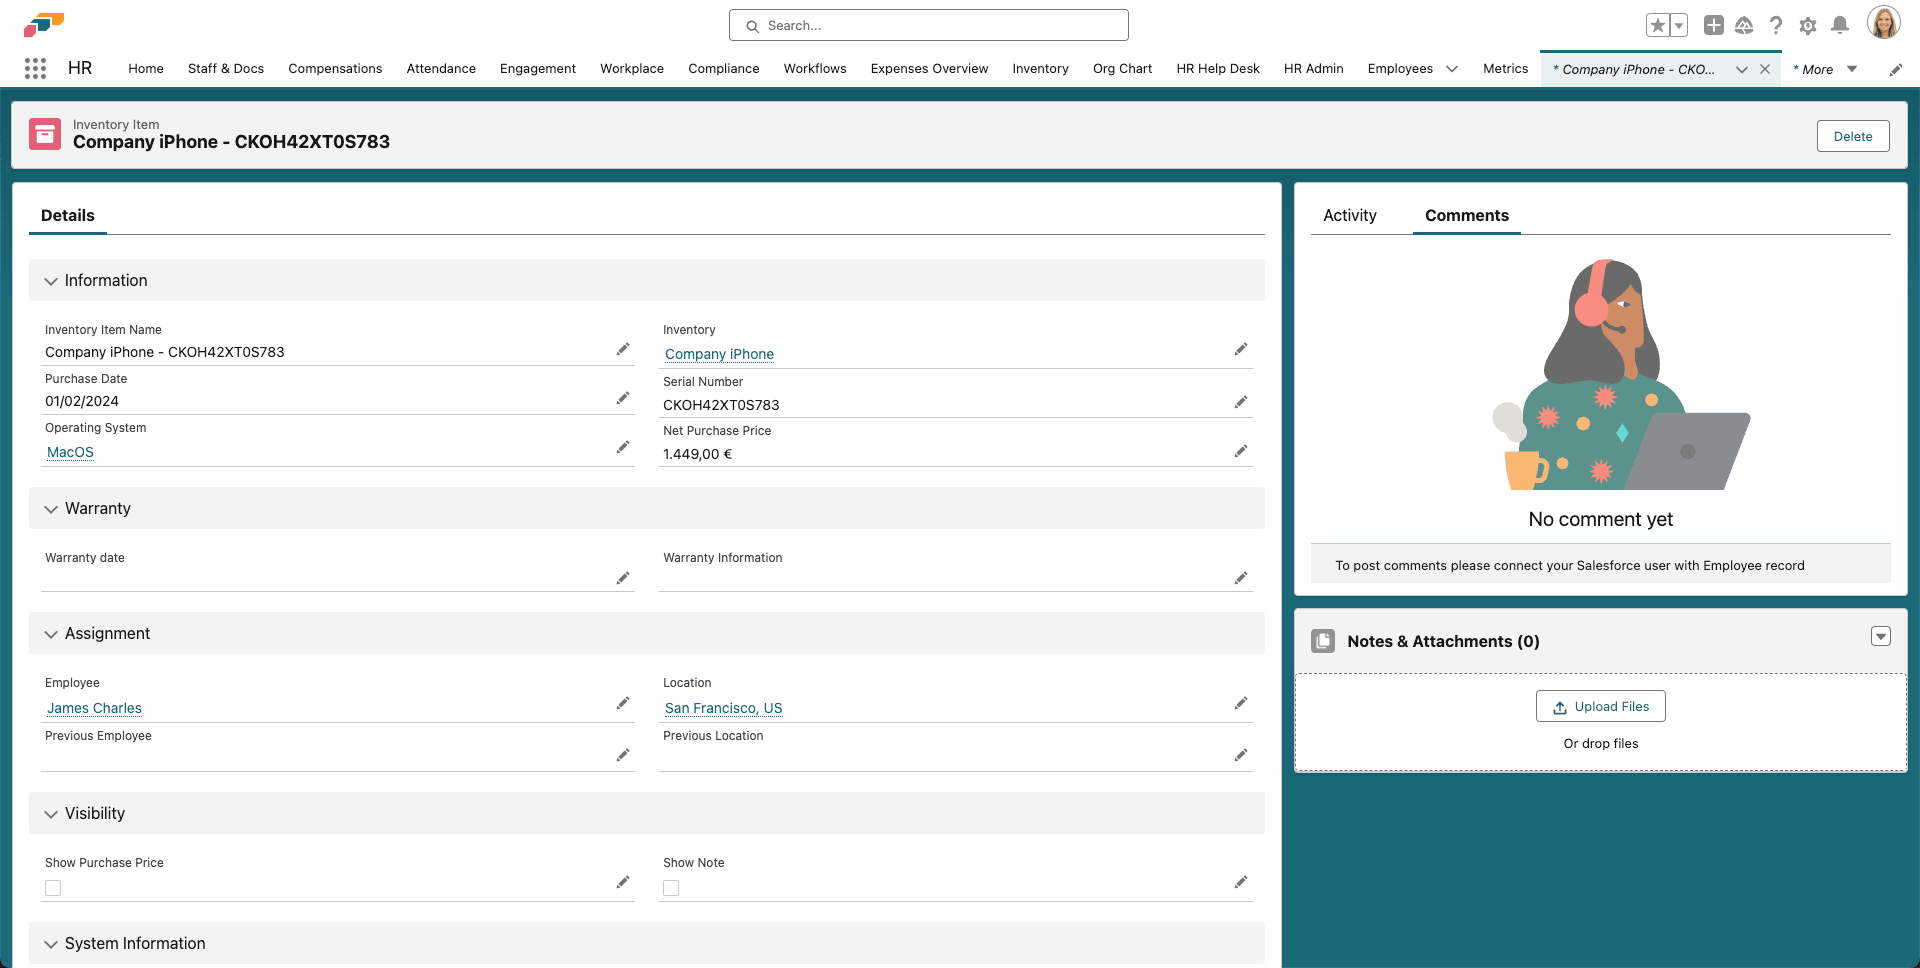
In Inventory, click the item's serial number. The Details page opens.
-
Review the information associated with the item.
-
Optional: Add a Warranty Date and Information.
-
Optional: Change the visibility of the purchase price and notes.
-
At the bottom of the page, review Inventory Item History to track changes to Assignee, Location, and other information.
