Approval Policies
Approval Policies define who approves requests in your organization. Each policy contains steps, approvers, and rules that determine how approval requests are routed and processed.
Accessing Approval Policies
Finding Approval Policies in Salesforce
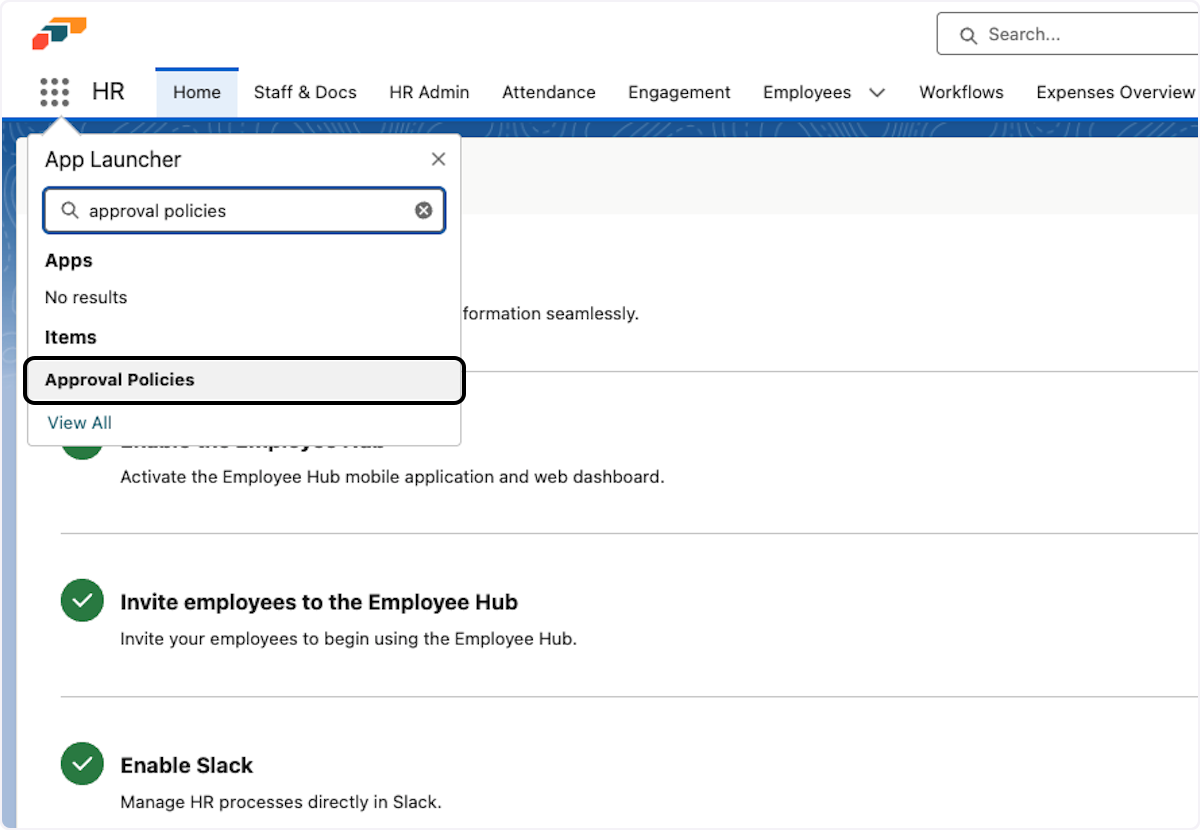
Use the App Launcher (🔍) to search for "Approval Policies".
Viewing All Policies
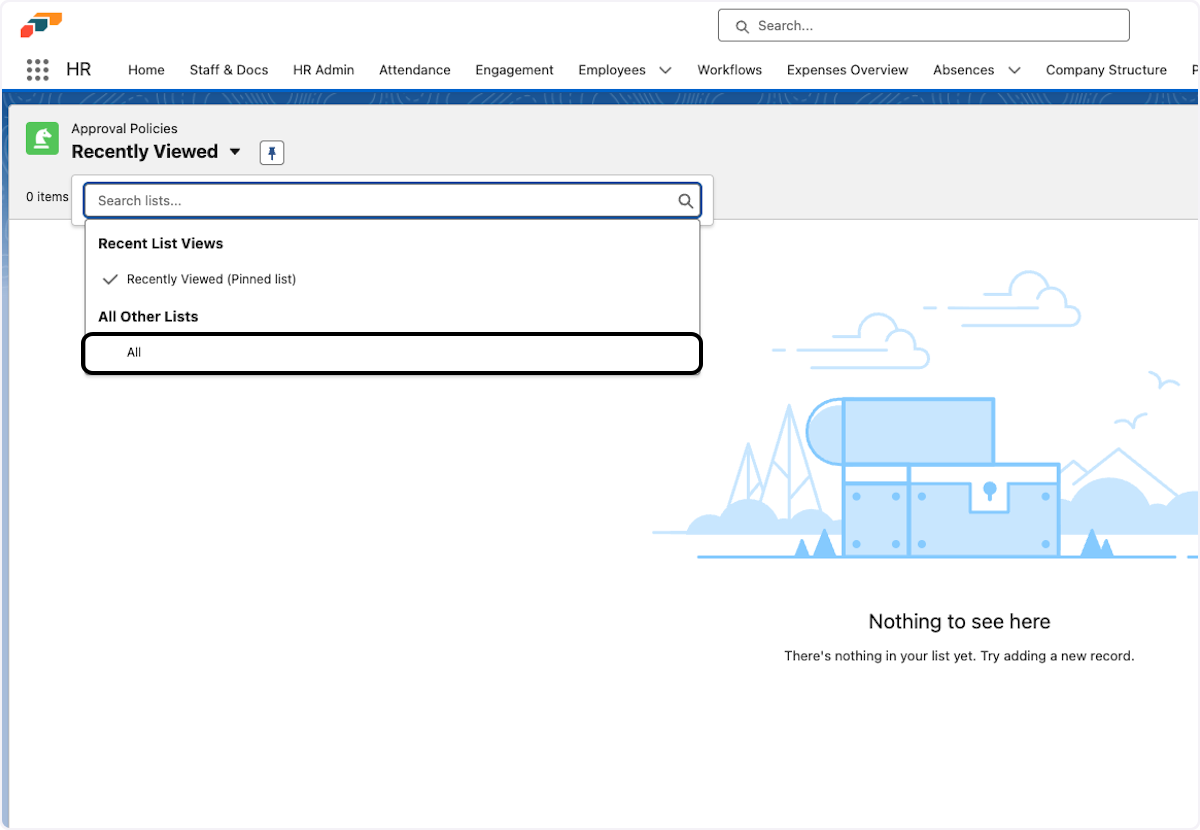
Change the List View from "Recently Viewed" to "All" to see all available approval policies in your organization.
Default Approval Policies
flair automatically creates default approval policies for each supported feature area. These policies:
- Are created automatically when you install or upgrade flair
- Cannot be deleted (to ensure approvals continue working)
- Can be disabled if you want to use custom policies instead
- Are marked as "Default" and have view-only forms
You can either create a new Approval Policy or modify the behavior by creating custom policies and disabling the defaults.
Default Absence Policy
Routes absence requests to the employee's direct manager. This policy:
- Targets all employees
- Has one approval step assigned to the employee's manager
- Applies to all absence types by default
Default Document Policy
Routes employee-uploaded documents to HR managers when the document visibility is set to "HR Manager and Employee". This policy:
- Only applies to self-uploaded documents
- Filters for documents with "Pending" approval status
- Requires HR manager review before approval
Creating and Managing Policies
Selecting a Policy to Configure
Click on any approval policy name to view or modify it.

Enabling and Disabling Policies
You can enable or disable any policy (except defaults which start enabled):
- Open the policy you want to enable/disable
- Look for the Enable/Disable button
- Click to toggle the policy state
Why disable a policy?
- Test a new policy without deleting the old one
- Temporarily bypass certain approval requirements
- Switch between different approval workflows for different periods
If you enable multiple policies for the same object, flair uses the matching priority to determine which policy applies. The policy with the lowest matching priority number takes precedence.
Understanding Matching Priority
When multiple approval policies could apply to the same request, the Matching Priority field determines which one is used:
- Lower numbers = higher priority (Priority 1 beats Priority 2)
- Use this to create fallback policies
- Example: Priority 1 for management team, Priority 2 for everyone else
Configuring Approval Steps
Accessing Steps
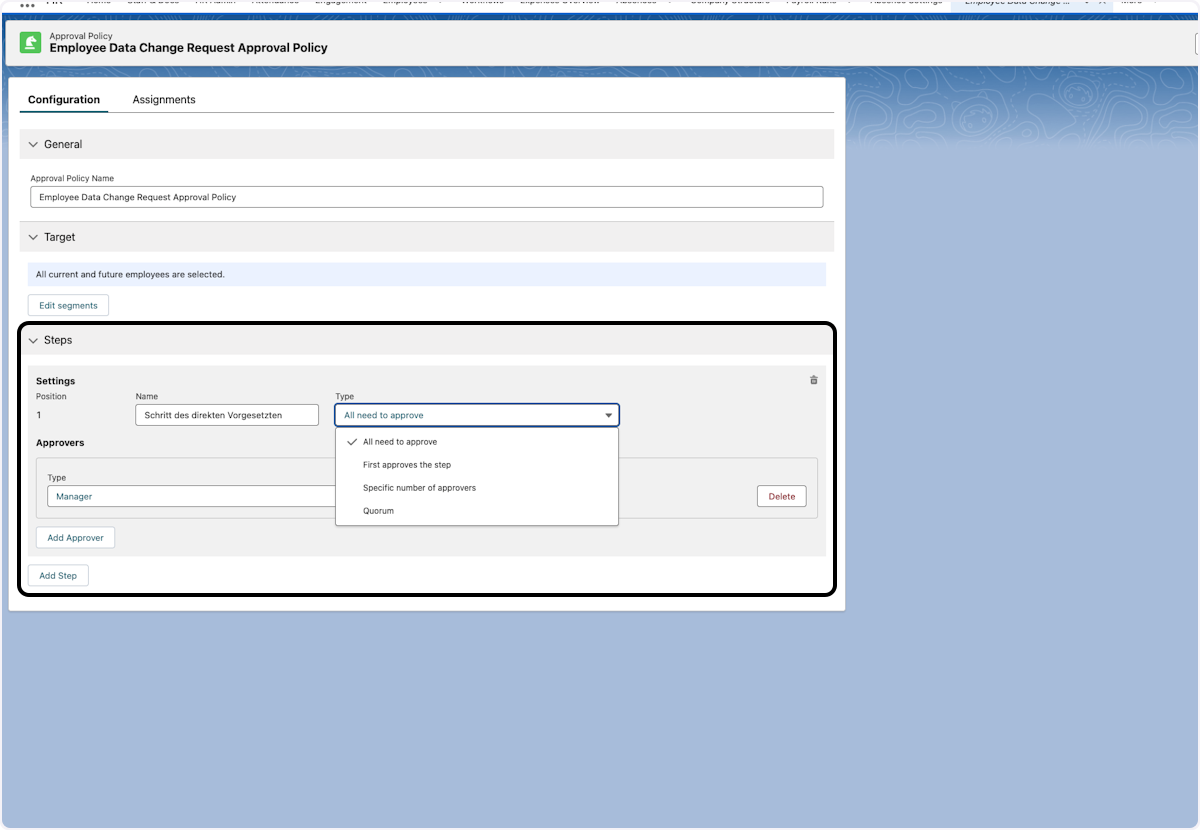
Click on the Steps tab to view and configure approval steps for a policy.

Modifying Step Details
Each approval step has:
- Name - Descriptive label for the step (e.g., "First Approval", "Department Head Review")
- Type - The nature of this approval step
- Order - Steps are processed in sequence
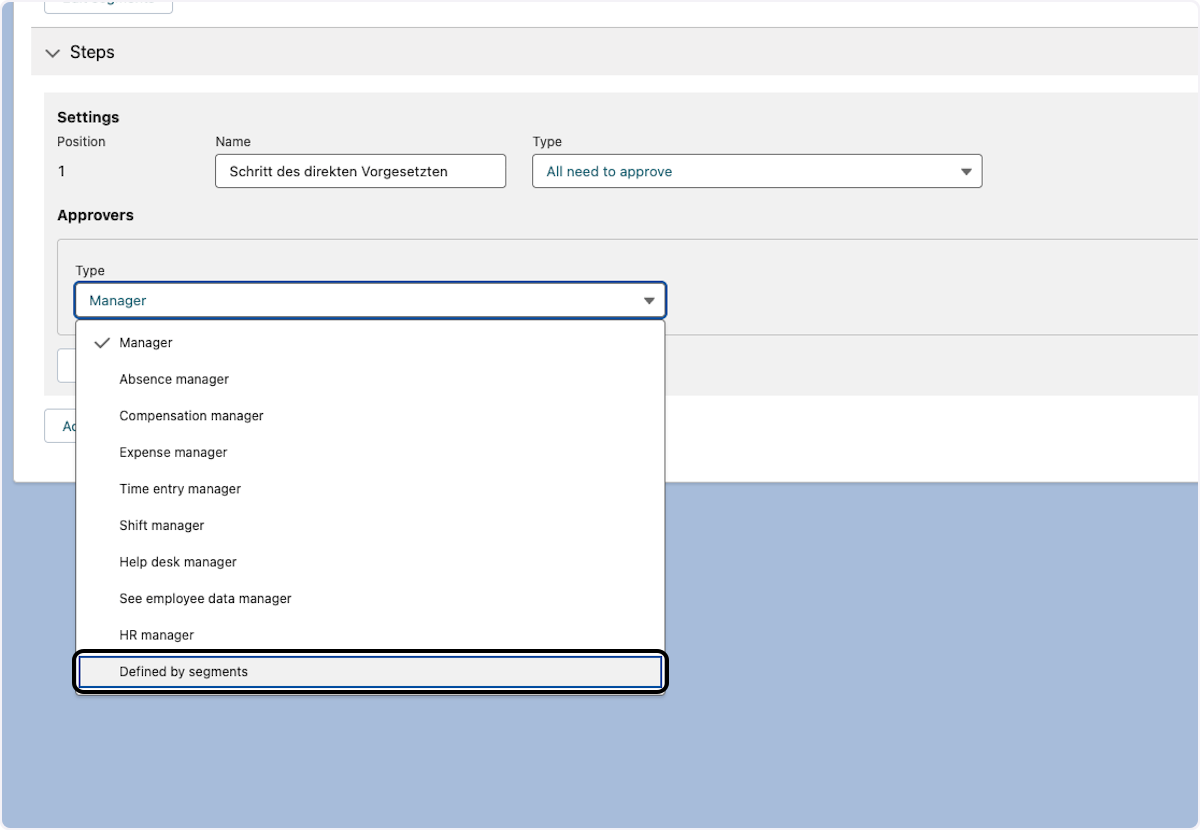
Configuring Approver Types
You can configure different types of approvers for each step:
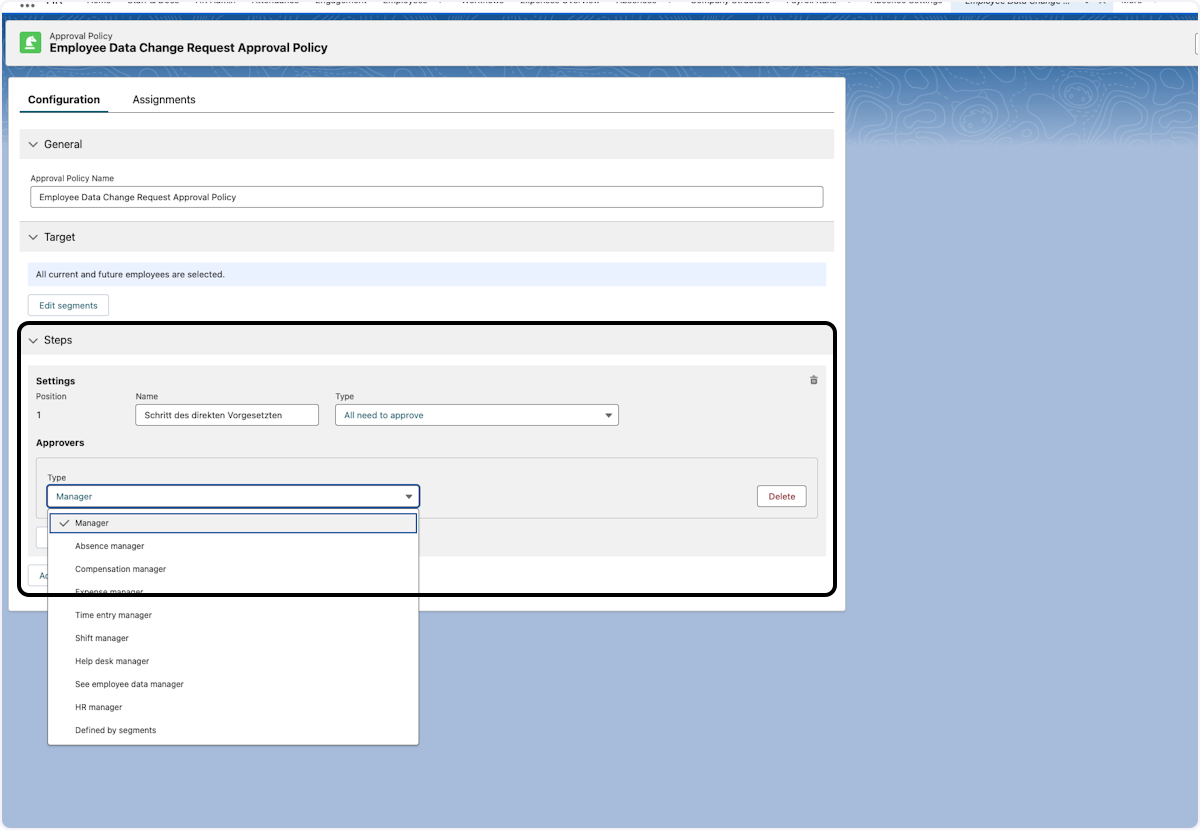
Available Approver Types:
- Manager - The employee's direct manager
- Additional Managers - Employees with additional manager responsibilities
- Defined by Segments - Specific employees, positions, or departments selected via segments
- Custom Field - Approver determined by a lookup field on the record
Defining Approvers with Segments
Segments allow you to select specific approvers based on organizational criteria.
Using Segment-Based Approvers
Click "Defined by segments" to select specific employees, positions, departments, or other criteria.
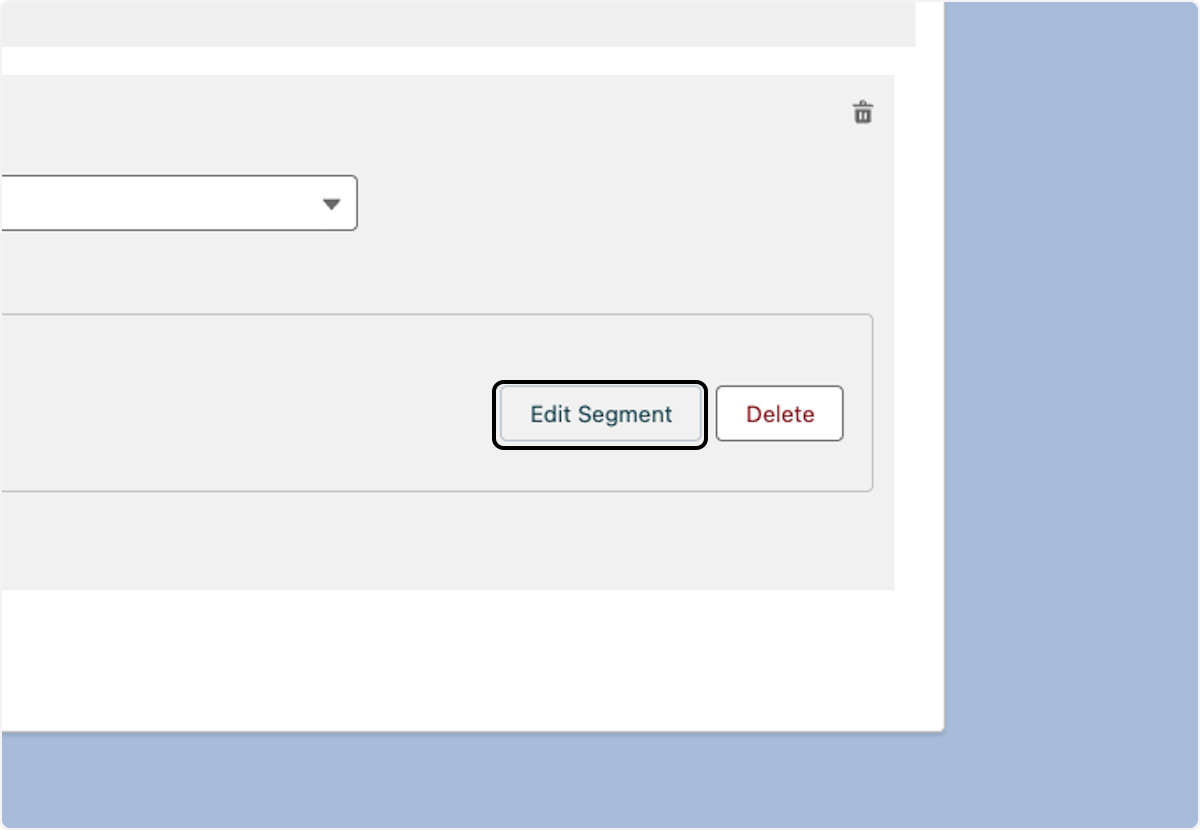
Editing Segments
Click Edit Segment to open the segment configuration interface.
Filtering for Specific Approvers
Use filters to narrow down your search and find the right approvers.
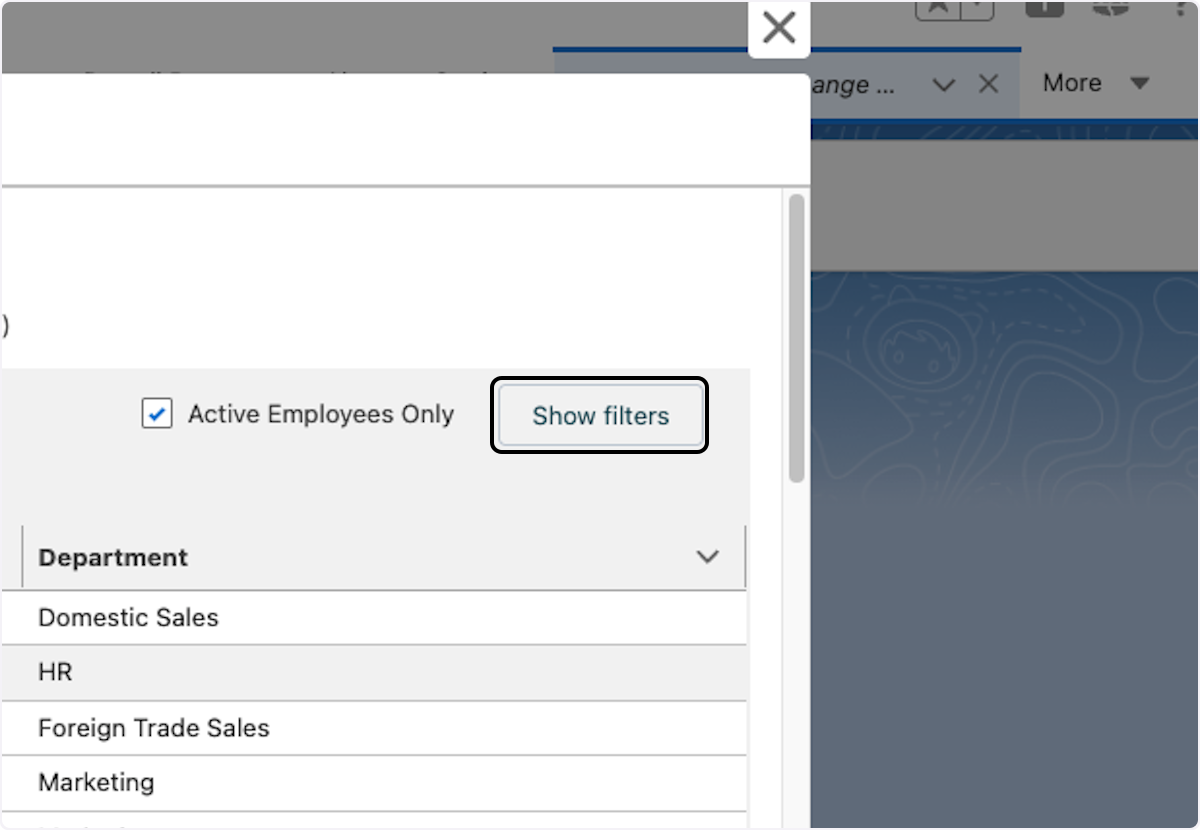
You can filter by:
- Department
- Position
- Location
- Custom employee fields
- Employment status
Applying Filters
Define your search criteria and click Apply filter.
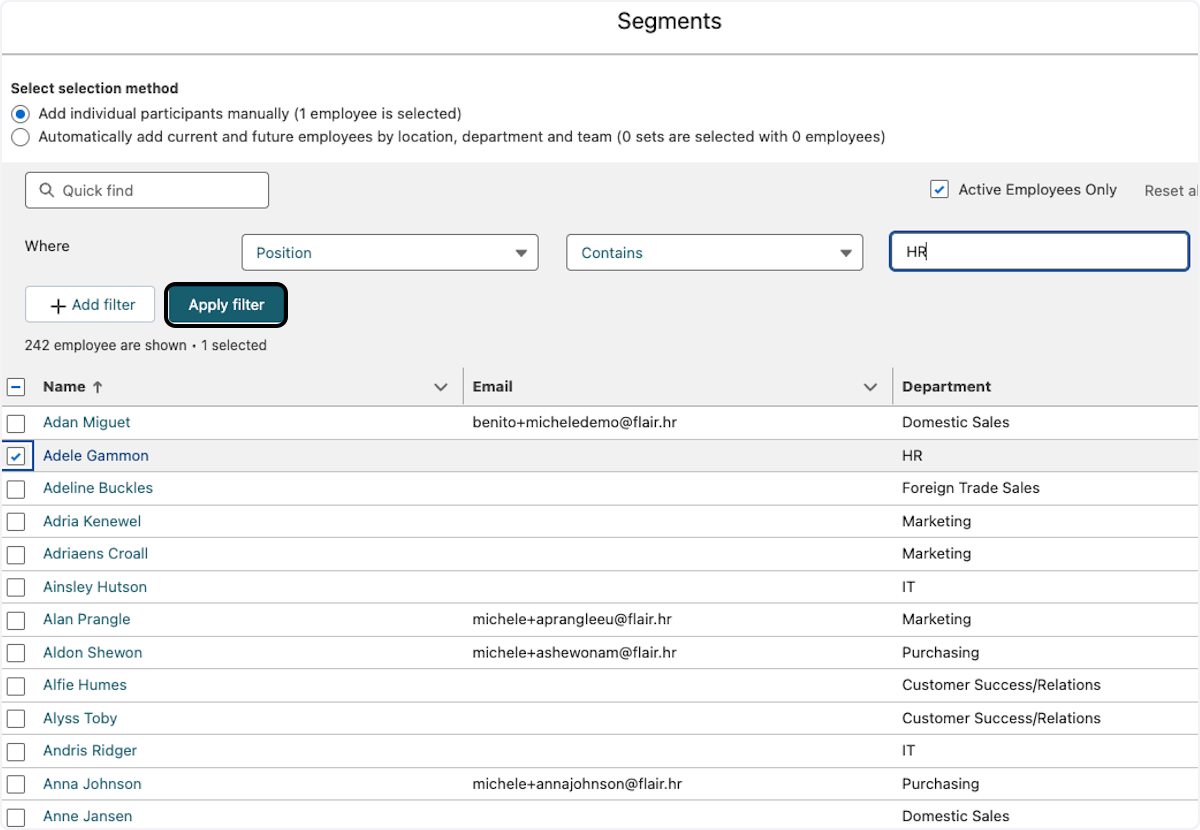
Selecting Approvers
Choose the employees who should approve this step, then click Save.

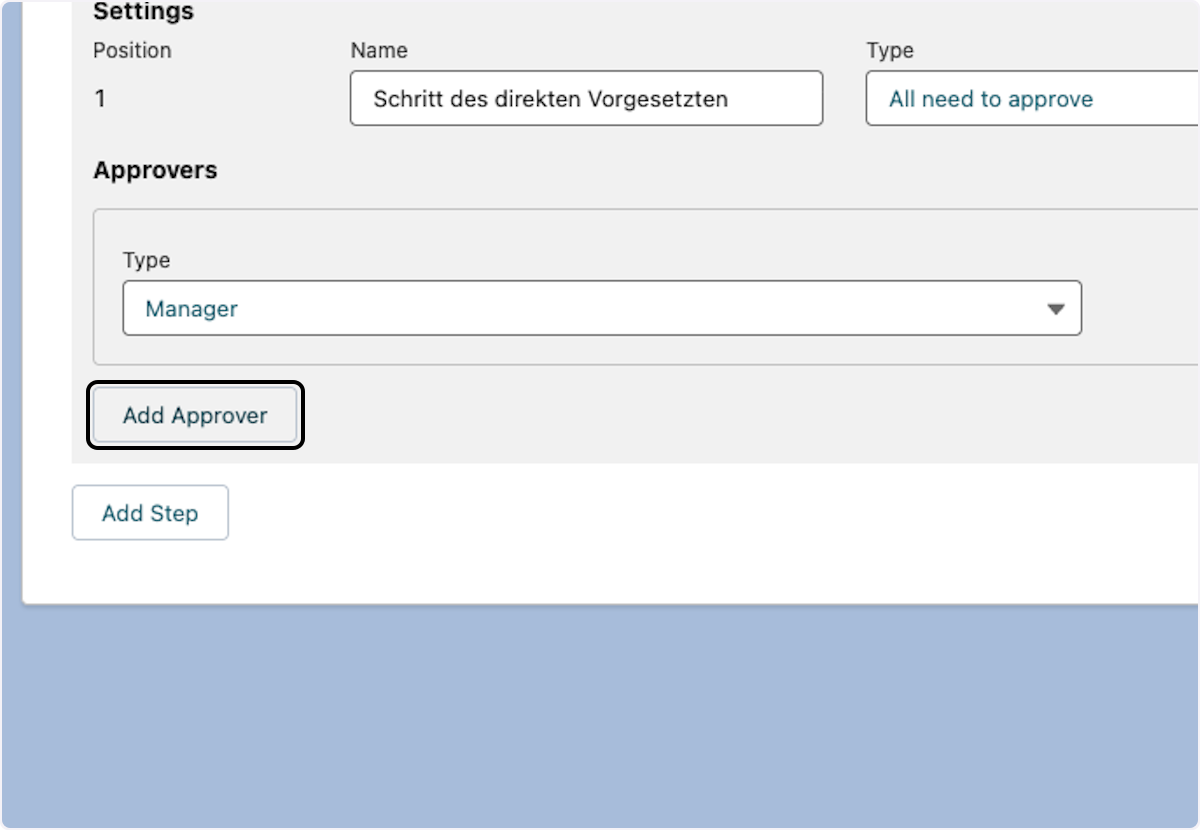
Adding Multiple Approvers
Multiple Approvers per Step
A single approval step can have multiple approvers. This is useful when:
- Any one of several people should be able to approve
- All approvers must approve (depending on step configuration)
- You want backup approvers in case someone is unavailable
Click Add Approver to add additional approvers to the same step.
Example scenarios:
- Manager + HR Business Partner both need to approve
- Any regional manager can approve (first one to respond)
- Department head + Finance approval for budget-related requests
Policy Assignments
Viewing Where Policies Apply
Click the Assignments tab to see where this approval policy is applied and what objects it covers.
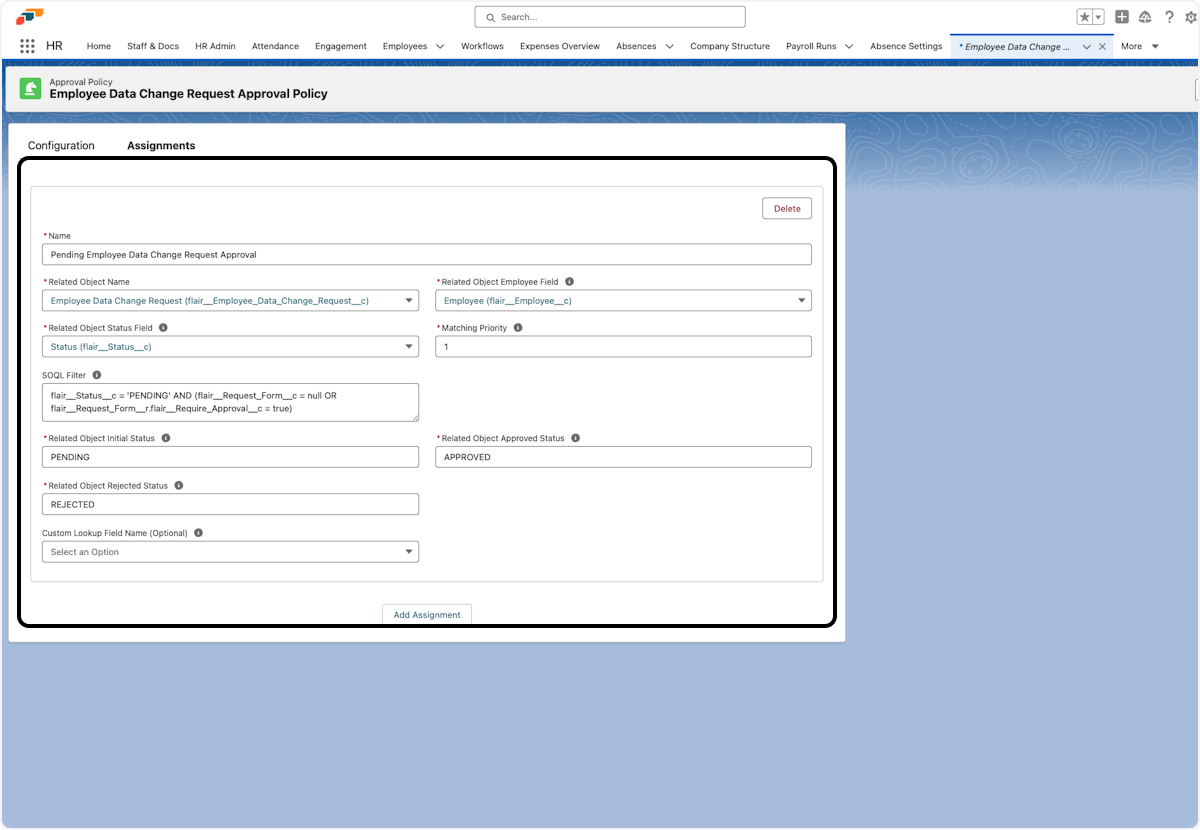
Assignment Configuration
The Assignments tab shows:
- Target Object - Which Salesforce object this policy applies to (Absences, Employee Documents, etc.)
- Employee Field - Which field identifies the employee who submitted the request
- Approval Status Field - Which field tracks the approval status
- SOQL Filter - Optional filter to limit when this policy applies
Example SOQL Filters:
-- Only for pending absences
Approval_Status__c = 'Pending'

-- Only for vacation requests
Absence_Category__r.Name = 'Vacation'

-- Only for documents visible to HR
Visibility__c = 'HR Manager and Employee' AND Self_Uploaded__c = true
Manager Transfer Handling
When an employee's manager changes, the Approval Framework automatically handles pending approval requests:
What happens:
- Any pending approval requests assigned to the old manager are skipped
- New approval requests are created for the new manager
- The new manager receives notifications about transferred requests
- The approval path history shows the transfer
Why this matters:
- Ensures approvals don't get stuck when organizational changes happen
- Maintains approval continuity during manager transitions
- Provides clear audit trail of who was responsible when
Review pending approval requests after manager changes to ensure smooth transitions. The approval path visualization makes it easy to see what was transferred.
Testing Your Policies
After configuring approval policies:
- Submit test requests - Have employees create sample absences or documents
- Verify routing - Check that approvals go to the right people
- Test notifications - Ensure approvers receive email, Slack, and Hub notifications
- Check approval paths - Use the approval path visualization to verify the flow
- Test edge cases - What happens with multiple managers, segments, etc.?
Troubleshooting
Approvals not routing correctly?
- Check the policy is enabled
- Verify the SOQL filter matches your requests
- Review matching priority if multiple policies exist
- Ensure approvers are in the correct segment
Multiple people receiving approvals?
- Check if you have Additional Managers configured
- Review if multiple approvers are set for the same step
- Verify you don't have overlapping policies with the same priority
Default policy can't be edited?
- Default policies are view-only
- Create a custom policy instead
- Disable the default policy if you don't want to use it