Payroll Data Management
The accurate input and efficient export of employee data are vital for effective payroll management. This section provides a comprehensive overview of the essential aspects involved in managing payroll documents and exporting data.
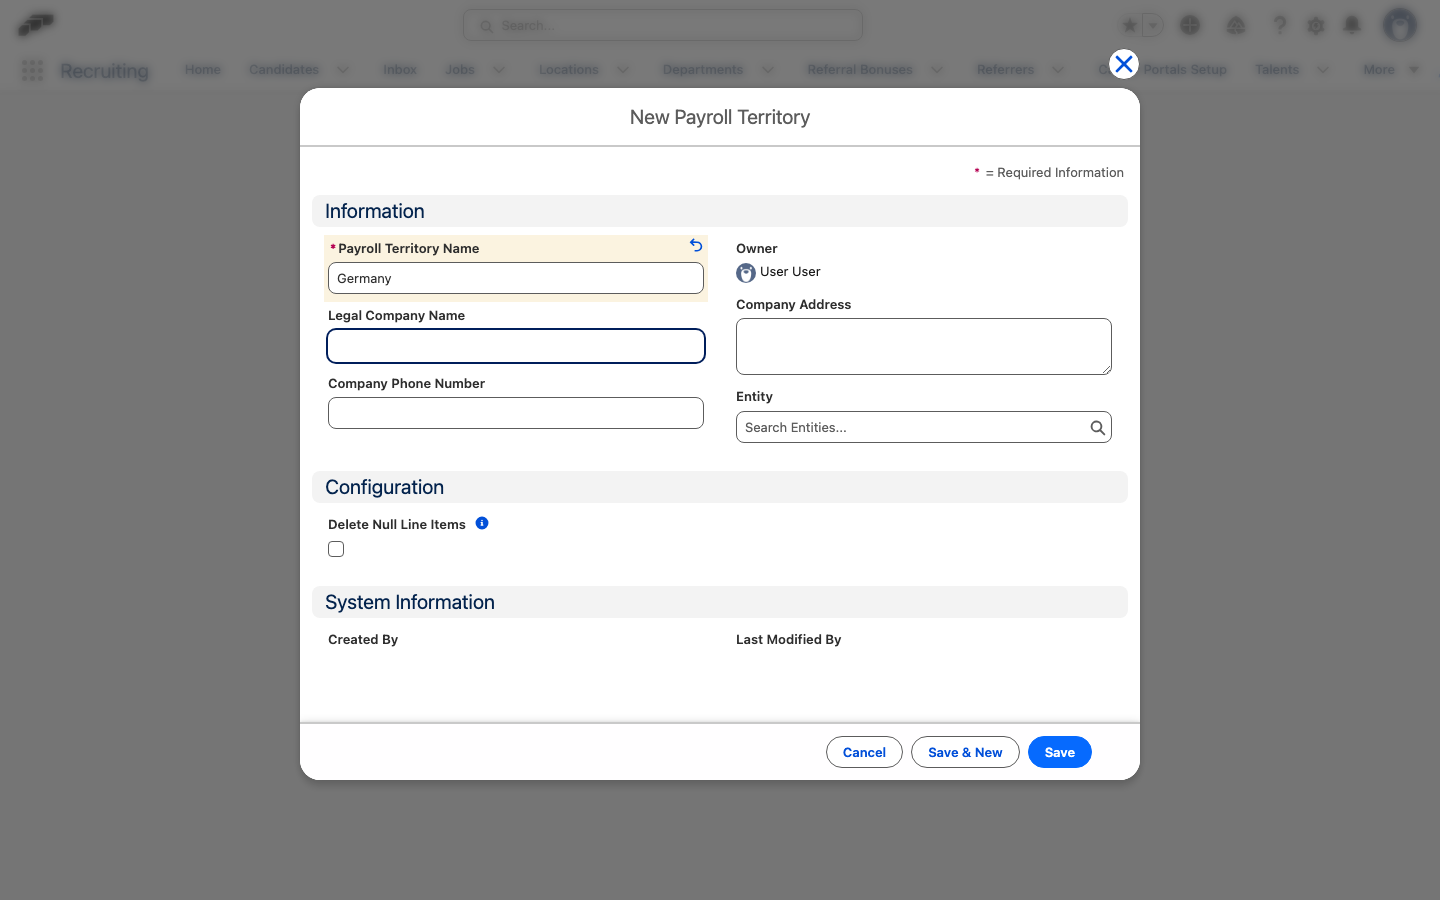
Setting Up Payroll Territories
Before creating payroll runs, you need to set up payroll territories to group employees by country or region.
- In the flair HR app, navigate to HR Admin > Payroll Territories.
- Click New to create a new territory.
- Fill in the territory details (name, country, currency).
- Save the territory.
To assign employees to a territory, open the territory and add employees. Only employees assigned to a territory will appear in payroll runs for that territory.
If employees are not showing up in a payroll run, verify that they are assigned to the correct payroll territory.
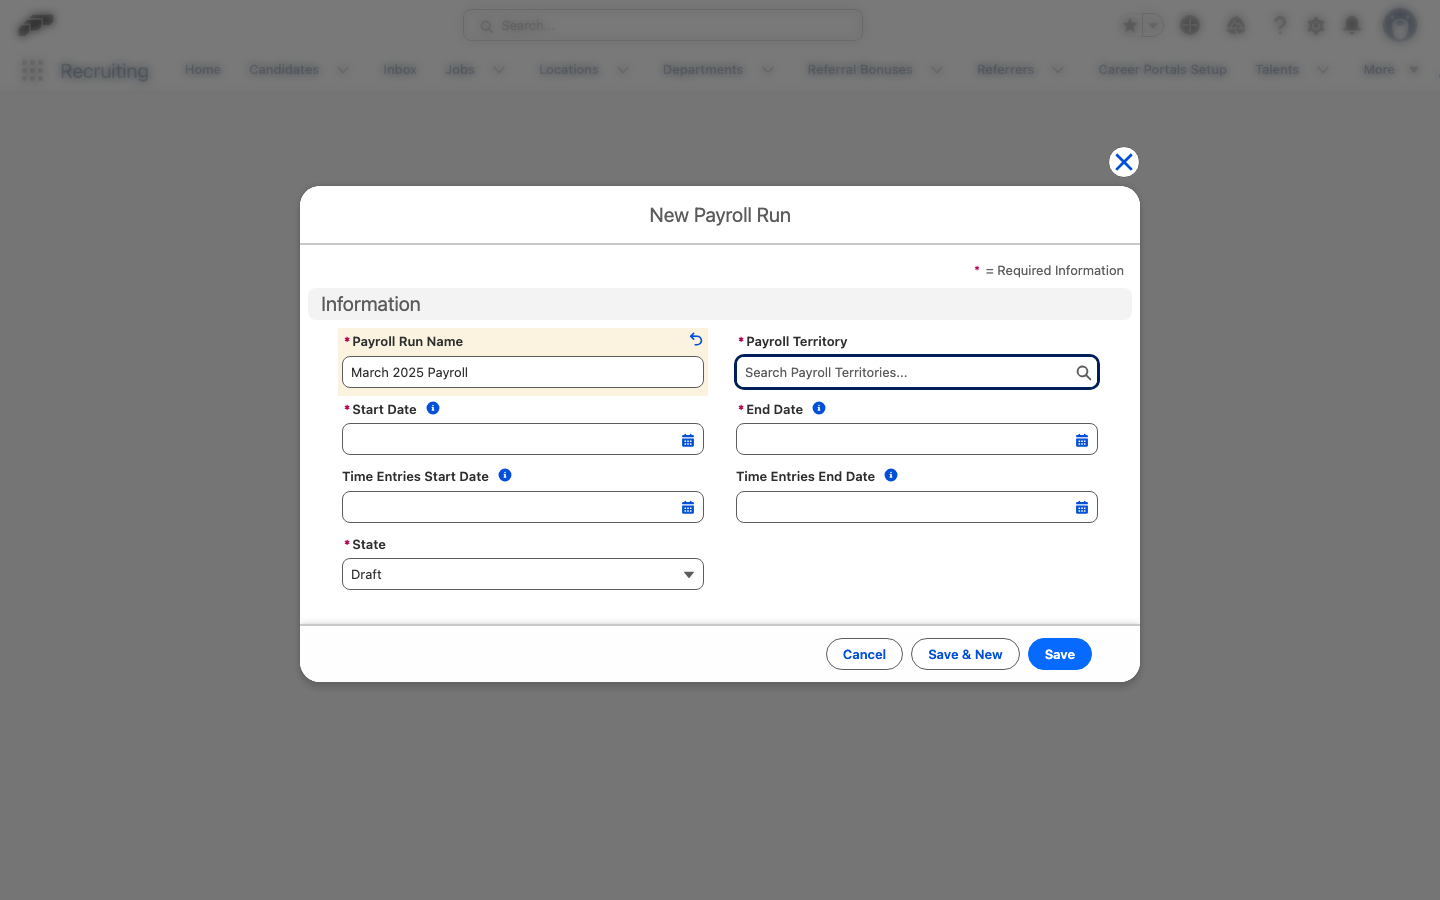
Creating a Payroll Run
To create a new payroll run:
- Open the Payroll Runs page in the flair HR app.
- Click New.
- Fill in the required details:
- Name: A descriptive name for the payroll run (e.g., "March 2025 Payroll")
- Start Date and End Date: The payroll period
- Payroll Territory: Select the applicable territory
- Click Save.
- Add employees to the payroll run by selecting them from the territory's employee list.
The payroll run moves through the following statuses:
- Draft: Initial state where you can add/remove employees and make changes.
- Pending Approval: Ready for review and approval.
- Submitted: Approved and submitted for processing.
- Completed: Payroll processing is finished.
Adding Stages to Payroll Runs
You can add custom stages to your payroll run workflow to match your organization's approval process.
- In Salesforce Setup, open the Object Manager.
- Search for the Payroll Run object.
- Click on Fields & Relationships.
- Find the State picklist field and click on it.
- Click New to add a new picklist value.
- Enter the name of your new stage and save.
To reorder stages, use the Reorder button on the picklist values page. To lock a stage (preventing further edits), append _locked to the API name of the picklist value.
Reversing Payroll Run Status
If you need to revert a completed payroll run back to Pending Approval status (e.g., to make corrections), you can clear the flair__Completed_At2__c field on the payroll run record. This can be done using:
- The Salesforce Inspector browser extension: locate the field and clear its value.
- The Developer Console: run a query to find the payroll run and update the field to
null.
After clearing this field, the payroll run will return to Pending Approval status, allowing you to make the necessary changes.
Generating Payroll Documents
The Payroll Runs tab on the flair HR app allows you to quickly generate documents associated with payroll.
Inside your created payroll run, you will notice a Documents tab on the right side of the screen. By using the Generate button you can create different types of documents including pay slips.
Managing Payroll Documents
Let's take a look at how to manage documents you want to include in the data export of a payroll run.
- First, visit the HR Admin page on the flair HR app on Salesforce.
- Next, select the Payroll Territories option. Once you're there, open the territory for which you want to configure exporting.
- Navigate to the Data Export section. Within this tab, you will find an overview of the documents that are set to be included in a Payroll Run associated with a particular Payroll Territory. It's worth noting that this list is fully customizable, allowing you to tailor it according to your preferences.
By selecting employees within the payroll run you can opt to create a summary of payments for those staff members. This method can also be used to make pay slips. You may also upload other documents and add them to generated files.