Shift Planning in Salesforce
To help companies utilize their staff resources effectively, the flair HR app on Salesforce enables employers and managers to efficiently organize work shifts.
The goal of shift planning should be to successfully rotate staff, maintain workforce well-being, control labor costs, and enhance employee productivity.
Accessing the Shift Planner
To get started with shift planning:
- Open the flair HR app on Salesforce
- Navigate to the Attendance tab
- Click on the Shifts section
Here you can see a handy summary of all company shifts.
- Click Manage Shifts to open the Shift Planner for all locations
The Shift Planner allows users to draft work schedules to fulfill their company's needs.
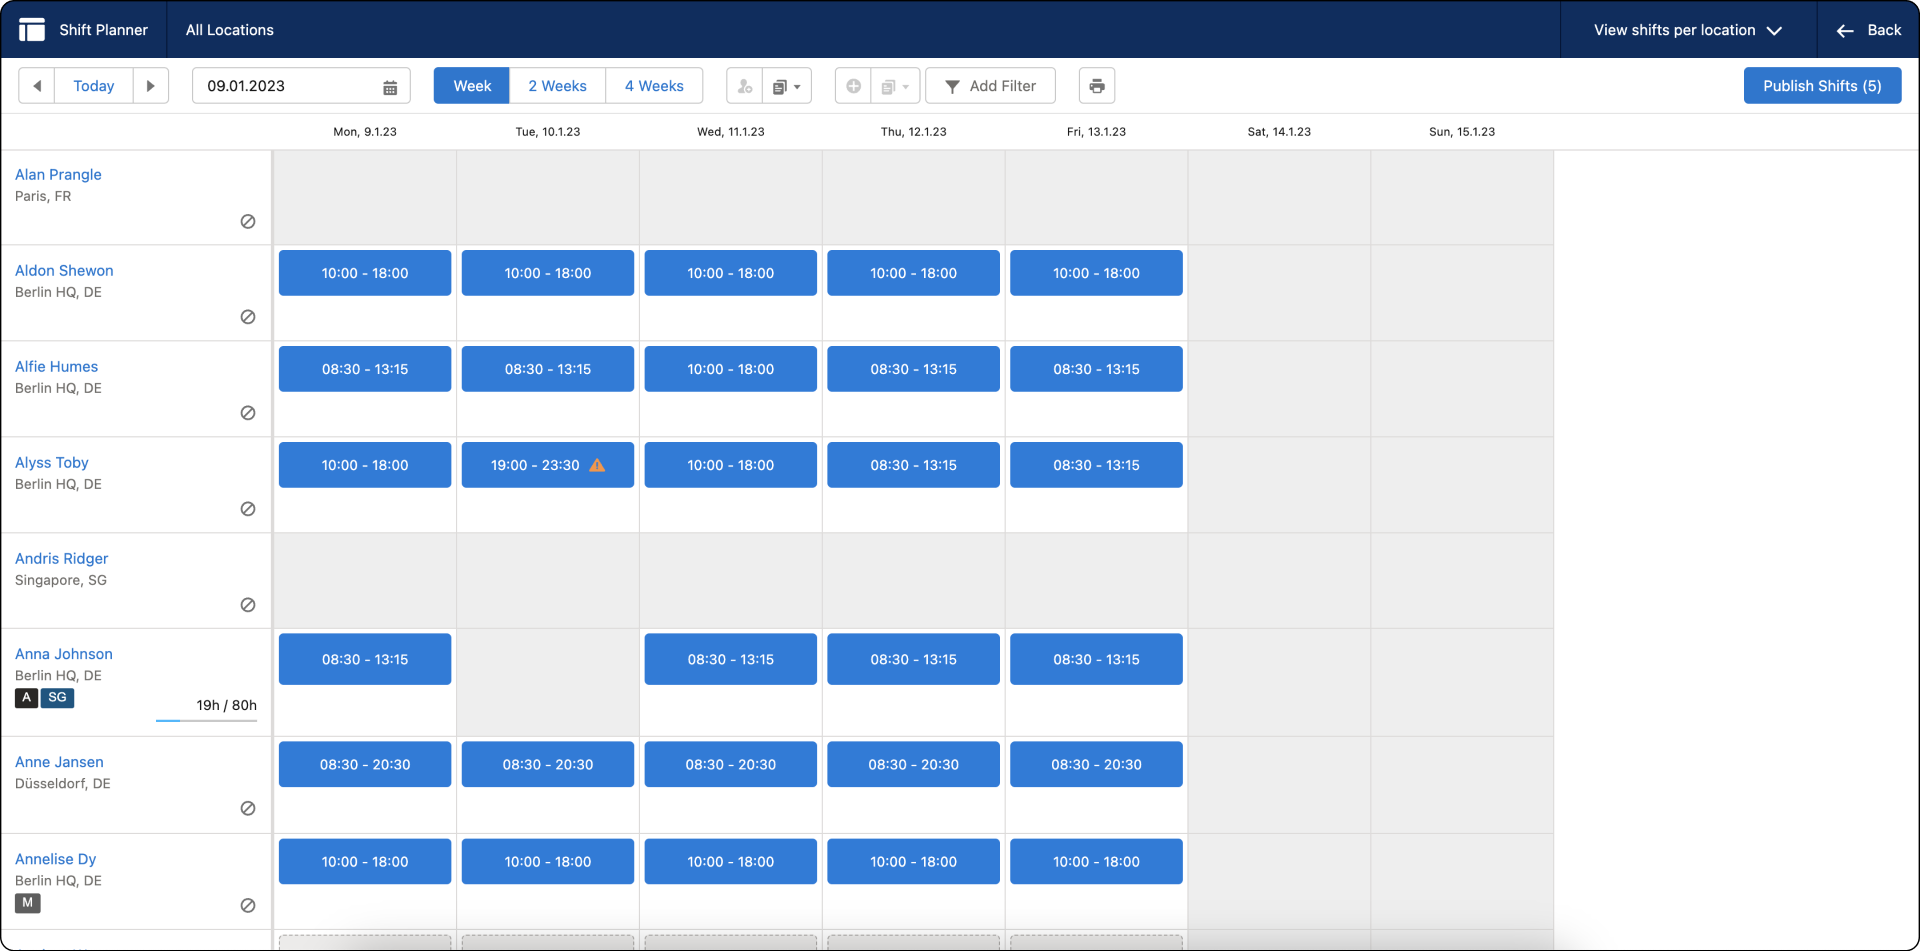
Filtering and Organizing
The Shift Planner provides powerful filtering options to help you manage shifts effectively:
Location Filters
To view and manage shifts for a single location:
- Select a specific location using the Add Filter tab
- This will display only shifts for that location
Employee Filters
The Add Filter tab also allows you to select employees based on:
- Skills: Filter by specific competencies or certifications
- Departments: View shifts by organizational unit

This filtering capability ensures you can quickly find and assign the right people to the right shifts.
Planning Tools
The taskbar at the top of the Shift Planner offers several useful tools:
- Calendar Navigation: Scroll through different weeks and months
- Add Employees: Include employees from different locations in the schedule
- Copy Shifts: Duplicate shift patterns from one week to another, saving time when schedules repeat
- Publish Shifts: Make the schedule visible to employees
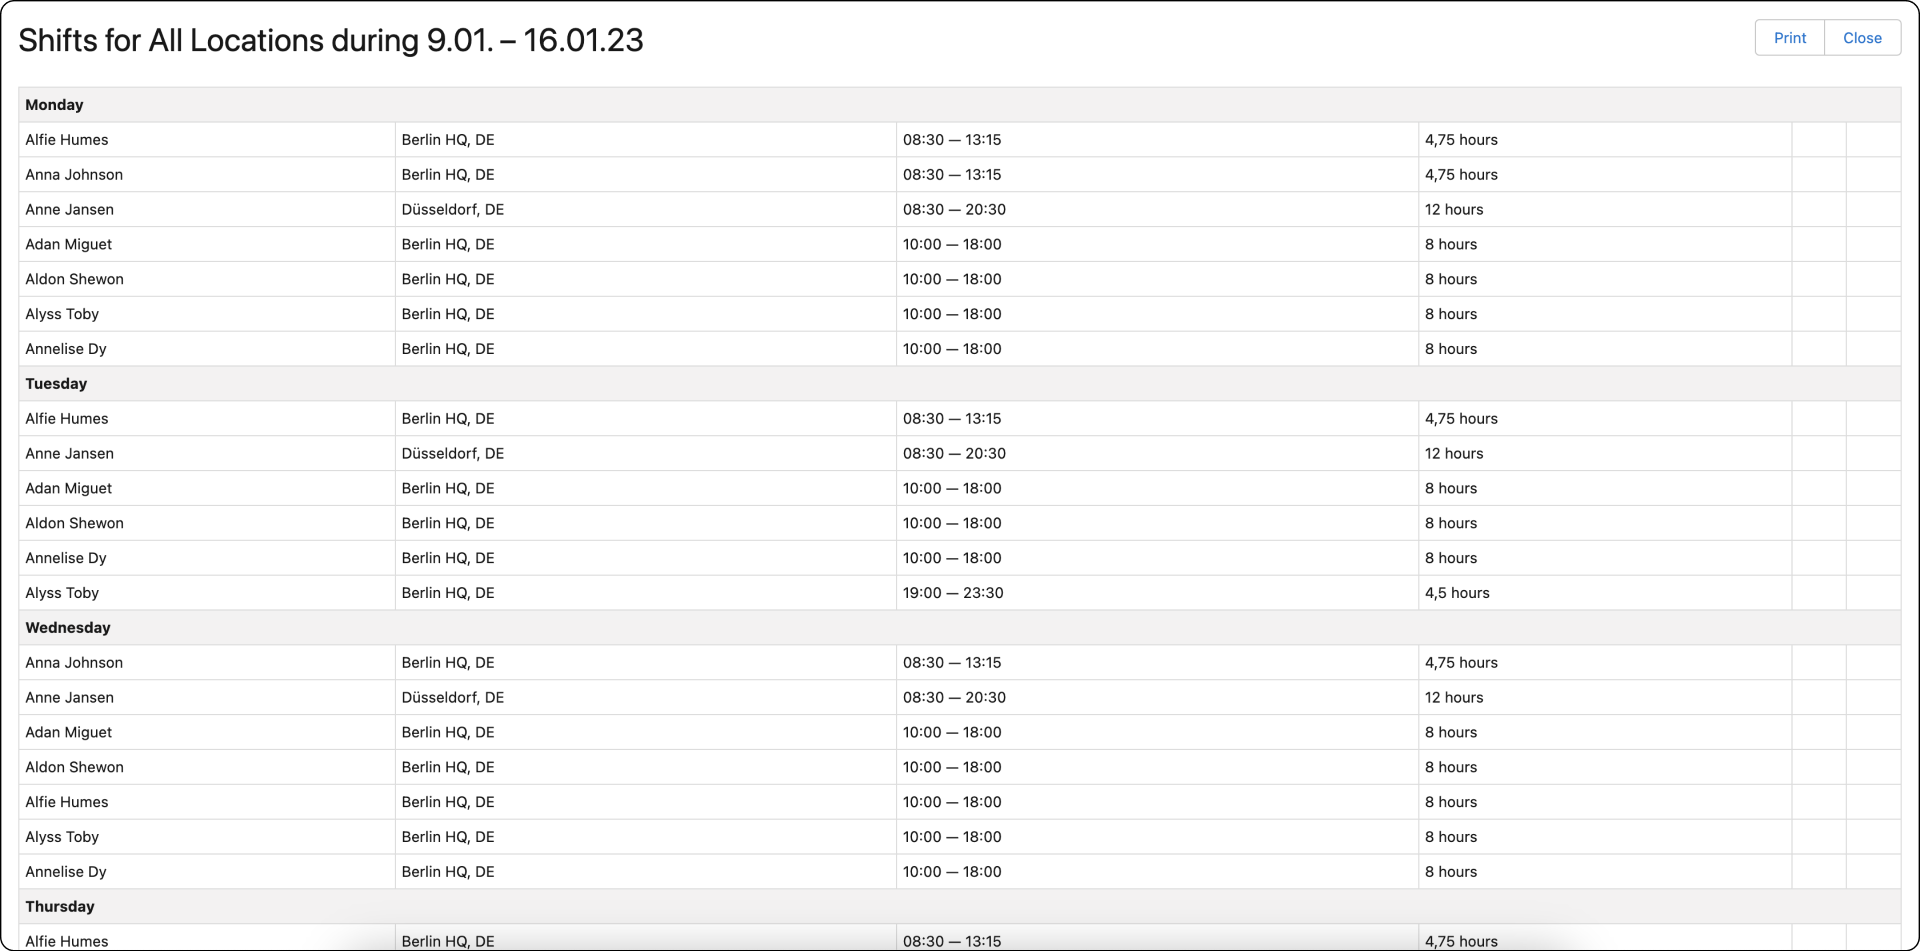
- Print View: Generate a printable version of the shift schedule
Employee Time Balance
To help avoid over- or under-scheduling, the Shift Planner shows each employee's current time balance — the difference between hours worked and their target — directly in their row.
- A green balance indicates a surplus (the employee has worked more than their target hours).
- A red balance indicates a deficit (the employee has worked fewer hours than required).
This lets you see at a glance who has capacity before assigning new shifts, and avoid creating additional overtime for employees who are already over target.
Multi-Location Employees
When you add an employee who also works at other locations to a Shift Planner board, their shifts at those other locations appear as greyed-out, read-only overlays in the same time slot.
These overlays are visible only to planners — they are not interactive and cannot be edited from this board. Their purpose is to make cross-location conflicts immediately visible so you don't accidentally double-book an employee across sites.
To add an employee from a different location to your board, use the Add Employees tool in the top toolbar. Their cross-location shifts will appear automatically.
Publishing Shifts
Once you've completed your shift planning:
- Review the schedule to ensure all shifts are covered
- Click Publish Shifts to make the schedule available to employees
- Employees will be able to view their assigned shifts in the Employee Hub
Always publish shifts well in advance to give employees adequate notice of their schedules.
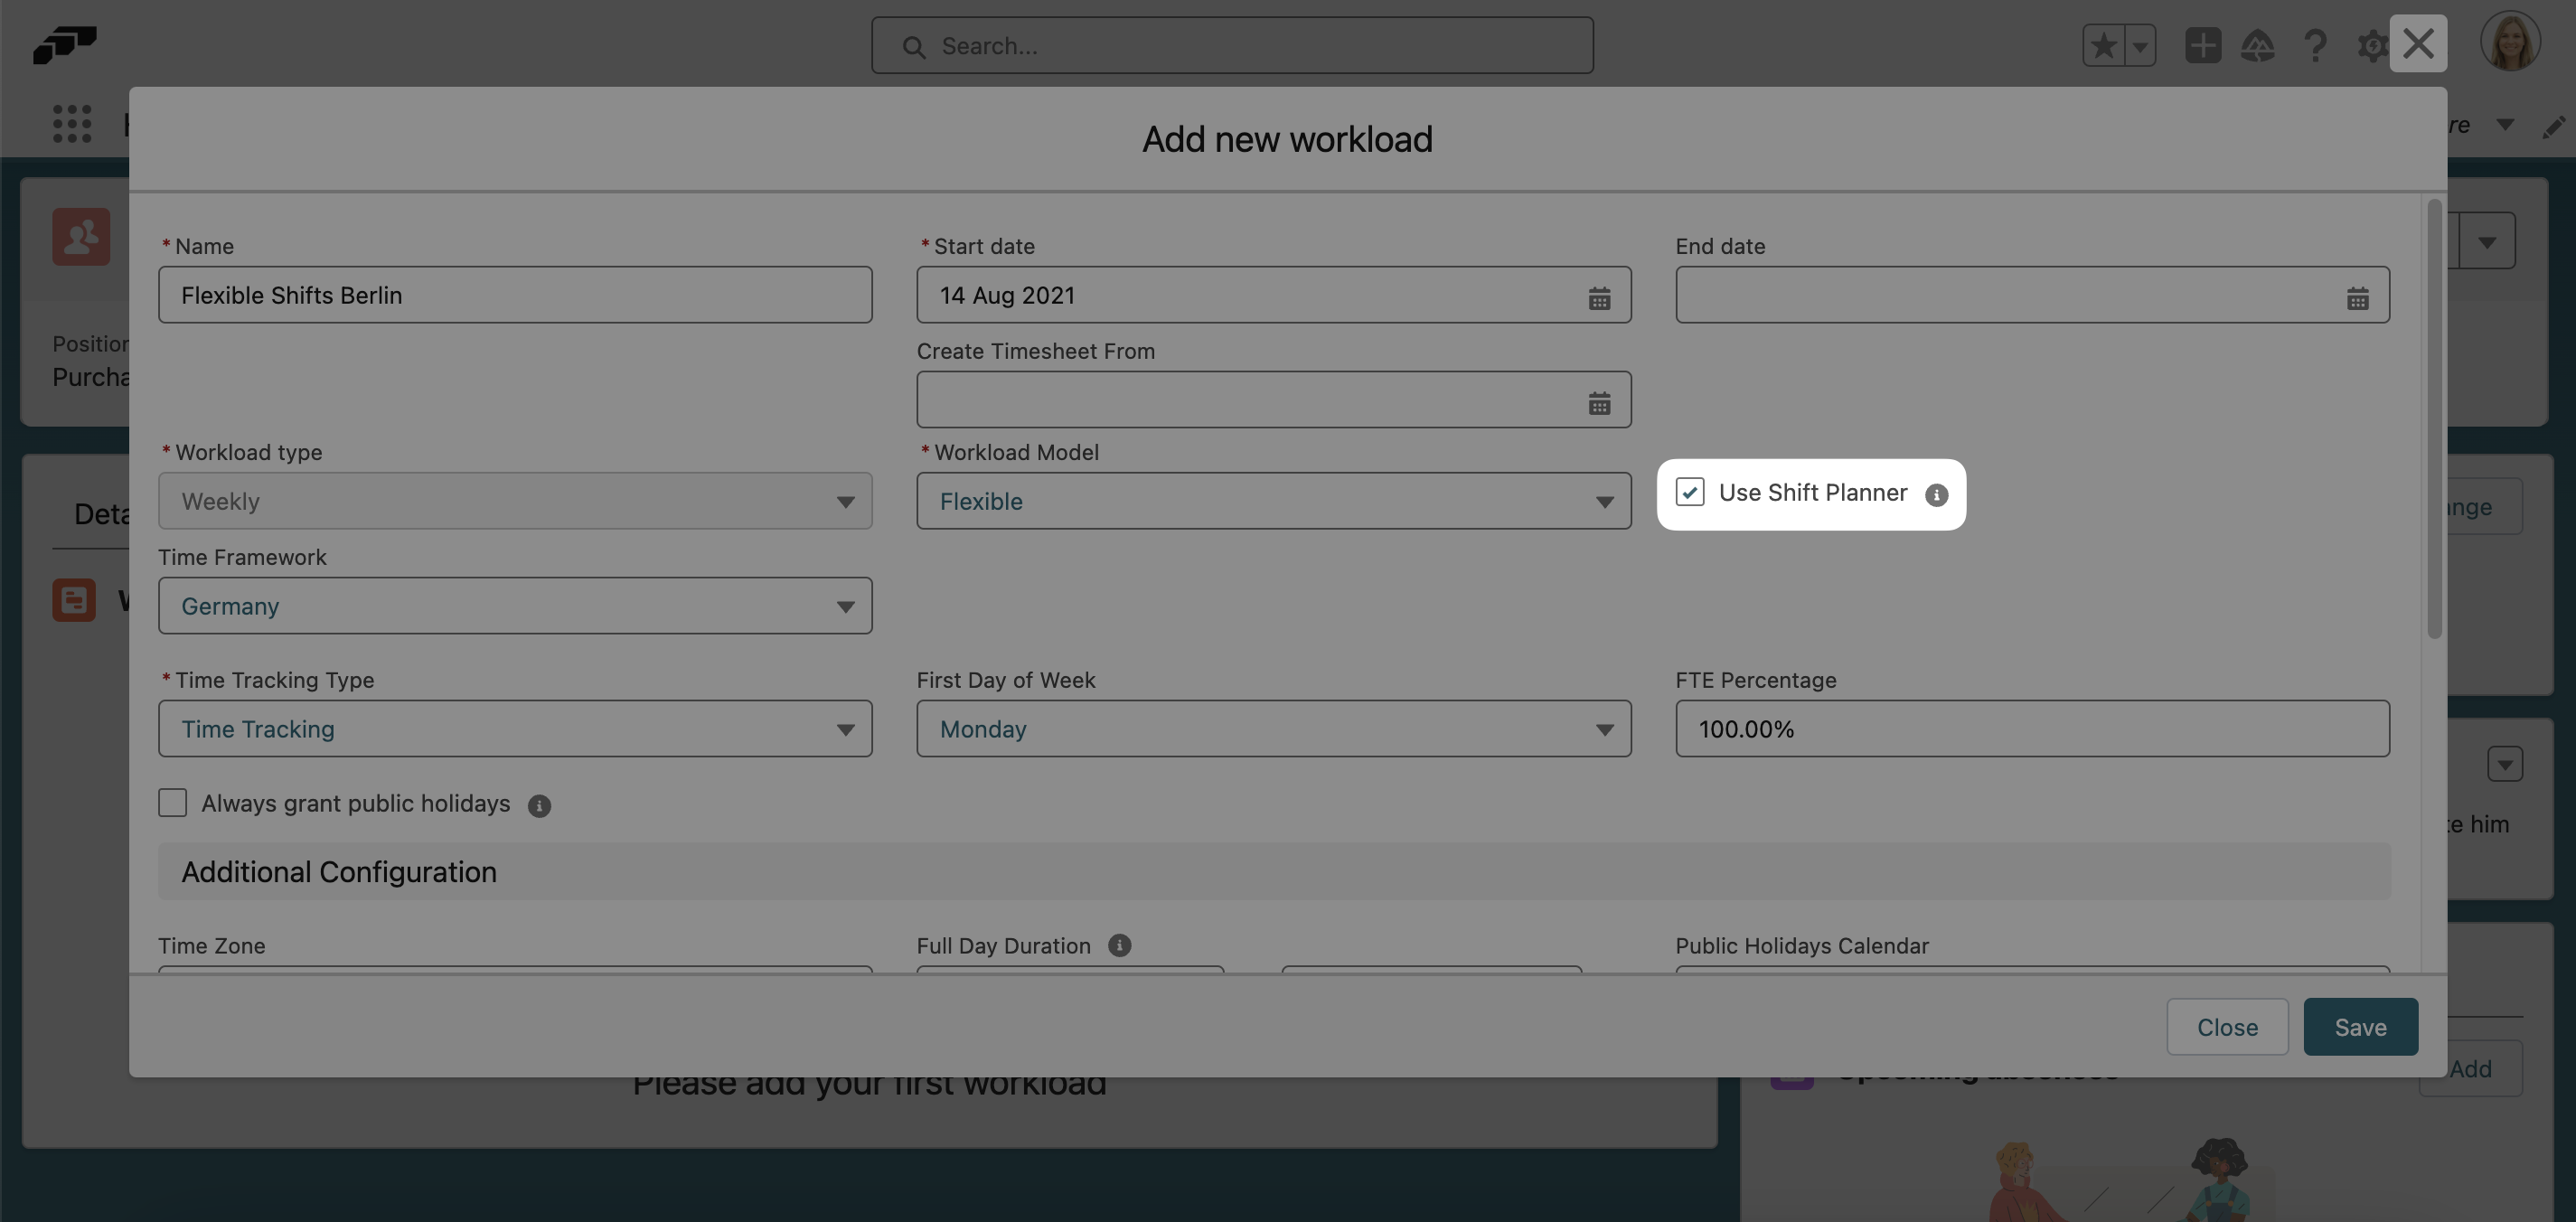
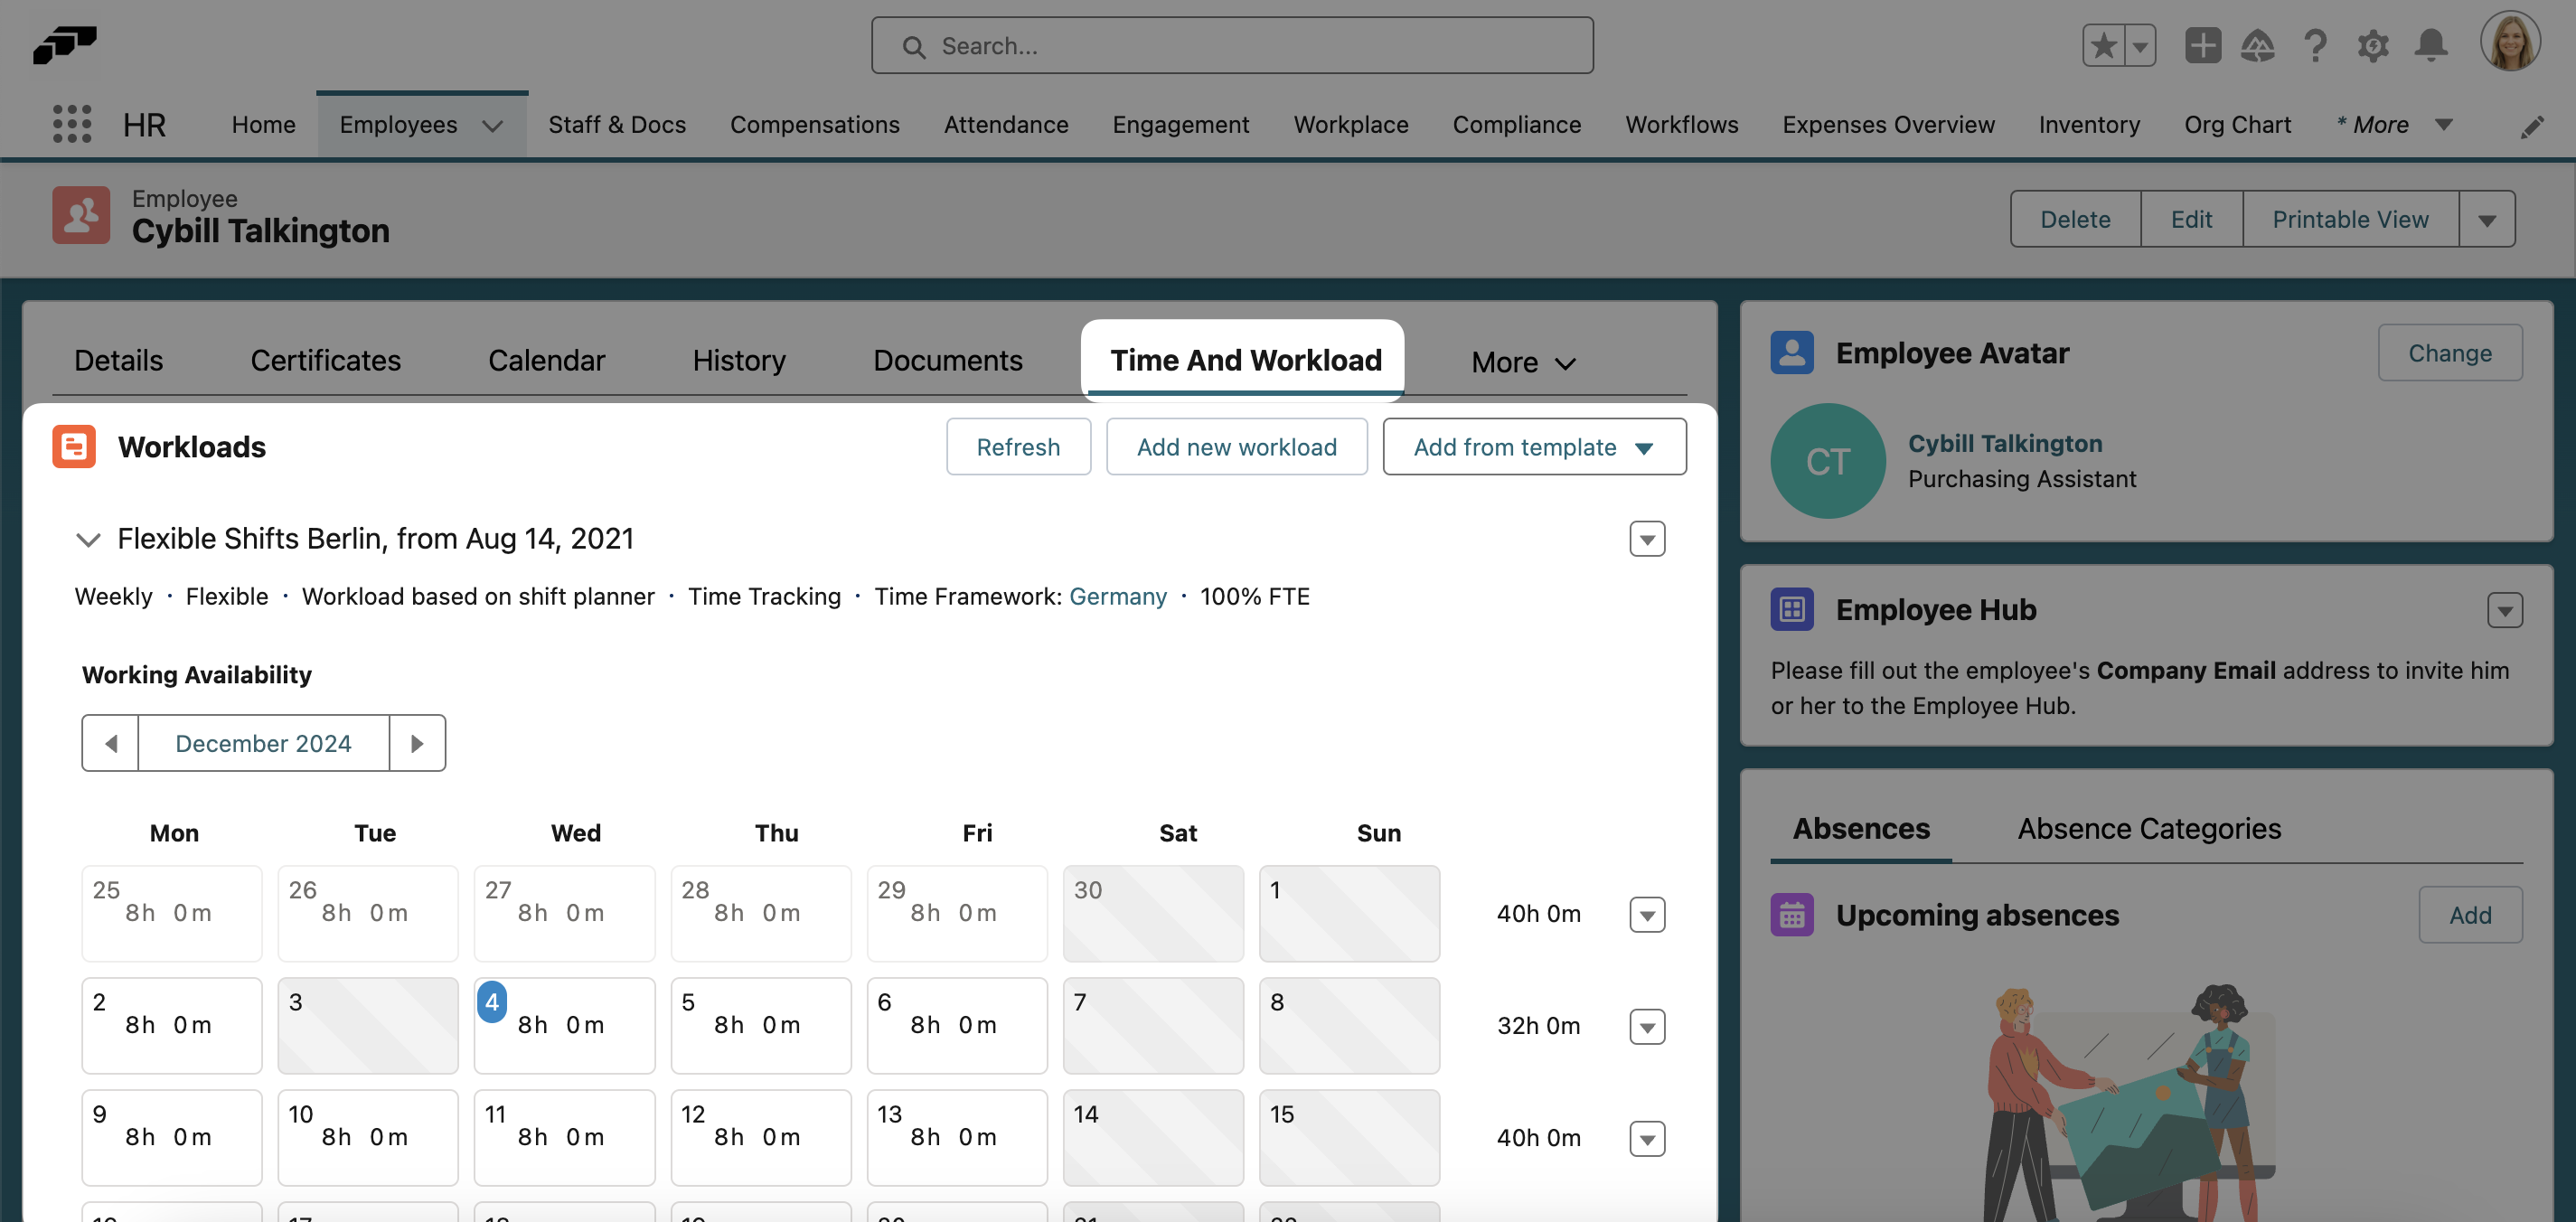
Synched Workloads
You can automatically synchronize the flair Shift Planner with Employee Workloads. This is particularly useful if your shift schedules vary from week to week.
By enabling synchronization, you can plan shifts and define working and non-working days directly in the Shift Planner, without needing to adjust the workload separately.
Setting Up Synched Workloads
To use synched workloads:
- When creating a new employee workload, check the Use Shift Planner checkbox
- This option is only available for flexible workloads
- Define the Full Day Duration field
Full Day Duration refers to the length of time that constitutes a full working day for an employee. This is required to correctly calculate absences.
Synched workloads cannot be edited from the Time & Workload tab in the Employee record. They are edited and managed in the Shift Planner only.
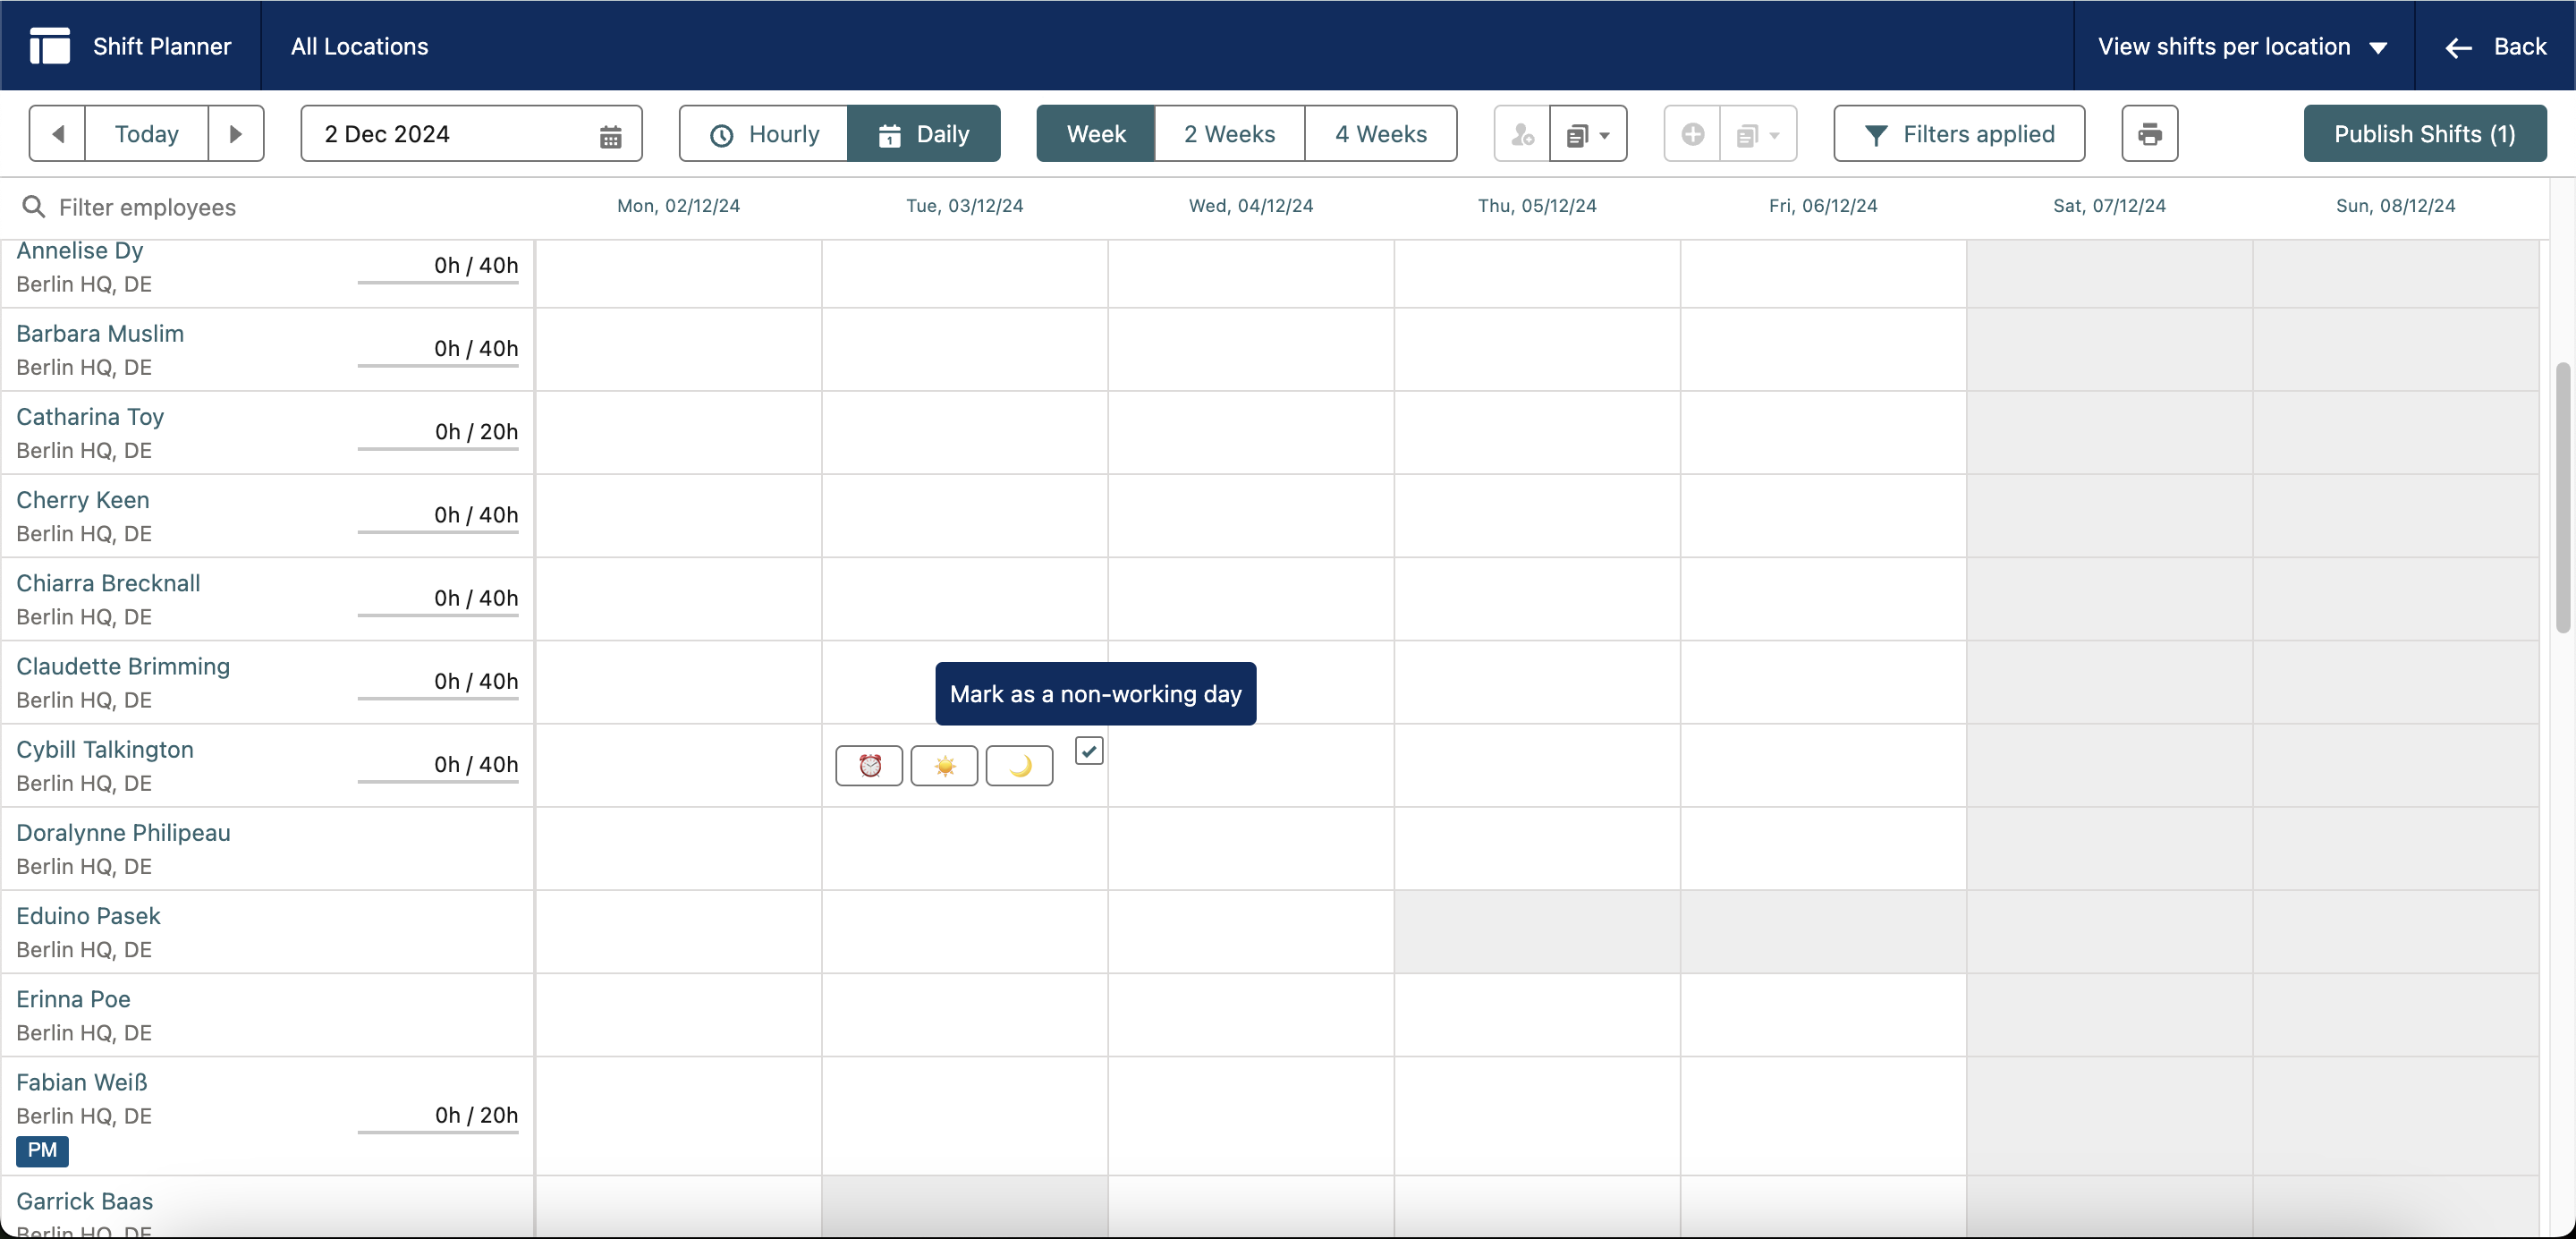
Managing Working Days
For employees with synched workloads, you will see a new checkbox in the top-right corner of each shift day in the Shift Planner.
This checkbox allows you to:
- Toggle whether a day is a working day or non-working day
- Add working days: The day length will use the value defined in the Full Day Duration field
- Remove working days: Mark days off without creating absence requests
Publishing Changes
The changes you make in the Shift Planner will be reflected in the Employee Workload, but there's an important step:
Shifts must first be published before they are reflected in the synched workload.
Until you publish the shifts, changes remain in draft mode and won't affect absence calculations or employee records.
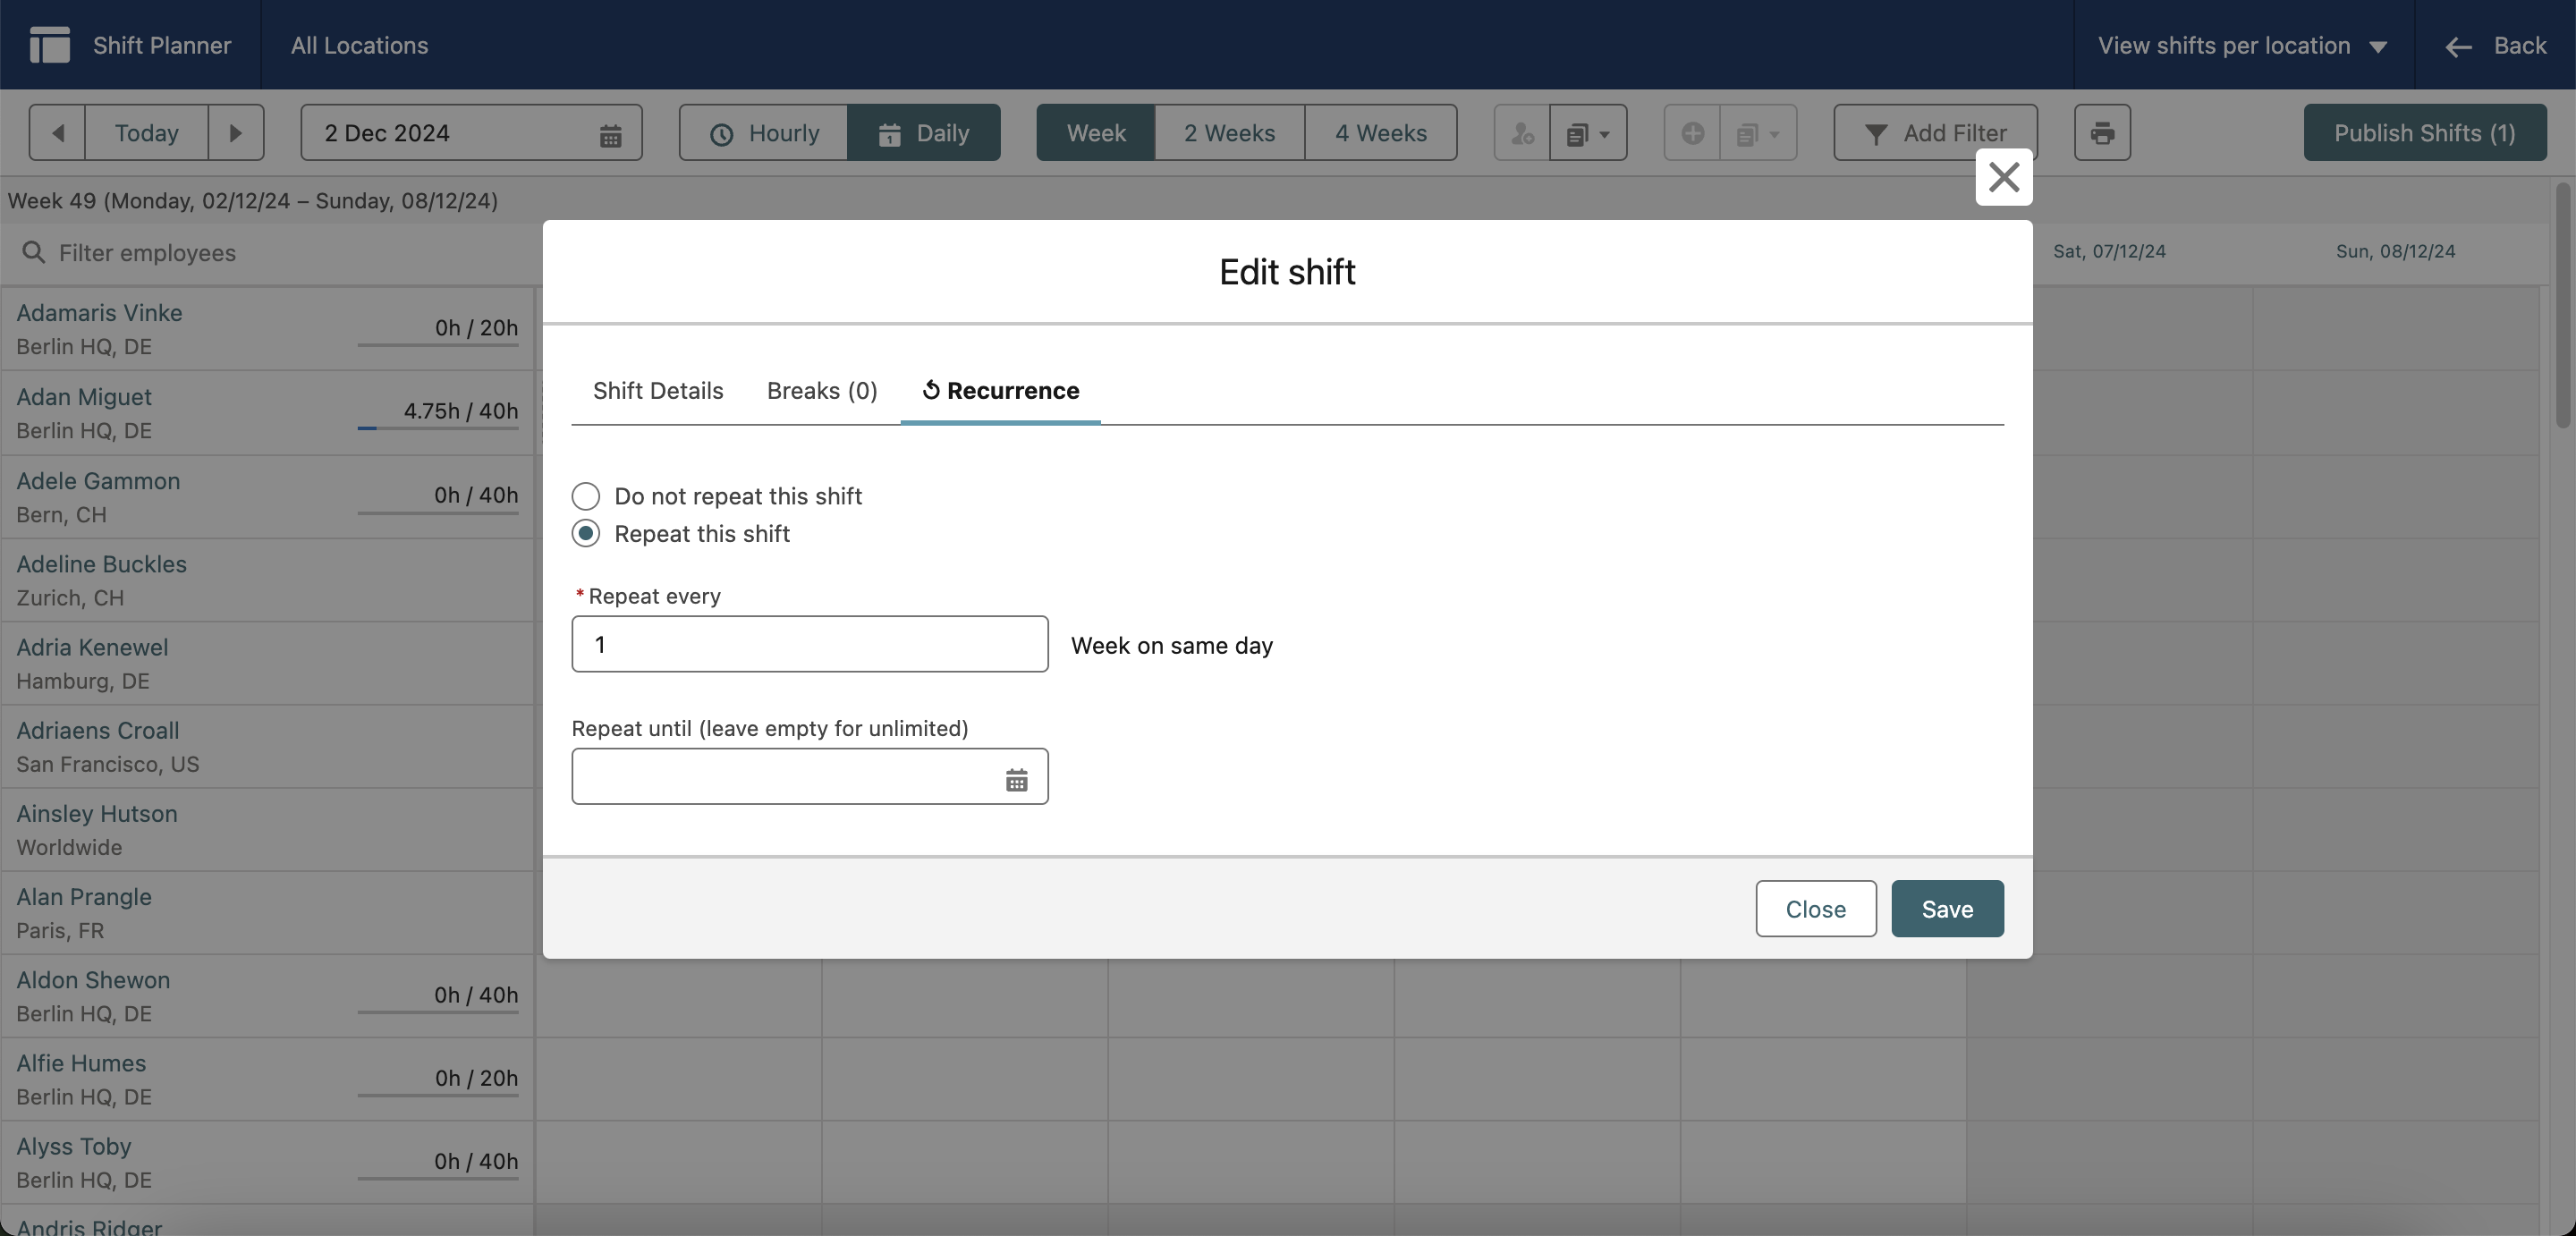
Recurring Shifts
In just a couple of clicks, you can make any shift recurring. This feature is ideal for organizations with predictable shift patterns.
Creating Recurring Shifts
To set up a recurring shift:
- Click on an existing shift in the Shift Planner
- This opens the Edit Shift popup
- Select the Recurrence tab
- Choose the Repeat This Shift option
- Define how often this shift will be repeated on the same day
- Set when this shift should be repeated until (or leave empty for unlimited repetition)
Leaving the Repeat Until field empty means that the shift will be repeated for an unlimited amount of time.
In the Shift Planner, recurring shifts are indicated by a cycle icon 🔄
Editing or Deleting Recurring Shifts
When you edit or delete a recurring shift, you have two options:
- This shift only: Apply your change to only the specific shift you selected
- This and all future shifts: Apply your change to all upcoming instances of this recurring shift
Recurring shifts in the past will not be affected by your changes.
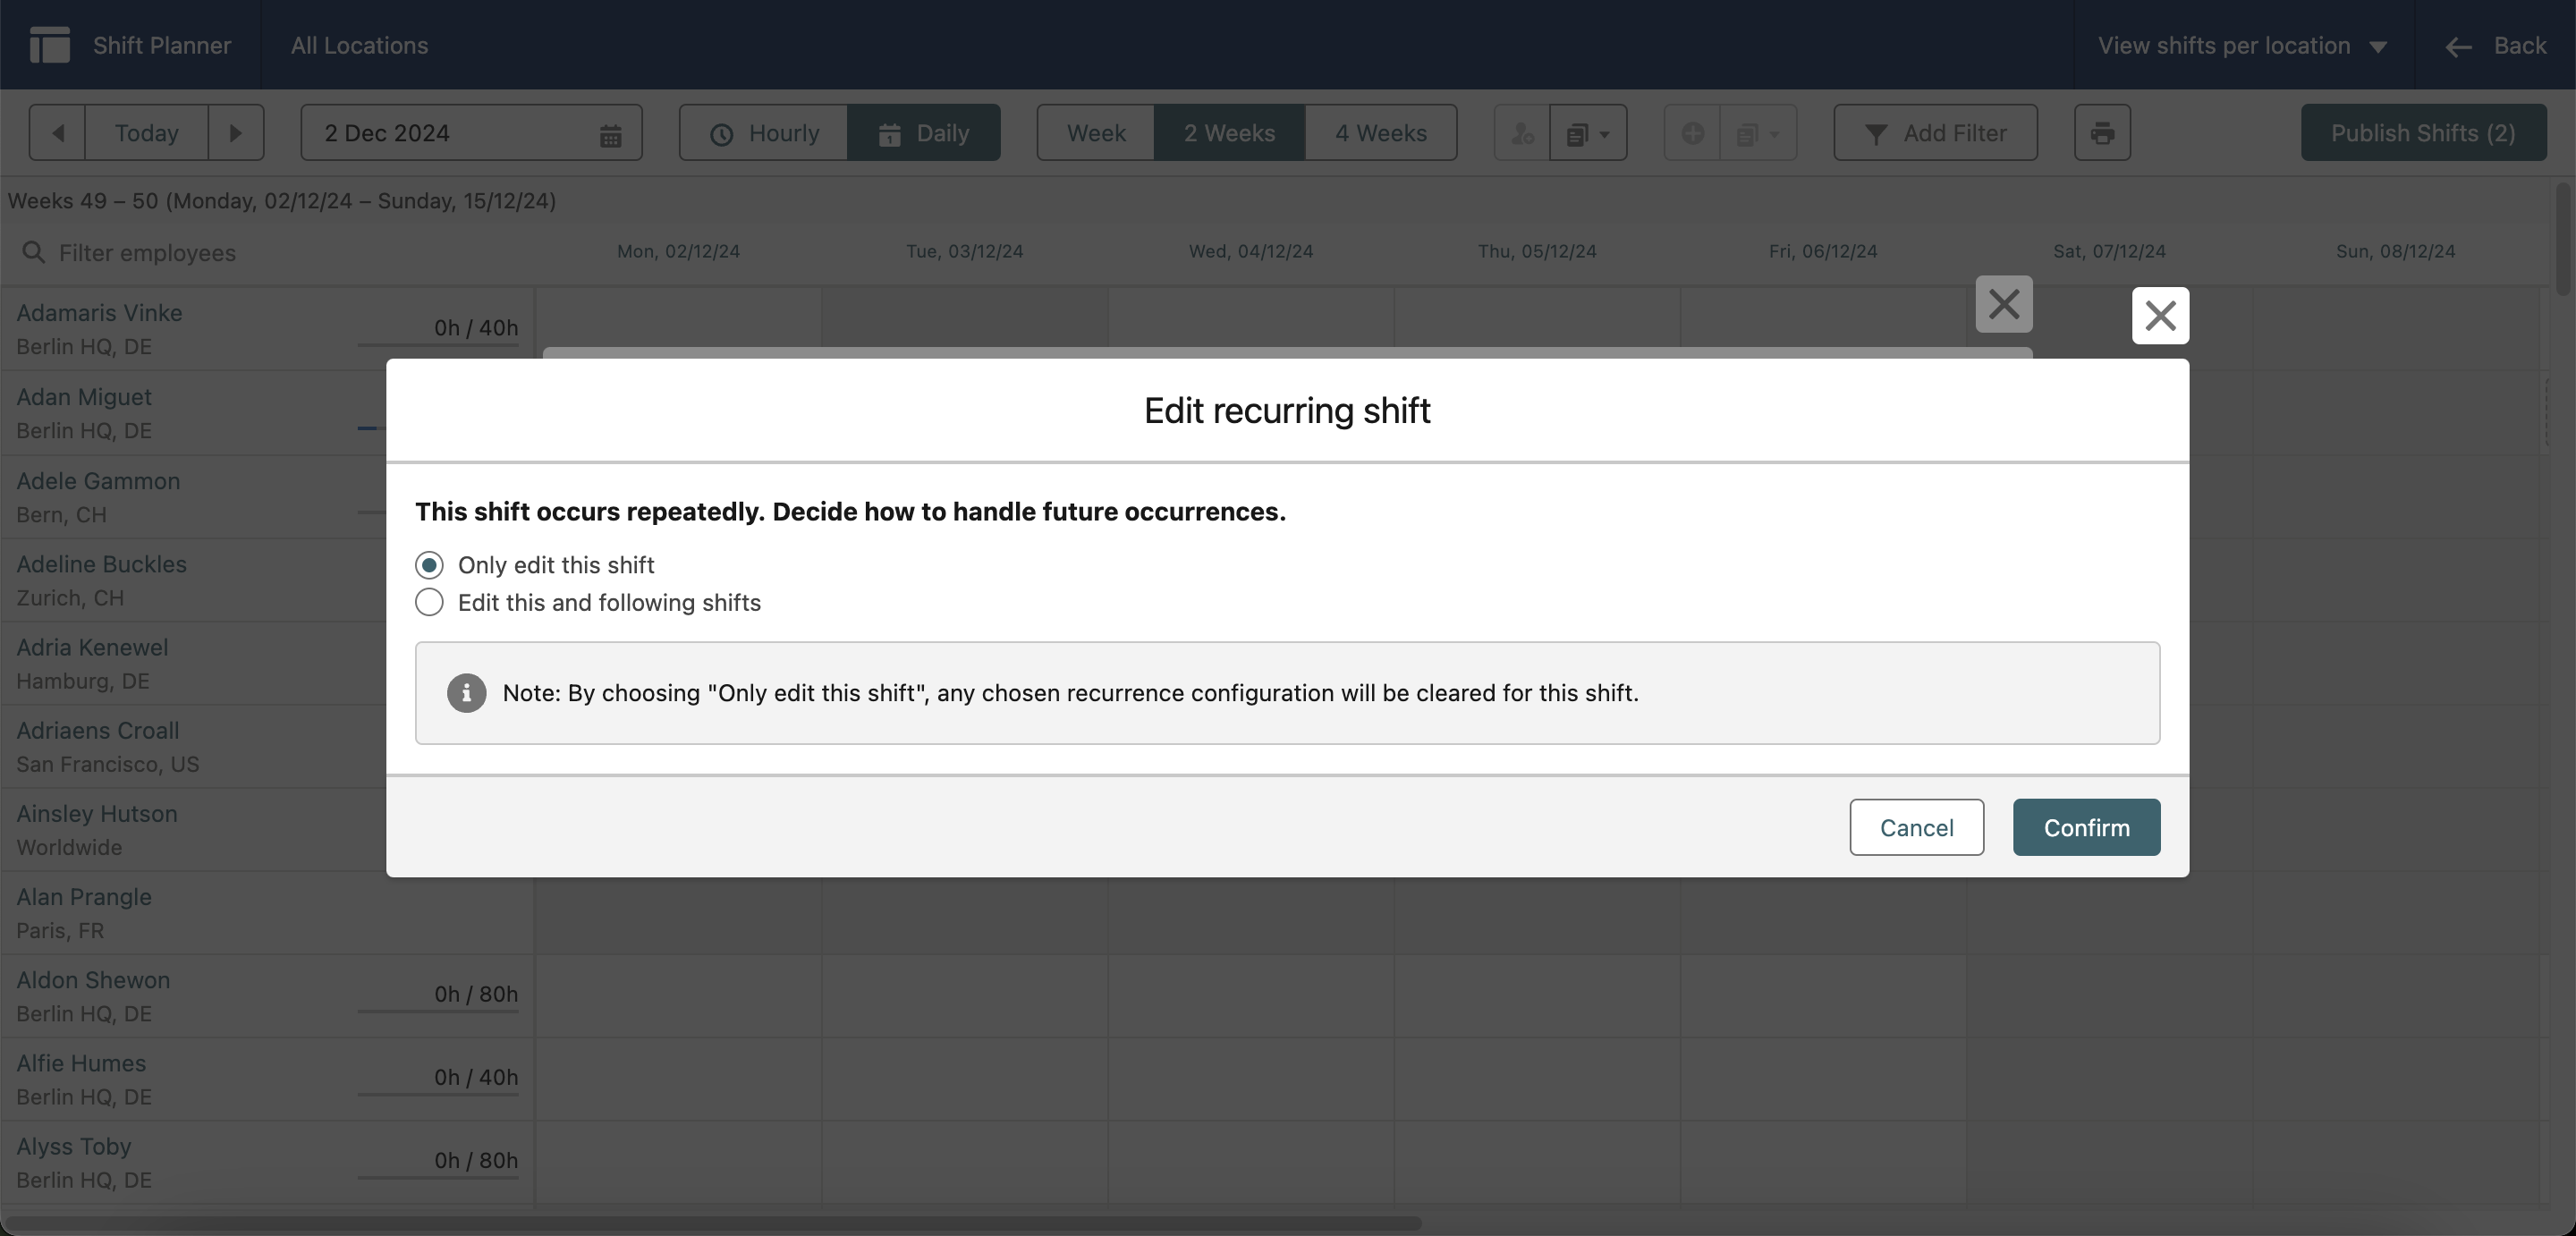
This flexibility allows you to make one-time adjustments when needed while maintaining the recurring pattern for future weeks.
Benefits of Recurring Shifts
Recurring shifts help you:
- Save time on repetitive scheduling tasks
- Maintain consistent shift patterns
- Reduce scheduling errors
- Provide predictable schedules for employees
- Easily accommodate regular business patterns