Document Builder Templates
Document Builder Templates allow you to create dynamic, modular documents with reusable building blocks. This feature is perfect for generating documents with standardized sections but customizable content, such as reference letters, performance reviews, or confirmation letters.
Document Builder Templates create documents from modular building blocks rather than static templates. Unlike regular Document Templates, where you upload a fixed document, Document Builder Templates let you:
- Build documents section by section
- Create multiple text options for each section
- Combine different options to generate customized documents
- Use dynamic employee data throughout the document
Key Benefits
✅ Flexibility - Mix and match content sections based on specific needs
✅ Consistency - Ensure all documents follow your organization's standards
✅ Efficiency - Reuse content blocks across multiple document types
✅ Personalization - Include employee-specific data automatically
✅ Professional formatting - Combine with Document Templates for polished layouts
Setting Up Document Builder Templates
Step 1: Access the Template Builder
- Navigate to HR Admin page
- Look for Document Builder Templates under the "Other" section
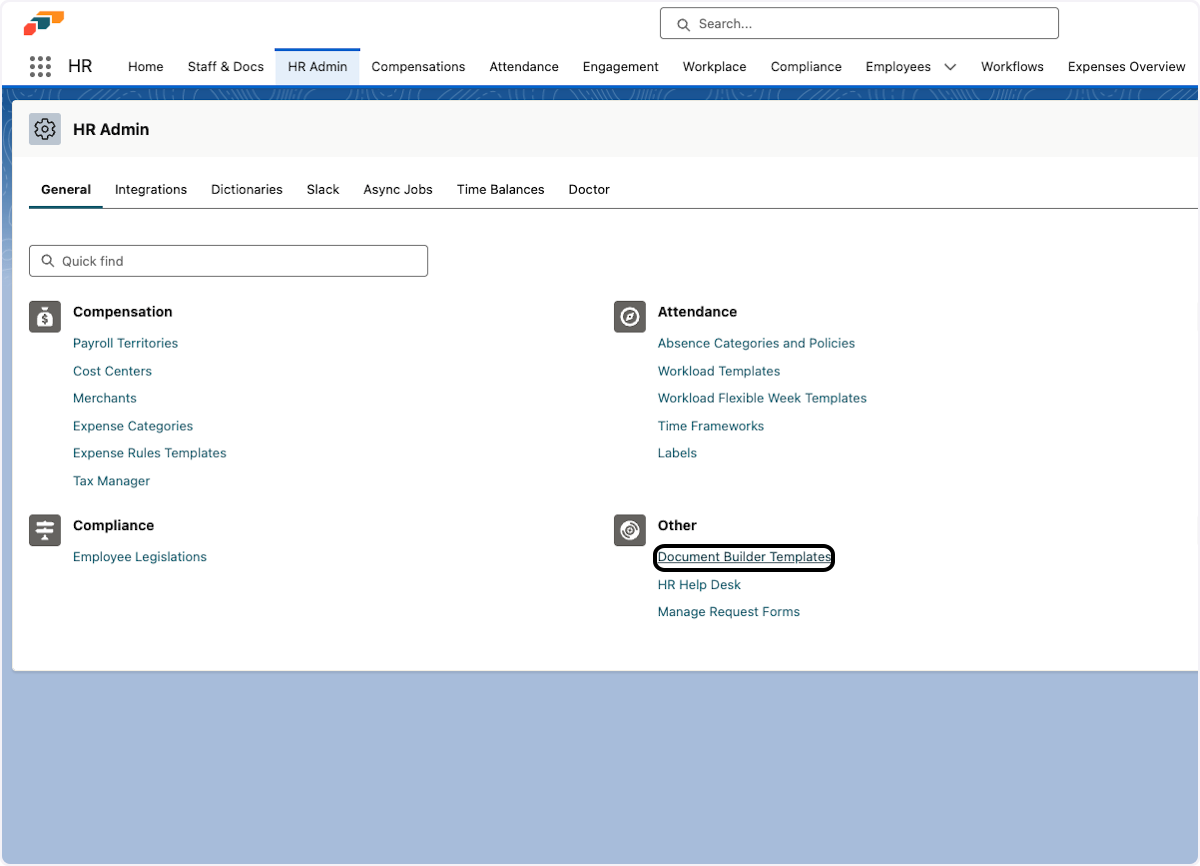
- Click New to create your template
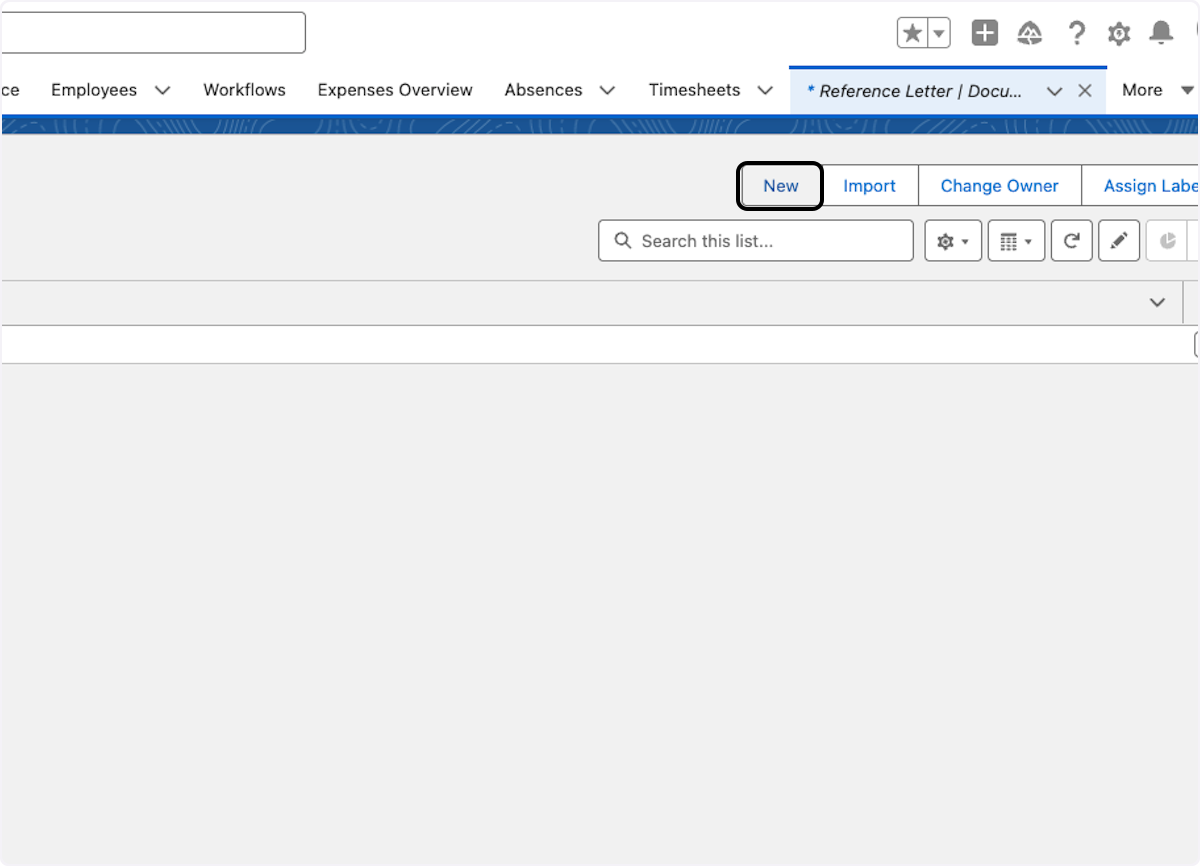
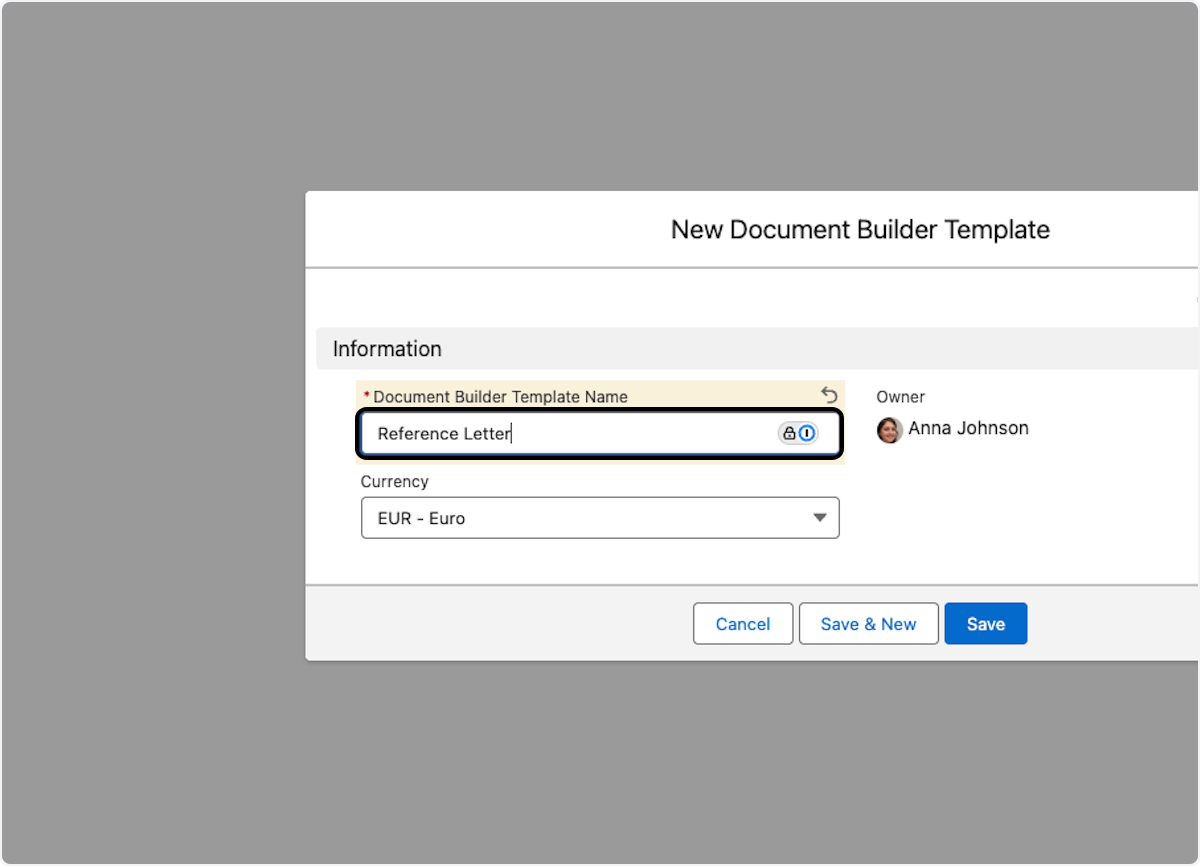
Step 2: Create Your Template Structure
- Give your template a meaningful name (e.g., "Reference Letter DE" or "Performance Review Template")
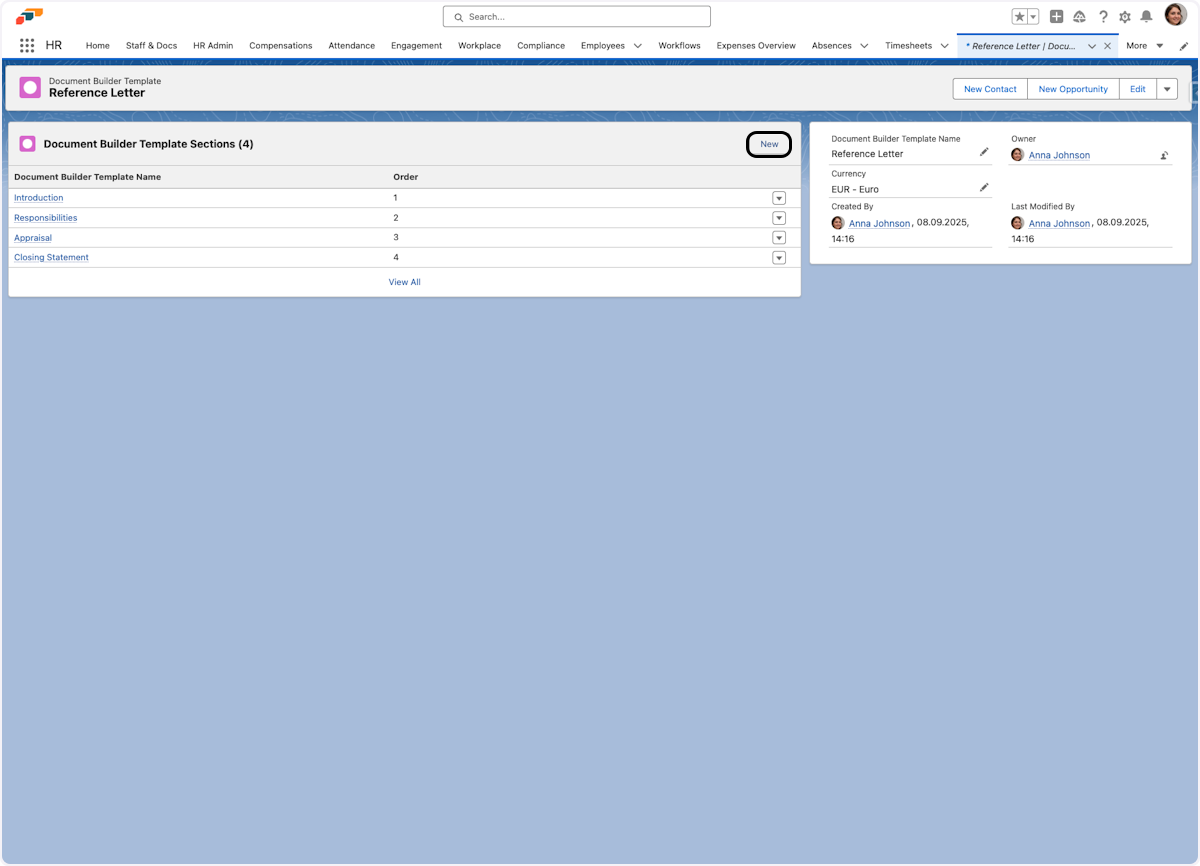
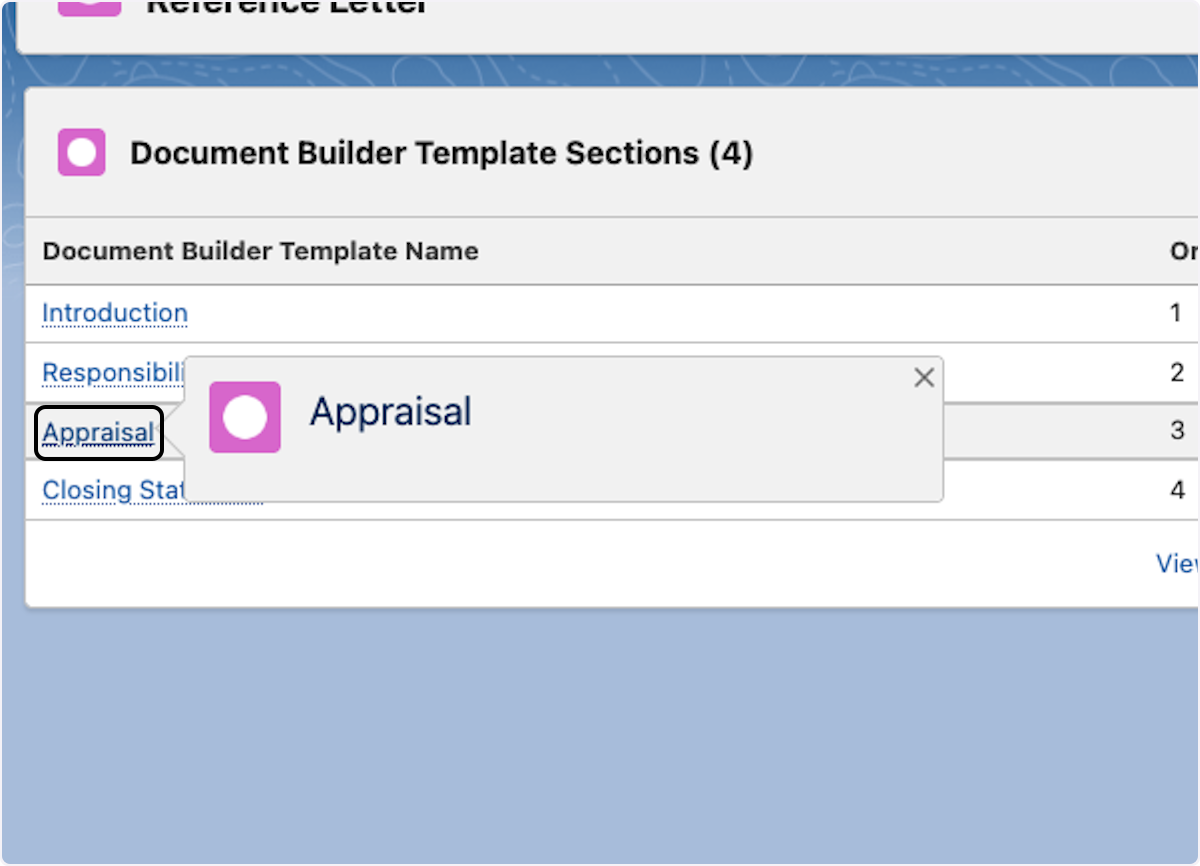
- Create sections by clicking New. Each section gets a numerical position:
- Section 1: Introduction
- Section 2: Main content
- Section 3: Closing statement
Step 3: Build Content Options
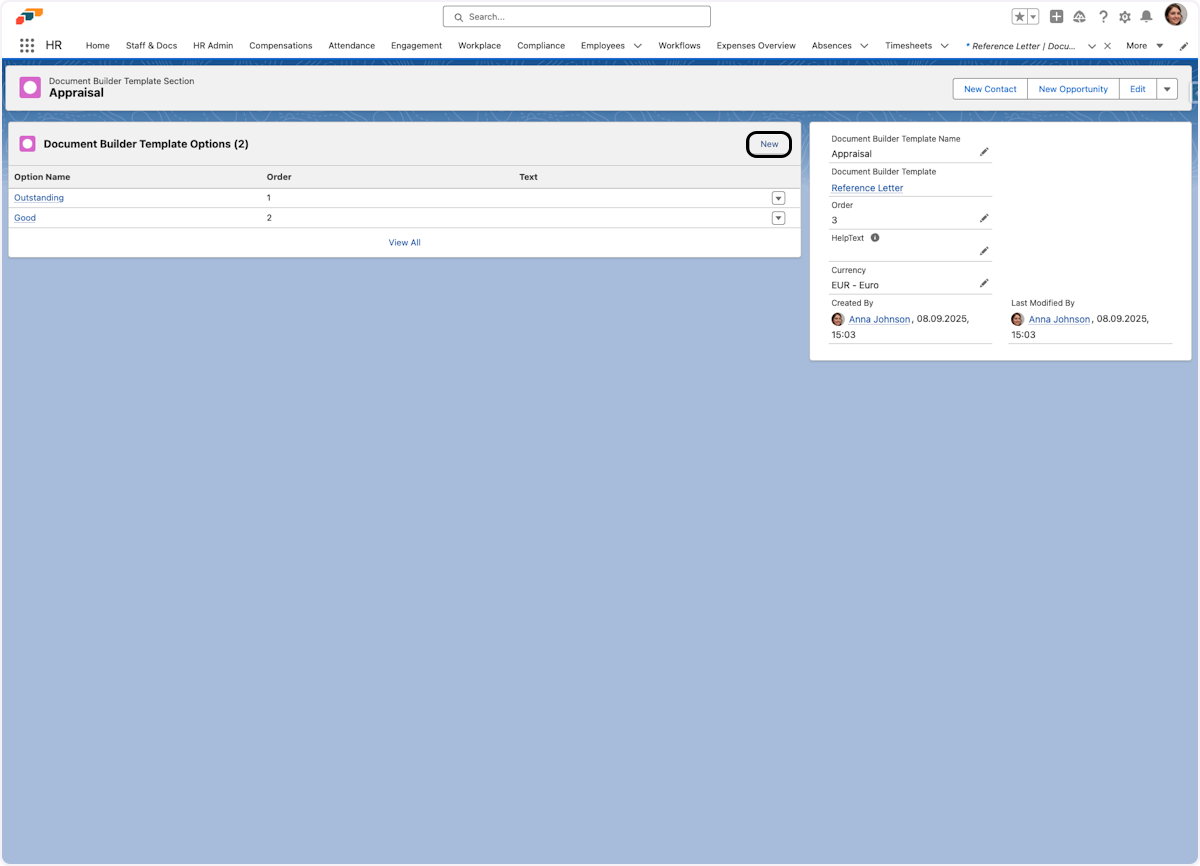
For each section, create multiple text options:
- Select a section to work with
- Click New to add a text template
- Name your option (e.g., "Appraisal")
- Add your content using either:
- Plain text
- Rich text with formatting
- Employee merge fields like
{employee_name}or{start_date}
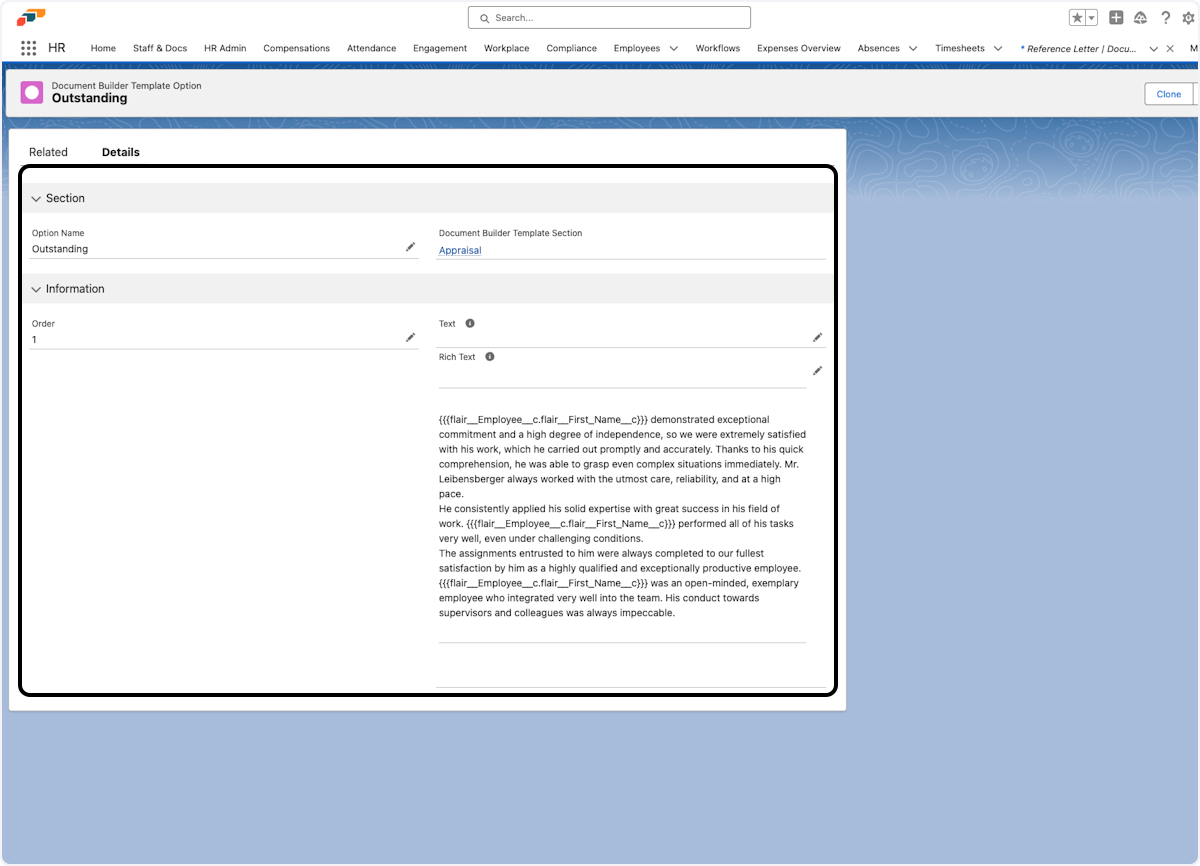
Create variations for different scenarios. For example, have "Outstanding", "Good", and "Satisfactory" options for performance reviews.
Available Merge Fields
You can use dynamic employee data throughout your templates:
Basic Employee Fields
{employee_name}- Full name{first_name}- First name only{last_name}- Last name only{start_date}- Employment start date{end_date}- Employment end date (if applicable){employee_number}- Employee ID
Advanced Fields
{department}- Department name{job_title}- Current position{manager_name}- Direct manager{salary}- Salary information (if permissions allow){workload}- Work schedule details
Custom Labels
{$Label.flair__Afternoon}- Use custom labels for multilingual support
Use curly braces {} for plain text fields. Rich text fields may use different syntax.
Using Document Builder Templates
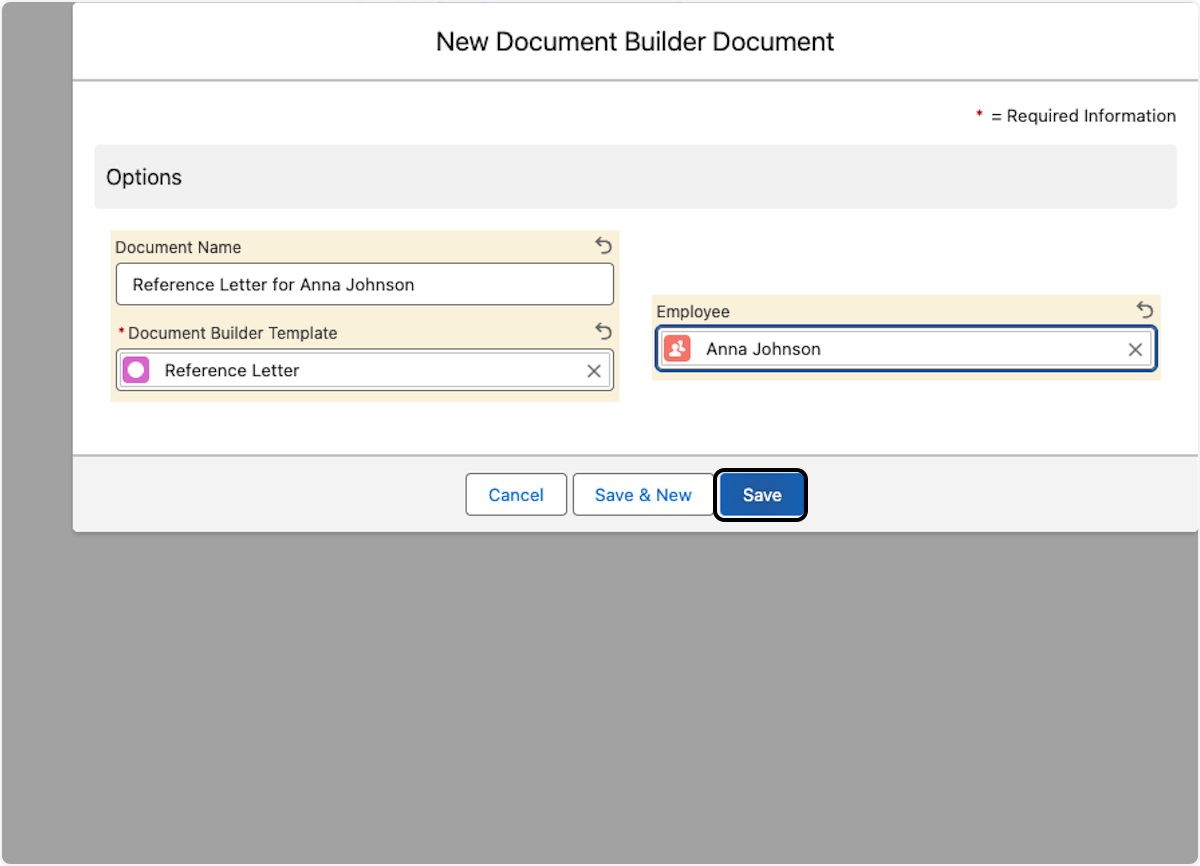
Step 1: Create a New Document
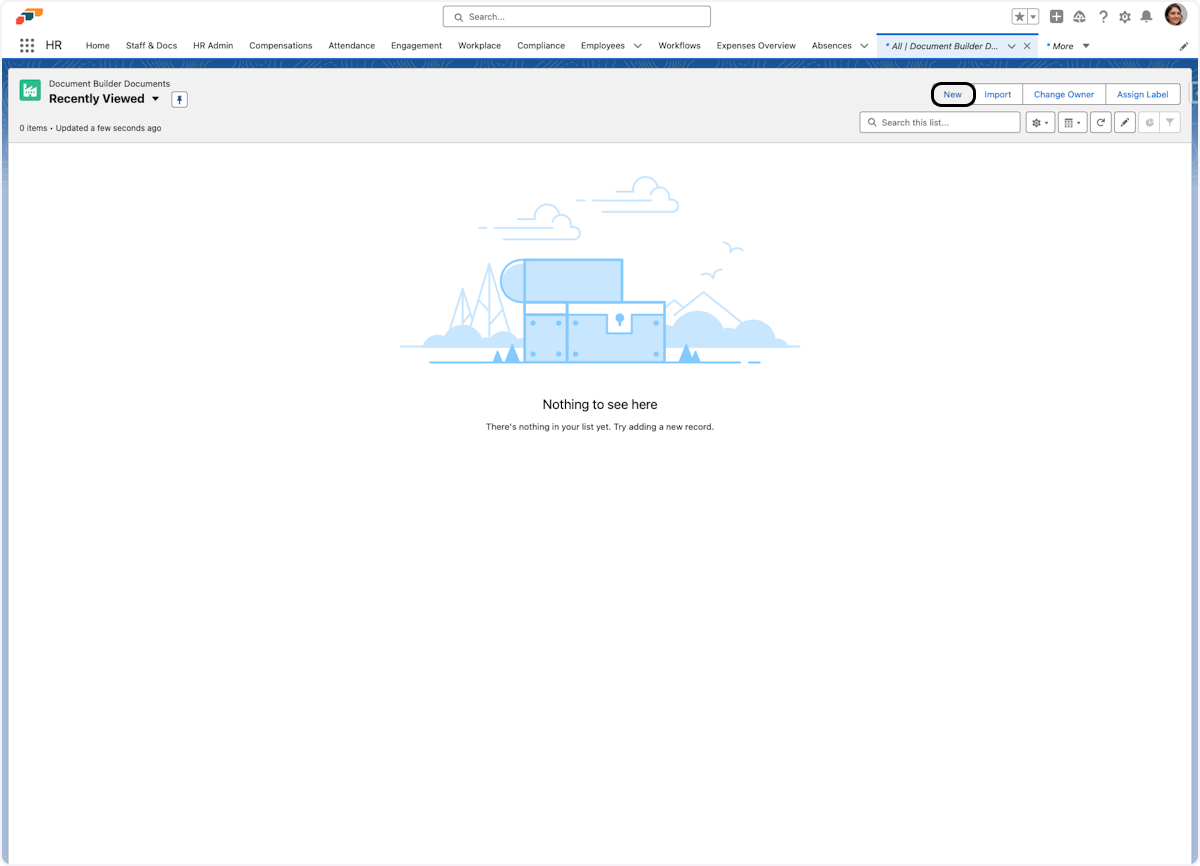
- Over the App Launcher, search for Document Builder Documents
- Go to Document Builder Documents
- Click New to create a document
Step 2: Choose Your Template
- Use the Select an Option search bar within the Document Builder tool to locate the appropriate template for your needs
- Find and select your template (e.g., "Reference Letter template")
- Next, identify the employee (or employees) for whom this document is being generated
- After saving, the template structure will appear on your screen
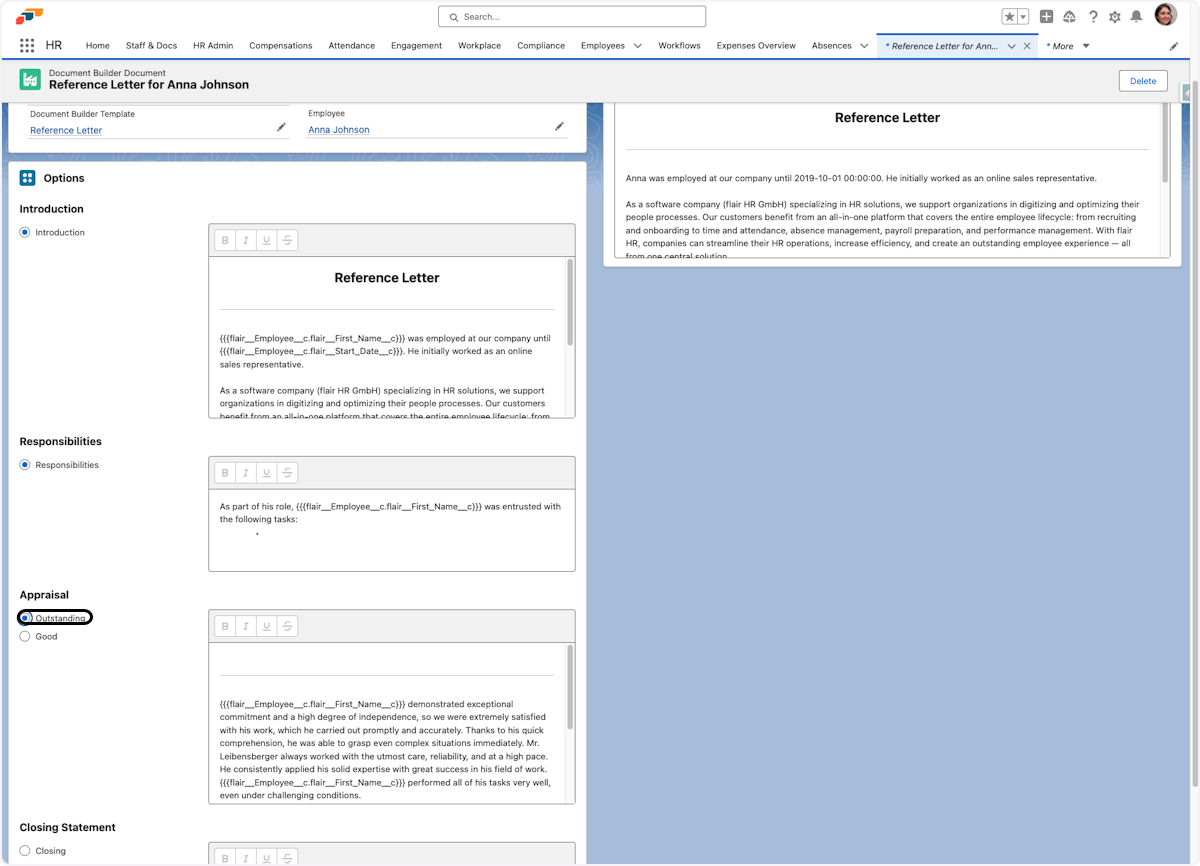
Step 3: Build Your Document
- Review each section - The (i) icon above each section displays the HelpText or prompts you created. This can be a description of the purpose of each section, or exact text that should go inside a template
- Select options from the left sidebar - On the left-hand side of your screen, you'll see the text templates that were created using the Document Builder Templates feature. Clicking on one of the options will make it appear in the document
- Preview the content on the right side - The template structure will show the selected options
- Make manual edits if needed (note: changes are lost if you switch options afterward)
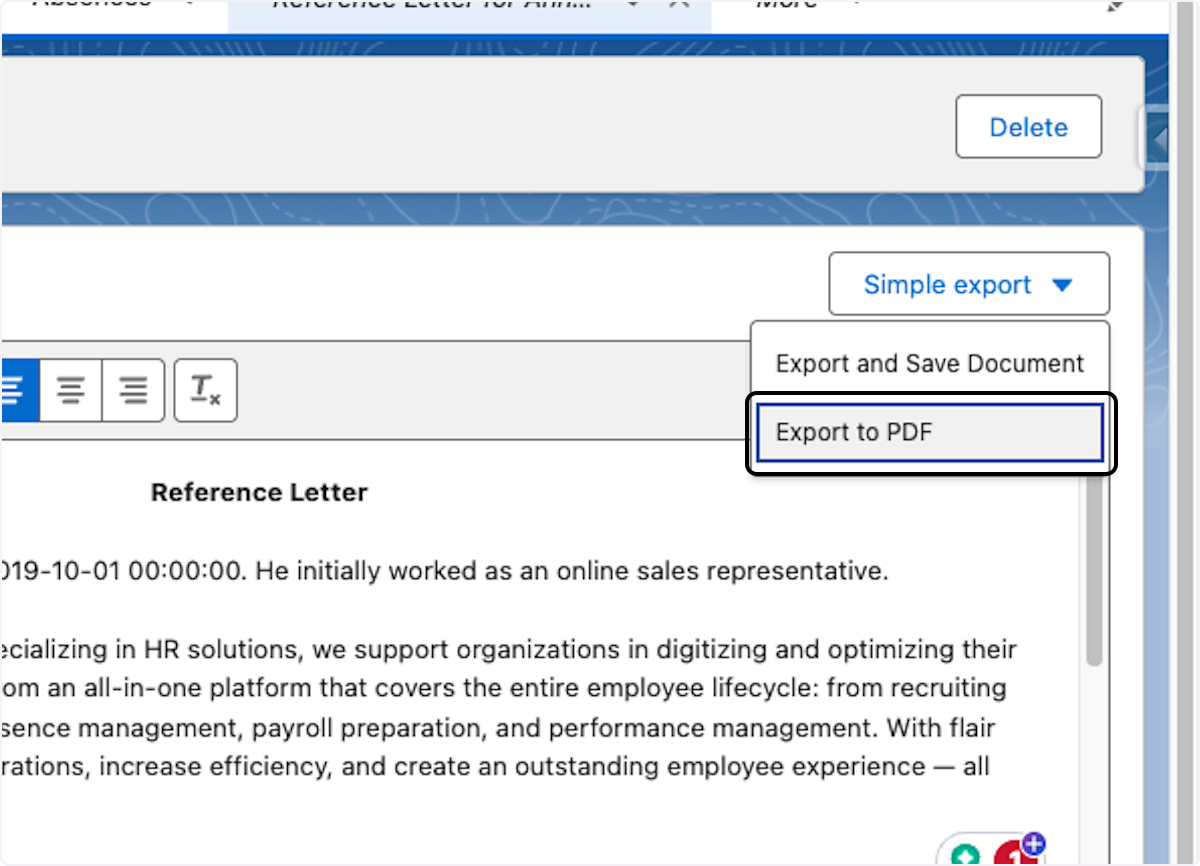
Step 4: Finalize and Export
Option A: Direct Export
- Click Export and Save Document to apply the generated document to the desired employee
- The document is saved to the employee's Documents section in their Employee Hub
- There is also the option to download a PDF version and print a paper copy if you wish
Option B: Apply Professional Layout
- Create a Document Template with
[result]or[~~result]placeholder - Map the placeholder to the Result field
- Generate a professionally formatted document
Best Practices
Content Organization
- Keep sections logical: Introduction → Body → Conclusion
- Create meaningful names for both templates and text options
- Use consistent terminology across all options
Text Options Strategy
- Create performance-based variants (Excellent, Good, Needs Improvement)
- Include language variations for multilingual organizations
- Prepare scenario-specific content (promotions, departures, achievements)
Formatting Tips
- Use rich text formatting for professional appearance
- Include merge fields strategically - don't overuse them
- Test with sample data before rolling out to your team
Common Use Cases
Reference Letters
- Introduction options: Different tones based on employee performance
- Achievement sections: Various accomplishment highlights
- Closing options: Formal vs. warm recommendations
Performance Reviews
- Goal achievement sections: Met, exceeded, or missed targets
- Skill assessments: Technical, communication, leadership evaluations
- Development plans: Growth areas and recommendations
Confirmation Letters
- Employment confirmations: Different contract types
- Promotion announcements: Various roles and departments
- Training completions: Different certification programs
Advanced Features - Combining with Document Templates
For professional branding and layouts, you can combine Document Builder Templates with Document Templates:
- Go to Staff and Docs → Document Templates and click Create Document Templates
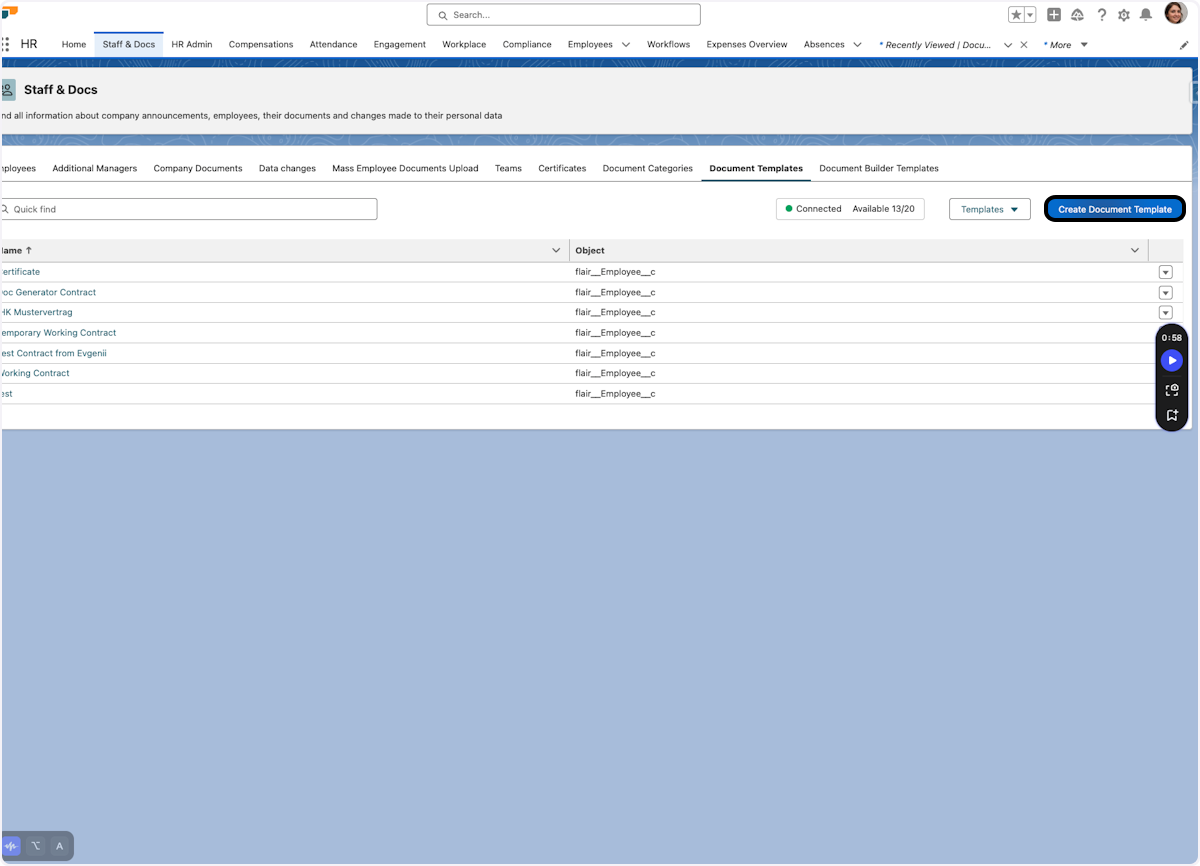
- Create a Document Template for the object Document Builder
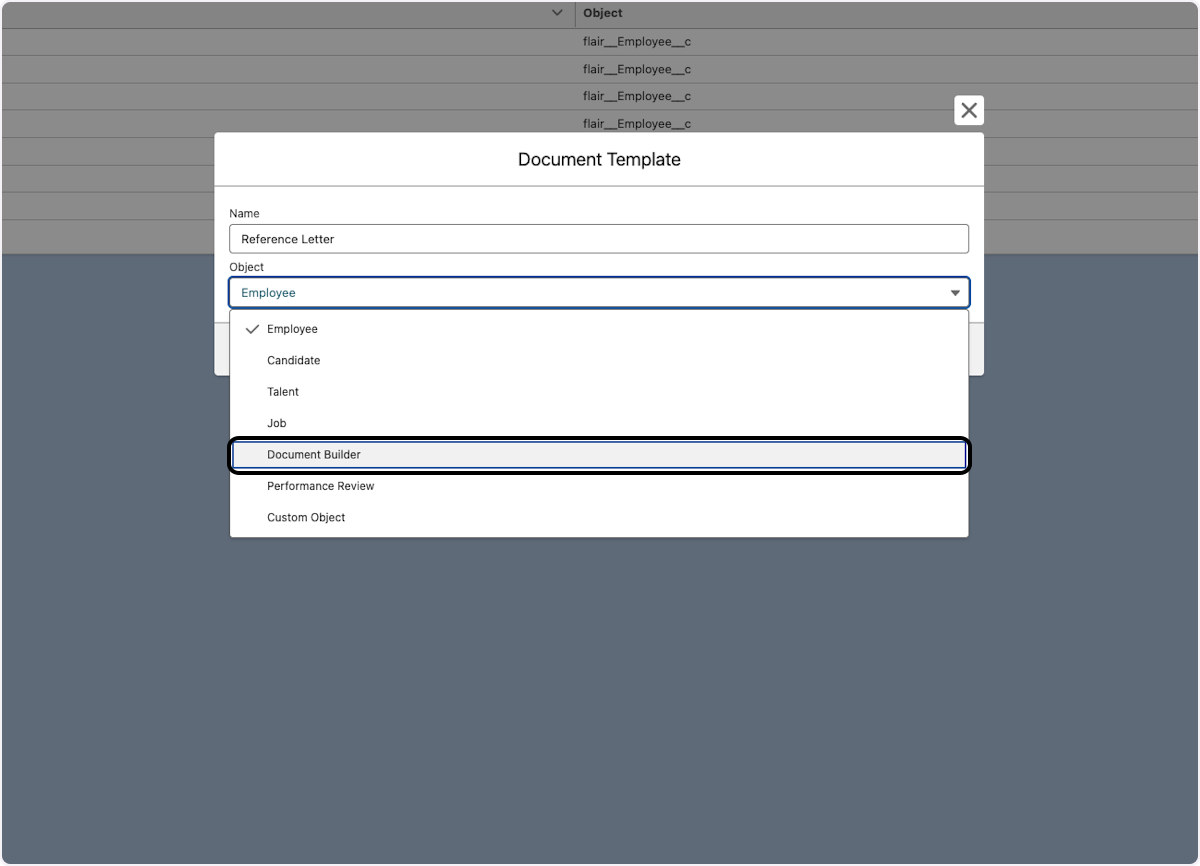
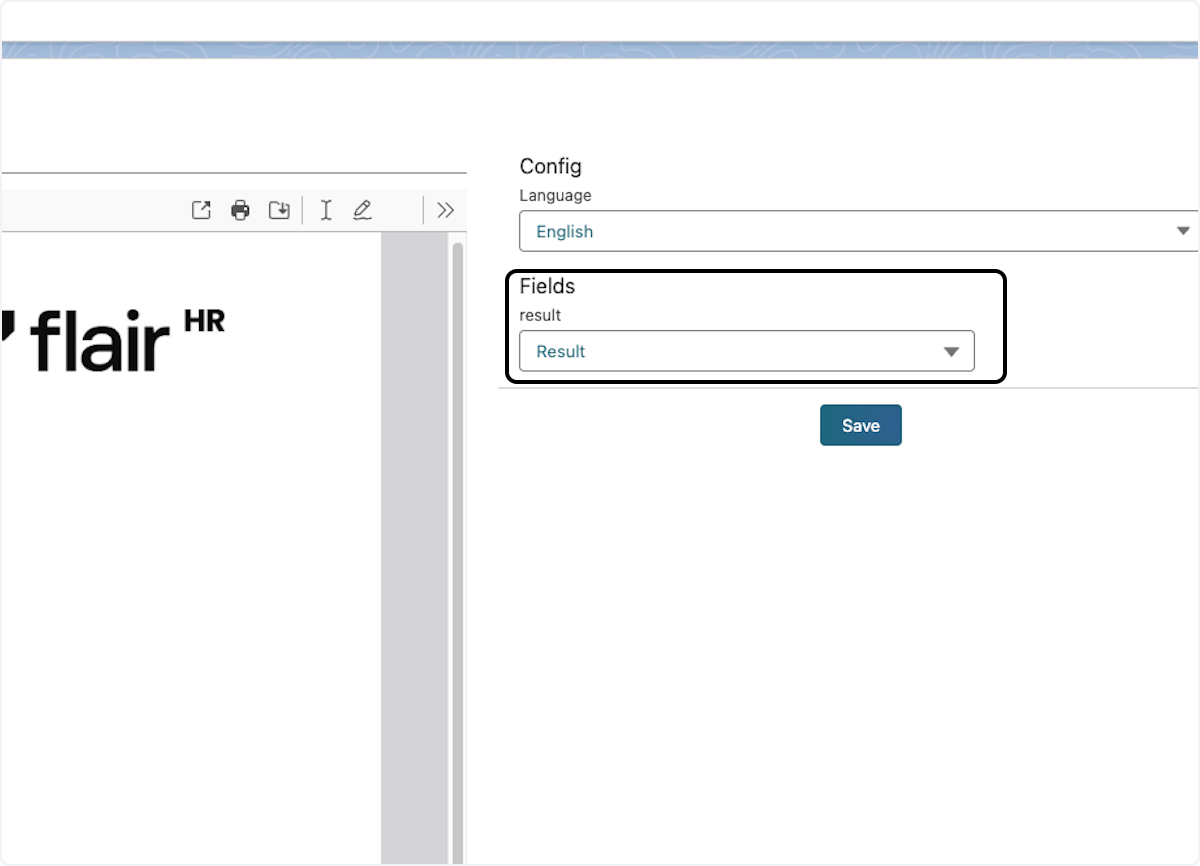
- Prior to uploading your document, add a placeholder into your document, such as
[result]for plain text or[~~result]to maintain formatting

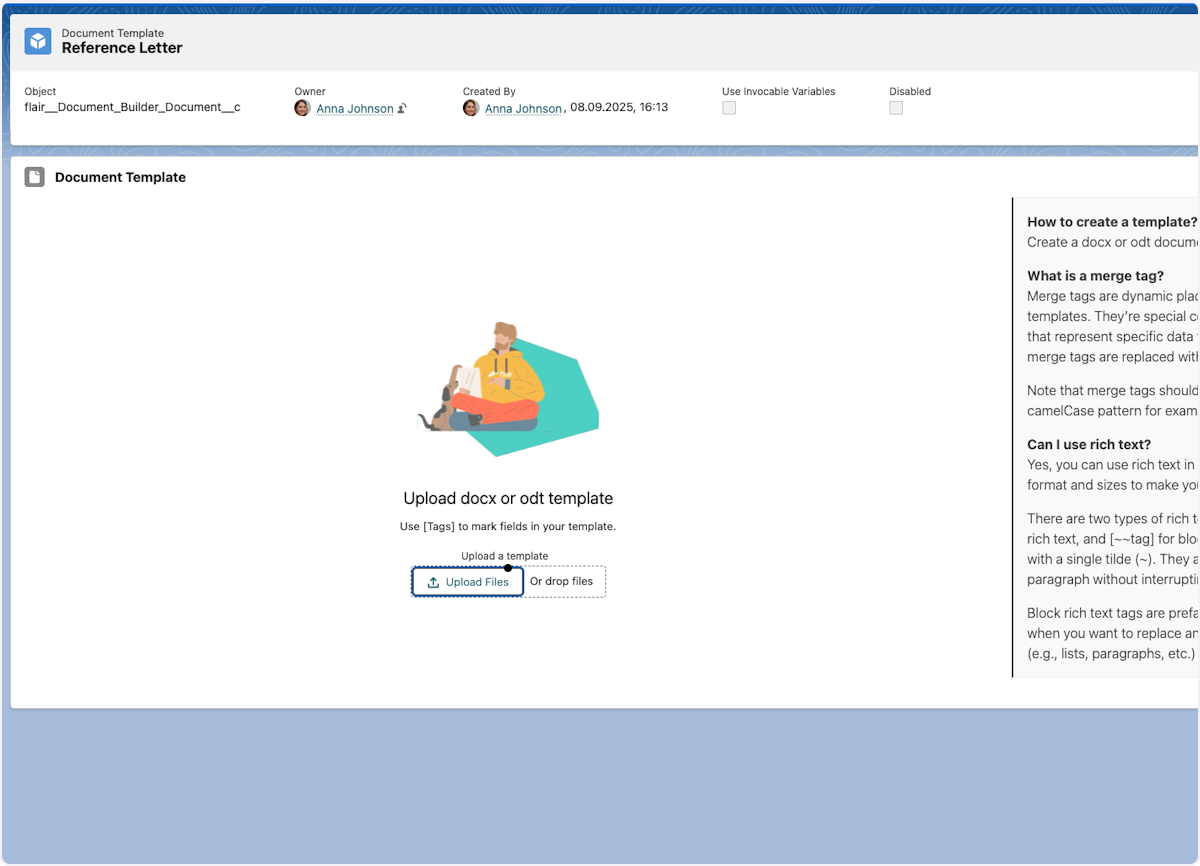
- Upload your document with your branding
- Map the placeholder to the Result field
- Click on Preview
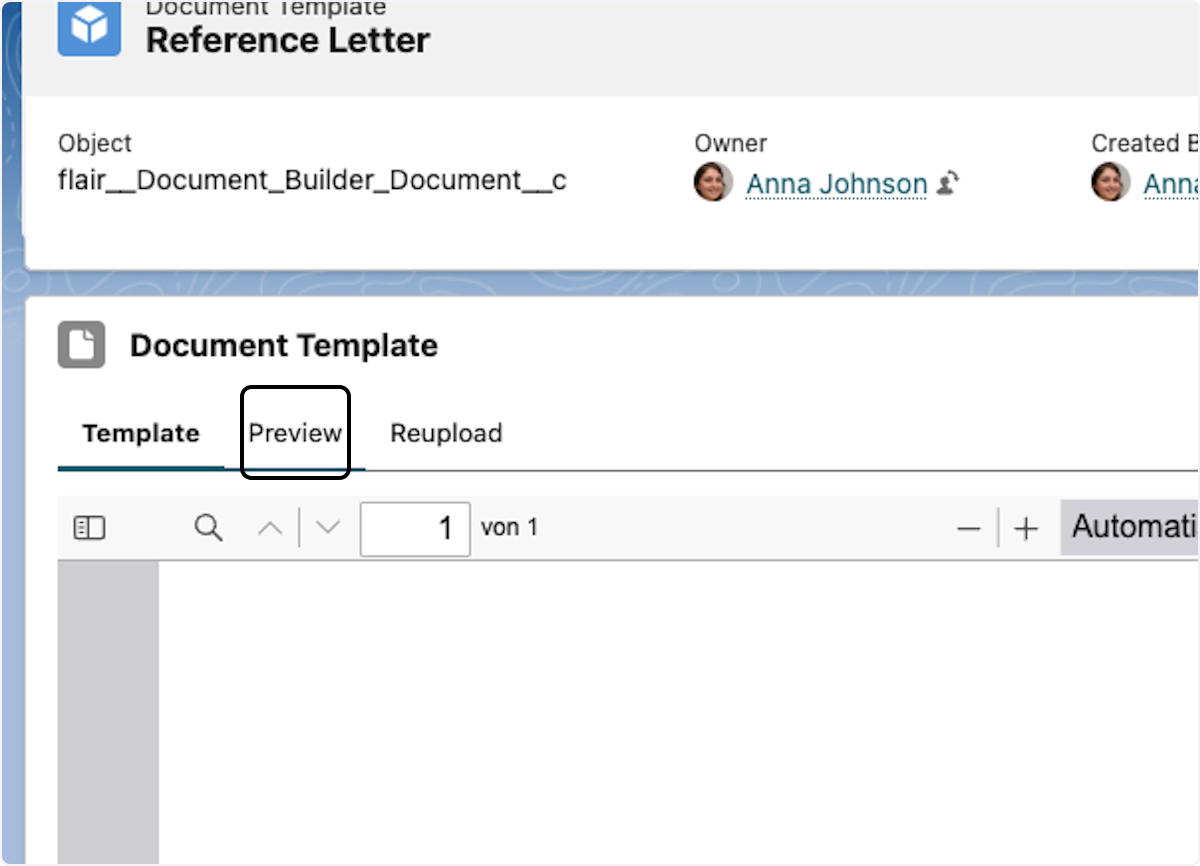
- Select the reference letter you created previously
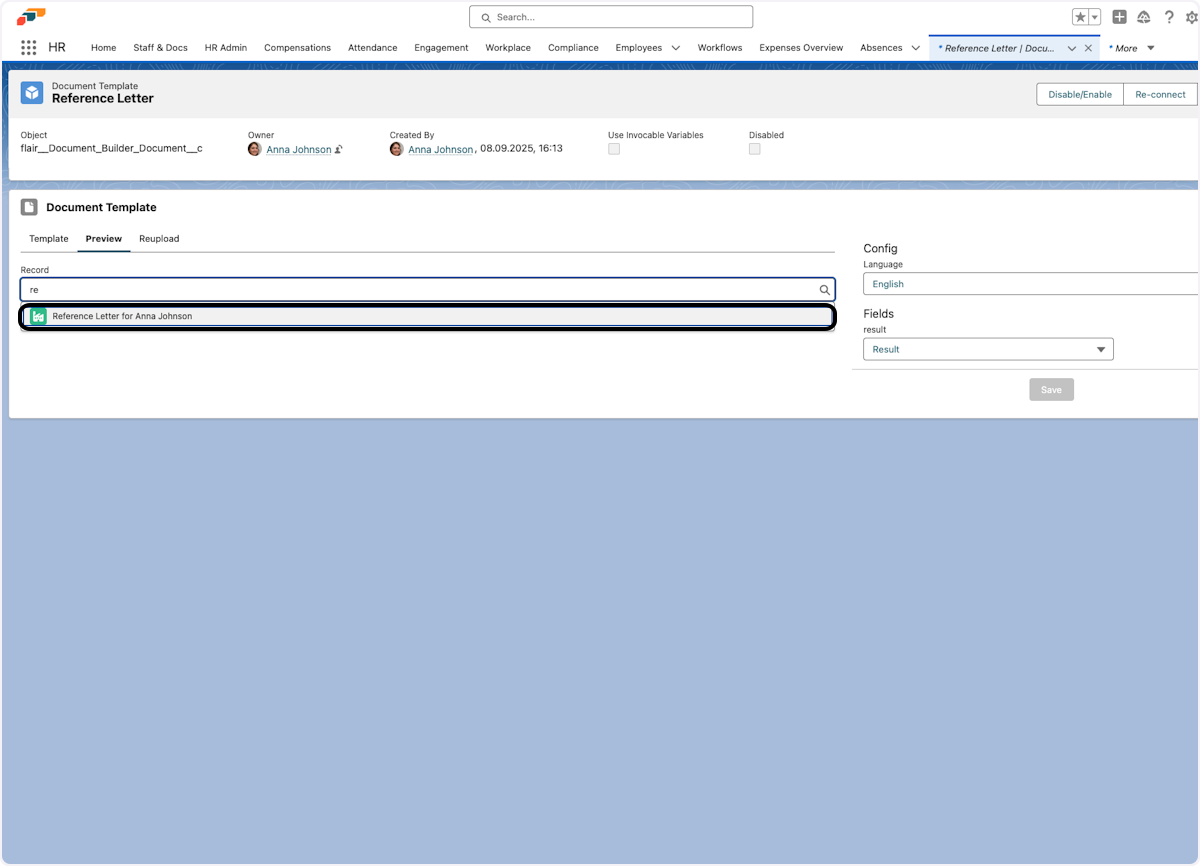
- Congratulations! You created a professional document with your branding and layout

Automation Integration
Document Builder Templates can be integrated with other flair features:
- Use with workflows to trigger document generation
- Combine with e-signature processes
- Integrate with approval flows for document review
Troubleshooting Common Issues
Template not appearing in Document Builder
- Ensure the template is saved properly
- Check that all sections have at least one text option
- Verify the template name doesn't contain special characters
Merge fields are not populating
- Confirm field names match exactly (case-sensitive)
- Check employee record has the required data
- Verify field permissions and visibility
Formatting issues
- Use rich text fields for complex formatting
- Test with different browsers
- Consider using Document Templates for consistent layouts