Managing & Approving Expenses
Managing expenses involves reviewing claims, making approval decisions, processing reimbursements, and collaborating with team members. This guide covers the full approval workflow from both Salesforce and Employee Hub perspectives, including the new expense group approval process.
Managing Expenses in Salesforce
In the Expenses Overview tab on the flair HR app, managers and HR administrators can view and manage all existing expense claims. This centralized view provides complete control over the expense approval workflow, including both individual expenses and expense groups.
Expenses Overview
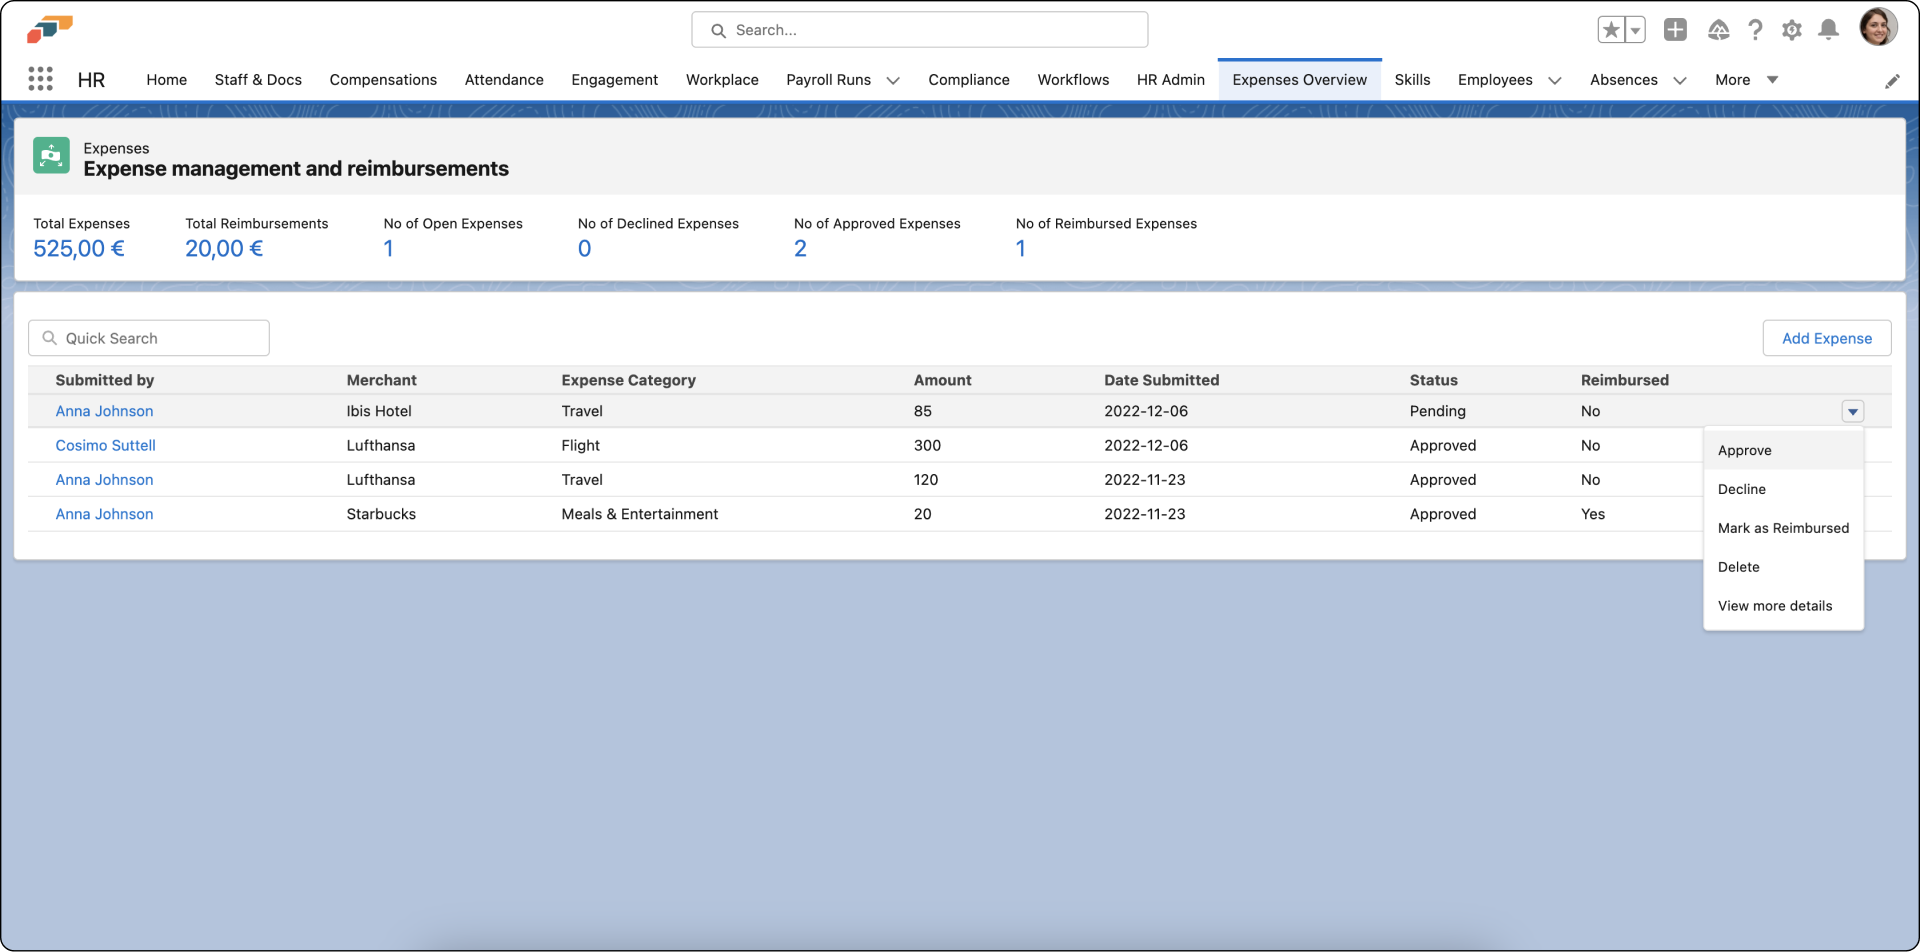
The Expenses Overview displays all expense claims and expense groups with their current status, making it easy to see what needs attention. Expense groups are displayed with their child expenses visible underneath.
Managing Expense Claims
To manage an expense claim:
- Navigate to the Expenses Overview tab
- Find the expense claim or expense group you want to manage
- Click on the downward arrow to the right of the expense/group
- Select from the dropdown menu options:
- Approve - Approve the expense or group for reimbursement
- Decline - Reject the expense claim or group
- Delete - Remove the expense record
- Mark as Reimbursed - Indicate that payment has been processed
- View More Details - See complete expense information
Managing Expense Groups
When managing expense groups:
- Approving a group - Approves all expenses within the group together
- Declining a group - Declines all expenses within the group together
- Viewing details - Shows the group overview with all child expenses listed
- Individual expense management - You can still manage individual expenses within a group if needed
Clicking on an expense group opens the detail view showing all expenses within that group, where you can review expense items and approve or decline individual expenses if necessary.
Approving Expenses
When you approve an expense claim or expense group:
- The expense/group status changes to Approved
- For expense groups, all expenses within the group are approved together
- The employee receives a notification
- The expense moves to the reimbursement queue
- Finance can process payment
For Expense Groups:
- Review all expenses within the group before approving
- Check that all expense items have proper documentation
- Verify that related expenses make sense together (e.g., all from the same business trip)
Best practice: Review all attached receipts, expense items, and descriptions before approving to ensure they meet company policy.
Declining Expenses
When declining an expense claim or expense group, it's important to provide clear feedback:
- Select Decline from the dropdown menu
- Provide a description explaining the reasoning
- The employee will receive notification with your explanation
For Expense Groups:
- Declining a group declines all expenses within it
- Provide specific feedback about which expenses or items are problematic
- Consider whether partial approval is possible (you may need to decline the group and ask for resubmission)
This flair feature:
- Opens up communication channels
- Allows employees to receive valuable feedback
- Helps prevent similar issues in future submissions
- Provides a clear audit trail
Marking Expenses as Reimbursed
After finance processes payment:
- Locate the approved expense
- Select Mark as Reimbursed from the dropdown
- The expense status updates to show completion
- The employee can see the reimbursed status in their Employee Hub
Deleting Expense Claims
Use the delete option carefully:
- This permanently removes the expense record
- Consider declining instead if you want to keep an audit trail
- Deletion may be appropriate for duplicate entries or test data
Manager View: Reviewing in Employee Hub
Managers have special permissions to review, approve, decline, and manage expense claims for their team members directly in the Employee Hub.
Accessing Team Expenses

From a manager's perspective:
- Log into the Employee Hub
- Click on the Manager tab
- On the My Team home screen, you'll see Pending Approval expense claims and expense groups displayed on the right-hand side
- Click Review All to see the full expenses list
The Manager tab provides quick visibility into expenses and expense groups that need your attention, so you can process them promptly.
Reviewing Expense Claims
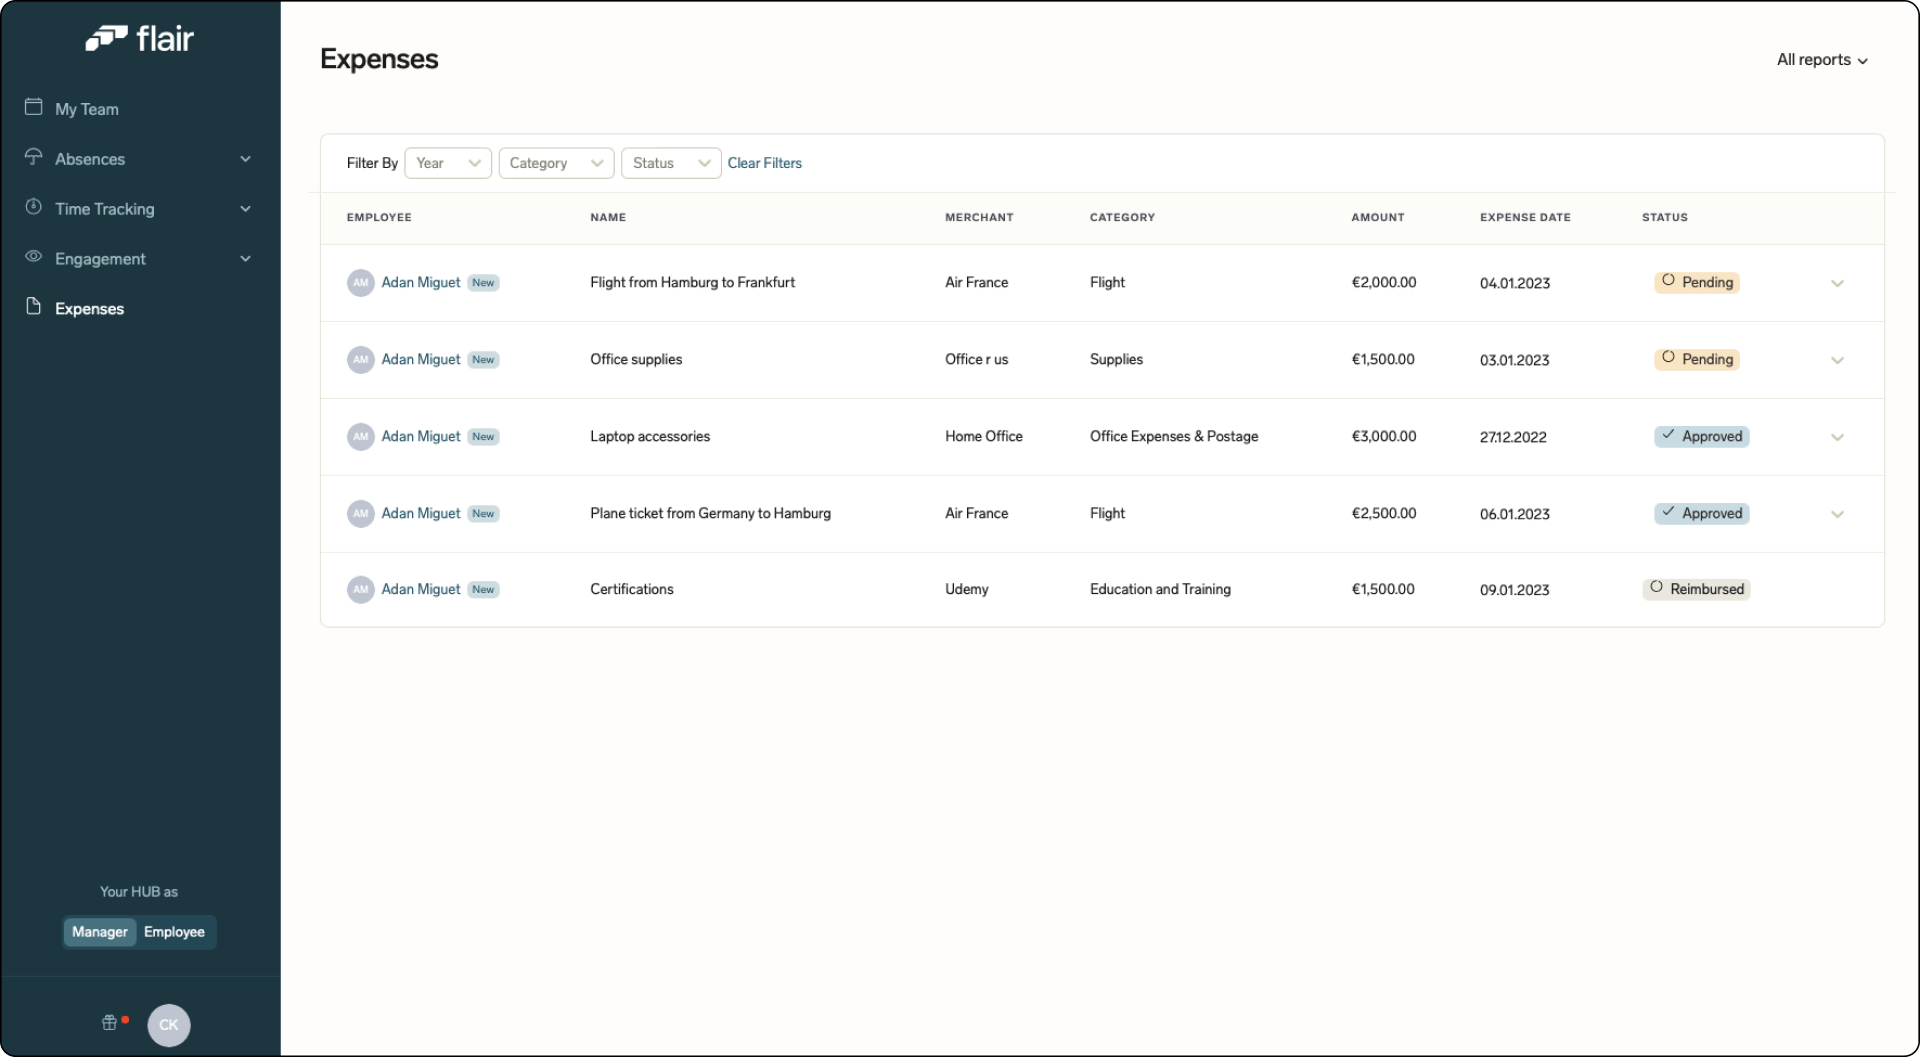
On the Expenses page, managers can:
- View a comprehensive list of all employee expenses, expense groups, and their status
- See key information at a glance:
- Employee name
- Expense date or date range
- Amount (or total amount for groups)
- Category
- Current status
- Group indicator (for expenses within groups)
- Filter or sort to find specific expenses
- Access detailed information for each claim or group
For Expense Groups:
- Groups are displayed with their child expenses visible
- Click on a group to see all expenses within it
- You can review individual expense items within each expense
Approving in Employee Hub
To approve an expense or expense group:
- Review the expense details carefully
- For expense groups, review all expenses within the group
- Check expense items and their documentation
- Click the dropdown icon on the right side of the expense or group
- Select Approve
- The employee receives a notification
- The expense (or all expenses in the group) moves to the reimbursement queue
From Approval Requests:
- Approval requests for expense groups include a button that brings you directly to the manager's view of the group
- You can review all details and approve or decline from there
Collaborating with Comments
Organizing expenses is often a collaborative process. flair enables colleagues to comment on expense claims to facilitate discussion and clarification.
How to Add Comments
To comment on an expense:
- Navigate to the Expenses section in the Employee Hub
- Click on an existing expense to open it
- You'll see two tabs: Information and Comments
- Select the Comments tab
- Write your message in the comment box
- Post your comment
The person who submitted the expense (and relevant managers/HR) will receive notifications about new comments.
Understanding Expense Status
- Draft - Work in progress; employee can still edit
- Pending - Awaiting review
- Approved - Accepted; awaiting reimbursement
- Declined - Rejected with feedback provided
- Reimbursed - Payment has been processed
For Expense Groups:
- The group status reflects the status of all expenses within it
- When a group is submitted, all expenses move to Pending together
- When a group is approved or declined, all expenses are affected together
Best Practices
For Managers
- Timely reviews - Review expense claims promptly
- Provide feedback - When declining expenses, give clear explanations
- Monitor patterns - Watch for unusual spending patterns or policy violations
- Be consistent - Apply expense policies uniformly across your team
For HR Administrators
- Regular reviews - Periodically audit expenses to identify trends or issues
- Clear policies - Communicate expense policies clearly to all employees
- Set spending limits - Define maximum amounts for different expense types
Related Topics
- Payroll - Expense reimbursements can be integrated with payroll processing
- Reporting - Generate expense reports by category, employee, or department