Accrual Policies
An accrual policy defines how employees accumulate (accrue) paid leave, how this allowance is prorated if an employee worked fewer hours, and if and when the accrued allowance expires. This guide covers everything from setting up basic accrual policies to managing special leave types like maternity and parental leave.
Set Up an Accrual Policy
Policies and laws concerning paid leave differ from country to country. In some countries, paid leave accrues gradually over time, rather than being granted all at once. In others, the leave entitlement increases with an employee's age.
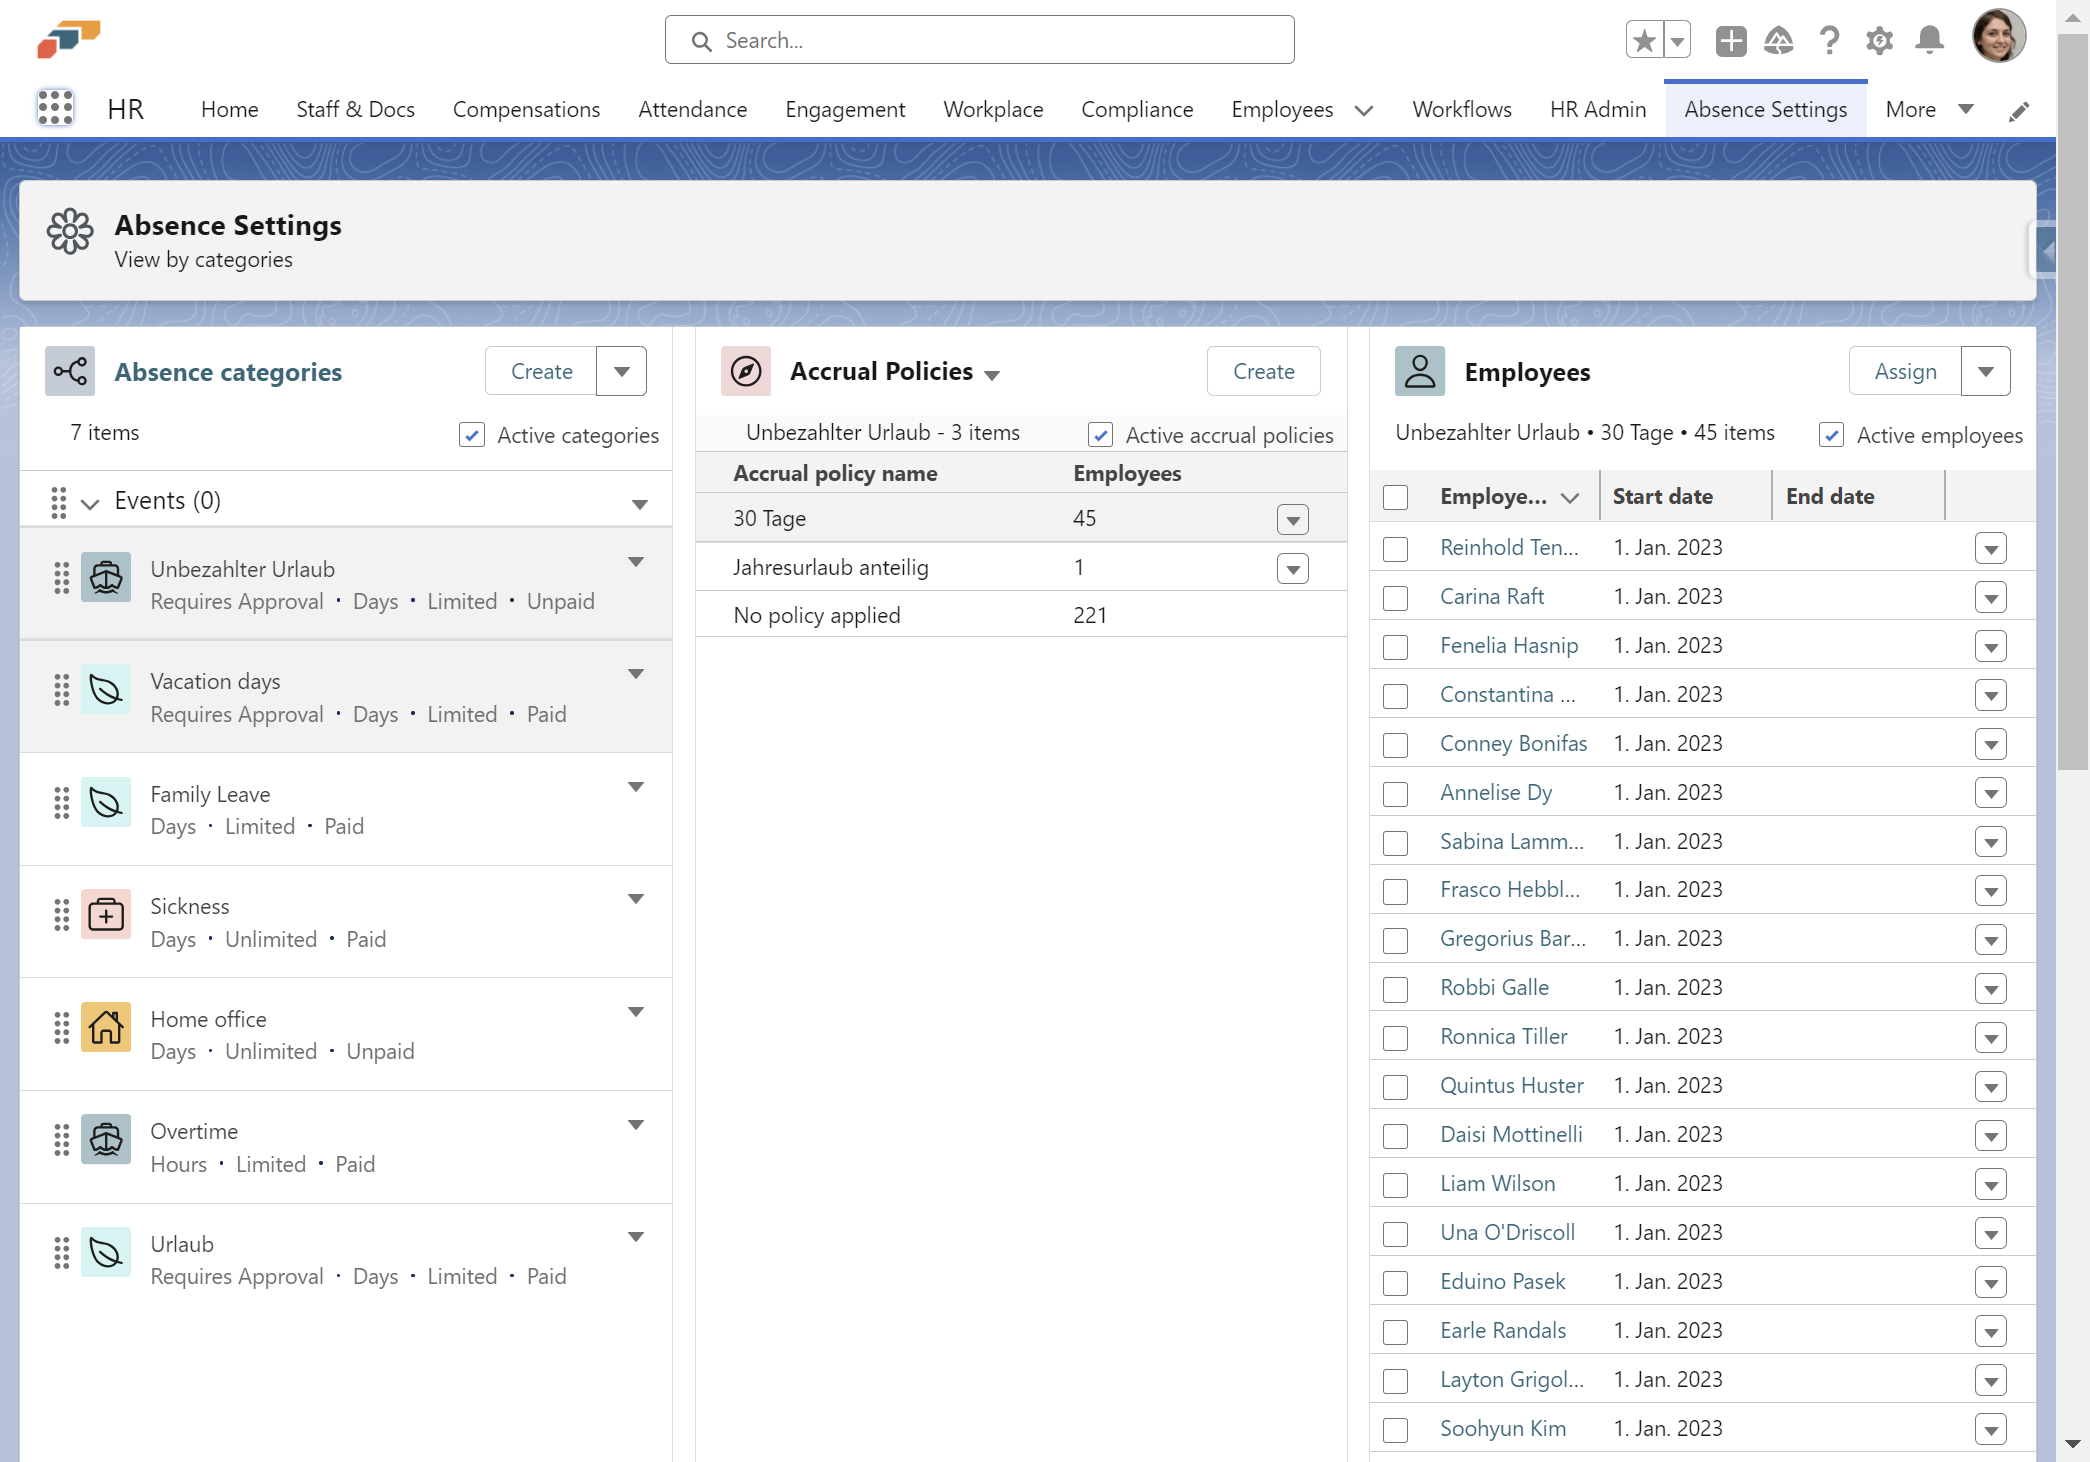
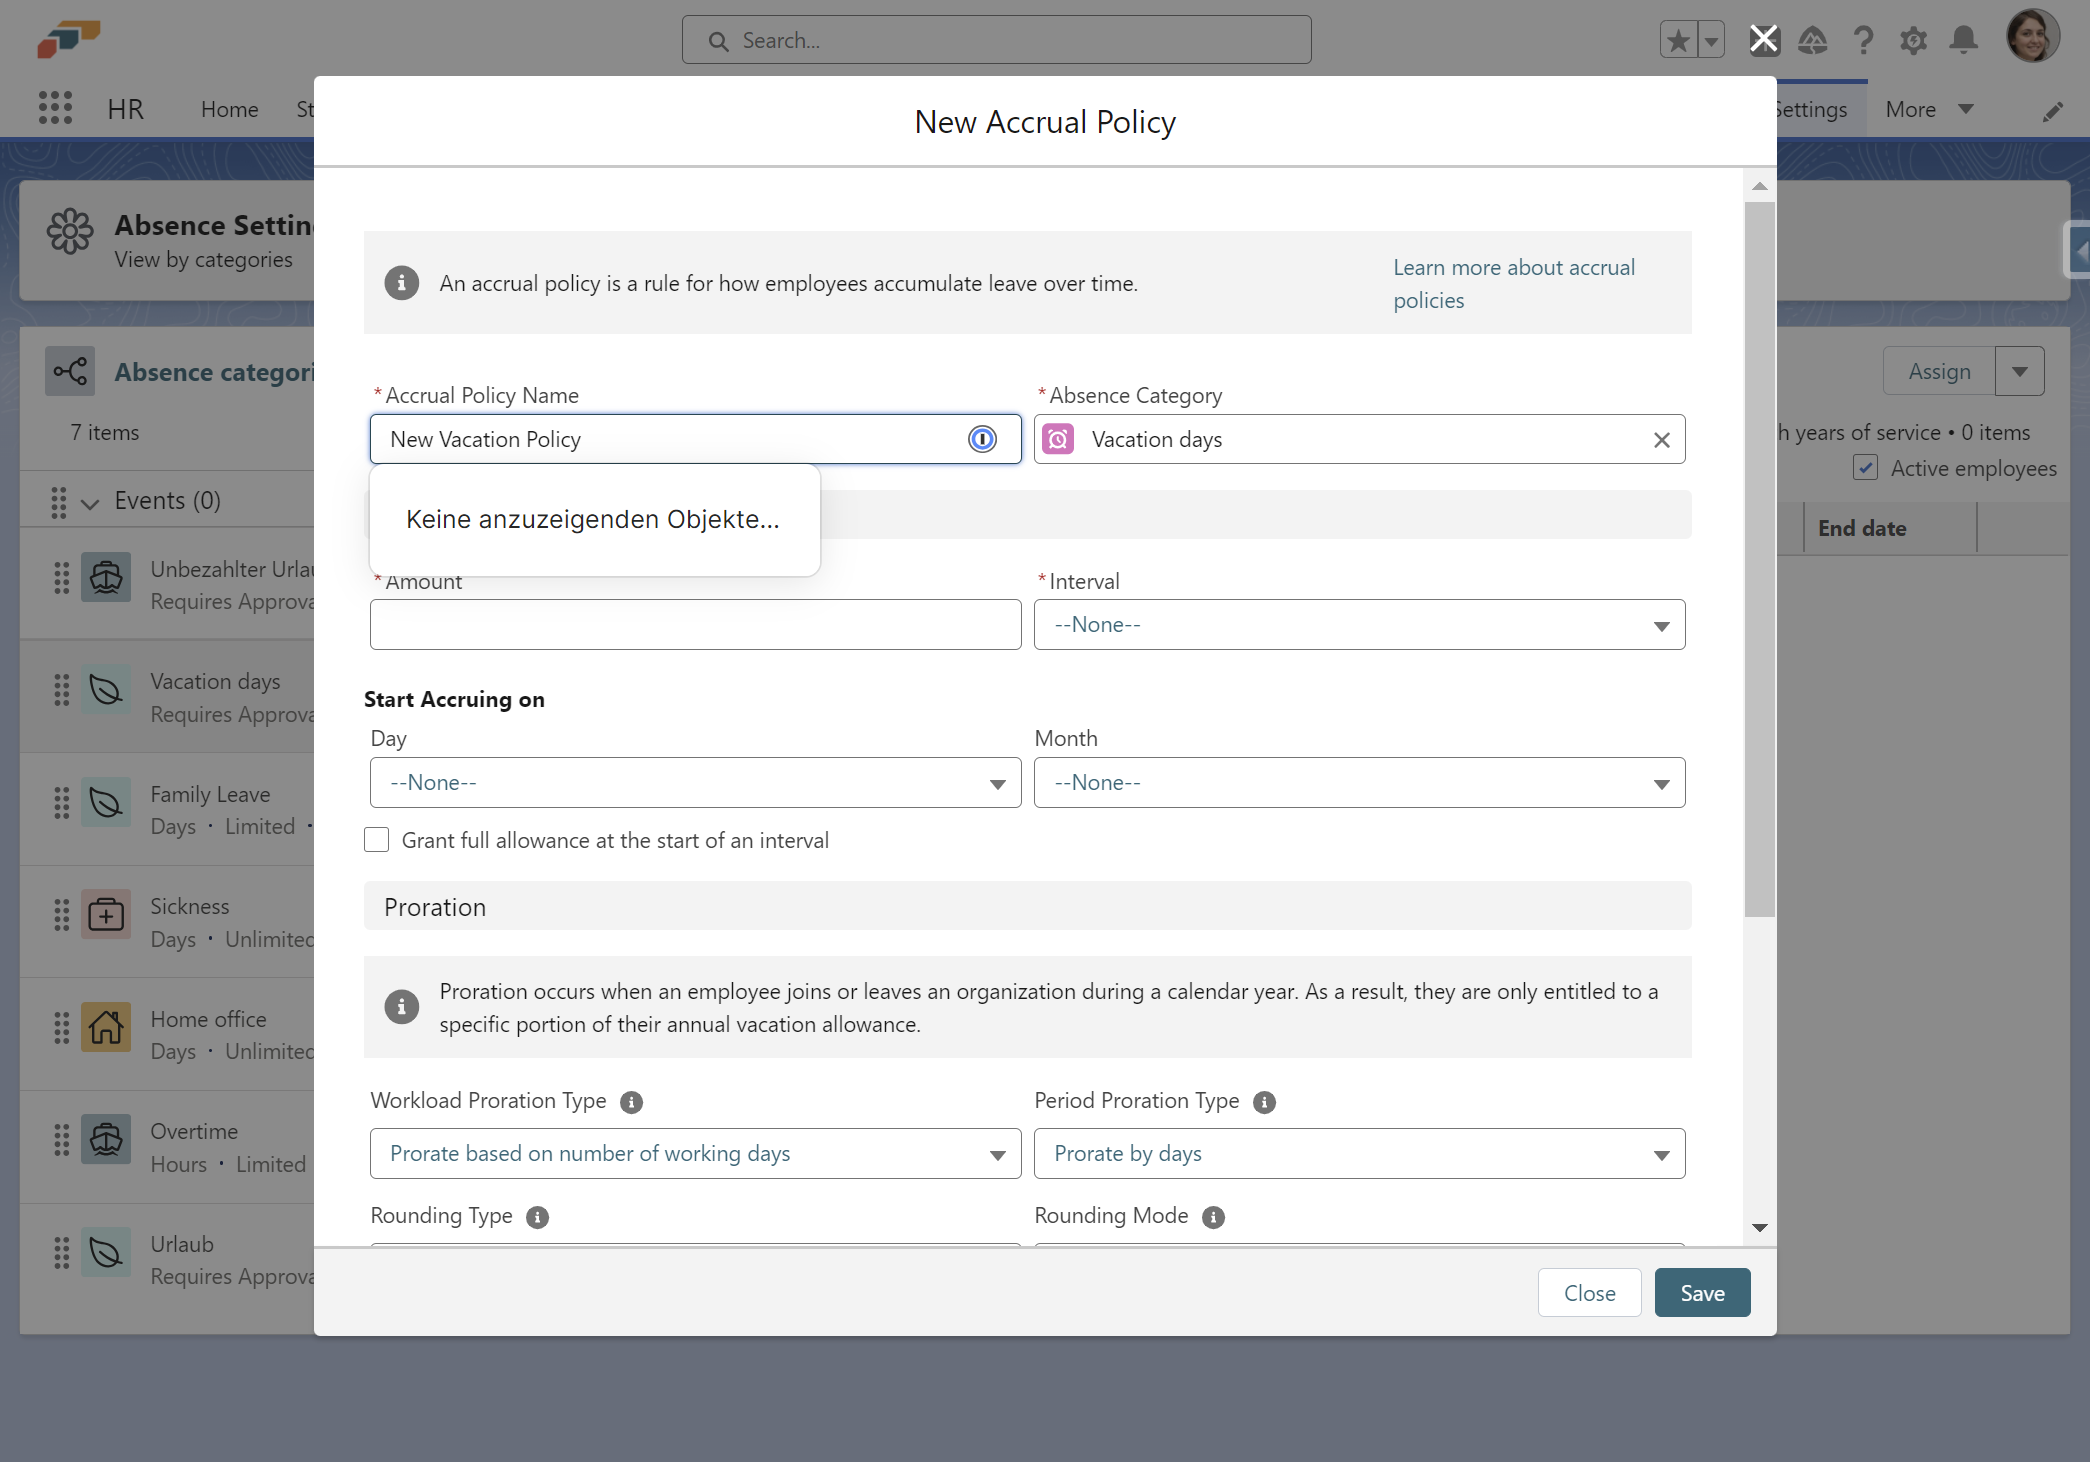
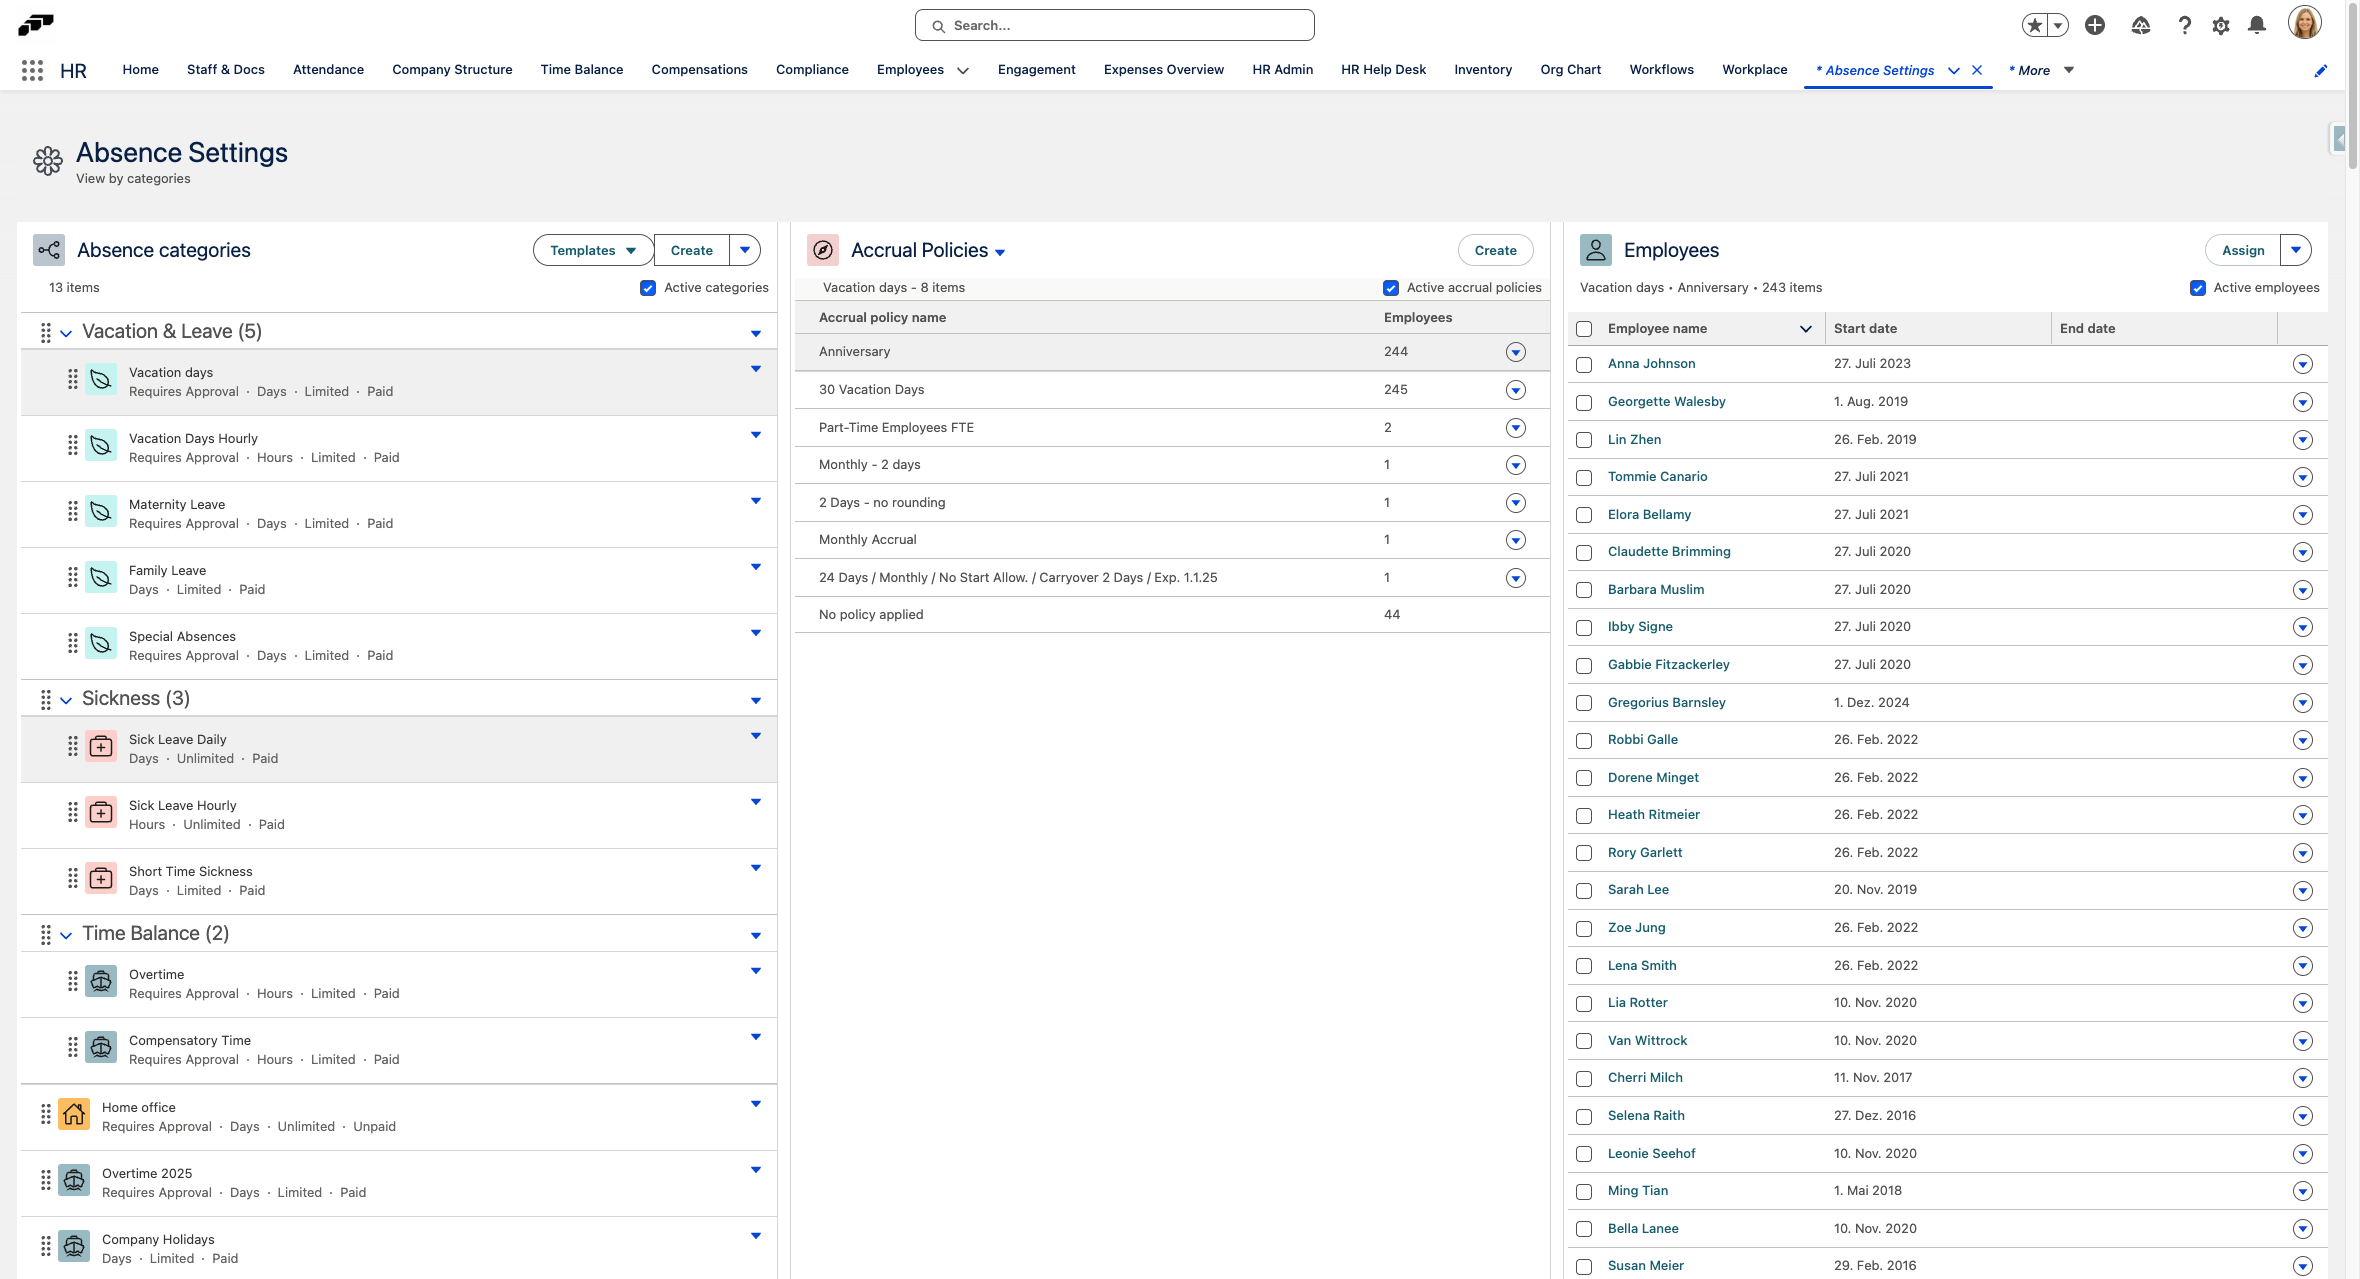
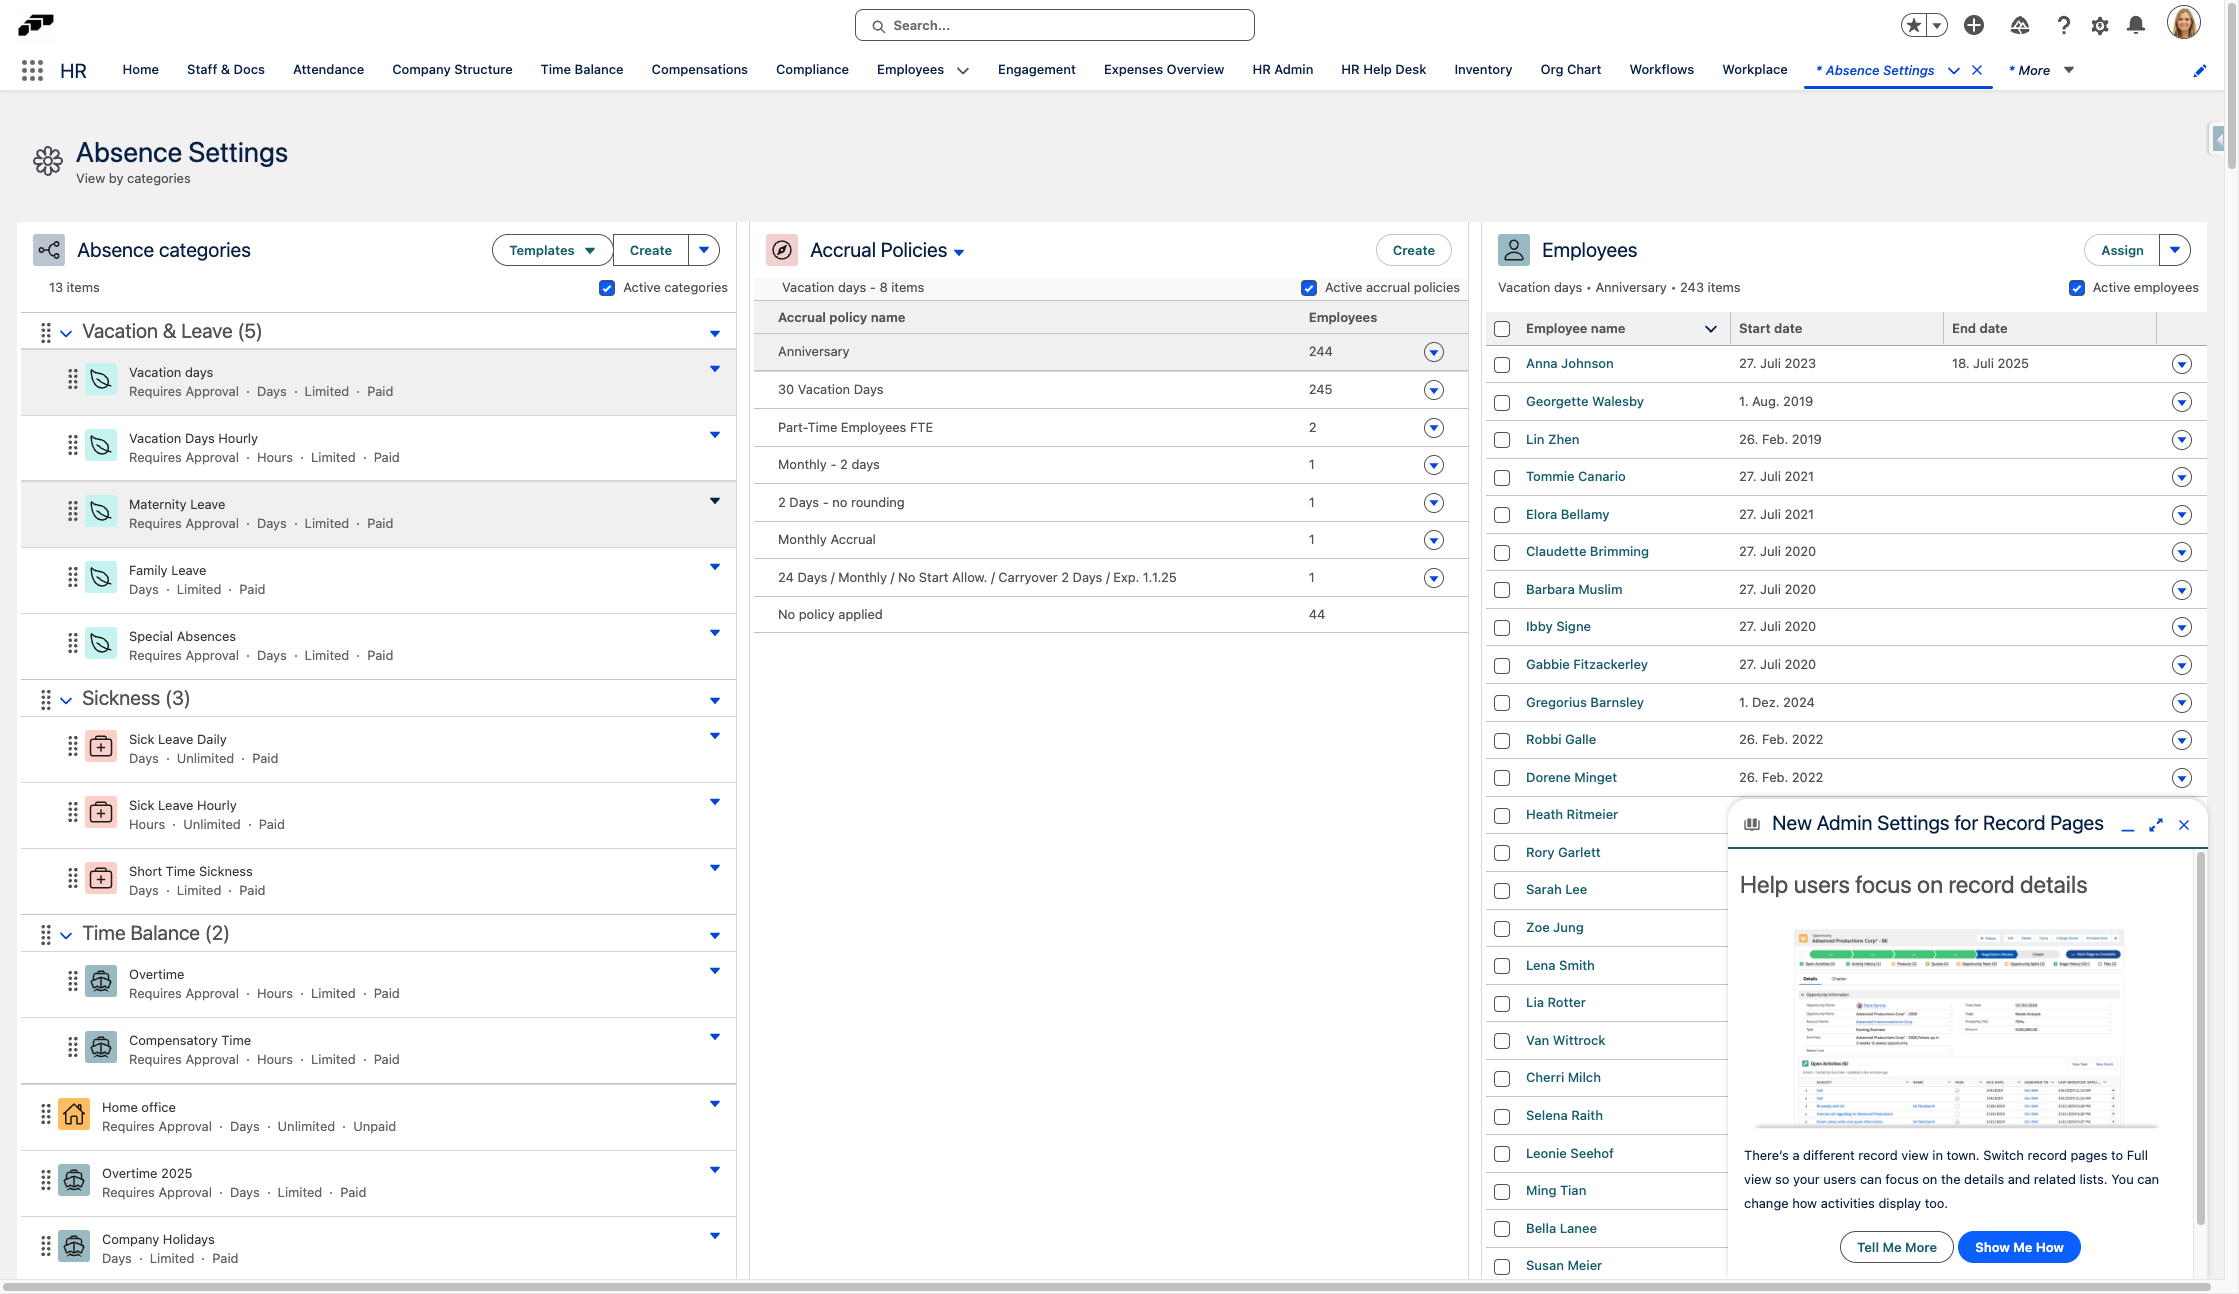
With flair, you can determine the rate of accrual by creating an accrual policy. To start, open the Absence Settings page in the flair HR app by using the App Launcher 𓃑. Select one of your absence categories from the left panel on the screen. You can then choose an accrual policy from the center panel or click Create to make a new one.
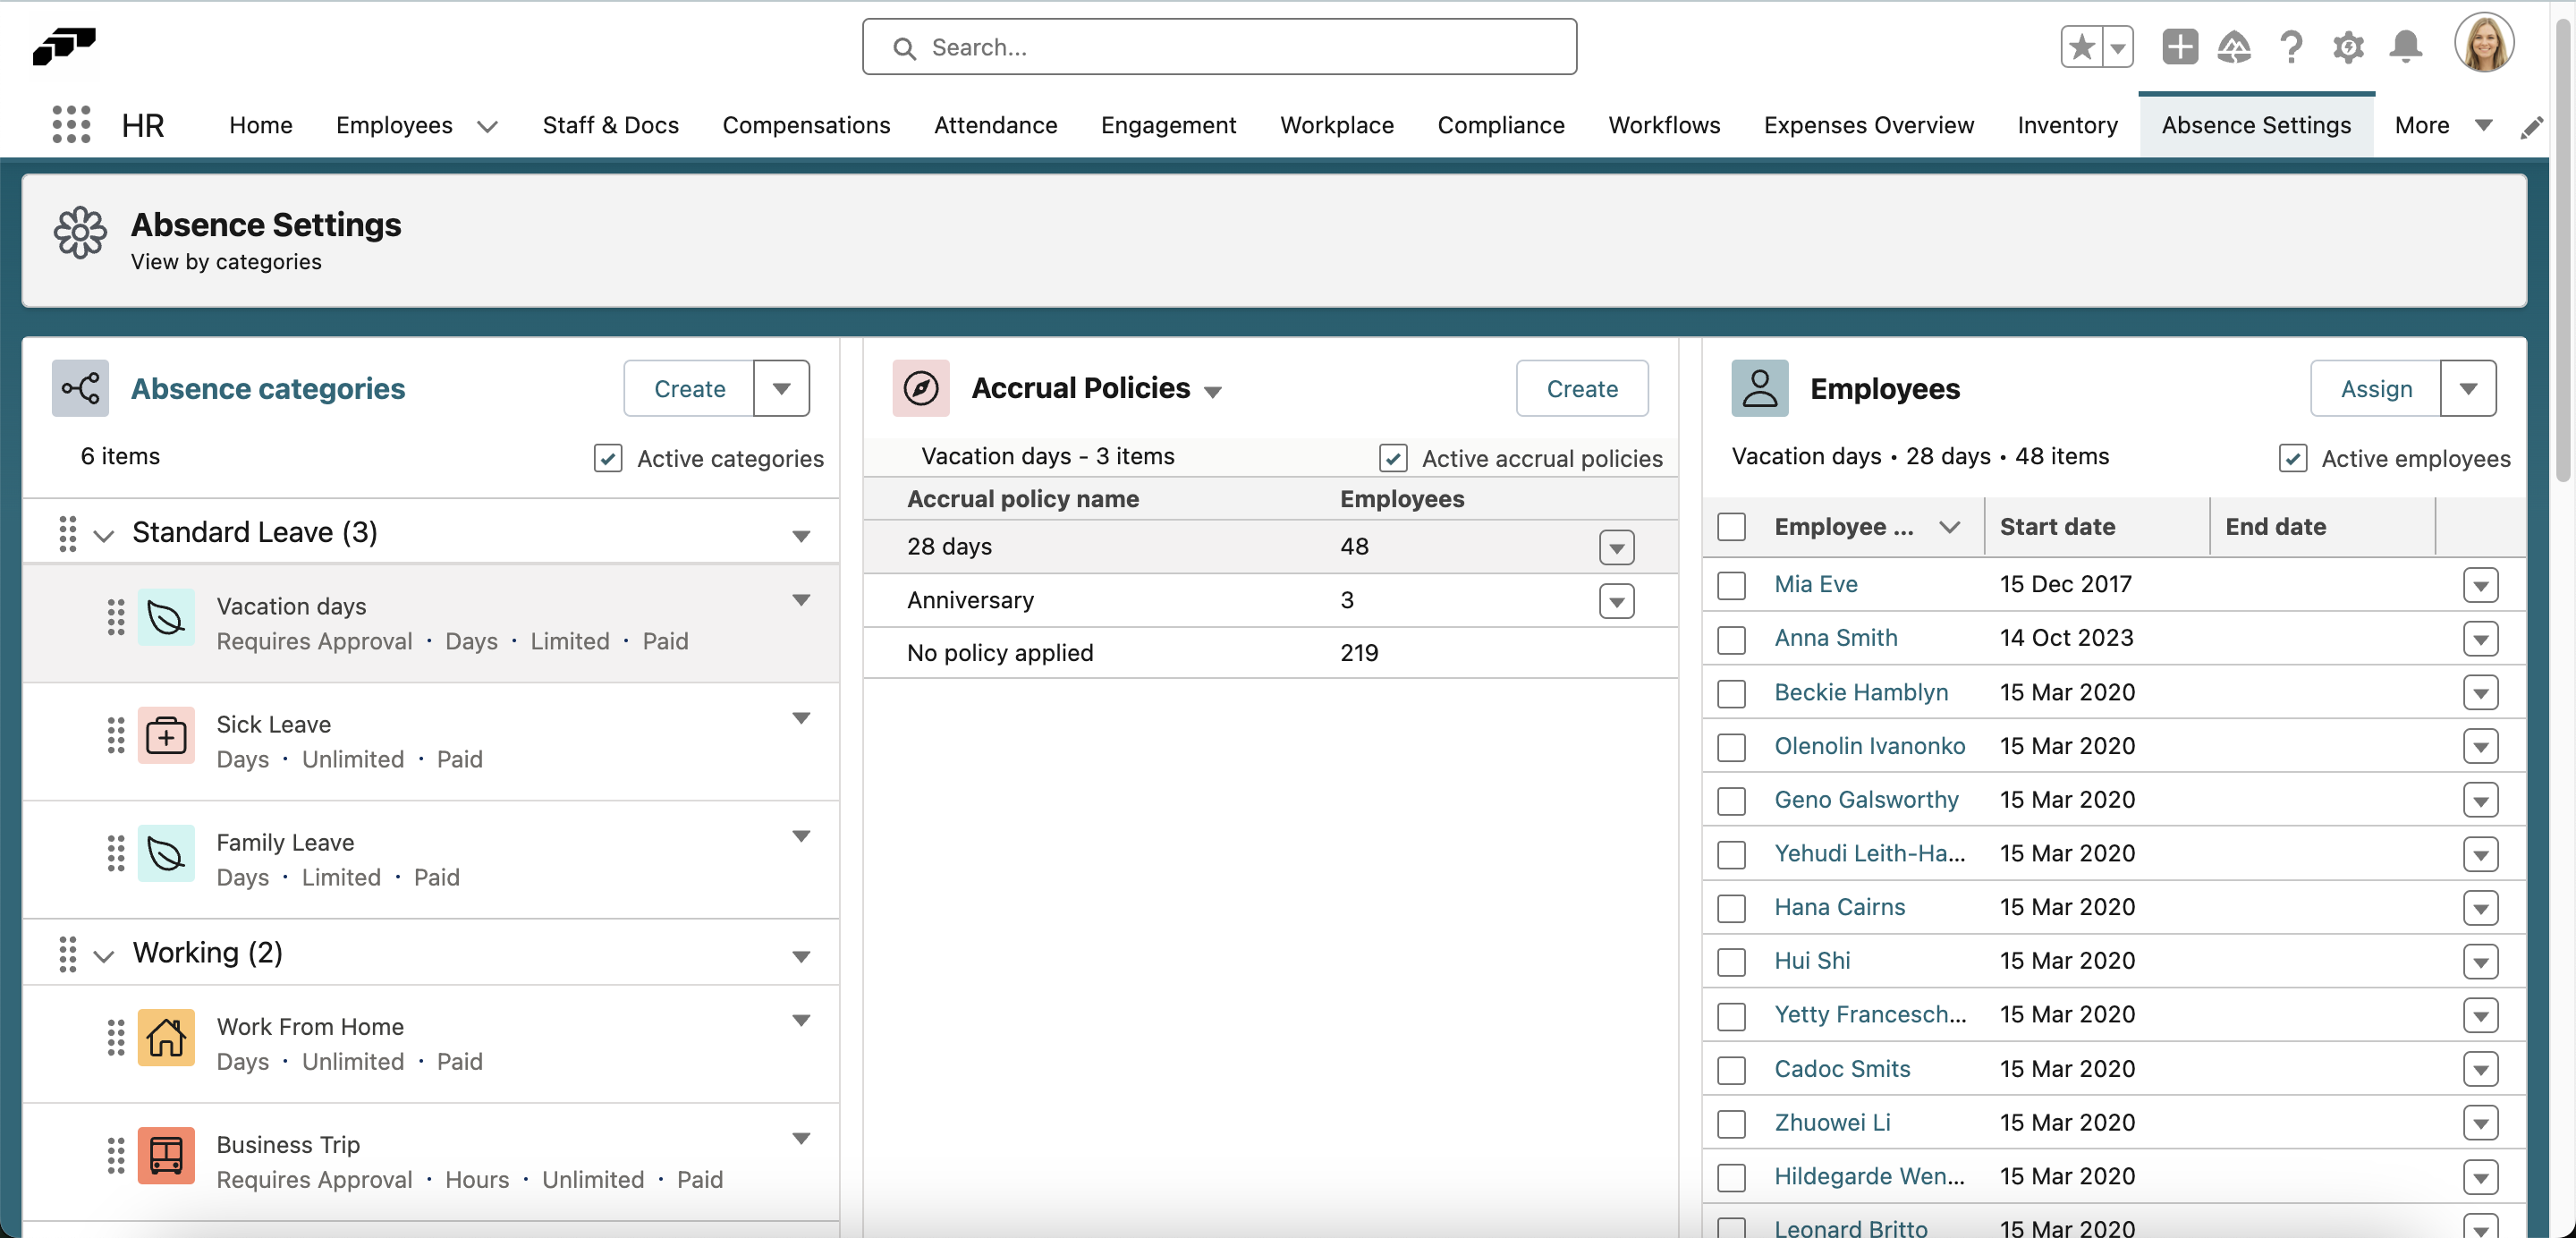
There are multiple options that allow you to customize your accrual policy to applicable employment law and company policy.
- Accrual Policy Name: Give your accrual policy a descriptive name so you can easily find it again later.
- Absence Category: Select which type of absence your accrual policy will apply to.
- Amount: Define the amount of absence to be accrued. For daily absence categories, the amount refers to days. For hourly absence categories, the amount is in hours.
- Interval: Choose the period of time over which the absence allowance will be accrued. Selecting the Anniversary option will accrue absences over the period of one year, starting on the employee's Start Date.
- Start Accruing On: Choose the date on which the which the accrual will start.
- Grant full allowance at the start of an interval: Checking this box will grant employees their full absence allowance all at once. If you check this box, you will also have the option to grant future allowances in advance.
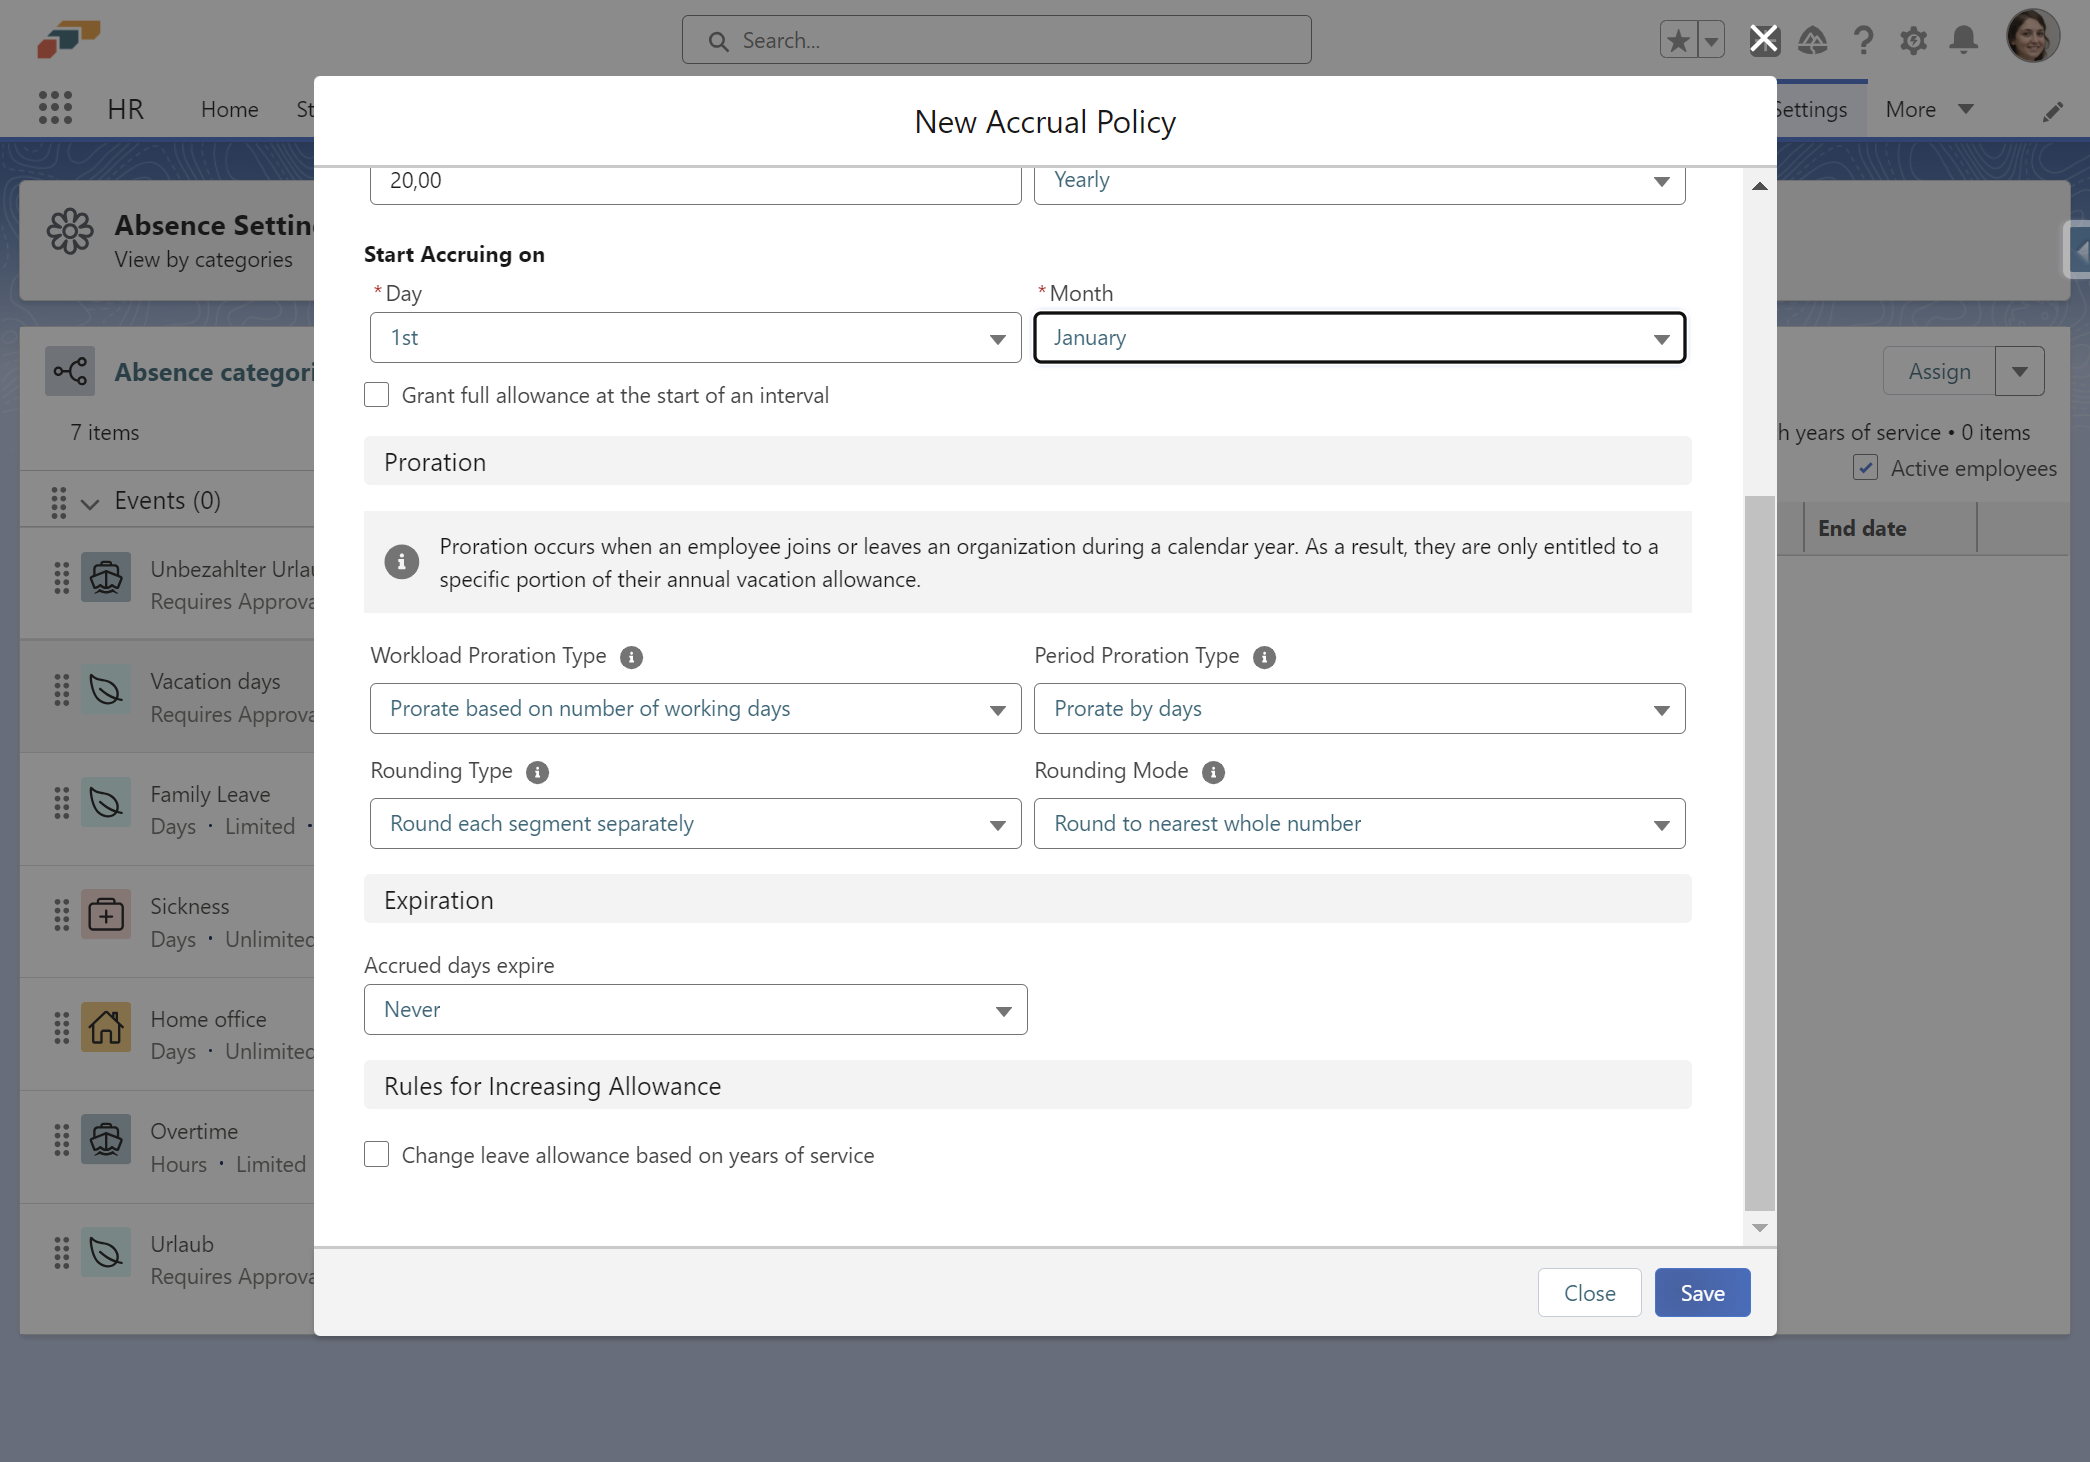
Proration Settings
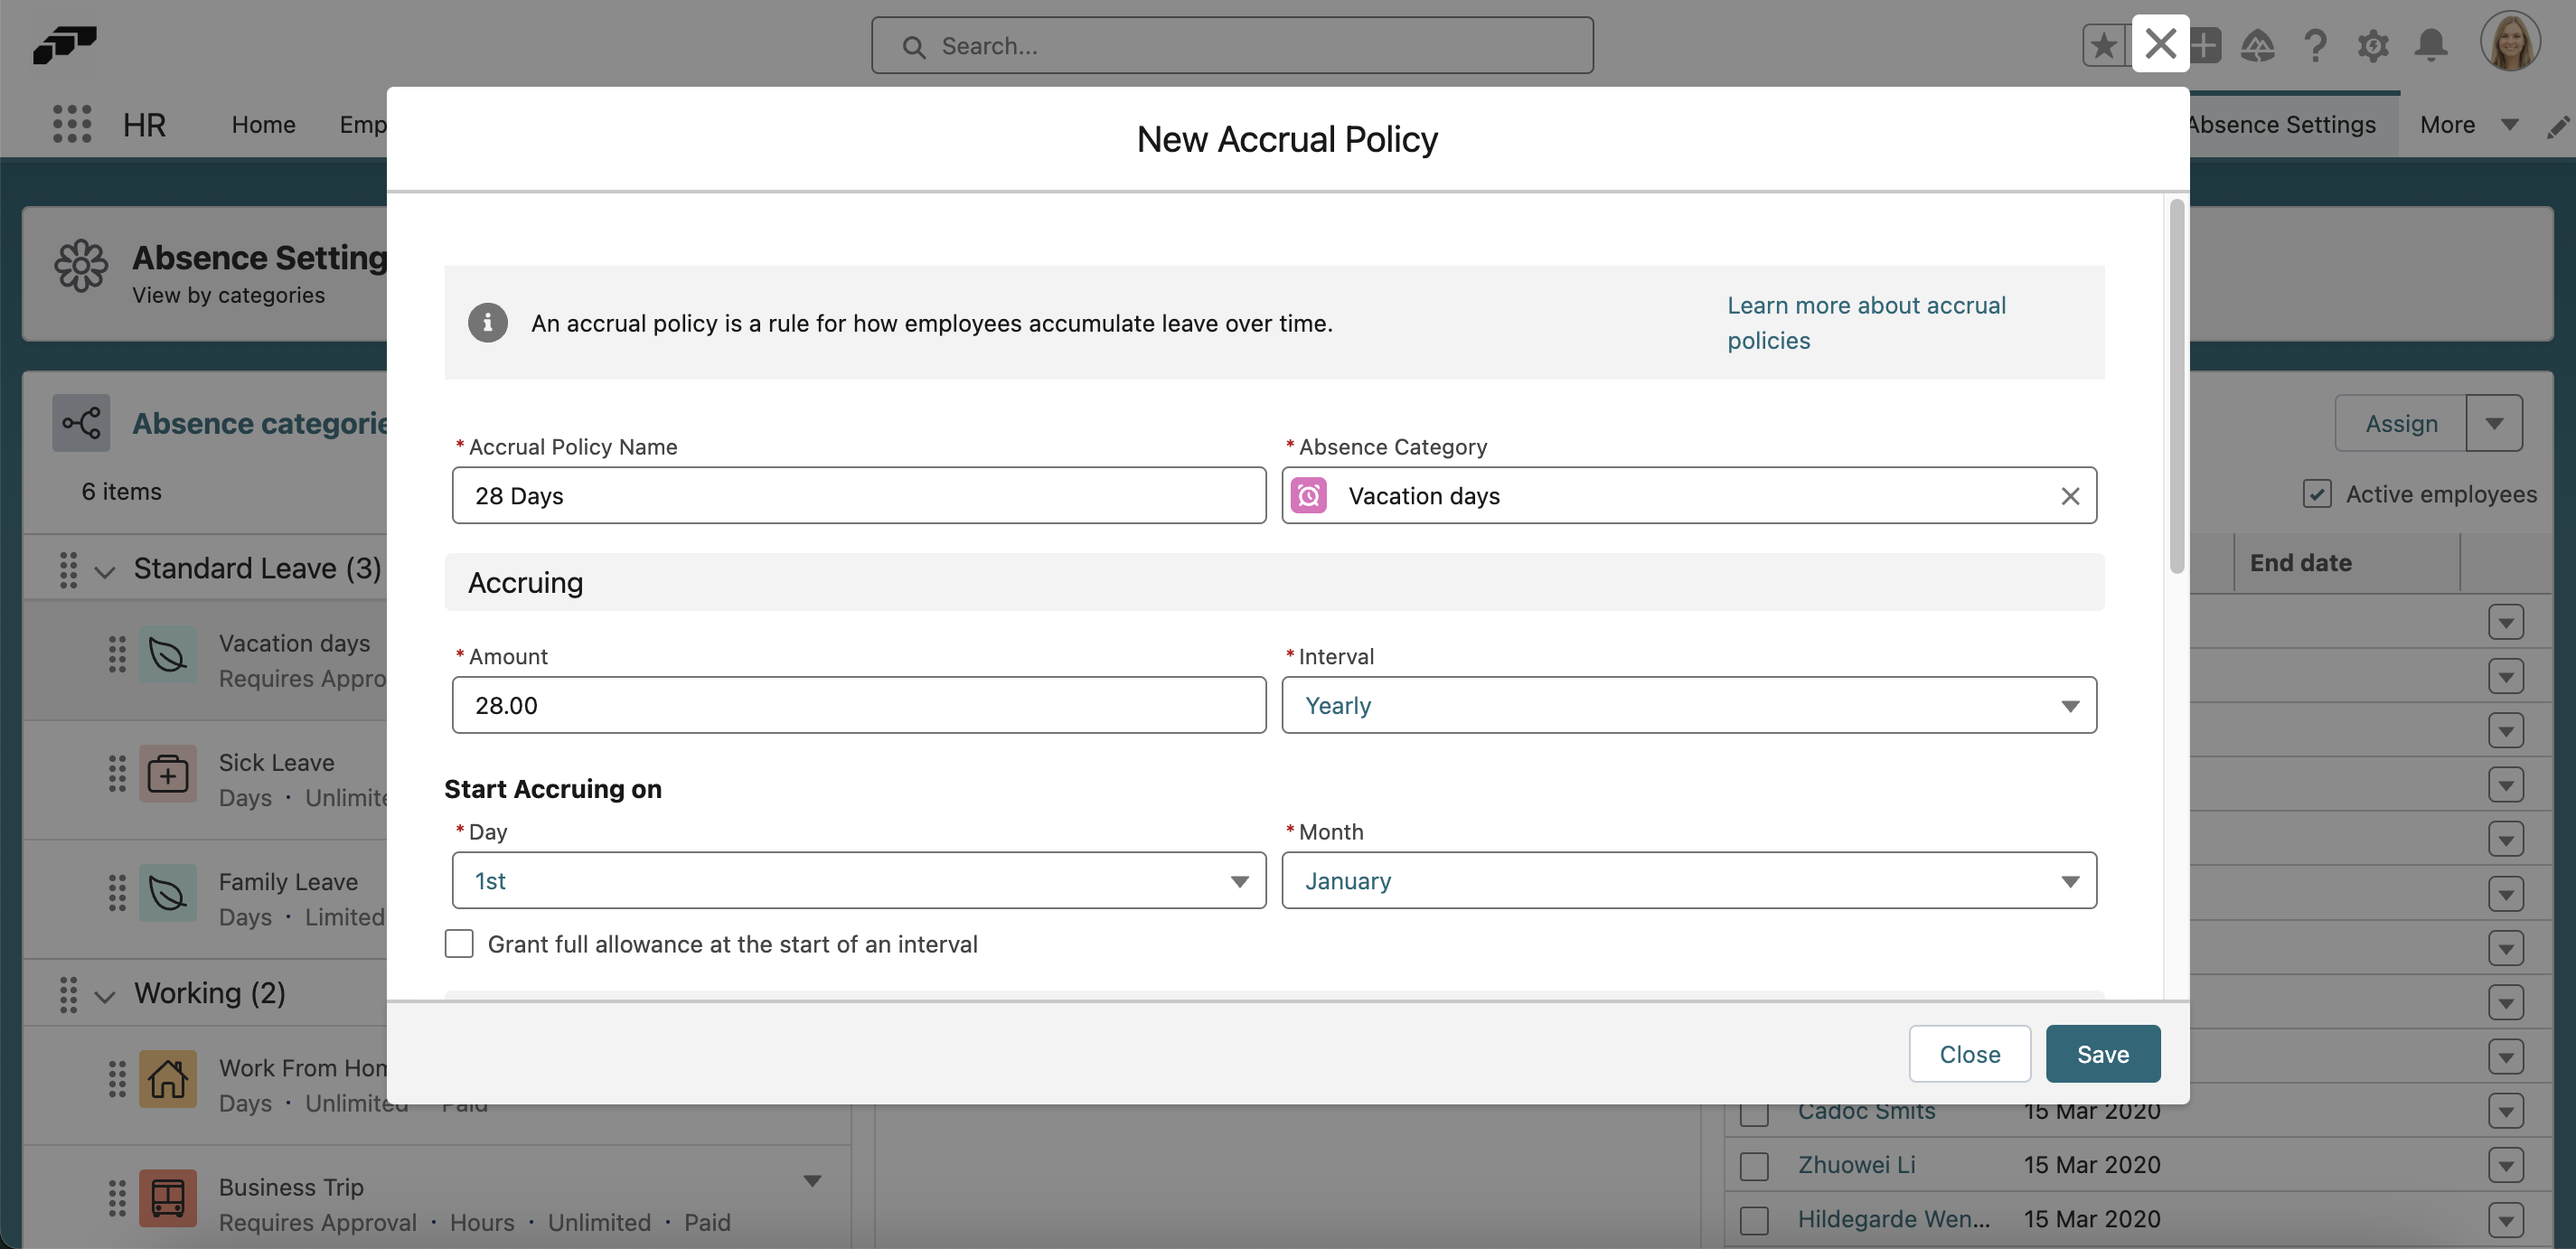
Proration occurs when an employee joins or leaves an organization during a calendar year. As a result, they are only entitled to a specific portion of their annual vacation allowance. It is also used to calculate absence allowances for part-time employees.
Workload Proration Type
- Do not prorate based on workload: All employees, both full-time and part-time, receive the same absence allowance.
- Prorate based on workload: The absence allowance is based on the number of working days in a week.
- Prorate based on FTE percentage: The absence allowance is based on the full-time equivalent (FTE) percentage. For example, if full-time employees work 40 hours per week, employees who work 20 hours per week have an FTE percentage of 50% and receive half the absence allowance.
Period Proration Type
- Do not prorate by period: Regardless of when an employee joins the company, the full vacation days are granted for the entire year.
- Prorate by days: If an employee joins during the year, the days are calculated pro rata from the start date until the end of the year.
- Prorate by months: If an employee joins during the year, the months are calculated pro rata from the start date until the end of the year.
- Prorate by full months: If an employee joins during the year, the total months from the start date are calculated pro rata until the end of the year. If the employee joined midway through a month, this month is not counted.
Rounding Type
- Round final result: The final prorated allowance is rounded.
- Round each segment separately: If an employee's workload changes during the period, the prorated allowance is rounded separately for each change (segment) and added up.
Rounding Mode
- Do not round: The prorated allowance is not rounded.
- Round to nearest whole number: The prorated allowance is rounded up or down to the nearest whole number.
- Round to the nearest half: The prorated allowance is rounded up or down to the nearest .5 value.
- Round up to nearest half: The prorate allowance is rounded up to the nearest .5 value.
Standard Proration Settings by Country
The recommended proration settings vary by country:
- Germany, Austria, and Switzerland: Prorate based on number of working days + Prorate by days.
- United Kingdom: Prorate based on number of working days + Prorate by months.
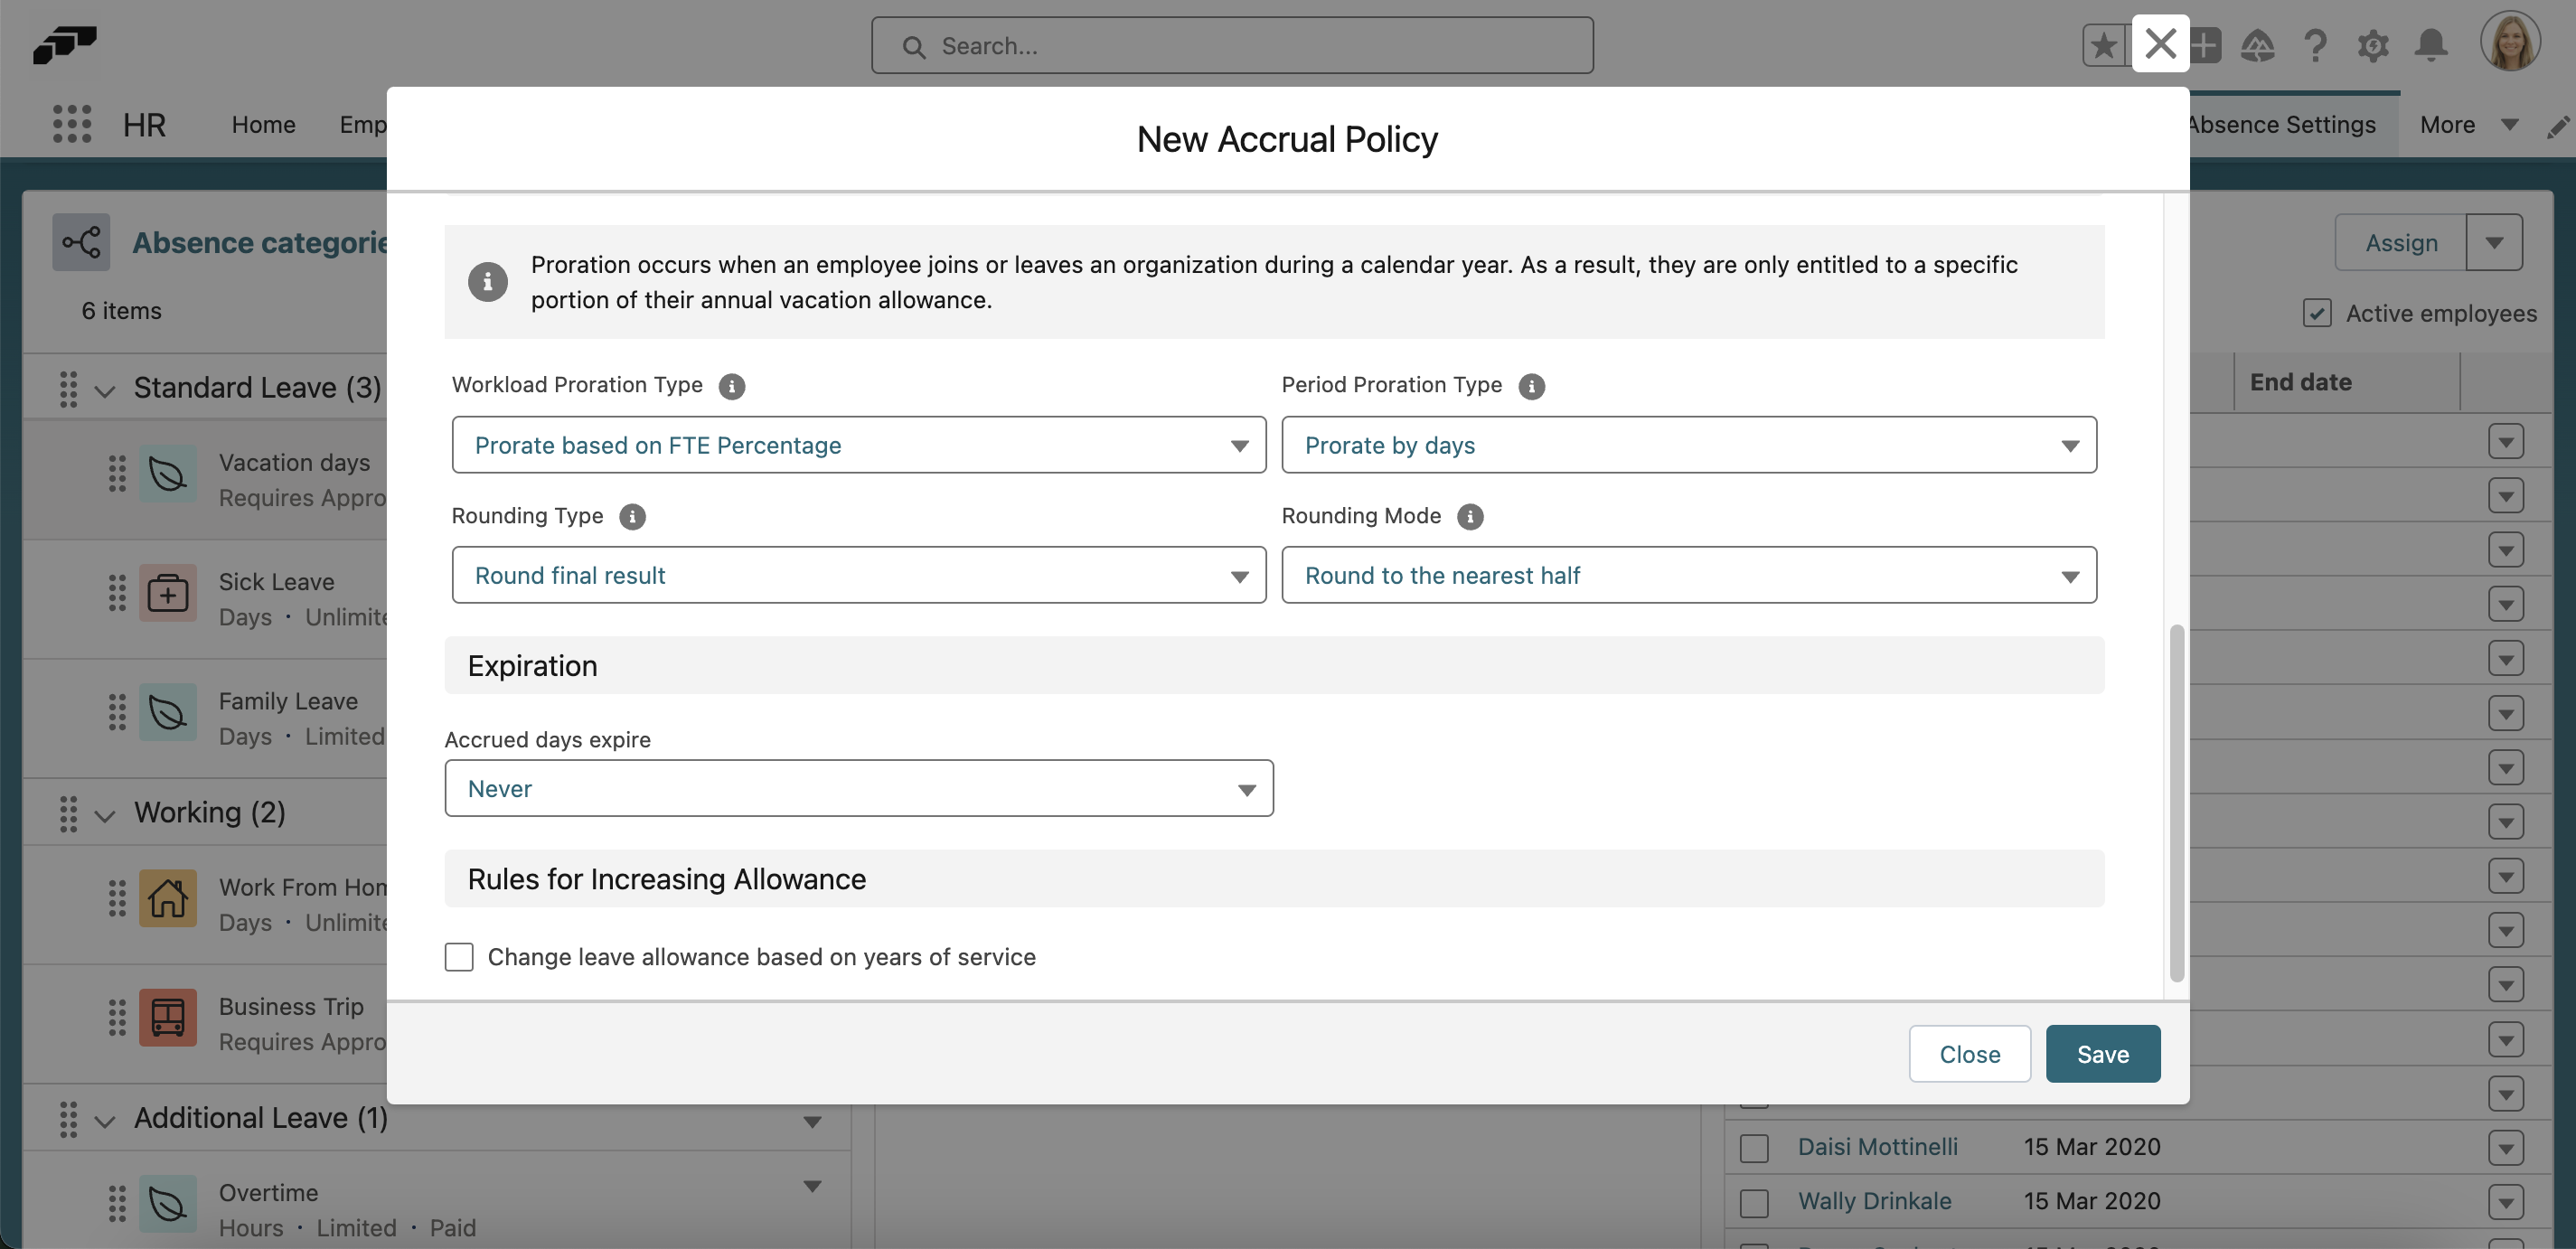
Expiration Settings
You can also choose when accrued absence days or hours should expire and how many are carried over into the next period.
- Never: Accrued absences never expire.
- At the end of an accrual interval: All accrued absences expire at the end of the period.
- With unlimited carryover: All absences are carried over to the next period. You can define the day, month, and year for the expiry of carried over absence allowance.
- With regulated carryover: Specify an amount of allowance that can be carried over to the next period. You can define the day, month, and year for the expiry of carried over absence allowance.
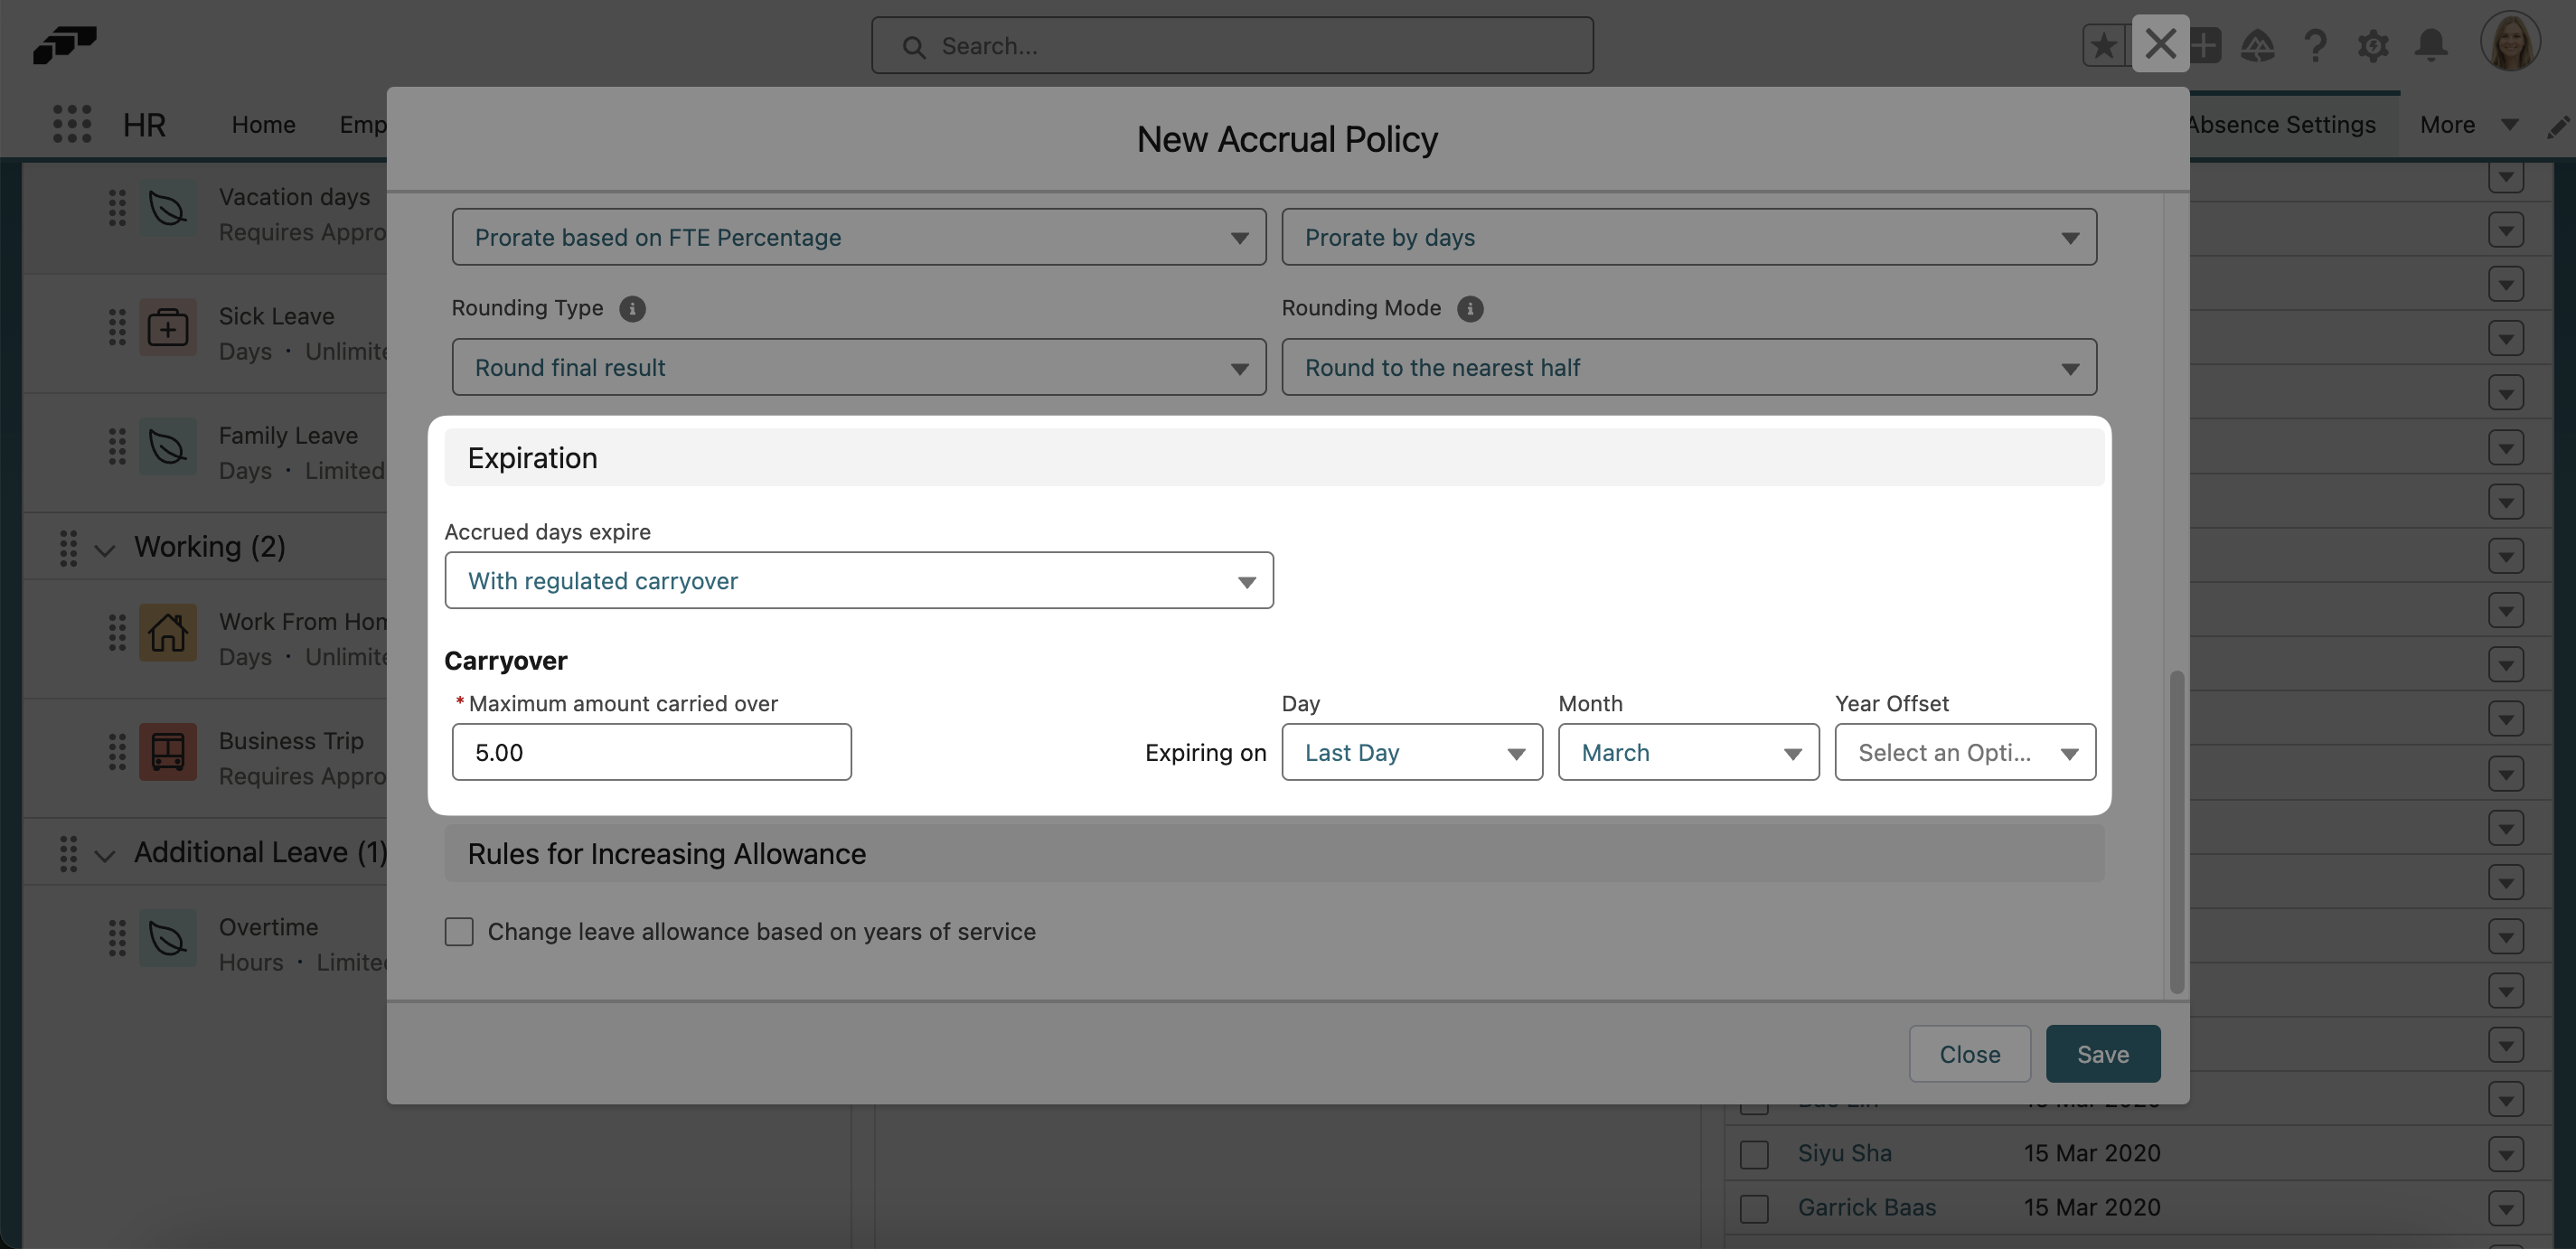
Rules for Increasing Allowance
You can also increase the amount of leave granted to employees based on their years of service in the company or their age.
To do this, when creating a new accrual policy, scroll down to Amount Change Rules and click the checkbox labeled "Change leave allowance based on employee's age or years of service".
You will then see some additional options. Click the "Additional leave is used first" checkbox if you would like the additional days earned to be used before the standard allowance defined at the top of the page.
In the Interval dropdown, you can choose whether the additional days accrue yearly or in the same accrual interval you defined earlier in your accrual policy.
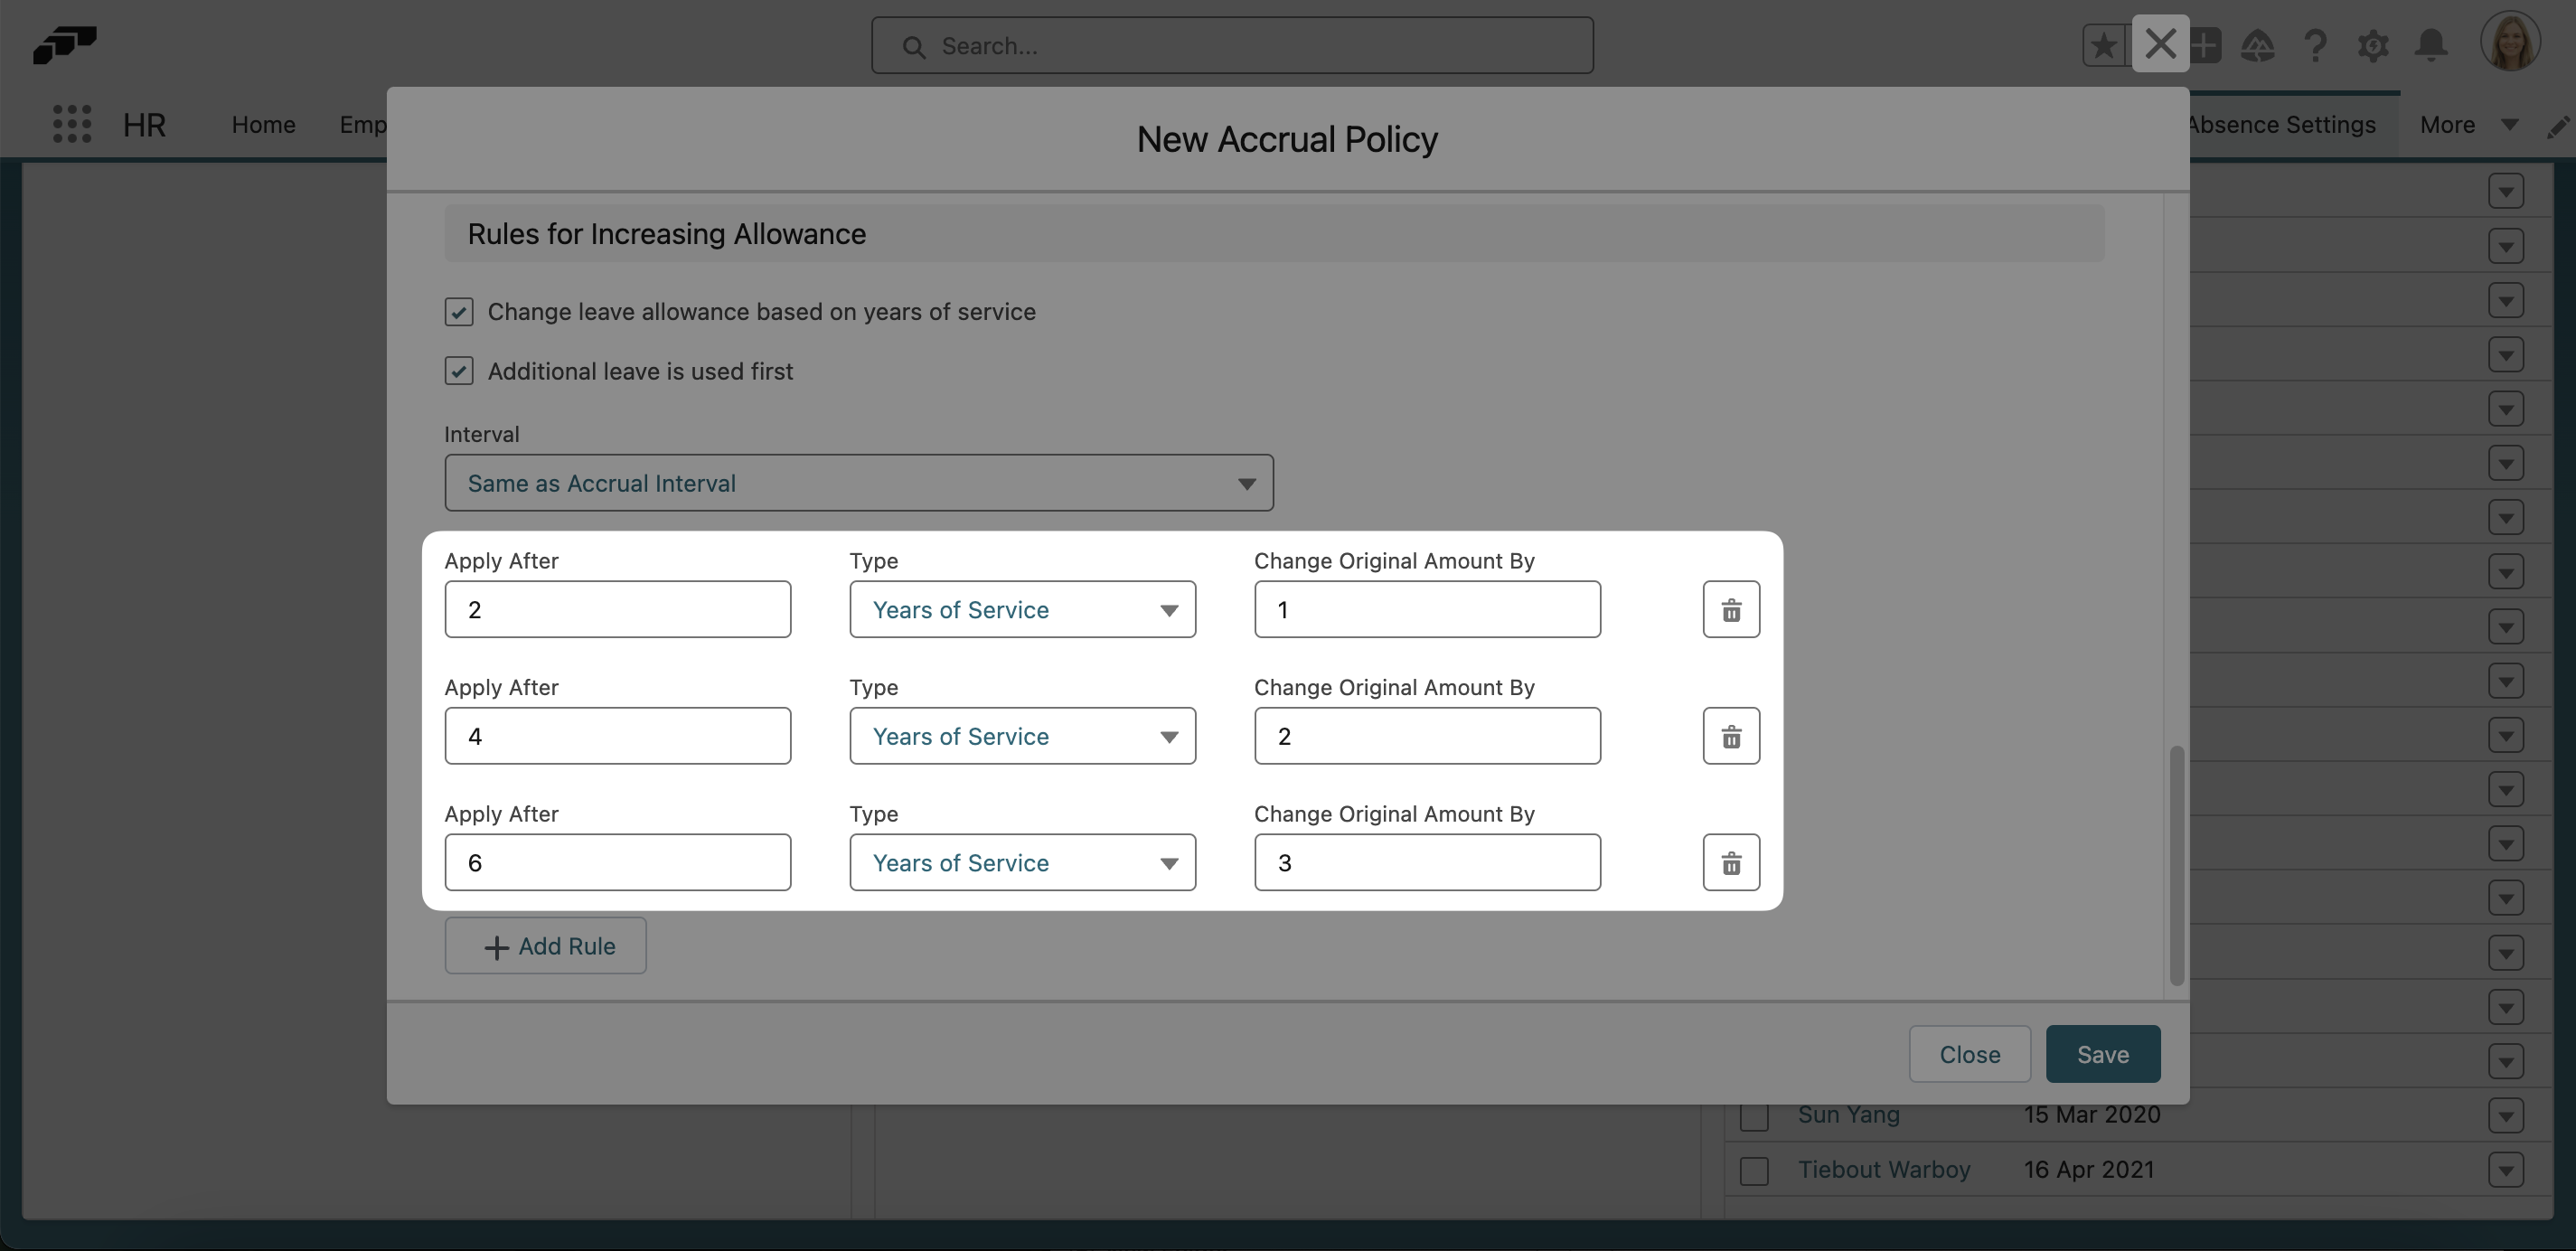
Now you can define your Amount Change Rules:
- Apply After: The number you enter here indicates either the number of years of service an employee must work or the age they must be to gain additional absence days.
- Type: Define whether the additional days are granted based on years of service or the employee's age.
- Change Original Amount By: The number you enter here defines how many absence days will be added to the original allowance. If you add a second rule, it does not stack on the rules before it. See the below example for further explanation.
- Add Rule: Click this button to add another rule. You will need a new rule for each accrual amount change you wish to make.
Example: If you want to grant employees one additional day off for every two years of service, you would enter 1 into the first Change Original Amount By field, 2 into the second Change Original Amount By field, and so on, as shown in the screenshot below.
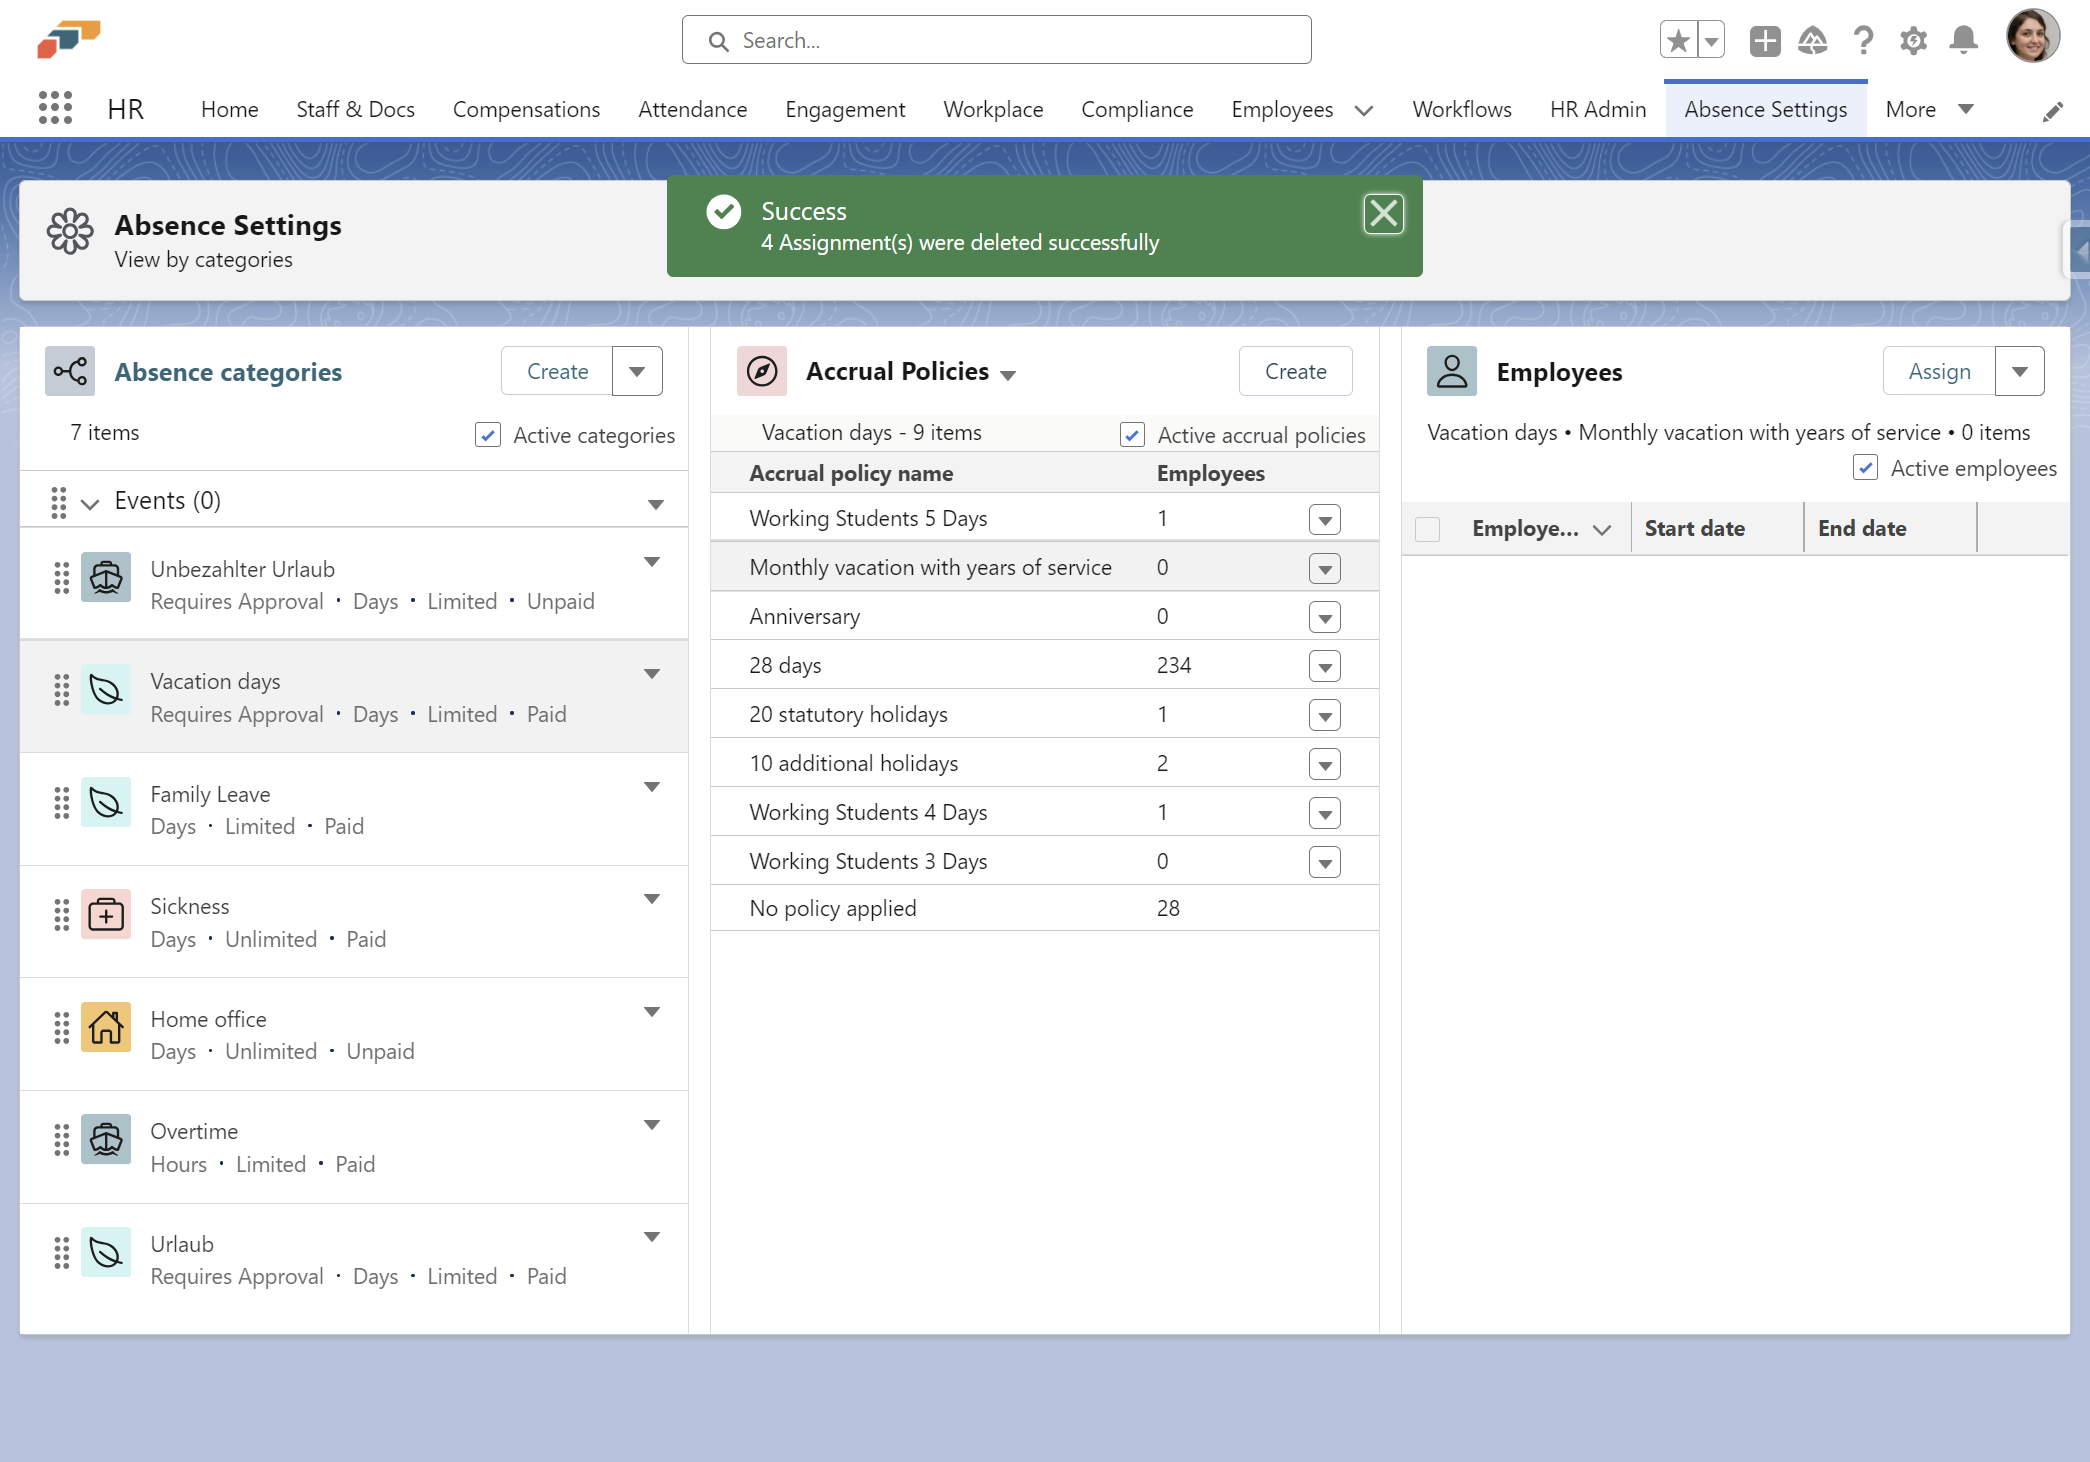
Replacing Outdated Accrual Policies
When you need to replace an outdated accrual policy with a new one, follow these steps to ensure a smooth transition and preserve employee absence balances.
Please ensure that you follow these steps in the exact same order.
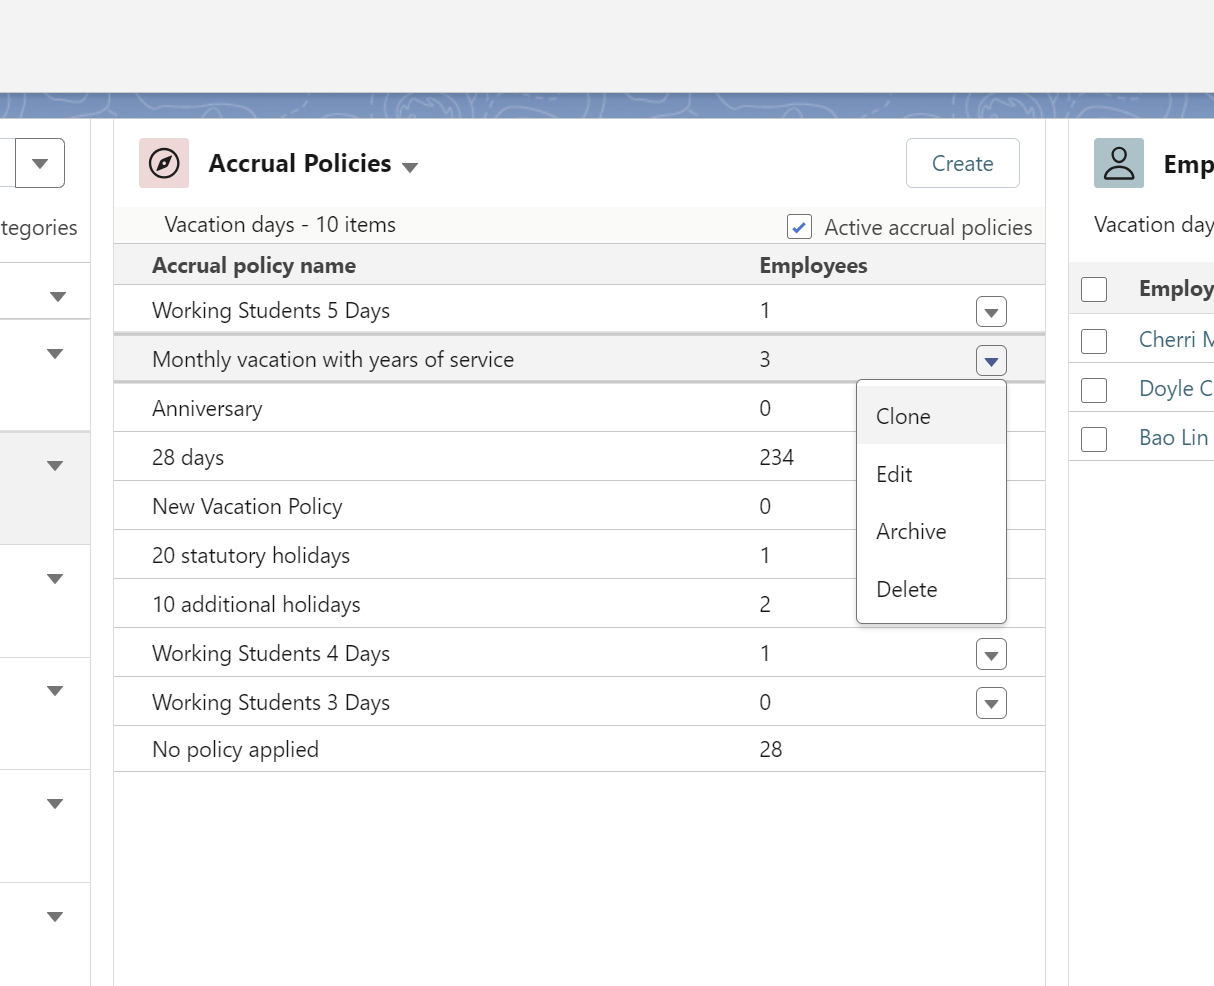
Deleting the Old Policy
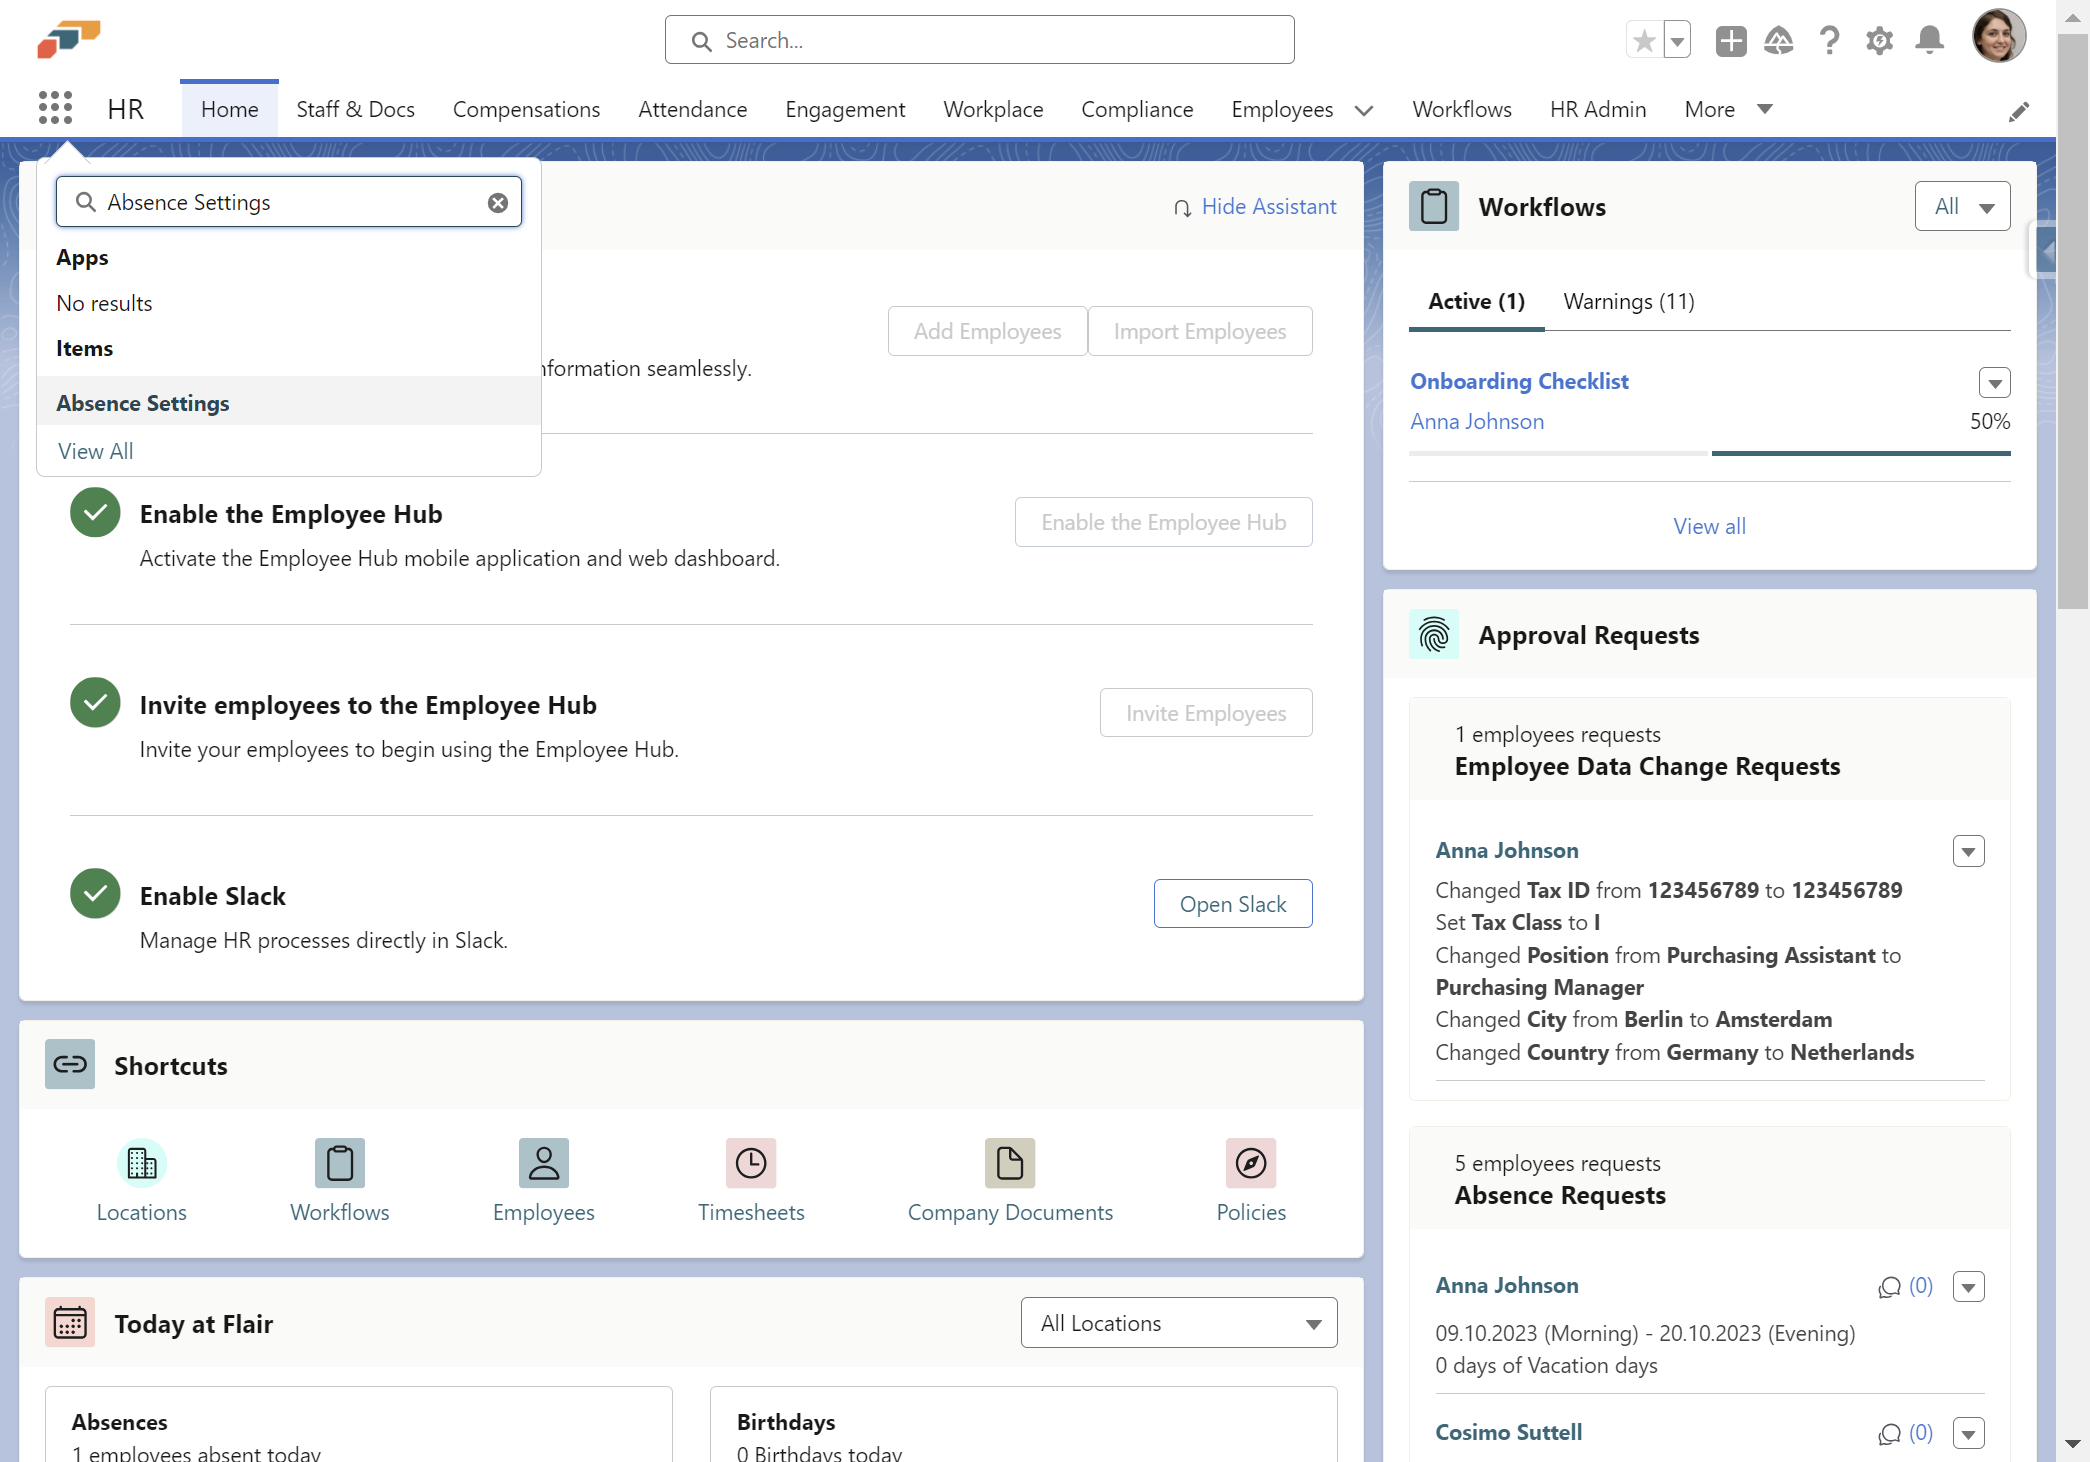
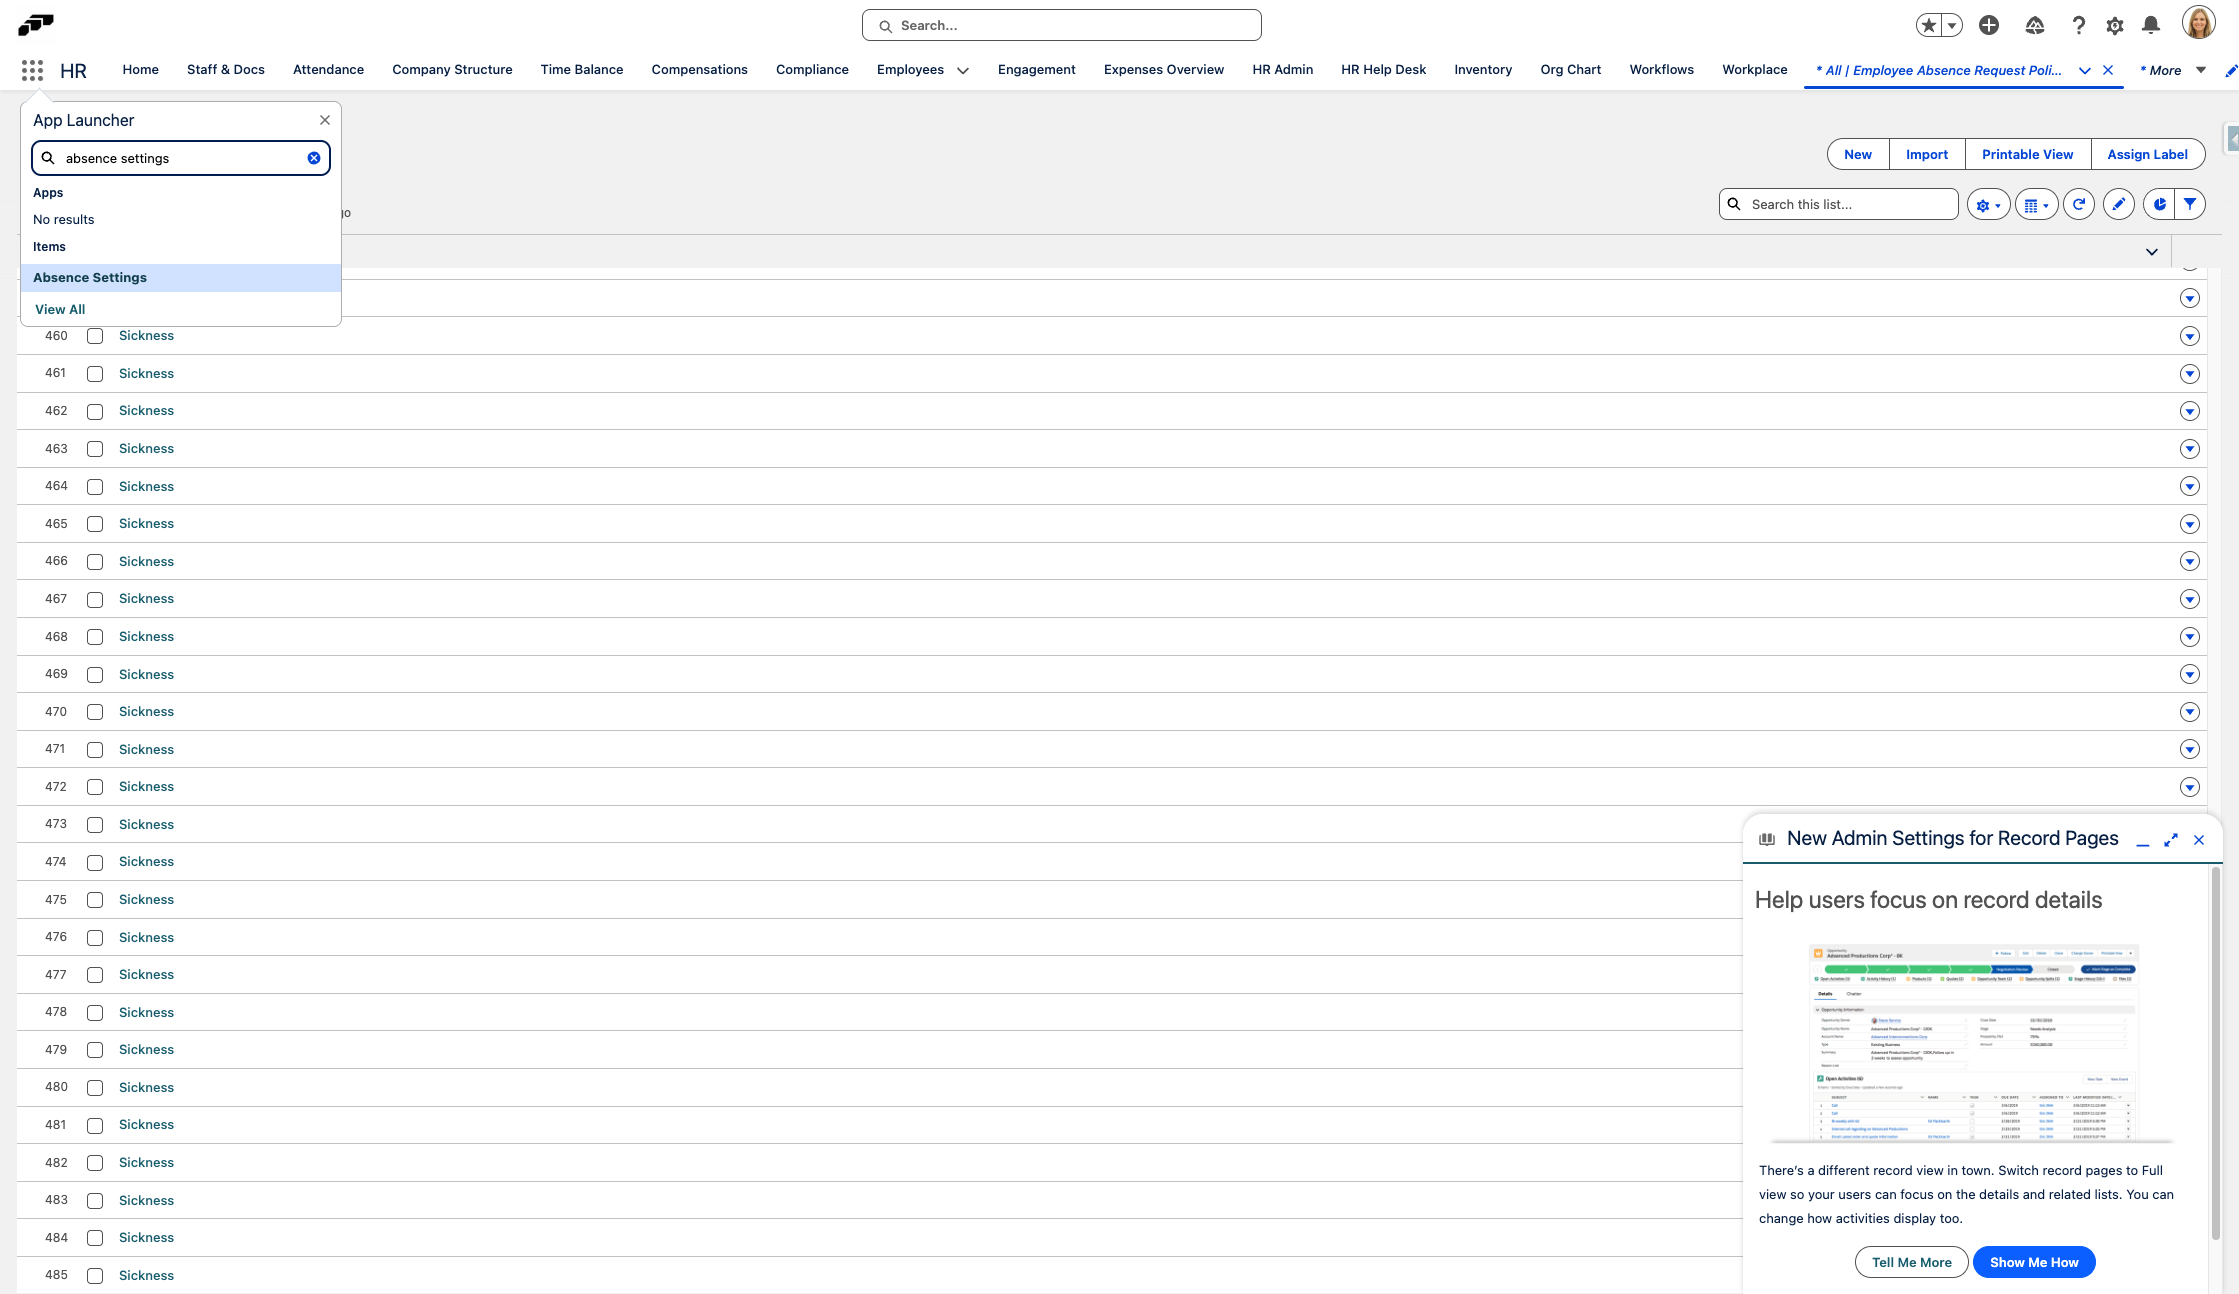
- Click on App Launcher
- Type "Absence Settings"
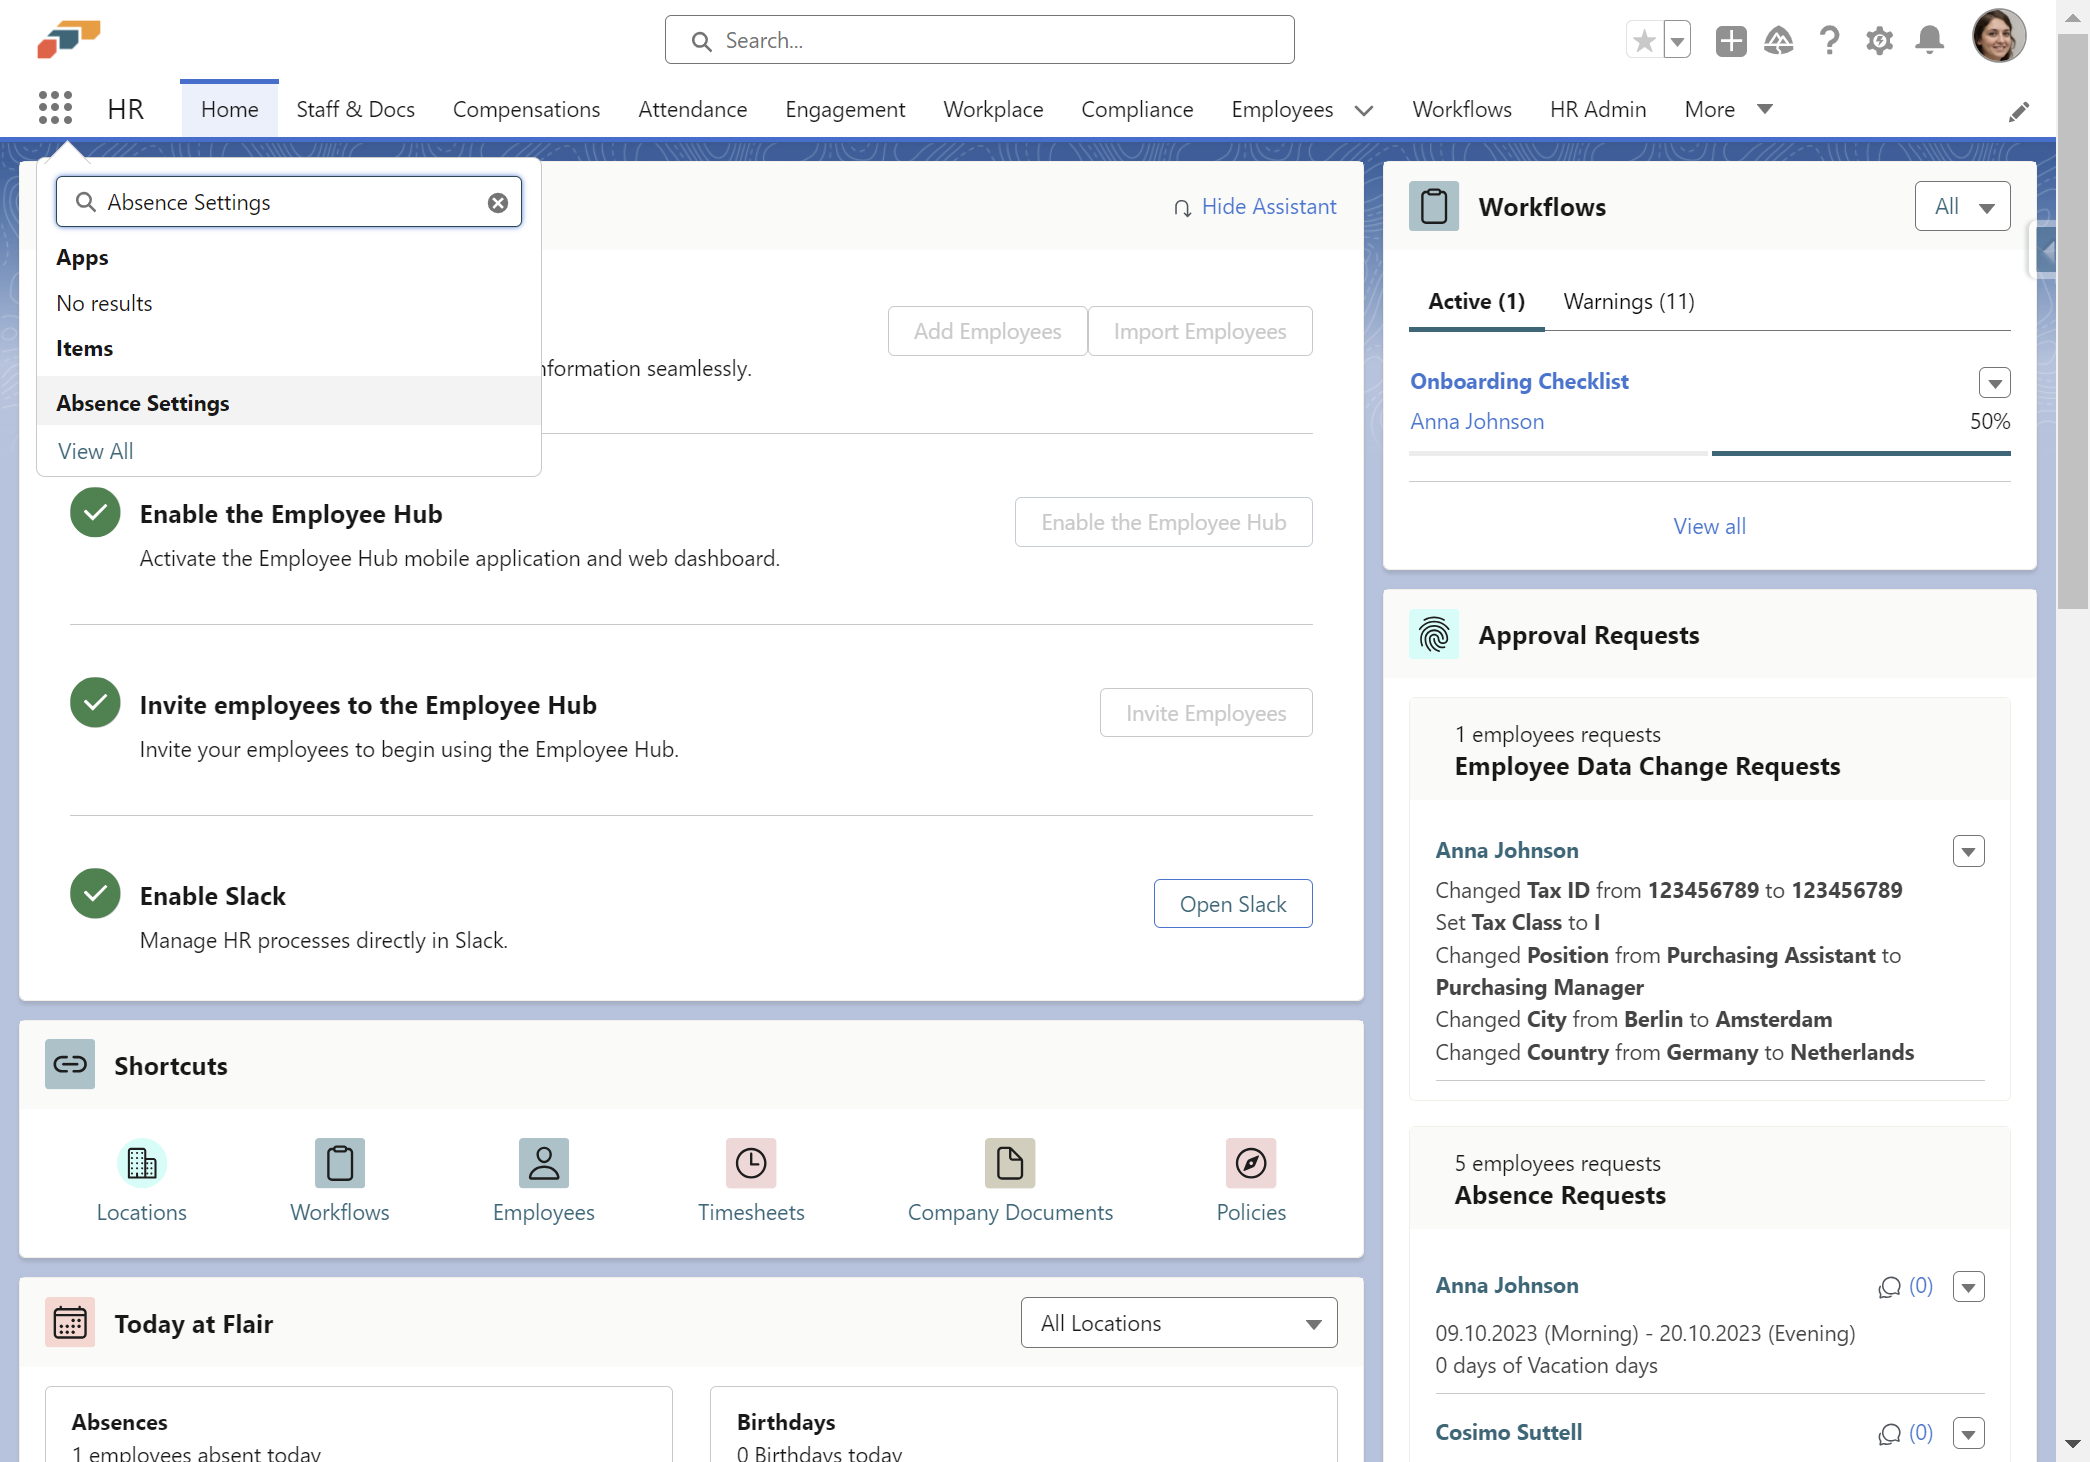
- Click on Absence Settings
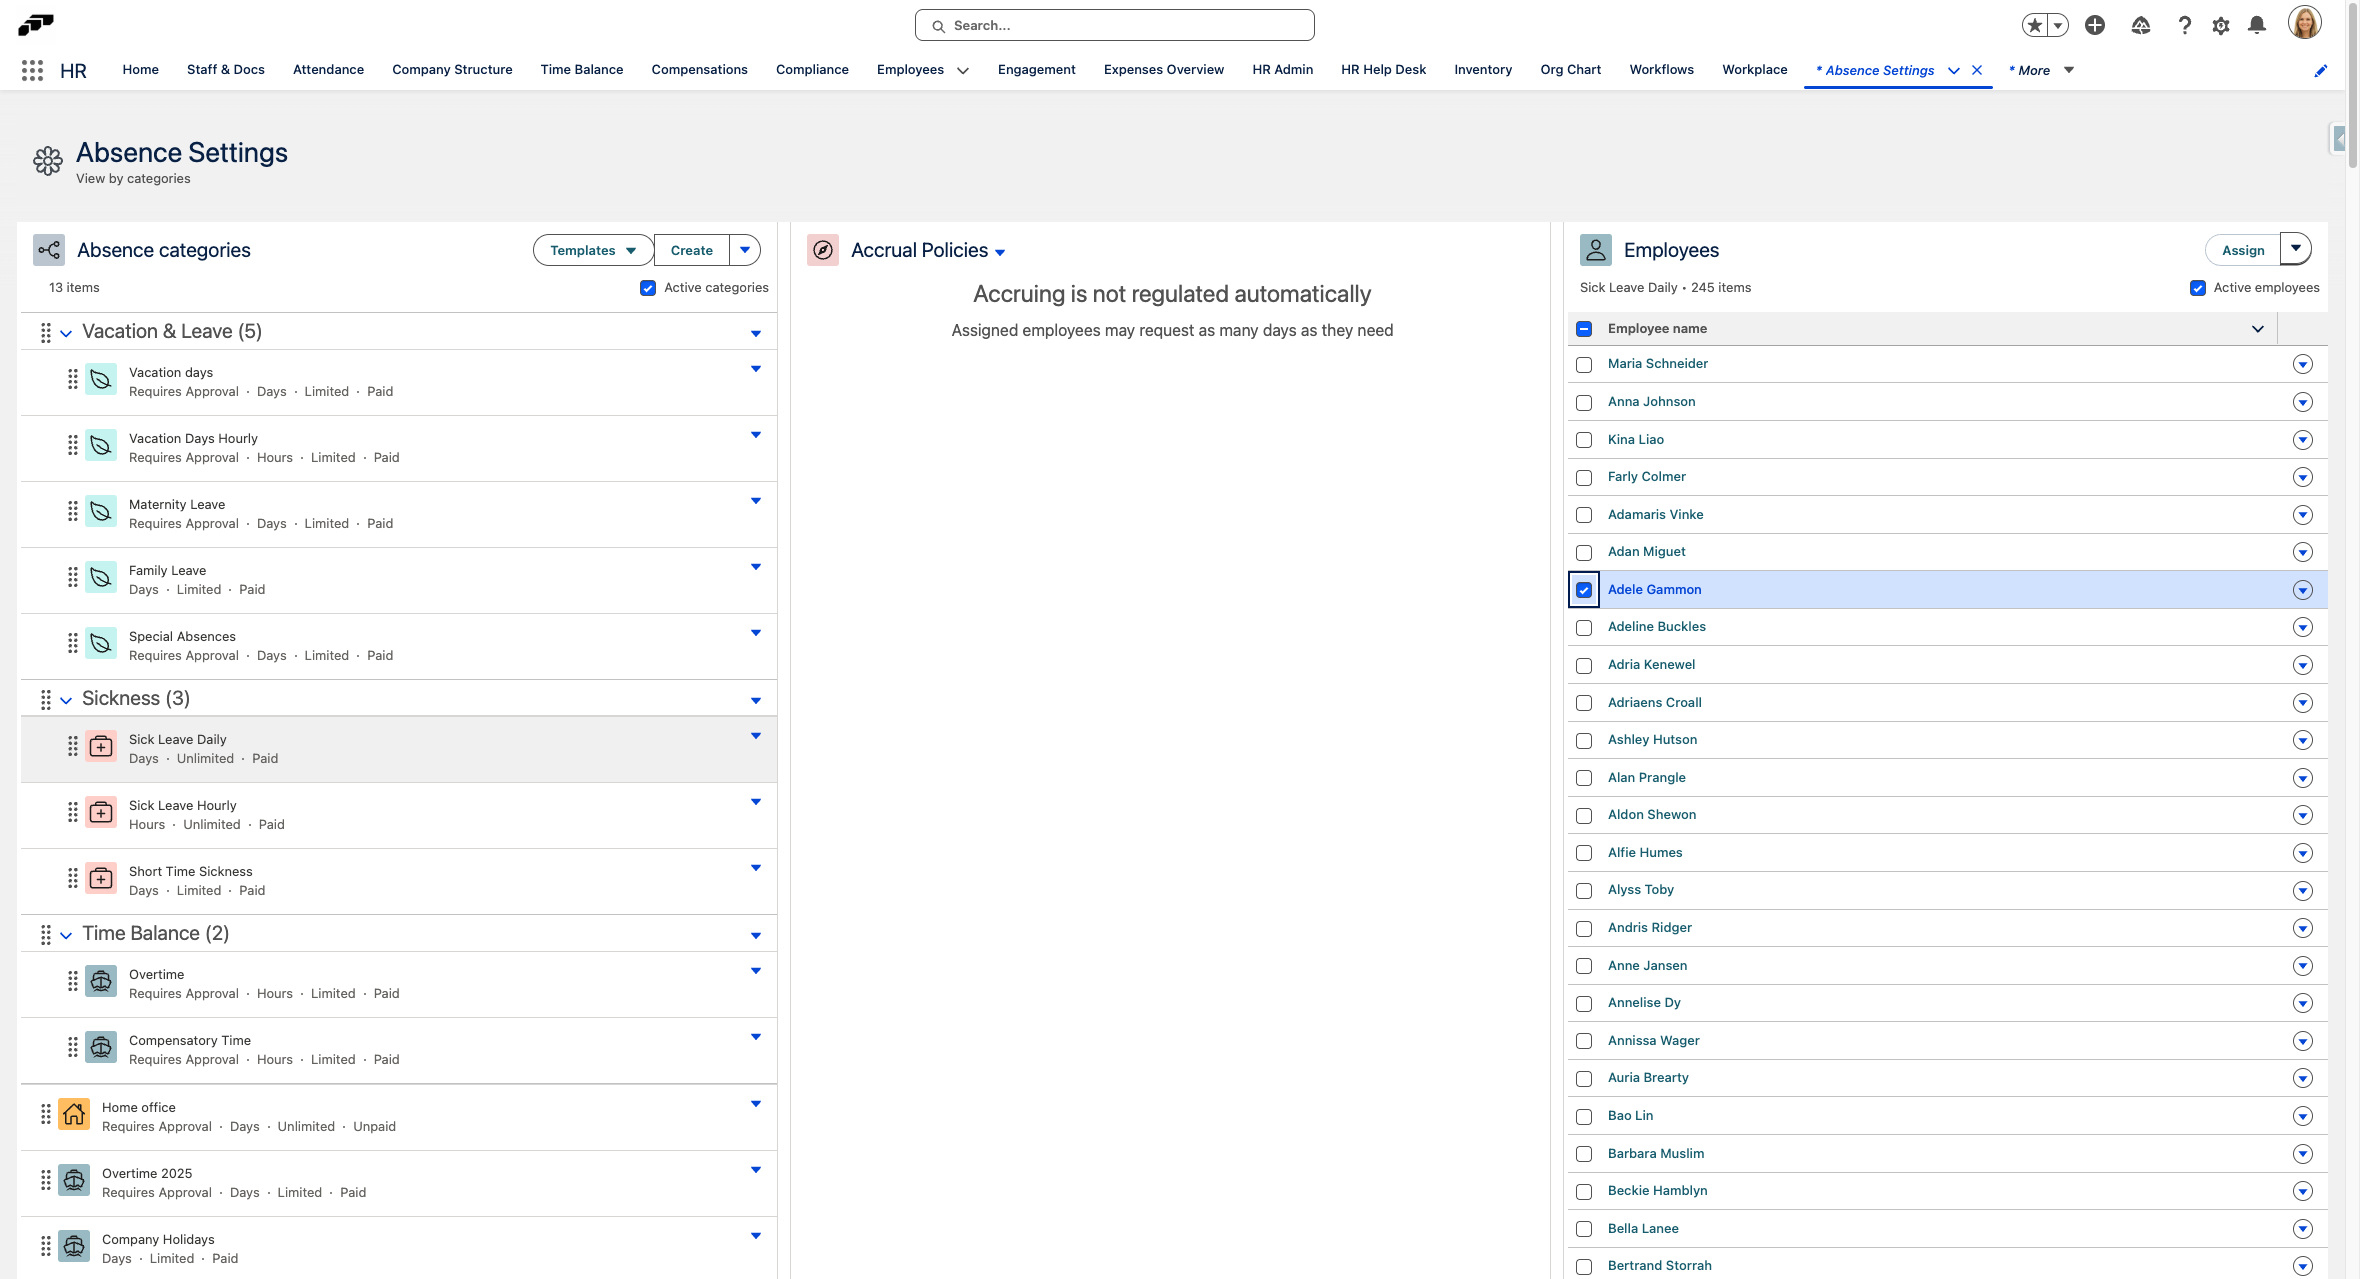
- Click on an Absence Category
- Select the Accrual Policy that you wish to delete by clicking on it.
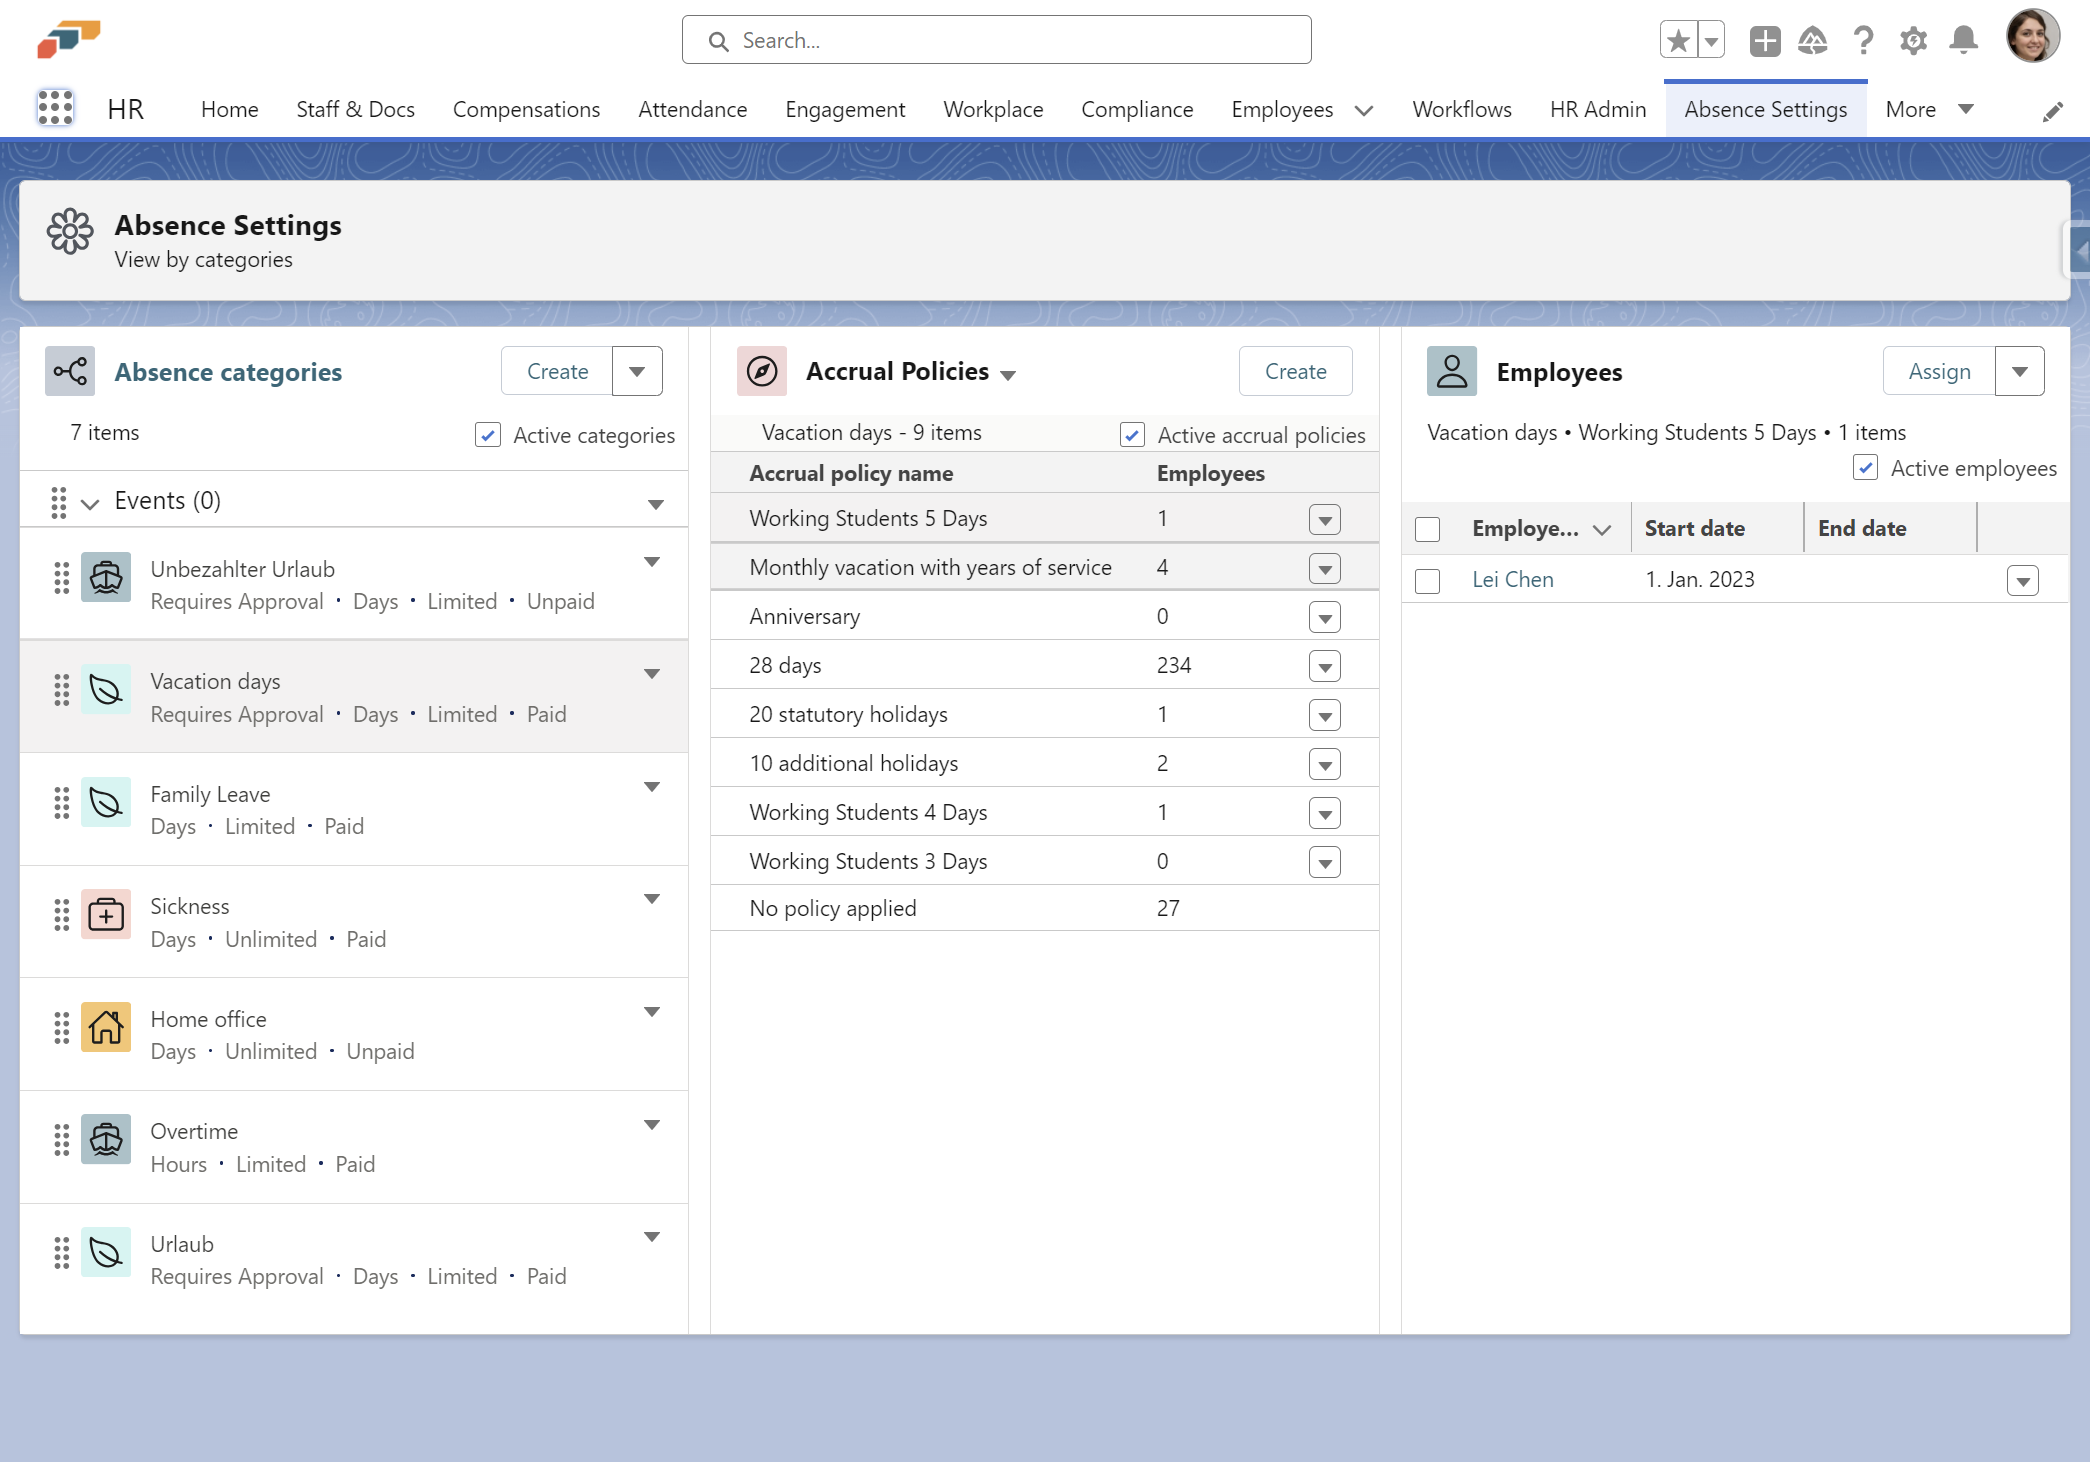
- Make sure to select all employees in the Employee List by checking the "Select All" option.
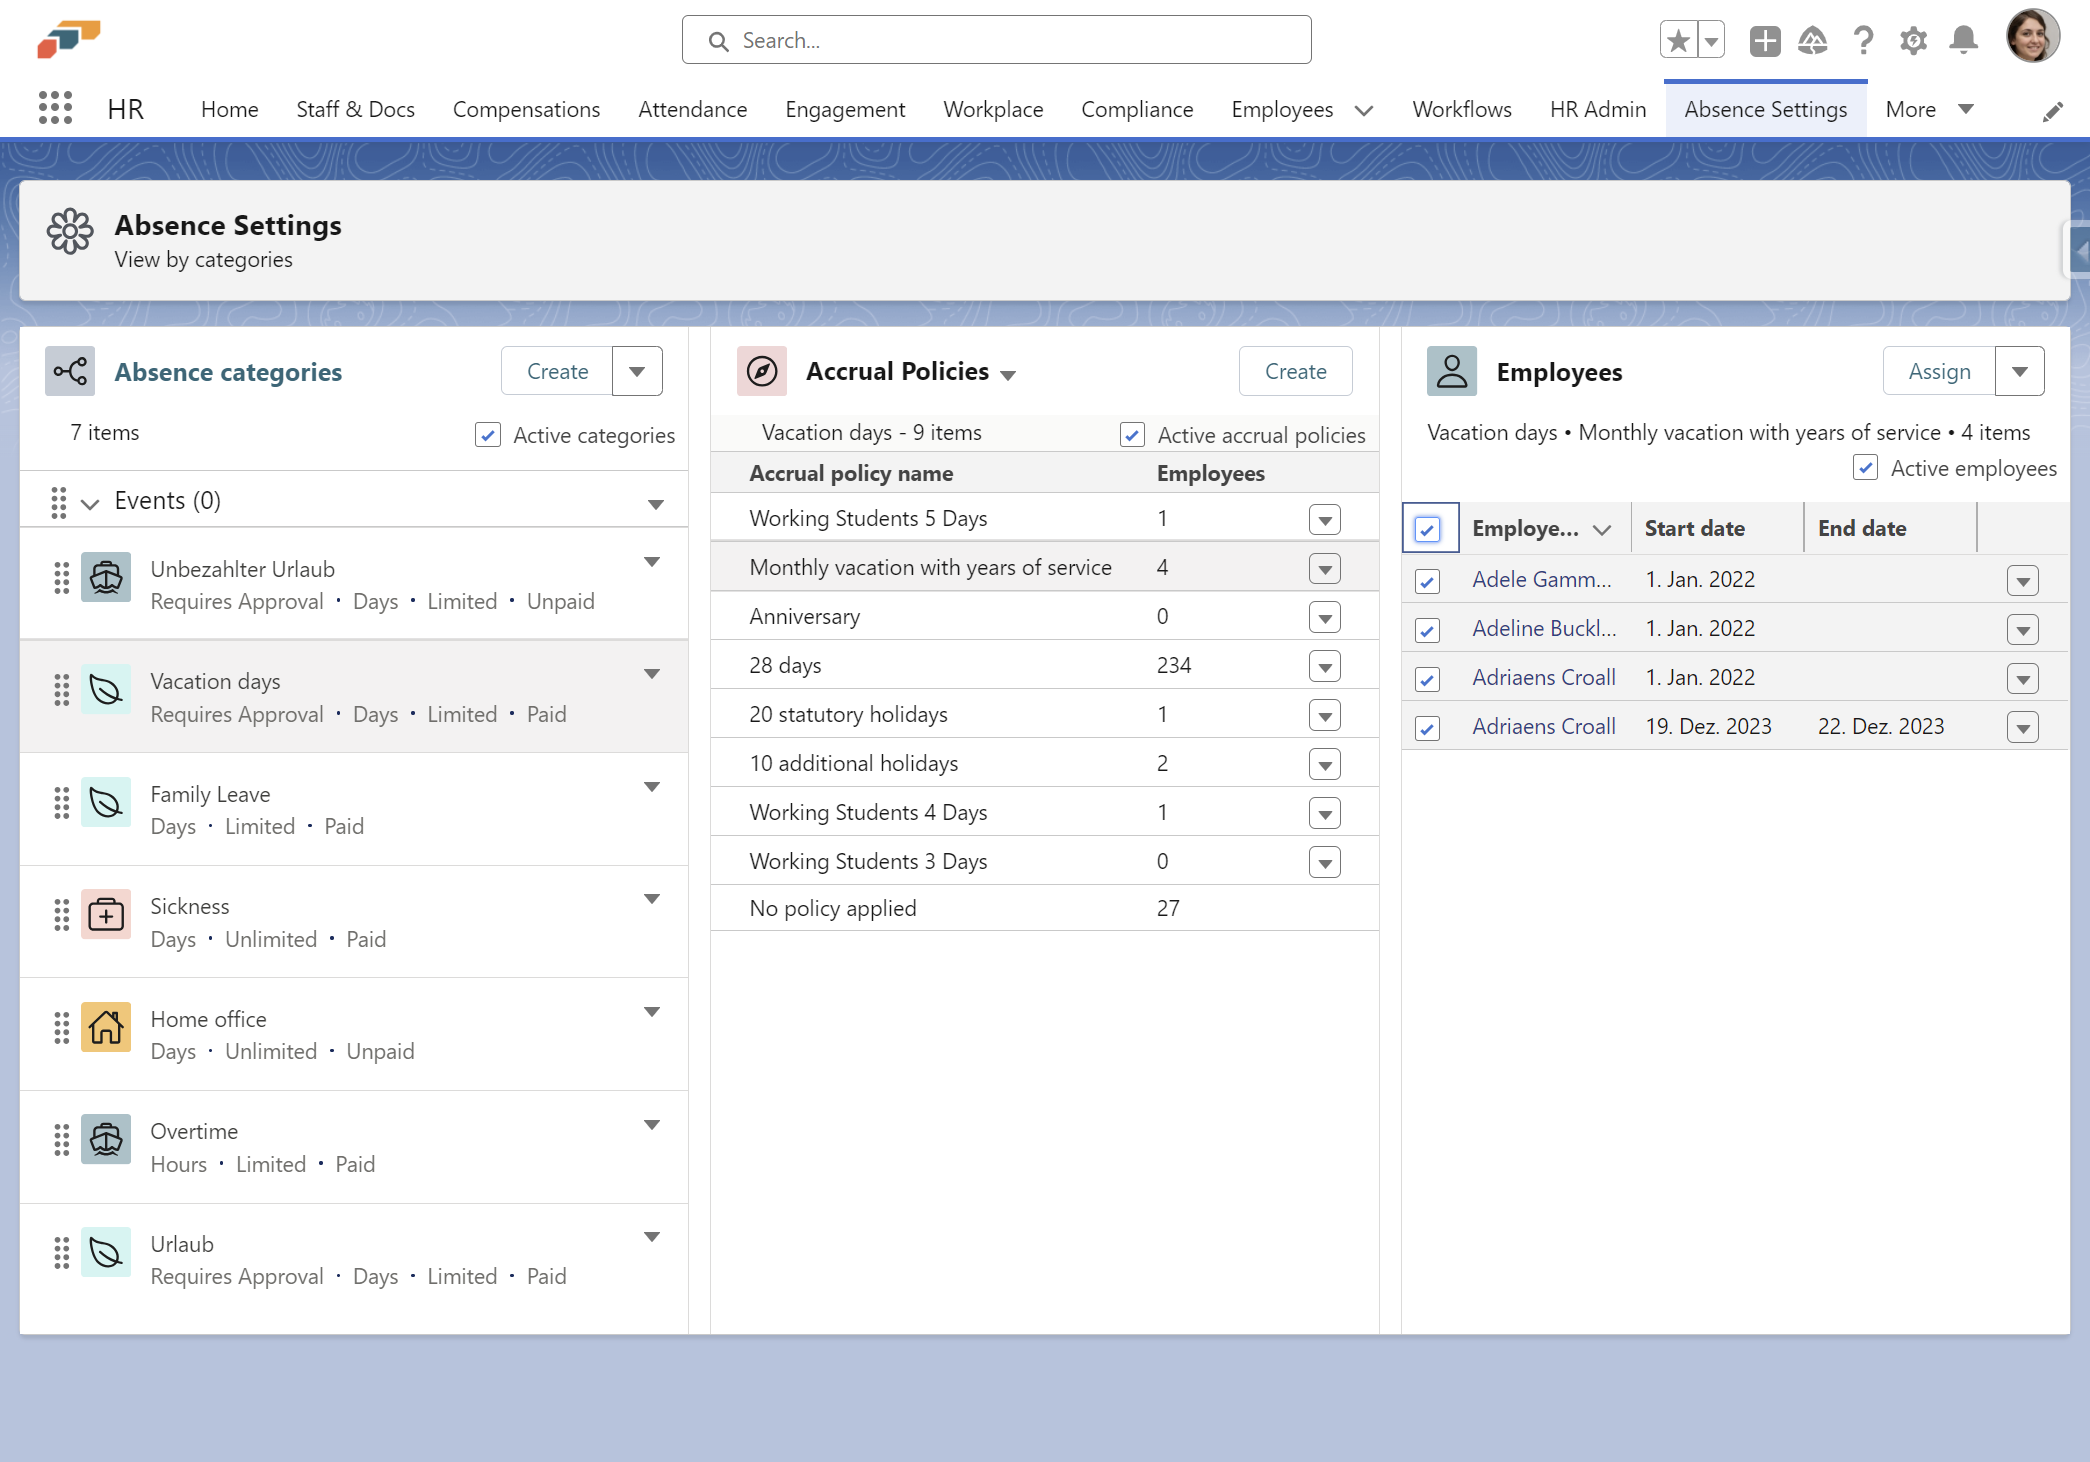
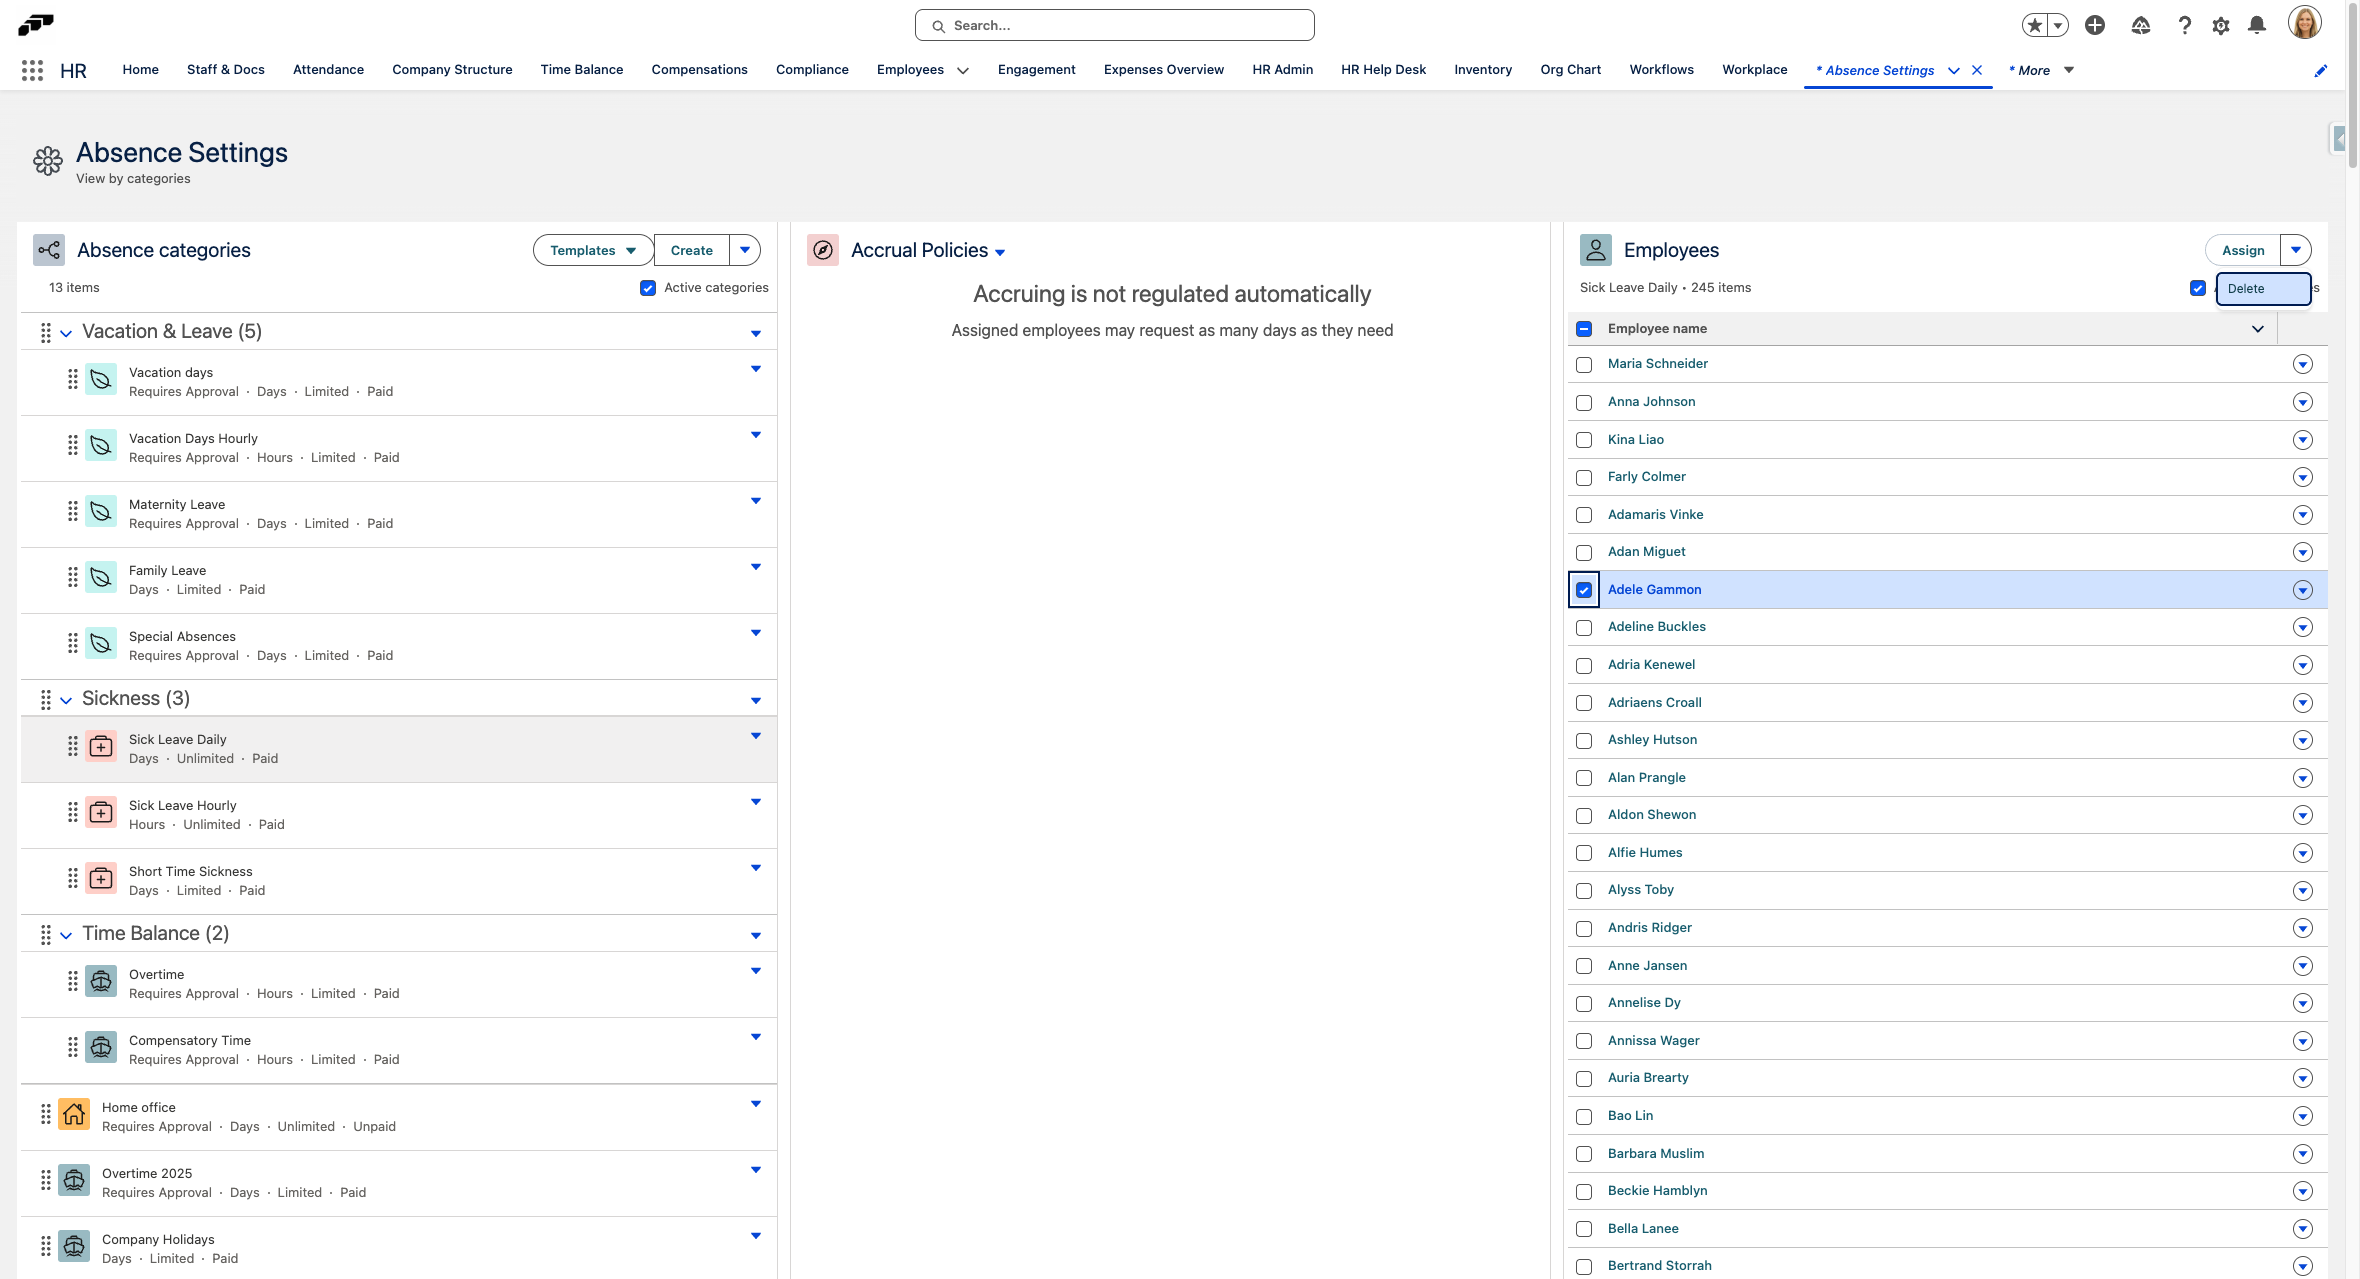
- Click on Show menu

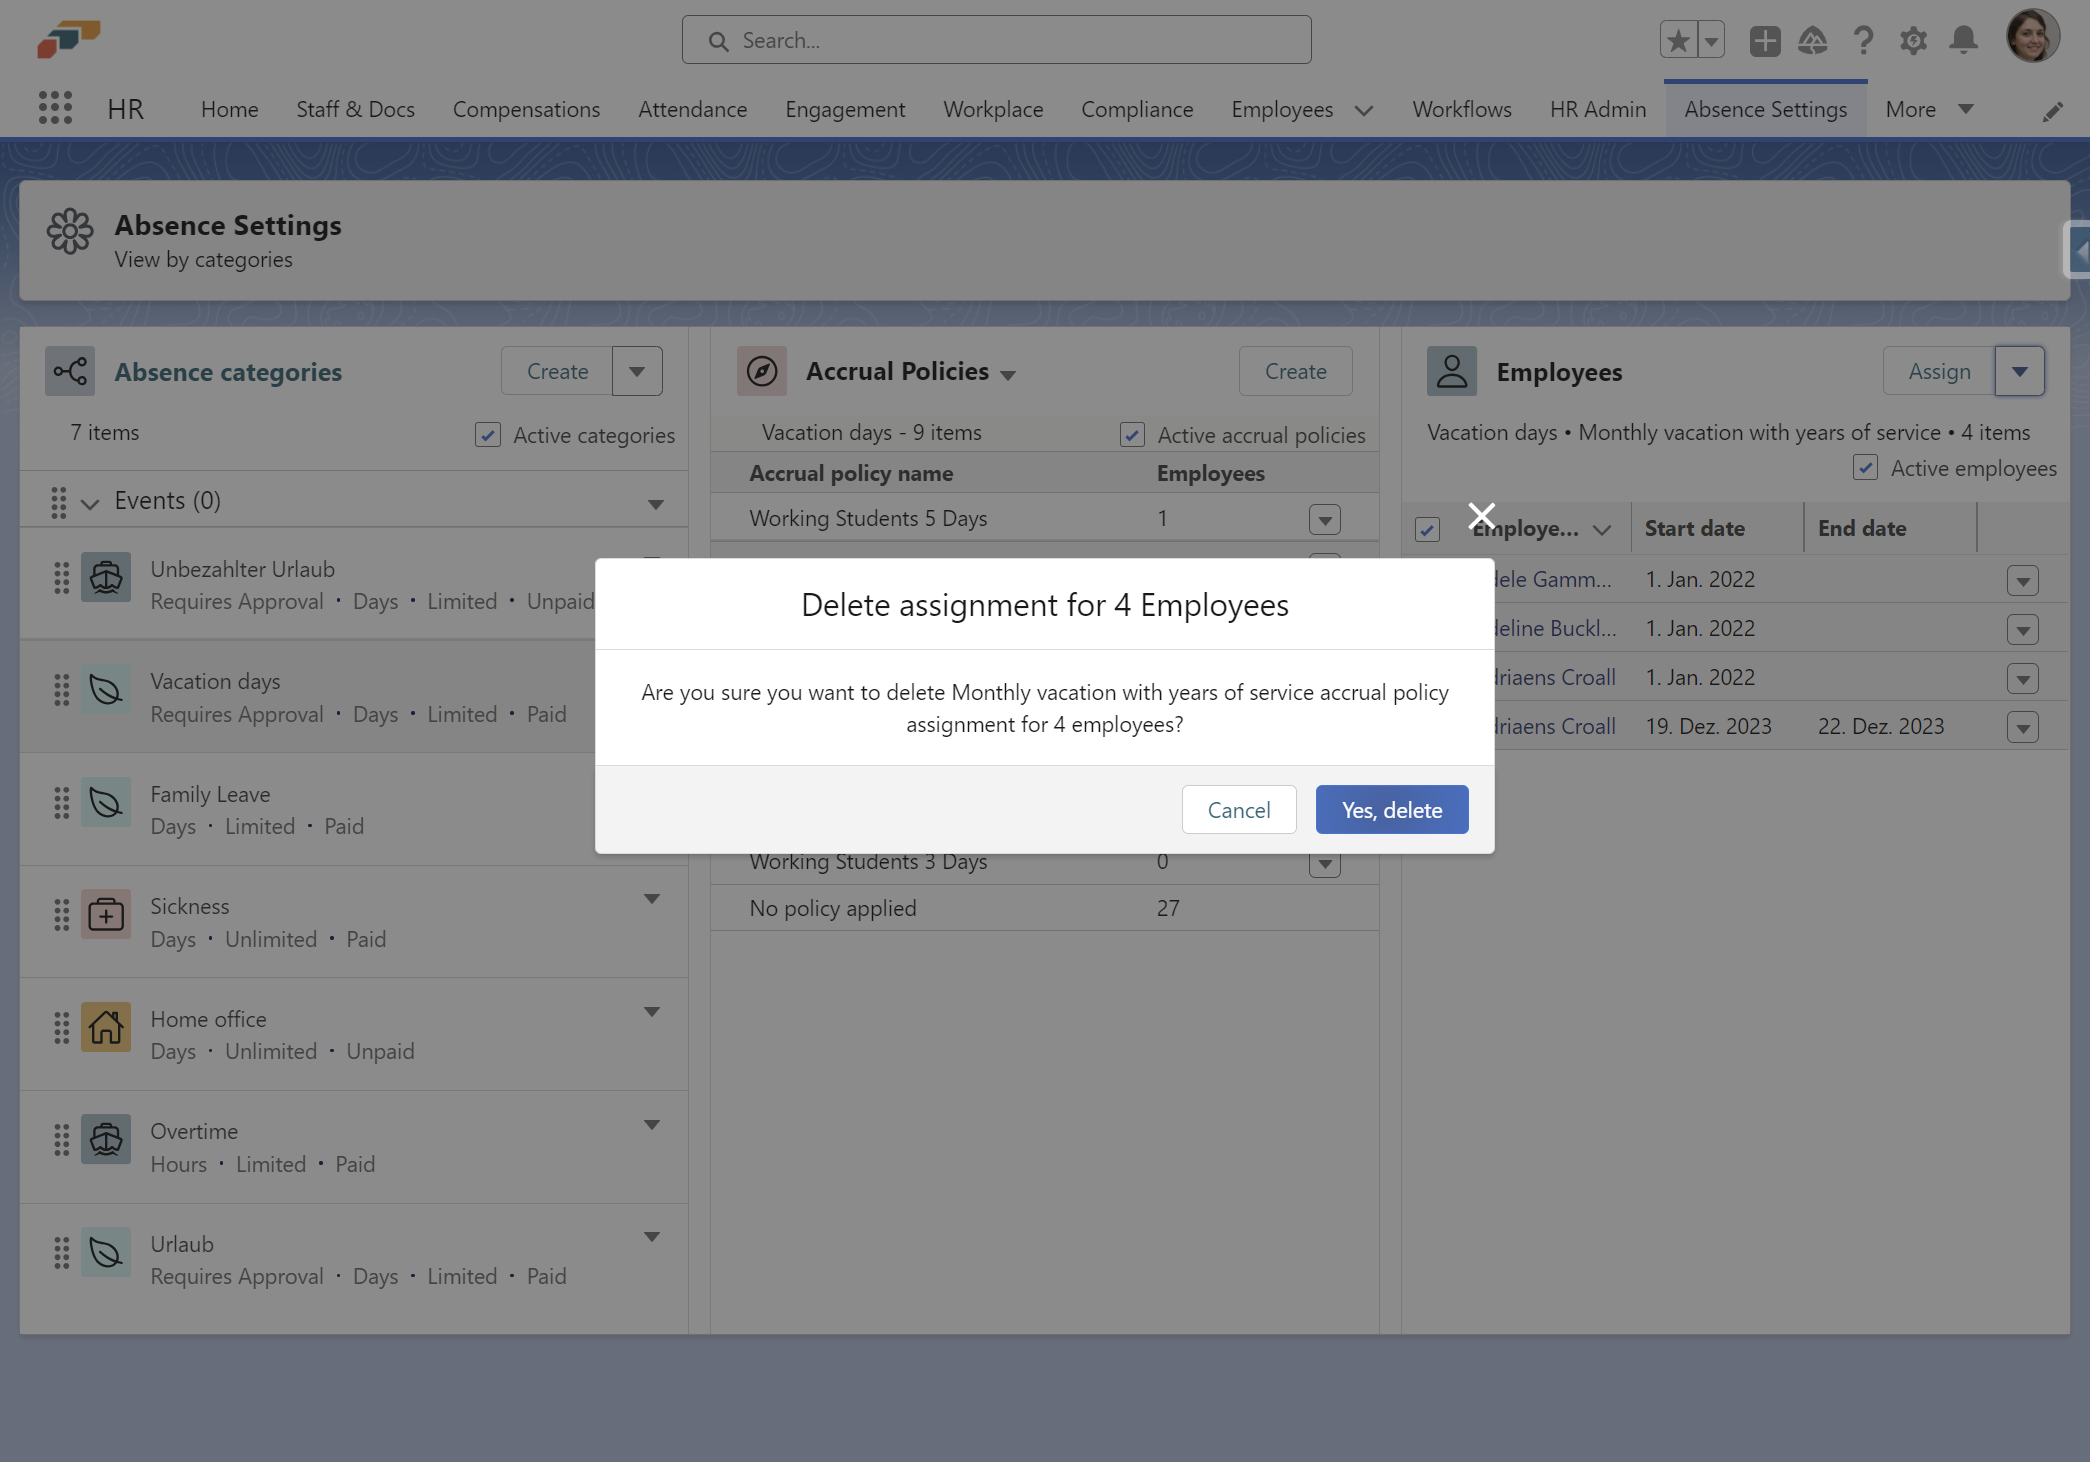
- Click on Delete

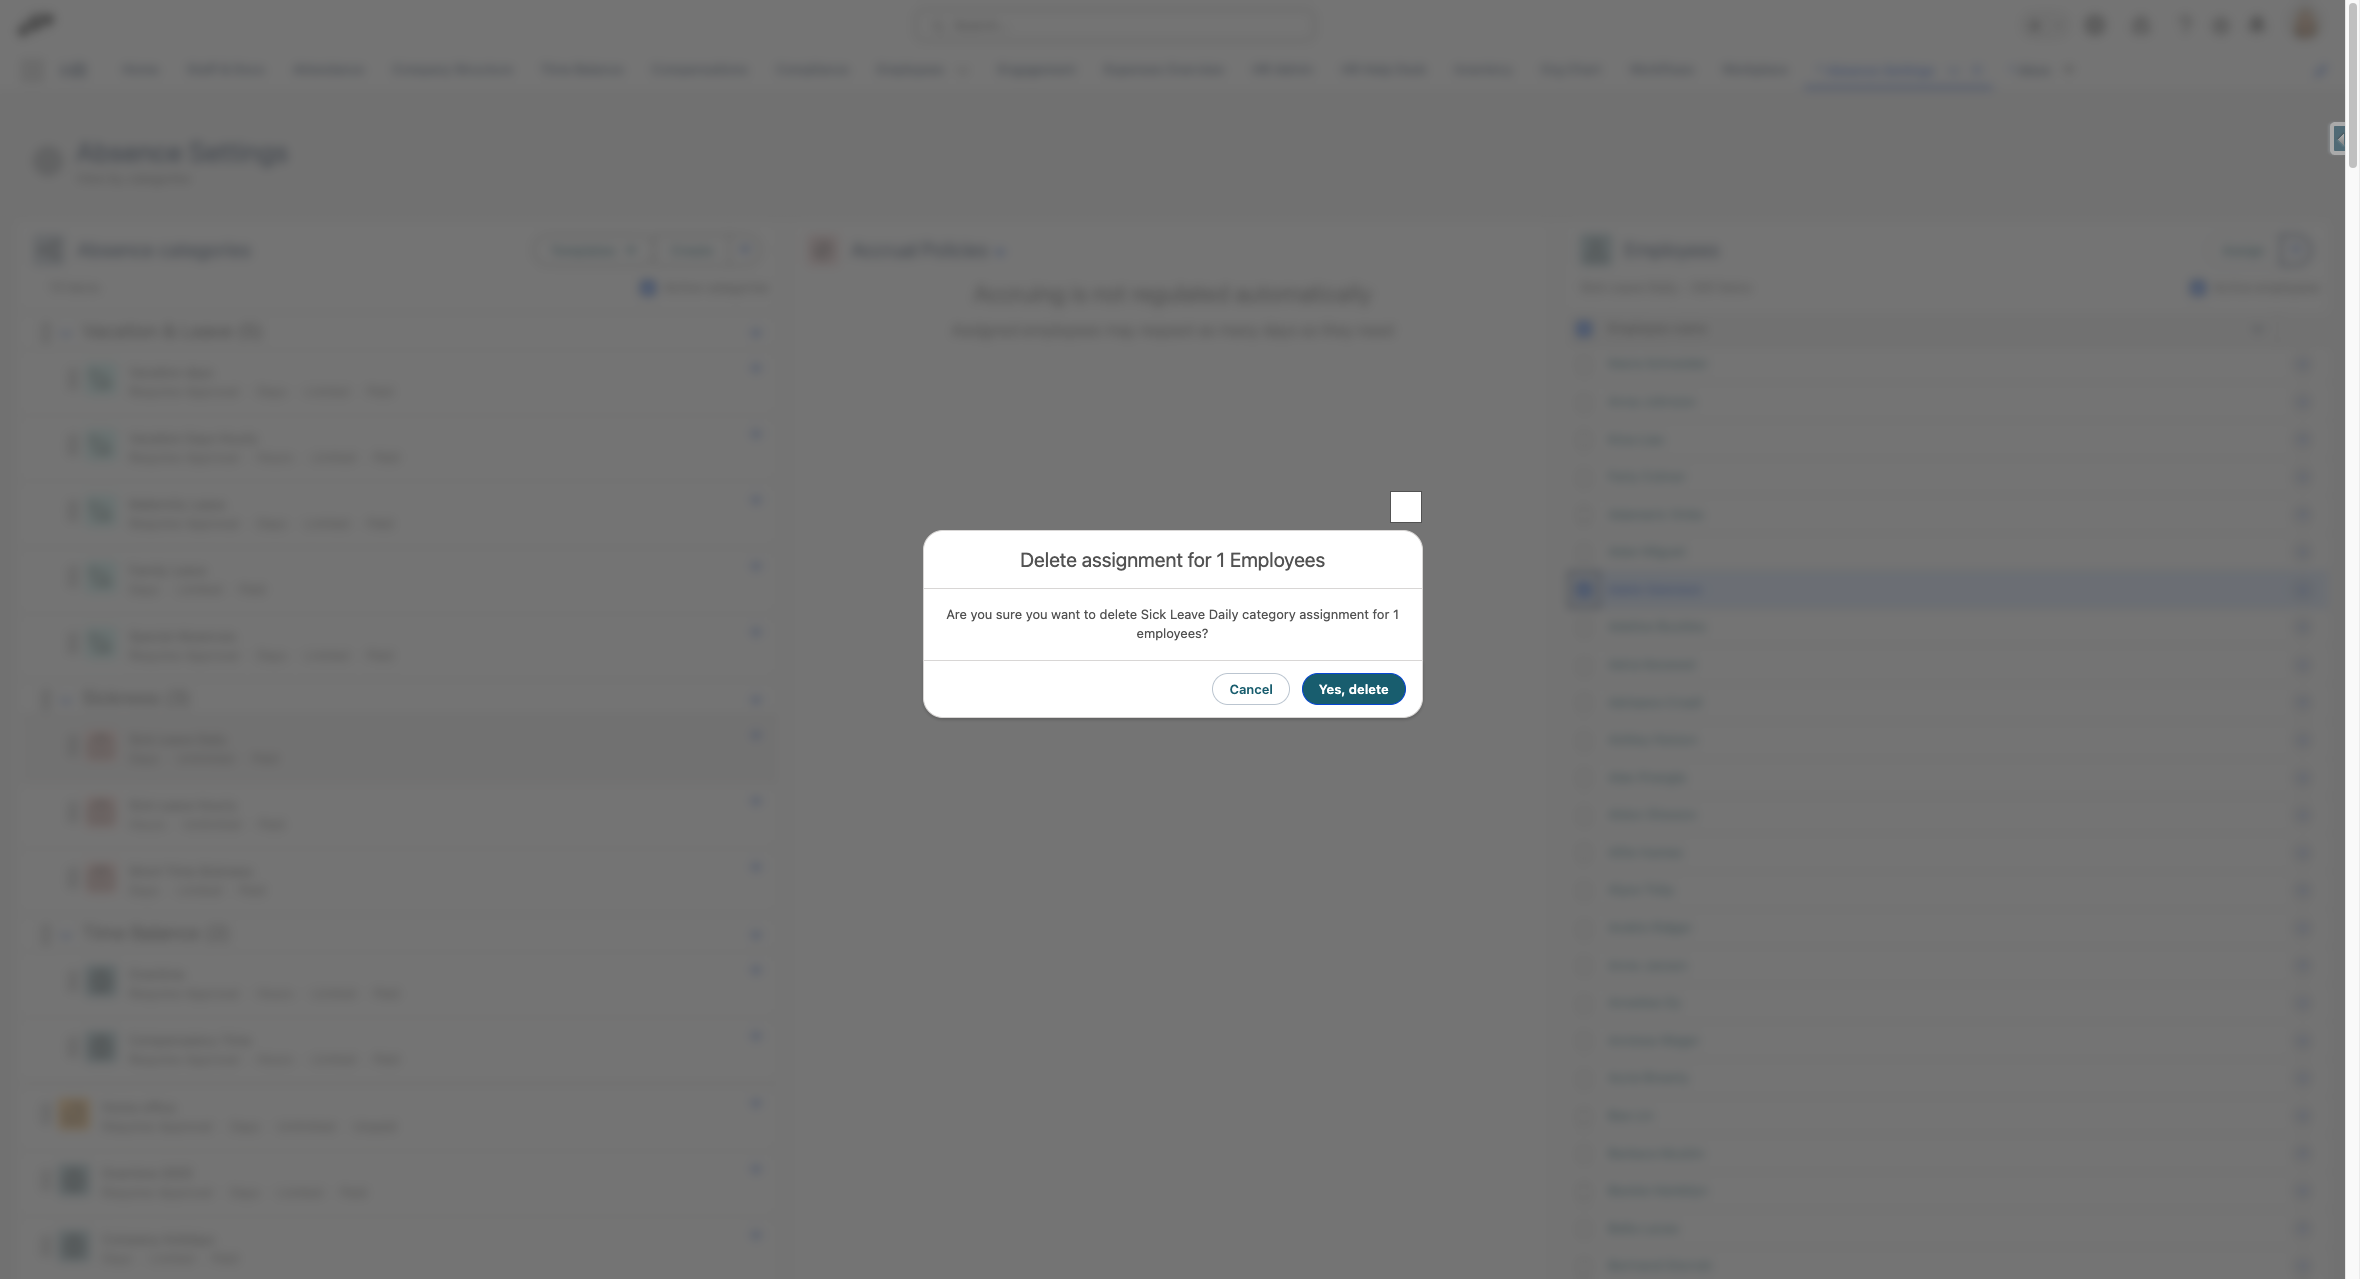
- Click on Yes, delete
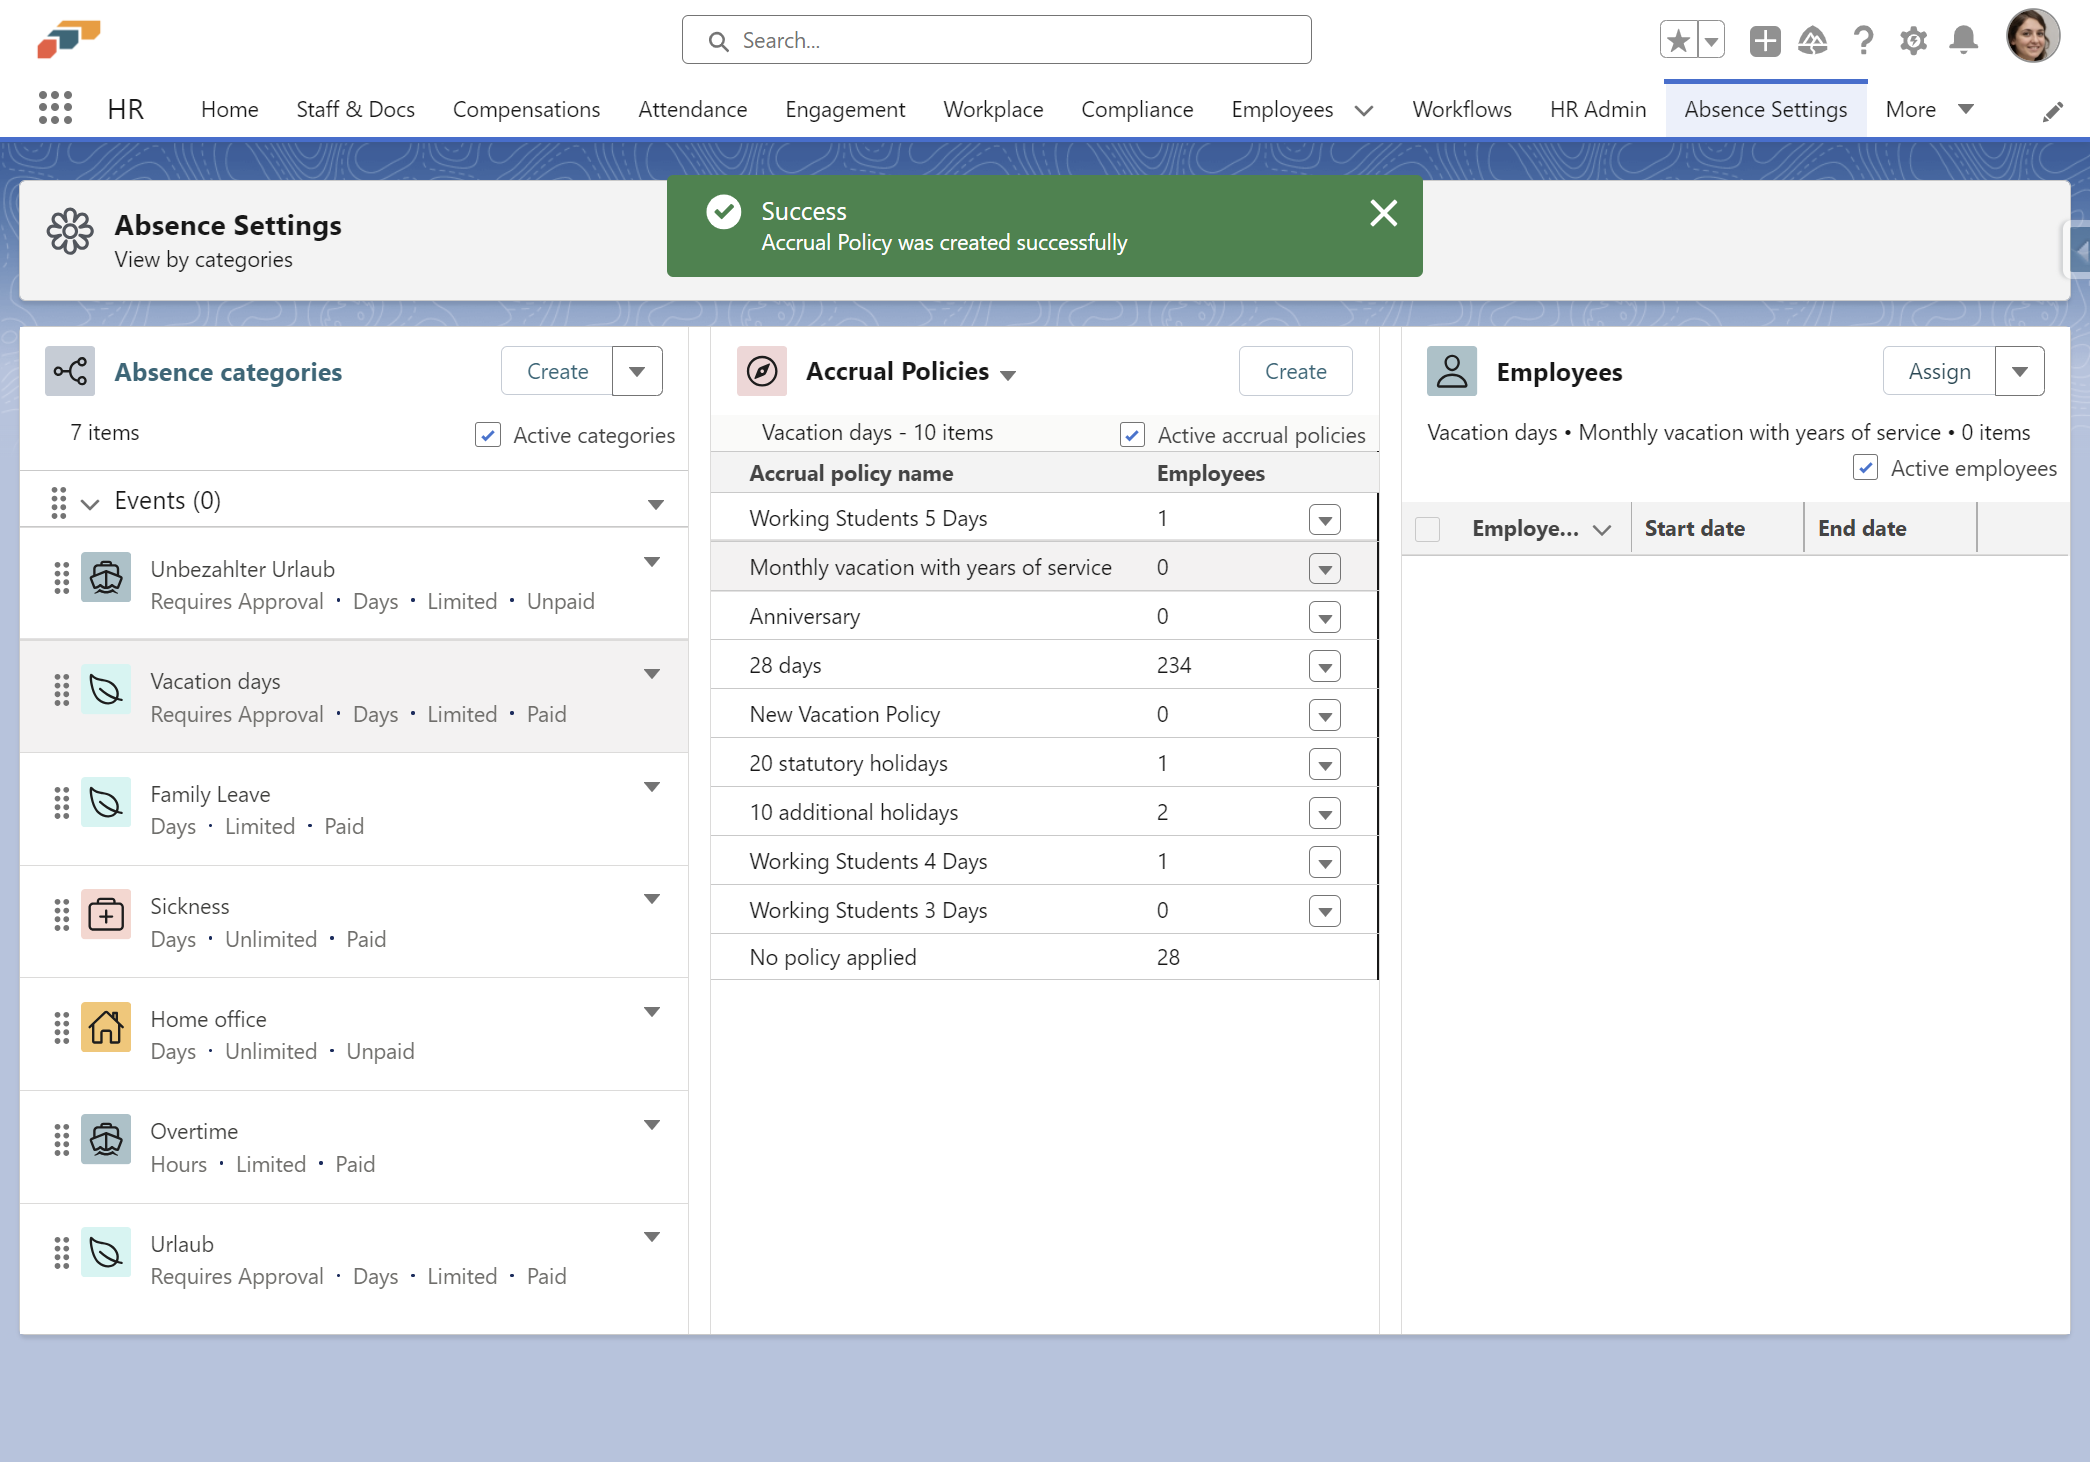
Creating and Assigning the New Policy
- To create a new Accrual Policy, simply click on the "Create" button.
- Provide all the necessary details for your new accrual policy.
- When you're done, click on 'Save'.
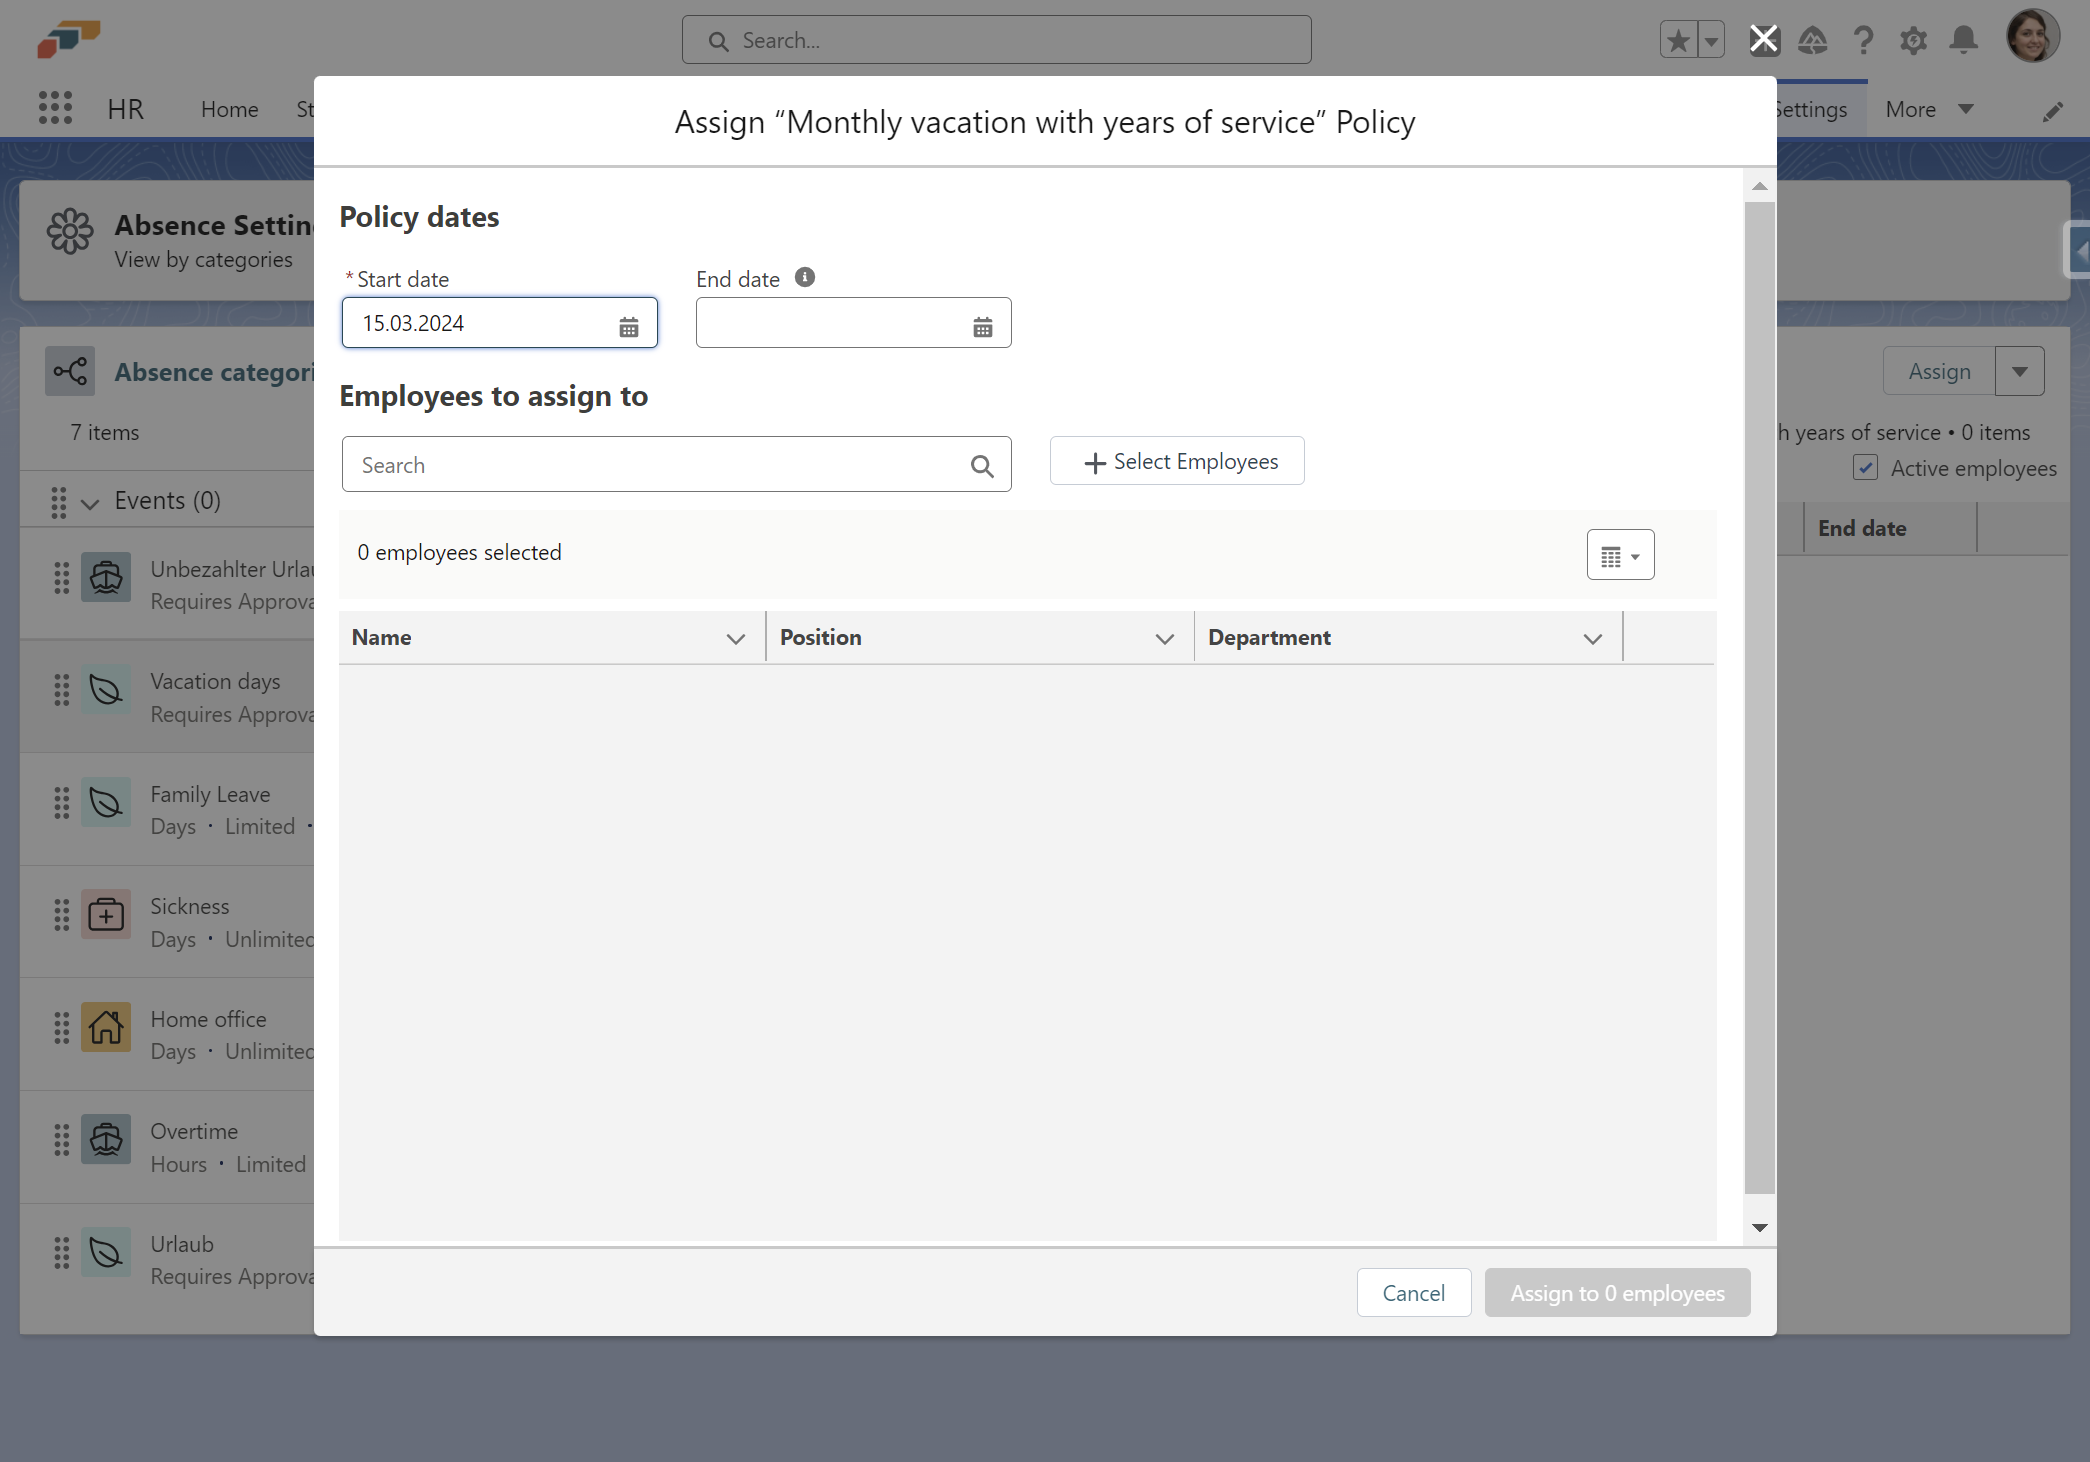
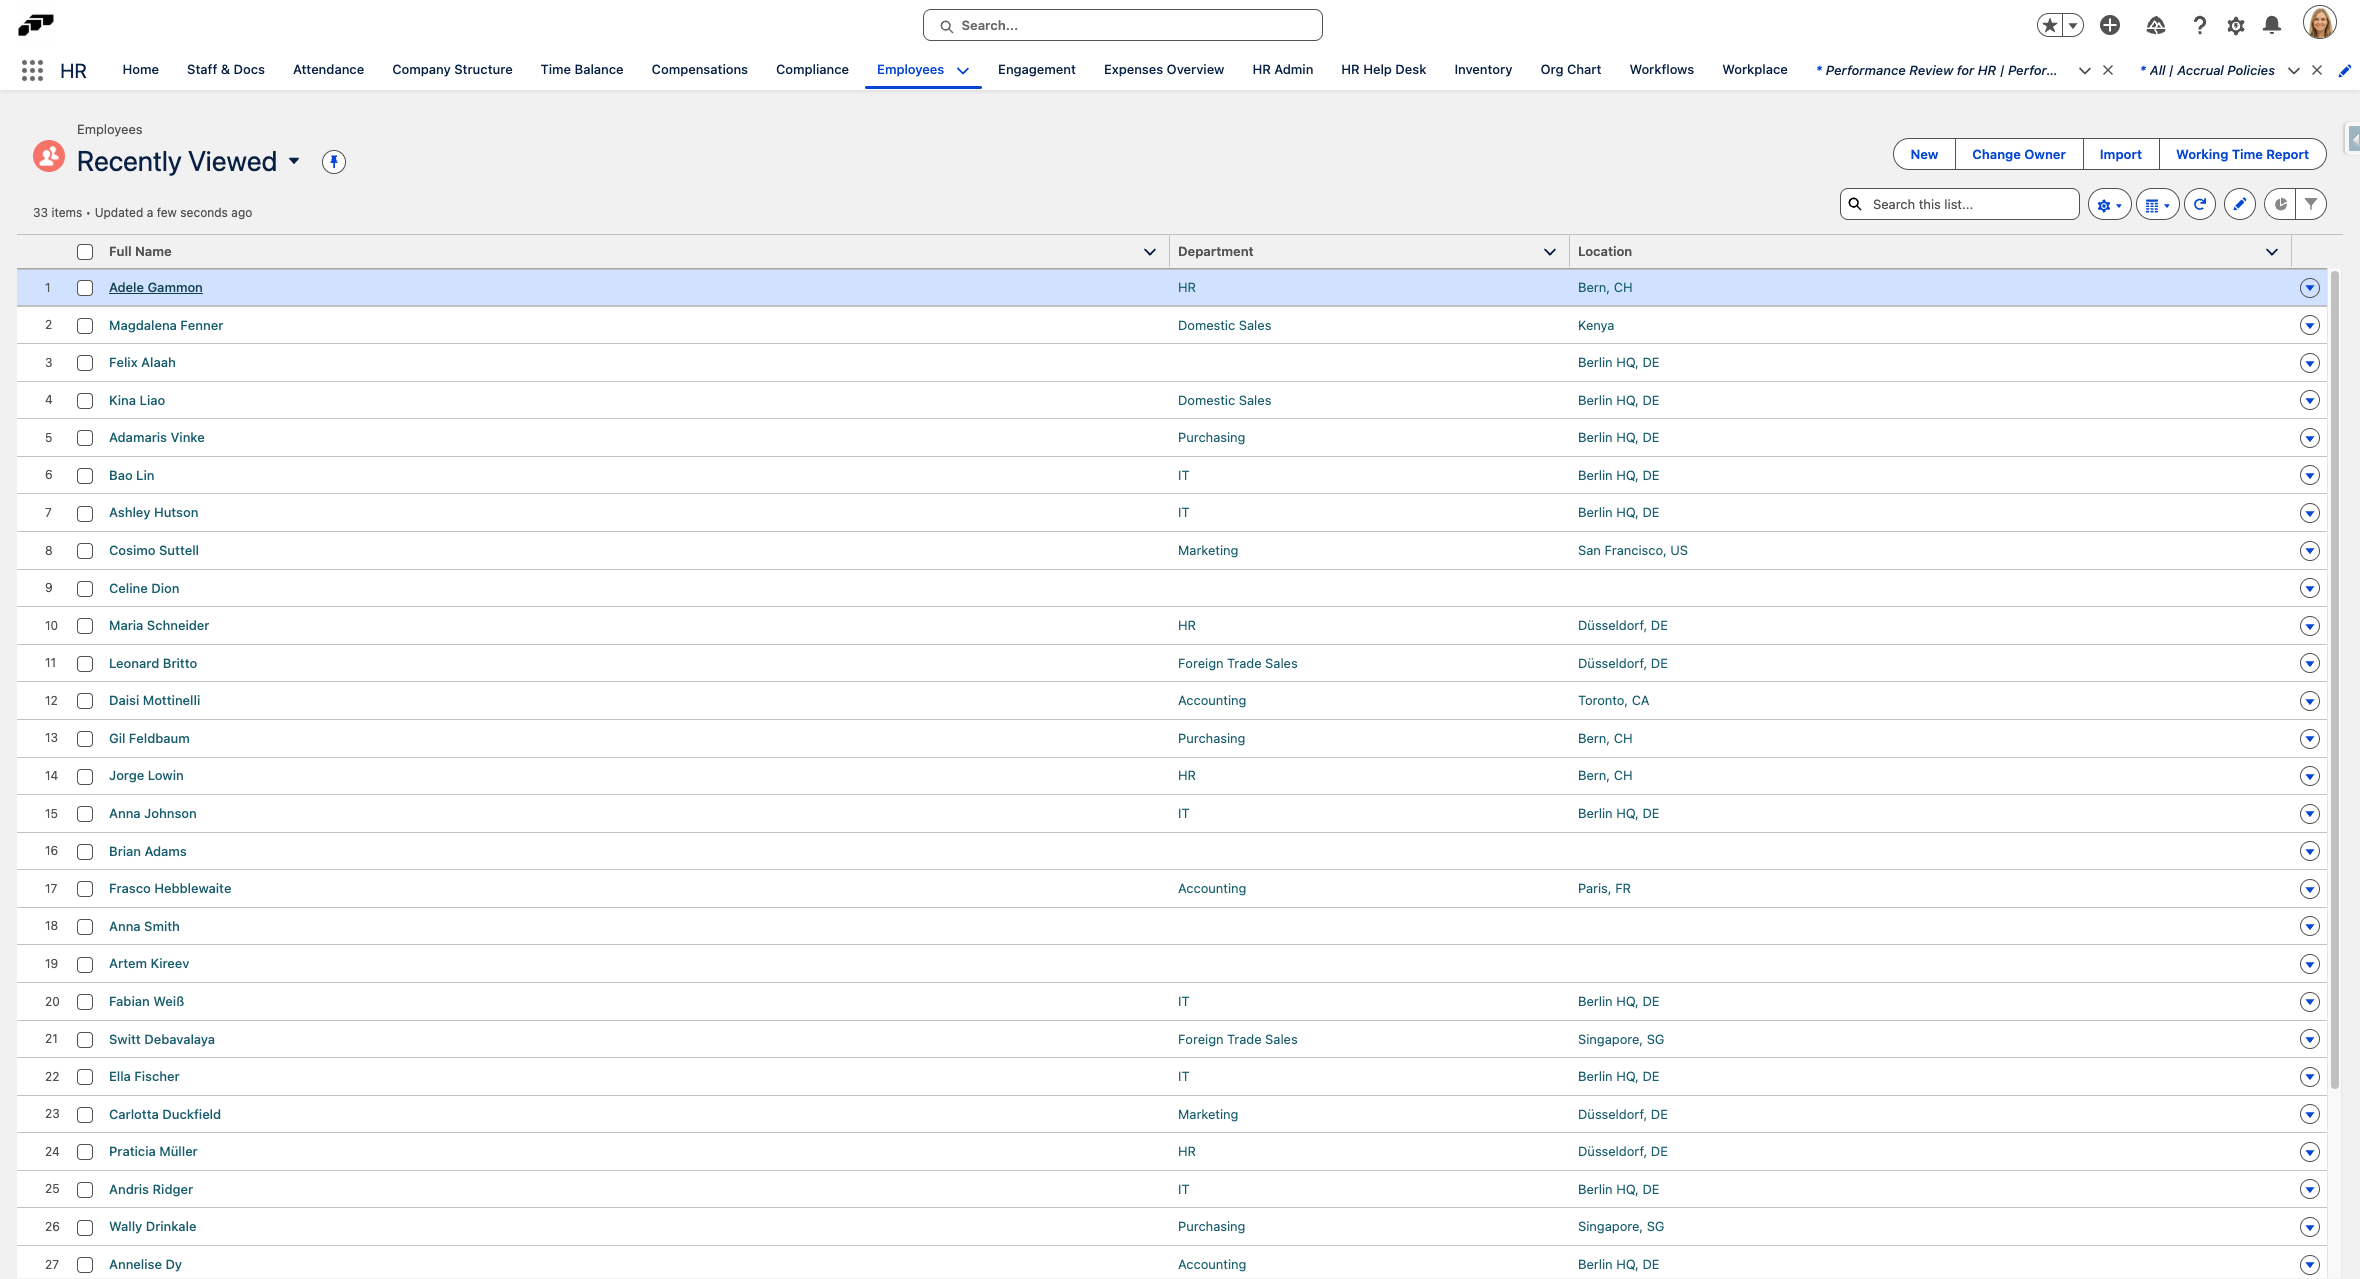
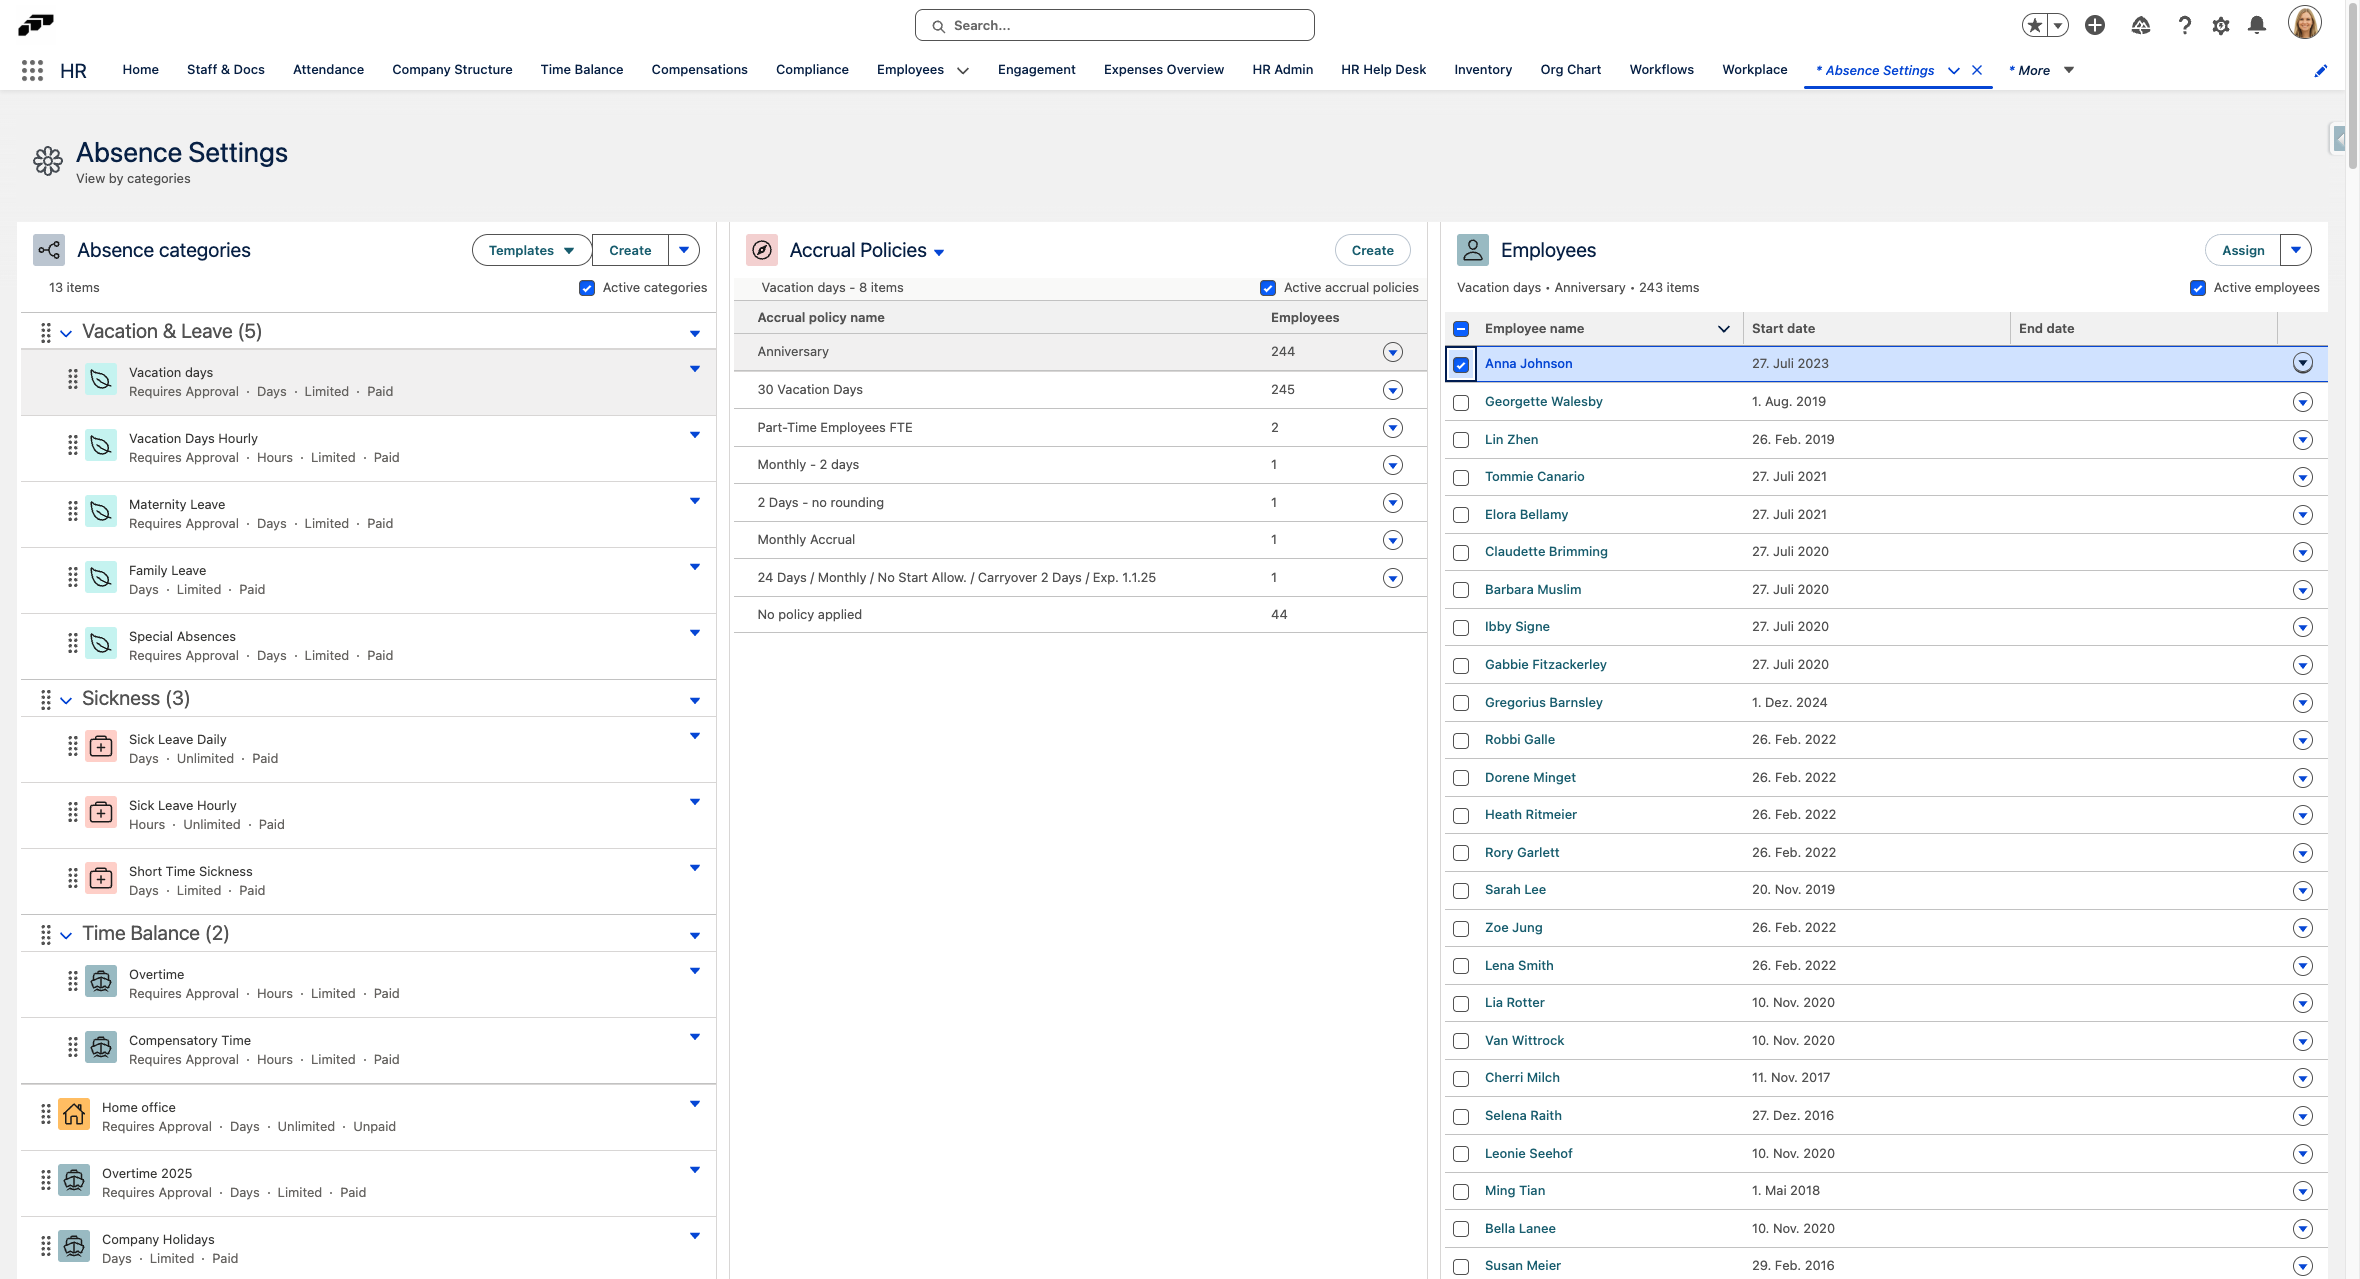
- To assign an employee, please navigate to the list view of employees and click on the 'Assign' button.
- *Click on Start date
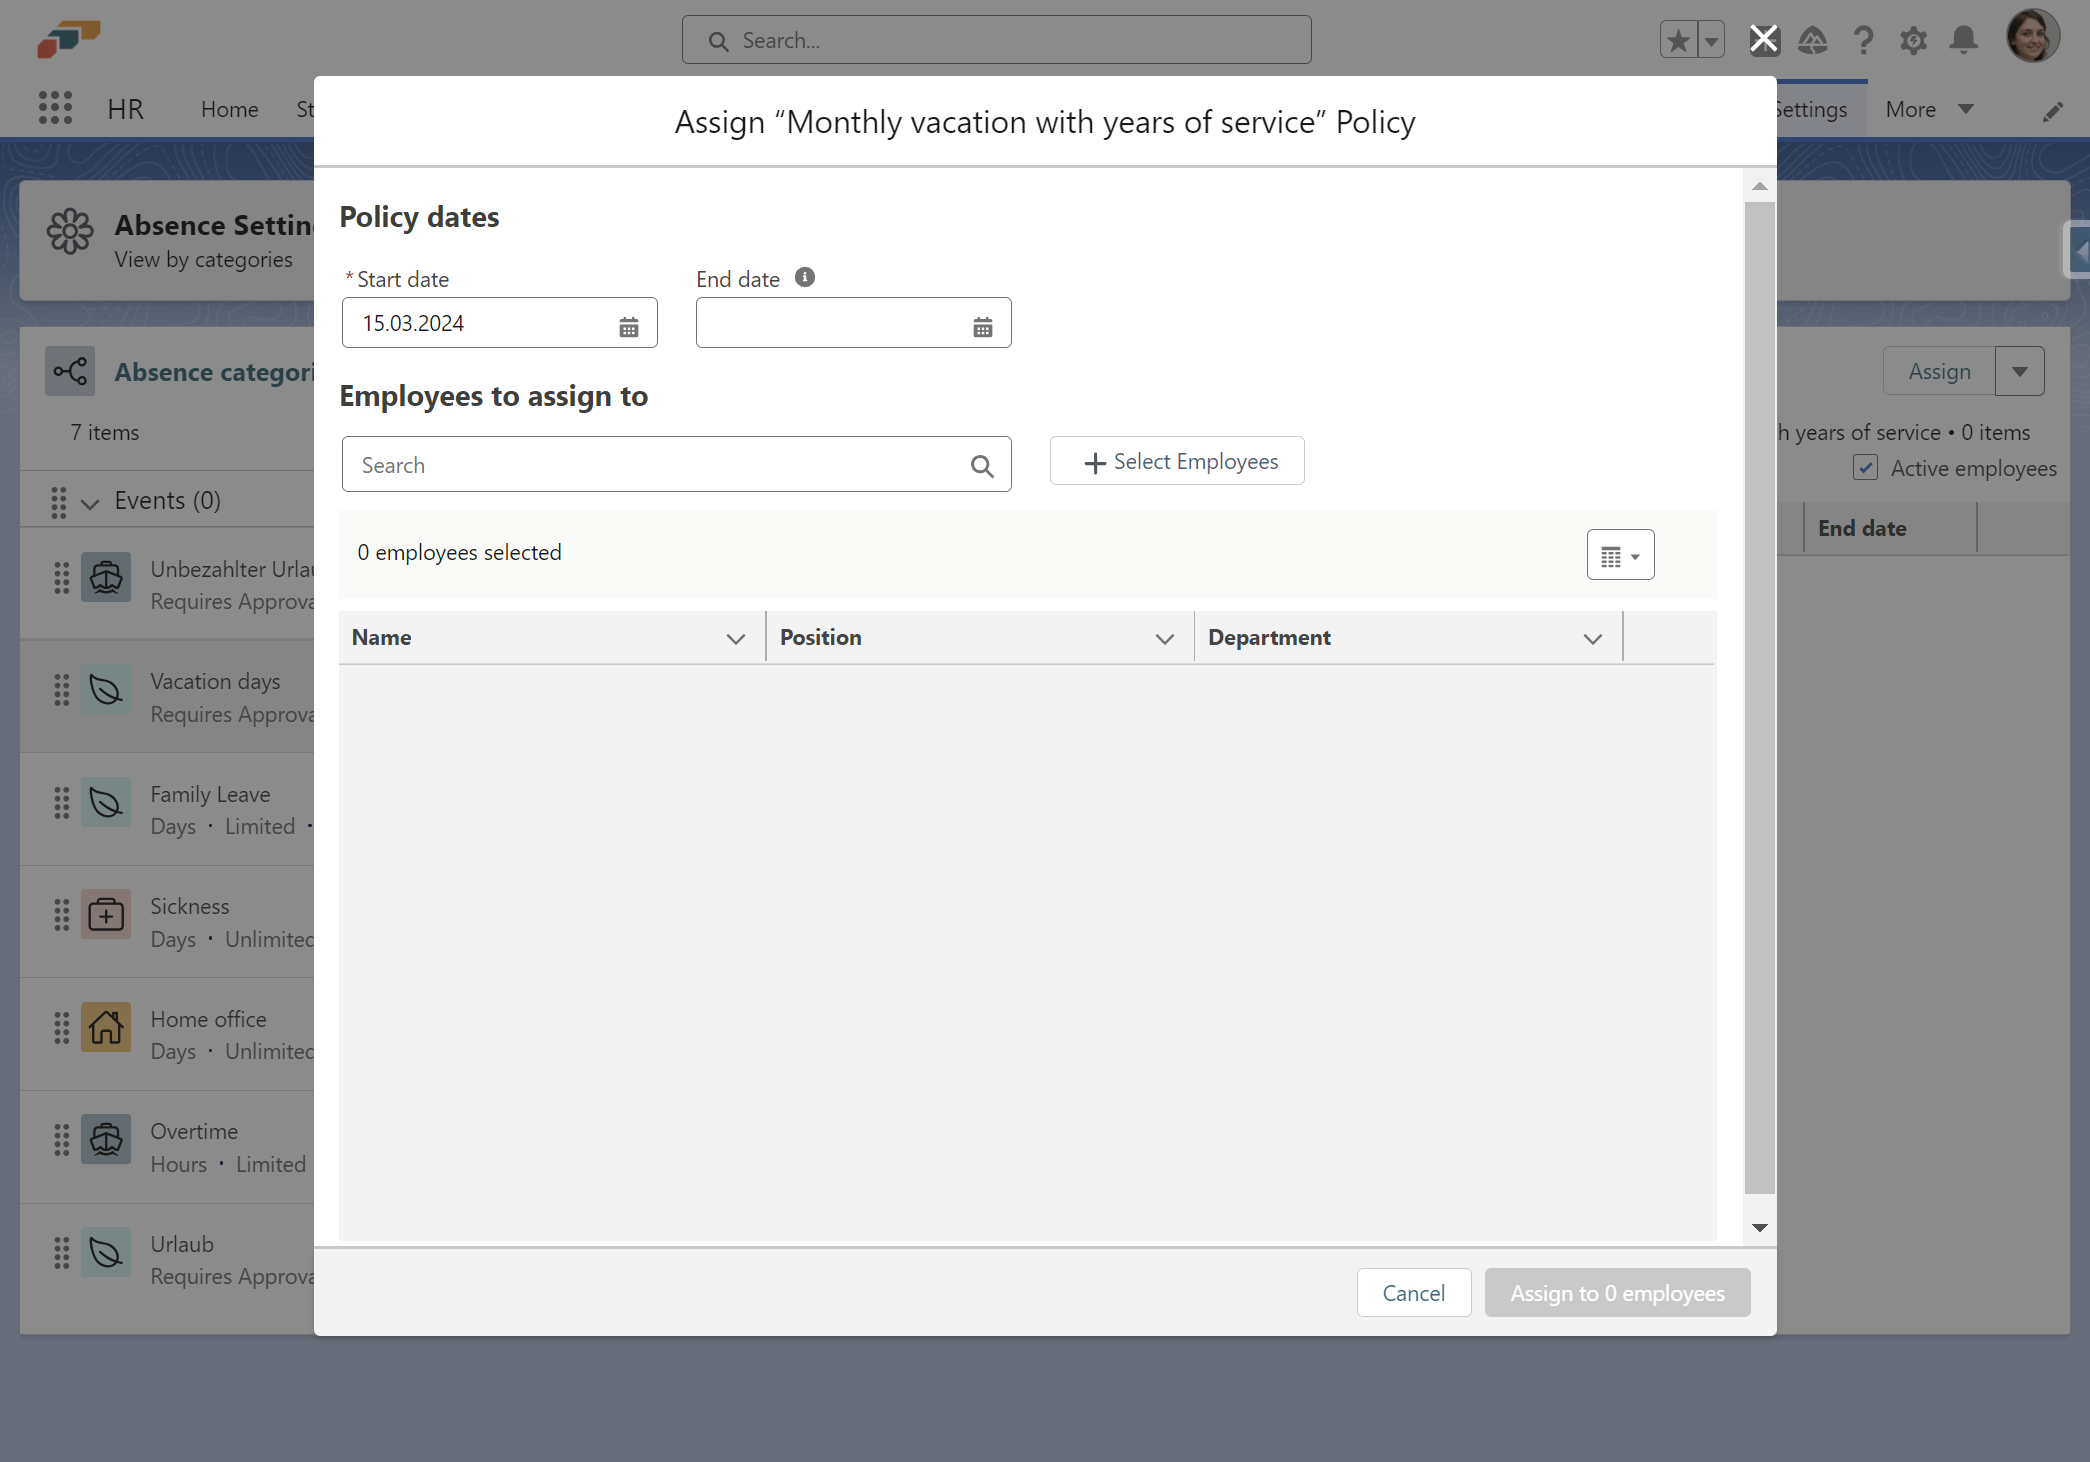
If you are changing from one Accrual Policy to another, you should select the same start date as the previous policy.
- To mass-assign multiple employees at once, please click on "Select Employees".
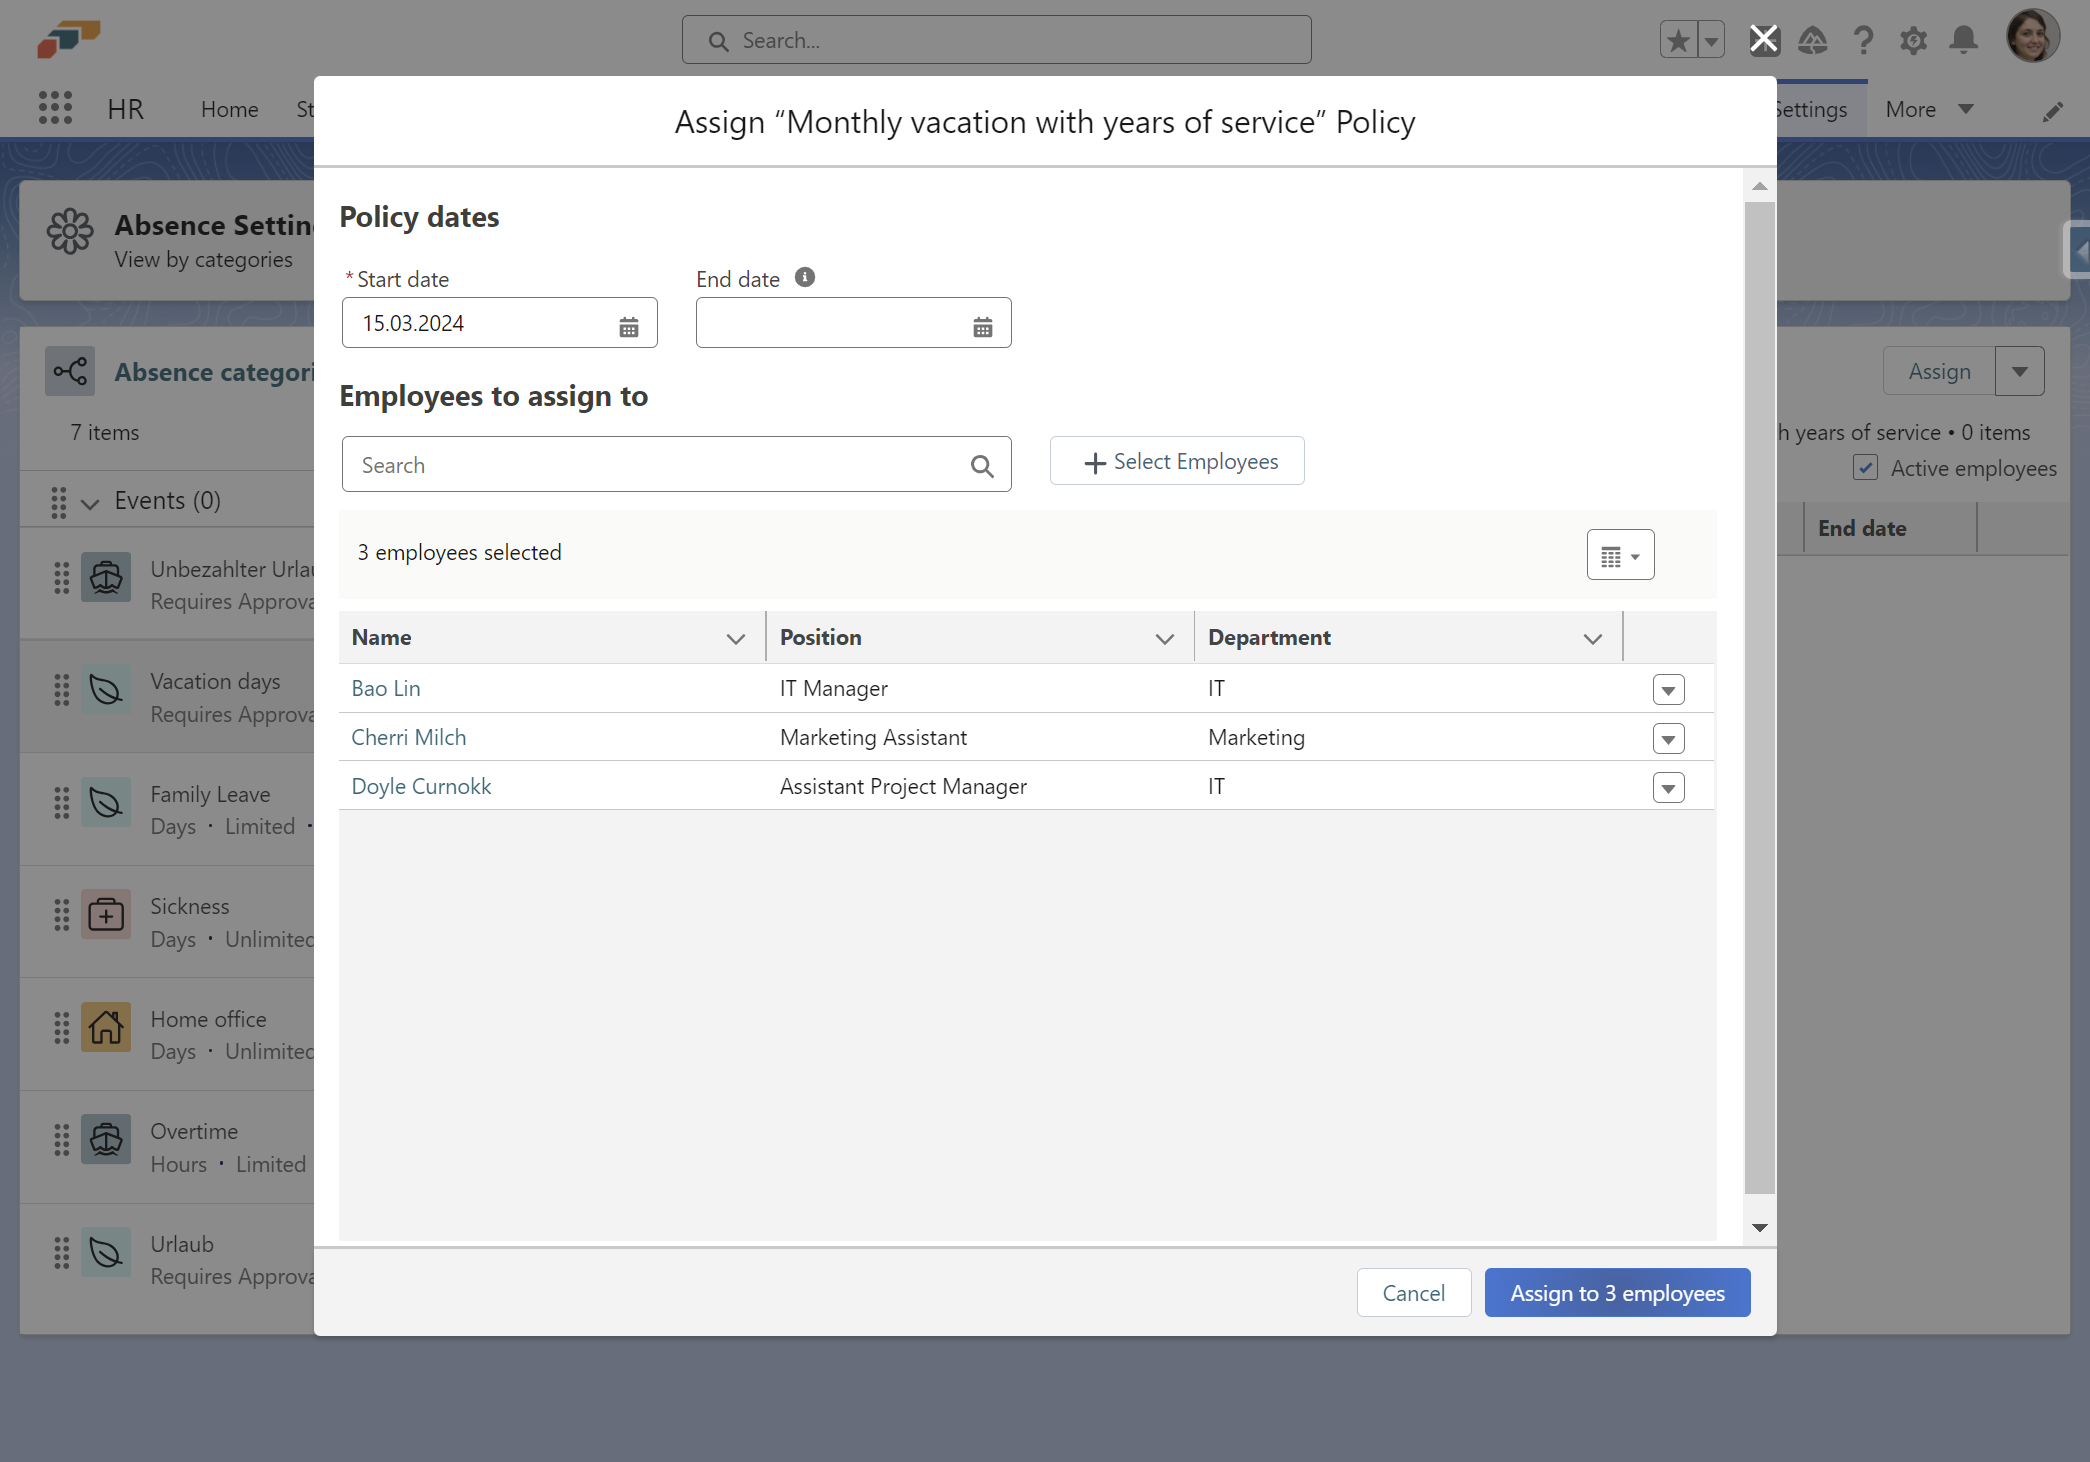
- Select the employees that you would like to choose.
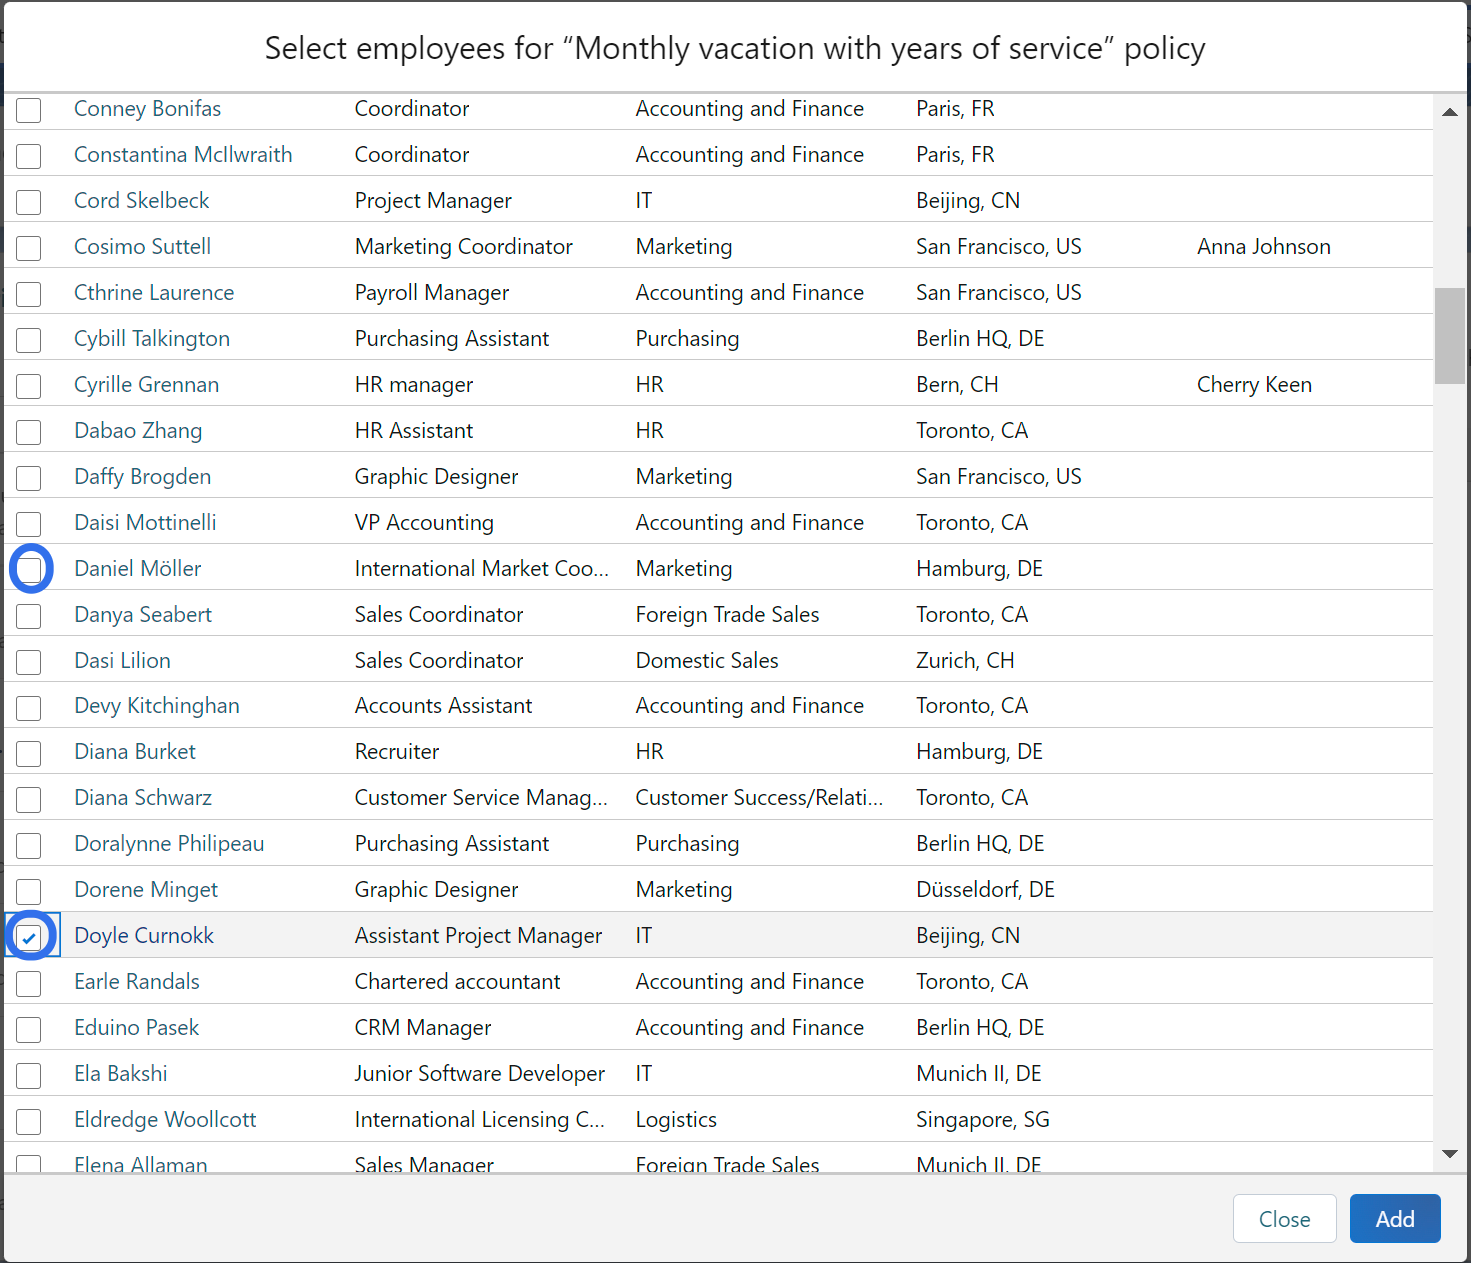
- To assign the Accrual Policy to employees, please click on the "Assign" button.
- You may proceed to archive the old Accrual Policy now.
The current absence balance will automatically transfer to the new accrual policy.
End or Delete Accrual Policies
There are three ways to end or delete employees' accrual policies and absence categories:
Option A: Turn off the Accrual Policy on the Employee record
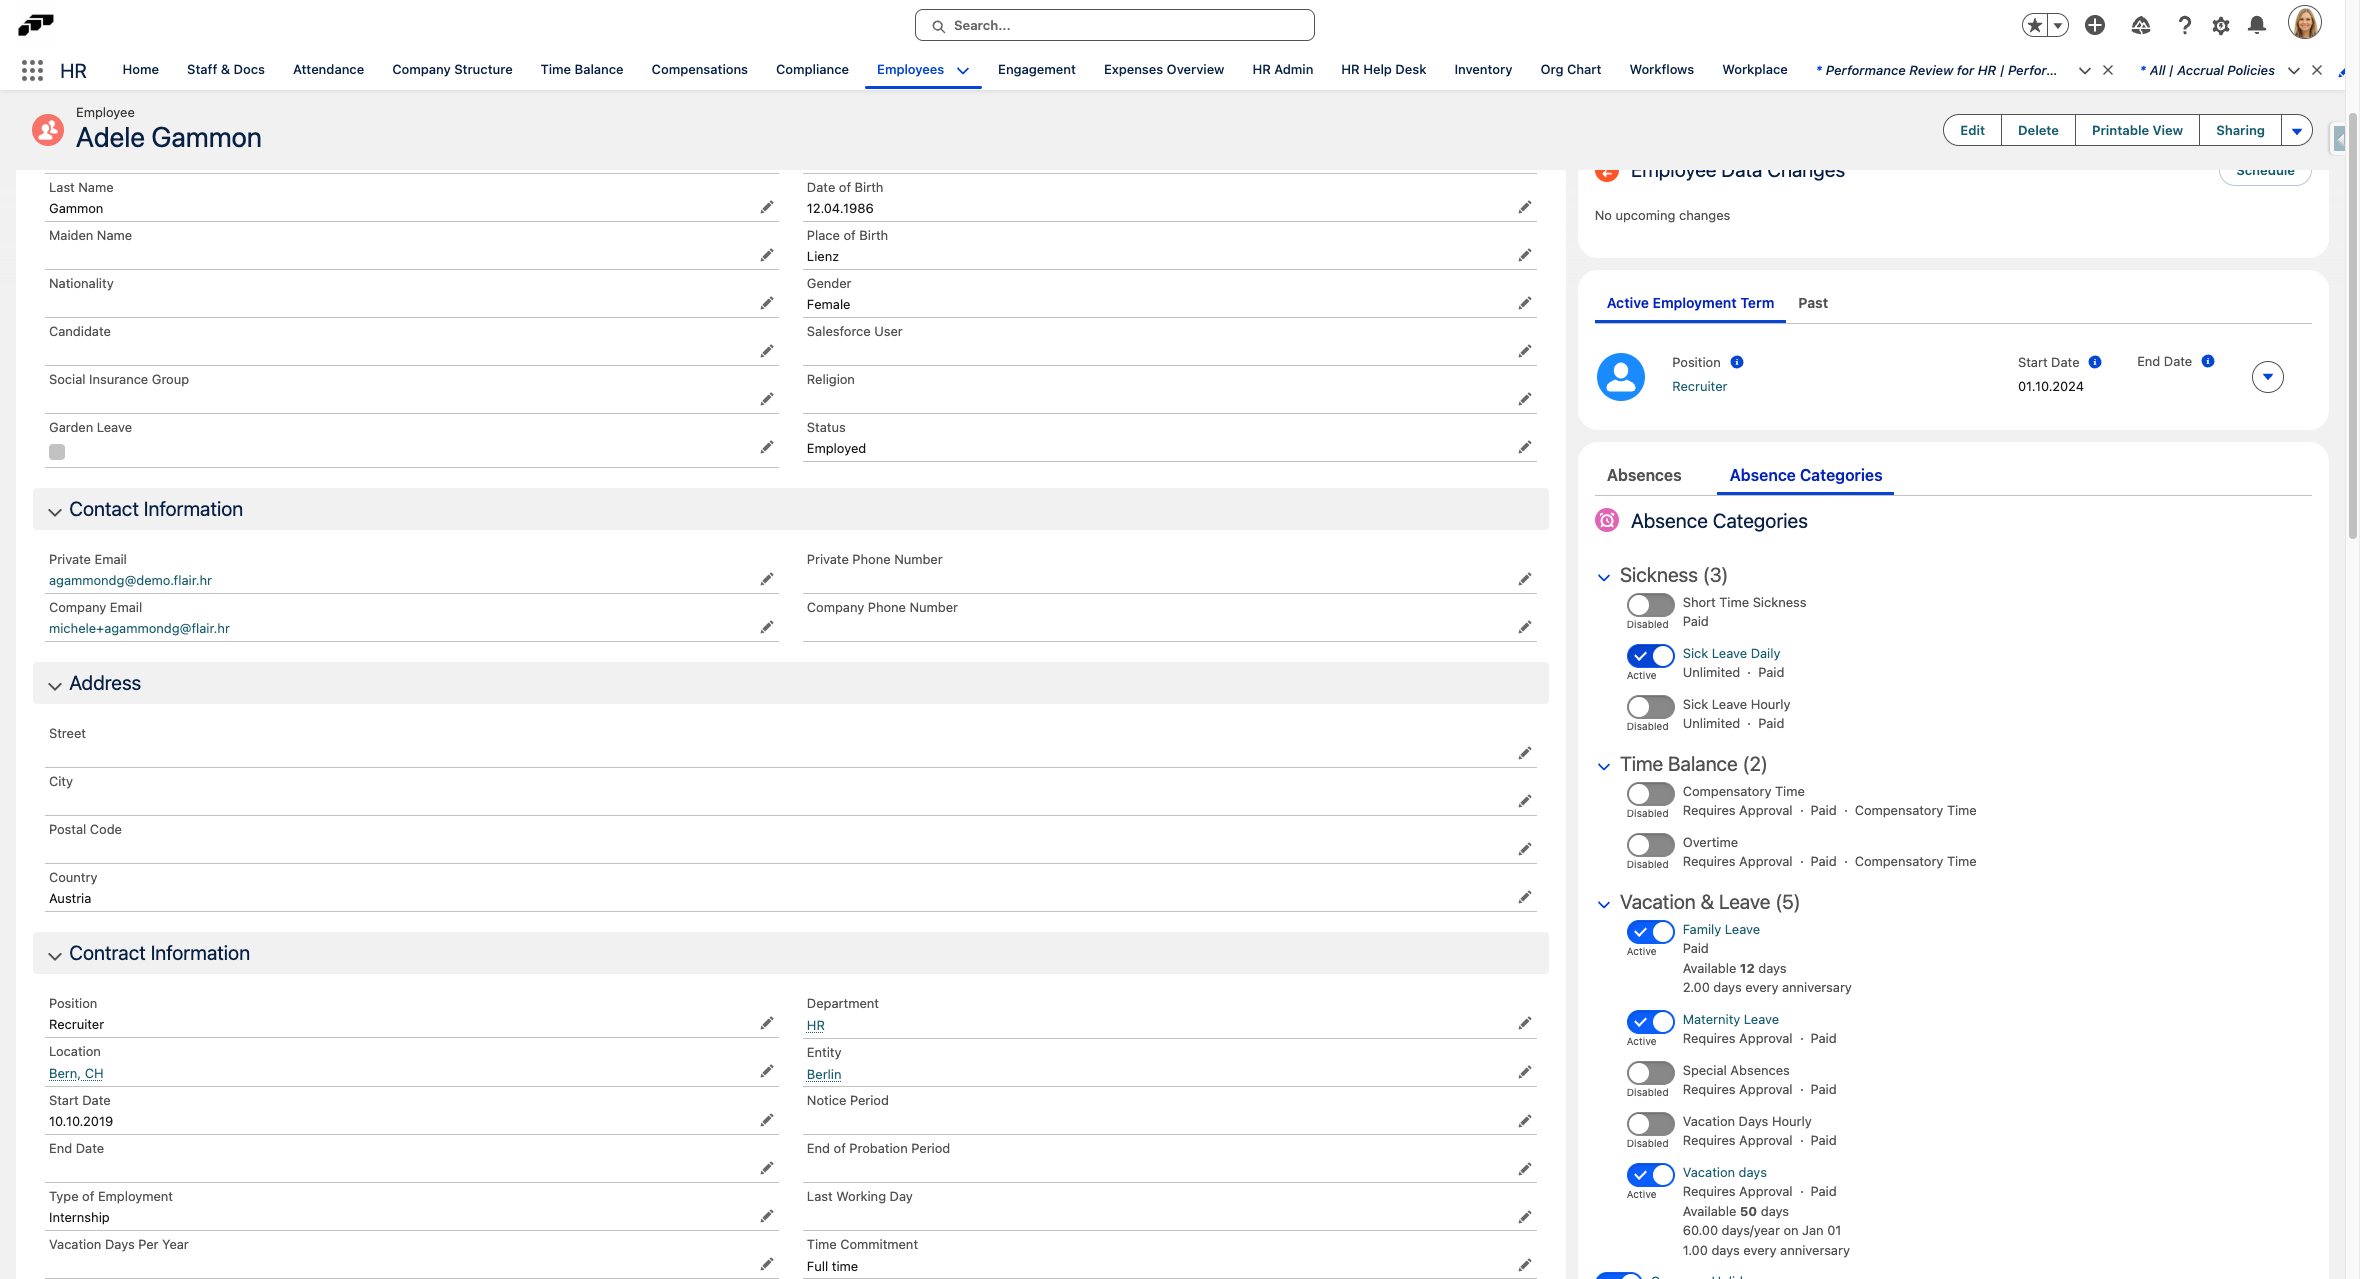
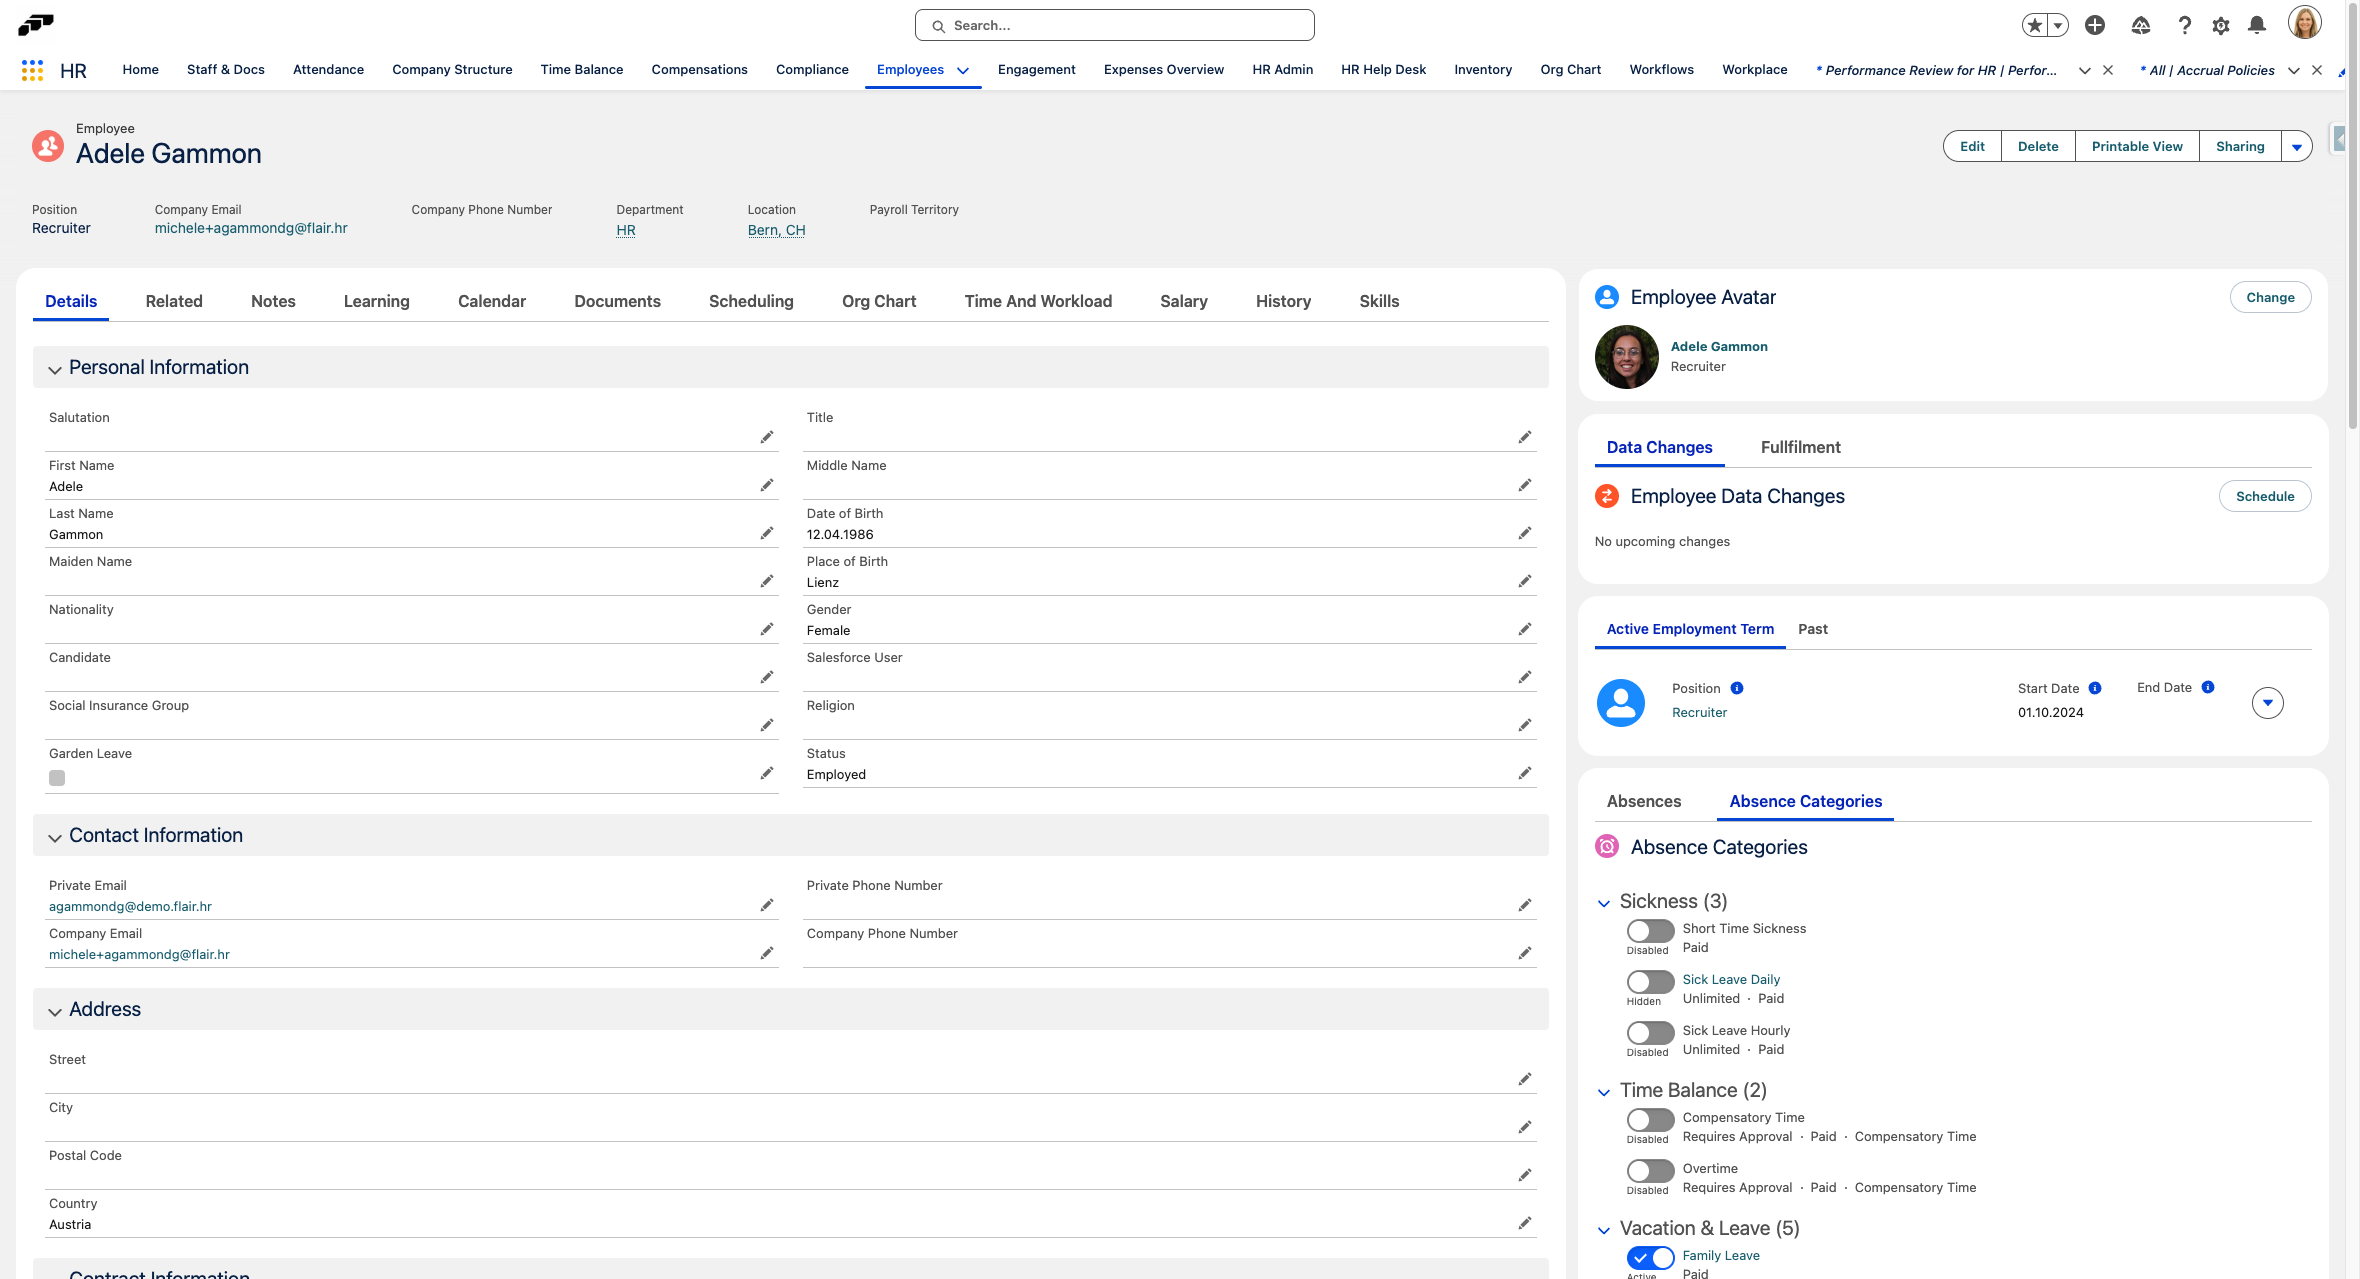
- Click on Employees
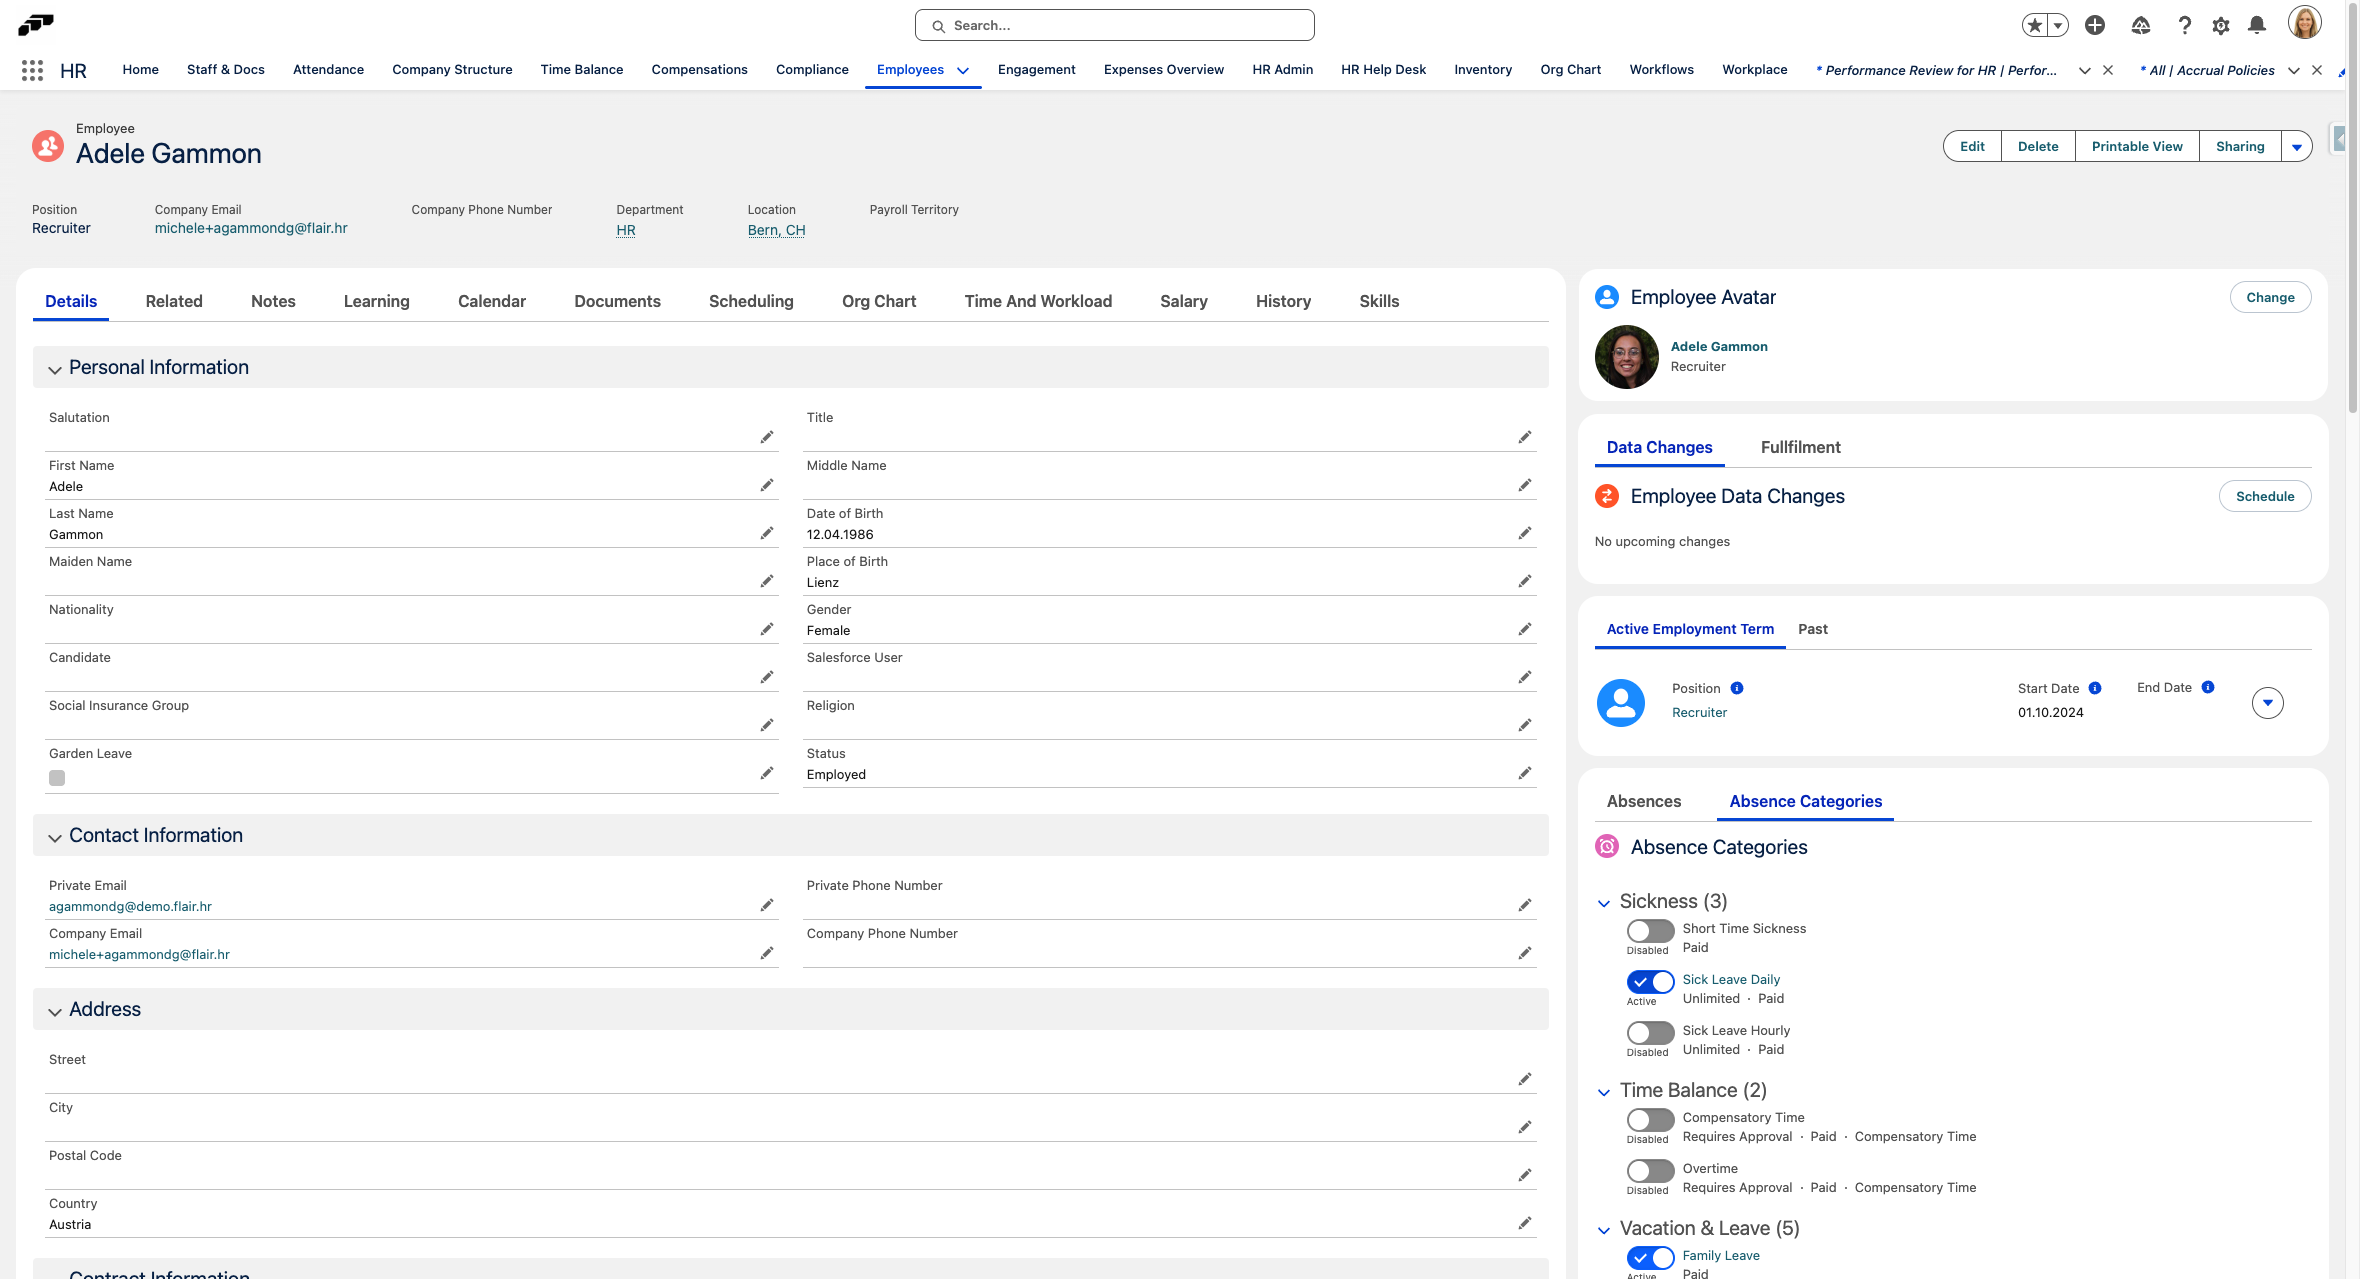
- For an accrual policy, choose which employee you wish to deactivate.
- Click on Absence Categories
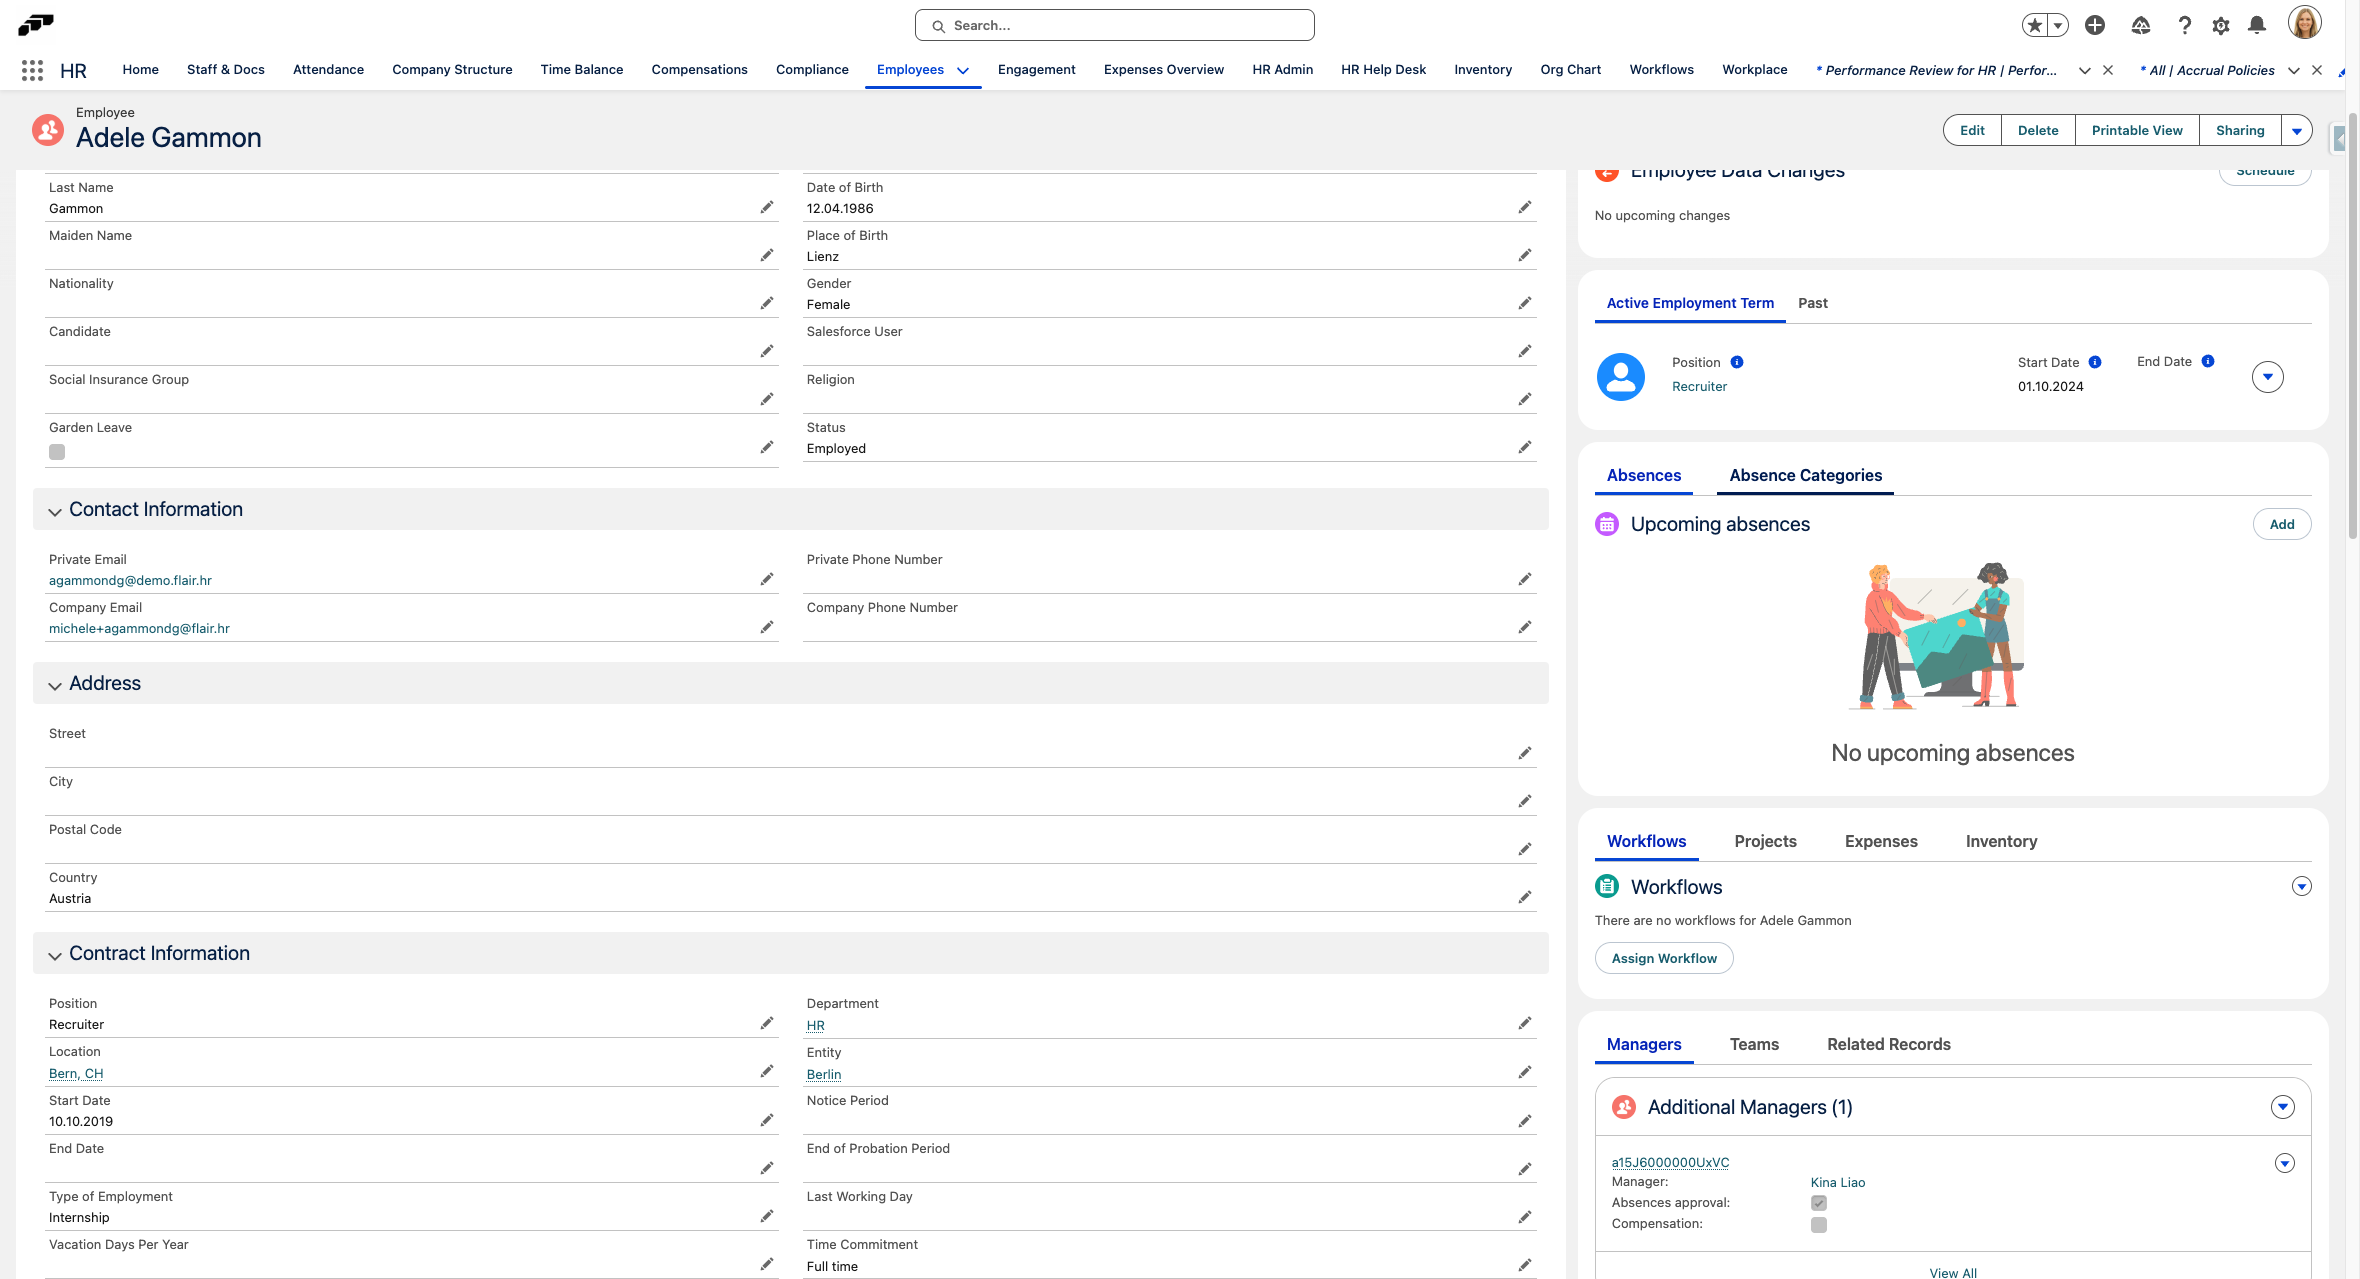
- To turn off an accrual policy or absence category, uncheck the box next to it.
Option B: Delete the Employee's Accrual Policy or Absence category from Absence Settings
- Click on App Launcher
- Type "absence settings"
- Select the Employee Absence Category from which you wish to remove the employee.
- Pick the right employee, then click the dropdown arrow next to the "assign" button.
- Click on Delete
- Click on Yes, delete
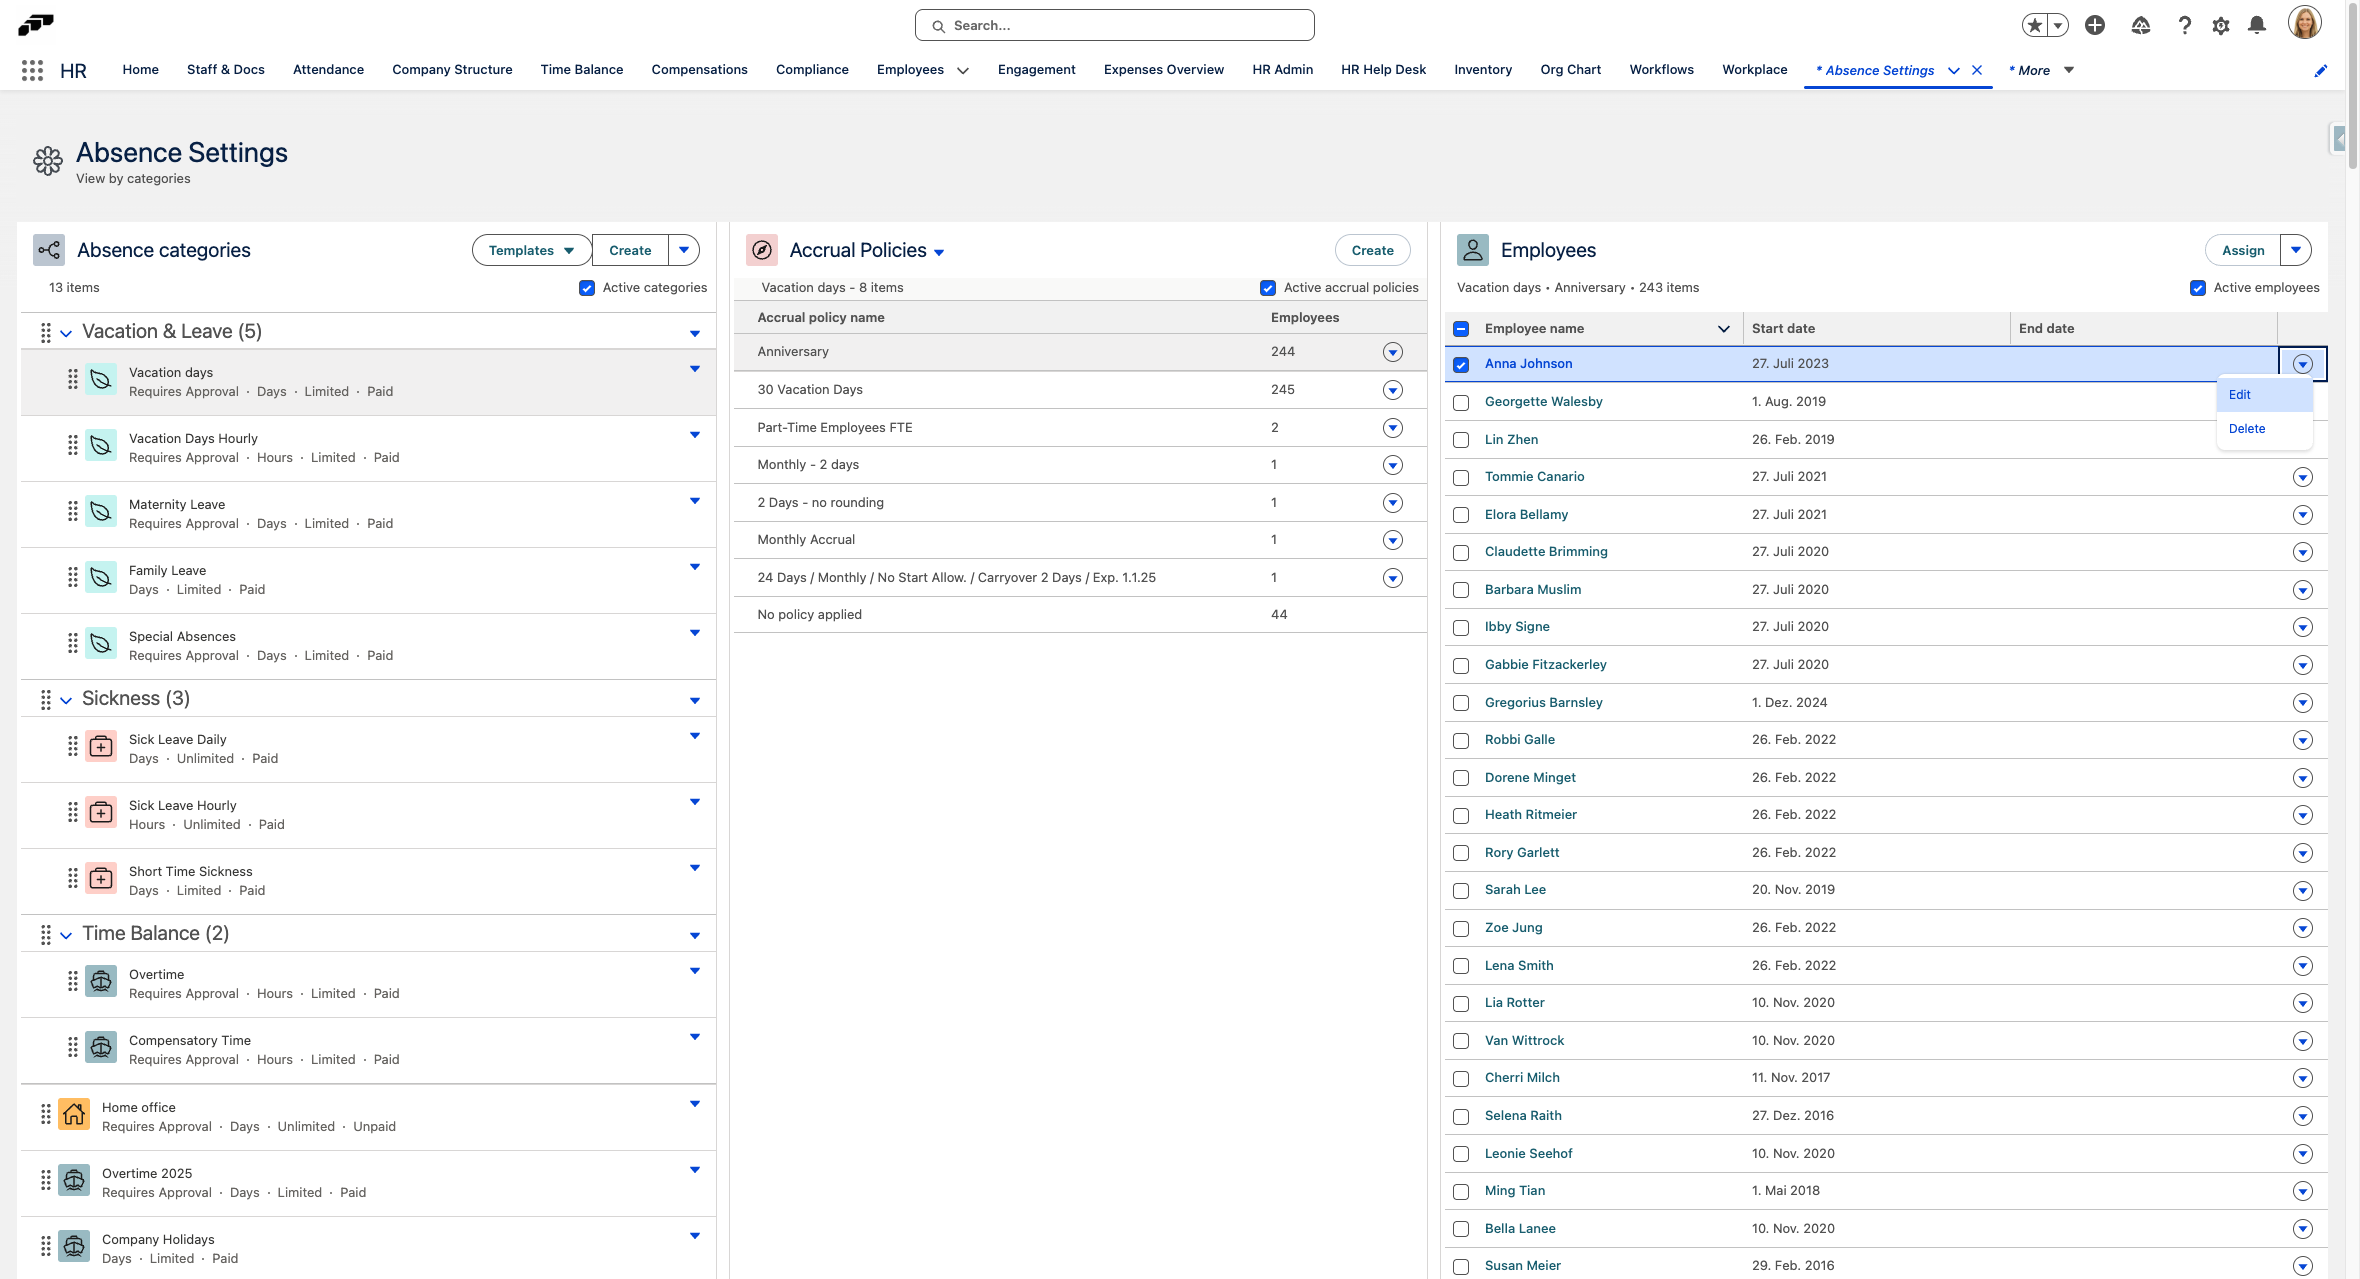
Option C: Give the Employees Accrual policy a Termination Date
Recommended for Accrual Policies to ensure accurate history data.
- Select the appropriate Employee Absence Category...

- Click on the appropriate accrual policy.

- Select the respective employee and click the drop-down arrow next to their name. You can also select multiple employees and click on the drop-down arrow next to the assign button to perform a mass action and set an end date in bulk.
- Click on Edit
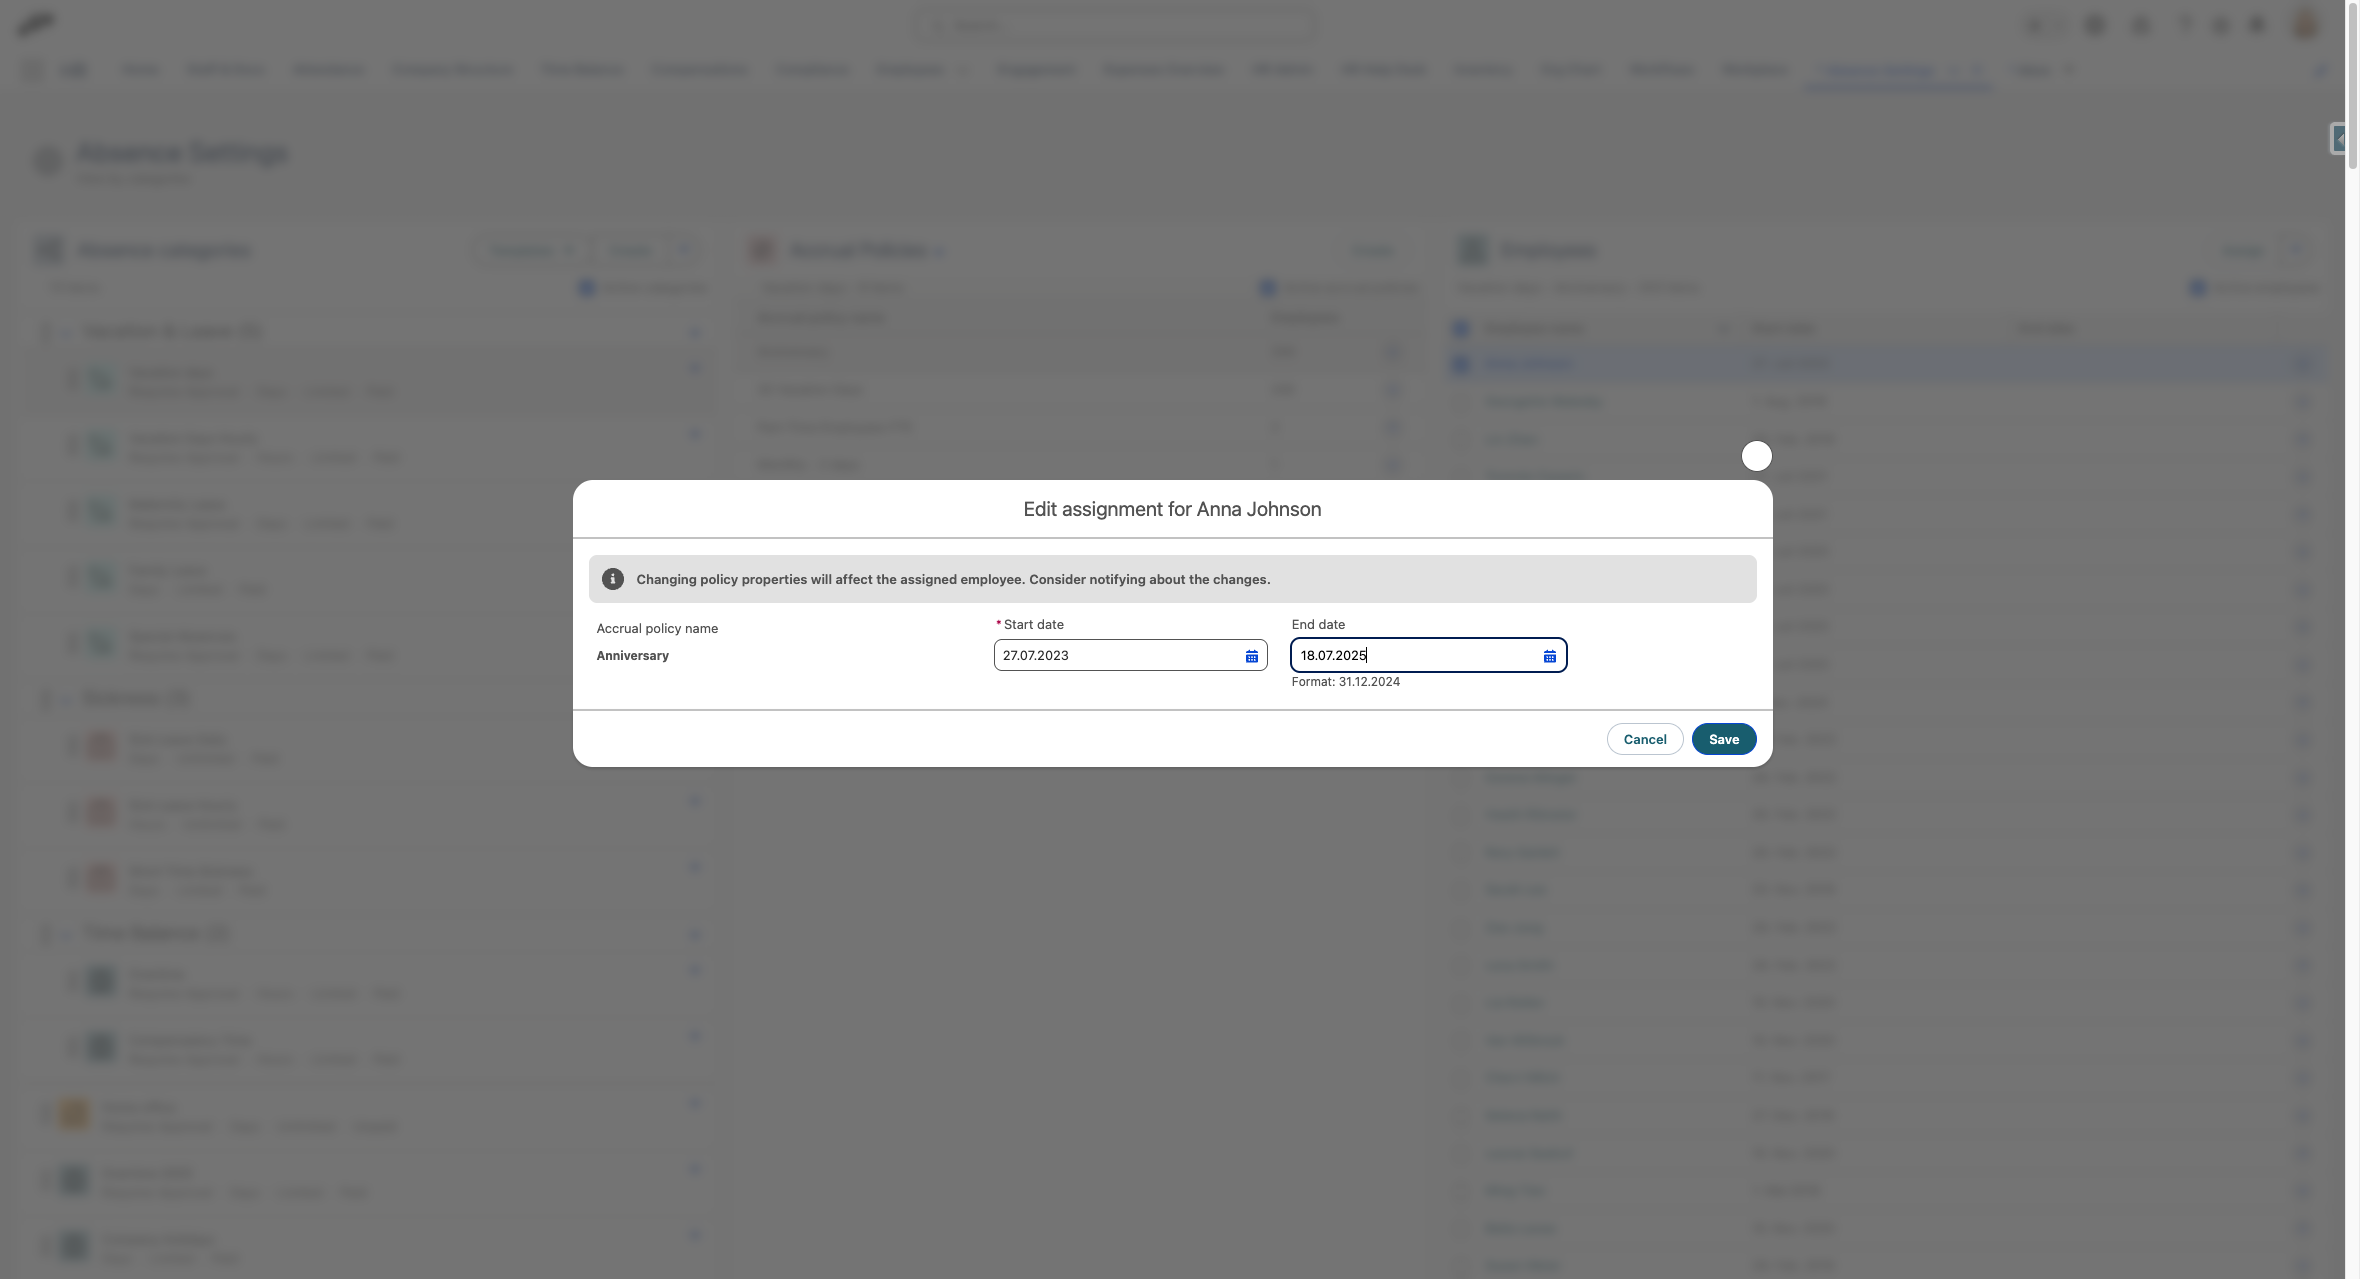
- Click on Select a date for End date
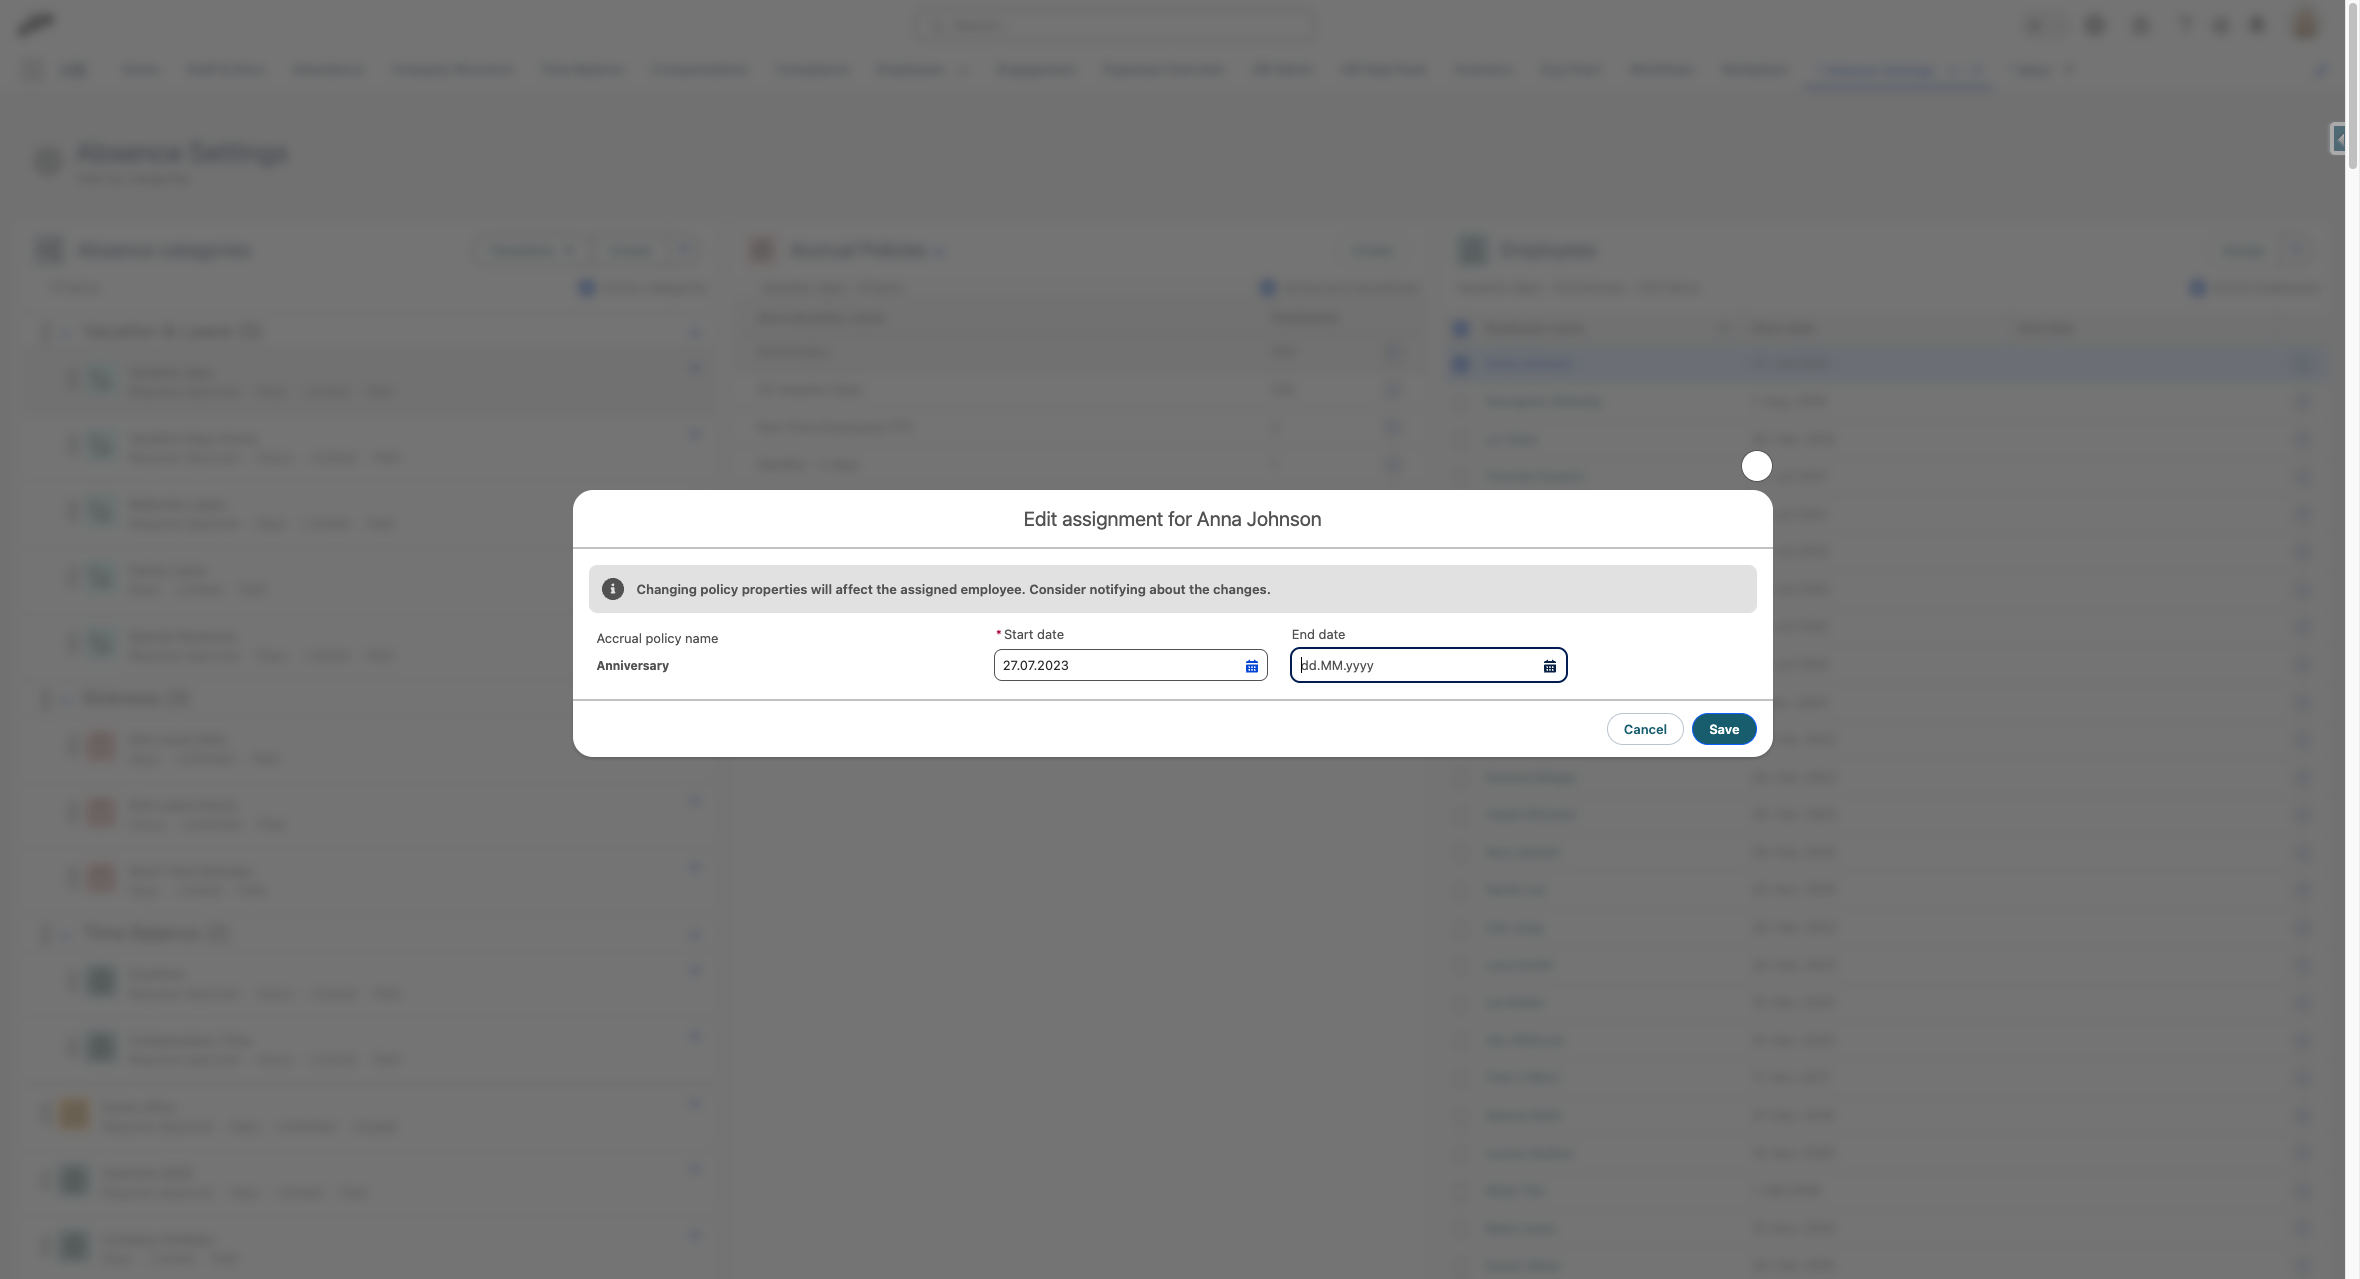
- Click on Save
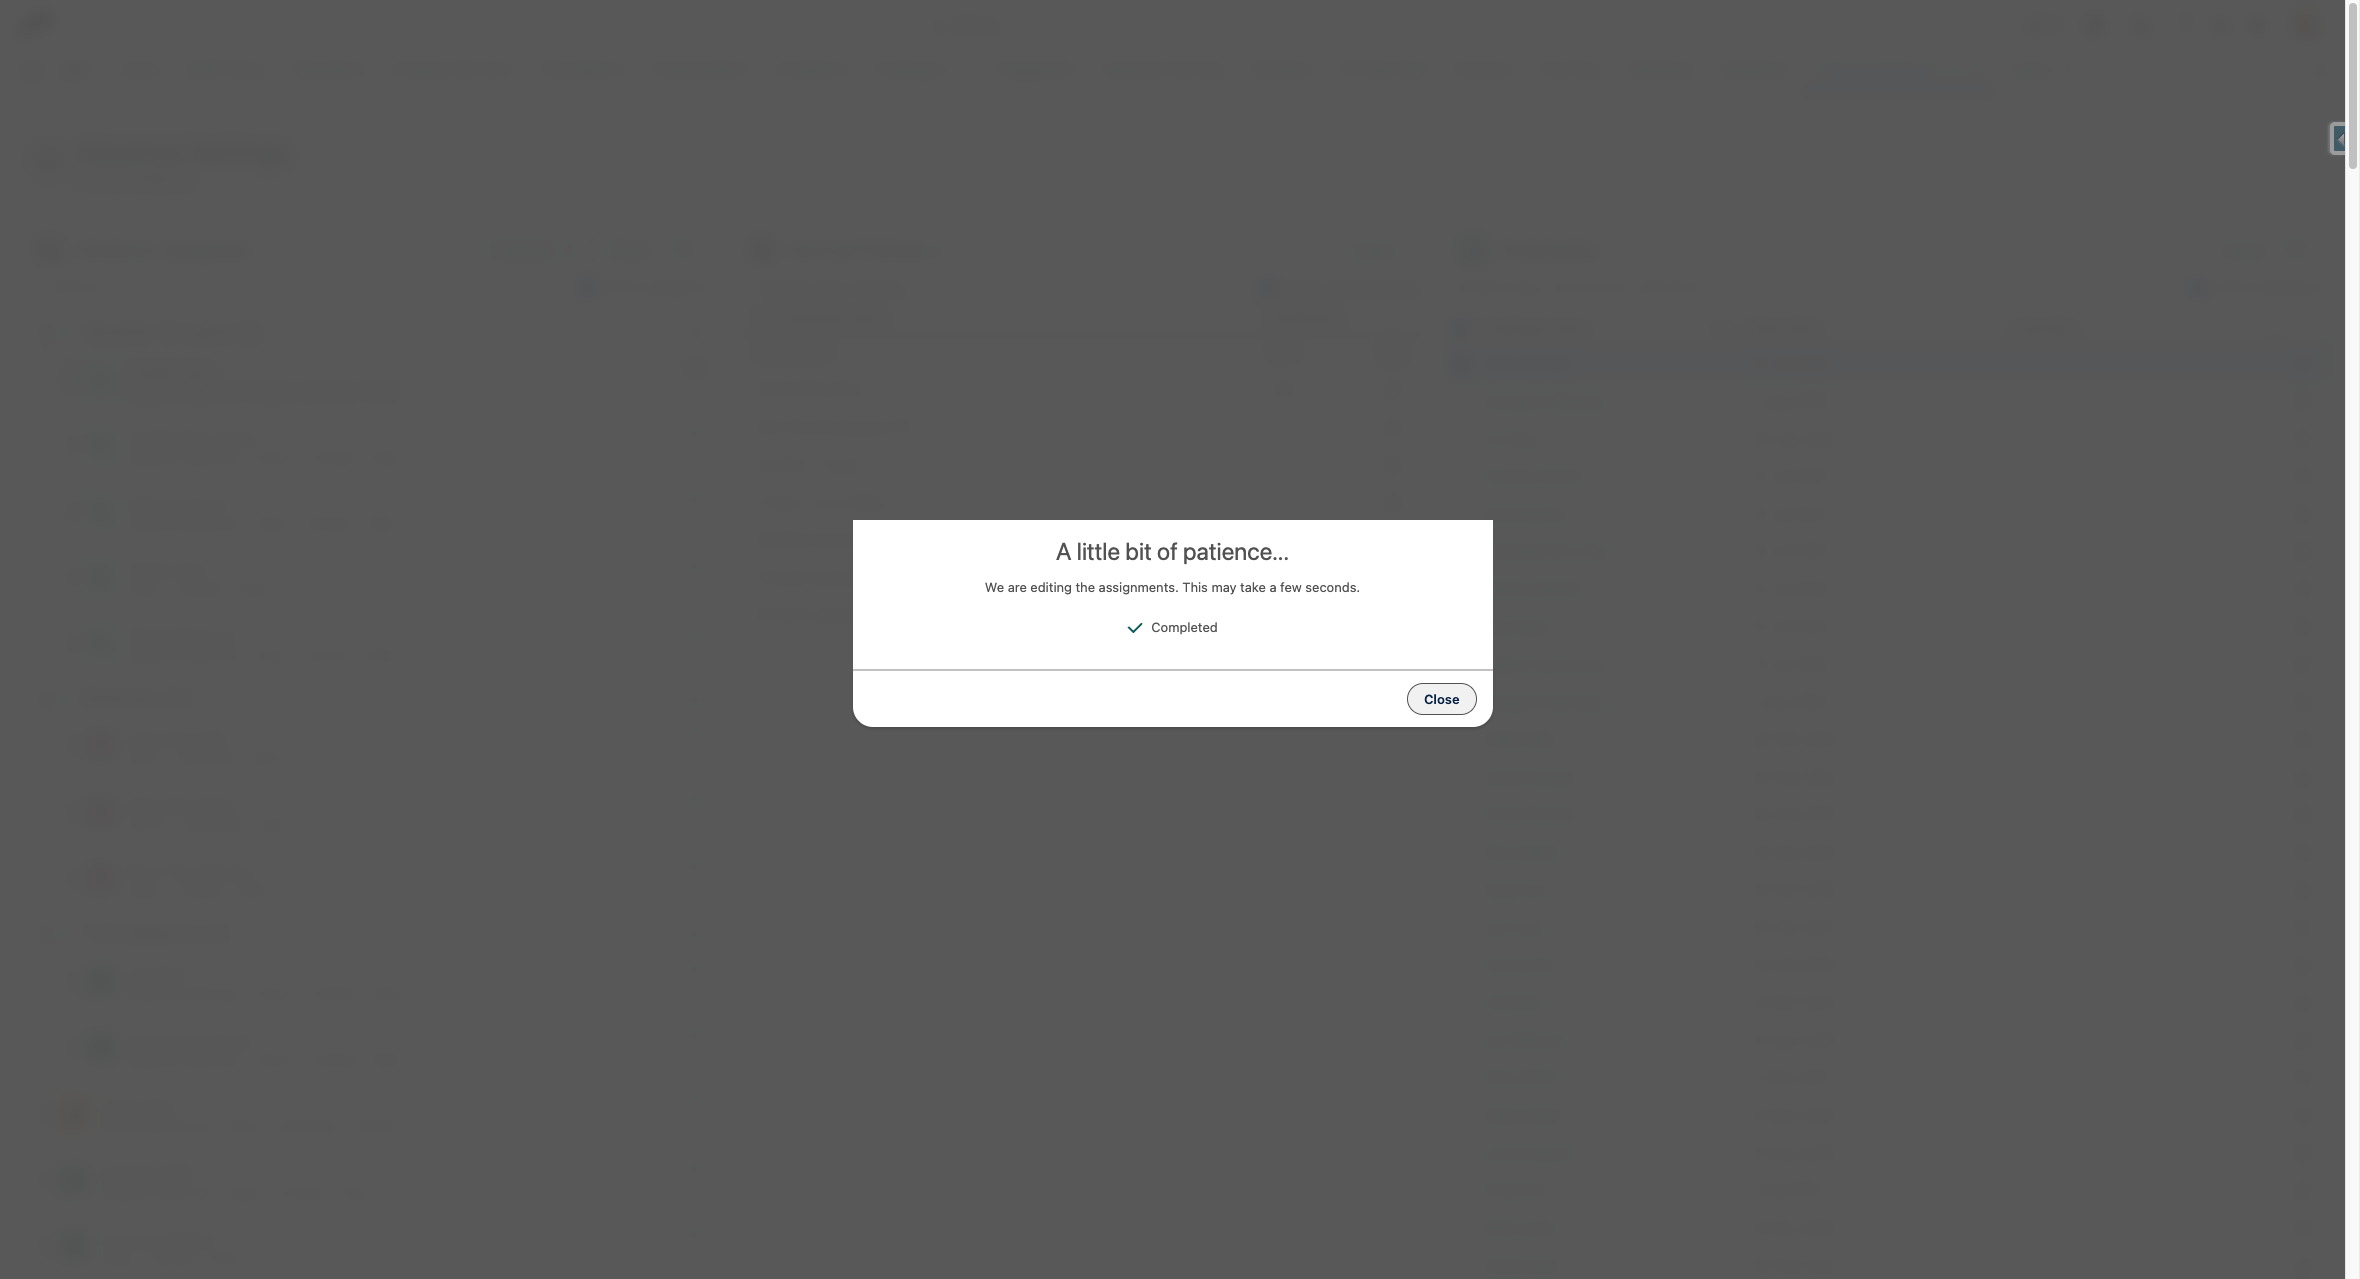
- Records processing will commence by the system.

- Click on Close
Sorting of Absence Allowances
When an employee has multiple absence allowances (e.g., carried-over days from the previous year and new allowances for the current year), flair uses the following logic to determine which allowance is consumed first:
- Allowances without start/end dates are considered first.
- Allowances with defined dates are sorted chronologically (oldest first).
- If two allowances share the same start date, they are ordered by weight (lower weight is consumed first).
For example, if an employee has 5 carried-over days from 2024 (expiring June 30, 2025) and 30 new days for 2025, the carried-over days will be consumed first since they have an earlier start date.
When an absence is booked for a future period, it is reserved from the future allowance. However, as that period approaches, carry-over days from the previous year are used first if they are still available.
Troubleshooting Accrual Policies
If you're experiencing issues with your accrual policies, here are the key areas to review:
Accrual Policy Settings
- End Date: Make sure the policy doesn't have an end date.
- Carry-over Rules: Check that carry-over limits and expiry settings reflect your company policy.
- Negative Policies: Don't use accrual policies with negative values, they can cause issues, especially around year-end, as negative balances don't expire.
Employee Record
- Employment Term: Ensure there's no end date in the employee's record, this can prevent accruals from generating.
- Workload: Verify that the employee has an active workload for the relevant year, as it's essential for calculating accruals.
Public Holidays
- Confirm that public holidays for the year are added either:
- In the Location object, or
- In the Public Holiday Calendar (recommended)
Additional Checks
-
You can view each employee's current allowance by checking their Employee Absence Category.
-
Absence Category Settings – check the following options:
- FTE-based absence deduction enabled?
- Target Hours Deduction
- Deduct by workload target hours
- Ignore until workload target hours
- Do not deduct hours
These settings directly affect how hours are deducted and how accruals behave.
-
If changes were made recently, try triggering a recalculation (e.g. by briefly reassigning the absence policy).
-
Ensure that the correct absence policy is assigned under the employee's absence settings.
Monthly Accrual Policies and Reporting Issues
When using monthly accrual policies, several inconsistencies may appear in reports, leading to confusing and incorrect representations of available, used, and carried-over days. The issue stems from how monthly and yearly accrual policies are handled in the reporting system.
Identified Issues
-
Incorrect Numbers for "Accrued" and "Carry Over":
- Reports display incorrect values for accrued and carried-over days, e.g., showing "2 days accrued" when the actual number should be higher.
- There's a lack of clear separation between monthly and yearly policies.
-
Confusion Around "Used Days" and "Available Days":
- Reports show values that do not align with the monthly policy.
- "Used Days" appears to refer to an entire year, even when the policy is set to monthly.
-
Incompatibility Between Monthly Accruals and Yearly Reporting:
- Reports are structured for yearly tracking and do not accurately reflect monthly accrual policies.
- This causes confusion and makes it difficult to understand how allowances are calculated.
Recommendations
Potential Temporary Solutions:
- Communicate to customers that reports may not display accurate data when monthly accrual policies are used.
- Consider removing the affected report components for monthly policies to reduce confusion.
Long-Term Fixes:
- Introduce the ability to configure reporting to reflect either monthly or yearly accrual structures.
- Allow better customization options to align reporting outputs with different policy types.
If everything looks correct and the issue persists, don't hesitate to reach out to support@flair.hr – we're happy to help!
Adjusting Accrual Policies
In some cases, you may need to make direct adjustments to accrual policies that cannot be done through the standard interface. This requires temporarily disabling triggers using Flair Migration Settings.
Issue
- Accrual policies need adjustments.
- Salesforce Inspector Reloaded does not support direct adjustments.
- Disabling triggers (via Flair Migration Settings) is a required step, which leads to the Salesforce Inspector Reloaded supporting direct adjustments.
Solution
Check Custom Settings
-
Navigate to Setup in Salesforce.
-
Search for Custom Settings in the Quick Find bar.
-
Locate the relevant setting Flair Migration Settings.
-
Click Manage next to it.
-
Click New:
Use Salesforce Inspector Reloaded
-
Open Salesforce Inspector Reloaded.
-
Edit the accrual policy fields.
Enable the Triggers Again
-
Navigate back to the Setup.
-
Locate the relevant setting Flair Migration Settings.
-
Delete the value that disabled the triggers.
Configure Maternity and Parental Leave Absence Policies
In addition to standard vacation policies, you can create specialized accrual policies for maternity and parental leave. These policies allow you to define specific allowances and rules for employees taking parental leave.
Creating the Absence Category
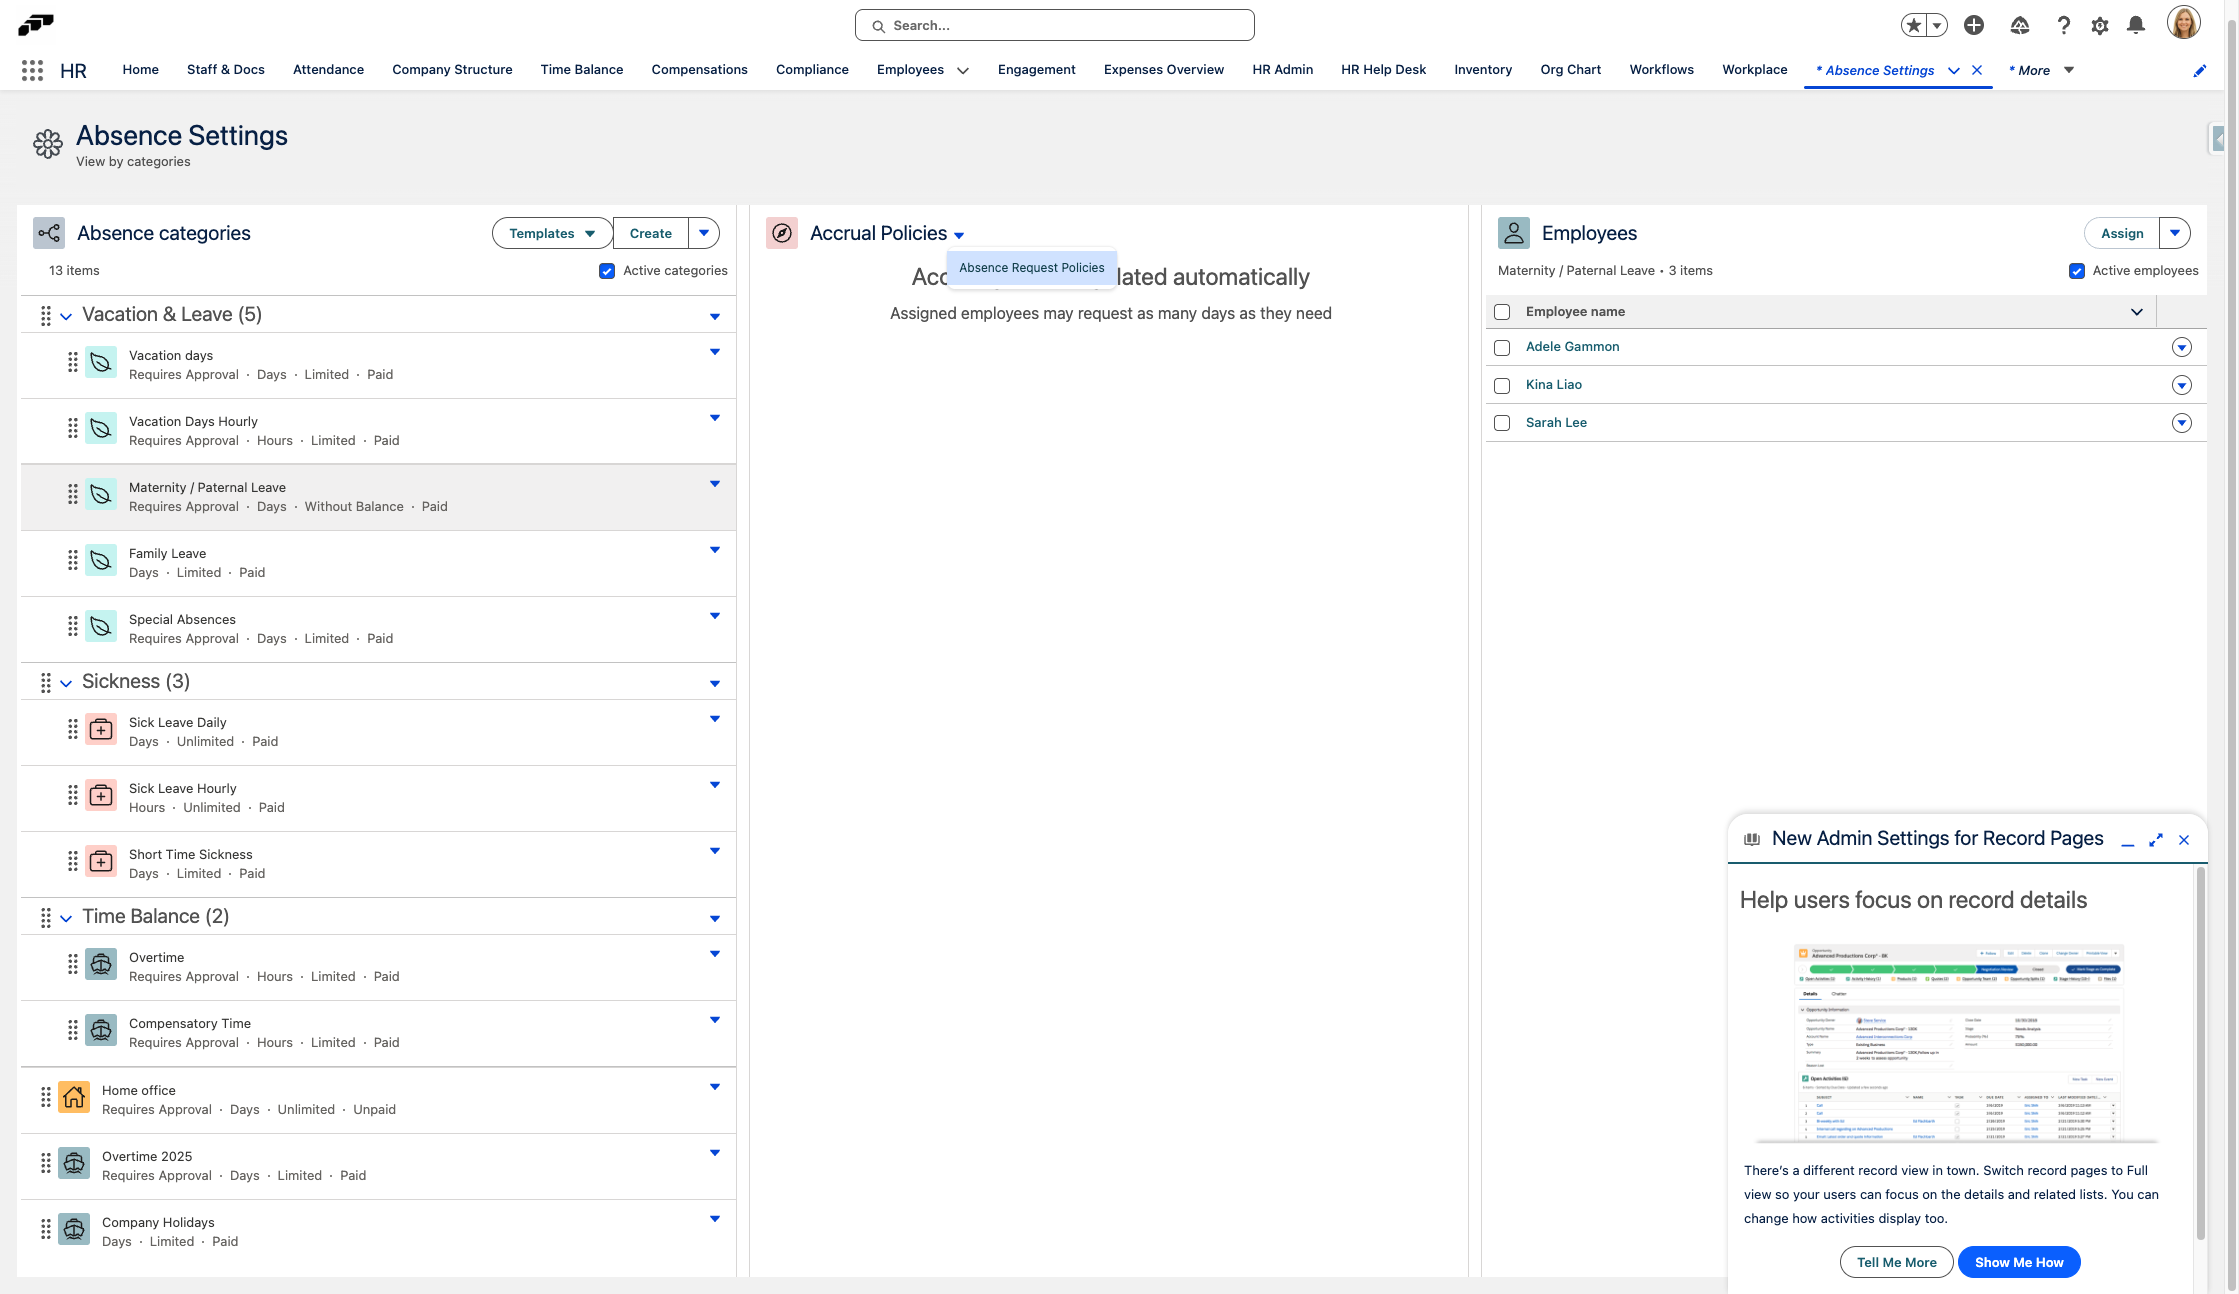
- Click on App Launcher

- Click on Absence Settings
- To add an absence category, either make a new one or click on an existing one.
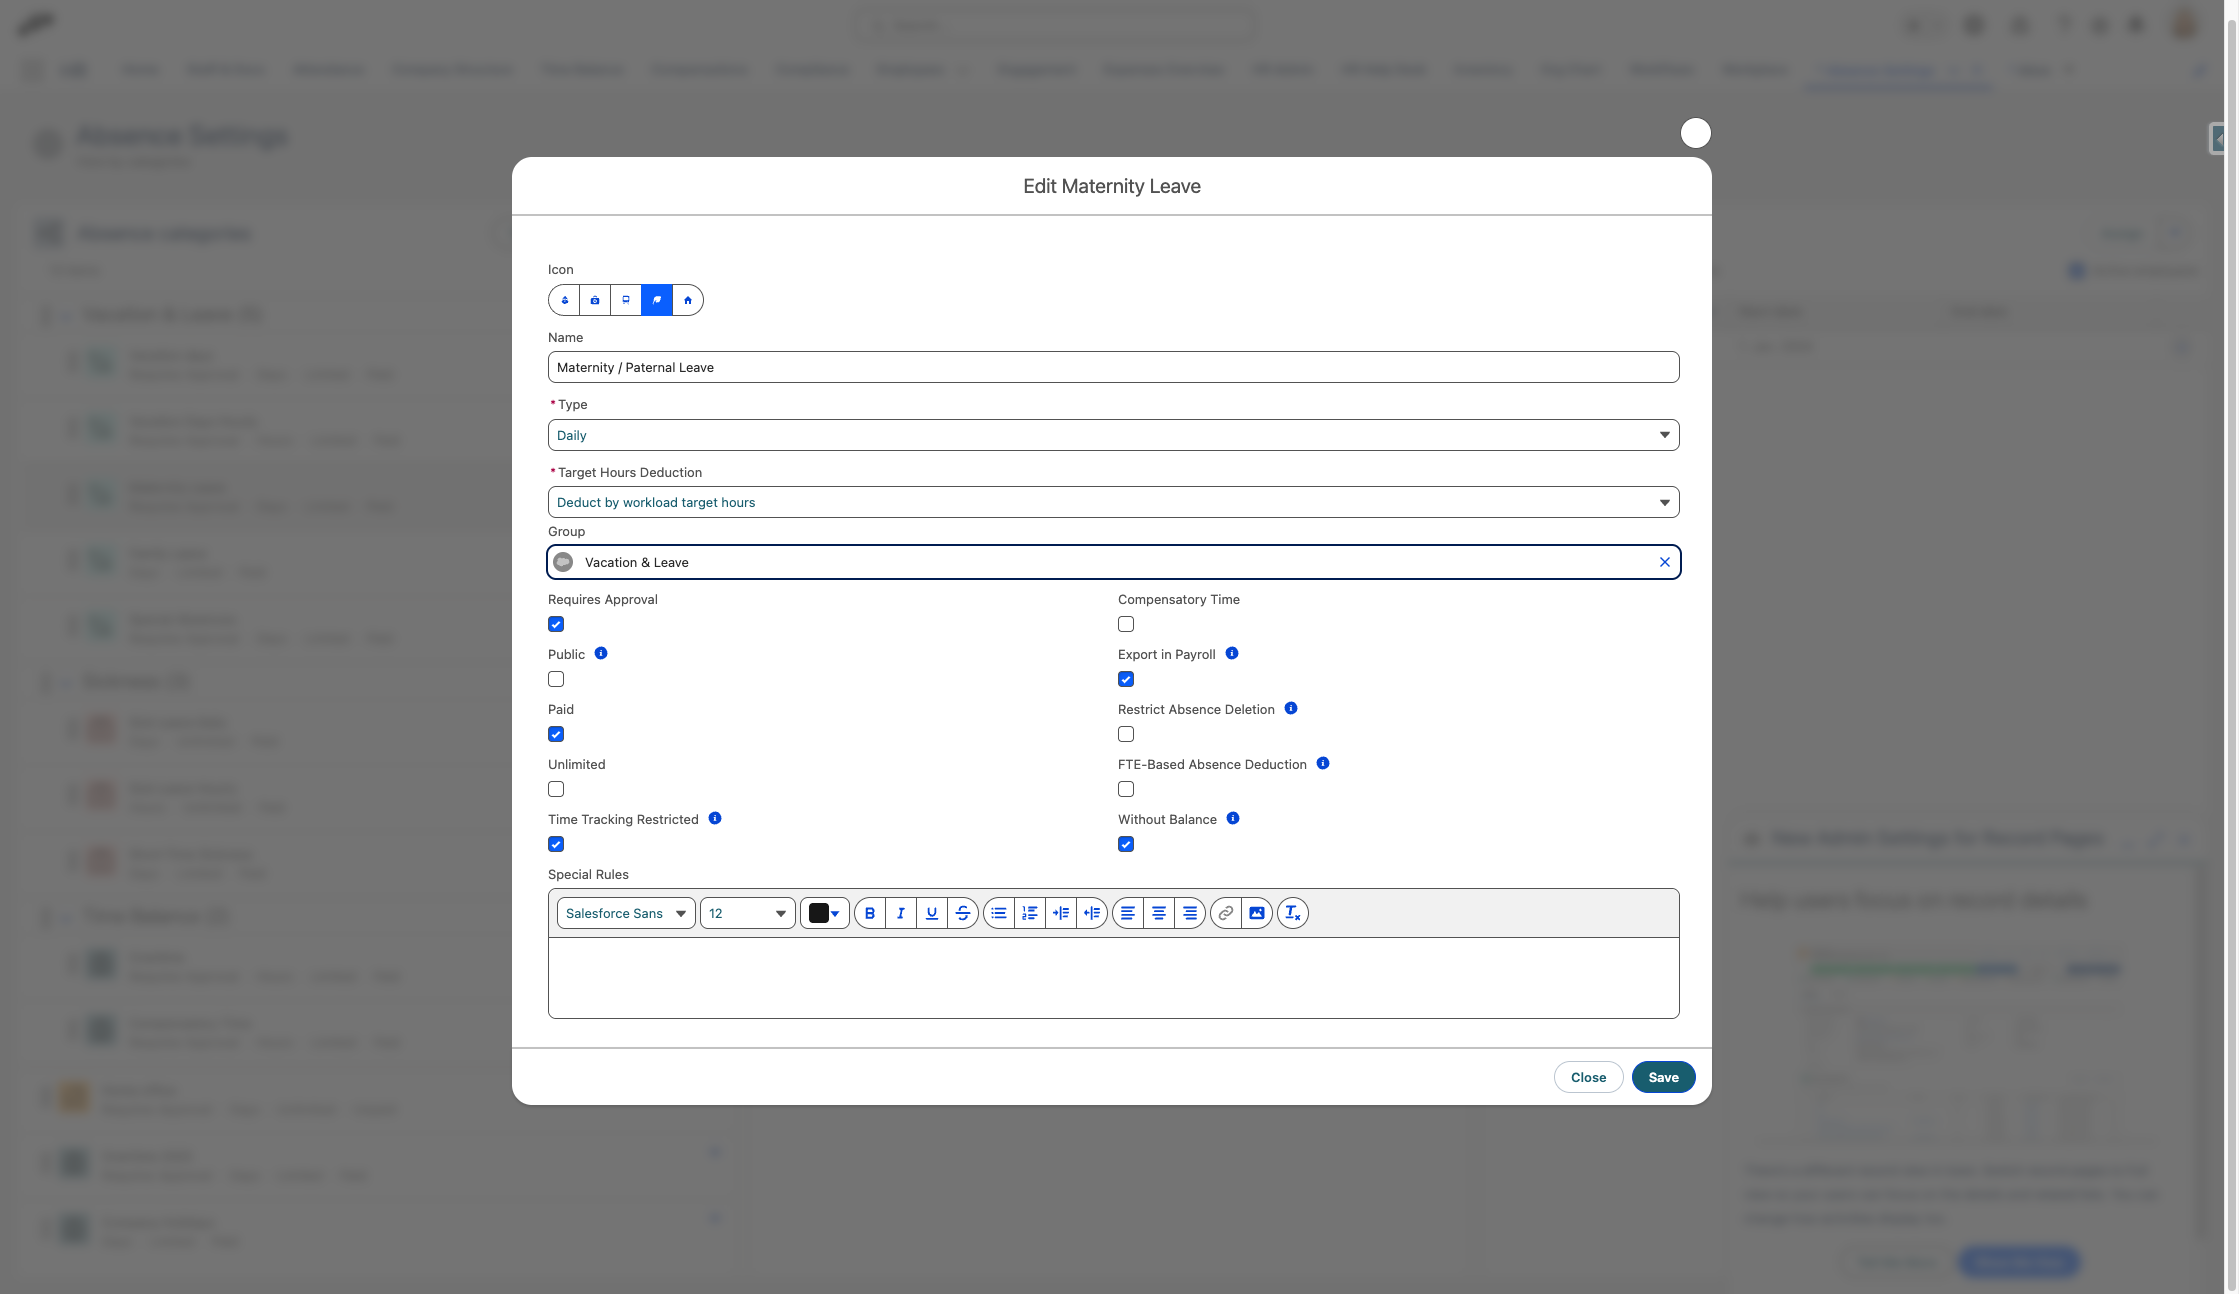
- Name your category "Maternity / Paternal Leave" or something similar.
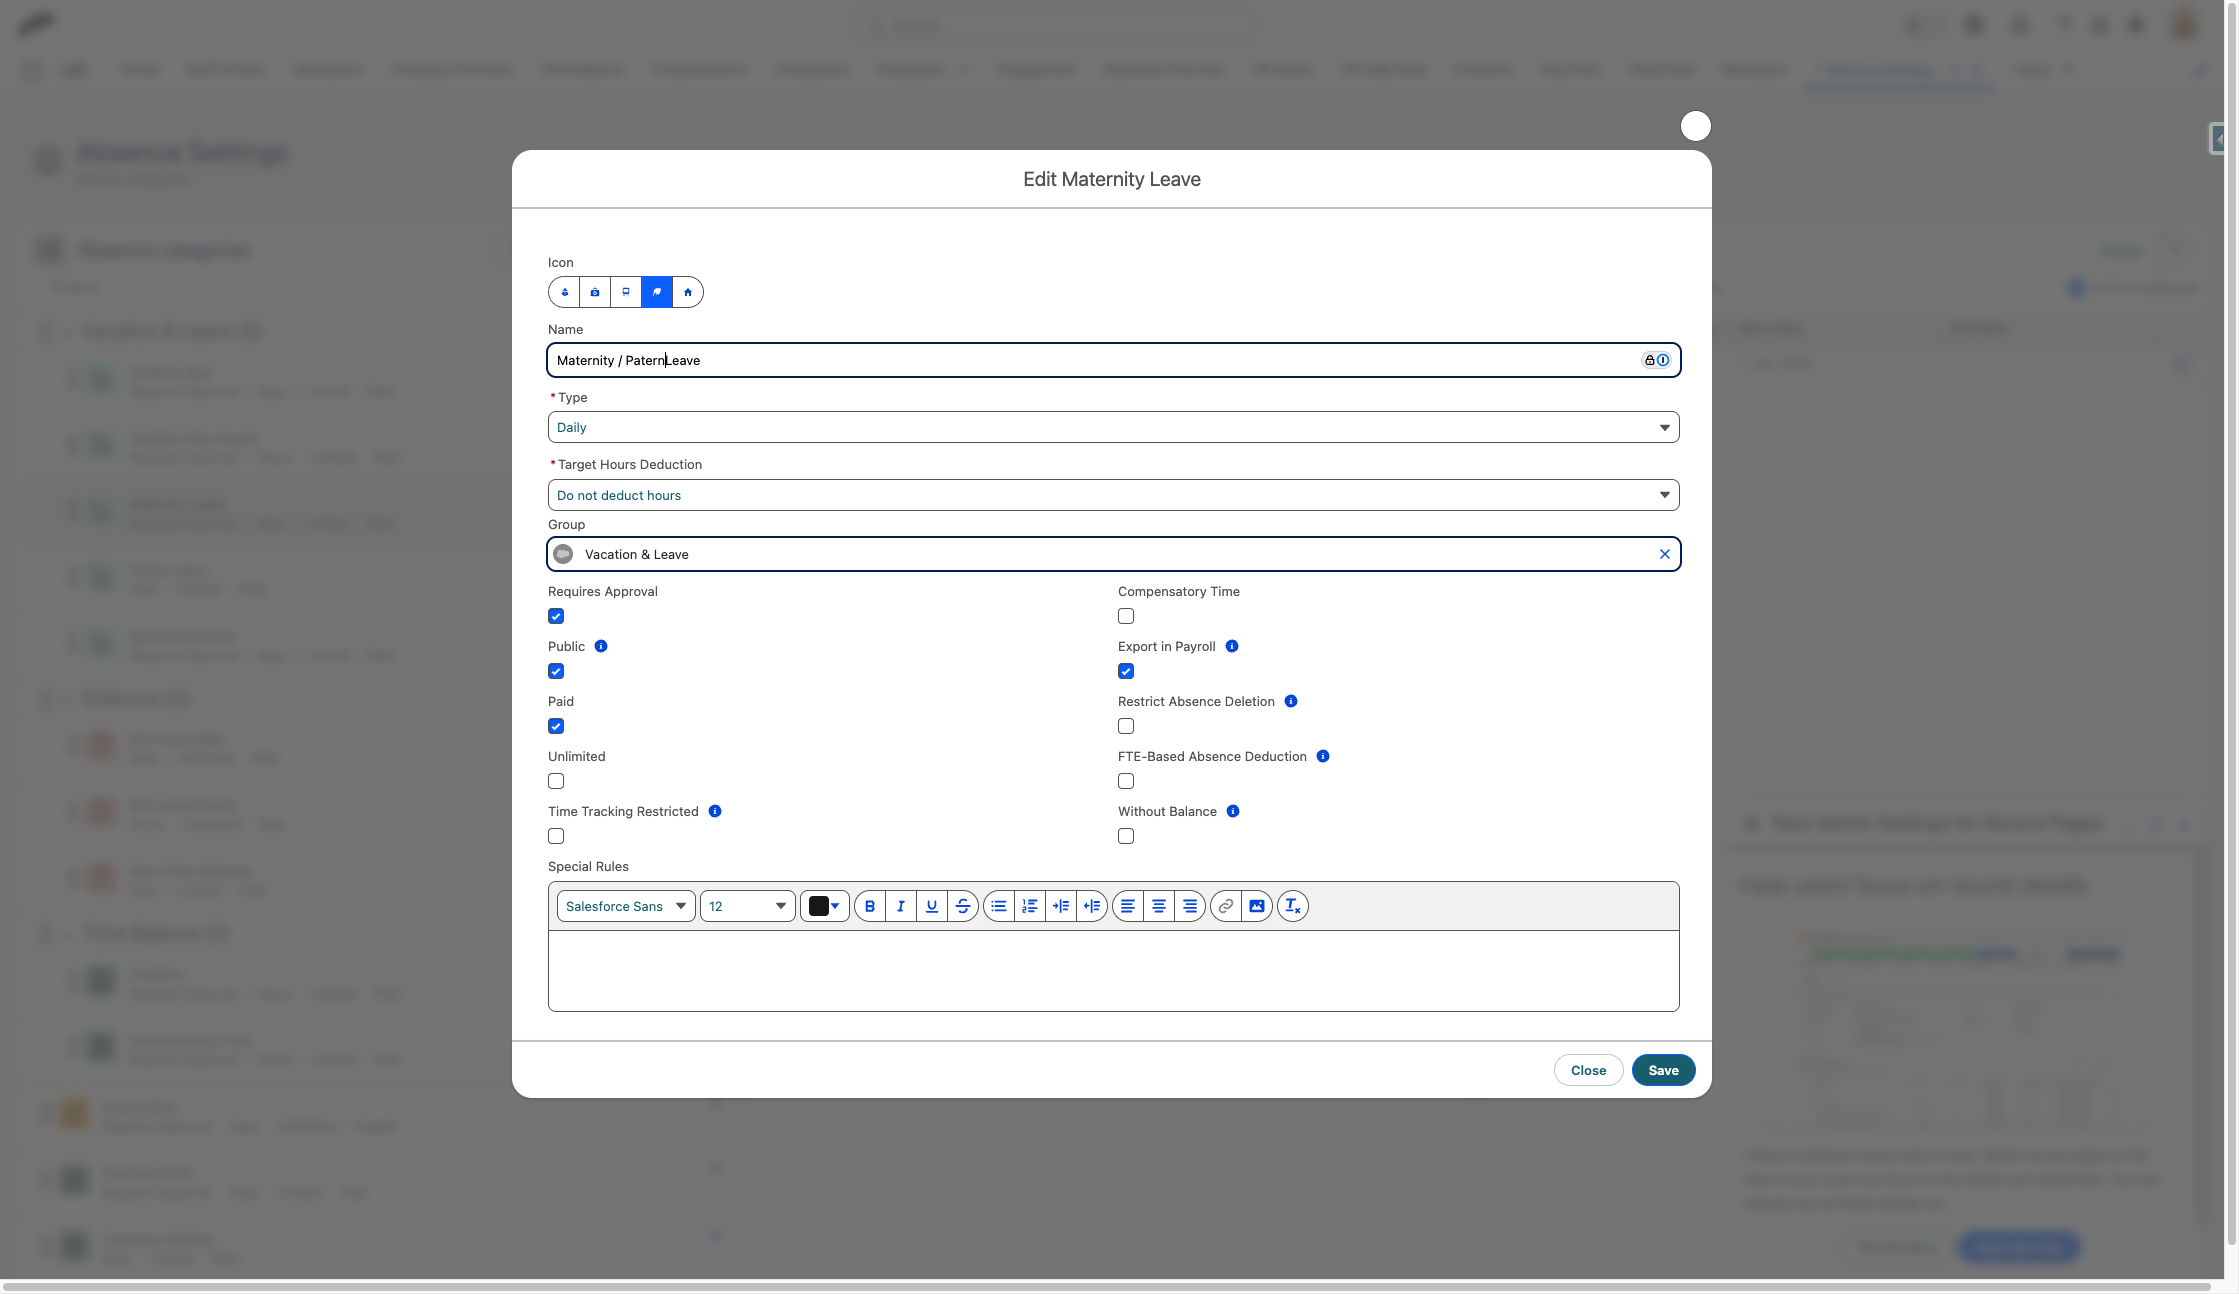
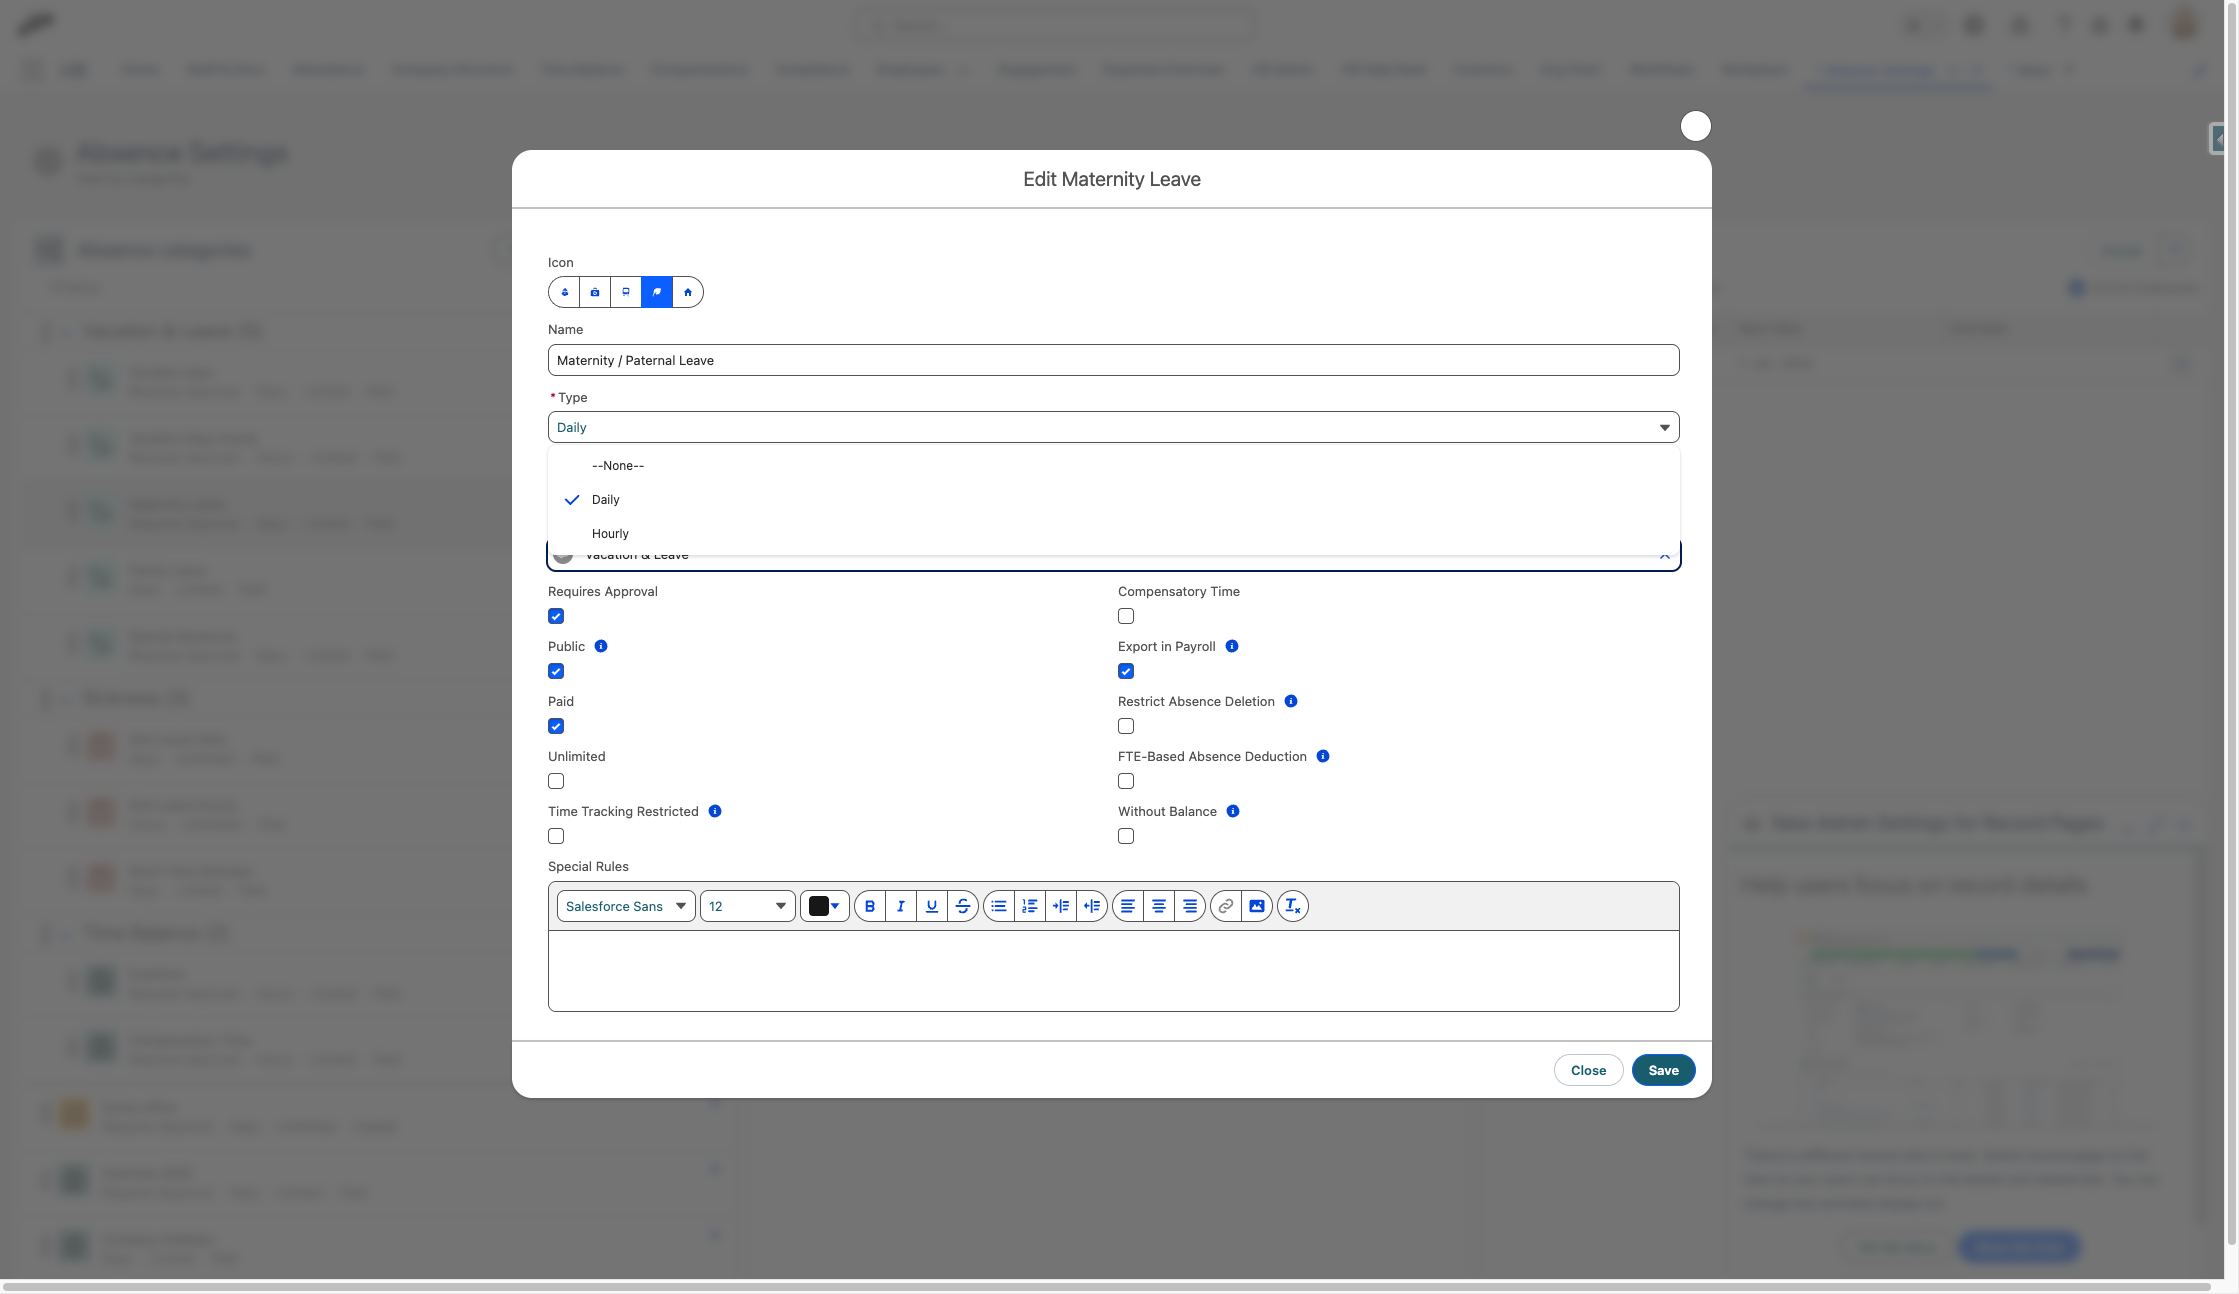
- Click on Daily in the Type field.
- Click on Deduct by workload target hours
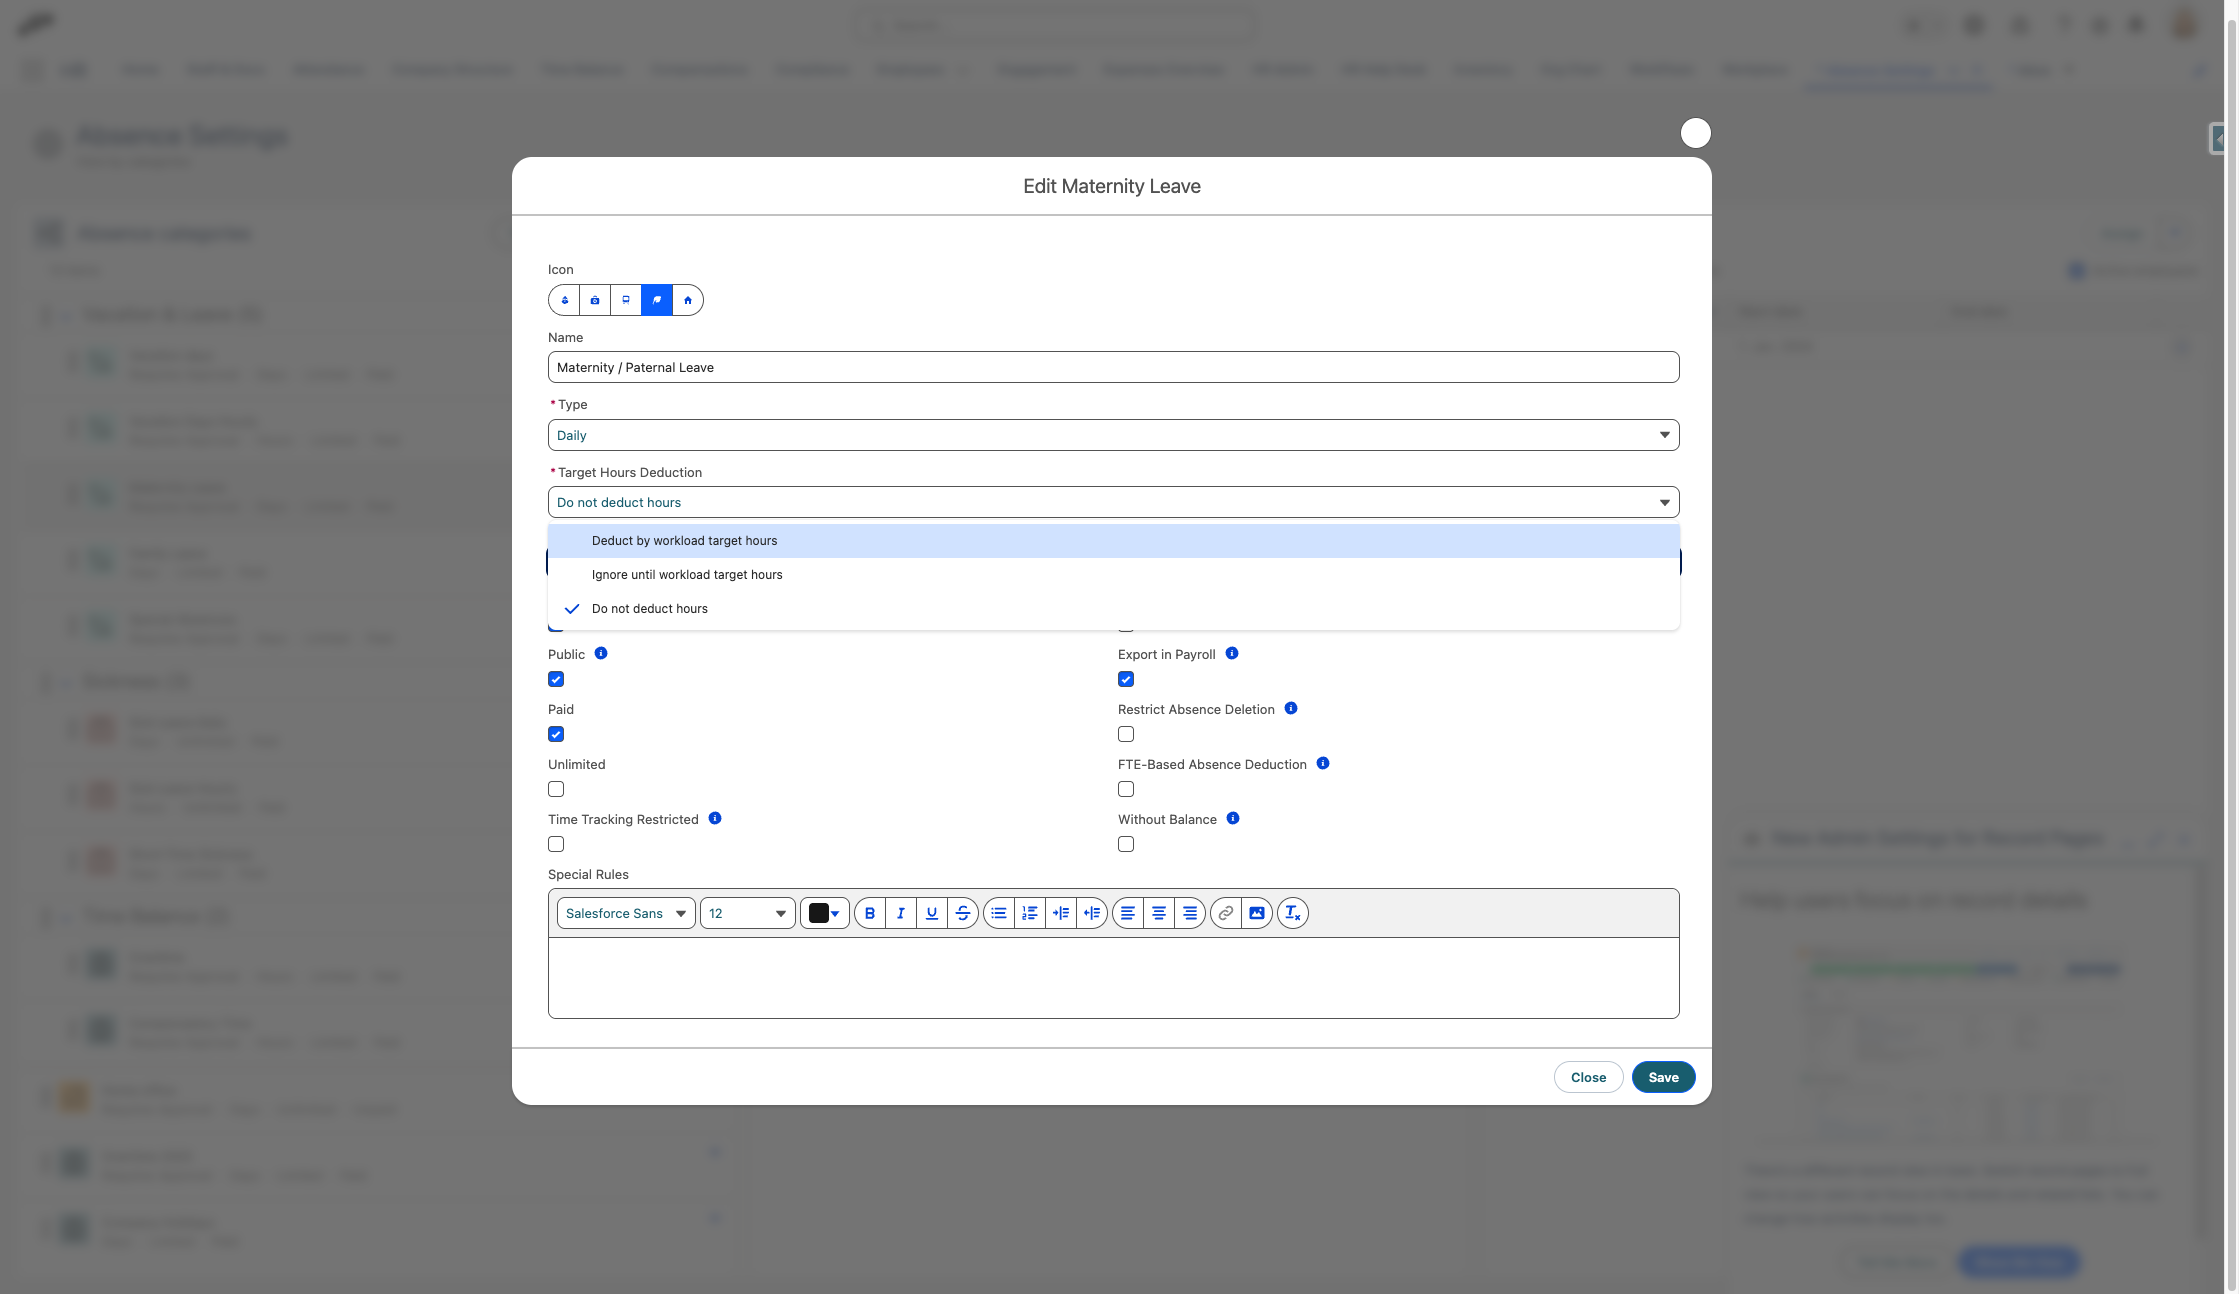
- Assess the regulations you want to implement in your category

- Click on Save
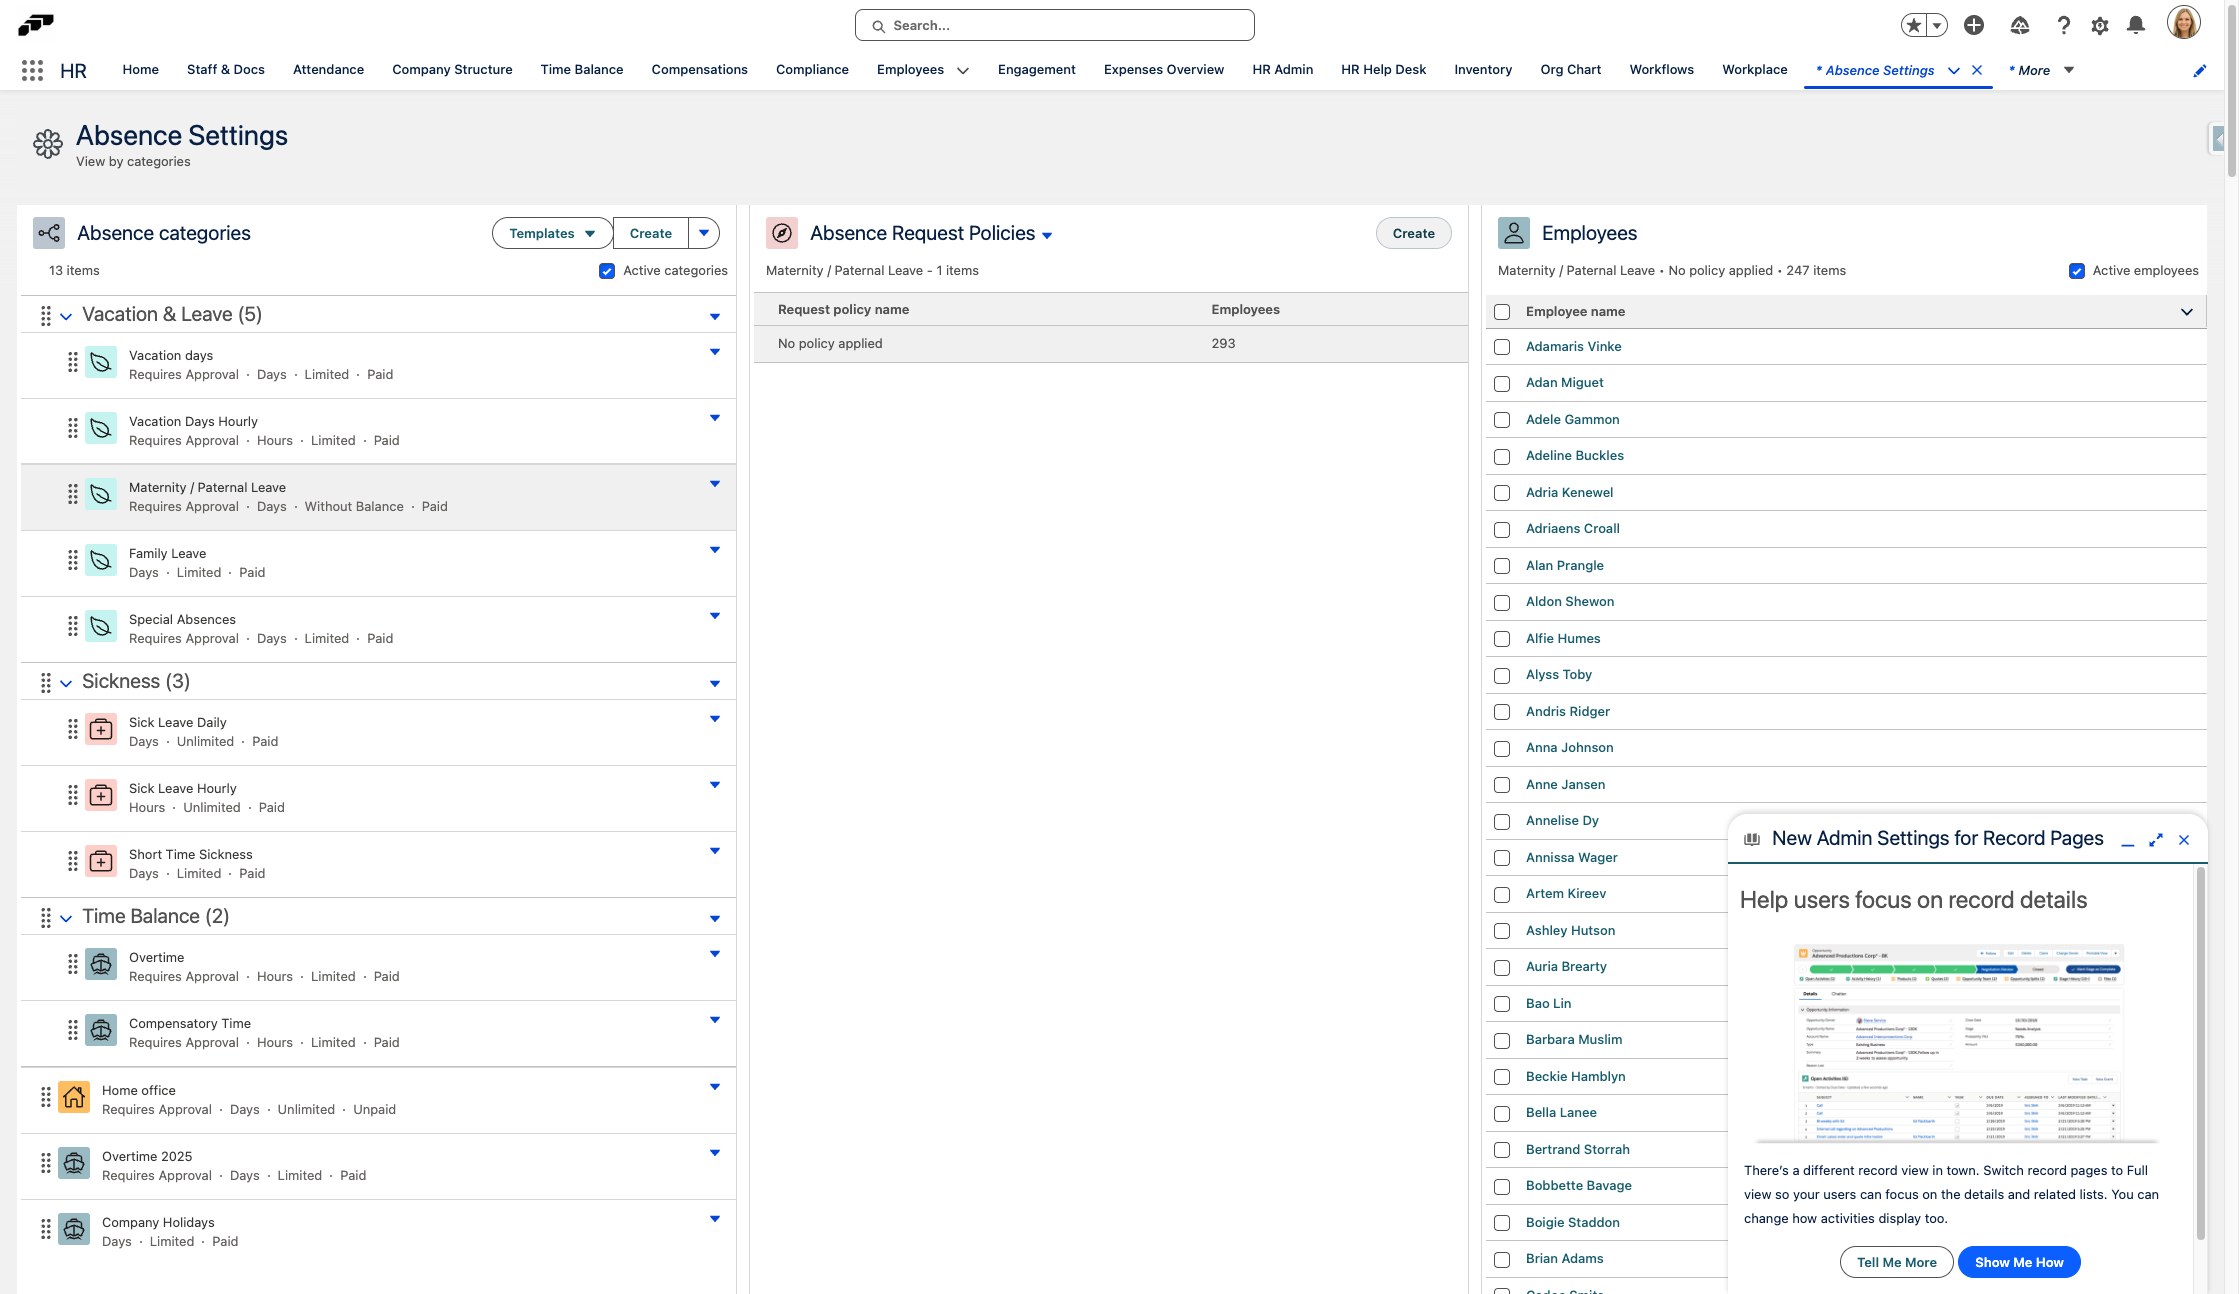
Setting Up Absence Request Policies
- Click on the drop down menu next to Accrual Policies.

- Click on Absence Request Policies
- Click on Create
- Name this policy "Maternity Leave" or something similar.
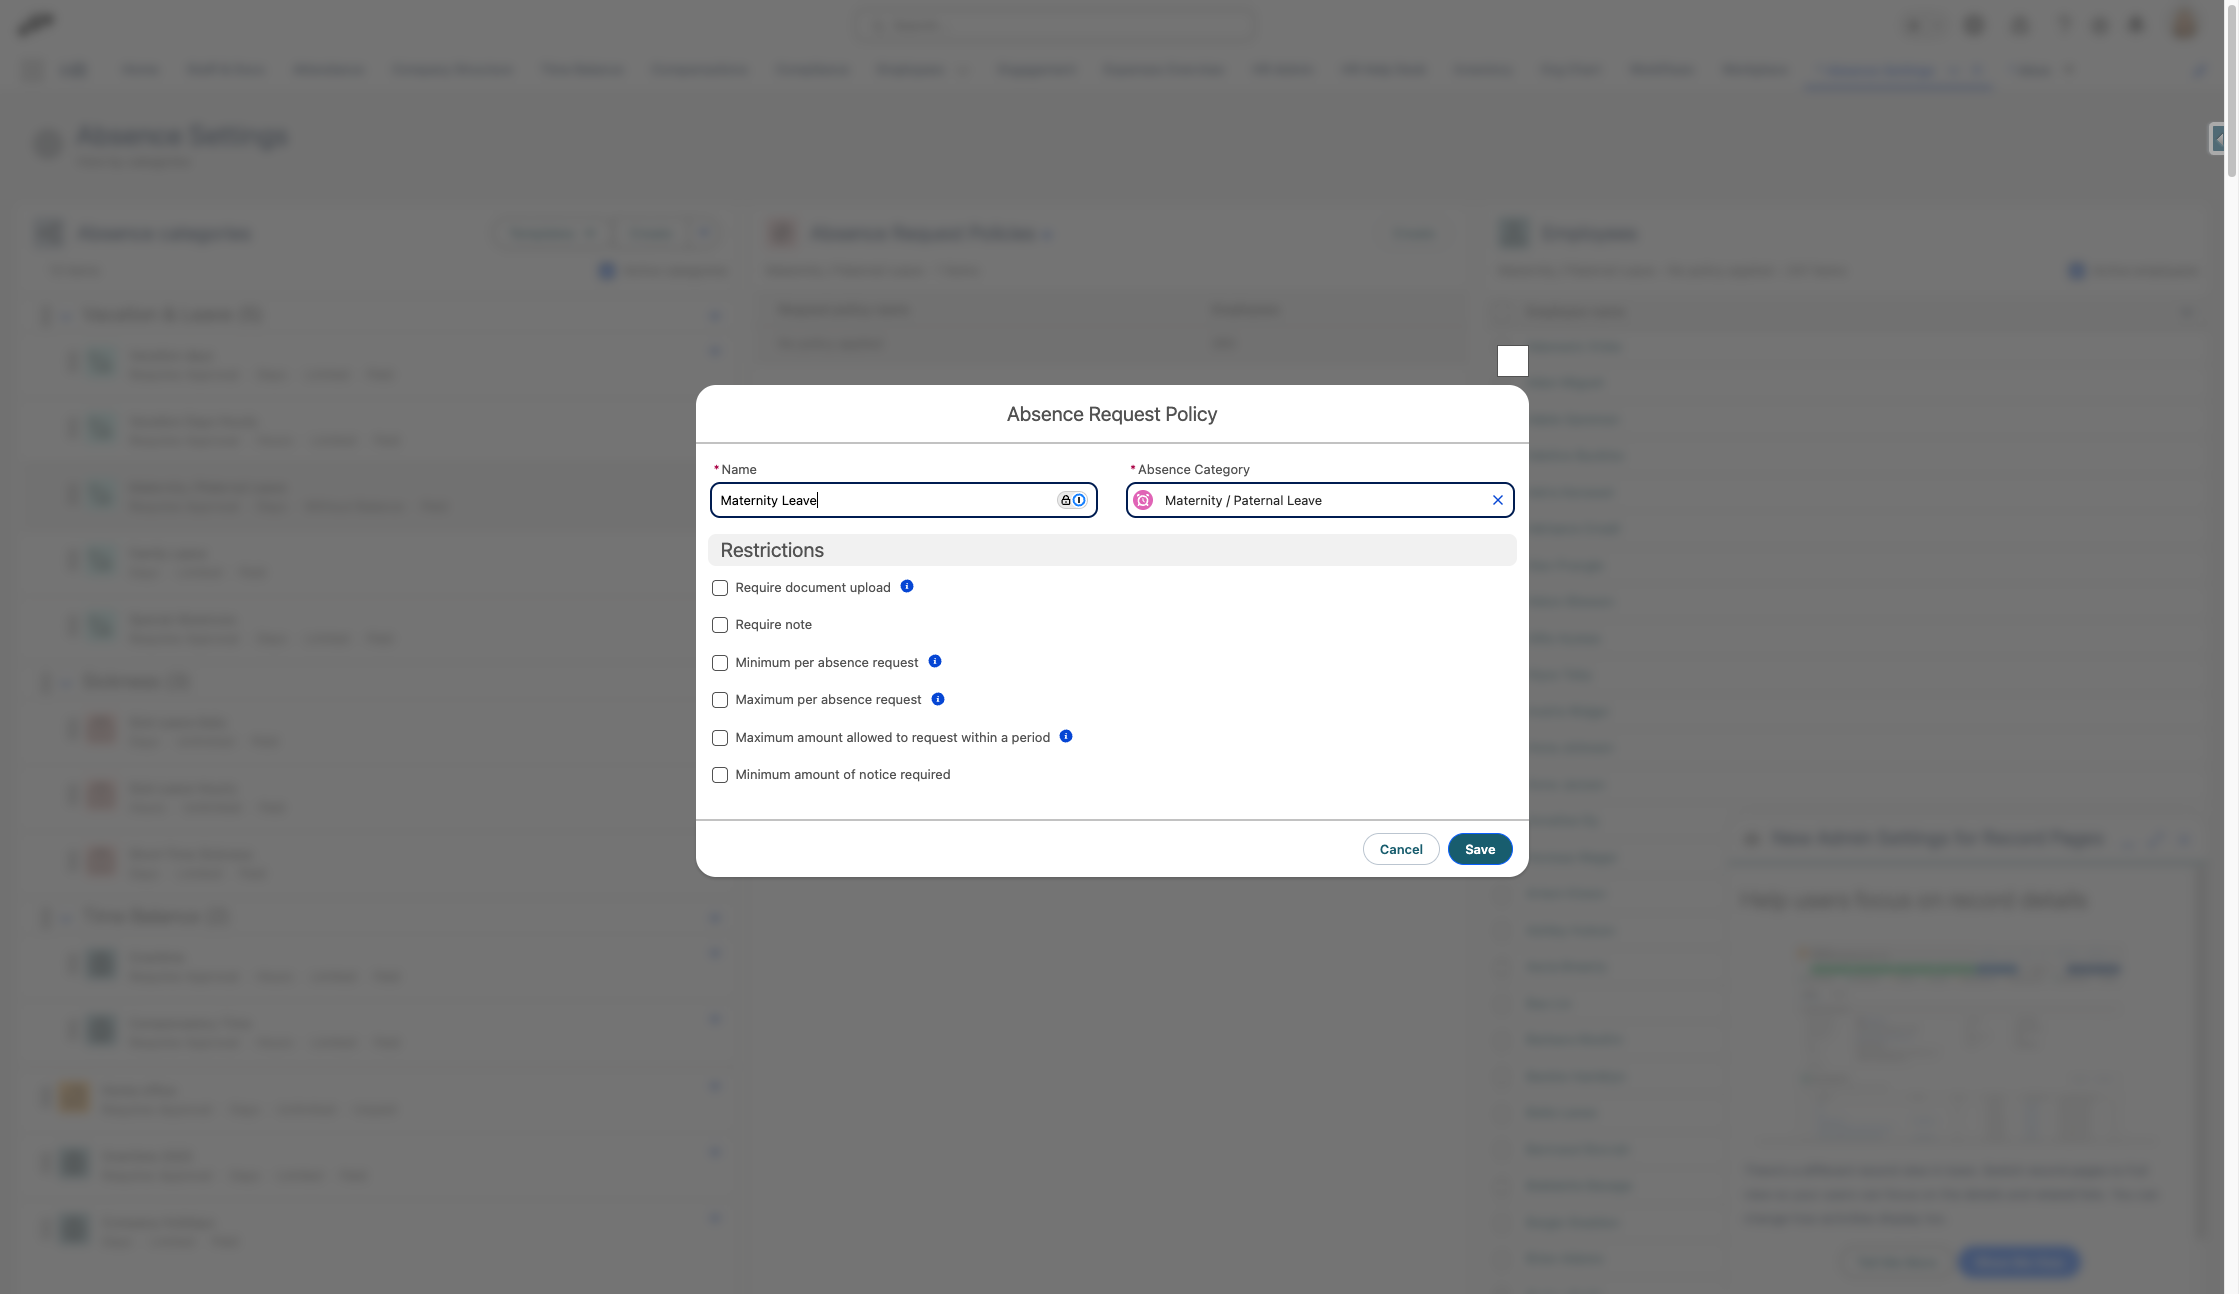
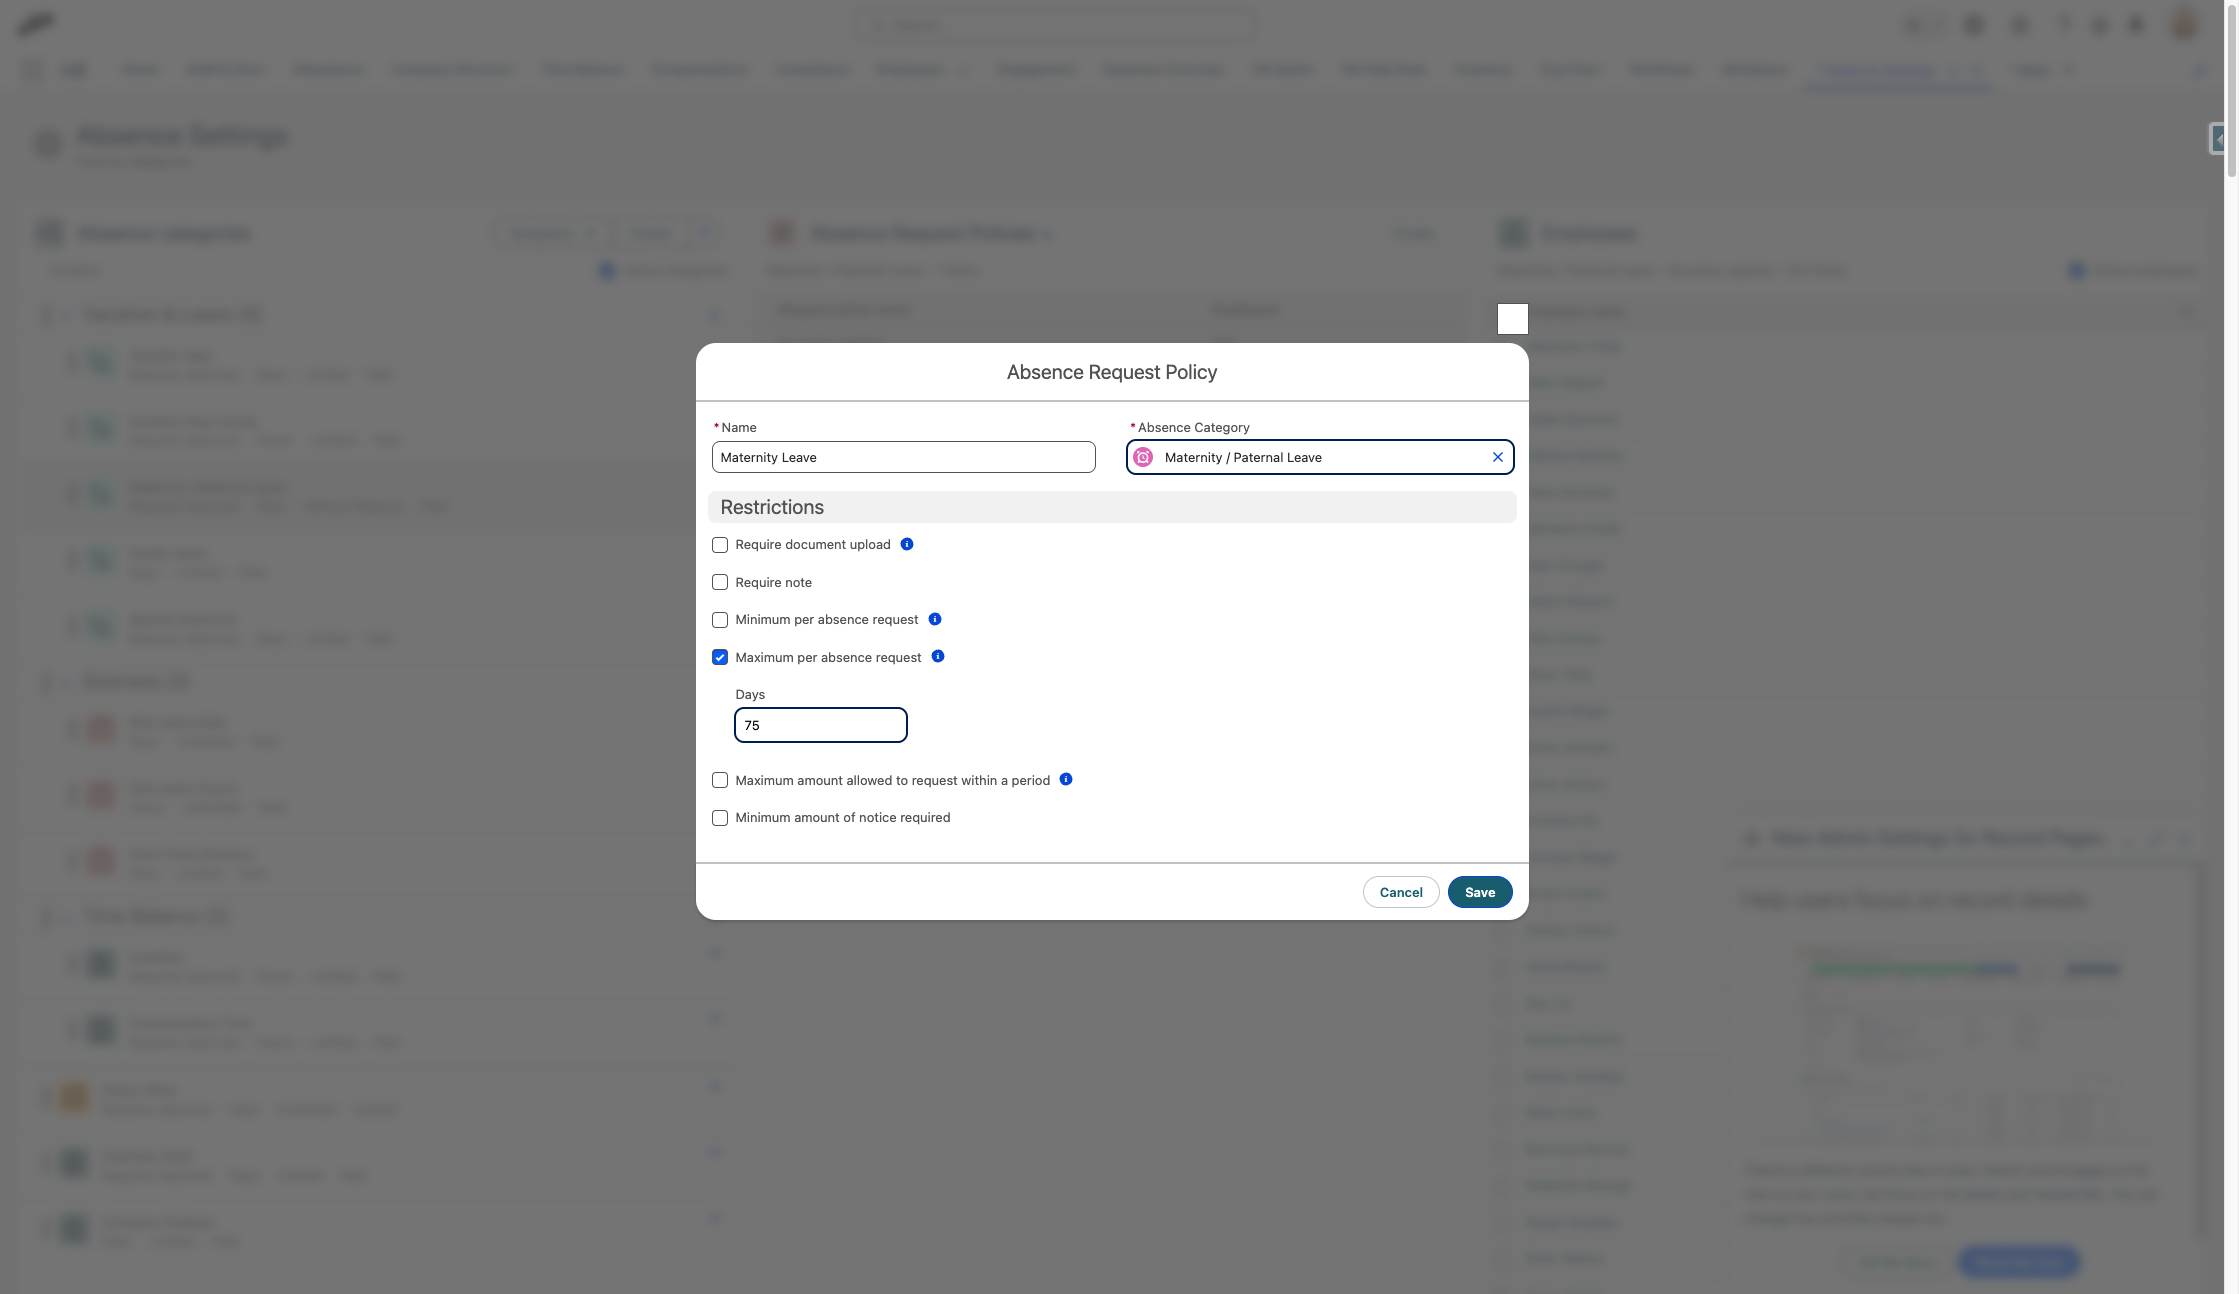
- Check Maximum per absence request

- Enter the number of days you want to give for maternity leave.
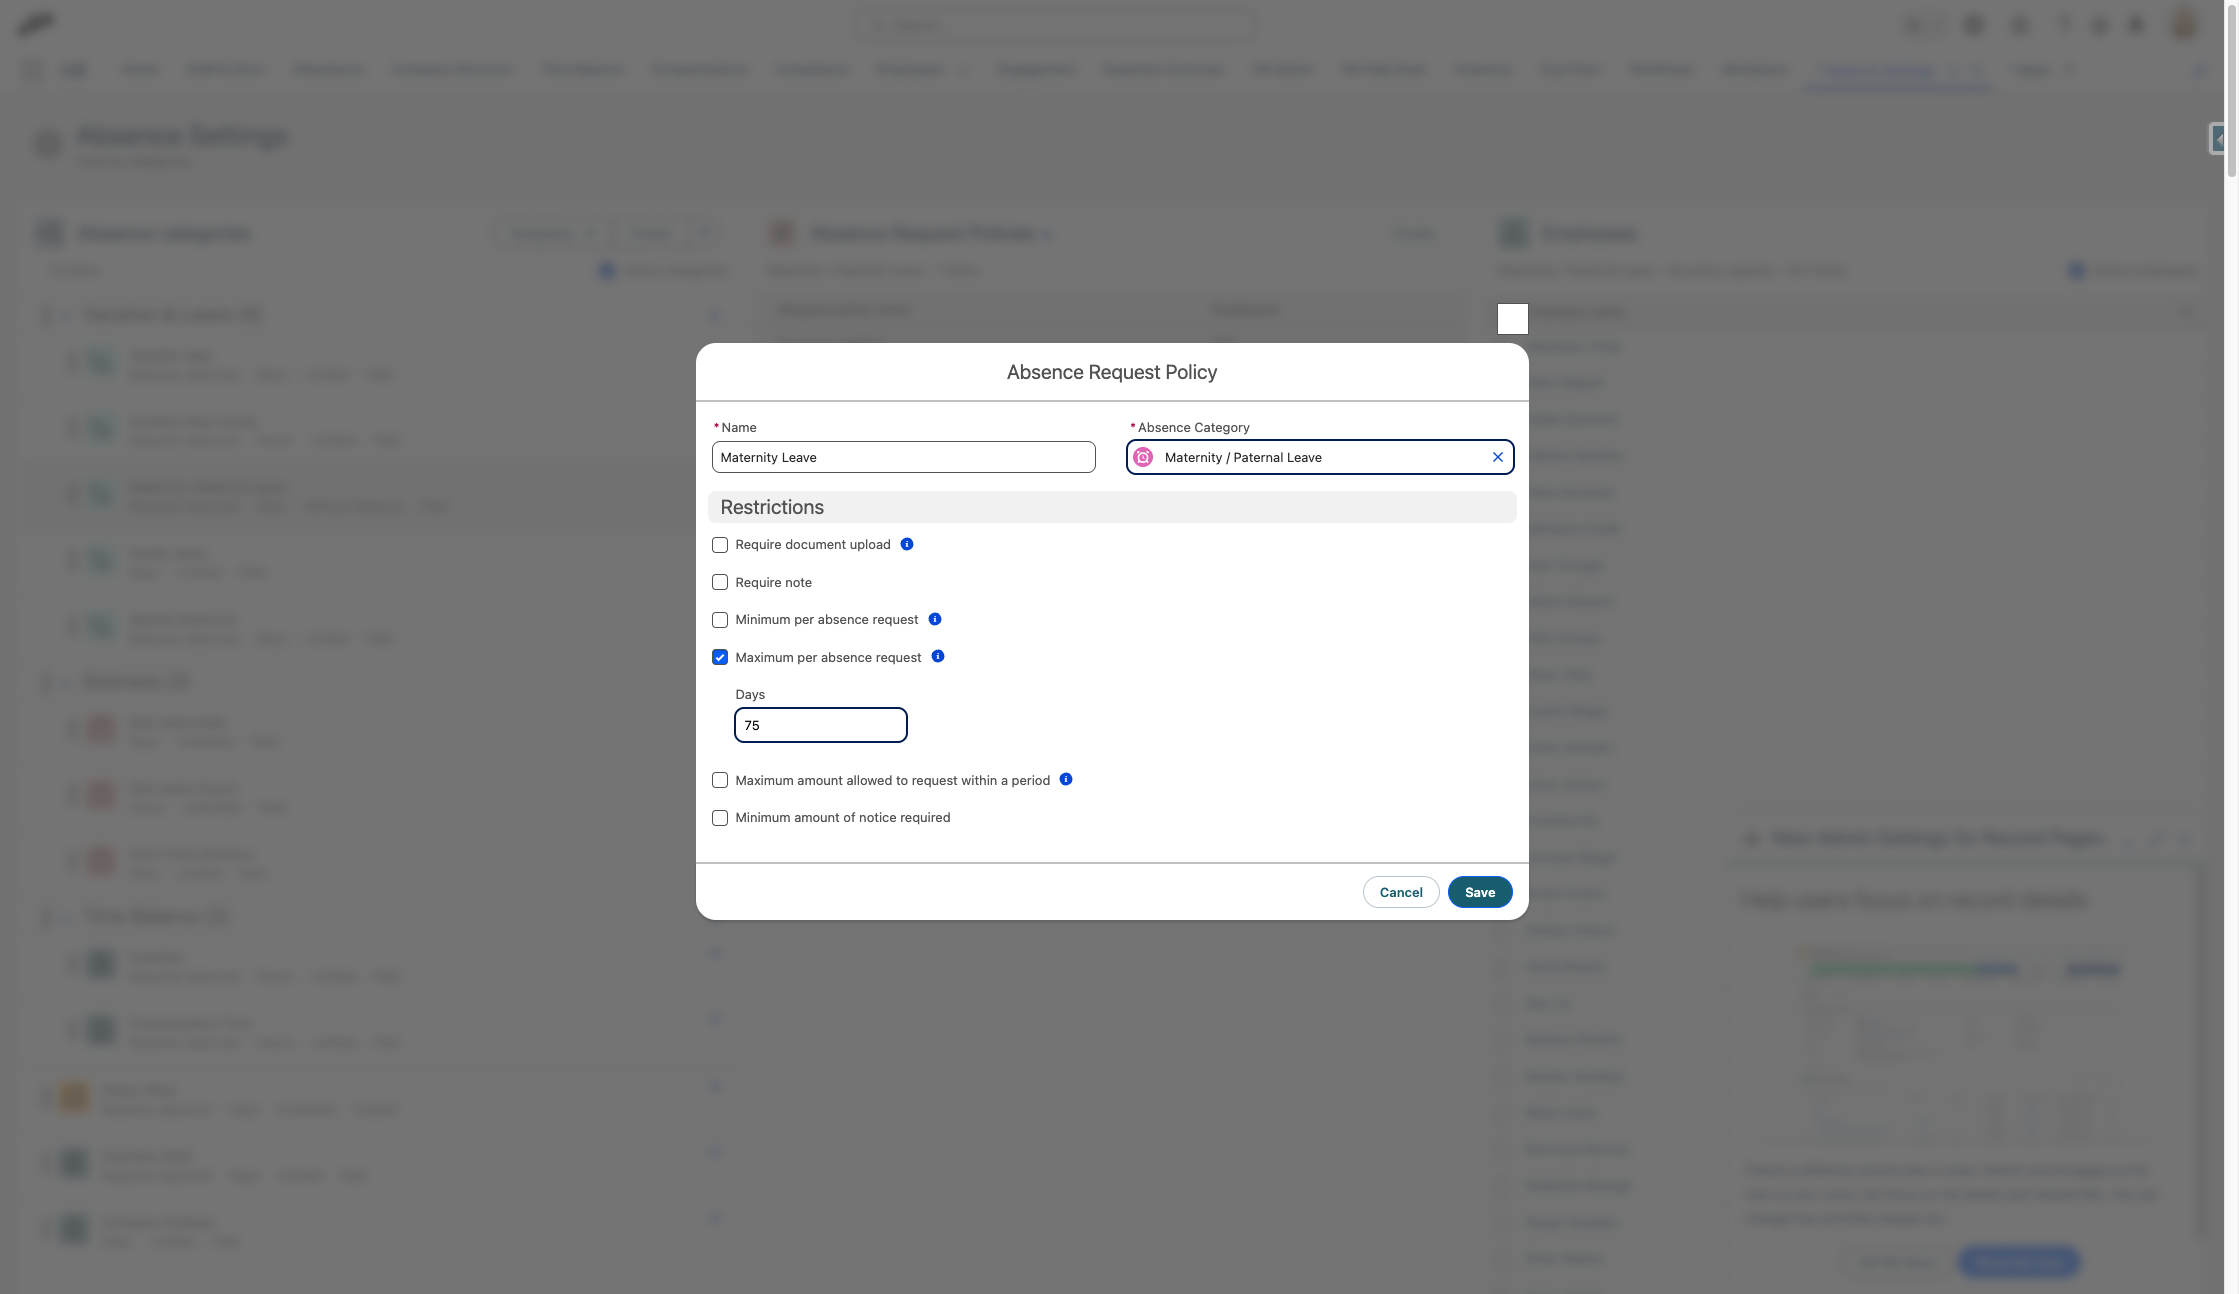
- Click on Save
Assigning Policies to Employees
Follow the same process you would use for any other accrual policy:
- Click on the policy name (e.g., "Maternity Leave")
- Click on Assign
- Click on Select Employees
- Select the employees to whom you wish to apply this policy and click Add
- Click on Assign to x-employees
You can repeat this process to create a separate policy for parental leave with different allowances and rules as needed.