Absence Policies & Setup
This guide covers everything you need to set up absence management in flair, from creating absence categories to configuring accrual policies and public holidays.
How To Set Up Absence Processes
From your flair HR Homepage on Salesforce, click on the HR Admin page. From there, go to Attendance > Absence Categories and Policies.
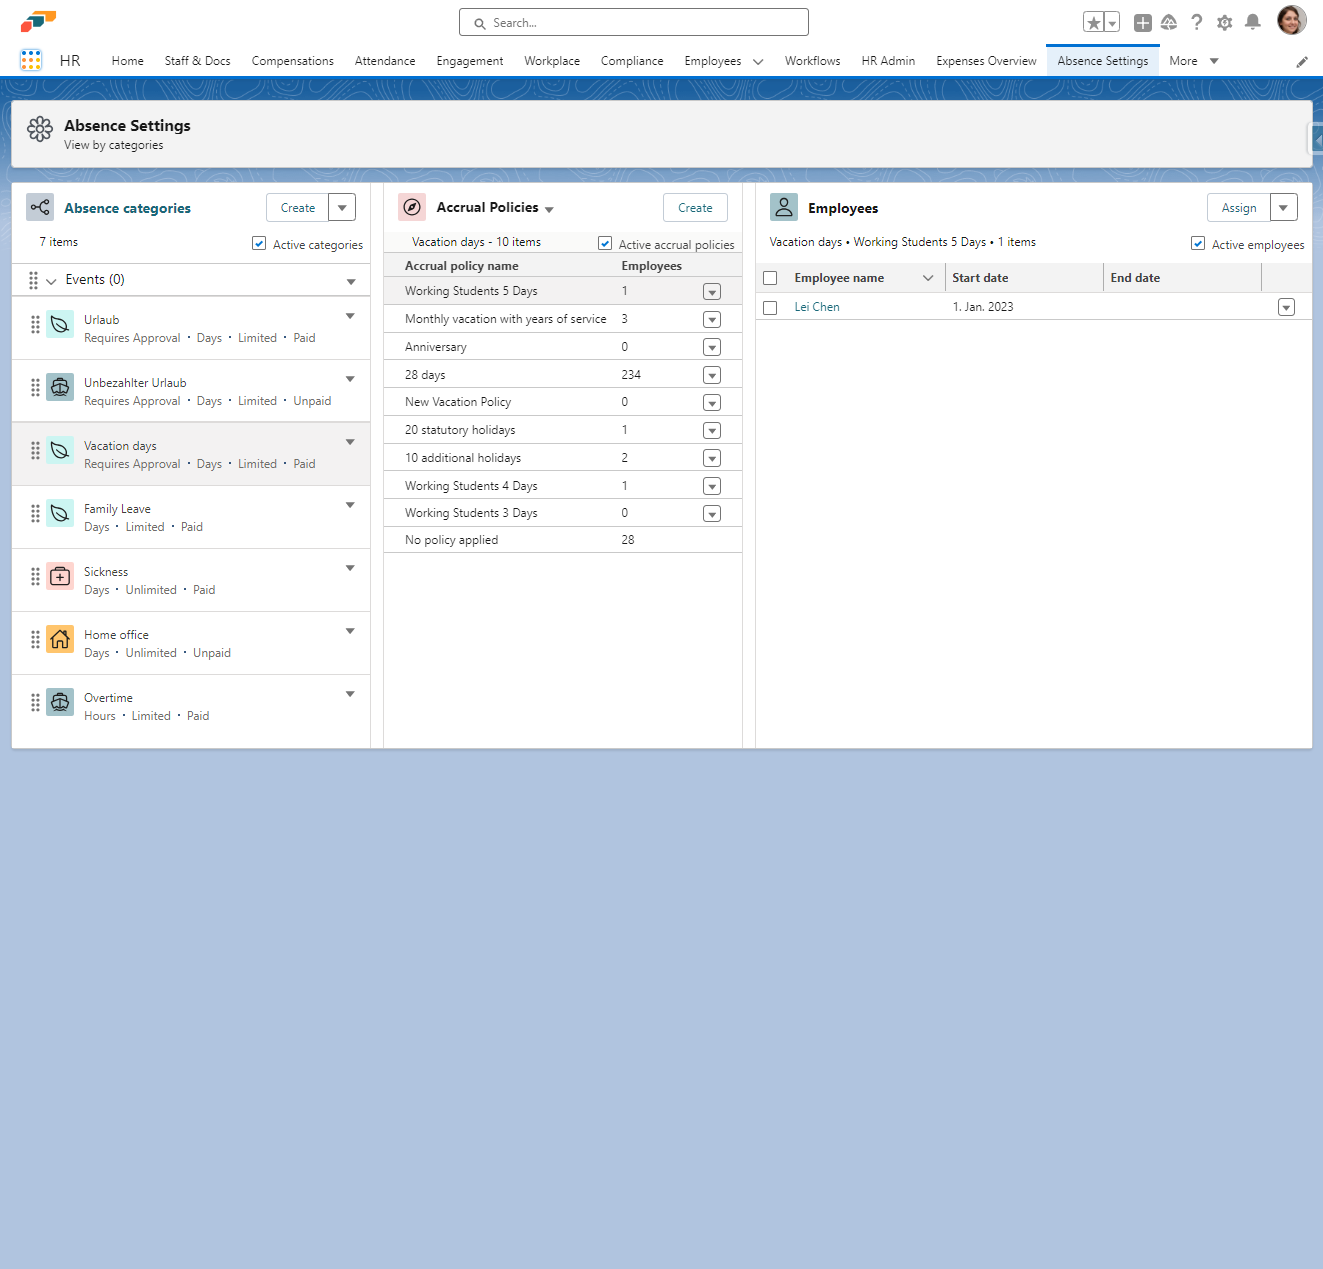
Here you will notice a simple three-panel screen, which displays your absence options in a Kanban board view. Let's walk through the options available to you.
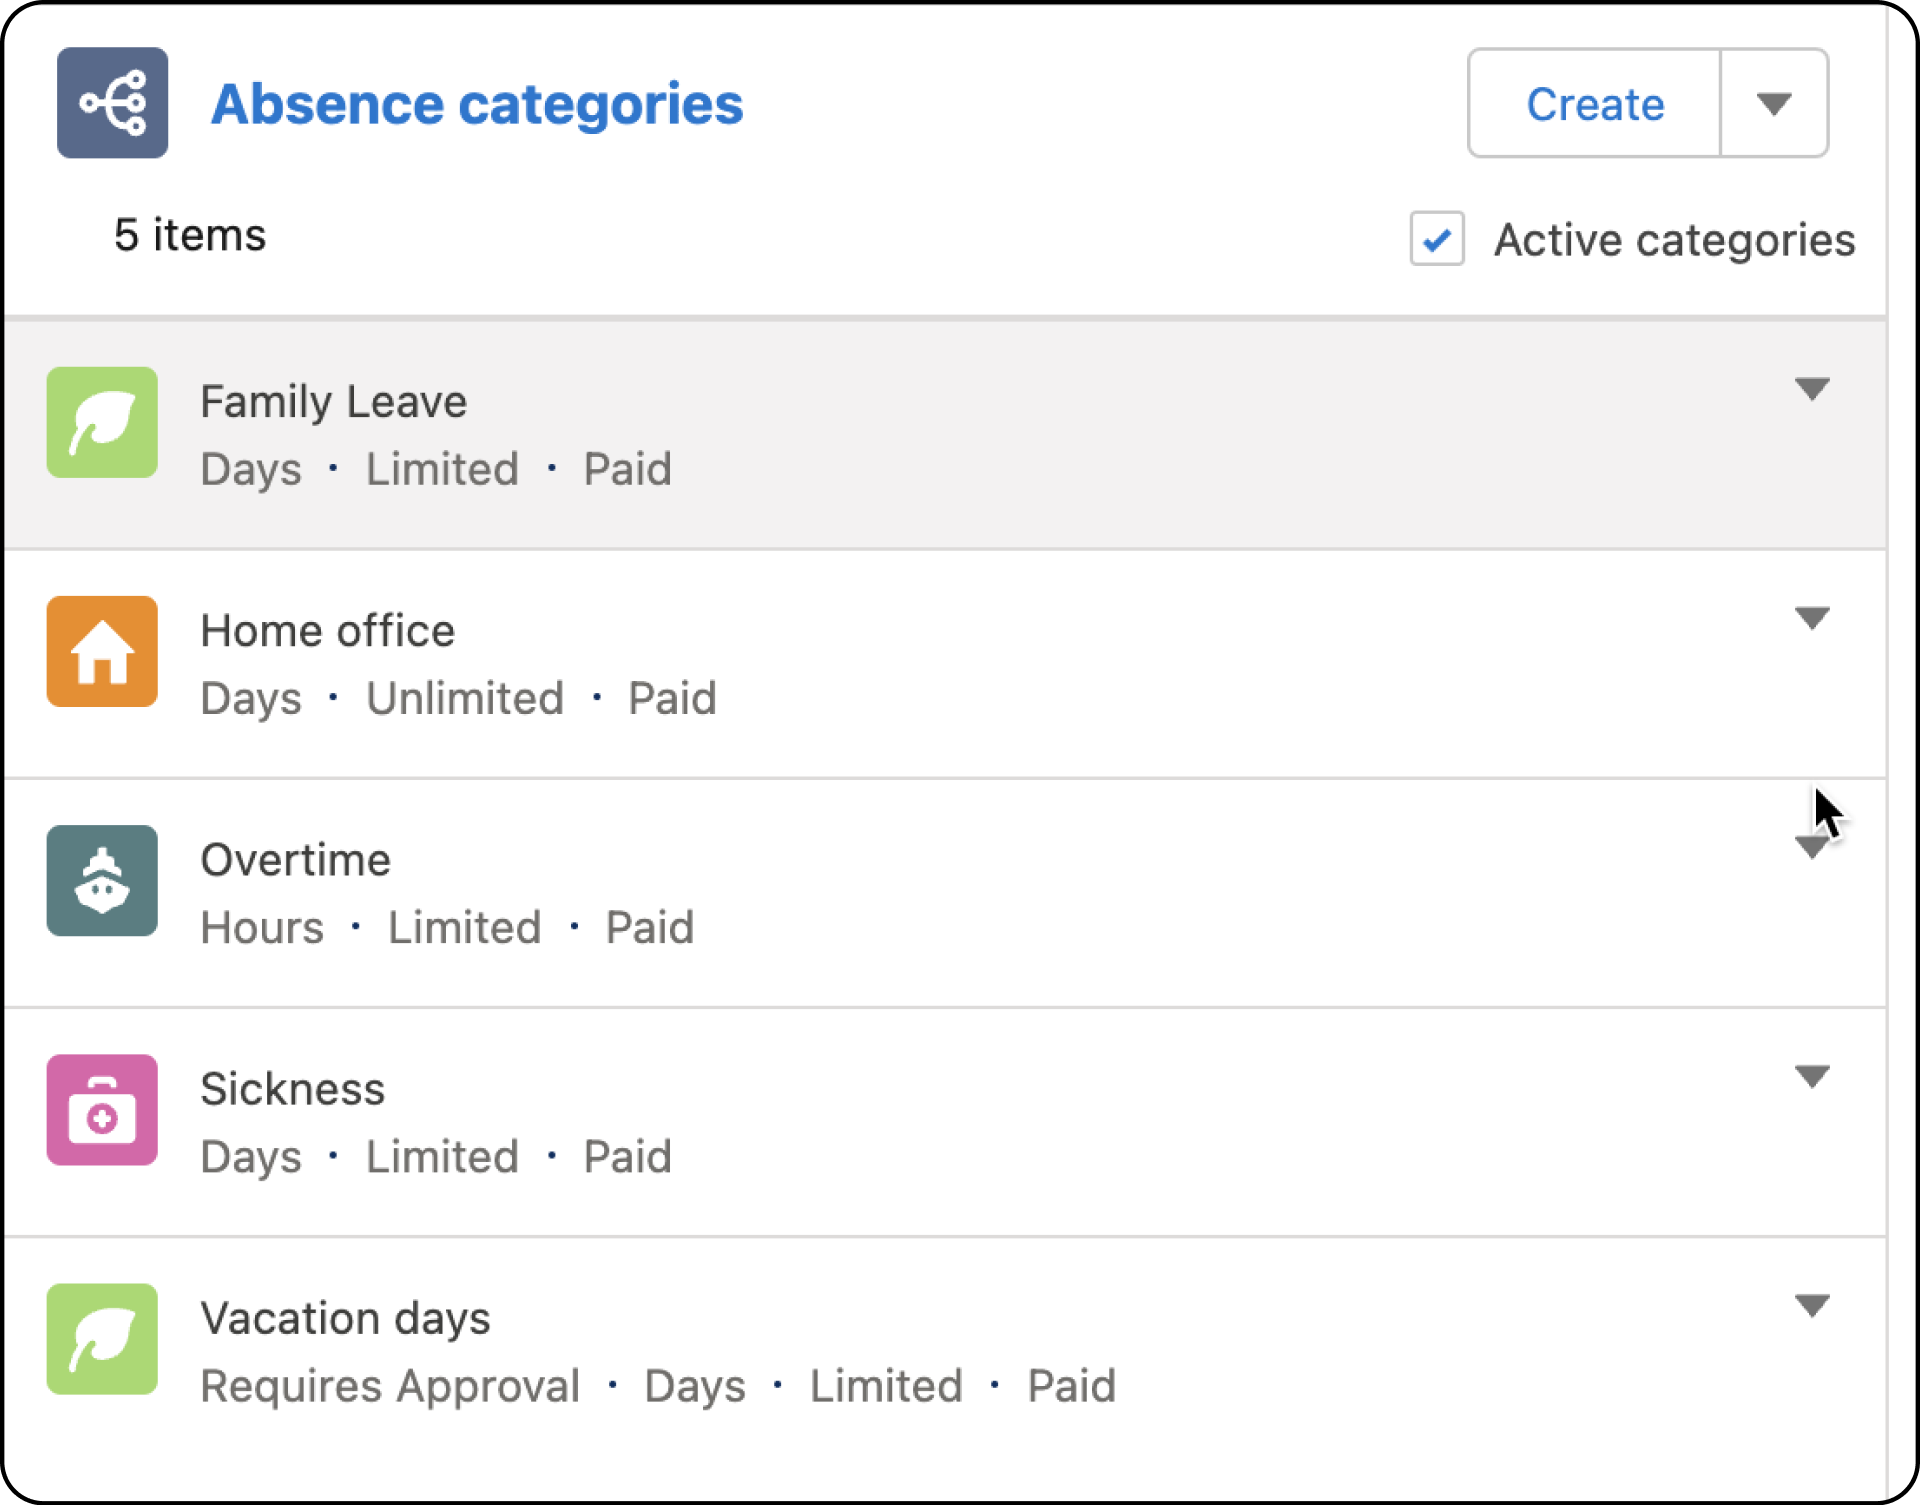
Absence Categories
Build an absence management strategy and manage employee leave according to the situation. Create and view the reasons for which your employees can officially be absent. The reasons are customizable and can include instances like Sickness, Family Leave, Vacation Days, or Overtime.
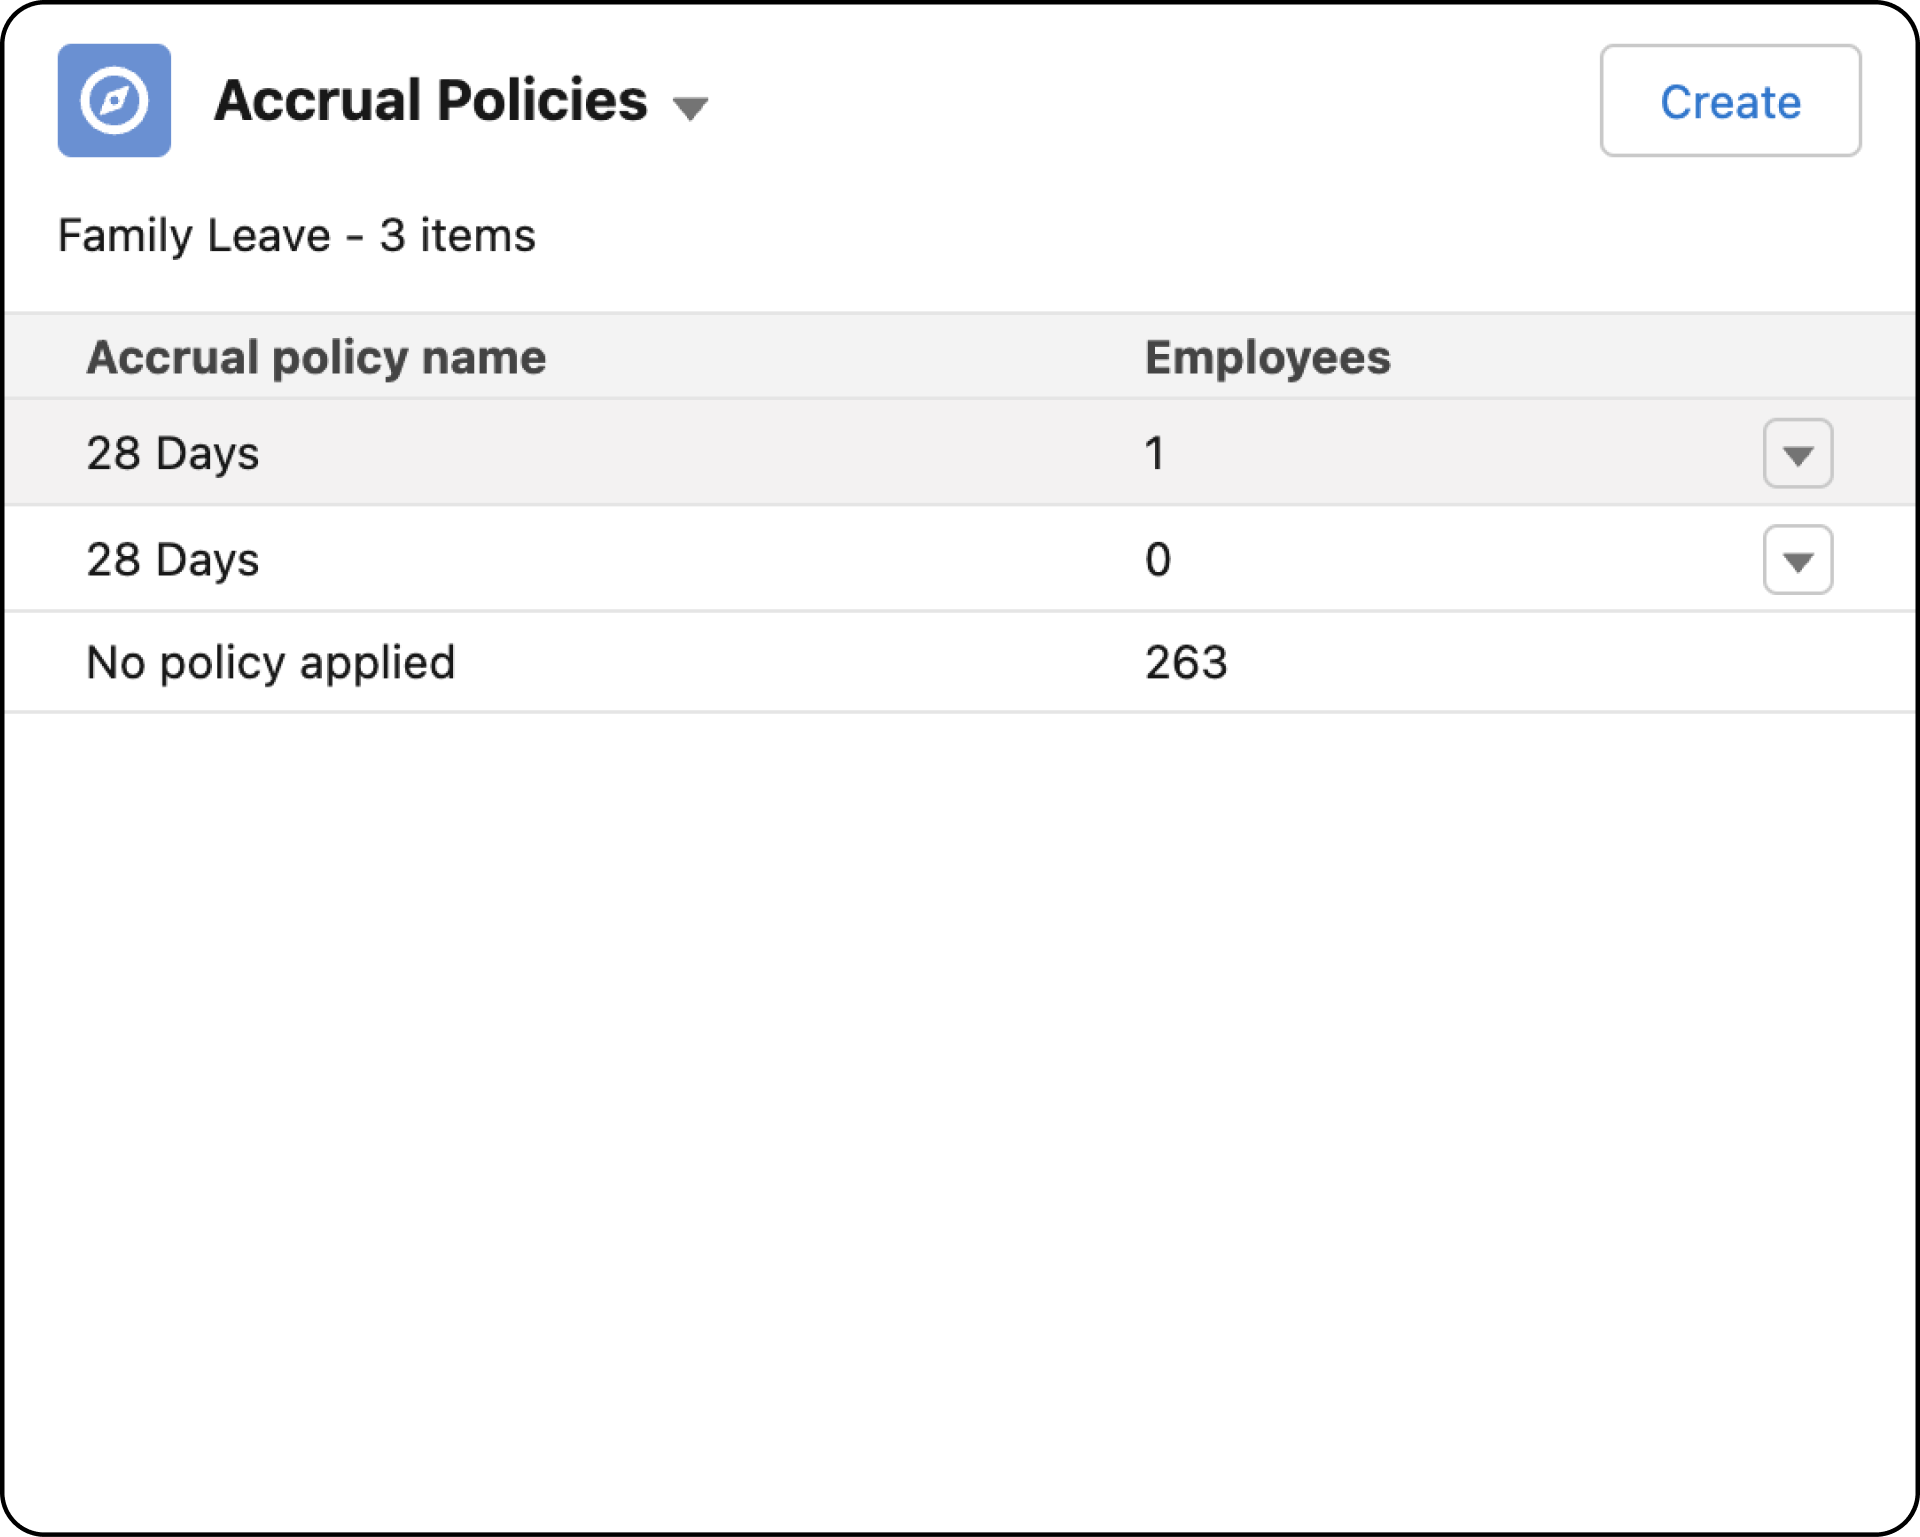
Accrual Policies
An accrual policy sets out how absence entitlements are calculated. This section allows you to manage the number of days that employees have available for a specific category of absence. For example, a company might have a policy of providing employees with 28 days of vacation per year. You can manage this policy here. Learn more in the Accrual Policies article.
Absence Request Policies
Absences like vacations or study leave should be planned in advance. Adding a minimum time notice for certain absences helps you to avoid short notice requests. You can make those changes directly on the flair HR app.
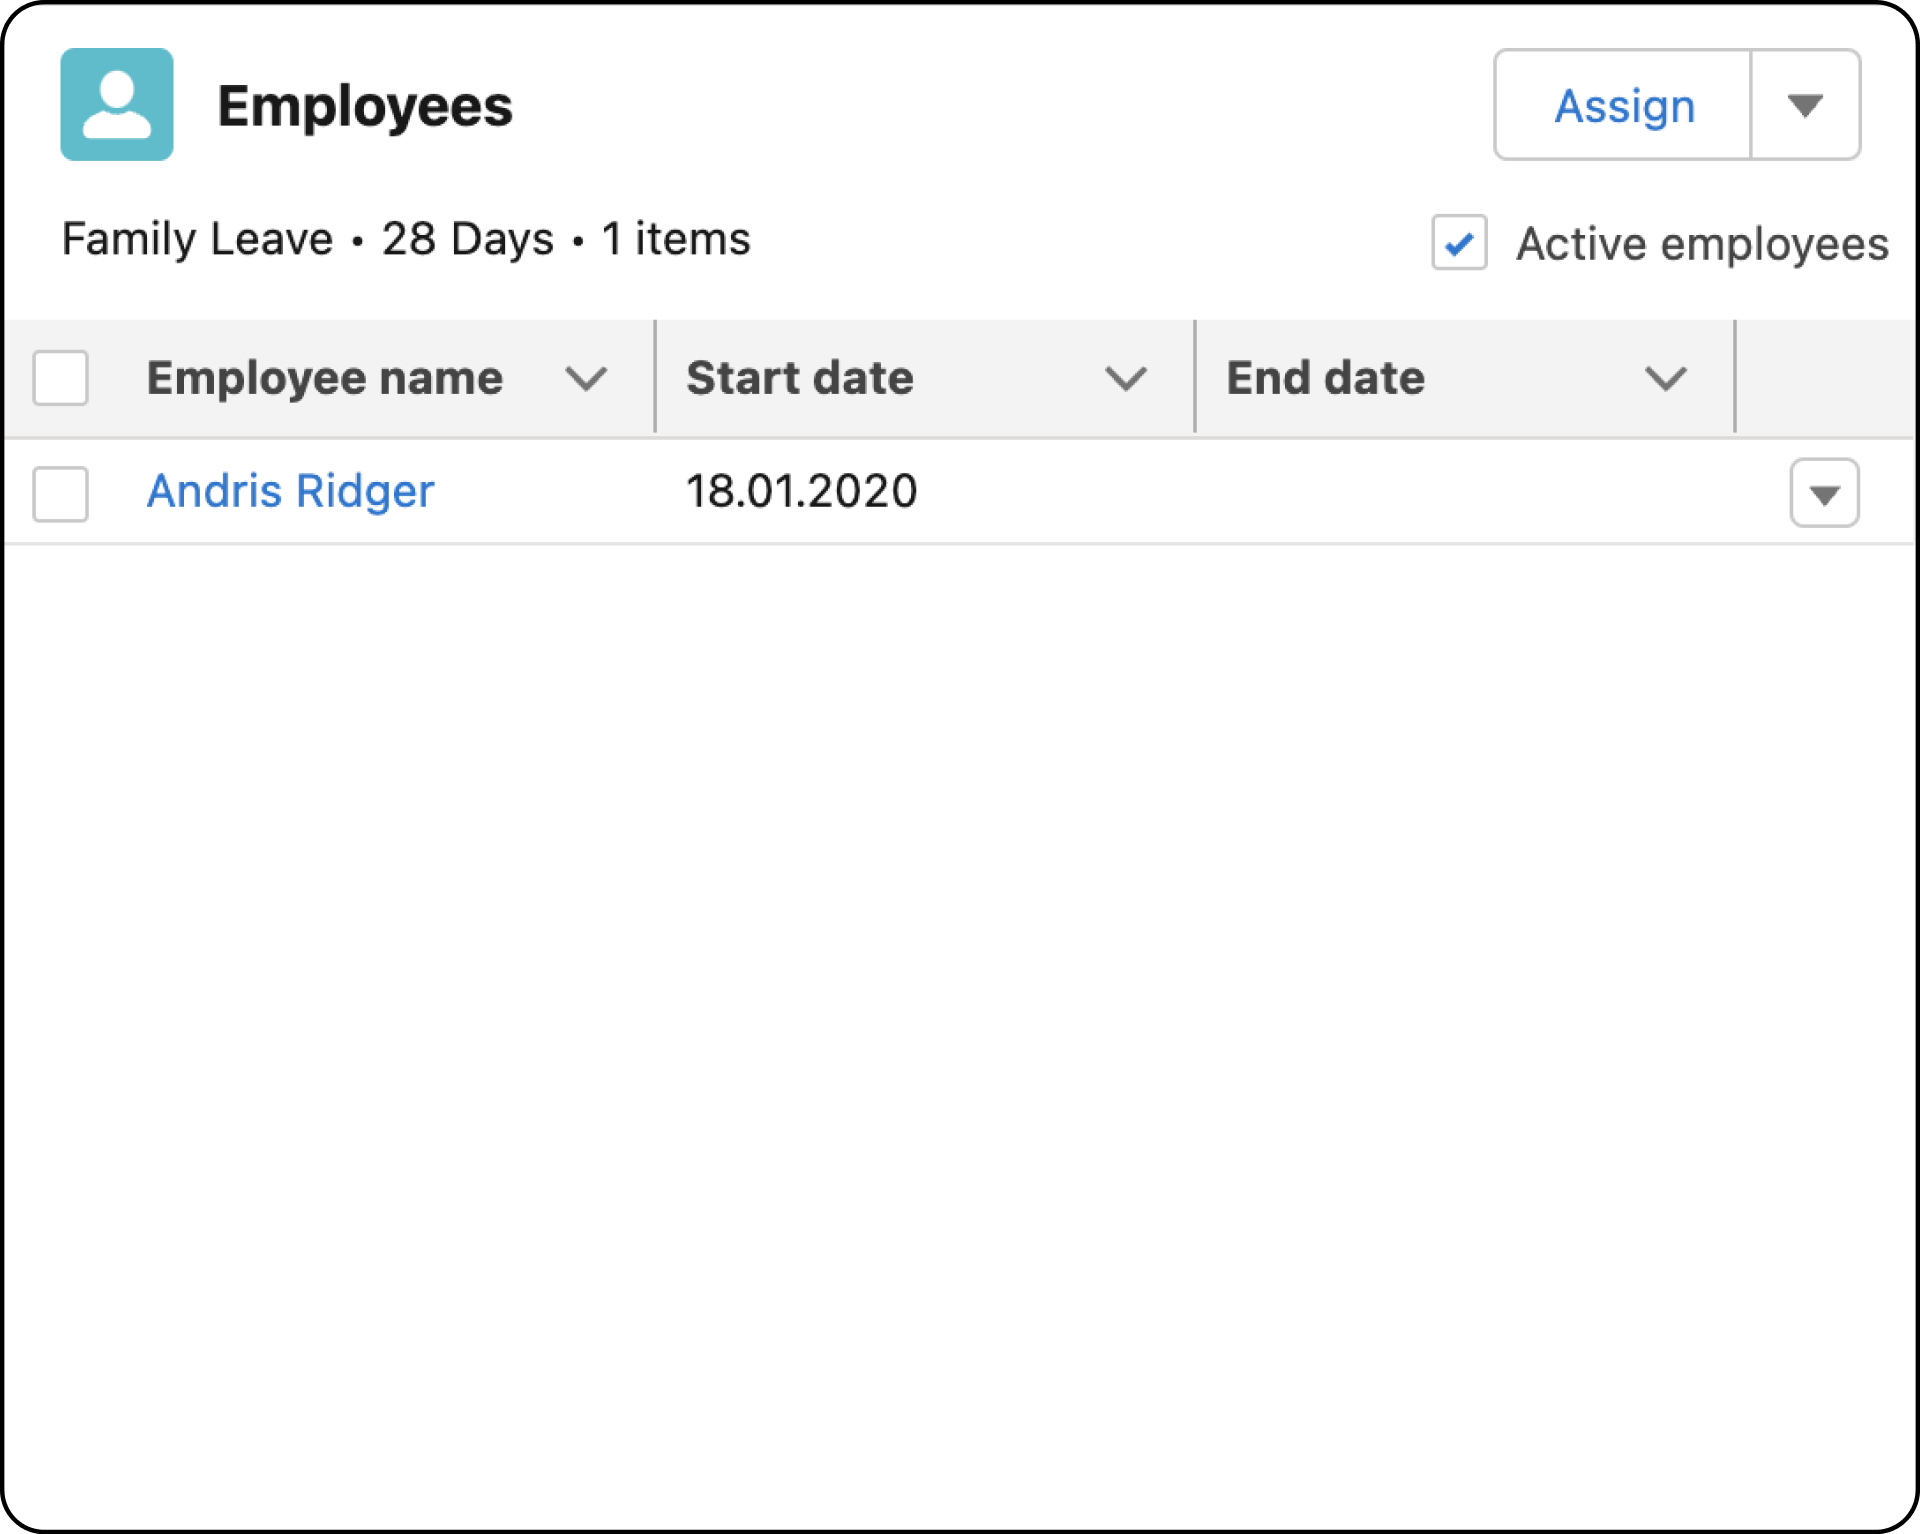
Employees
Under the third panel, Employees, you can assign accrual policies to staff. For example, you can choose which employees are eligible to request Overtime absence.
Absence Categories
Category Colors
In addition to an icon, each absence category can now have a custom color. The color appears in the Employee Hub's calendar views and absence overviews, making it easier for employees and managers to identify different absence types at a glance.
To set a color:
- Navigate to Absence Categories in Salesforce.
- Open an absence category record.
- In the Color field, enter a hex color code (e.g.
#FF5733) or use the color picker. - Save the record.
Categories without a color assigned continue to use their icon-based styling. You can clear a color at any time by removing the value from the Color field.
Clamping Hourly Absences to Working Hours
For hourly absence categories, you can set a category to only count an employee's scheduled working hours. When enabled, an hourly absence requested outside an employee's normal working window (for example, 6–7pm for someone who works 9–5) no longer reduces their balance. By default, absence categories count the full entered time regardless of the employee's schedule.
To enable this setting:
- Navigate to Absence Categories in Salesforce.
- Open an hourly absence category record.
- Enable Clamp to Working Hours.
- Save the record.
Absence Request Policies
Not every business will have the same absence request policies. That's why flair makes it easy to customize your settings for absences.
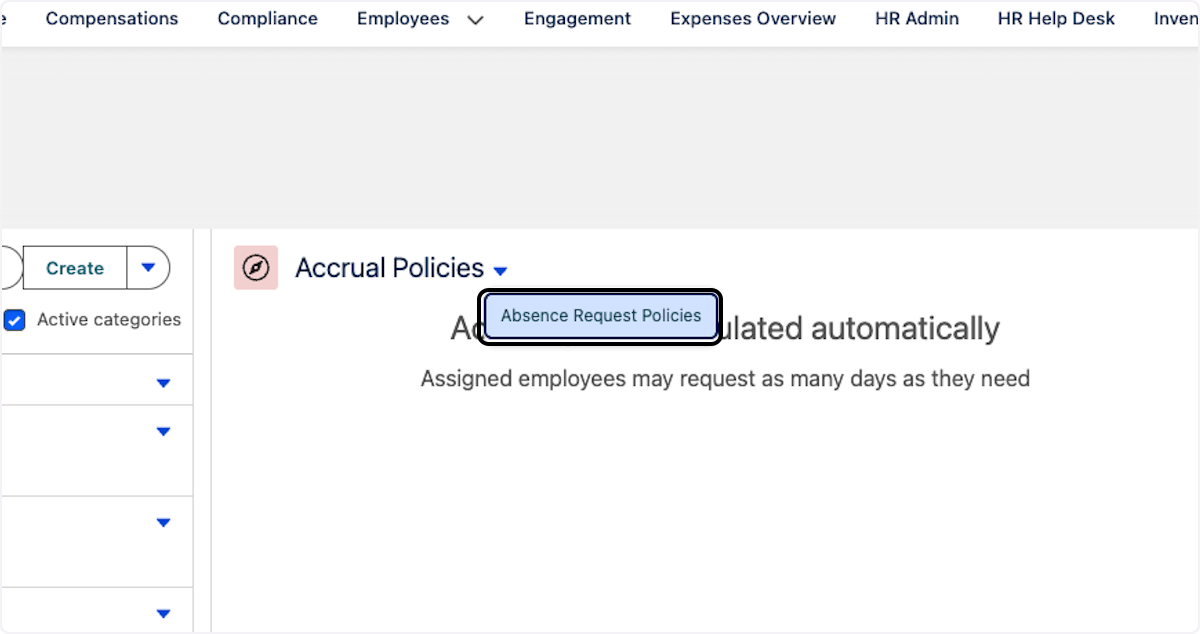
To do this, select Absence Settings in the flair HR app on Salesforce and visit the kanban style board. Clicking on the downward arrow beside the Accrual Policies heading will reveal a new setting field – Absence Request Policies.
Here you will be able to set the mandatory requirements surrounding certain absence requests.
For example, make it a requirement for employees to upload a doctor's note after a specific period of sickness. Or set the minimum notice period for a vacation request. Once you have made your policy changes, they will appear in the Employee Hub.
Require a Medical Certificate for Sick Leave
You can require employees to upload a medical certificate when requesting sick leave, especially for absences lasting a certain number of days or more.
Creating the Policy
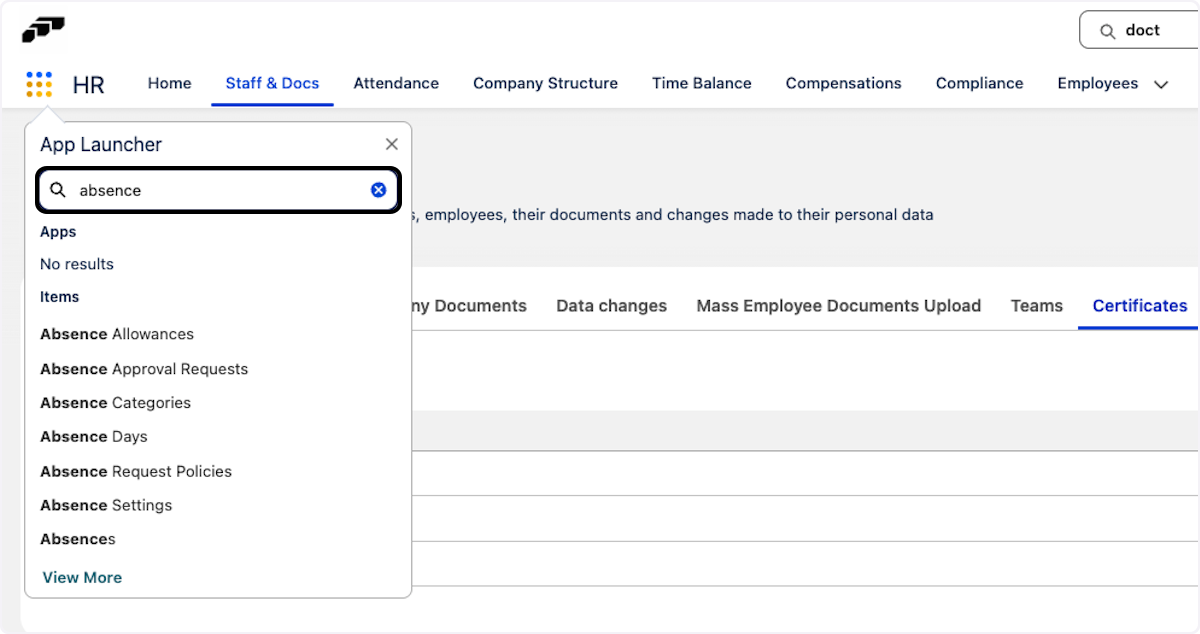
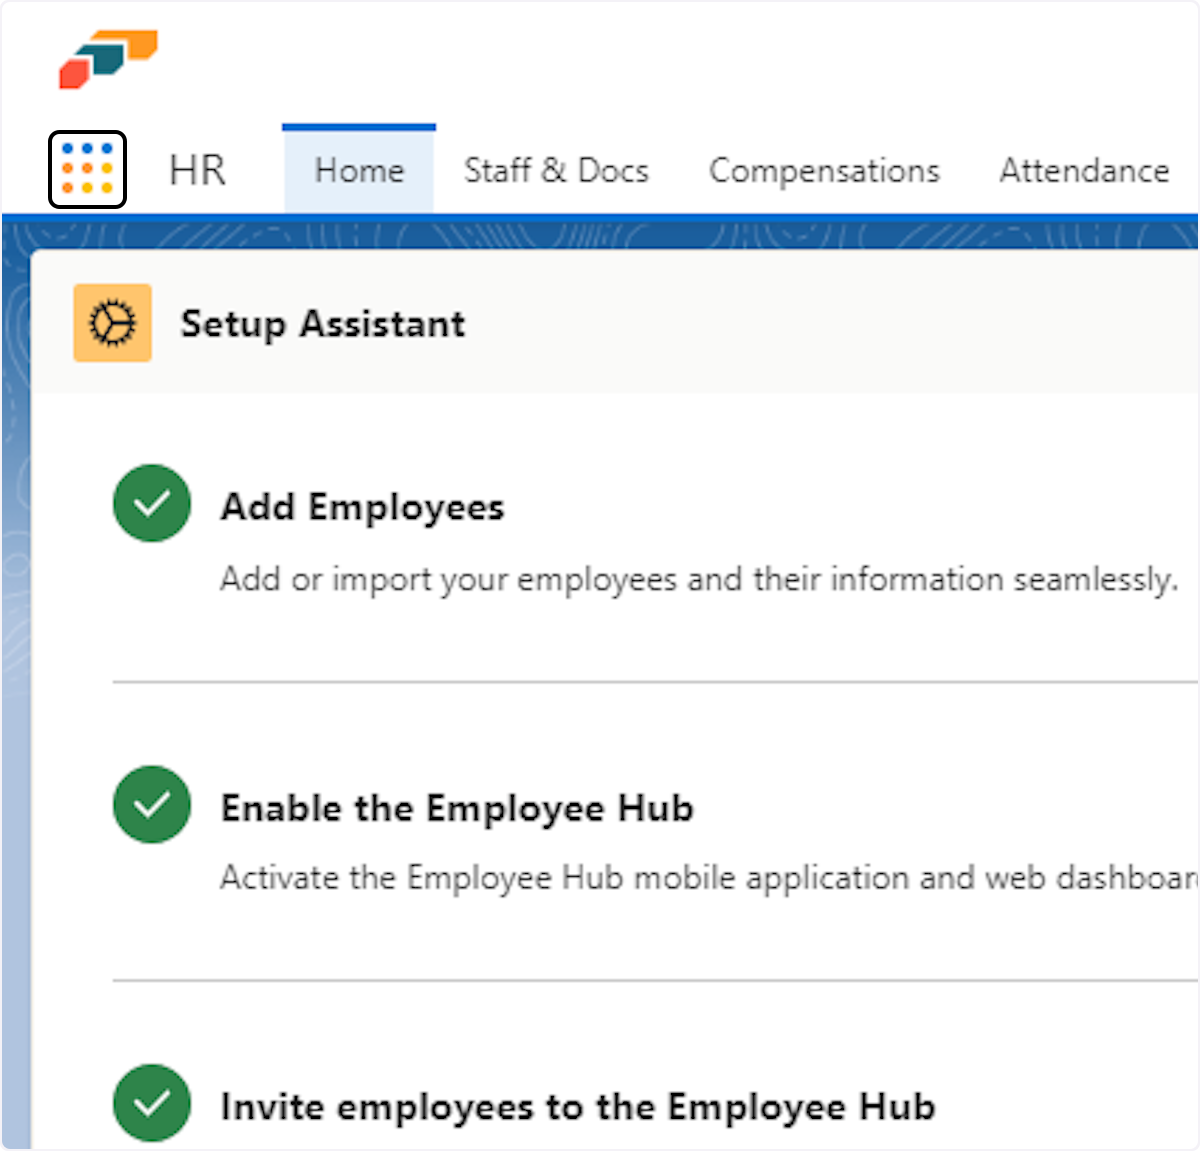
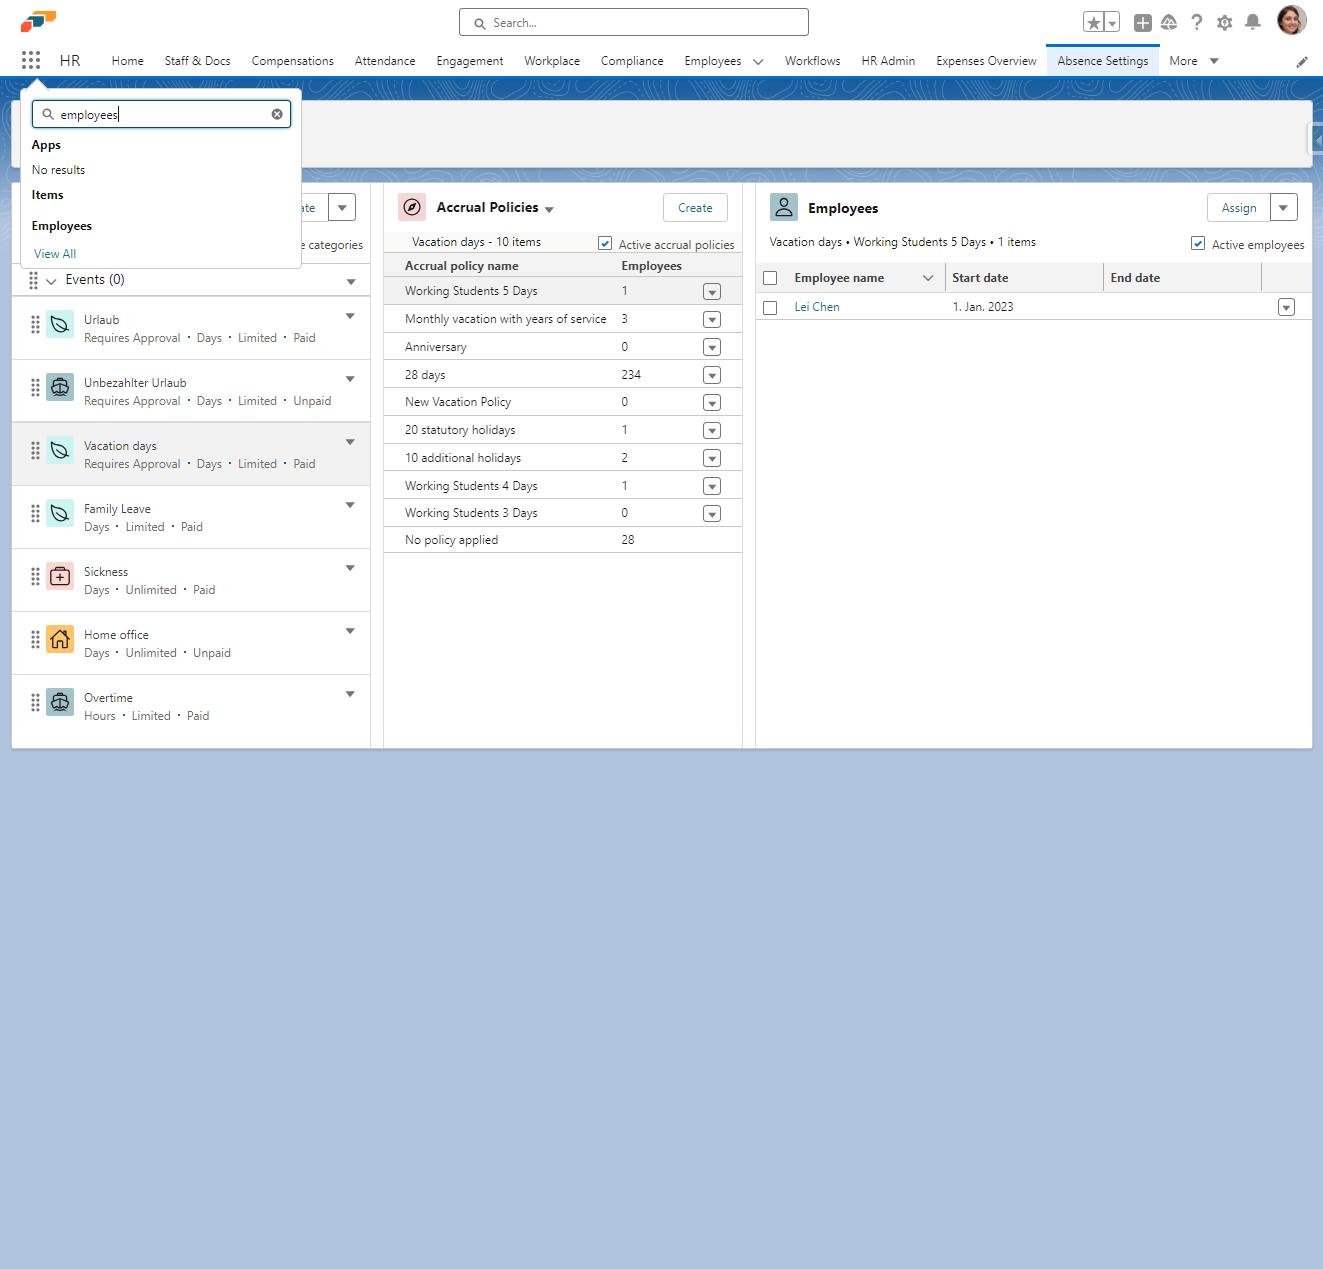
- Click on App Launcher
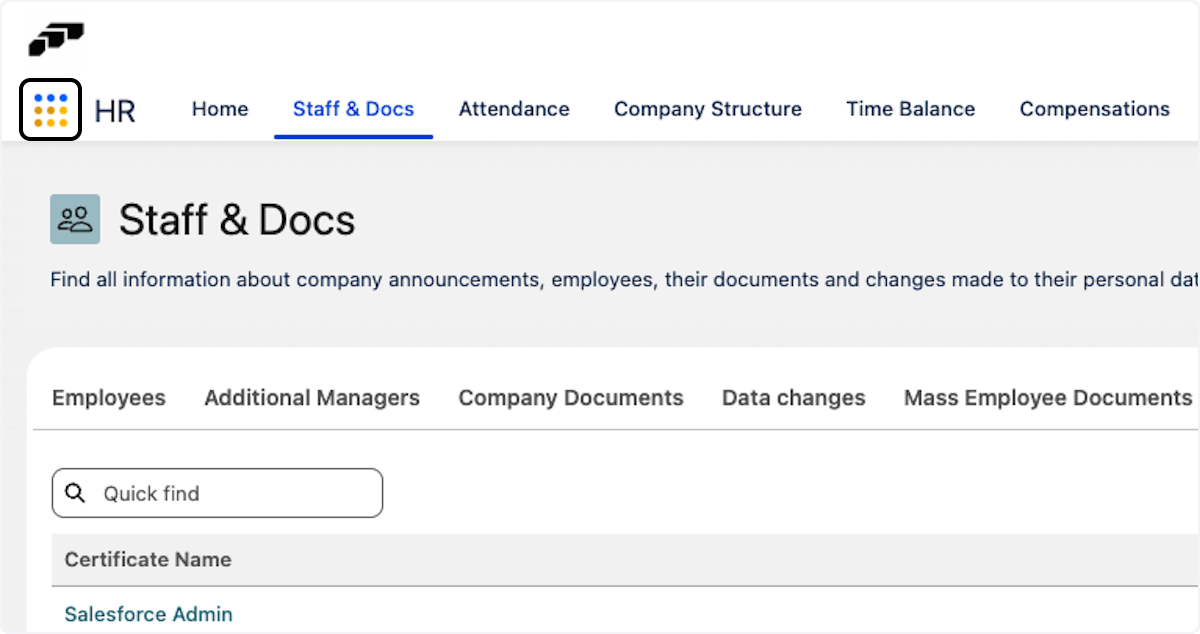
- Type "absence"
-
Click on Absence Settings
-
Select your sick leave category
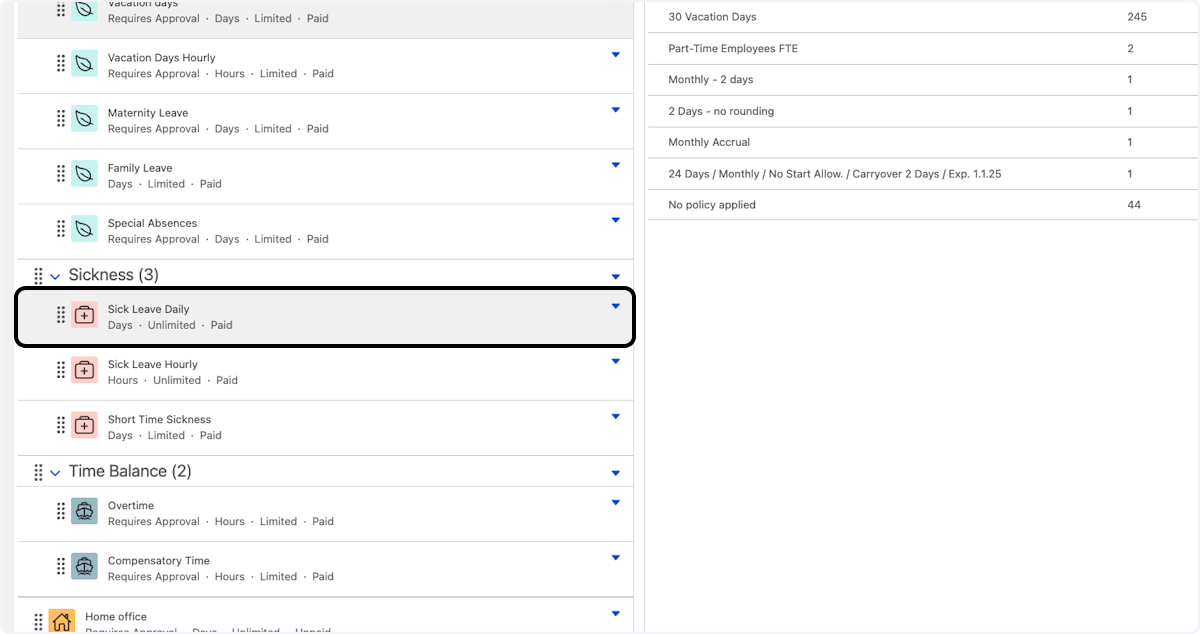
- Click on the drop-down arrow next to Accrual Policies
- Click on Absence Request Policies
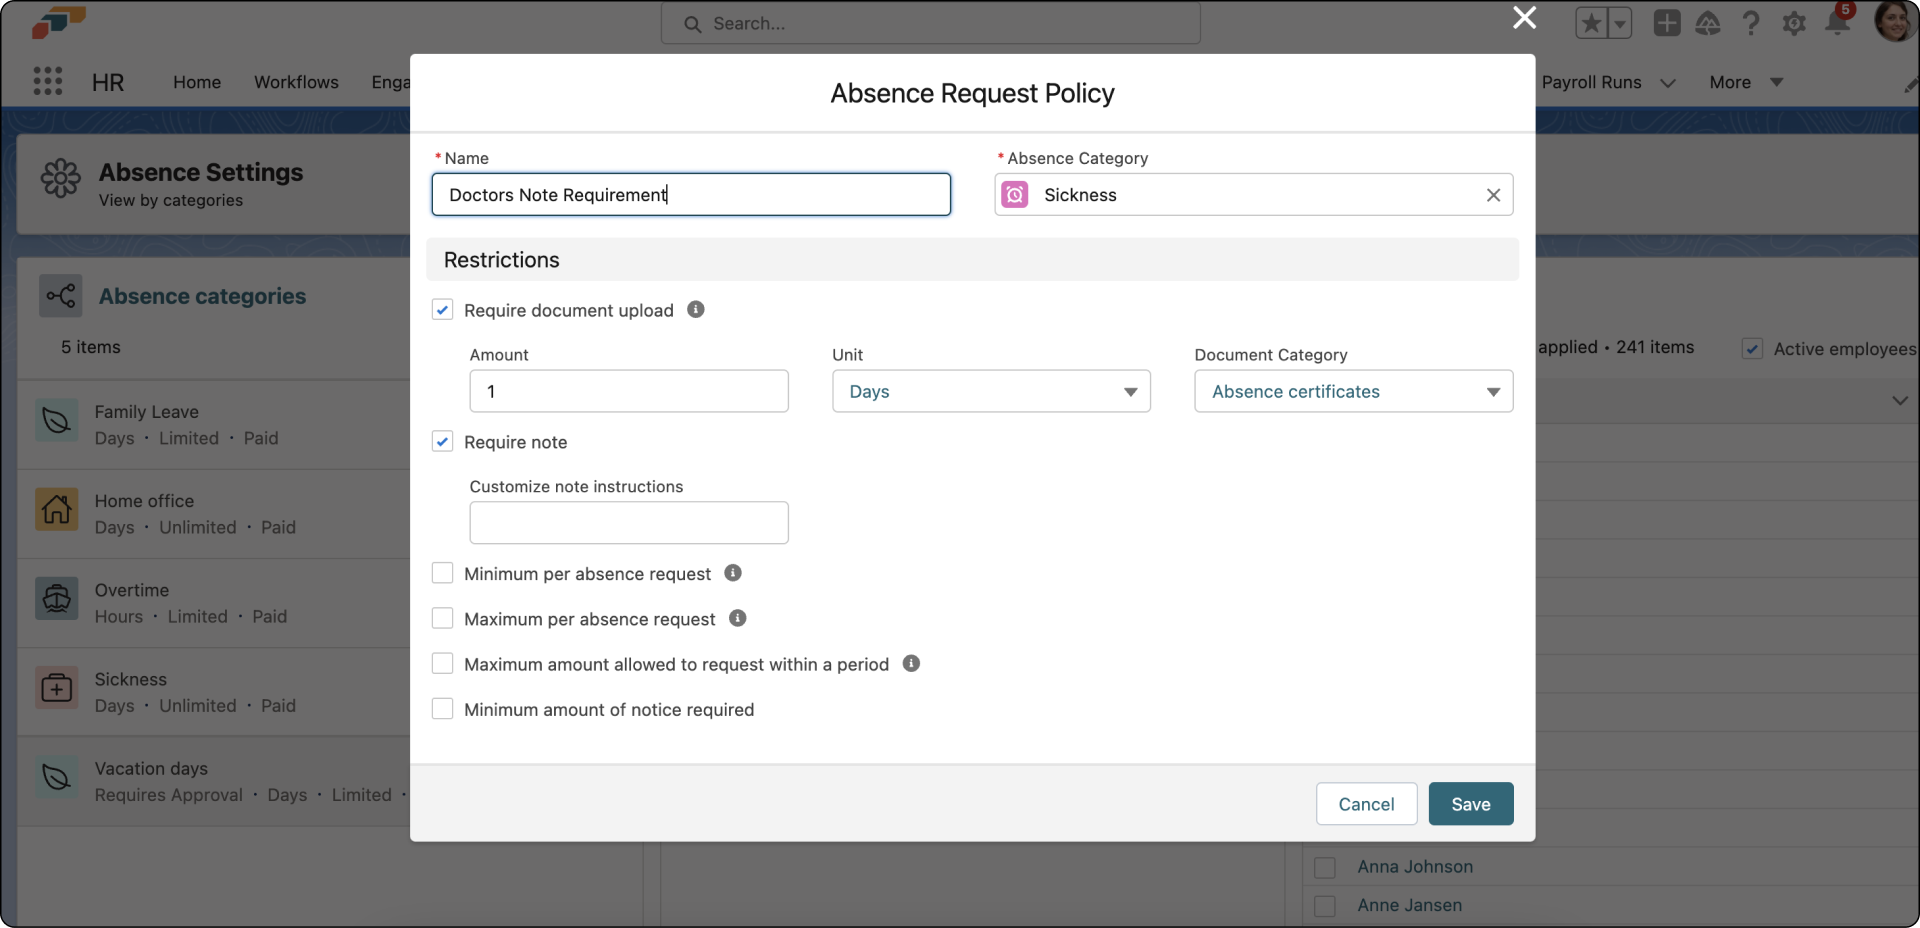
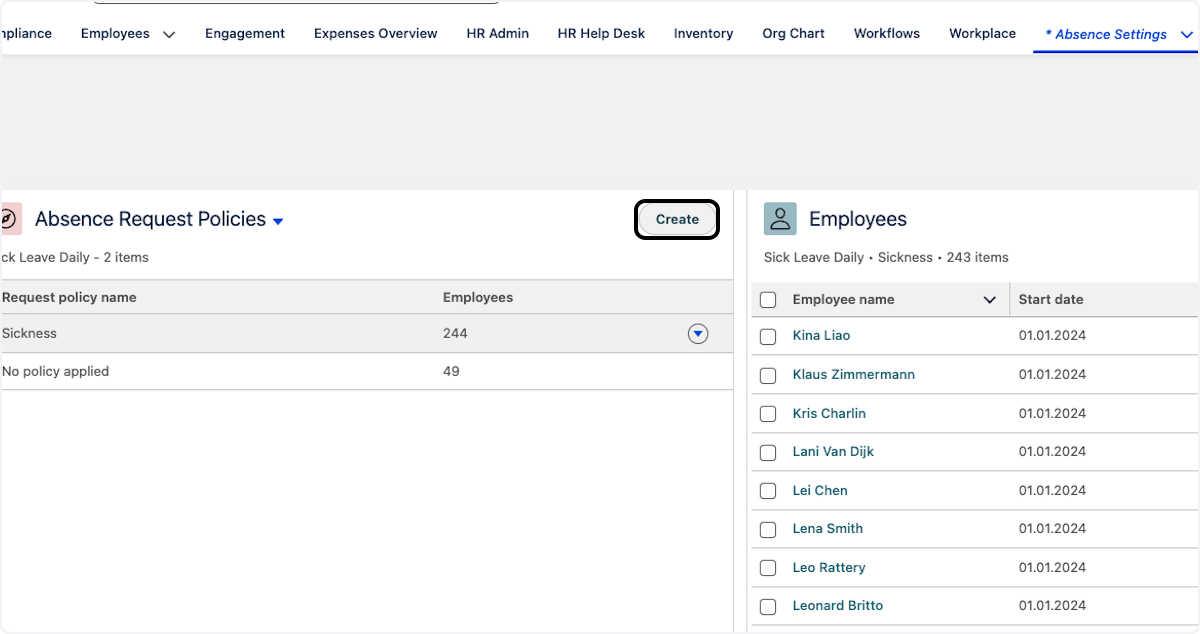
- Click on Create
- Give your policy a name
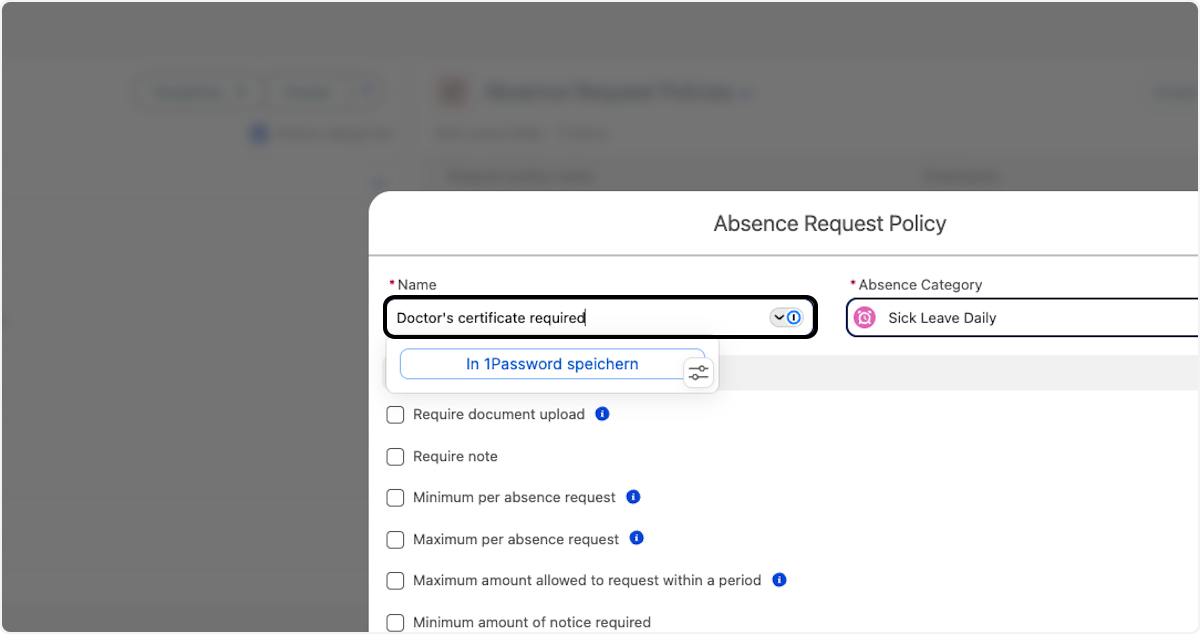
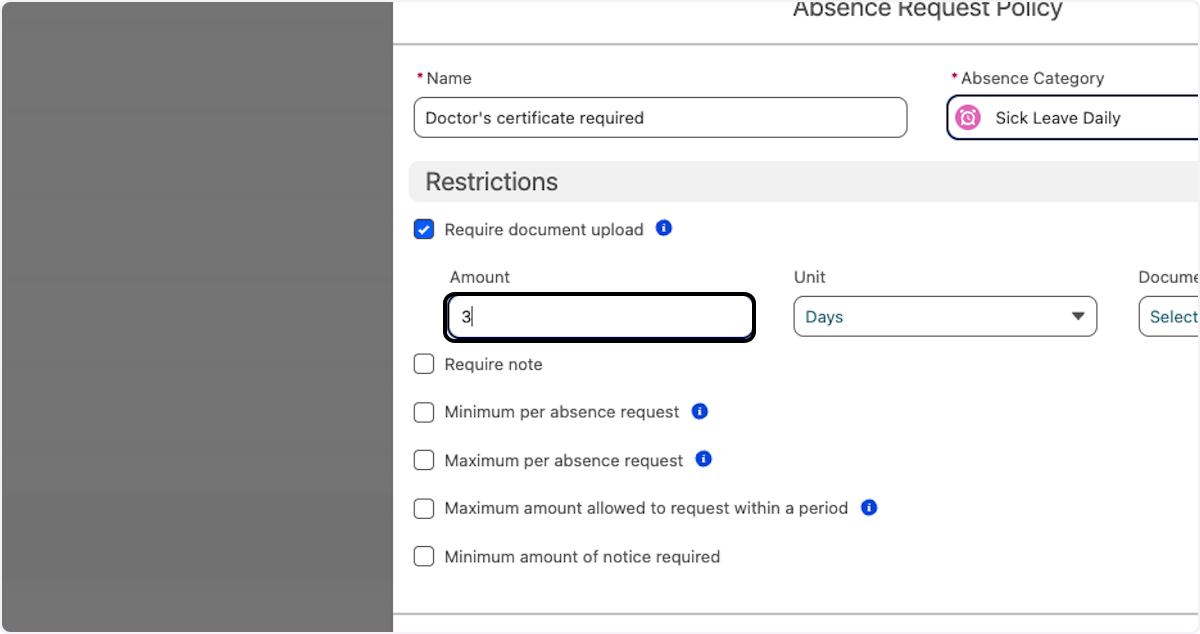
- Check Require document upload
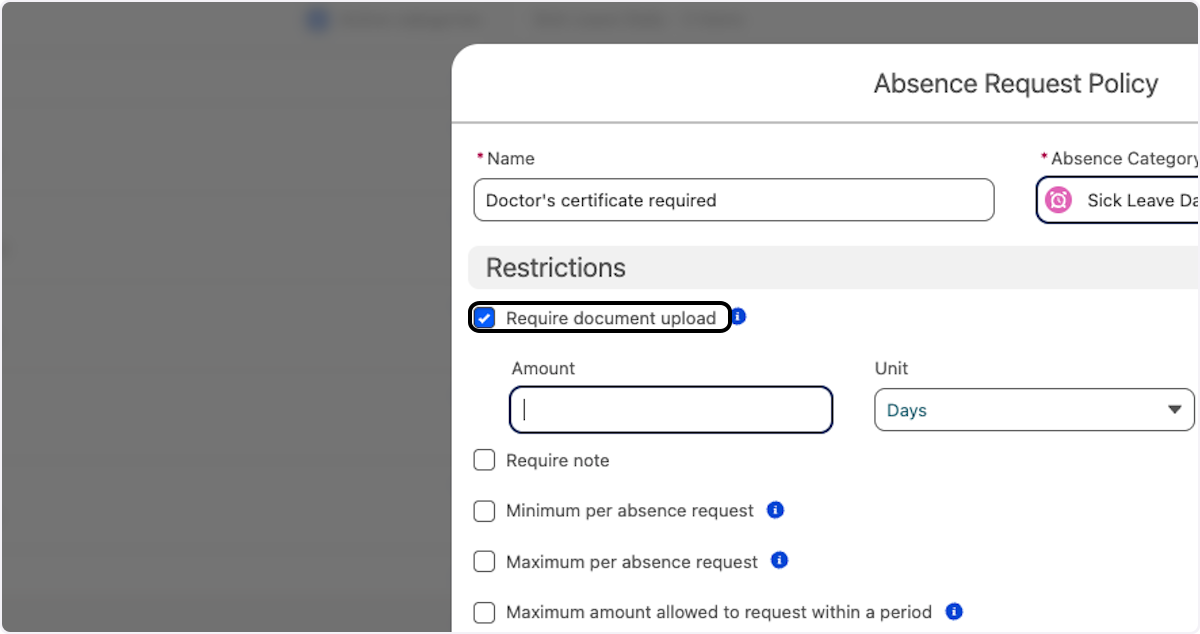
- Select the number of days
For example, if you select 3 days, the employee can submit an absence request for 1 or 2 days without uploading a doctor's note. If the absence lasts 3 days or more, uploading a document is required before they can submit the request.
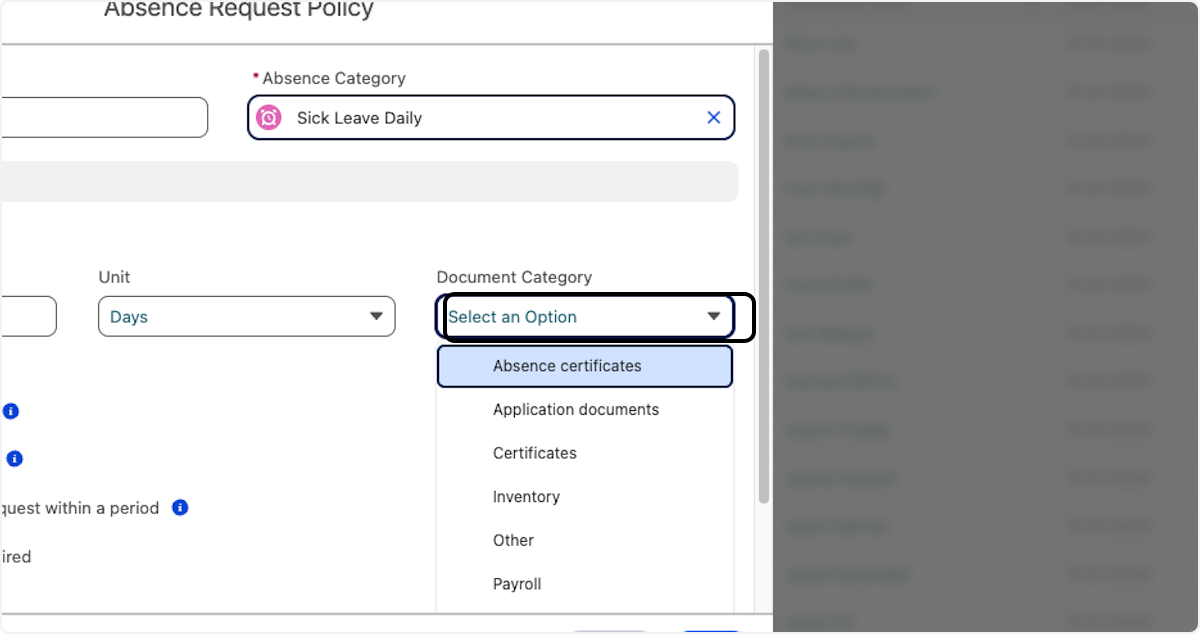
- Choose the absence category in which the document is to be kept
- Click on Save
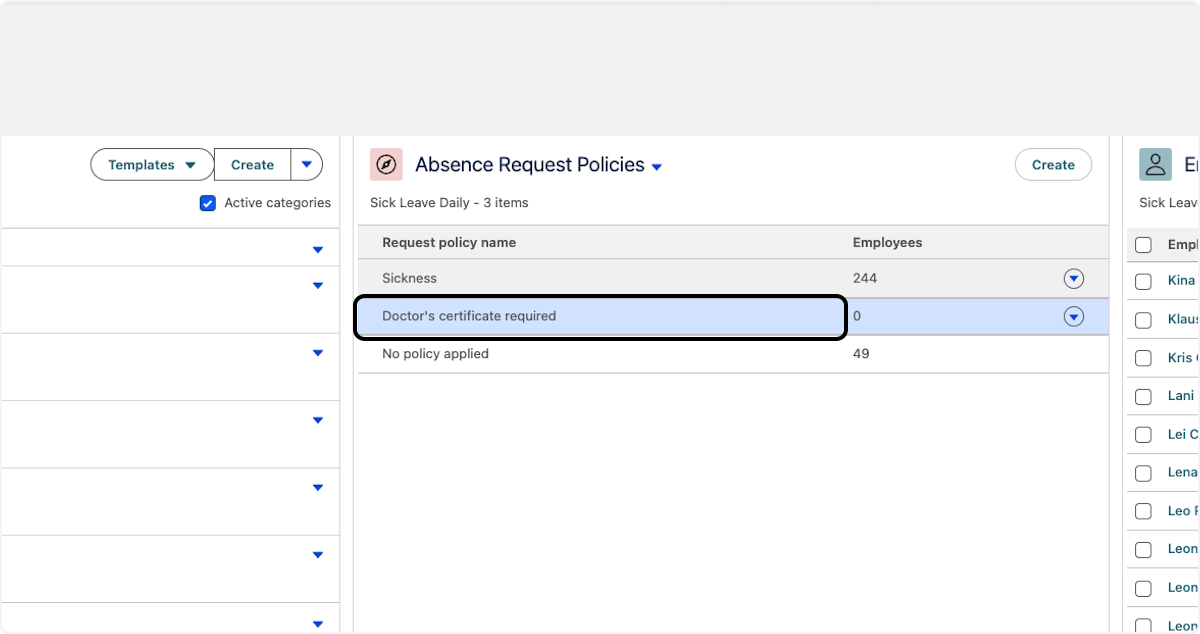
Assigning Employees to the Policy
- Click on your newly created policy (e.g., "Doctor's certificate required")
- Click on Assign
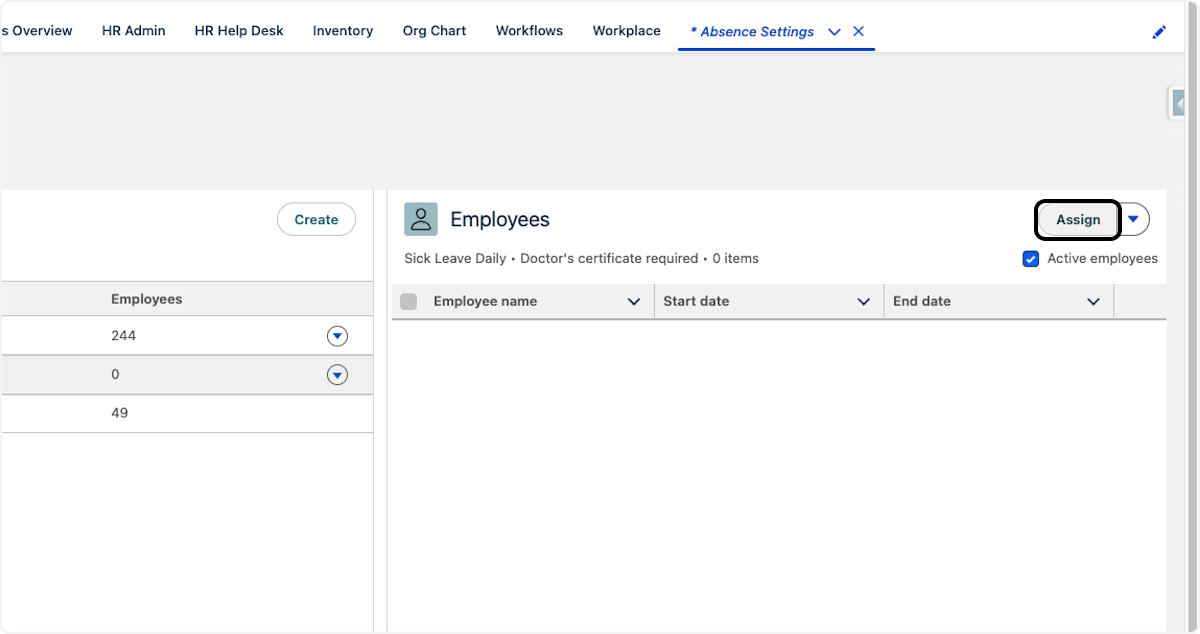
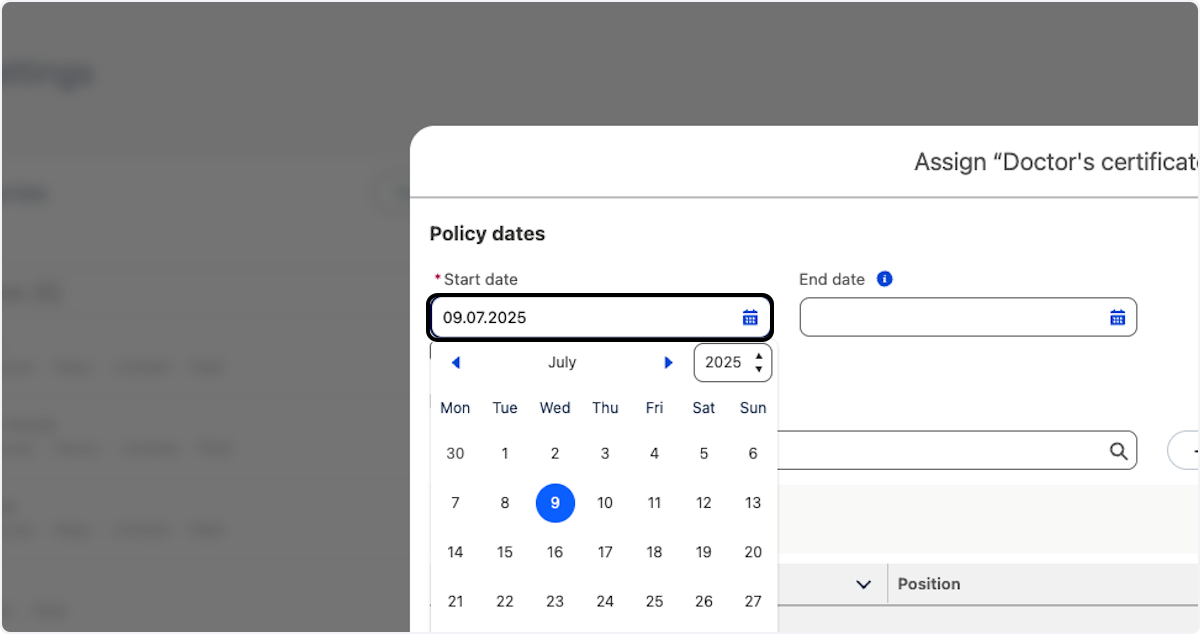
- Select a start date, or check Use employee start date
- Click on Select Employees
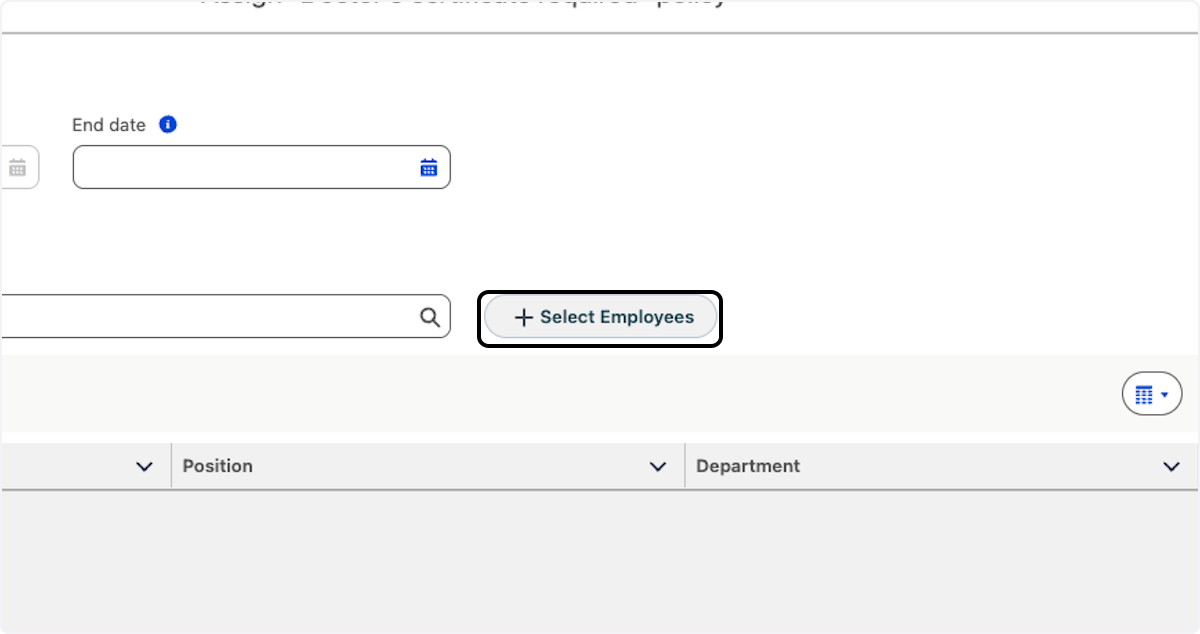
- Select employees for your policy and click Add, then assign the policy to the selected employees
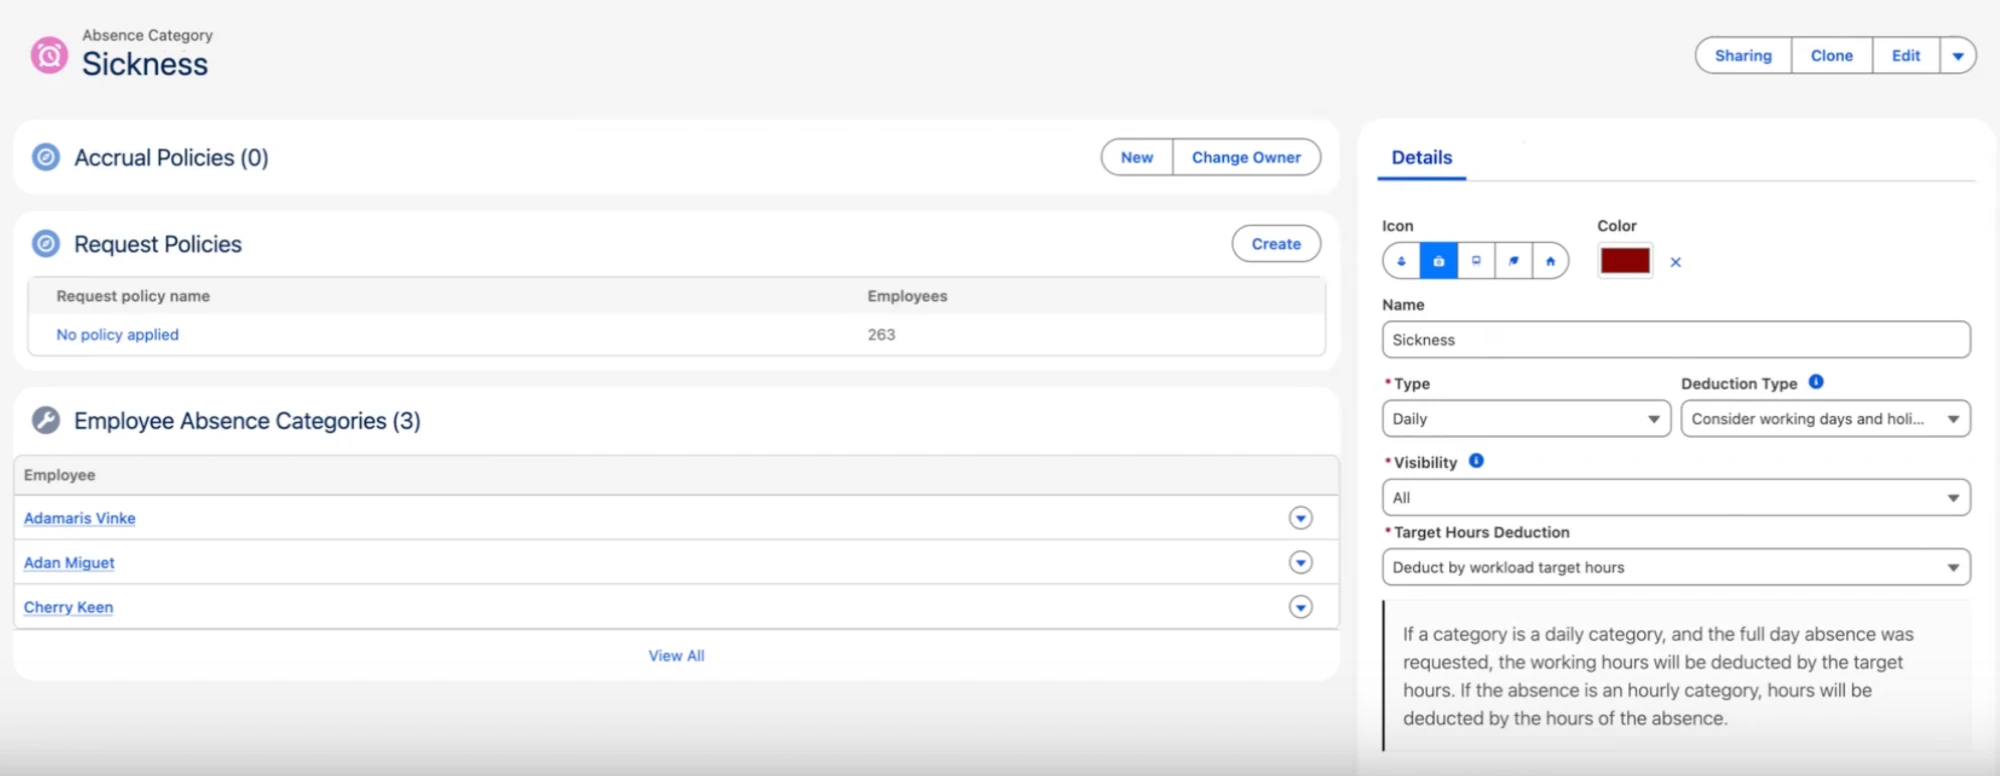
Configuring Maternity and Parental Leave
To set up maternity or parental leave as an absence category:
- Navigate to Absence Settings in the flair HR app
- Create a new absence category or edit an existing one
- Name it appropriately (e.g., "Maternity Leave" or "Parental Leave")
- Set the Type to Daily
- Set the Deduction to Deduct by workload target hours
- Configure additional regulations as needed for your organization
- Click Save
Next, create an Absence Request Policy to control the maximum leave duration:
- In the absence category, navigate to Absence Request Policies
- Click Create
- Name the policy (e.g., "Maternity Leave")
- Check Maximum per absence request and enter the number of days allowed
- Click Save
Finally, assign the policy to the relevant employees and verify that the allowance appears correctly in their employee records under Absence Categories.
You can create separate categories and policies for maternity and parental leave to apply different maximum durations and regulations to each.
Absence Visibility Settings
flair allows you to control who can see absences in the Employee Hub through visibility settings. This feature provides privacy controls at three levels: Absence Category, Employee Absence Category, and individual Absence records.
Visibility Options
When creating or editing an absence category, you'll find a Visibility field with three options:
- All: All employees can see absences in this category
- Employees, Teams, with their Managers: Absences are visible to the employee, their team members, and managers
- Employee only with their Managers: Only the employee and their managers can see the absence
How Visibility Works
Visibility Hierarchy:
- Absence Category Level: Set the default visibility when creating an absence category. This setting applies to all new absence records created under this category.
- Employee Absence Category Level: Each employee's absence category assignment can have its own visibility setting, which defaults to the category's visibility but can be customized.
- Individual Absence Level: Each absence record inherits visibility from the employee absence category, but HR managers can override it when creating or editing absences.
Who Can Always See Absences:
- Managers: Managers can always view absences of their direct reports, regardless of visibility settings
- Additional Managers: Employees assigned as additional managers (including absence managers) can view absences regardless of visibility
- The Employee: Employees can always see their own absences
Team Visibility:
For absences with "Employees, Teams, with their Managers" visibility, employees are considered in the same team if they:
- Are assigned to the same team, OR
- Share the same manager
Where Visibility Applies:
Visibility settings affect how absences appear in:
- Employee Hub calendar view
- Colleagues view
- Absent Today widget
- Shift Planner
- All absence-related views
Important Notes:
- Changing visibility on an absence category only affects new absence records created after the change
- Existing absence records retain their current visibility settings
- HR managers can edit visibility on individual absences even after they're created
- Employees cannot change visibility when creating absence requests; it's inherited from their employee absence category
Setting Visibility on Absence Categories
- Navigate to Absence Categories and Policies in Salesforce
- Click Create on the Absence Categories panel (or edit an existing category)
- Fill in the category details (name, type, etc.)
- Select the desired Visibility option from the dropdown
- Click Save
The visibility setting you choose will be the default for all new absences created under this category.
Editing Visibility on Individual Absences
HR managers can change visibility on individual absence records:
- Open the absence record in Salesforce
- Locate the Visibility field
- Select the desired visibility option
- Click Save
This allows you to override the default visibility for specific absences when needed.
Prerequisites: Workloads
Before setting up absence categories and accrual policies, employees must have workloads assigned. Workloads define employee working hours and schedules, which are essential for calculating absence allowances correctly, especially when using workload-based proration in accrual policies.
To learn how to create and assign workloads, see the Creating and Assigning Workloads section in the Timesheets documentation.
Automatically Import Public Holidays
Every country or region has a variety of public holidays, which vary from year to year. Having this information in your system allows you and your employees to plan absences properly.
You can easily import local holidays into your flair HR app. There are two ways to do this.
To import public holidays into your employee absence calendars, use the Salesforce App Launcher to open the Calendars page. Click New to create a new calendar and give it a name. You can set a Start Date and End Date for the calendar or leave these fields blank. The Type field should be filled with PUBLIC_HOLIDAY. Then click Save.
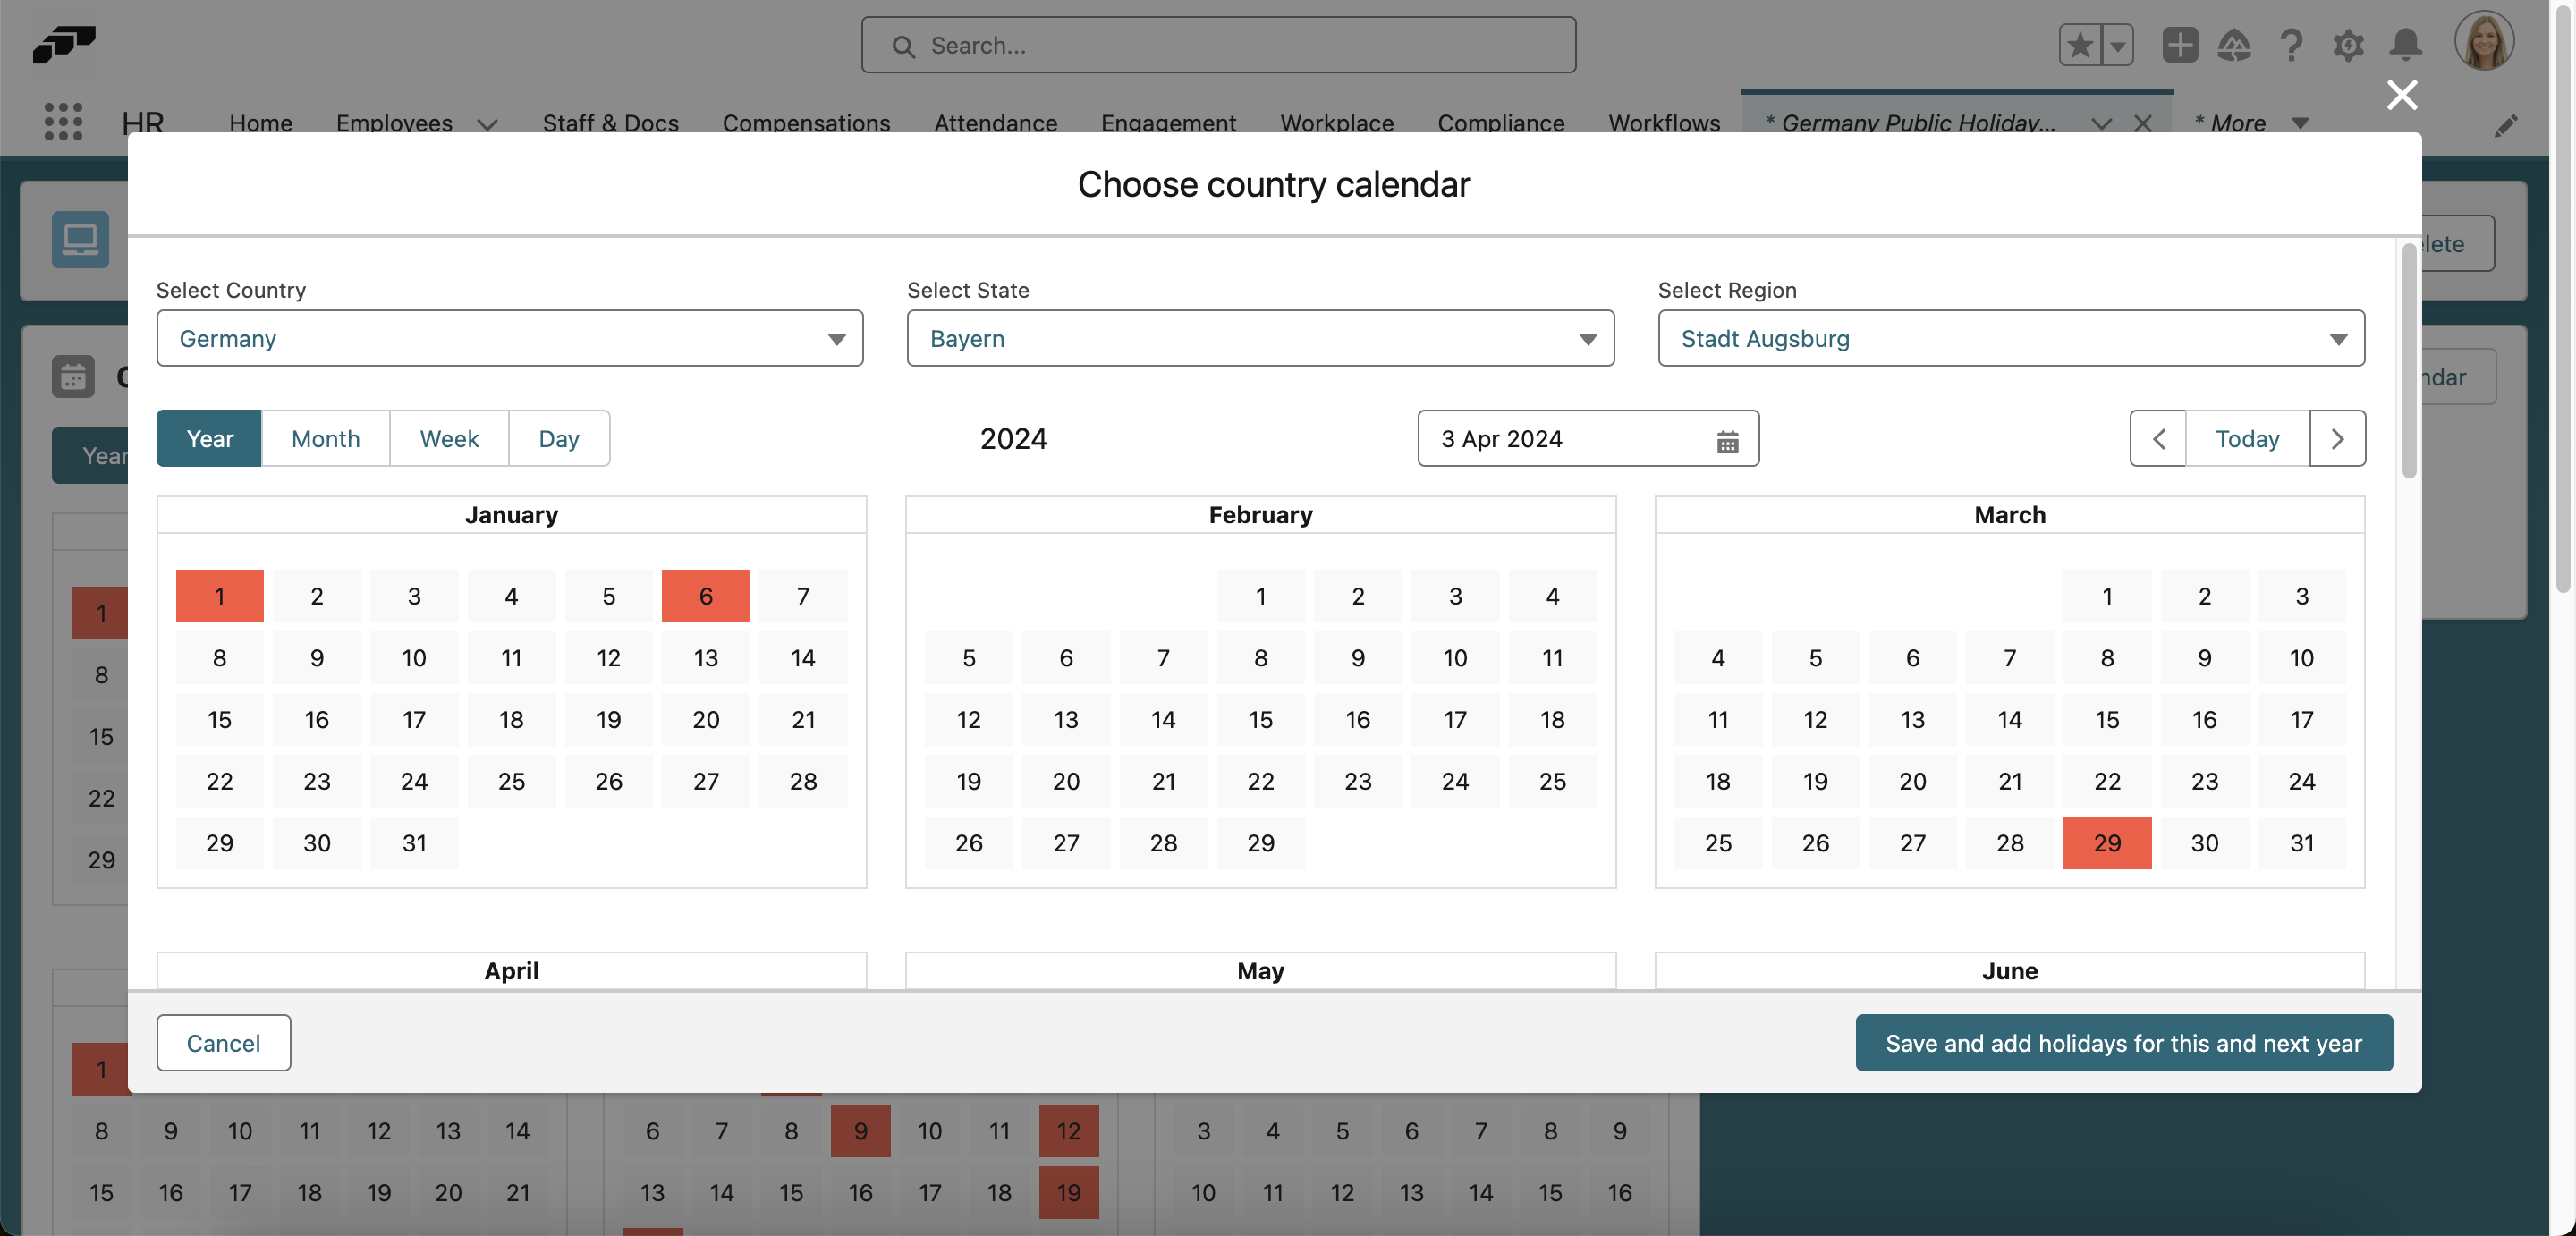
On the next screen, you will see a calendar. Using the Calendar Subscription box on the right side of the screen, toggle "Automatically add calendar periods" to Active. Next, click Define Country Calendar.
You can now select which local public holidays to import. There are three levels: Country, State, and Region (Region is only visible if there are specific regional holidays in your chosen location). This allows you to choose specific public holidays that are particular to your employees' location. For example, in countries such as Germany and the United States, public holidays differ from state to state. There may even be public holidays specific to a region or city within a state, as is the case in the German city of Augsburg. You can import these specific holidays by selecting the available options in the dropdown menus.
Once you have selected the public holidays that you want to import, they will appear in red on the calendar. Hovering over these marked days will show you the name of the holiday that will be observed. When you are ready, click "Save and add holidays for this and next year" to insert the holidays into your calendar.
By default, public holidays will use the name in the local language. For example, if you selected Germany as the country for your public holiday calendar, the names of the public holidays will be in German. If you want to translate these names, follow the steps below to edit your public holidays.
Using this method, flair will automatically add public holidays for the next two years for your chosen location – so you don't have to manually update it every year.
Batch Creating Public Holiday Calendars
Instead of creating and configuring holiday calendars one at a time, you can set up calendars for every state or region of a country in one guided step — for example, creating calendars for all 16 German states at once. Calendars that already exist are skipped, and their holidays are filled in automatically.
Customizing Public Holiday Calendars
After automatically importing public holidays, you can further customize your calendar by adding, removing, or editing specific holidays.
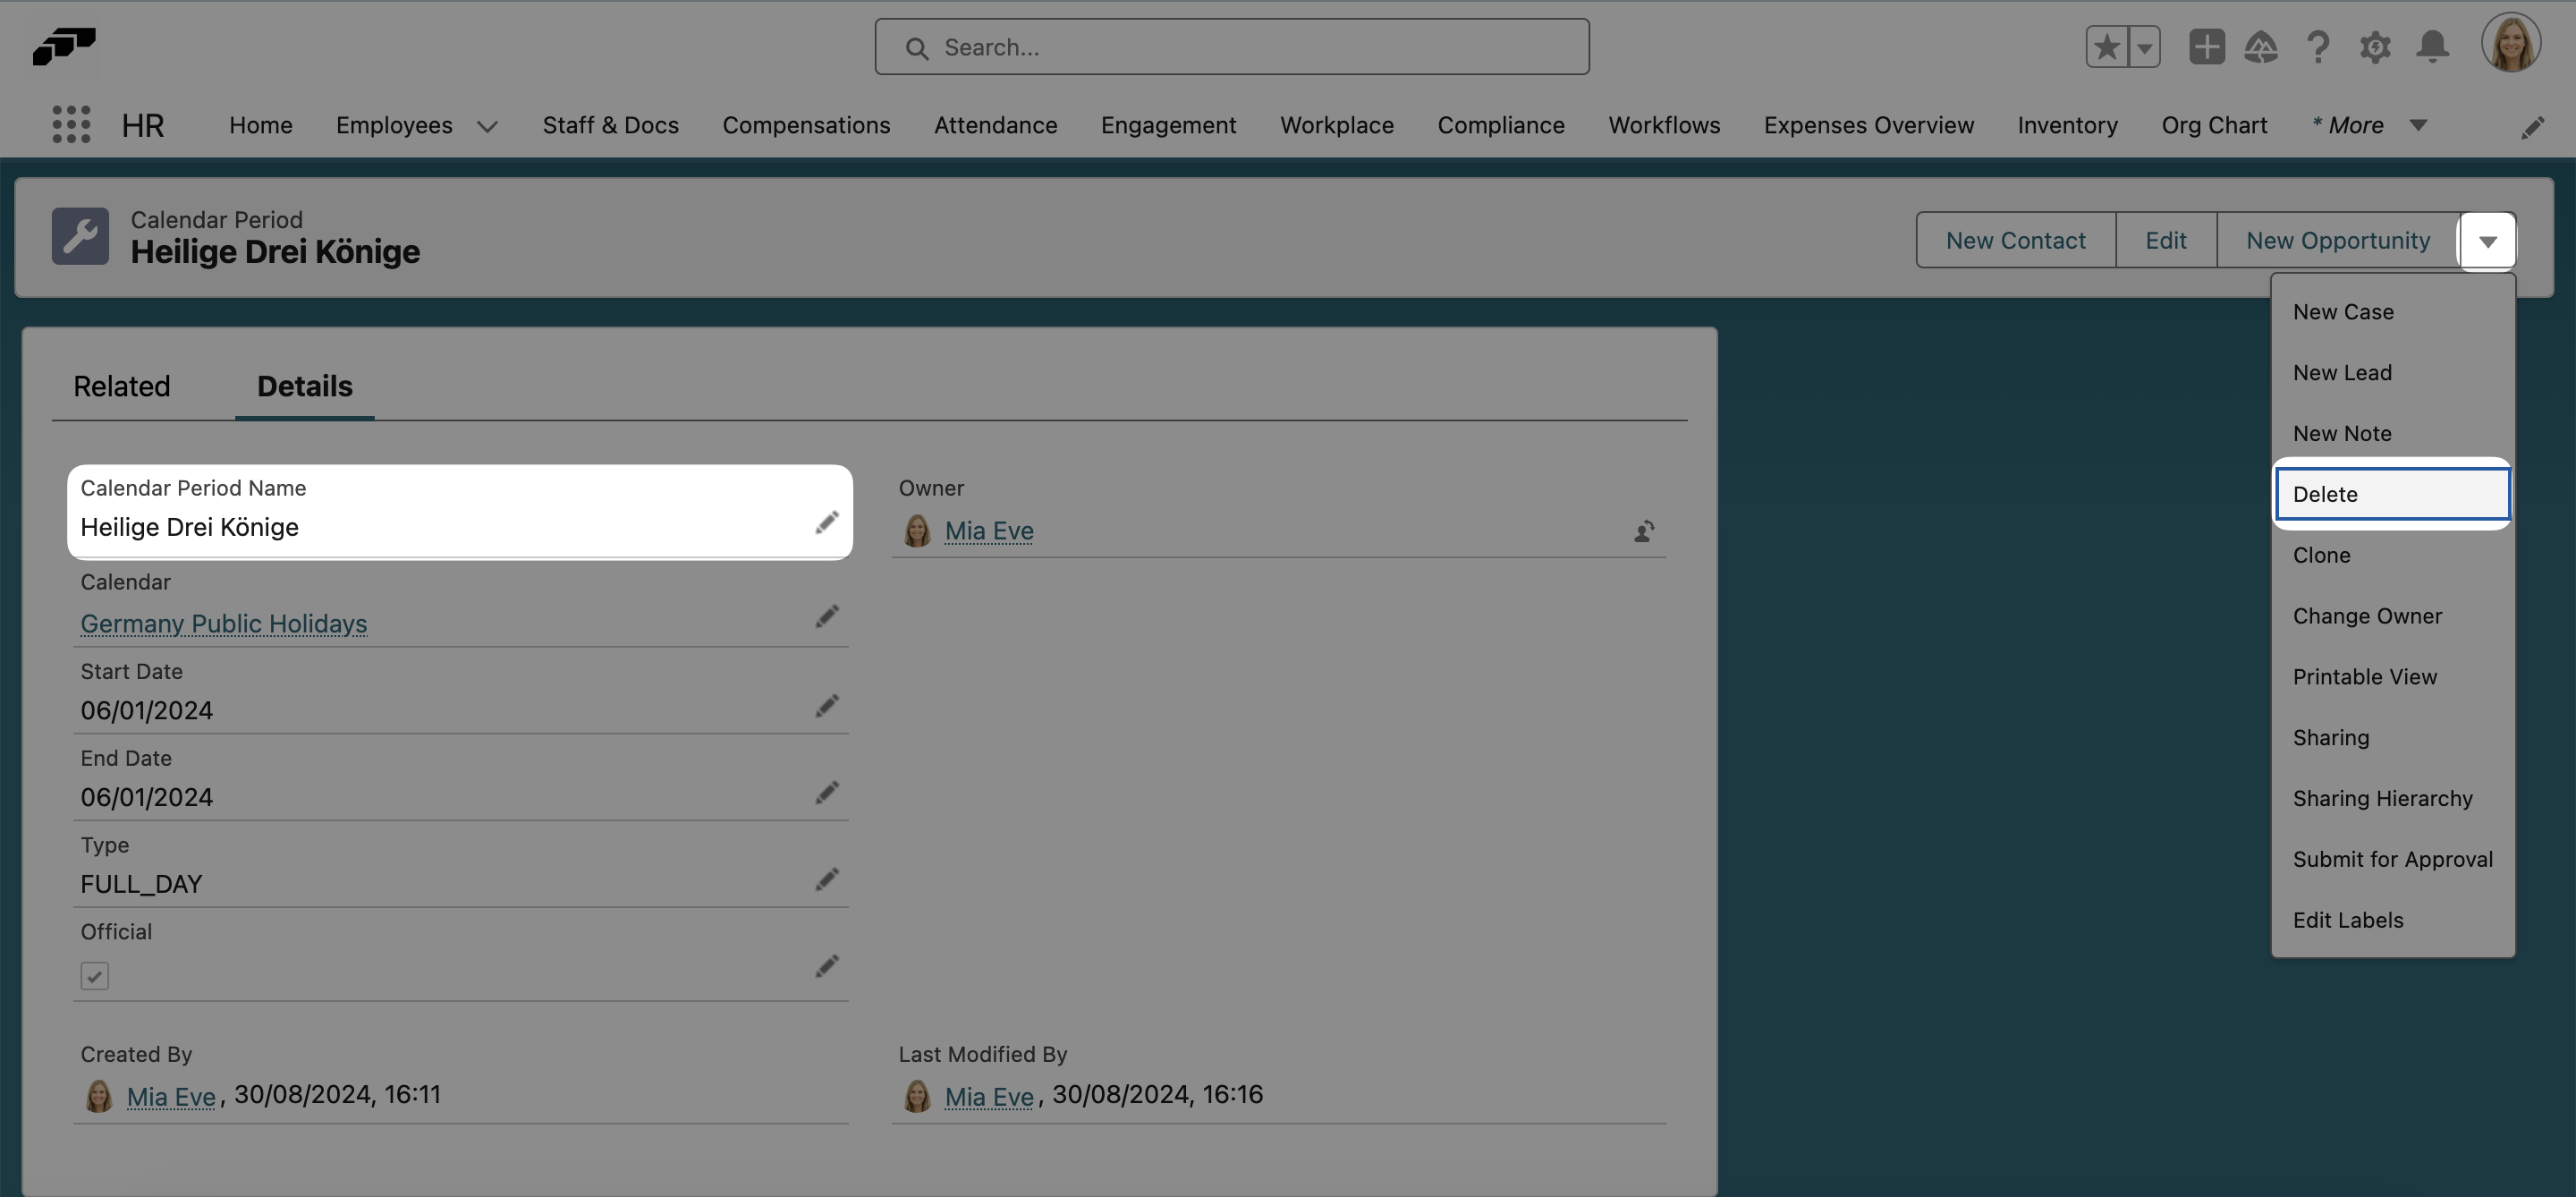
To rename or remove a holiday, switch to the monthly calendar view. Find the holiday you wish to change or remove and click on it. On this page, you can click the down arrow ▼ and Delete to remove the public holiday. You can also rename the holiday by clicking the pencil icon next to the field Calendar Period Name.
It is also possible to customize your holiday calendars by clicking the Add Period Manually button. Here, you can create your special holidays to complete your public holiday calendar. Simply give your holiday a name, start date, and end date, and click Save to add this holiday to the specified year. You will have to repeat this process for successive years if needed.
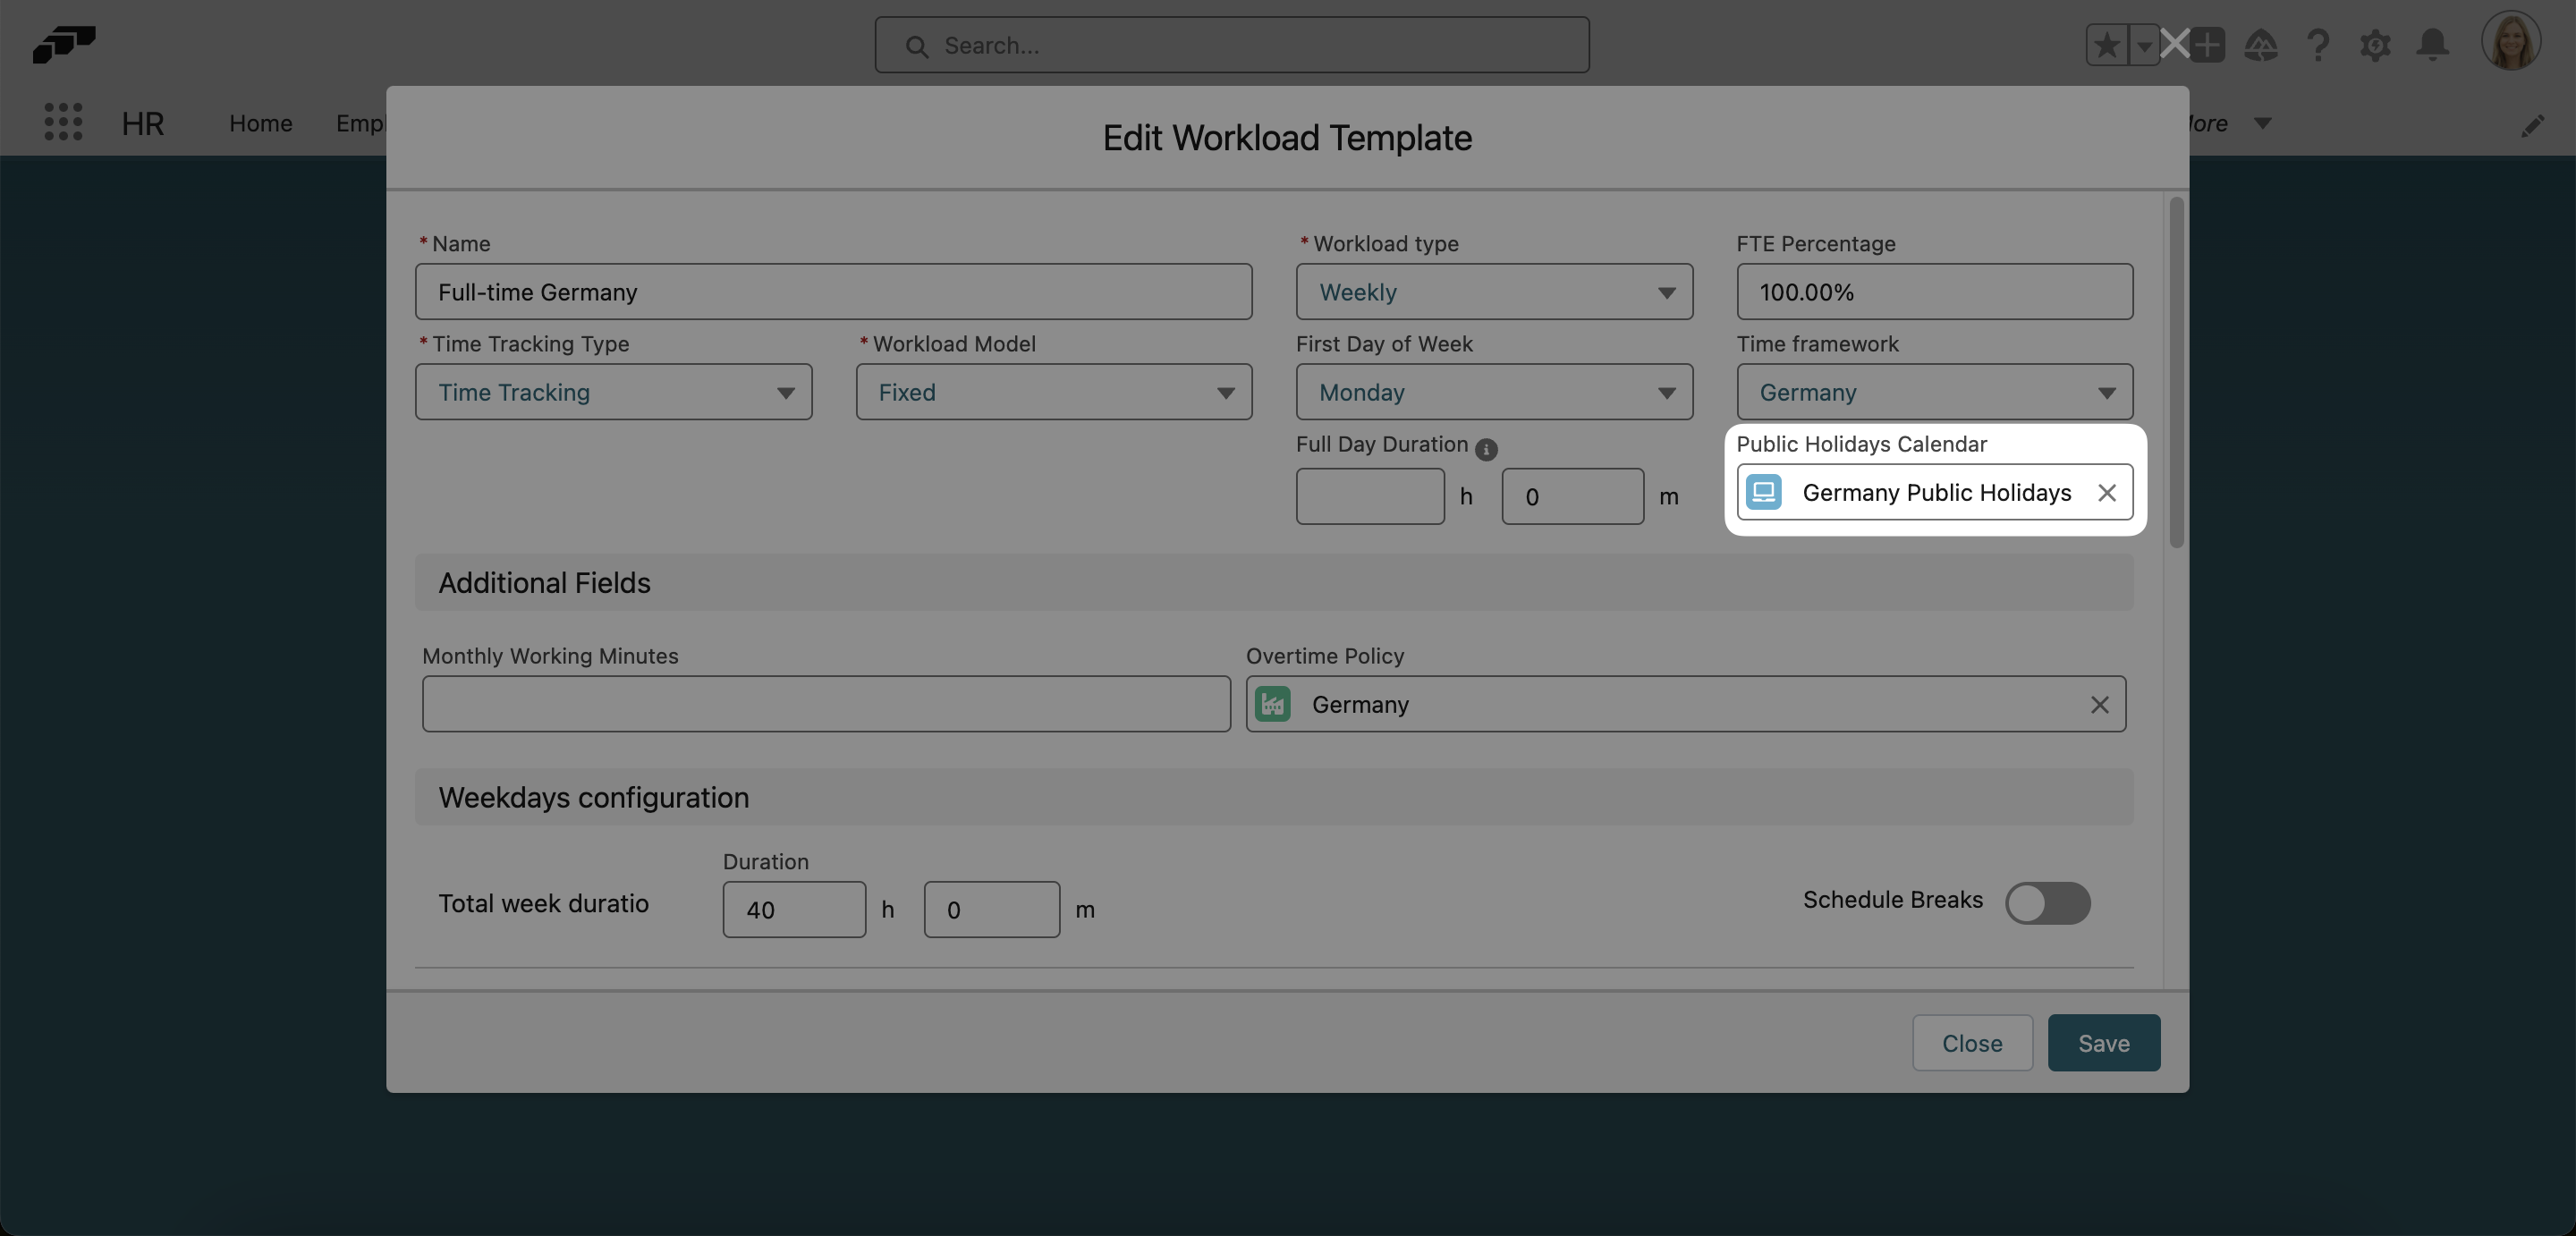
Once you have created a Calendar, you can assign it to a group of employees. Simply open the Employee Workload Templates page, edit an existing Workload or create a new one, and choose a Calendar from the field named Public Holidays Calendar. These public holidays will now appear in the personal absence calendar of every employee who has been assigned this Workload.
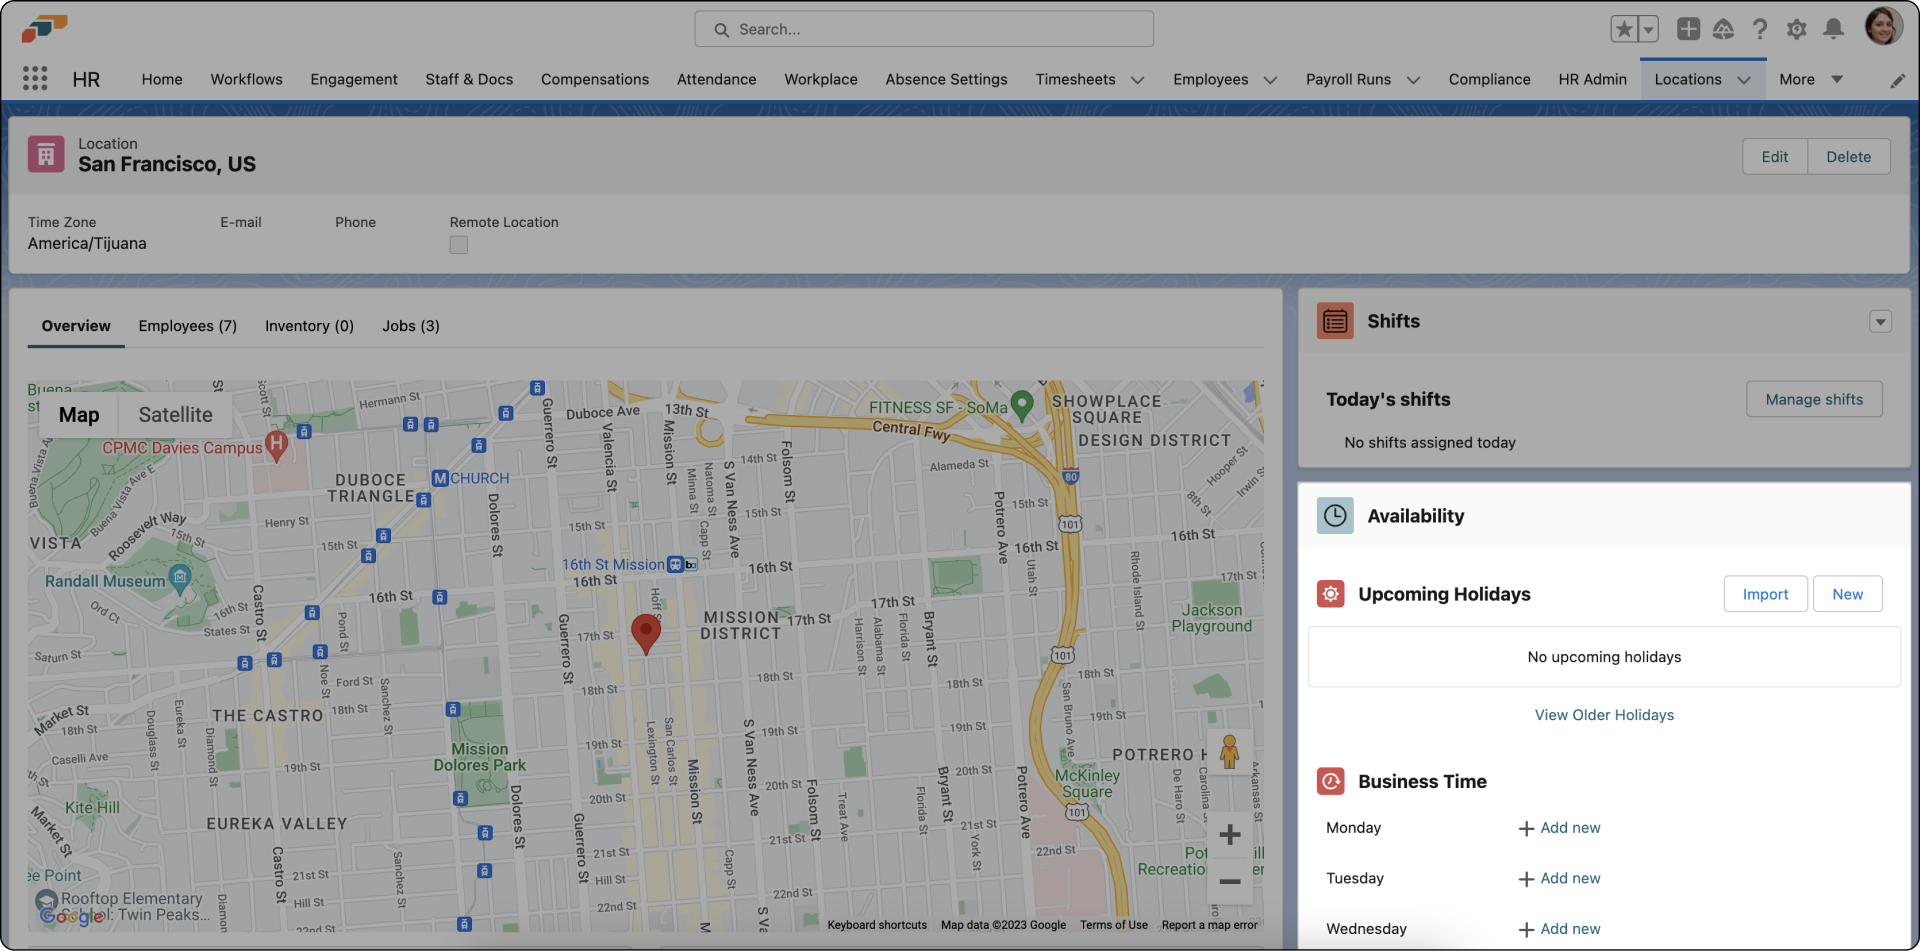
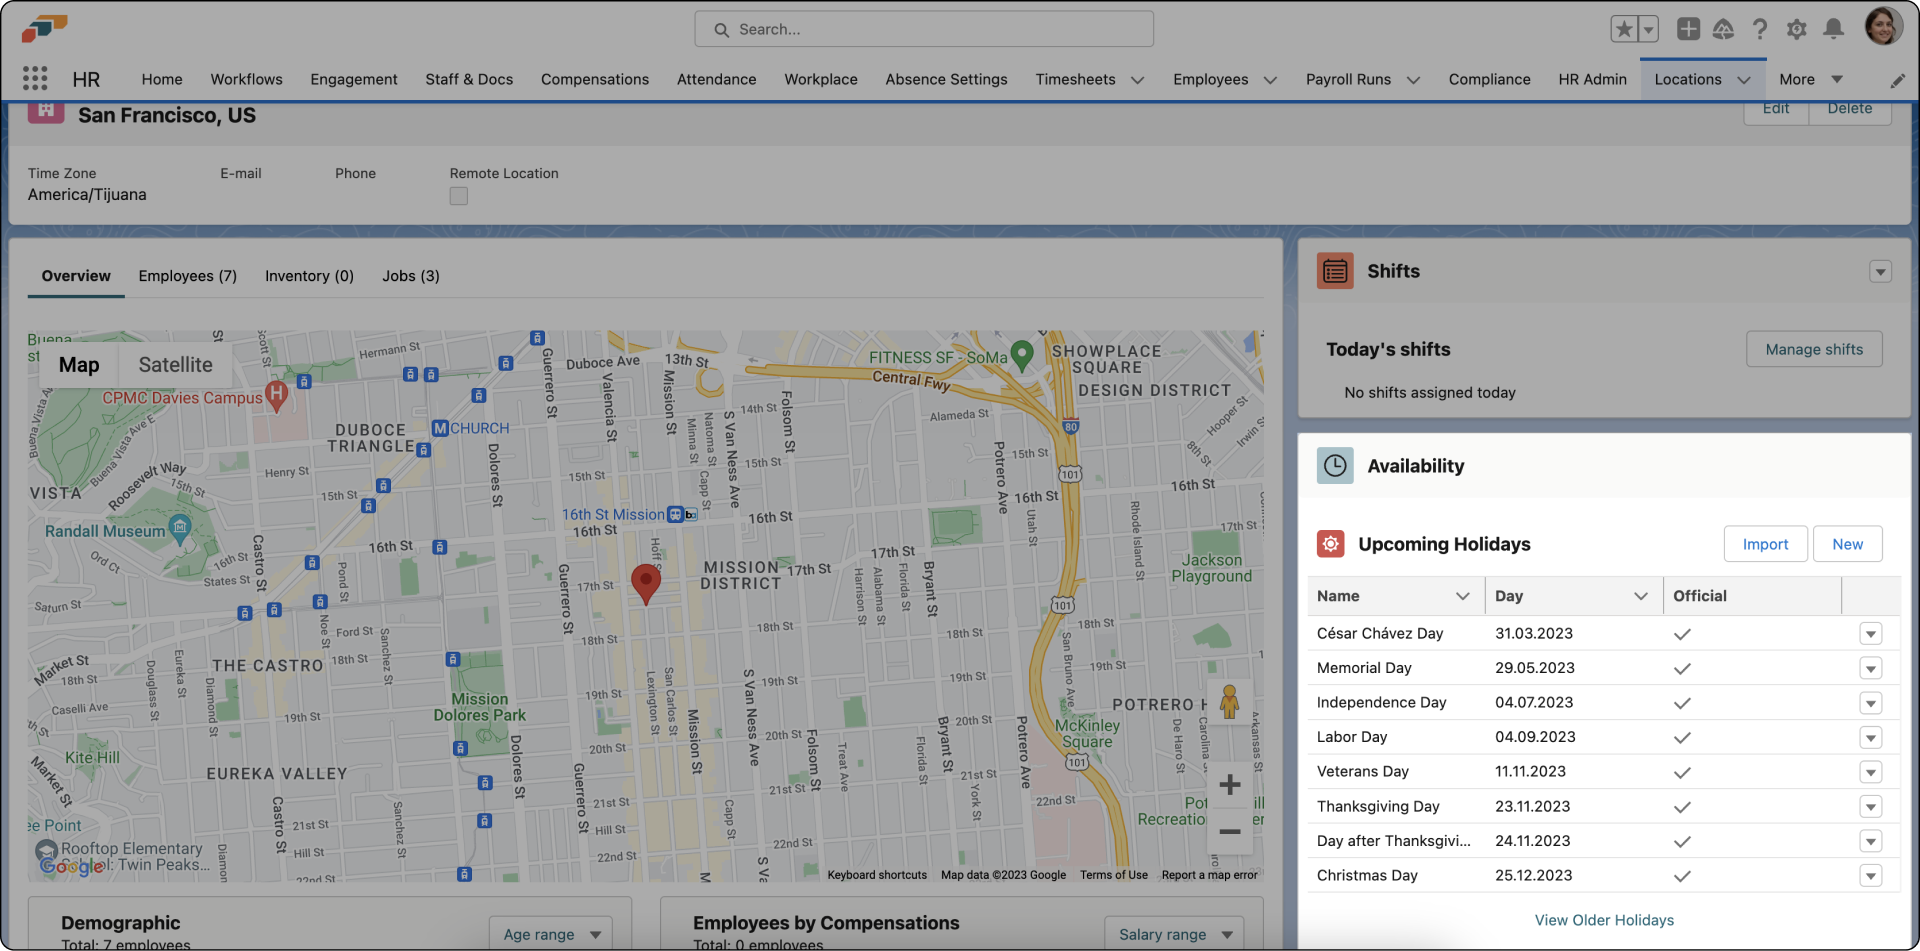
Alternatively, you can import public holidays for a specific location via the Locations page.
Select a location, then click on the Import button in the Holidays component.
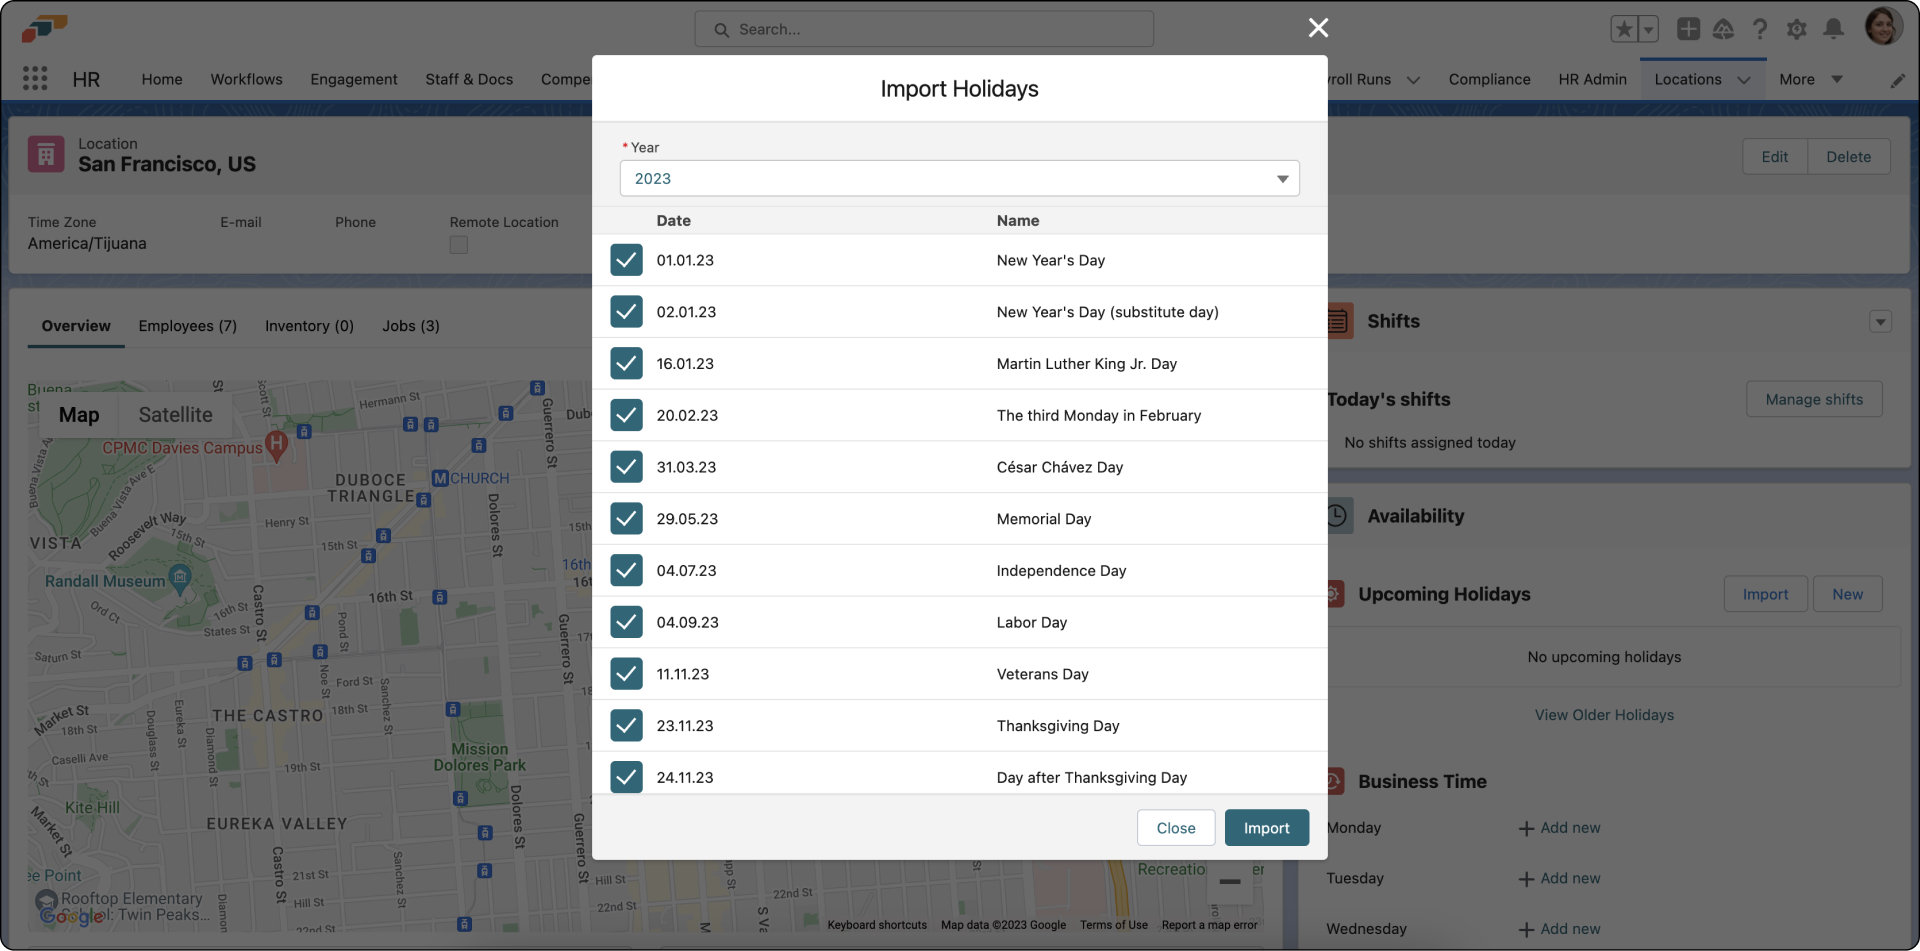
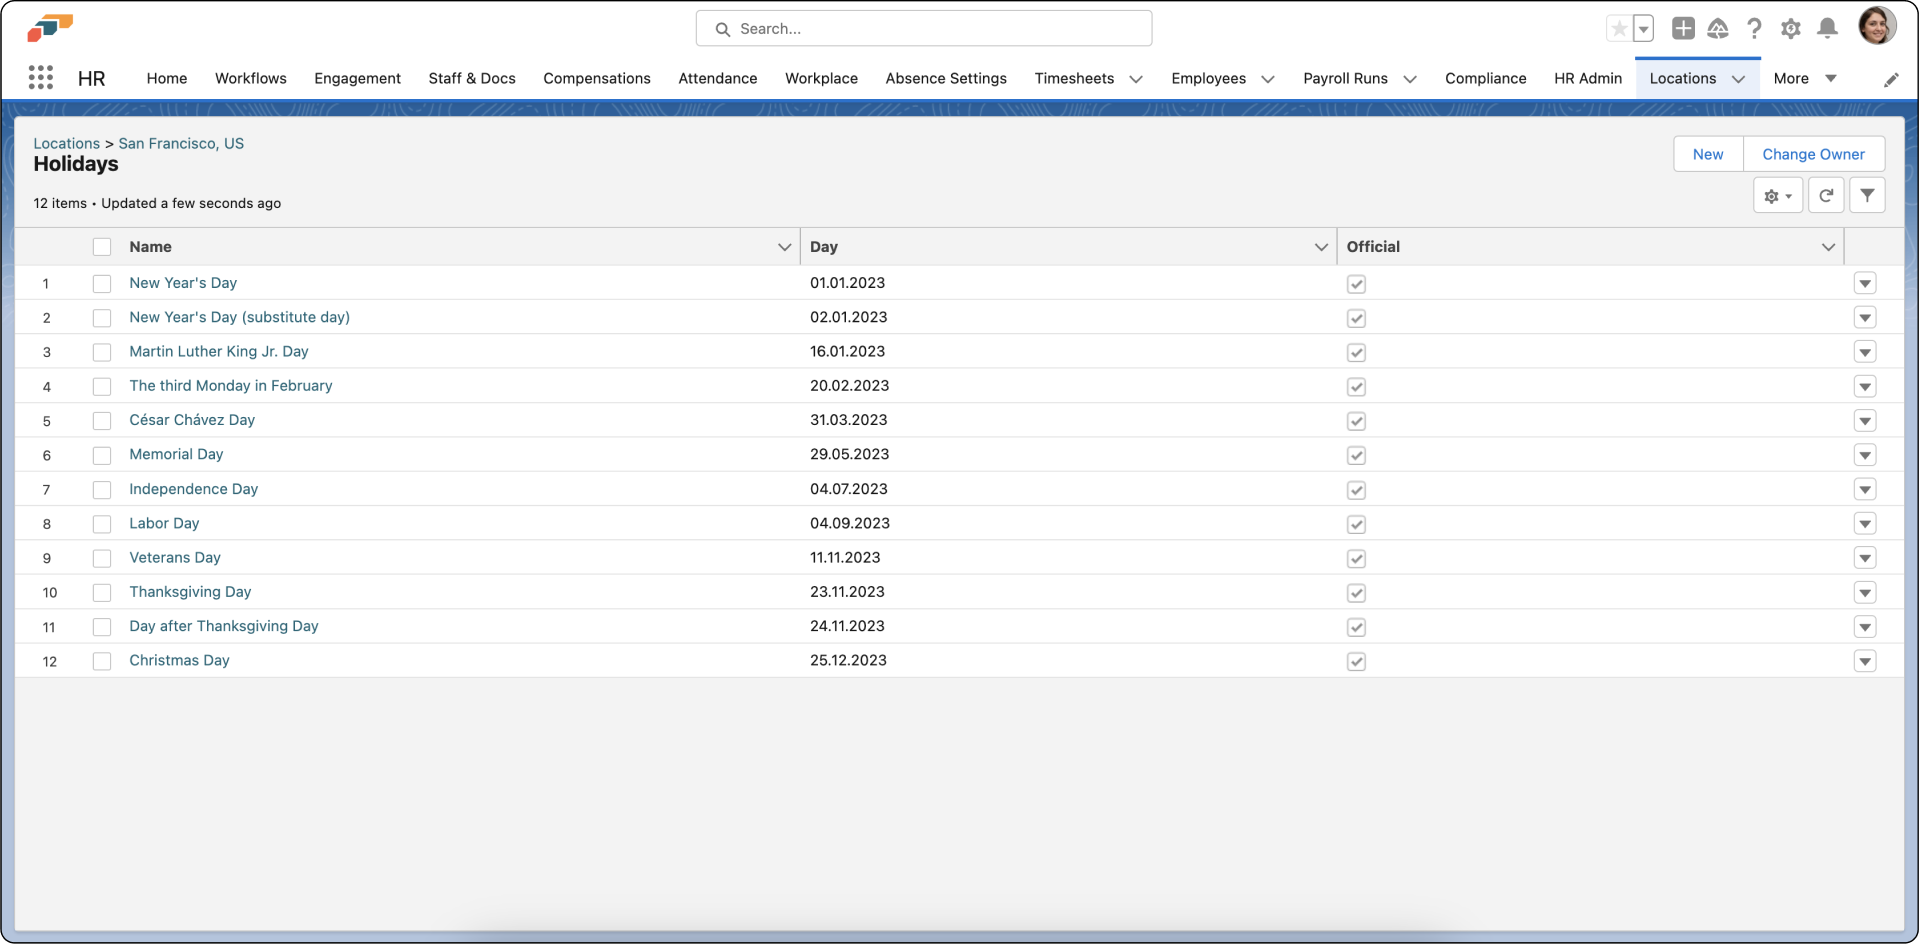
Now select a year for which you want to import public holidays, and all public holidays for this location will be shown. Select the ones you want to import, and click Import.
If the public holidays are not downloaded automatically, please check that your location address information is correct (street, postal/ZIP code, state, country, etc.).
And that's all! Now you have imported your local public holidays into flair.
Manually Adding Public Holidays
In flair, an employee can only be assigned to one location – this is the main location of their employment. But what if, for example, you have remote workers who are entitled to holidays from multiple locations?
In this case, you can manually add public holidays. First, create a location for the group of employees who are entitled to holidays from multiple regions. Next, give this new location an address (for example, the address of your headquarters), and import public holidays for this location using the automatic import method.
Adding Company Holidays to a Location
Follow these steps to manually add a company holiday to a specific location:
1. Click on App Launcher
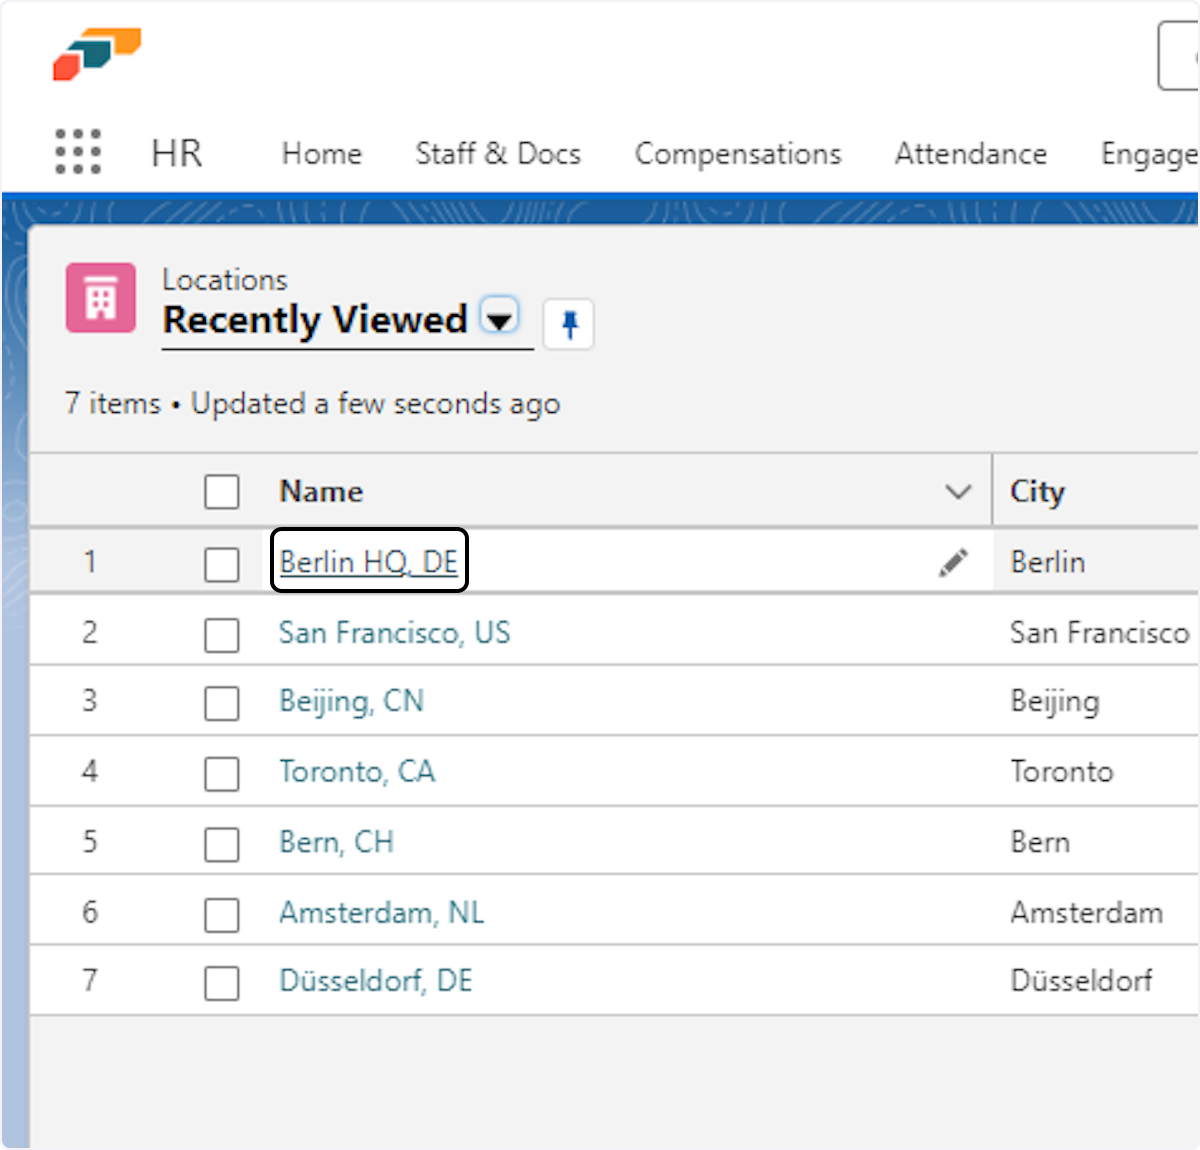
2. Click on Locations
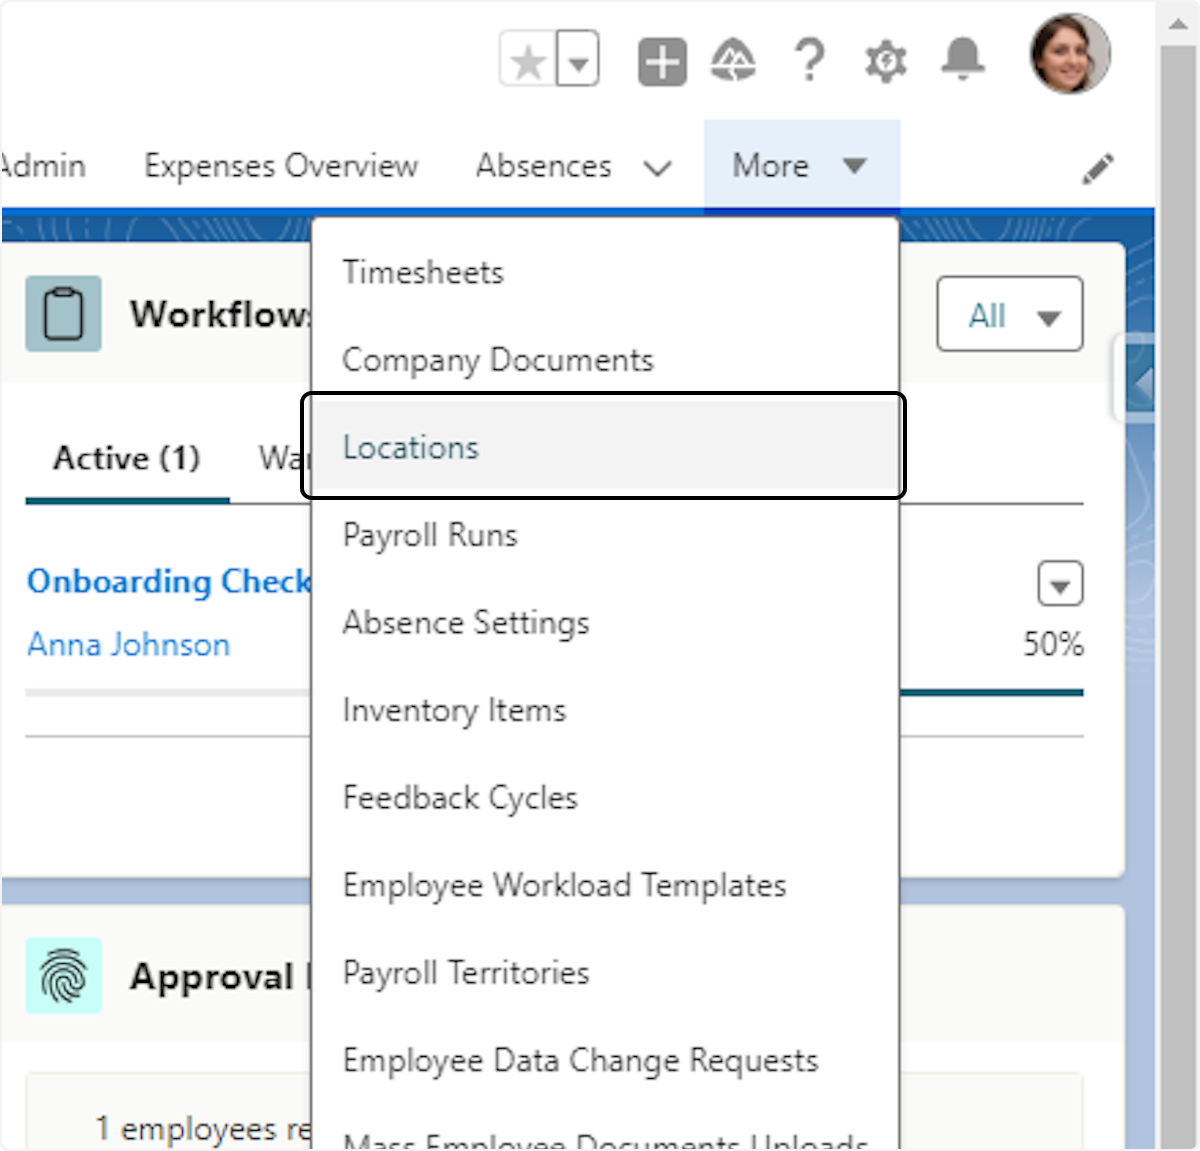
3. Click on one of your locations
You can create a new location if you haven't created a location already.
4. Click on New in the Upcoming Holiday section
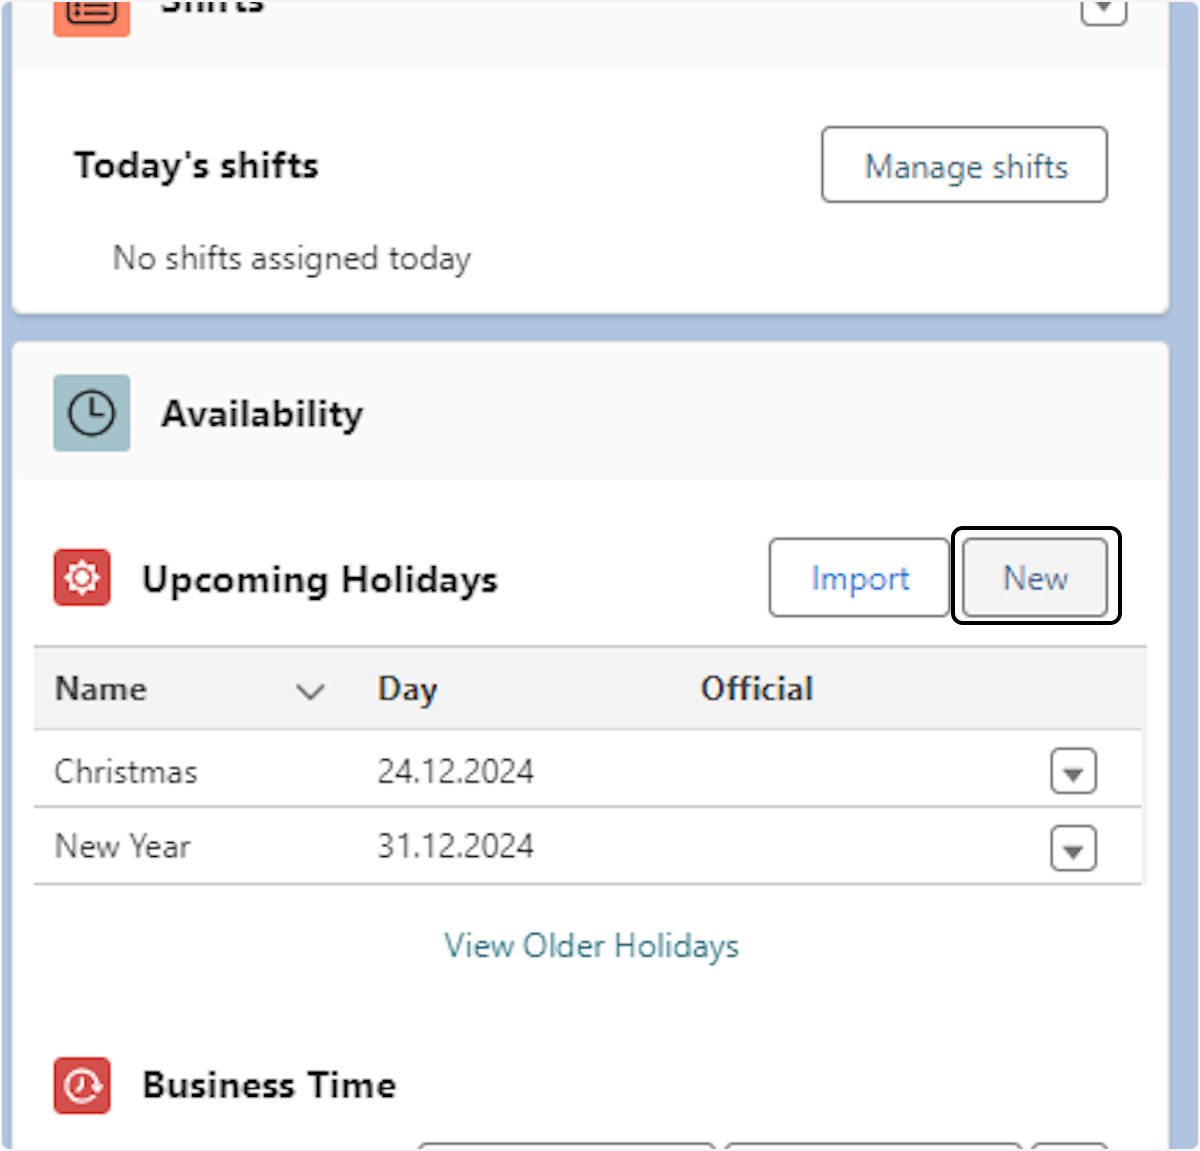
You have the option to edit, delete, or create public holidays.
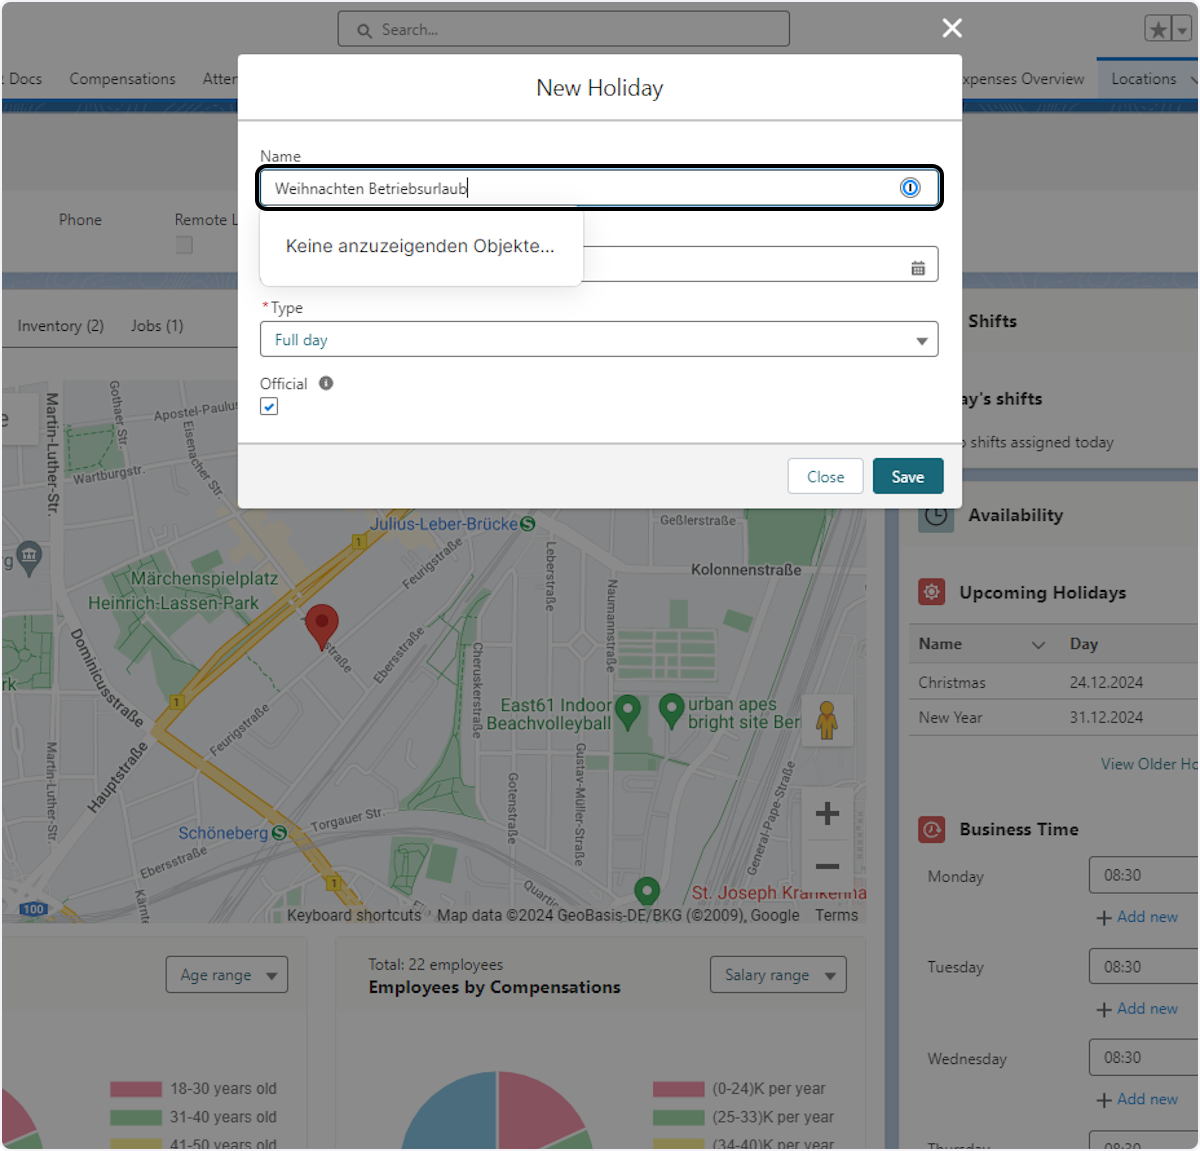
5. Type the holiday name (e.g. "Christmas Company Holiday")
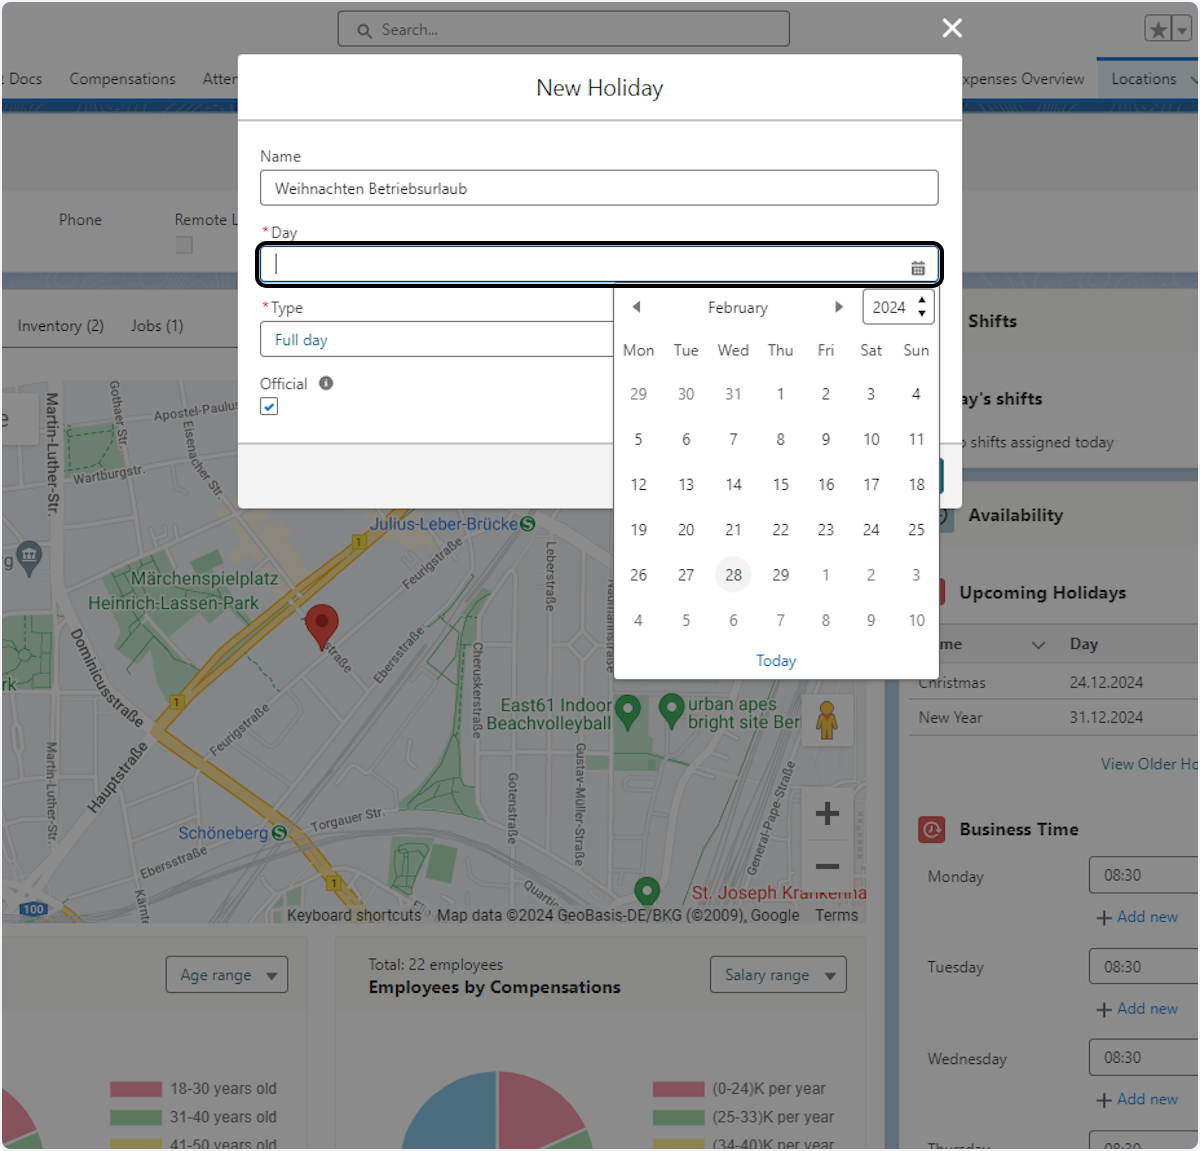
6. Click on Day and choose a date
7. Click on Type and select whether it's a half day or a full day
8. Check "Official" if this is an official holiday
9. Click Save
Holiday Assignment
The company holiday will be applicable to all employees assigned to this location, as holidays are determined by the location. If you haven't assigned employees to a location yet, you can do so now.
The company holiday will apply in the Employee Hub but will not deduct a day from the employees' overall vacation days.
Manually Adding Vacation Days (Allowances)
In some cases, you may need to manually add vacation days or allowances to an employee's account. This is useful for one-time adjustments, corrections, or special circumstances. Manual allowances should only be used for rare occasions—for recurring events, we recommend setting up a separate accrual policy.
To manually add vacation days in Salesforce:
- Click on App Launcher
- Type "employees"

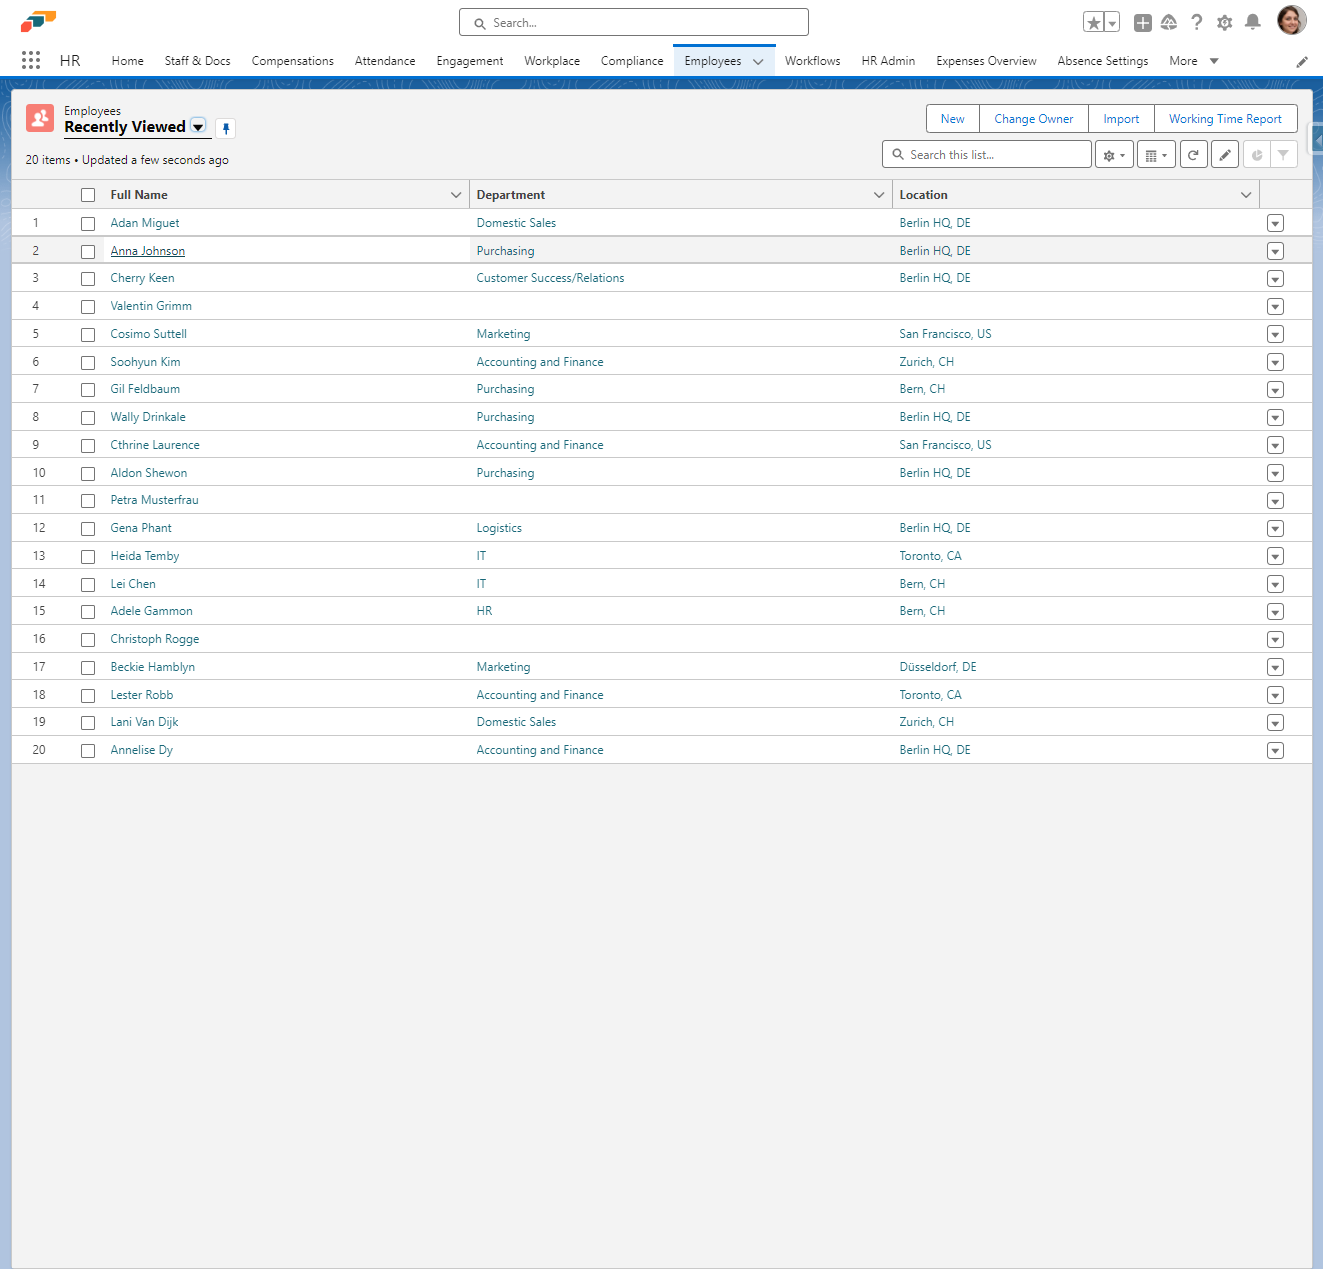
- Click on Employees
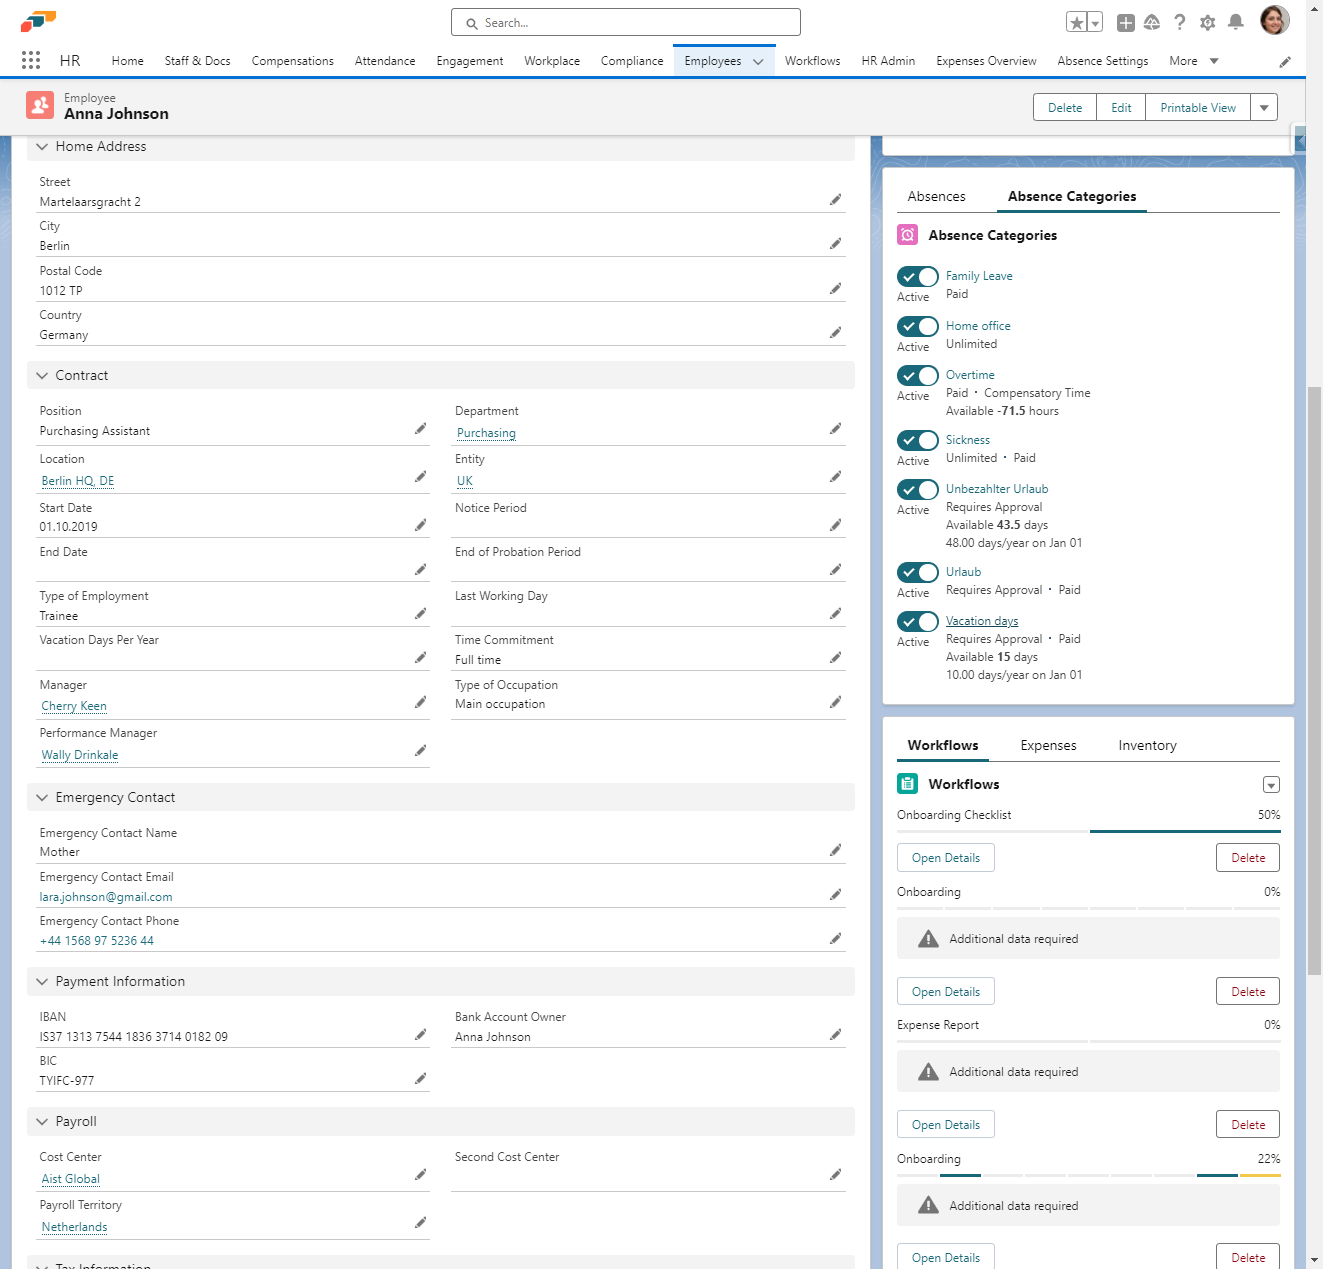
- Click on the name of the Employee to whom you want to add a manual allowance.
- Click on Absence Categories
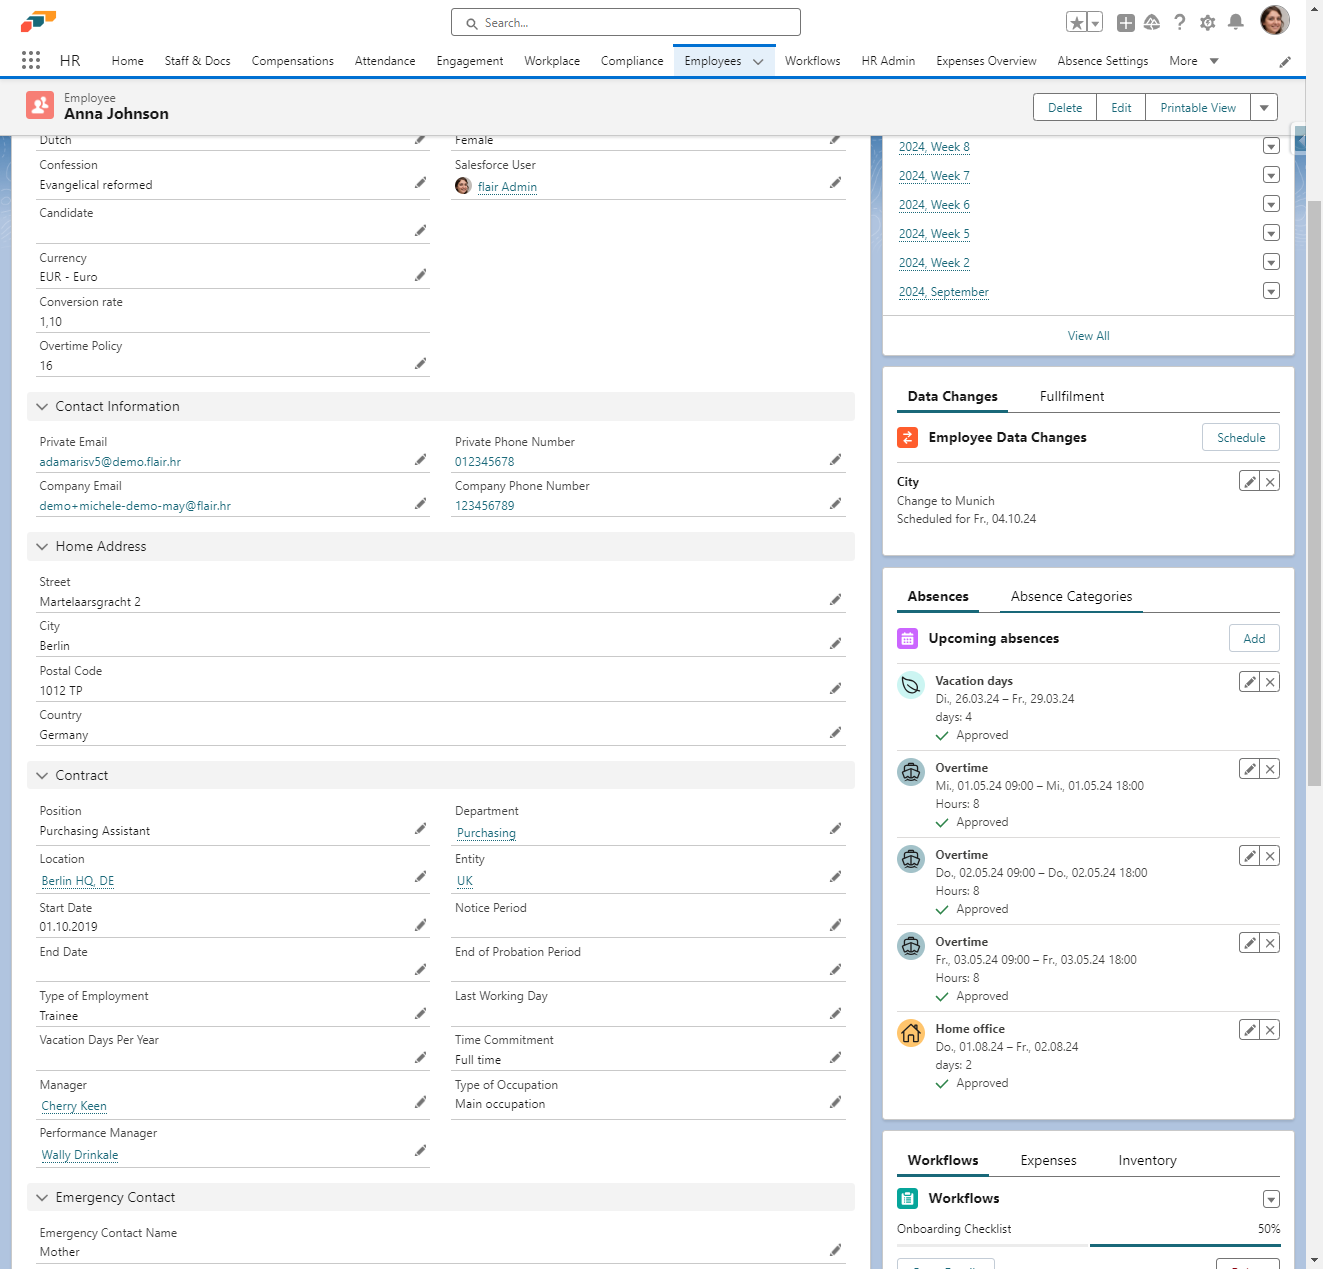
- Select the Accrual Policy to which you want to add the Manual Allowance.
- Click on Allowances
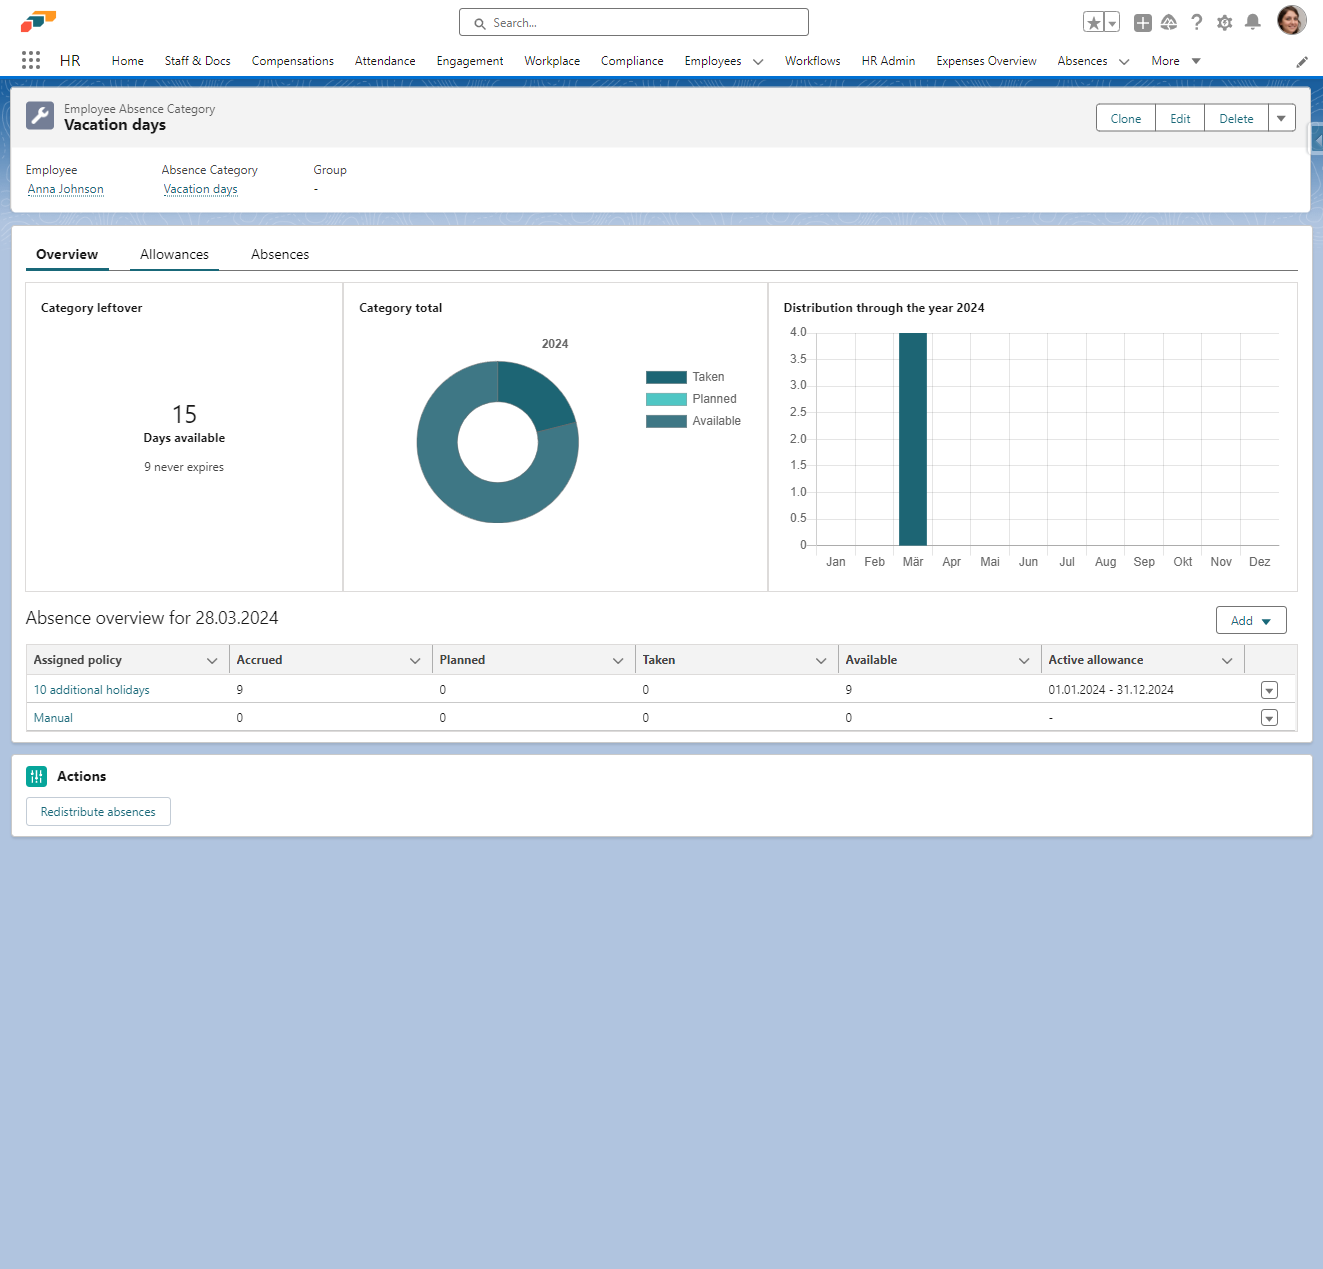
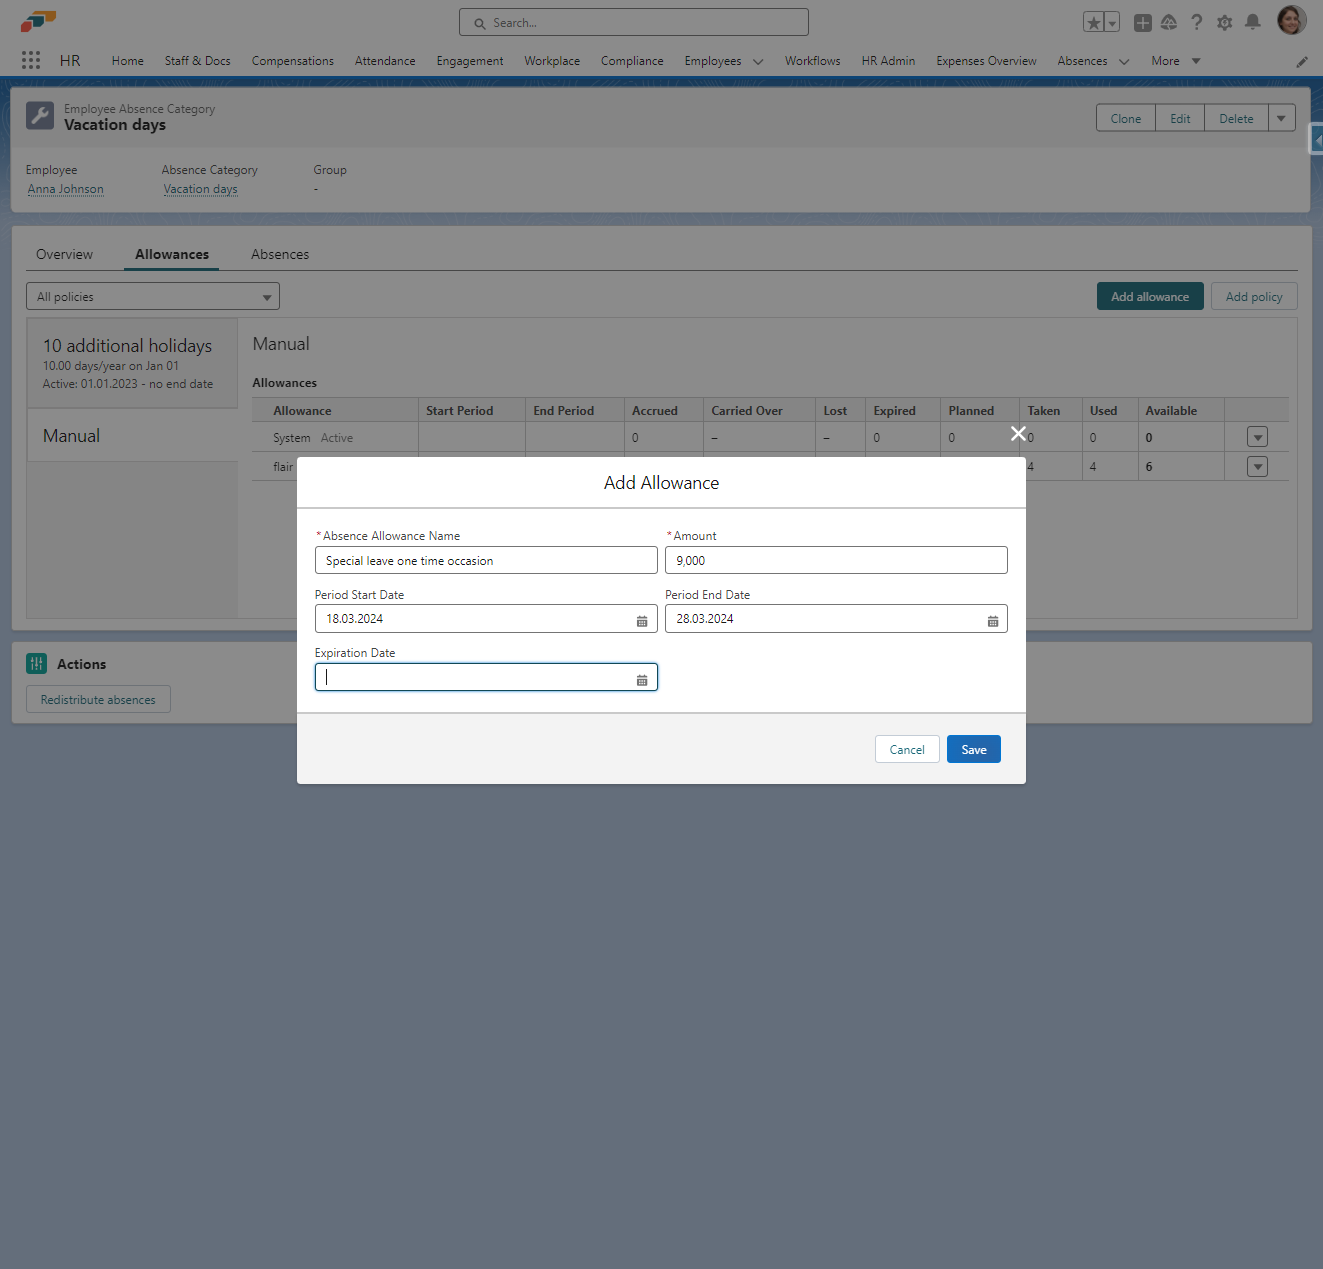
- Click on Add allowance
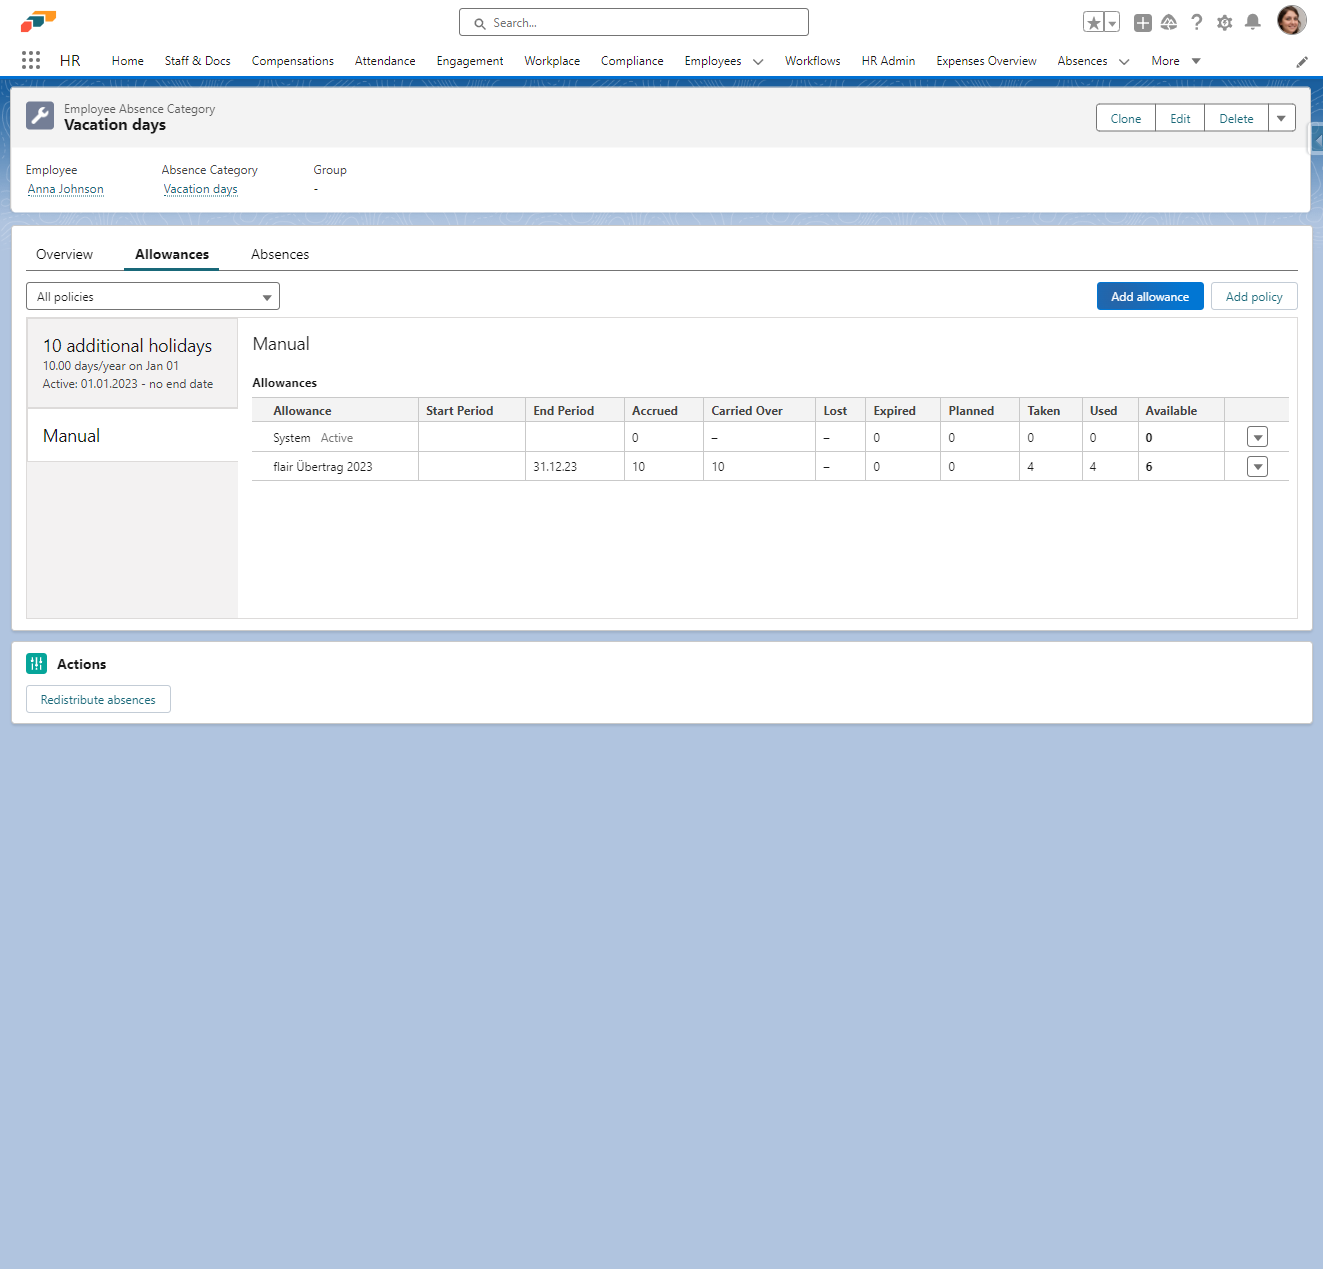
- Give a meaningful name to your manual allowance.

- Select the number of days you would like to choose.
- Select a start date and an end date for the period.

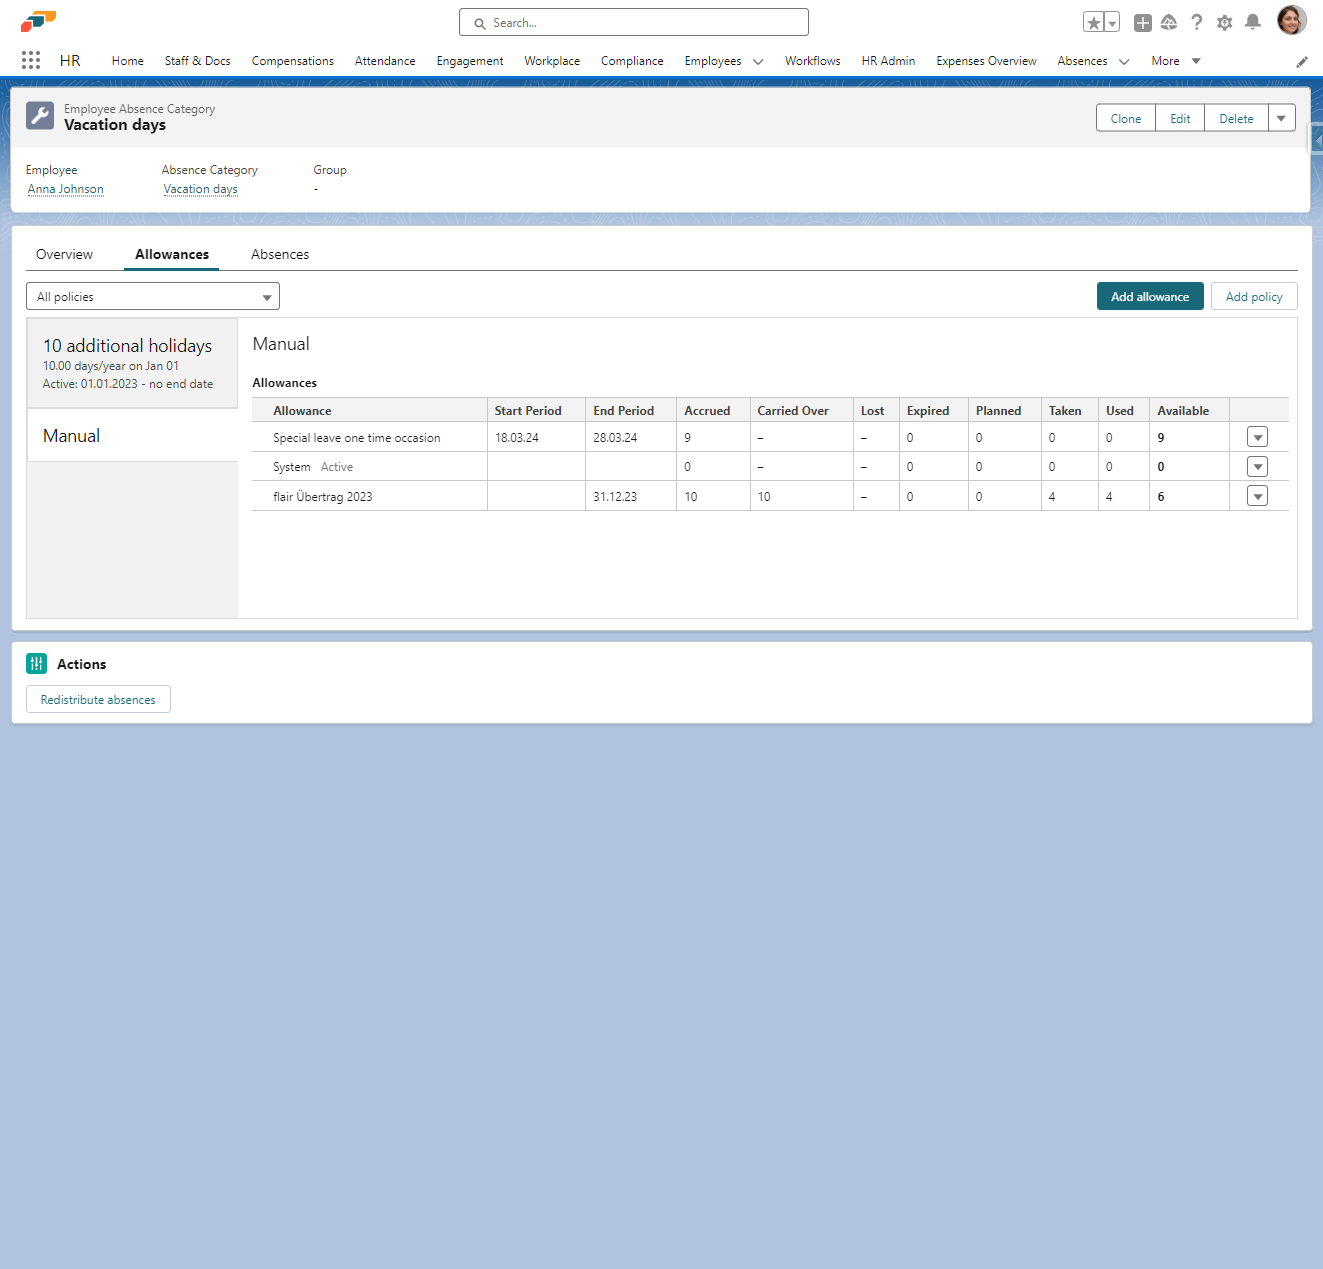
- Click on Save
- You have successfully added a manual allowance.
Please note that a manual allowance should only be used for rare occasions. If you would like to use it for recurring events, we recommend setting up a separate accrual policy!
Understanding Allowance Sorting Logic
When employees request absences, flair uses a specific logic to determine which allowances are used first. Understanding this sorting logic helps you predict how absence balances will be deducted.
Sorting Priority for Current and Past Absences
For absences in the current period or in the past, allowances are prioritized using the following logic:
-
Allowances without Start or End Dates
- These allowances are considered first, as they are not restricted by a time frame.
-
Allowances with Defined Start and End Dates
- These allowances are sorted chronologically from the oldest start date to the newest.
-
Allowance Weight
- If multiple allowances have the same start date, they are ordered by weight (if a weight parameter is available).
Example Scenario
If an employee has the following allowances:
- Allowance A (No start or end date)
- Allowance B (Start: Jan 1, 2023, End: Dec 31, 2023)
- Allowance C (Start: Mar 1, 2023, End: Dec 31, 2023)
- Allowance D (Start: Jan 1, 2023, End: Dec 31, 2023, with a higher weight than Allowance B)
The order of application would be:
- Allowance A (No dates)
- Allowance B (Oldest start date: Jan 1, 2023)
- Allowance D (Same start date as B but higher weight)
- Allowance C (Newer start date: Mar 1, 2023)
Future Vacation Deduction
If you have any unused absence allowance from the current period, those days will be deducted first, even if your absence is planned for a future period.
This ensures that you have the opportunity to use your absence allowance from the current period before starting to use your allocation for the upcoming period.
If an employee books vacations for the next period, this absence is reserved from the future allowance. However, if carryover days from the previous year are left and the time of the absence is approaching, the carryover days from the past year will be taken first.
By following this structured sorting approach, the system ensures that allowances are applied in a logical and predictable manner. Understanding these rules helps in managing leave balances and ensuring fair application of accruals.