Manage labels and translations
Adapt flair terminology and translated content in Salesforce and the Employee Hub. This guide covers Translation Workbench, display labels, picklists, Employee record types, and the Employee record page.
Salesforce Admins who manage languages, objects, fields, picklists, profiles, and record types in Salesforce Setup.
Before you begin
- Confirm which Salesforce languages your organization supports.
- Make sure you can manage Translation Workbench, Object Manager, profiles, and record types.
Enable Translation Workbench
Enable Translation Workbench when translations or the option to overwrite Custom Labels are missing.
- In Salesforce Setup, enter
Translation Workbenchin Quick Find. - Open Translation Workbench.
- Enable Translation Workbench.
- Select the languages your organization supports.
Update Salesforce translations
- In Salesforce Setup, open Translation Workbench.
- Select Translation Language.
- Choose the language to update.
- Use Translate to update Custom Labels, field labels, and other text.
- Review translations for Job records and any other required objects.
- Save the translations.
After Translation Workbench is enabled, you can overwrite Custom Labels throughout flair to match your organization's terminology and language preferences.
Add and translate a picklist value
Add the picklist value
- In Salesforce Setup, open Object Manager.
- Select the object, such as Job.
- Open Fields & Relationships.
- Select the picklist field, such as Type of Employment.
- Under Values, click New.
- Enter the picklist value.
- Click Save.
Translate the picklist value
- In Salesforce Setup, enter
workbenchin Quick Find. - Open Translation Workbench → Translate.
- In Setup Component, select Picklist Value.
- Select the object that contains the new value, such as Job.
- Select the picklist field, such as Type of Employment.
- Double-click Picklist Value Label Translation for the new value.
- Enter the translation.
- Click Save.
Activate a picklist value
Salesforce explains how to add or edit picklist values and manage inactive picklist values.
After activating a value, add it to each required record type:
- In Salesforce Object Manager, select the object.
- Open Record Types.
- Select the record type.
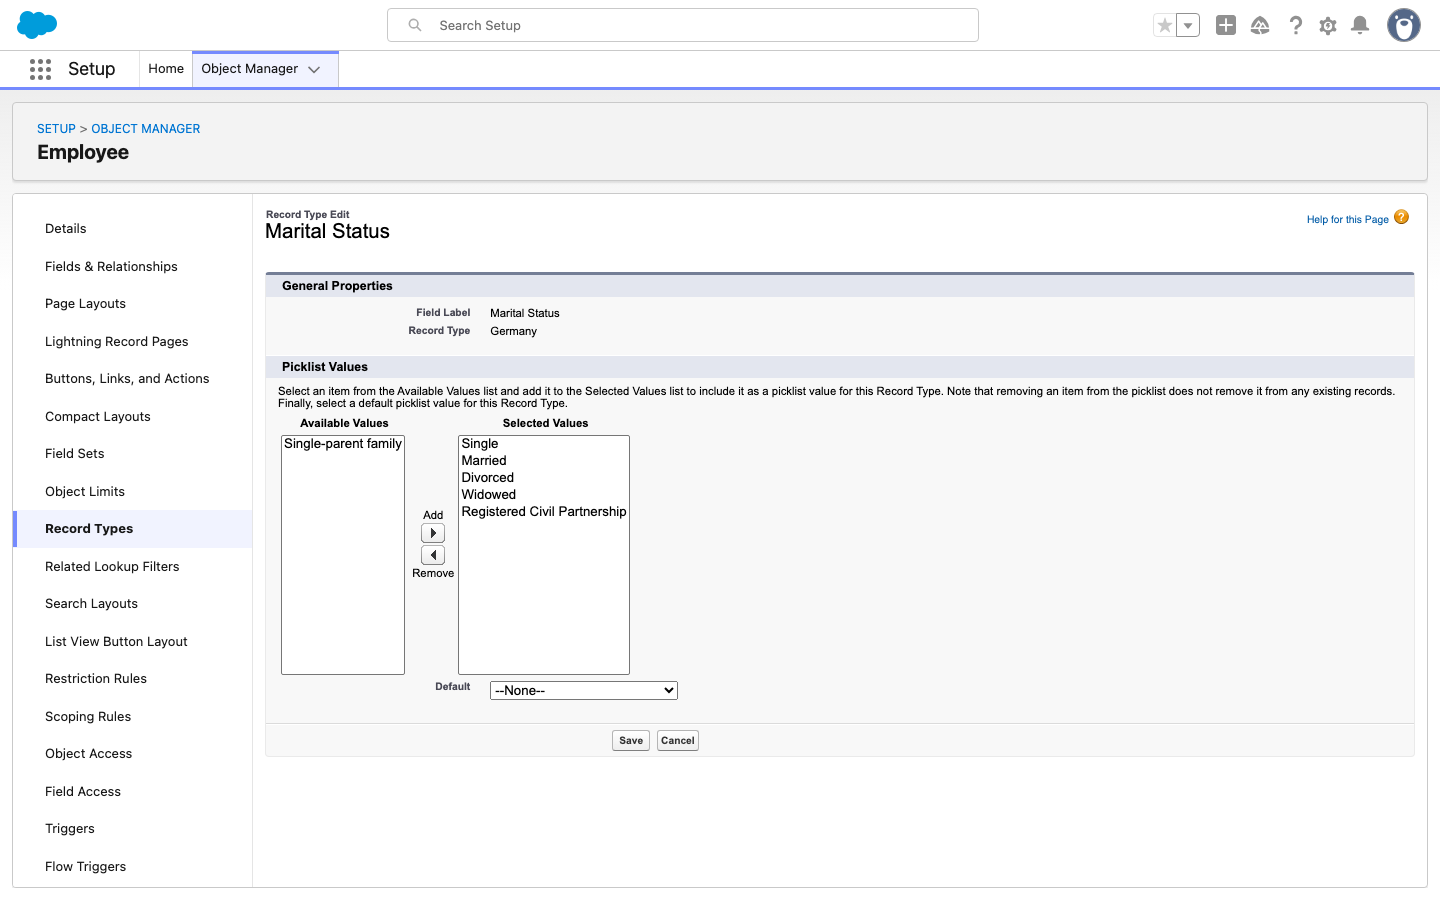
- Under Picklists Available for Editing, open the picklist.
- Add the new value to Selected Values.
- Save the record type.
Rename objects and fields
Rename display labels when your organization uses different terminology, such as Org Unit instead of Department.
- In Salesforce Setup, open Object Manager → Rename Tabs and Labels.
- Rename the required object or field labels.
- Save the changes.
The custom names appear in Salesforce and the Employee Hub, including these areas:
- Filters, columns, tabs, and pickers in Attendance, Staff, Docs, Workplace, and Inventory.
- Shift Planner.
- Headcount and performance reports.
- Org Chart.
Renaming changes only the display label. The API name stays the same, so existing reports, automations, and integrations continue to work.
Enable Employee record types for profiles
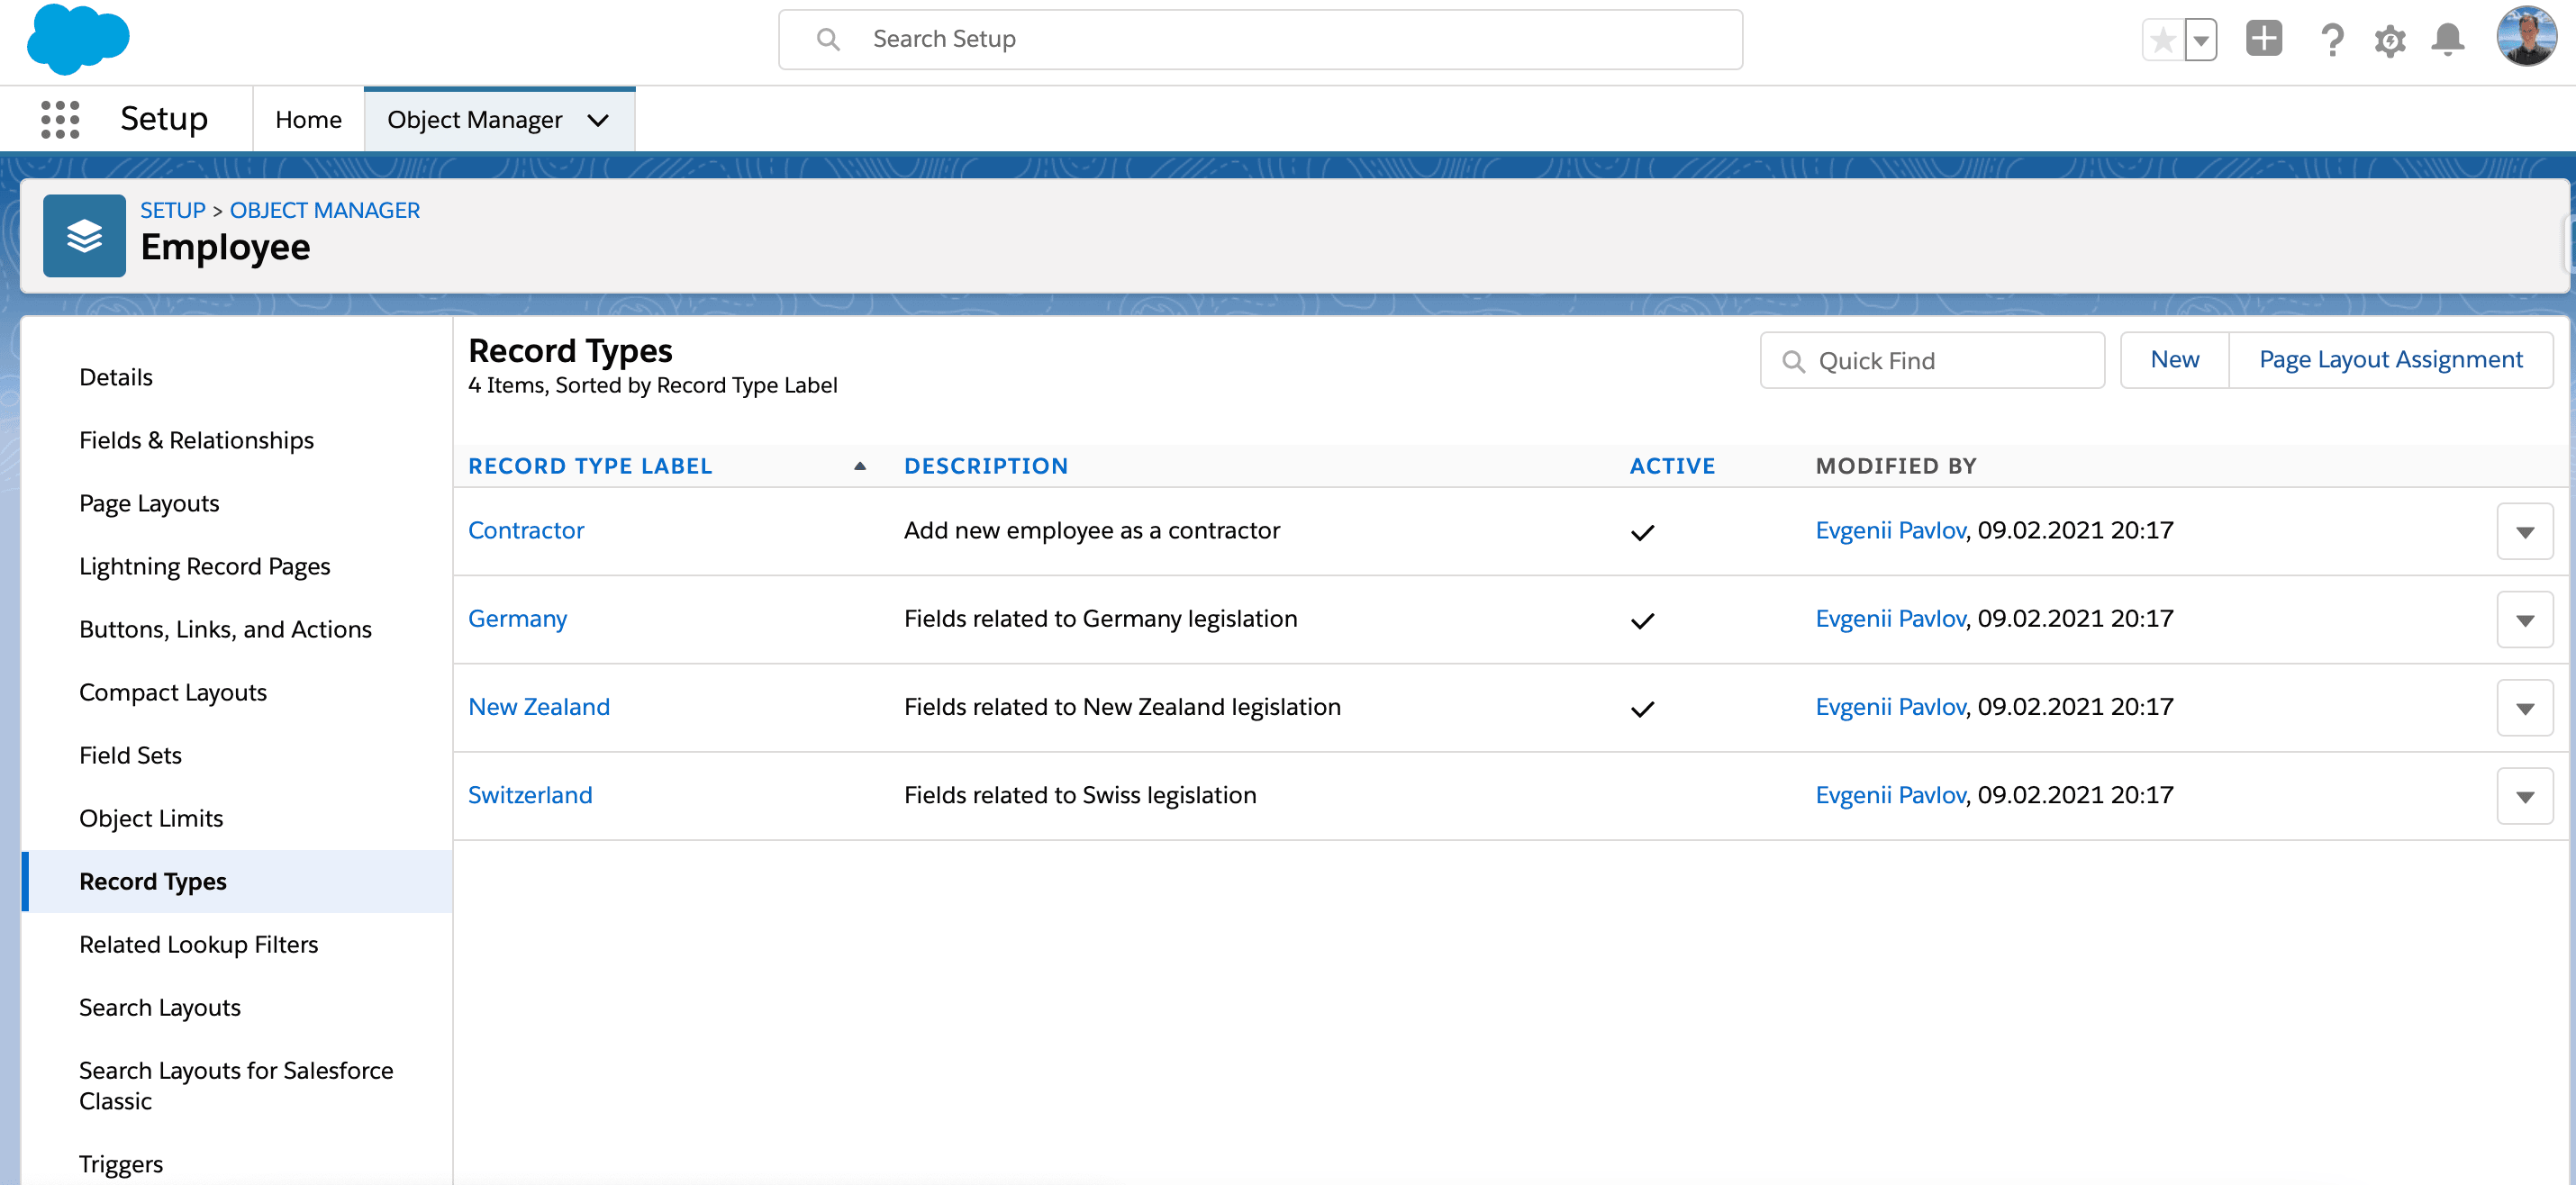
An Employee record type controls which fields and picklists appear on an employee profile. Organizations can use different record types for country-specific information.
-
In Salesforce Setup, enter
Profilesin Quick Find. -
Open Profiles.
-
Select a profile.
-
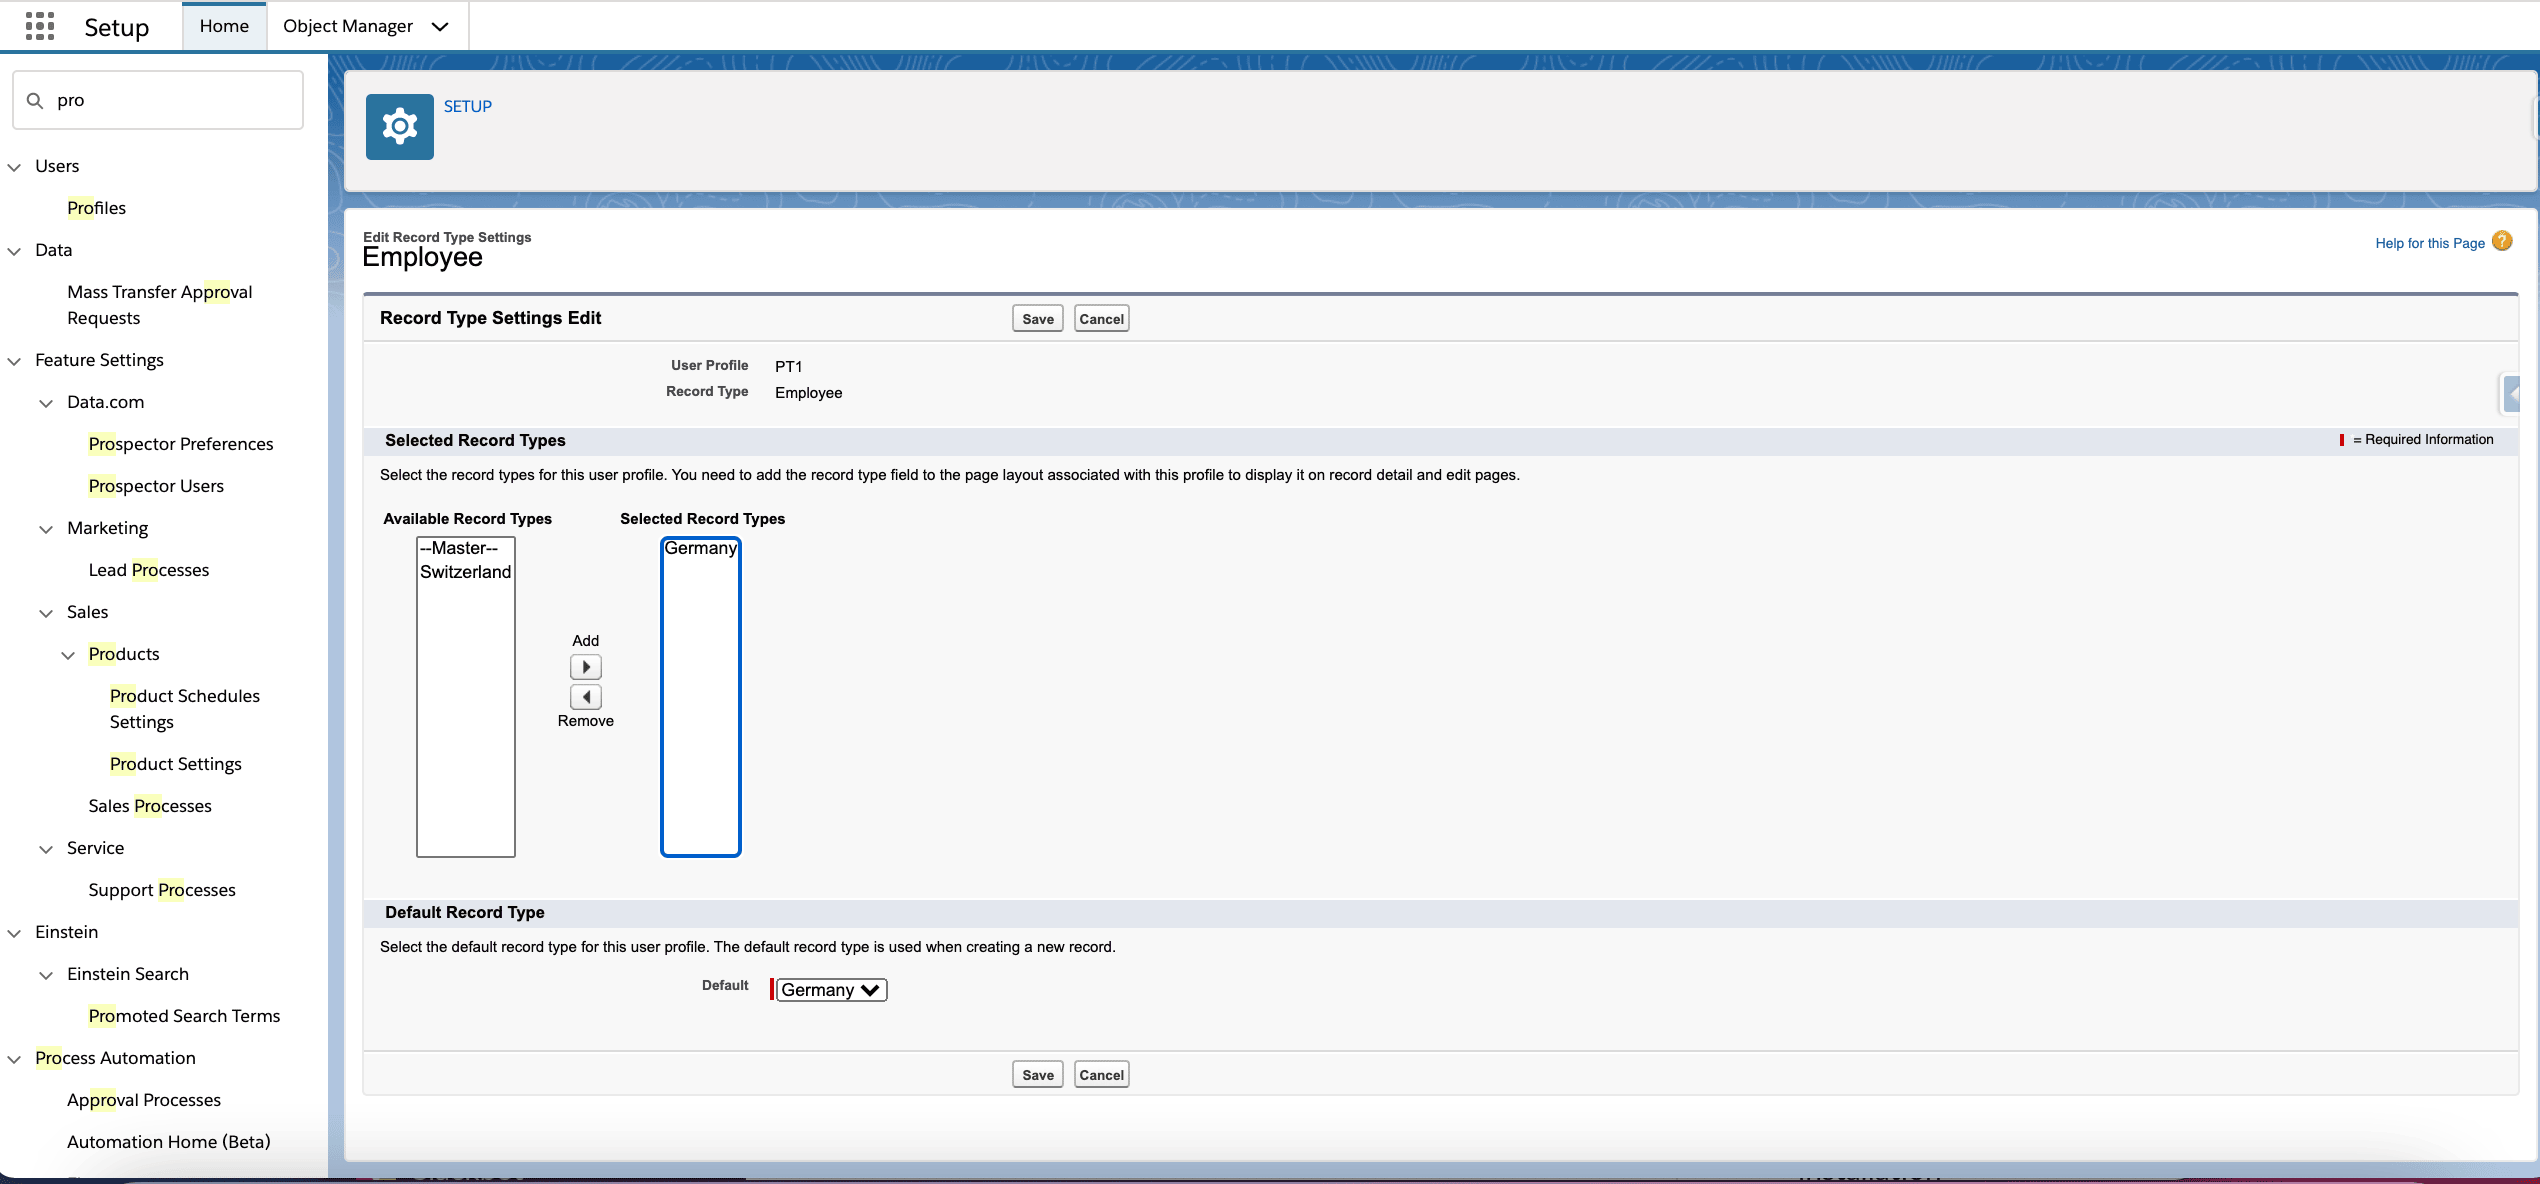
Under Custom Record Type Settings, next to Employees, click Edit.
-
Add each required record type from Available Record Types to Selected Record Types.
-
Optional: Remove record types that the profile does not use.
-
Select the default record type.
-
Click Save.
-
Repeat these steps for every profile that needs the Employee record type.
Add components to the Employee record page
Use Lightning App Builder to add related lists and other components to the Employee record page.
- In Employees, open an employee record.
- Click the setup gear, and then click Edit Page. Salesforce opens Lightning App Builder.
- Drag the required component, such as Related List - Single, onto the page layout.
- Complete the component's required fields.
- Click Save.
- Click Activation.
- Assign the page as the organization default, an app default, or to the required apps, record types, or profiles.
- Click Close, and then click Save.
Some component configurations require Dynamic Forms.
Troubleshooting
A translated Salesforce page still appears in English
- In Setup, open Personal Information → Language & Time Zone for the user.
- Match the user's language to a configured Translation Workbench language.
- Check whether custom Lightning components require separate translation files.
- Confirm that every required translation file is deployed.
- Refresh the page to rule out cached content.