Configure the Employee Hub
Configure how employees access and use the flair Employee Hub. This guide covers domains, session security, navigation, data layouts, invitations, multiple Hubs, and test environments.
HR Admins and Salesforce Admins who configure the Employee Hub in the flair HR app and Salesforce Setup.
Before you begin
- Confirm that the Employee Hub is enabled for your organization.
- Make sure you can manage Employee Hub settings, Salesforce objects, permission sets, and Flows.
- If you are configuring multiple Employee Hubs for the first time, involve your Customer Success Manager.
Set the Employee Hub domain
Set a custom domain when the Employee Hub uses SAML single sign-on (SSO). Notification links and the SSO login URL use this domain.
-
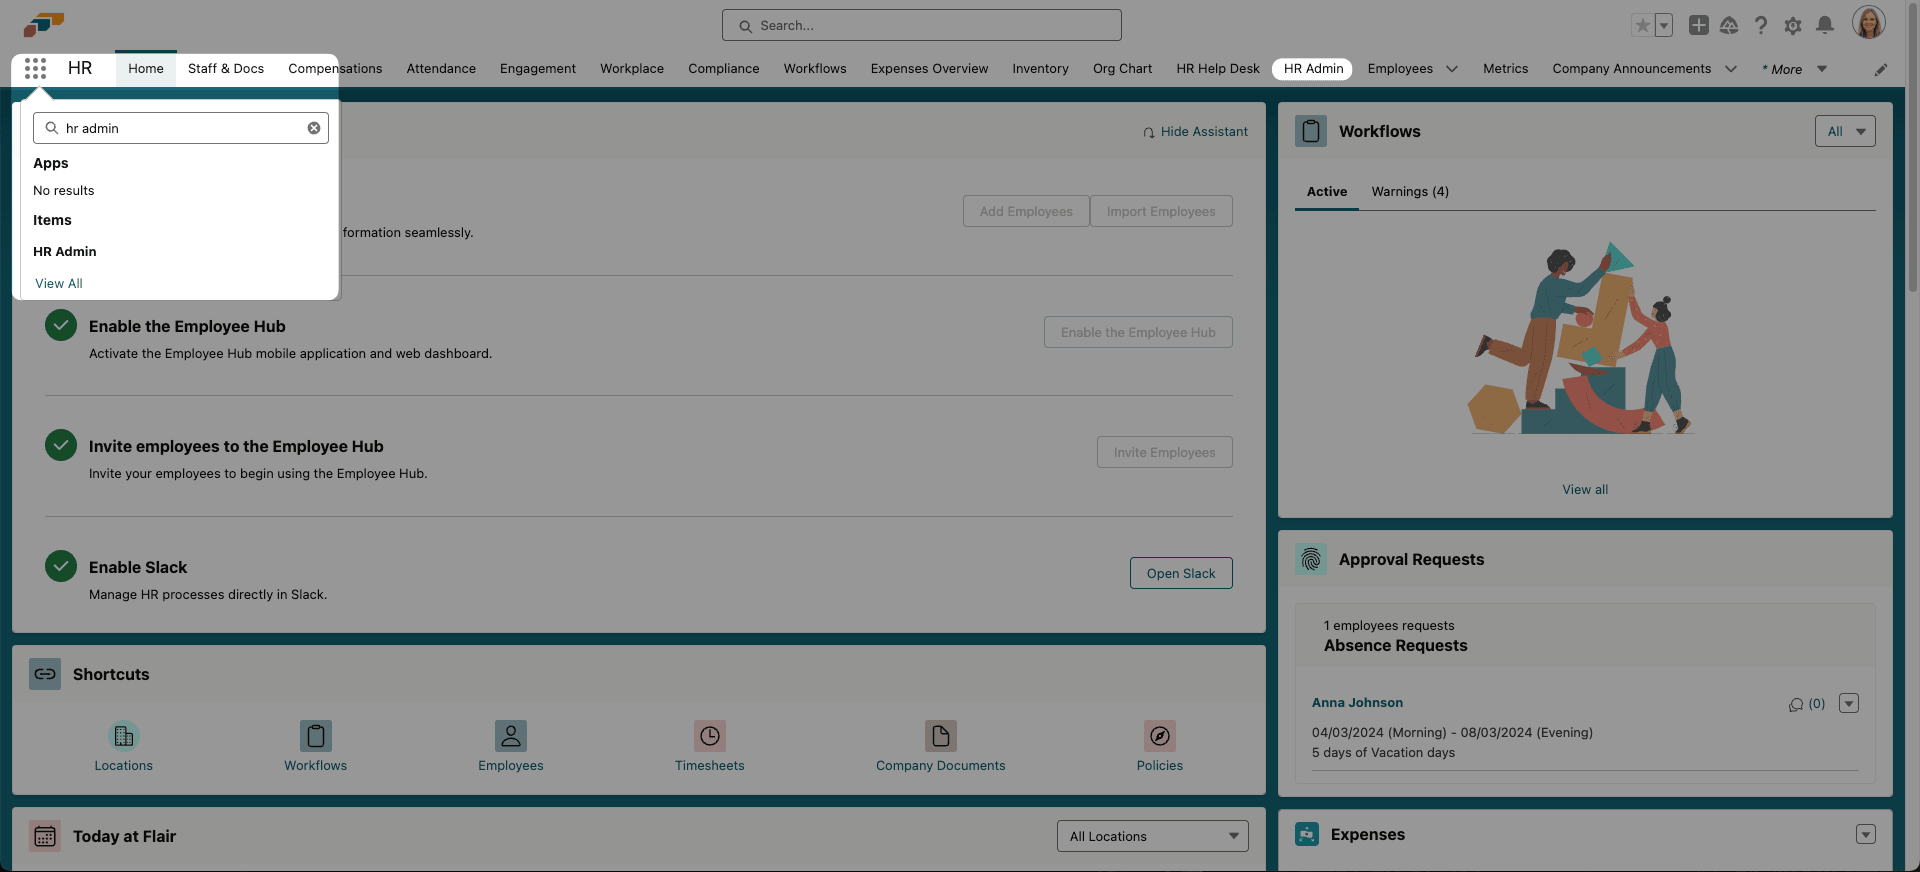
In the flair HR app, open HR Admin from the navigation bar or the App Launcher (⋮⋮ grid icon).
-
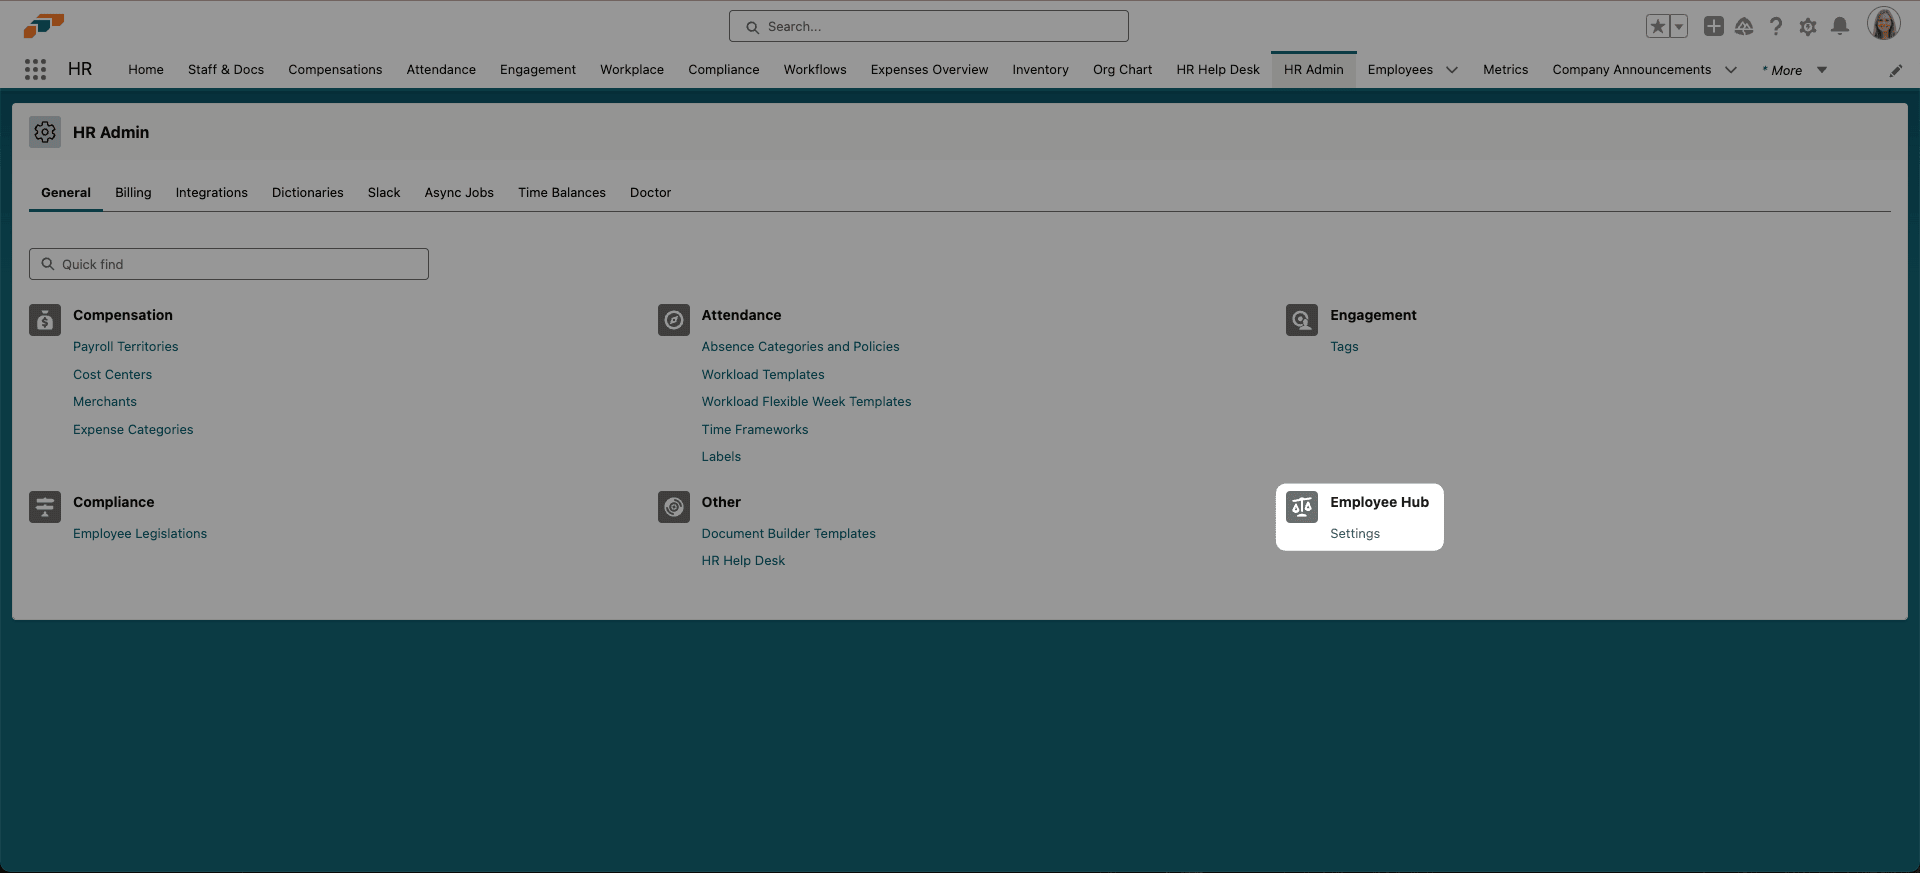
Under Employee Hub, click Settings.
-
In the list of Hubs, click the name of the Hub to configure. The list shows the Hubs you viewed recently. If your Hub is missing, search for its name in the Salesforce search bar. If your organization runs multiple Employee Hubs, repeat these steps for each Hub.
-
In the left menu, select Domain.
-
In Domain, enter the Employee Hub domain, such as
YOURCOMPANY.hub.flair.hr. -
Click Update Domain.
tipEnter only the domain after
https://. Includinghttps://in Domain causes an error.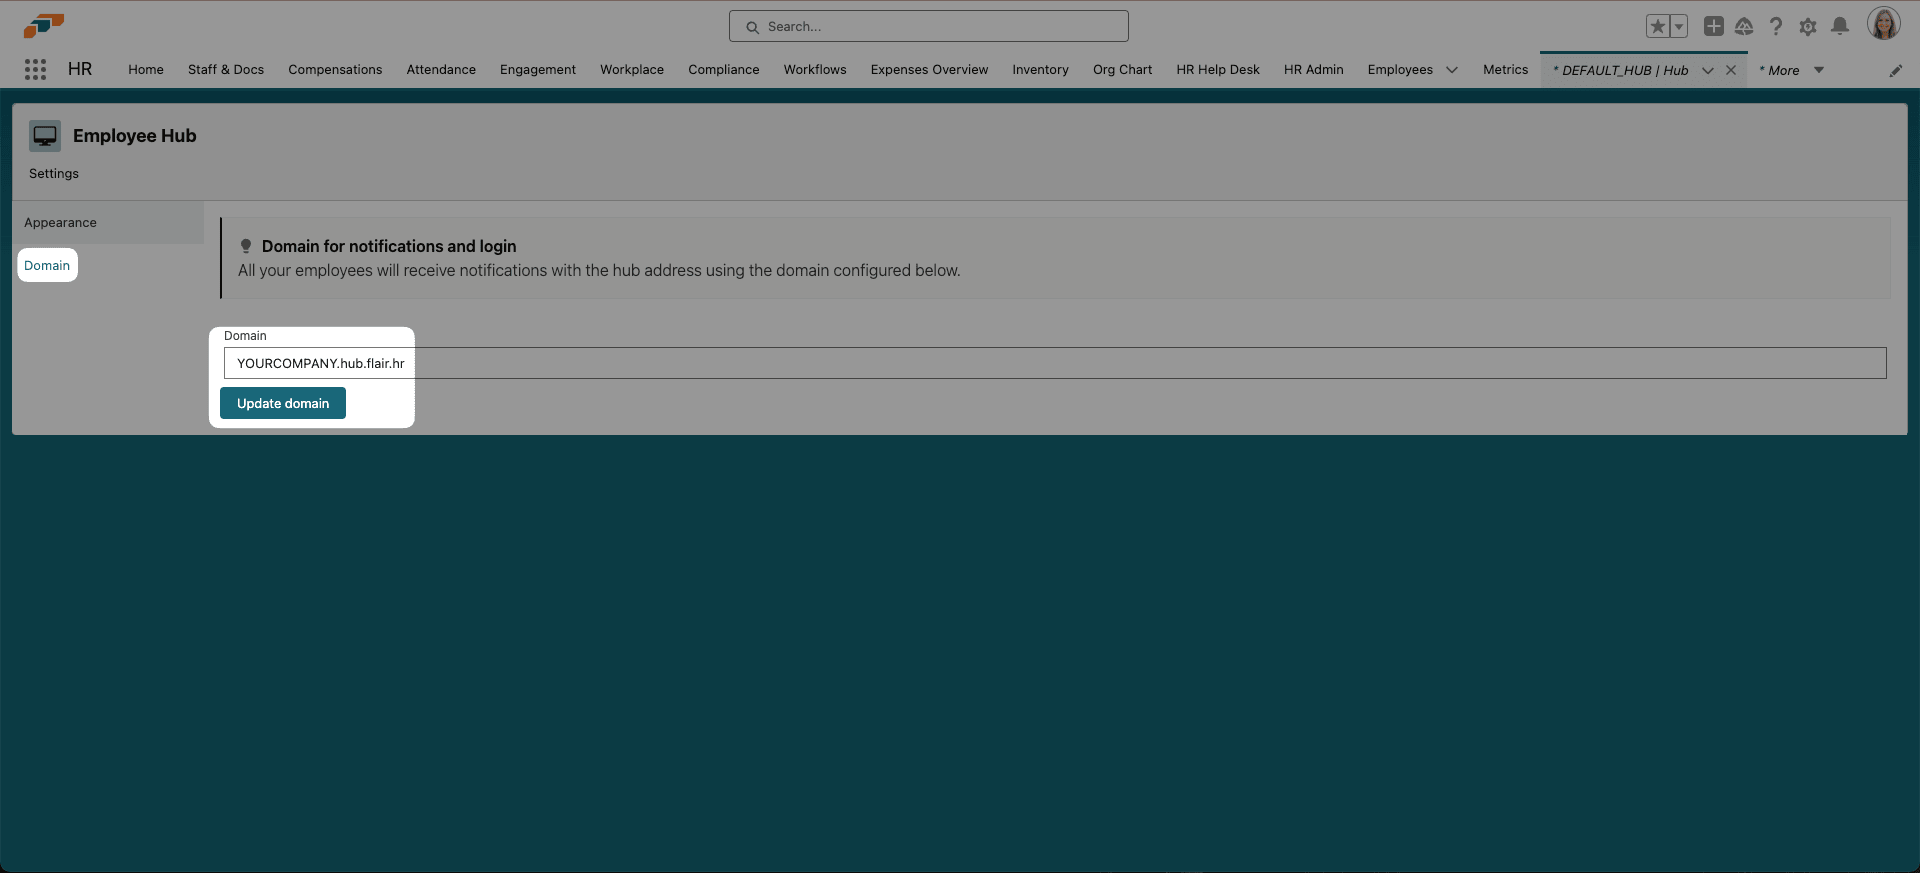
Set the Employee Hub inactivity timeout
The Employee Hub signs out inactive users to protect access. The default timeout is 15 minutes when Inactivity Timeout is empty, and the setting applies to every Employee Hub user.
-
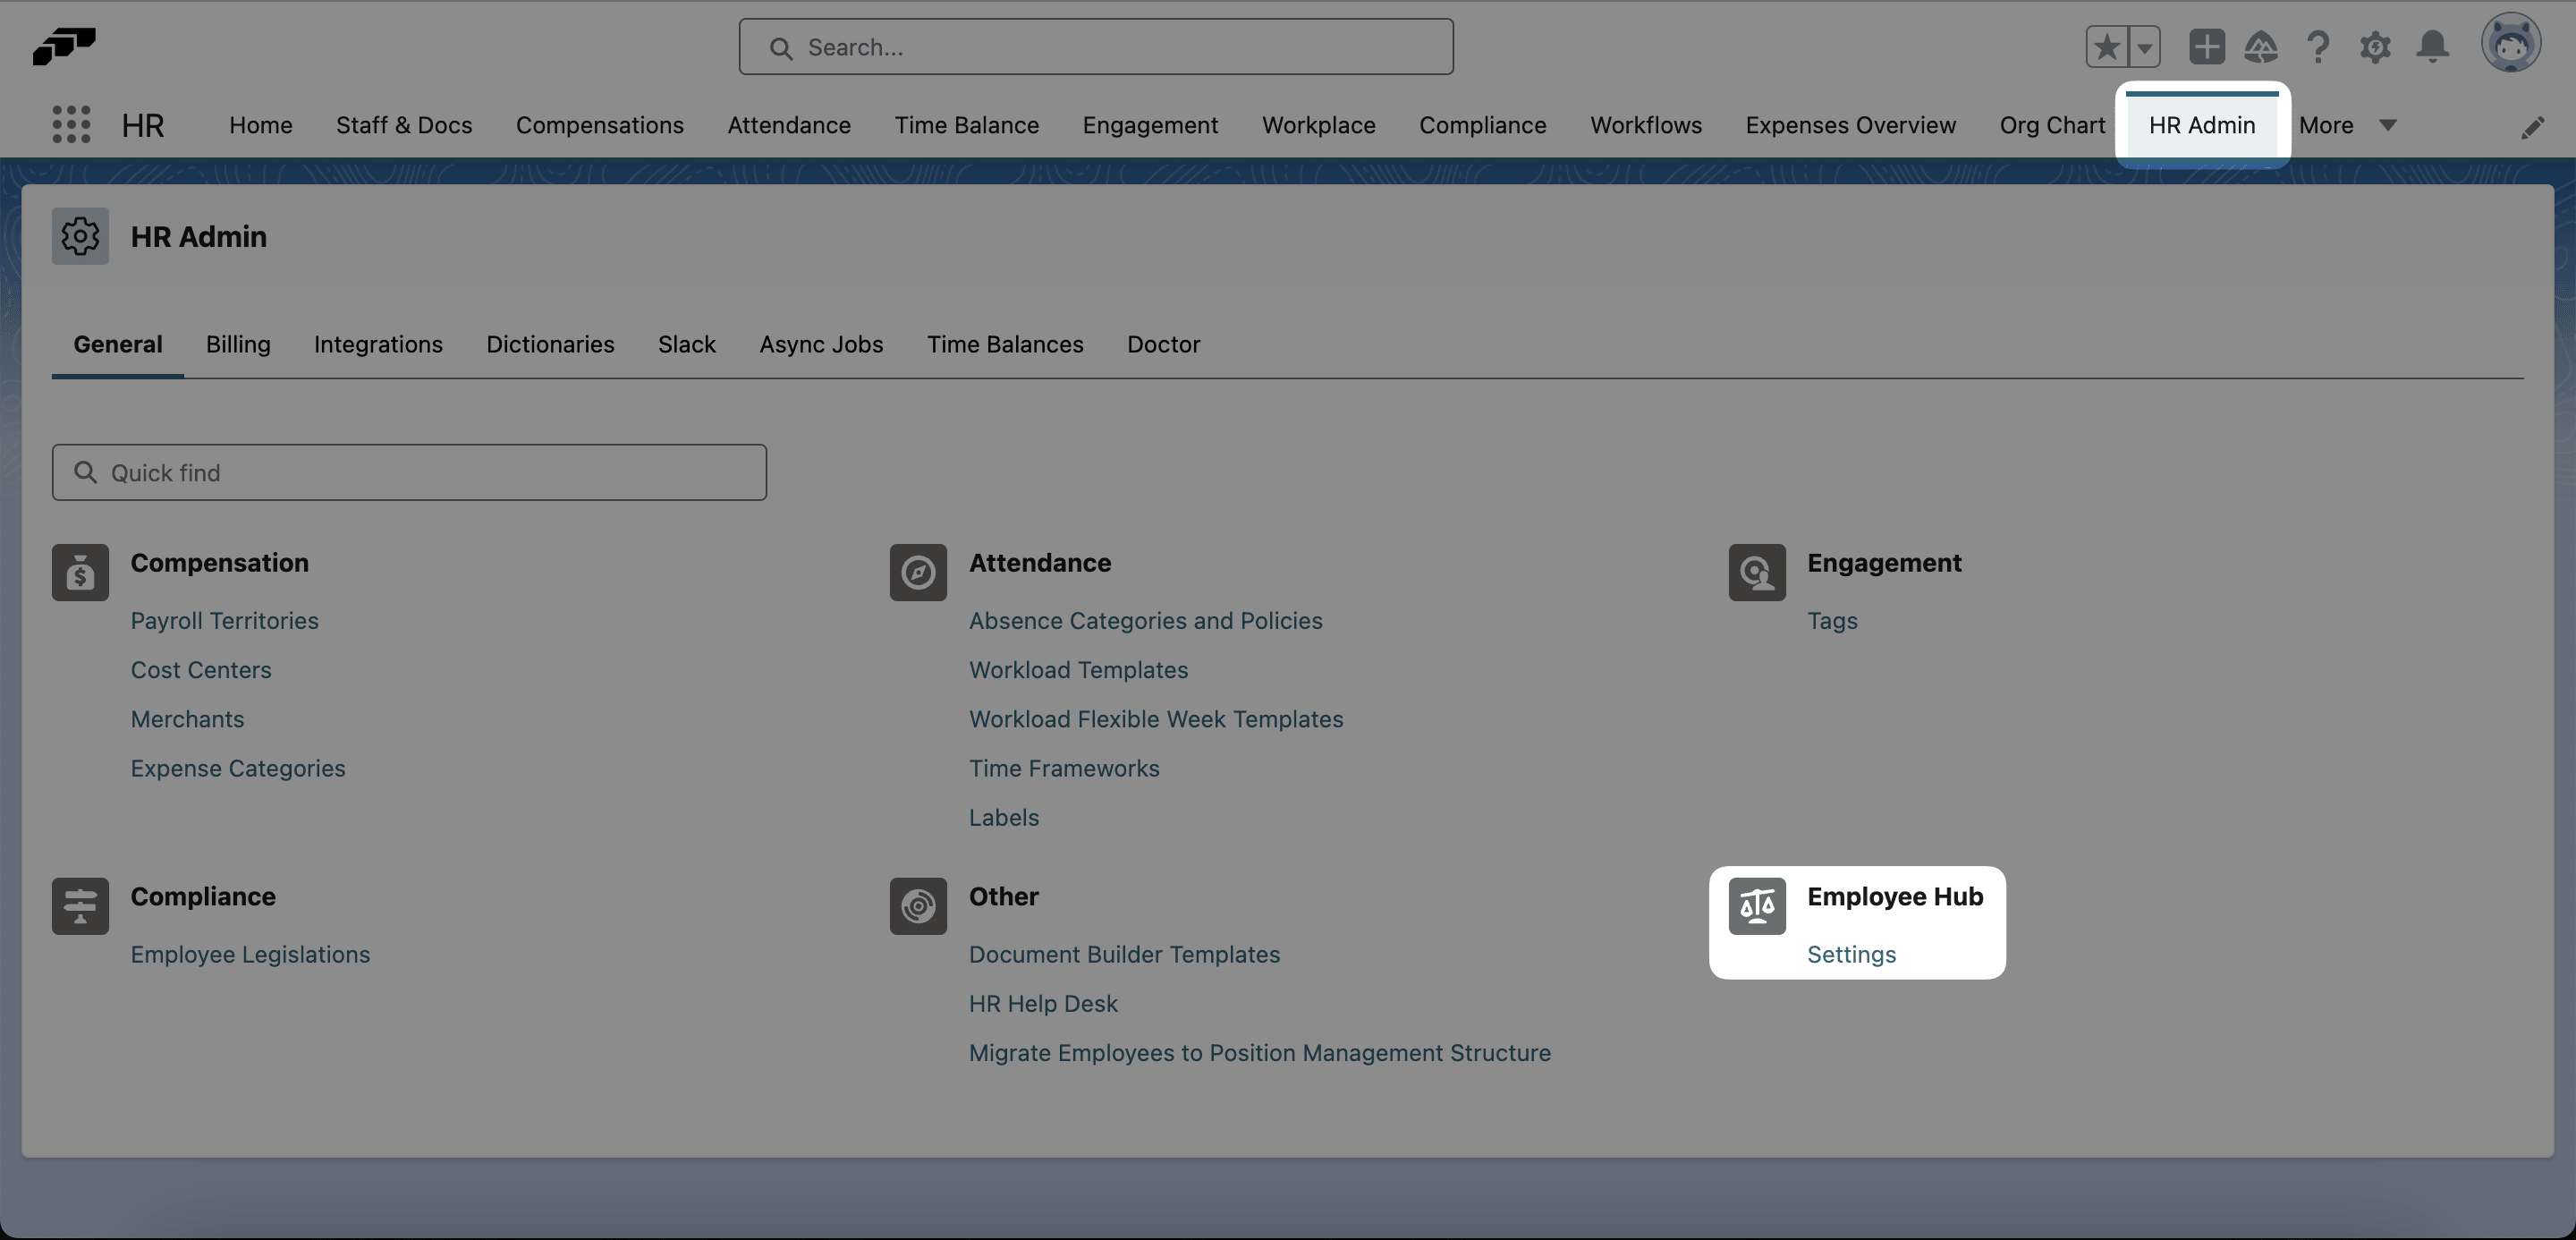
In the flair HR app, open HR Admin.
-
On the General tab, under Employee Hub, select Settings.
-
In the list of Hubs, click the name of the Hub to configure. If your Hub is missing from the recently viewed list, search for its name in the Salesforce search bar.
-
In the left menu, select Security.
-
In Inactivity Timeout, enter the number of inactive minutes before sign-out. For example, enter
15,30, or60. -
Click Save.
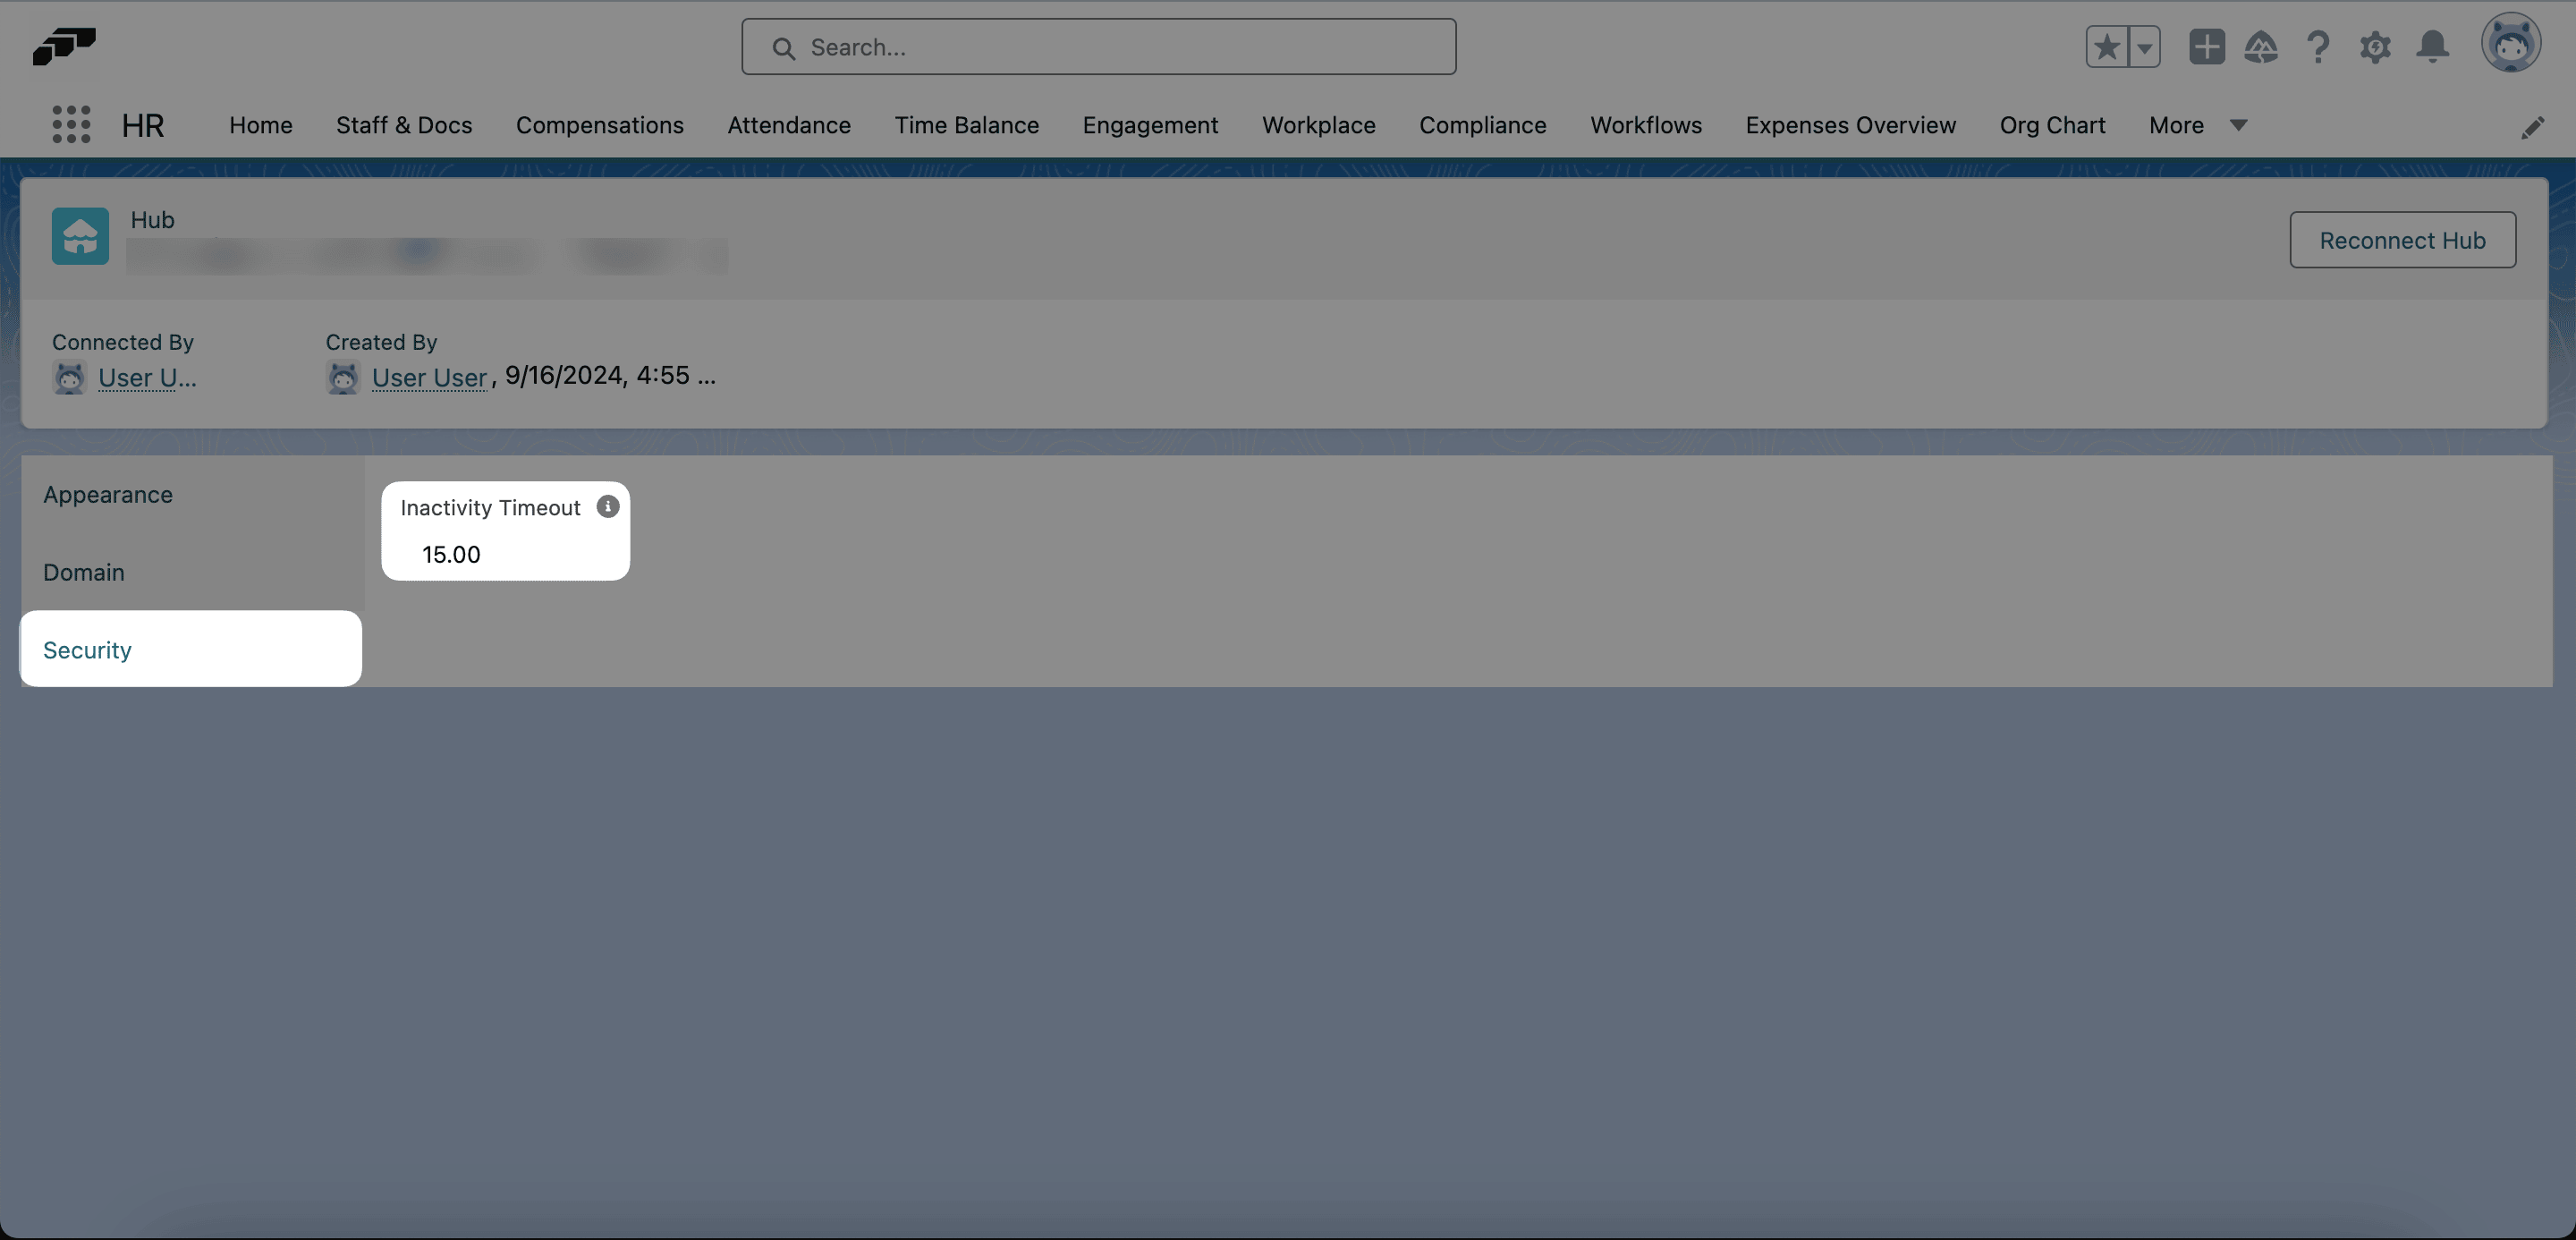
The current security guidance requires a session timeout and does not support disabling it. Use a positive timeout duration.
Customize the Employee Hub feature menu
Create menu views to hide built-in Employee Hub features for selected employees, departments, entities, or locations.
-
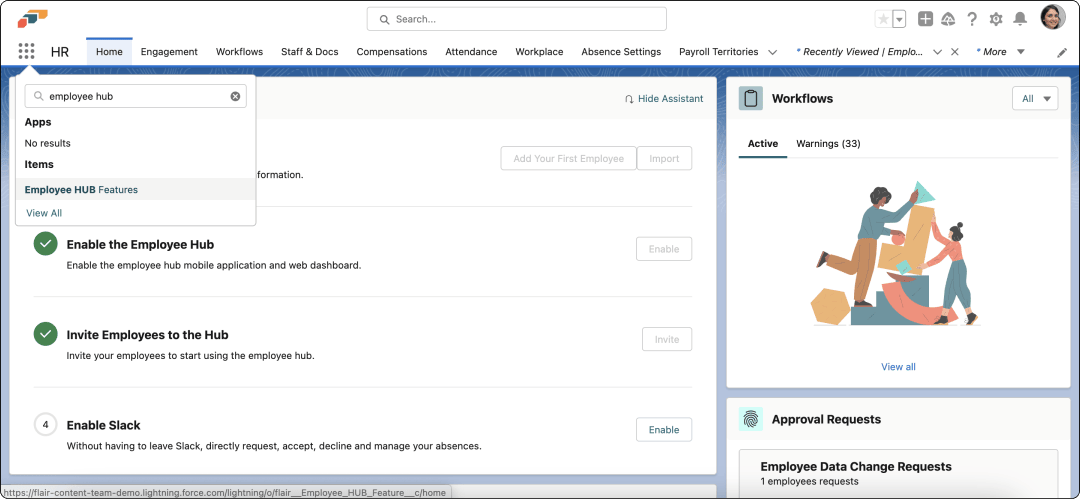
In the flair HR app, open Employee Hub Features from the App Launcher (⋮⋮ grid icon).
-
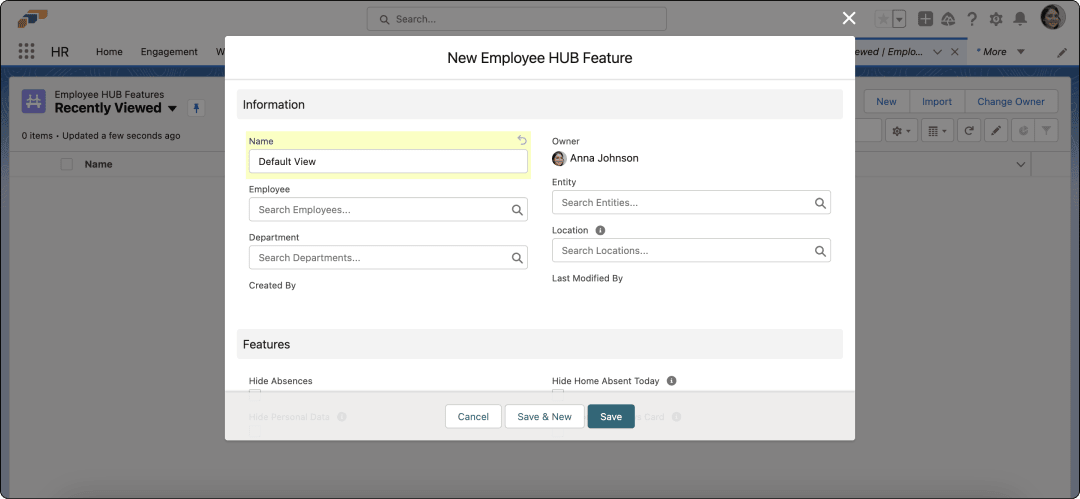
Click New. The window contains Information and Features sections.
-
Under Information, enter a name, such as
Default View. -
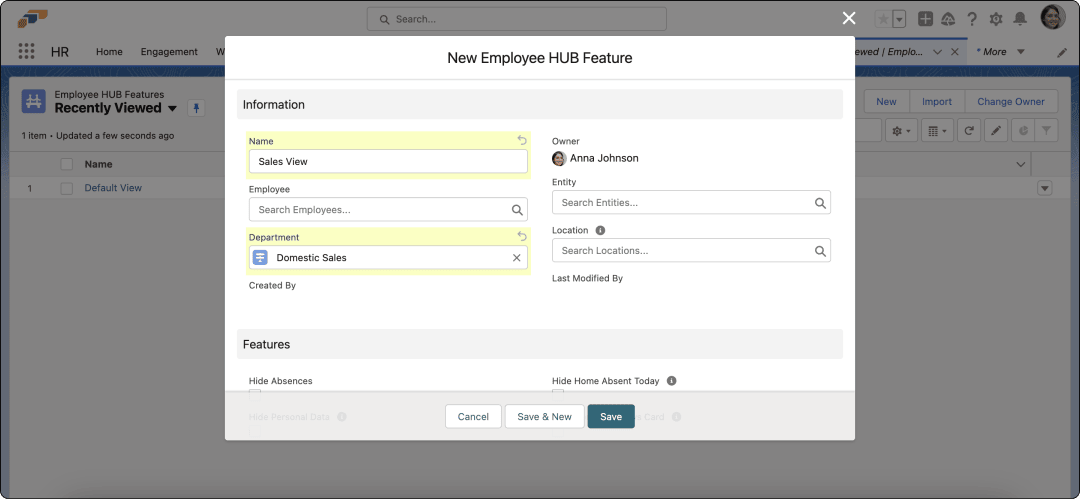
Select the employees, departments, entities, or locations that use the view. Leave the audience empty to apply the view to every employee.
-
Under Features, select each feature to hide. For example, hide Shift Planner for teams that do not work in shifts.
-
Save the view.
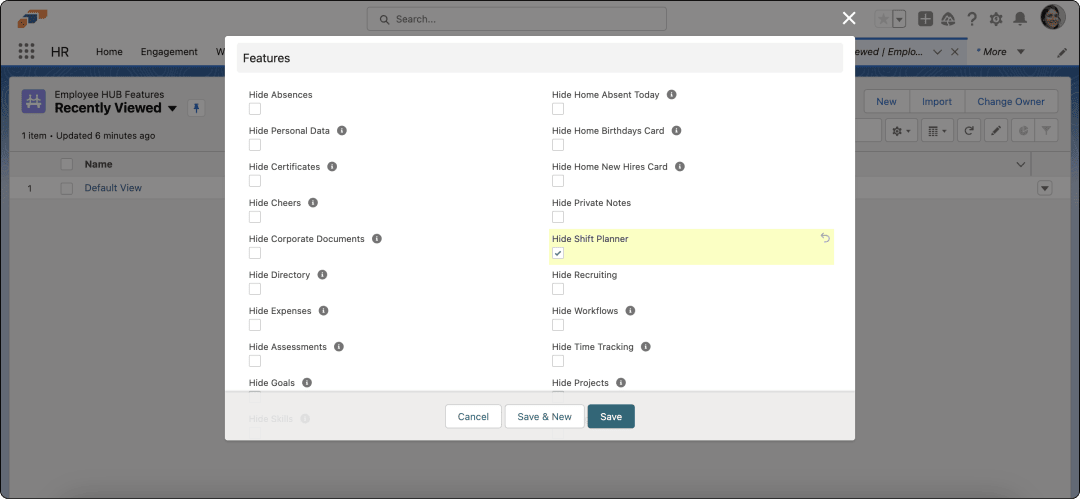
You can also control built-in features for a location or employee:
- On a Location record, use the Employee Hub feature controls at the bottom of the page.
- On an employee record, use the Employee Hub Features tab.
To hide chat for an audience, select Hide Chats under Features. Employees use the Chats panel in the Employee Hub top navigation. For the employee workflow, see Chat with colleagues in the Employee Hub.
Check what the settings hide in the mobile app
The flair mobile app reads the same feature-menu view as the Employee Hub, but only these settings change the app:
| Setting | What it hides in the mobile app |
|---|---|
| Hide Absences | The Absences tab and the Upcoming time away card on Home |
| Hide Home Absent Today | The Out today card |
| Hide Home Birthdays Card | The whole Celebrations card, including work anniversaries |
| Hide Anniversaries | Work anniversaries inside Celebrations |
| Hide Time Tracking | The clock-in bar and the Time Tracking and Projects cards |
| Hide Personal Data | My Info on the More tab |
| Hide Personal Documents | My Documents on the More tab |
| Hide Expenses | The Expenses card and My Expenses on the More tab |
| Hide Corporate Documents | Company Documents on the More tab |
| Hide Directory | Directory on the More tab |
| Hide Announcements | The Latest updates card |
| Hide Public Holidays | The Public Holidays card |
| Hide Cheers | The Cheers card and Cheer a Coworker in the Add menu |
| Hide Workflows | The Workflows card on Home |
| Hide Approval Processes | The Approval Requests card |
| Hide Shift Planner and Hide flair Scheduler | The next-shift card, once both are selected. With only Hide flair Scheduler selected, the card shows Shift Planner shifts instead. With only Hide Shift Planner selected, the card appears only for employees who get flair Scheduler shifts. |
| Block Avatar Upload | Take photo and Choose photo in the profile photo menu |
| Block Avatar Deletion | Delete photo in the profile photo menu |
The other Features settings, such as Hide Goals, Hide Surveys, or Hide Org Chart, have no effect in the app. The app also hides flair Scheduler shifts when your organization has no flair Scheduler subscription.
Some entry points stay visible in the app despite these settings:
- Hide Workflows removes only the Workflows card. The Workflows tab in the bottom navigation stays visible.
- The Add menu ignores Hide Absences, Hide Personal Documents, and Hide Expenses: Request absence, Upload document, and Add Reimbursement stay available.
To hide only the clock-in and clock-out controls in the app, use the Time Framework setting described in Hide time tracking controls in Hub or mobile.
Restrict document and folder changes in the Employee Hub
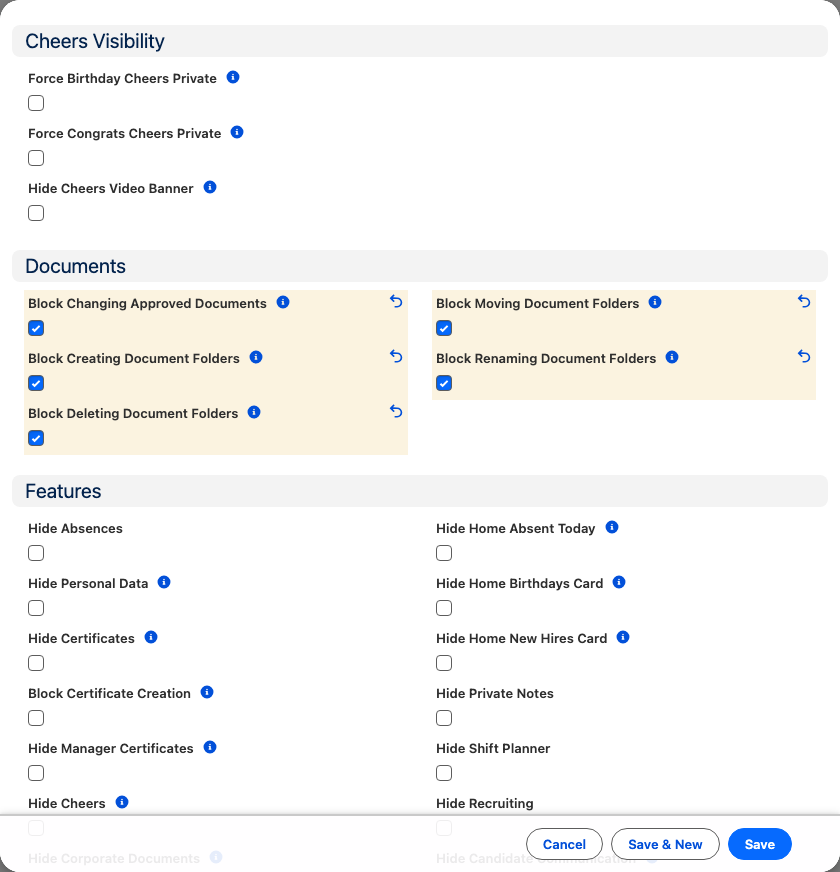
Employee Hub Feature records carry checkboxes that stop employees from changing their own documents and folders in the Employee Hub, so the structure stays the way HR filed it. Each restriction applies to the audience of the record you set it on.
-
In the flair HR app, open Employee Hub Features from the App Launcher (⬚⬚ grid icon).
-
Open an existing view, or click New to create one.
-
Select the employees, departments, entities, or locations the restrictions apply to. Leave the audience empty to apply them to every employee.
-
Select the restrictions to enforce:
Setting What it does Block Changing Approved Documents Stops employees from moving or renaming approved documents, no matter who uploaded them. Deleting an approved document is always blocked and does not need this setting. Block Creating Document Folders Stops employees from creating new document folders. Uploading, viewing, and downloading stay available. Block Deleting Document Folders Stops employees from deleting document folders. Documents inside a folder are protected separately. Block Moving Document Folders Stops employees from moving document folders into other folders. Block Renaming Document Folders Stops employees from renaming document folders. -
Save the record. The restrictions apply to the selected audience in the Employee Hub.
Once HR approves an employee document, its owner can no longer delete it in the Employee Hub, whether or not you enable any of these settings. Managers acting on someone else's documents and HR working in Salesforce can still delete, move, and rename. An employee keeps full control of an upload until HR approves it.
Restrict profile changes and manager visibility
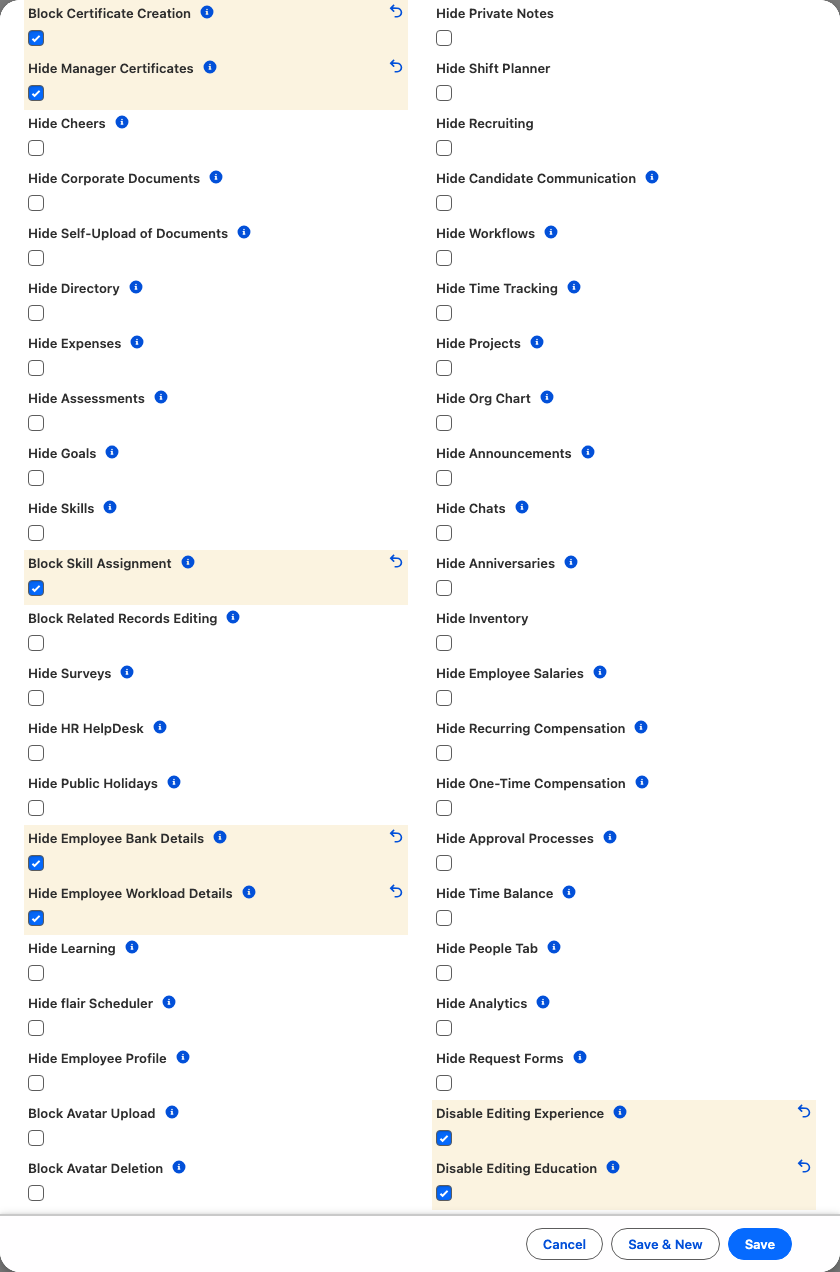
Employee Hub Feature records also carry checkboxes that stop people from changing certificates, skills, education, and work experience in the Employee Hub, and that hide sensitive details from managers. Each setting applies to the people in the record's audience while they use the Employee Hub. To restrict what managers see, include the managers in the audience.
-
In the flair HR app, open Employee Hub Features from the App Launcher (⋮⋮ grid icon).
-
Open an existing view, or click New to create one.
-
Select the employees, departments, entities, or locations the settings apply to. Leave the audience empty to apply them to every employee.
-
Under Features, select the settings to enforce:
Setting What it does Block Certificate Creation Stops adding, editing, and deleting certificates in the Employee Hub. Block Skill Assignment Stops adding, removing, and changing skills for people and projects in the Employee Hub. Skills stay visible. Disable Editing Education Employees can view their education entries but cannot add, edit, or delete them. Disable Editing Experience Employees can view their work experience entries but cannot add, edit, or delete them. Hide Manager Certificates Hides the certificates tab when a manager views an employee's profile. Hide Employee Workload Details Hides the employee's current workload from managers on the employee's overview, and removes working-hour changes from the employee history managers see. Hide Employee Bank Details Removes changes to IBAN, BIC, and bank account owner from the employee history managers see. Hide Private Notes Removes the Private notes tab from managers' view of their team members, so they can't write or read private notes. Existing notes are kept. -
Save the record. The settings apply to the selected audience in the Employee Hub.
Hide Employee Bank Details does not change the fields managers see in an employee's personal data. To remove bank fields there, edit the Employee Hub Manager layout. See Configure Employee Hub data layouts. To hide salaries and compensation from managers, see Control manager visibility.
Add custom Employee Hub navigation
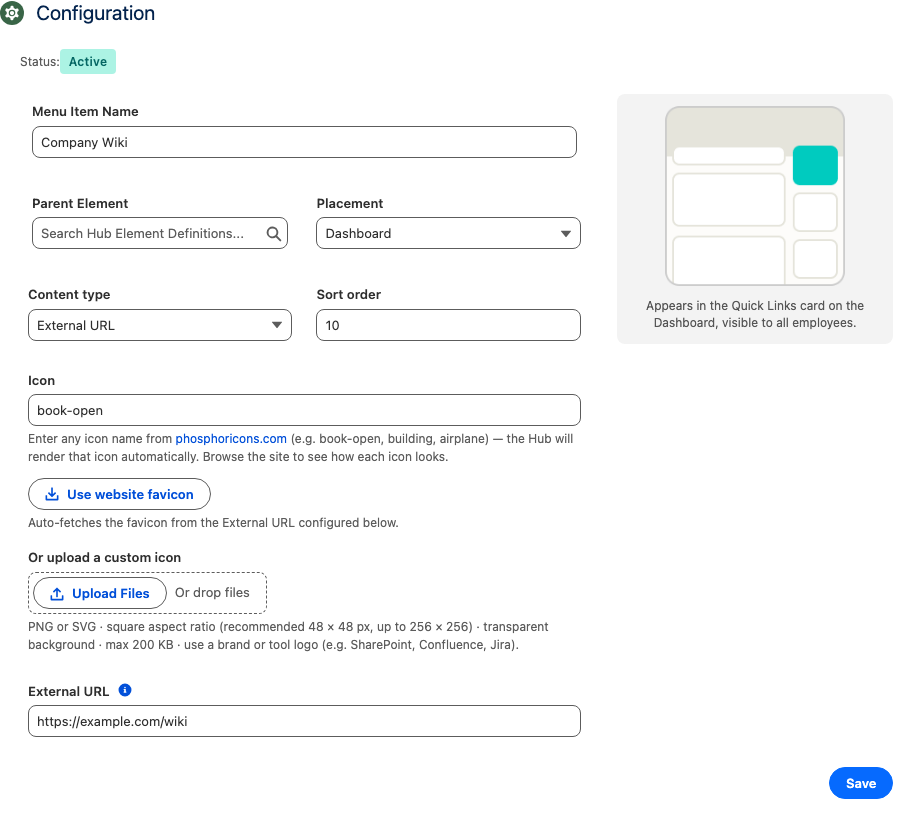
Add links to the sidebar, a Quick Links dashboard card, or the profile menu. A navigation element can open an external URL, run an embedded Salesforce Flow, or load a custom Lightning Web Component.
- In the flair HR app, open Hub Element Definitions from the App Launcher (⋮⋮ grid icon).
- Click New.
- In Hub Element Definition Name, enter a name.
- Click Save. The record opens on the Configuration tab.
- Optional: In Menu Item Name, change the label employees see. It defaults to the name you entered.
- In Placement, select Sidebar, Dashboard for the Quick Links card, or Profile Dropdown.
- In Content Type, select what the element opens:
- External URL: Enter the address in External URL.
- Flow: Enter Flow API Name and Page Url.
- LWC: Enter SF Component Name and Page Url.
- Group: Collects other elements, which expand inline.
- Optional: Except for Profile Dropdown elements, enter an icon name in Icon or upload a custom icon.
- Optional: To add the element to a group, select the group in Parent Element. The element uses the group's placement.
- Click Save.
- On the Segments tab, click Edit segments to limit who sees the element. A new element starts with a segment for all employees.
- Click Enable. The element appears in the Employee Hub for its segments.
Configure multiple Employee Hubs
An organization with multiple brands or legal entities can run separate Employee Hubs from one flair Salesforce organization. Each Hub record has its own domain, login page, logo, login image, and entity assignments.
An employee's entity determines their Hub. Login routing and notification links in Slack and email use the recipient's assigned Hub. Organizations with one Employee Hub are unaffected.
- Create one Hub record and domain for each brand or legal entity. For example, use
acme.hub.flair.hrandglobex.hub.flair.hr. - Upload the logo and login image for each Hub.
- On each Entity record, set Hub to the Hub its employees use. Employees inherit the Hub from their entity.
- Mark one Hub as the default for employees without a specific entity assignment.
- Optional: Configure a separate SSO provider for each Hub. On the SAML SSO configuration record, set Hub to restrict that login option to one Hub.
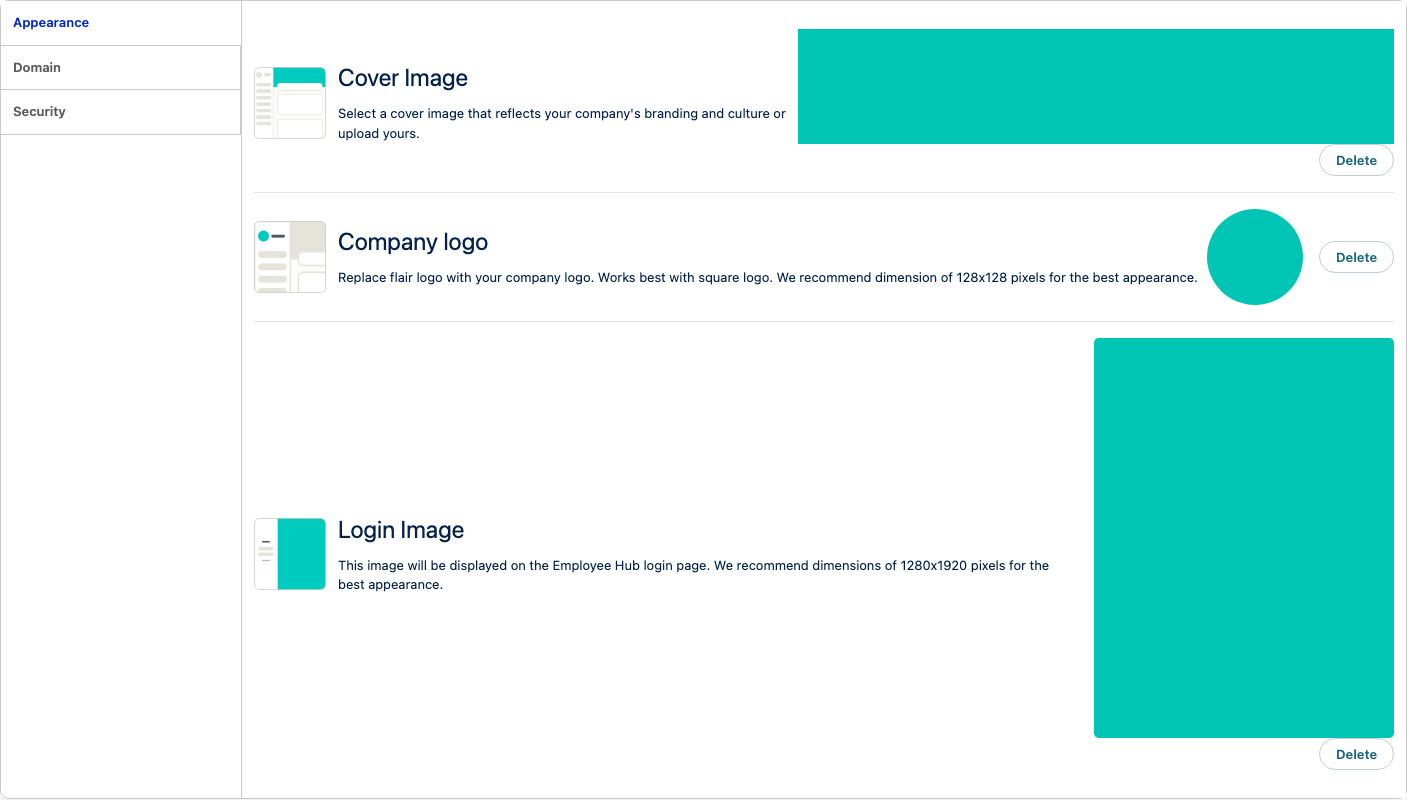
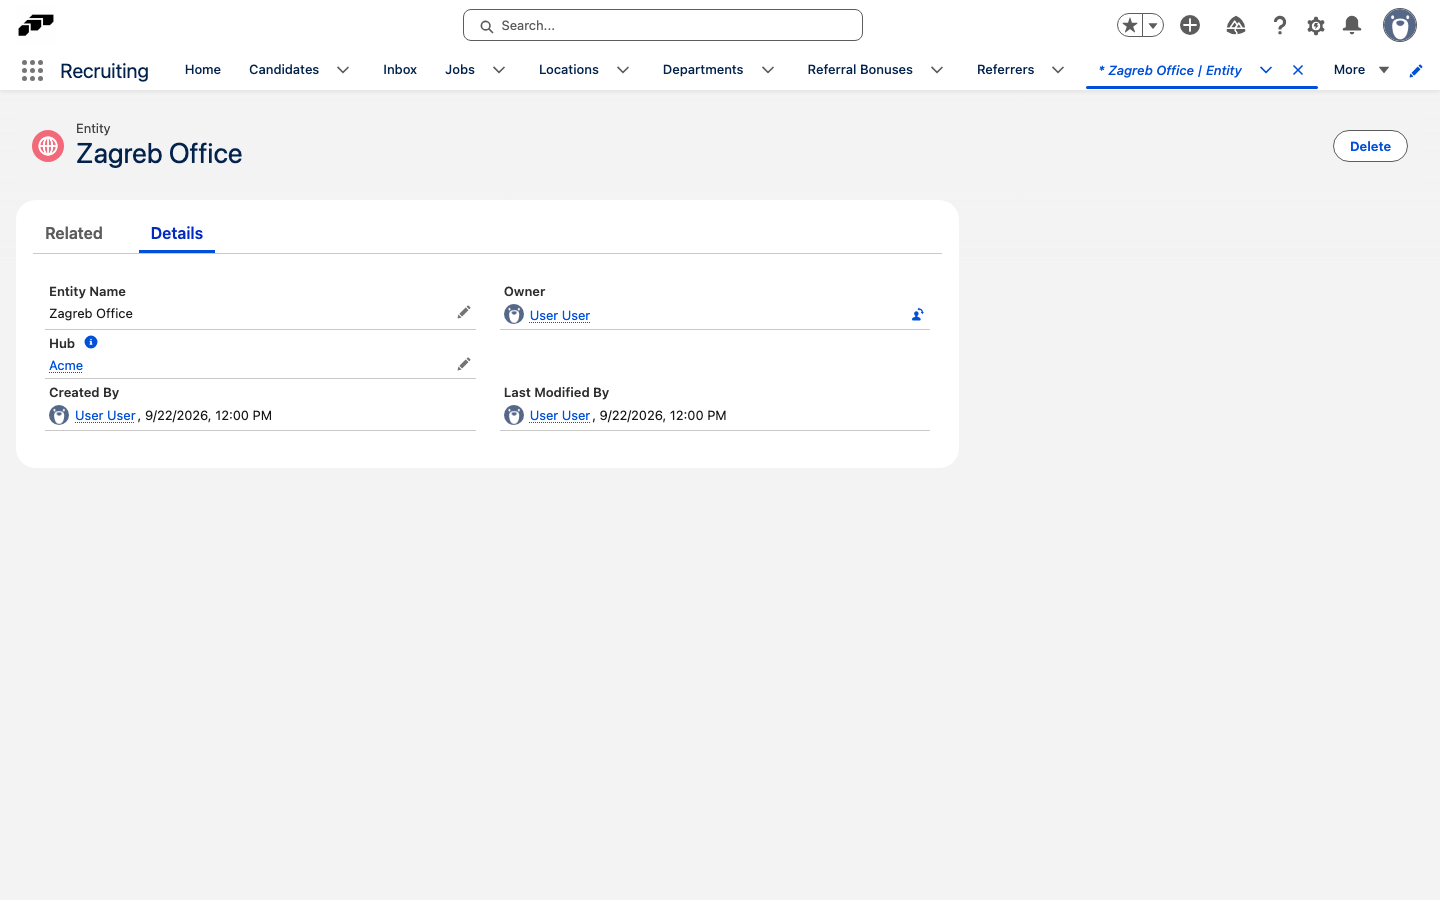
After setup, flair routes each employee to the Hub assigned to their entity. If a logo or banner is missing, confirm the Entity → Hub assignment.
Connect a Sandbox to a test Employee Hub
Assign Flair Hub to the Sandbox integration user to test Employee Hub functionality outside your production organization.
-
In the Salesforce Sandbox, click the setup gear.
-
Select Setup.

-
Open Administration → Users → Users.
-
Select the integration user.
-
Under Permission Set Assignments, click Edit Assignments.

-
Add Flair Hub to Enabled Permission Sets.
-
Click Save. The Sandbox connects to the test Employee Hub.

Configure Employee Hub data layouts
Salesforce page-layout names determine whether a layout controls an employee's Personal Data view, a manager's team-member view, or a specific record type.
Create a data layout
-
In the flair HR app, click the setup gear.
-
Select Setup.
-
Open Object Manager.
-
Search for
employee. -
Select Employee (
flair__Employee__c).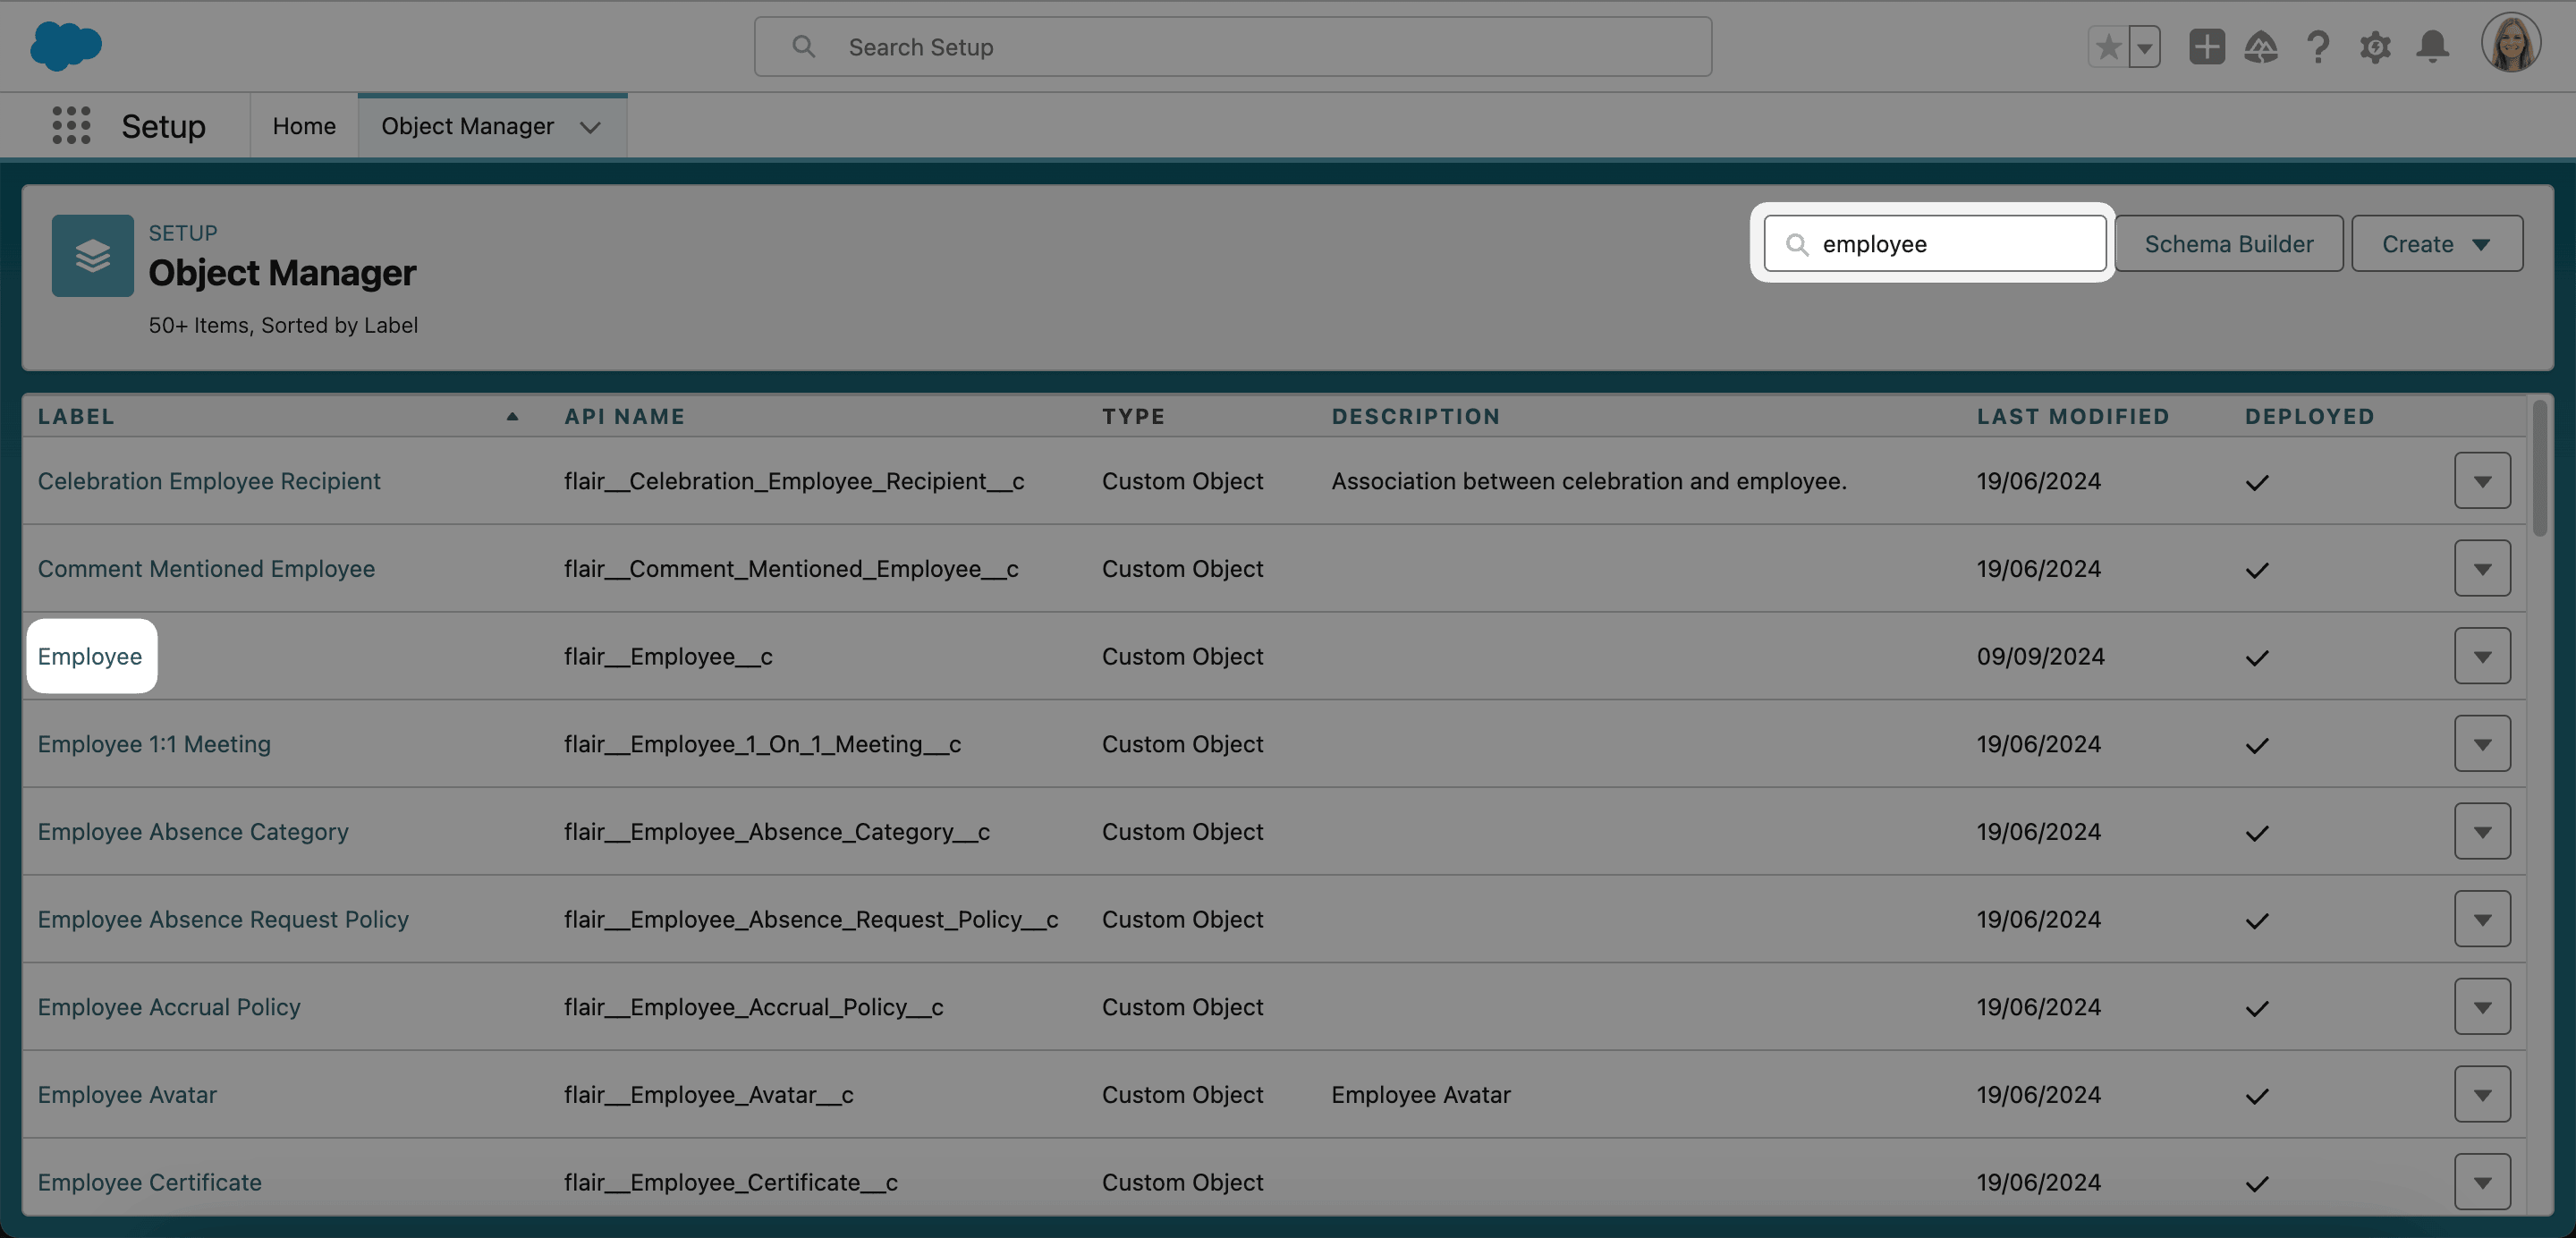
-
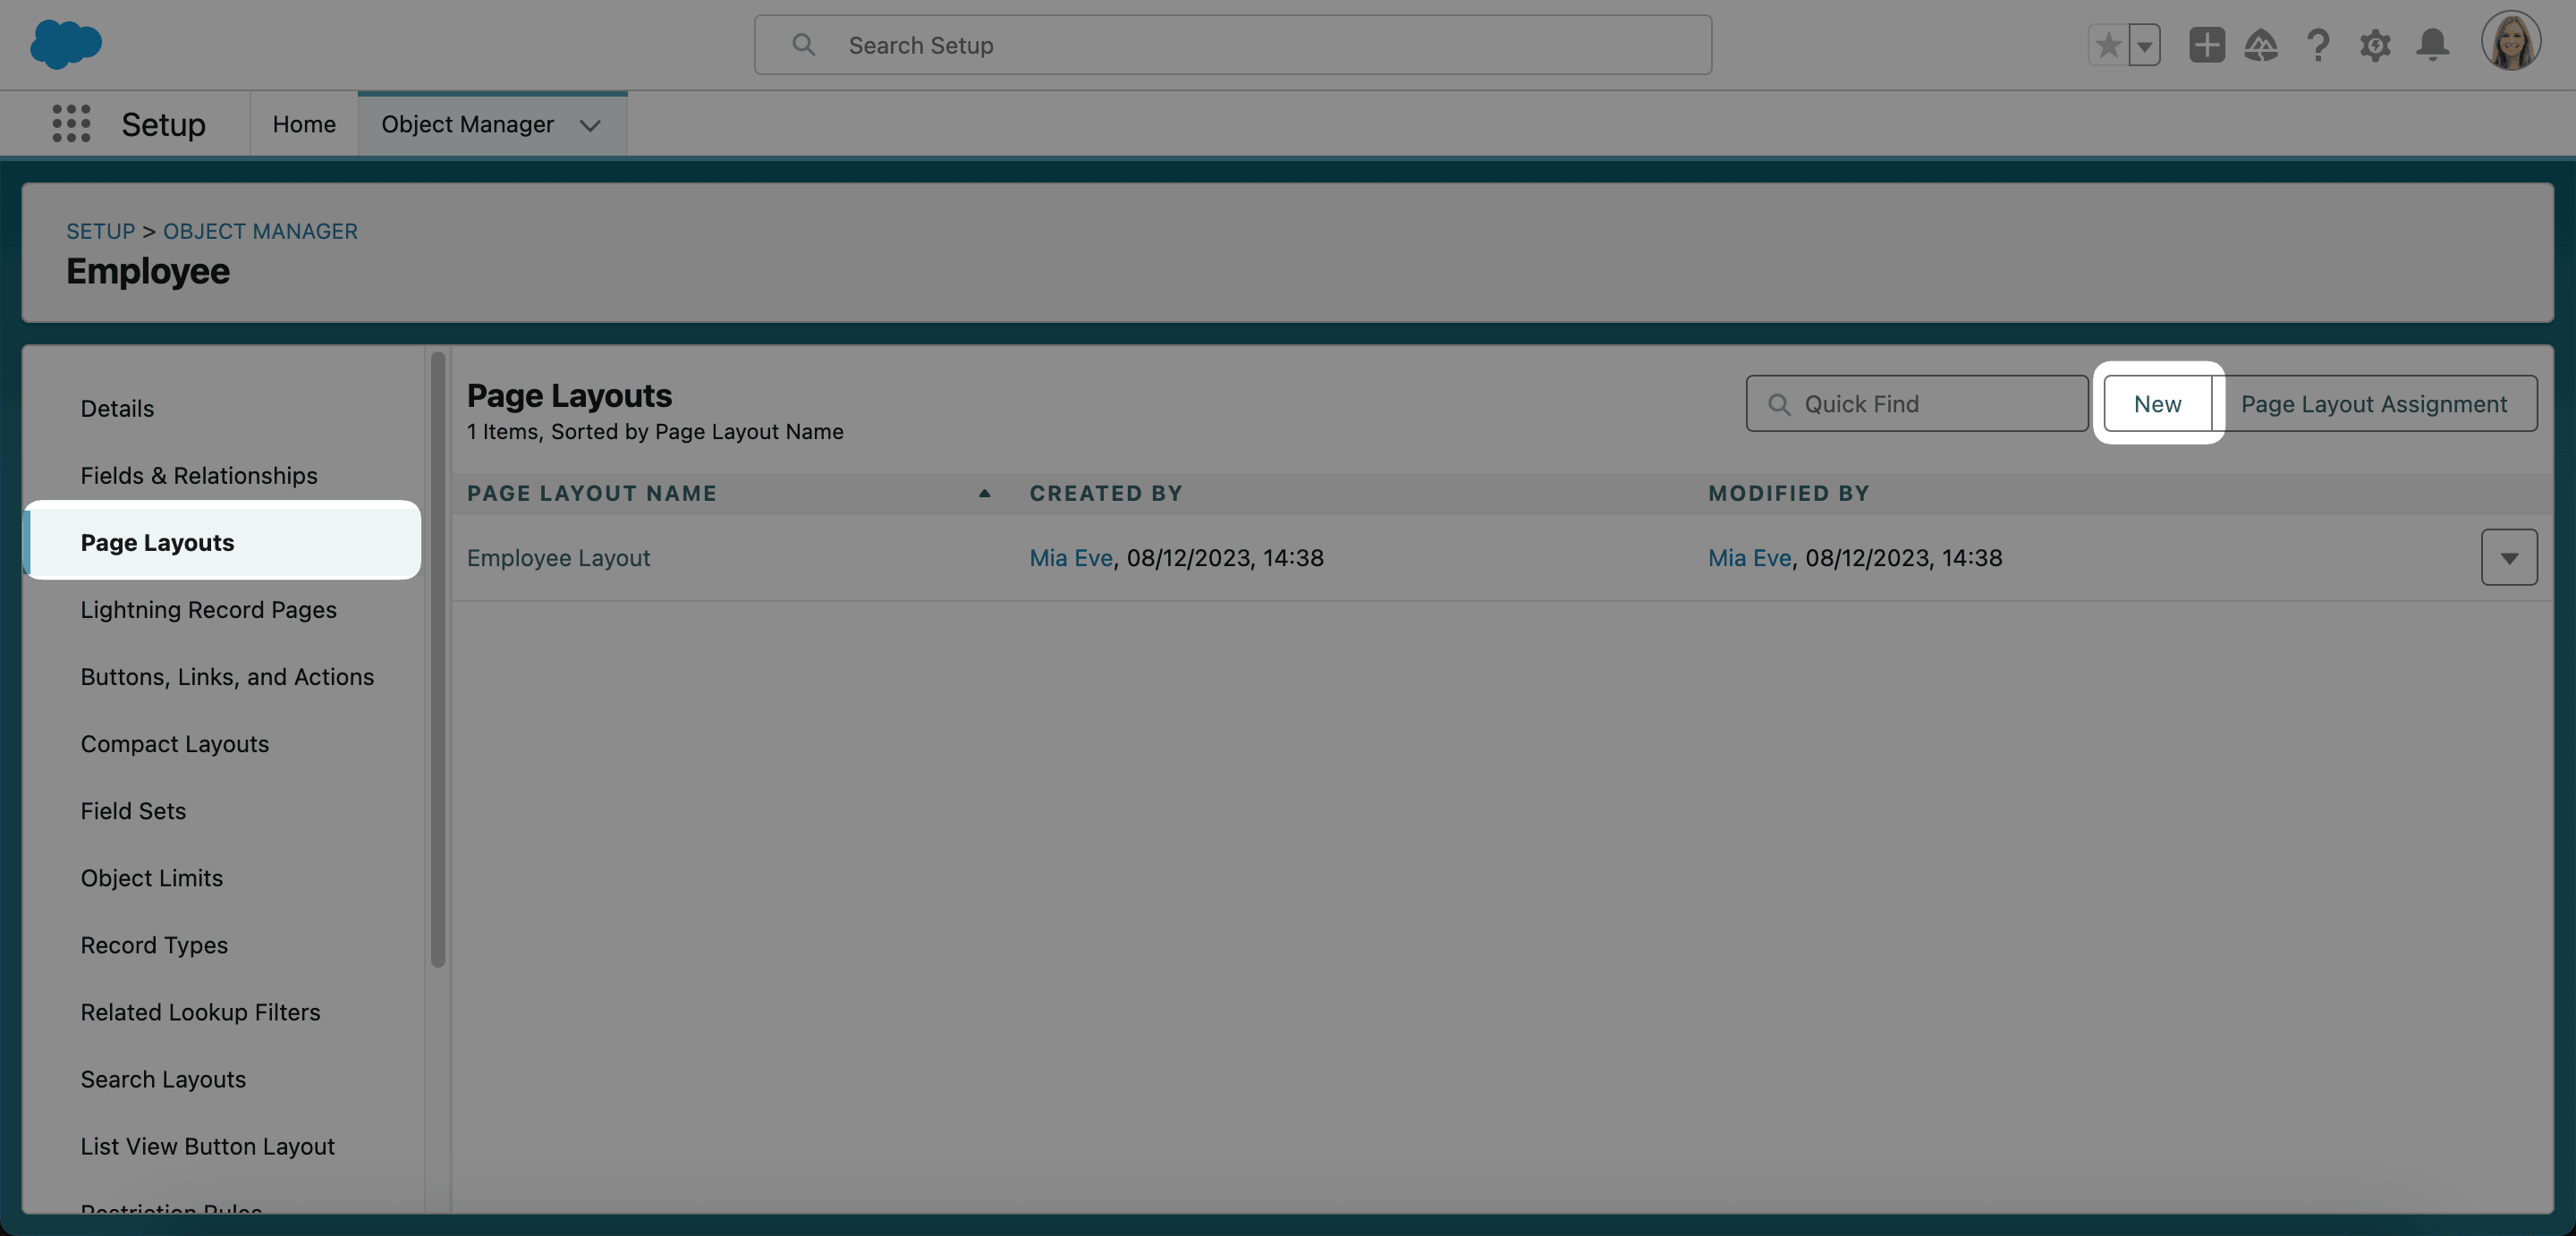
In the left menu, select Page Layouts.
-
Click New.
-
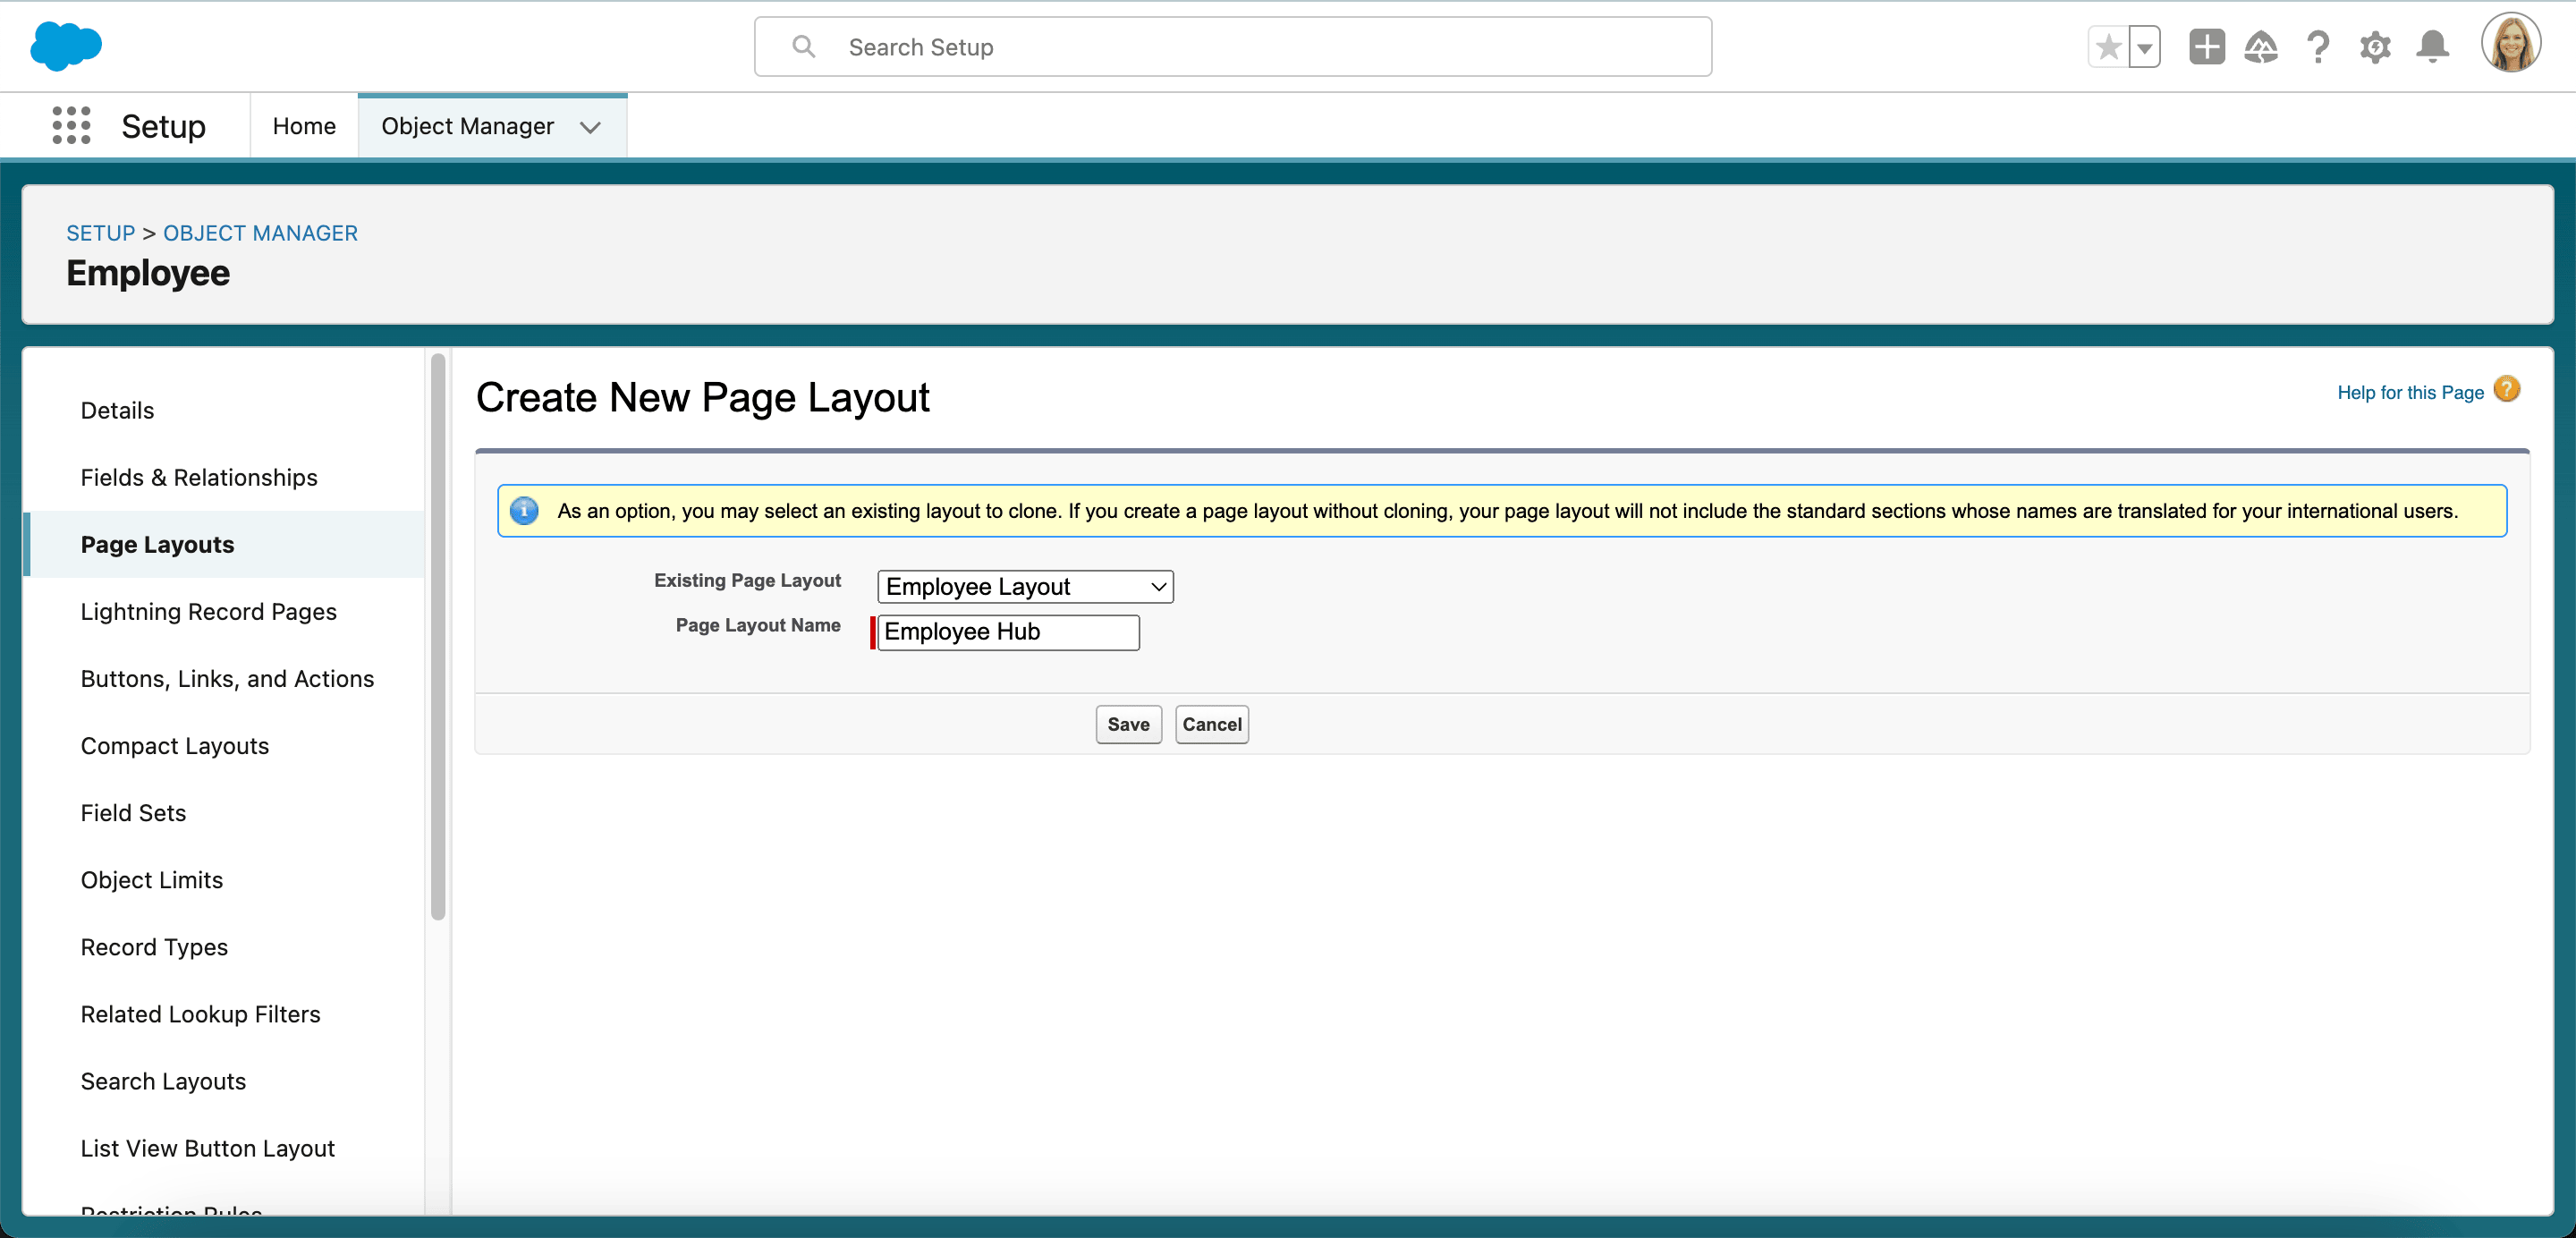
In Existing Page Layout, select Employee Layout to clone the existing layout.
-
In Page Layout Name, enter
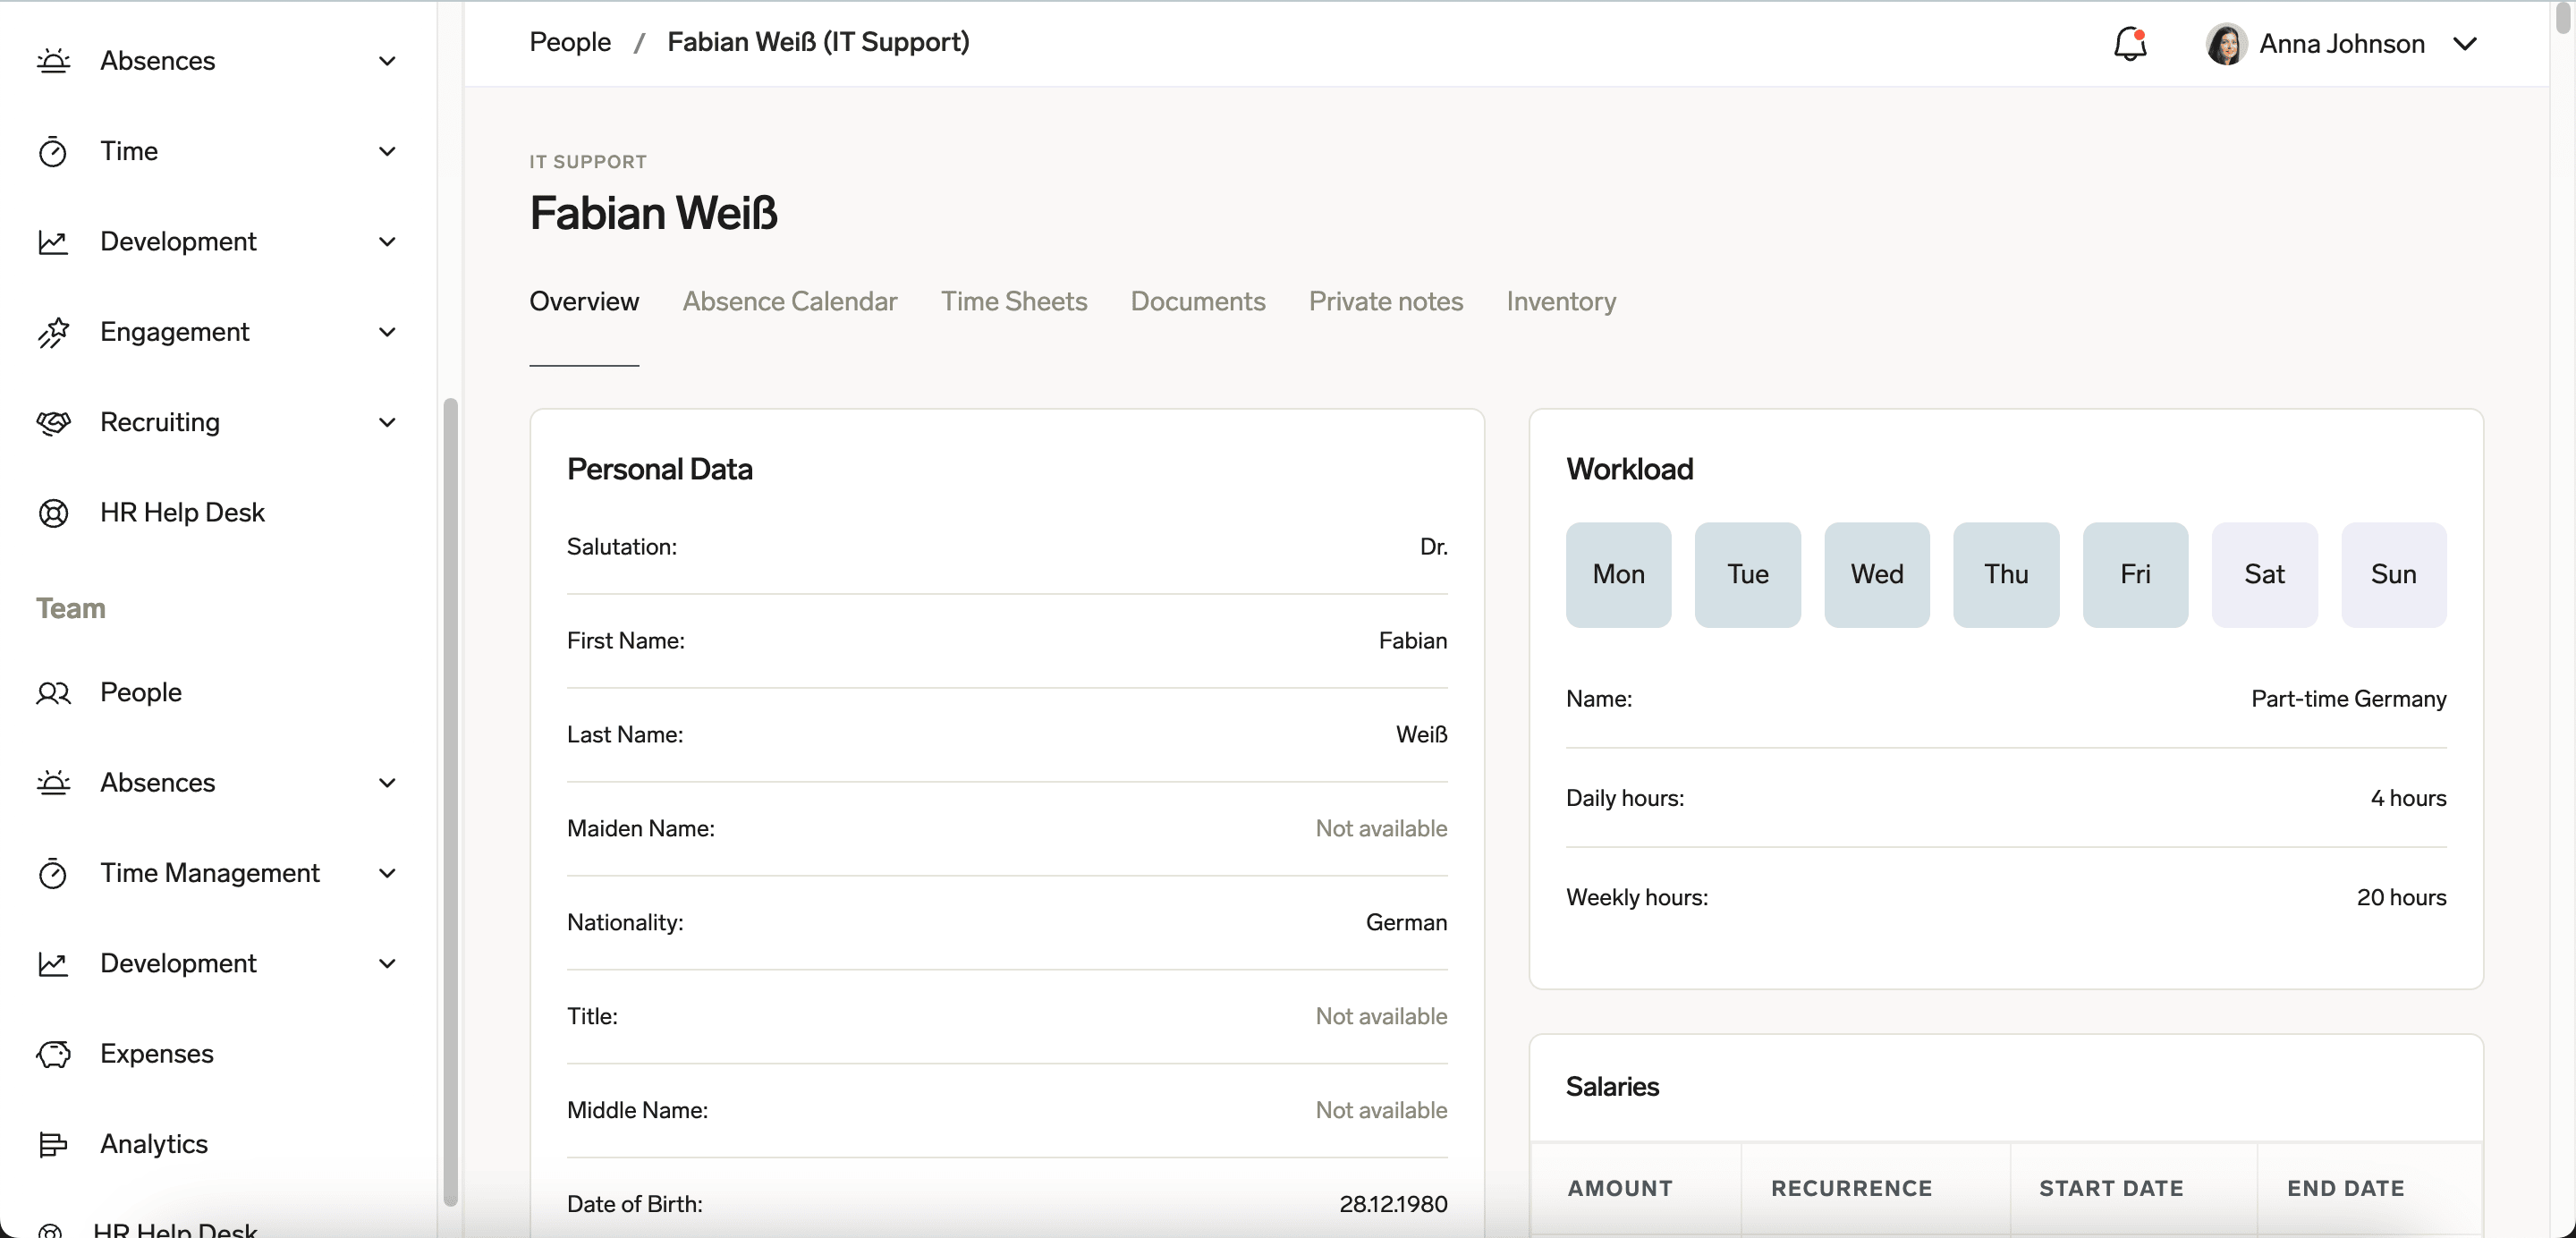
Employee Hubfor the employee's Personal Data view orEmployee Hub Managerfor a manager's team-member view.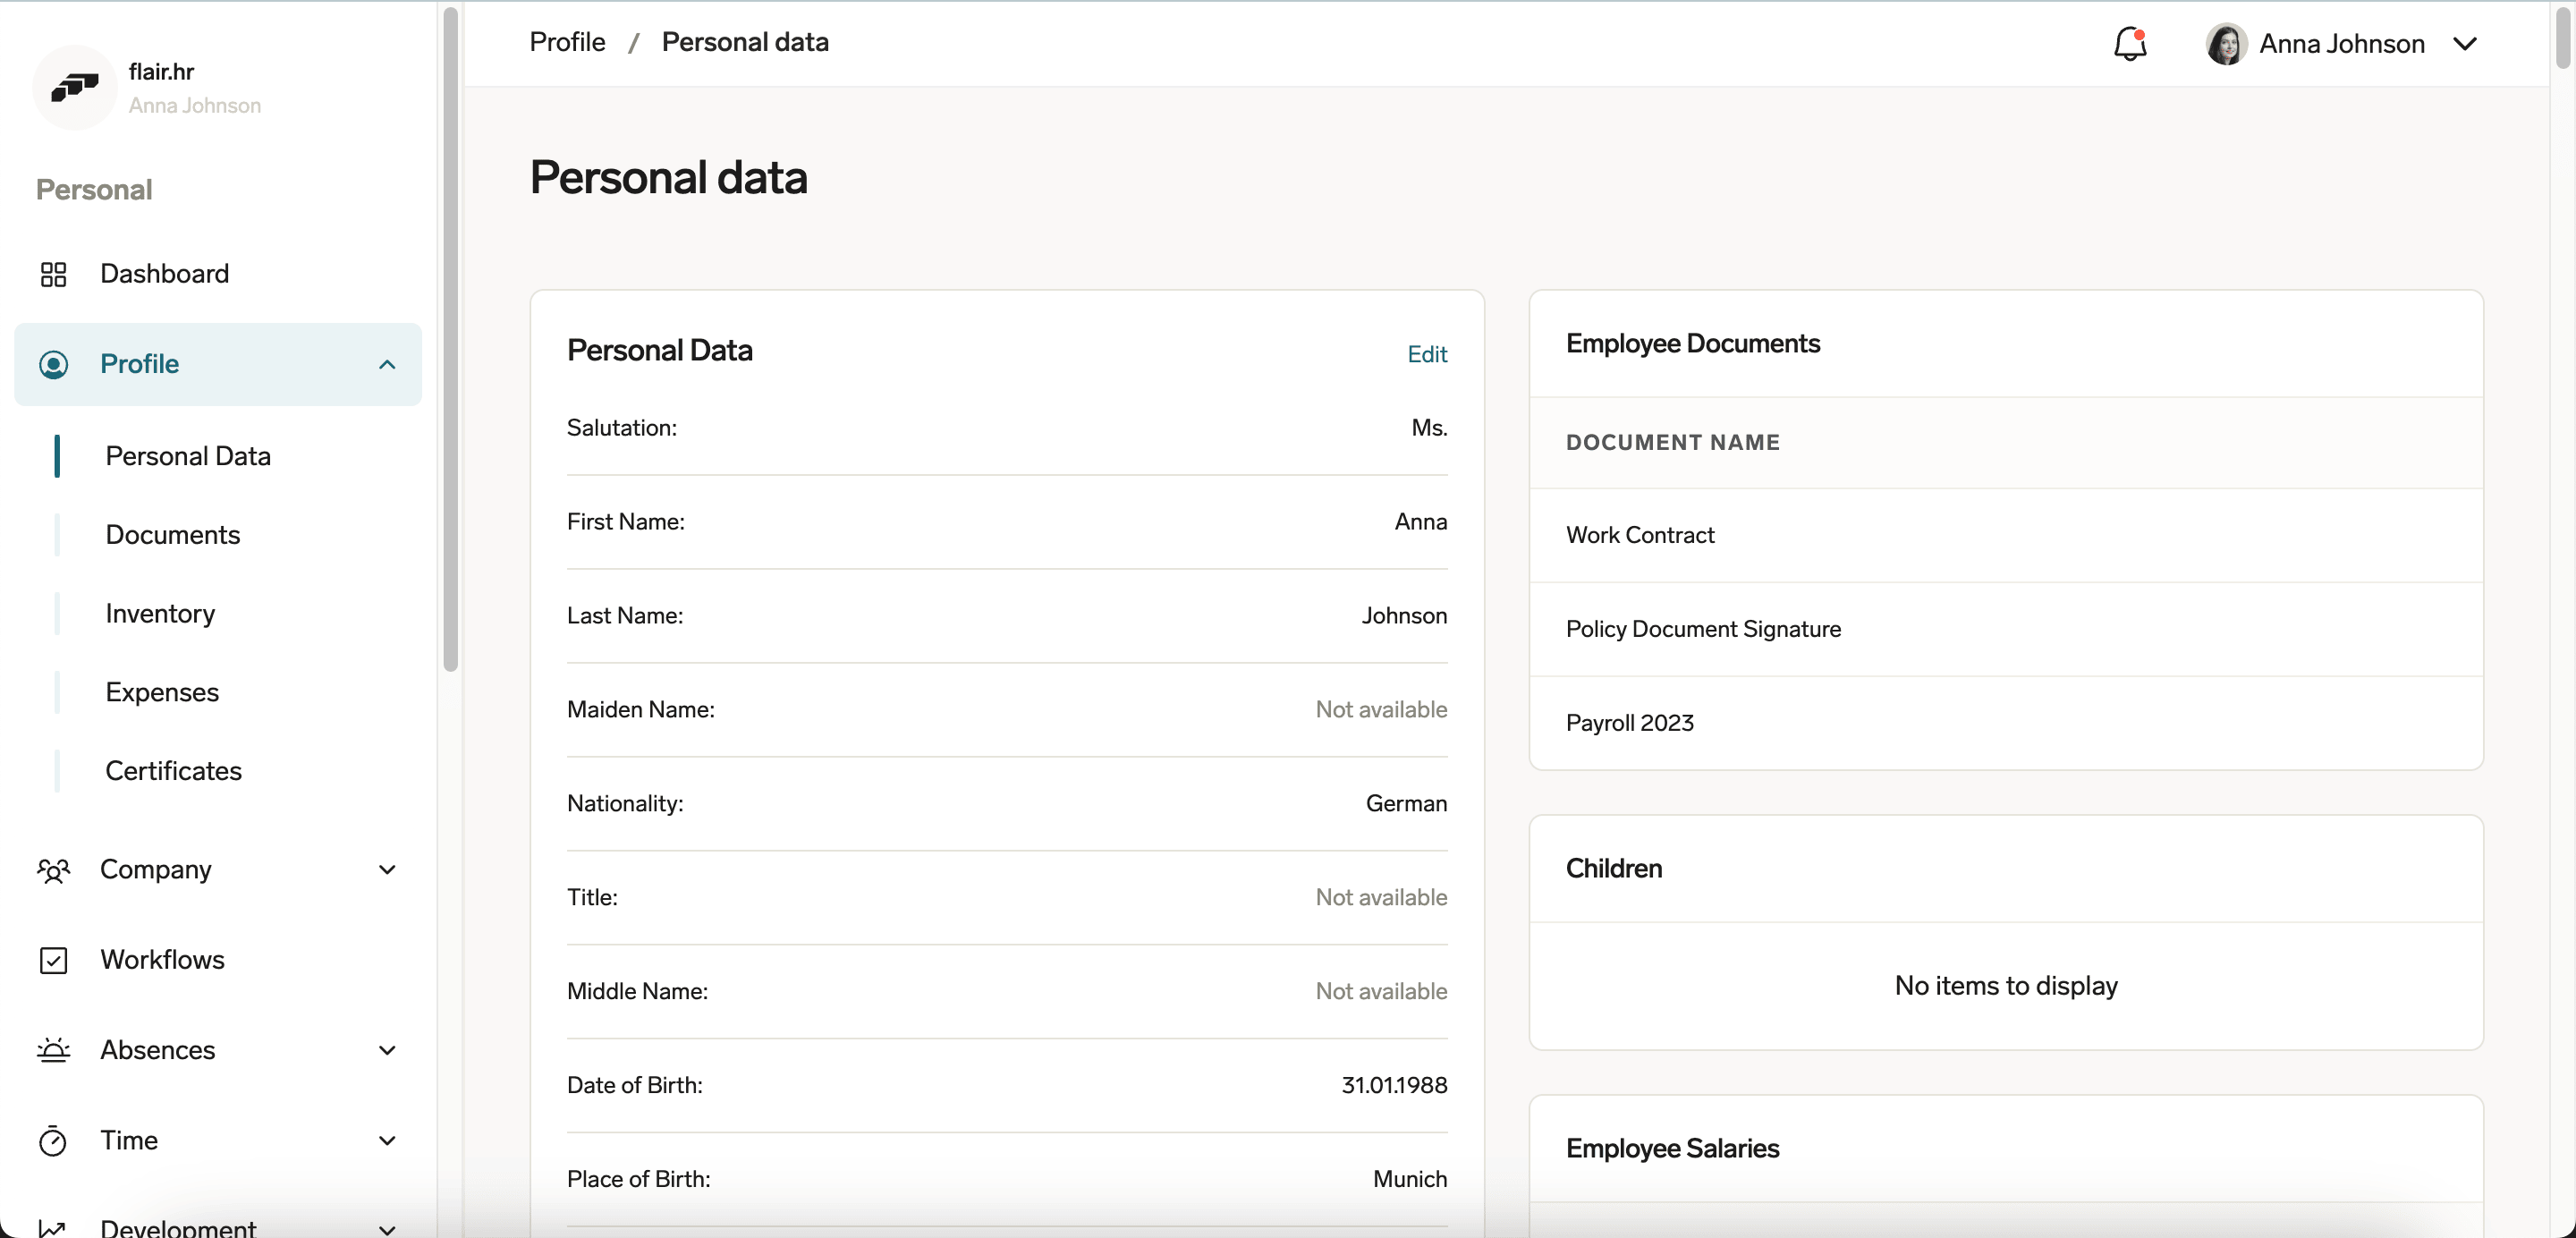
-
Click Save.
Customize a data layout
-
In the layout editor, drag fields from the gray component panel onto the page layout. Faded fields are already on the layout; select one to find its location.
-
Drag an existing field to change its position.
-
Double-click a field to make it read-only or required.
-
Click the minus icon next to a field to remove it.
noteEmployee Hub data layouts support simple field types, including text, numbers, checkboxes, and picklists.
-
In the top-left corner of the component panel, click Save. The layout is applied to the Employee Hub.
Configure a layout for a record type
- Create a layout for the required Salesforce record type, such as Global, Germany, or Italy.
- Name an employee layout
Employee Hub: RecordTypeName. - Name a manager layout
Employee Hub Manager: RecordTypeName. - Replace
RecordTypeNamewith the exact Salesforce record-type name. For example, useEmployee Hub: GermanyorEmployee Hub Manager: Germany. - Save the layout.
Translate a data layout section name
The Employee Hub shows each data layout section using the page layout's section label as its heading. To make a section heading translatable per employee language, replace the section's label with the name of a Salesforce Custom Label.
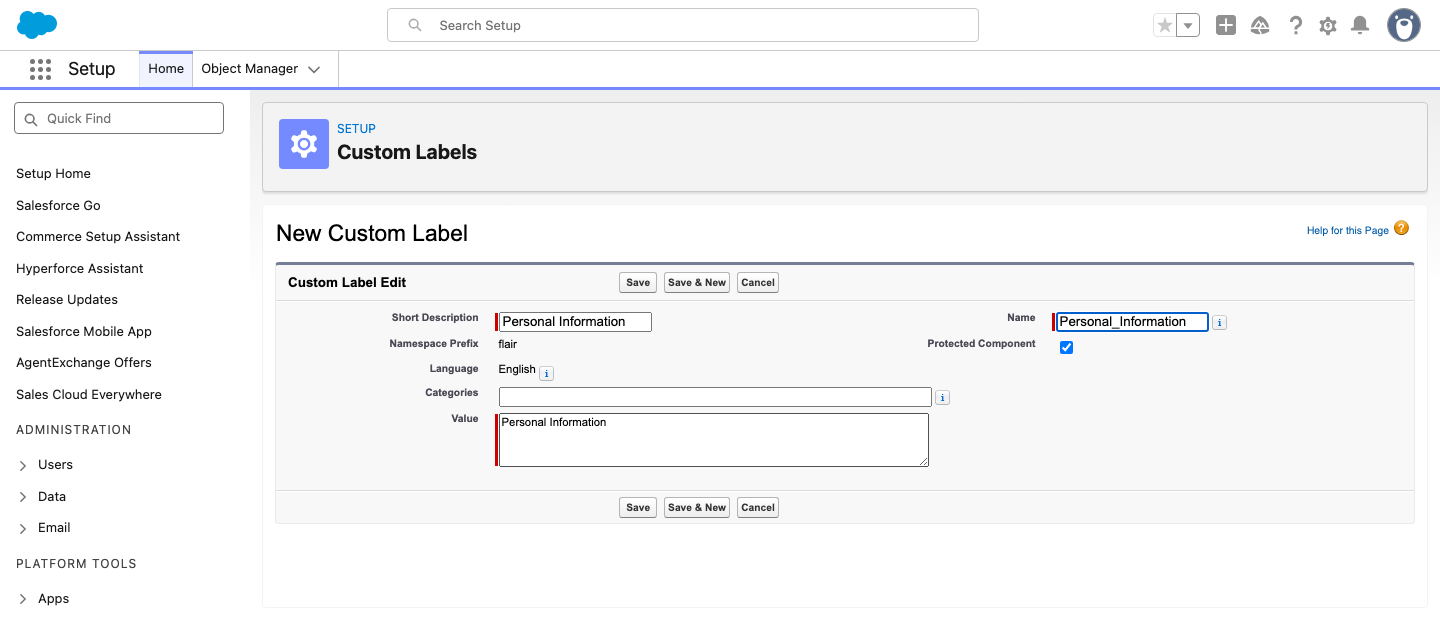
- In Salesforce Setup, enter
Custom Labelsin Quick Find. - Open Custom Labels, and click New Custom Label.
- In Name, enter an API name with no spaces that you will also use as the section label, such as
Personal_Information. - In Value, enter the section heading in the organization's default language.
- Click Save.
- On the data layout, rename the section to the same value you entered in Name, for example
Personal_Information. - Translate the Custom Label for each language your organization supports.
If no Custom Label name matches the section label, the Employee Hub shows the page layout's literal section label instead.
Automatically invite new hires
Create a Salesforce Flow that sends an Employee Hub invitation when an employee's Company Email changes.
-
In the flair HR app, open an Employee record.
-
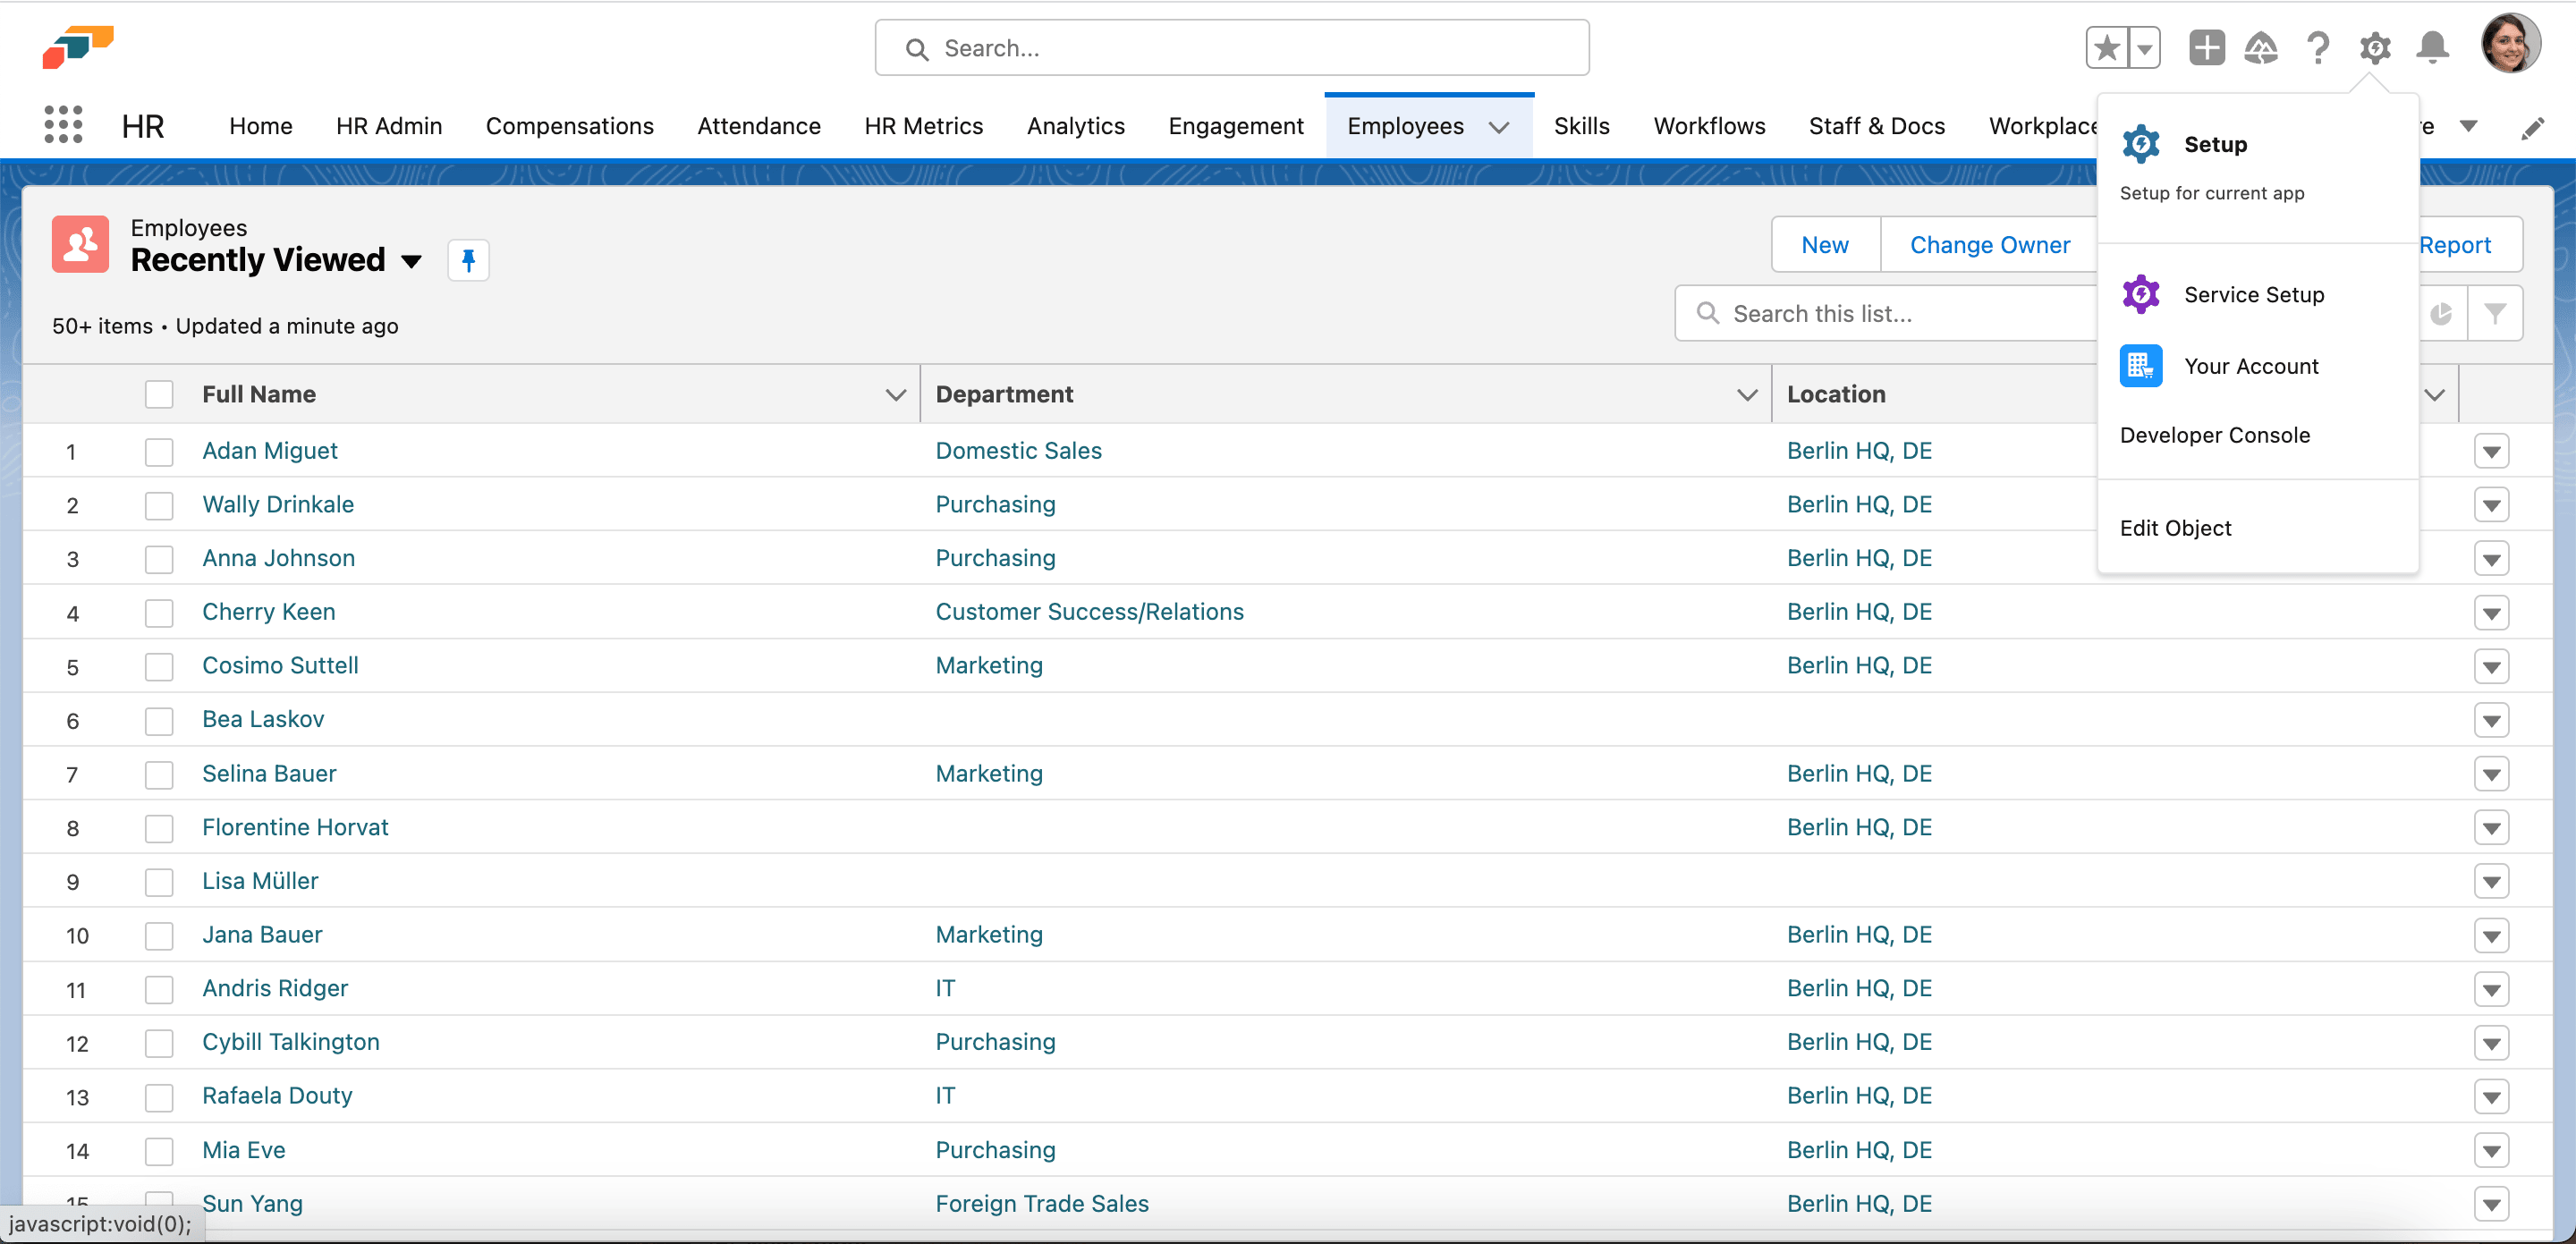
Click the setup gear.
-
Select Edit Object.
-
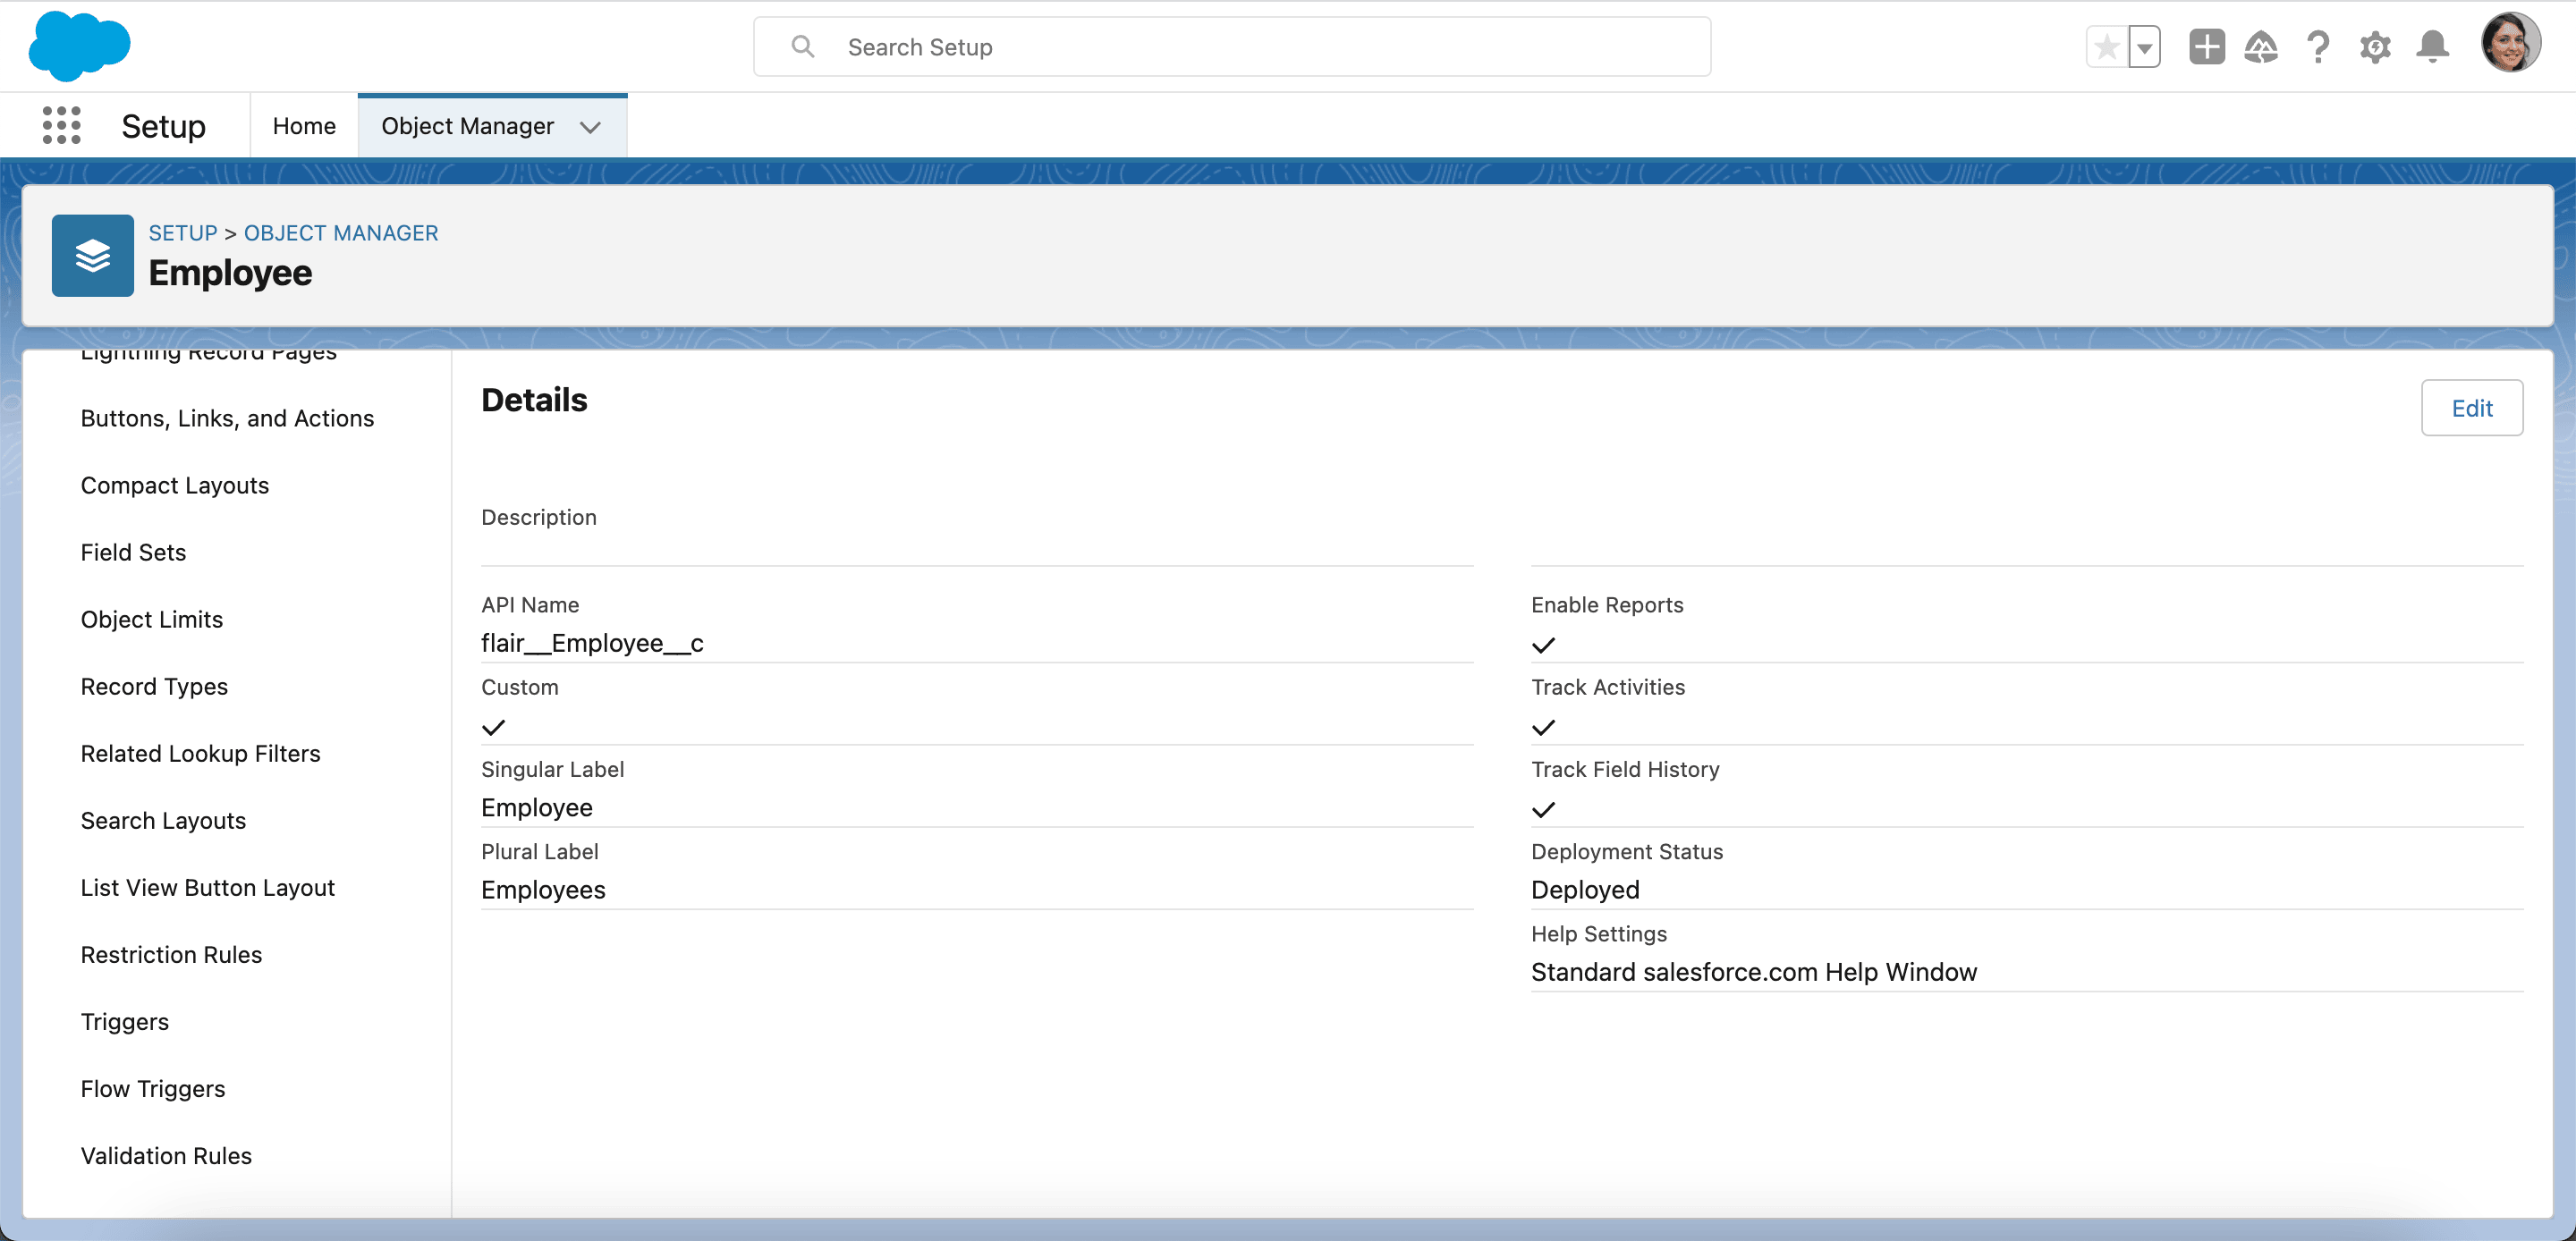
In the left menu, click Flow Triggers.
-
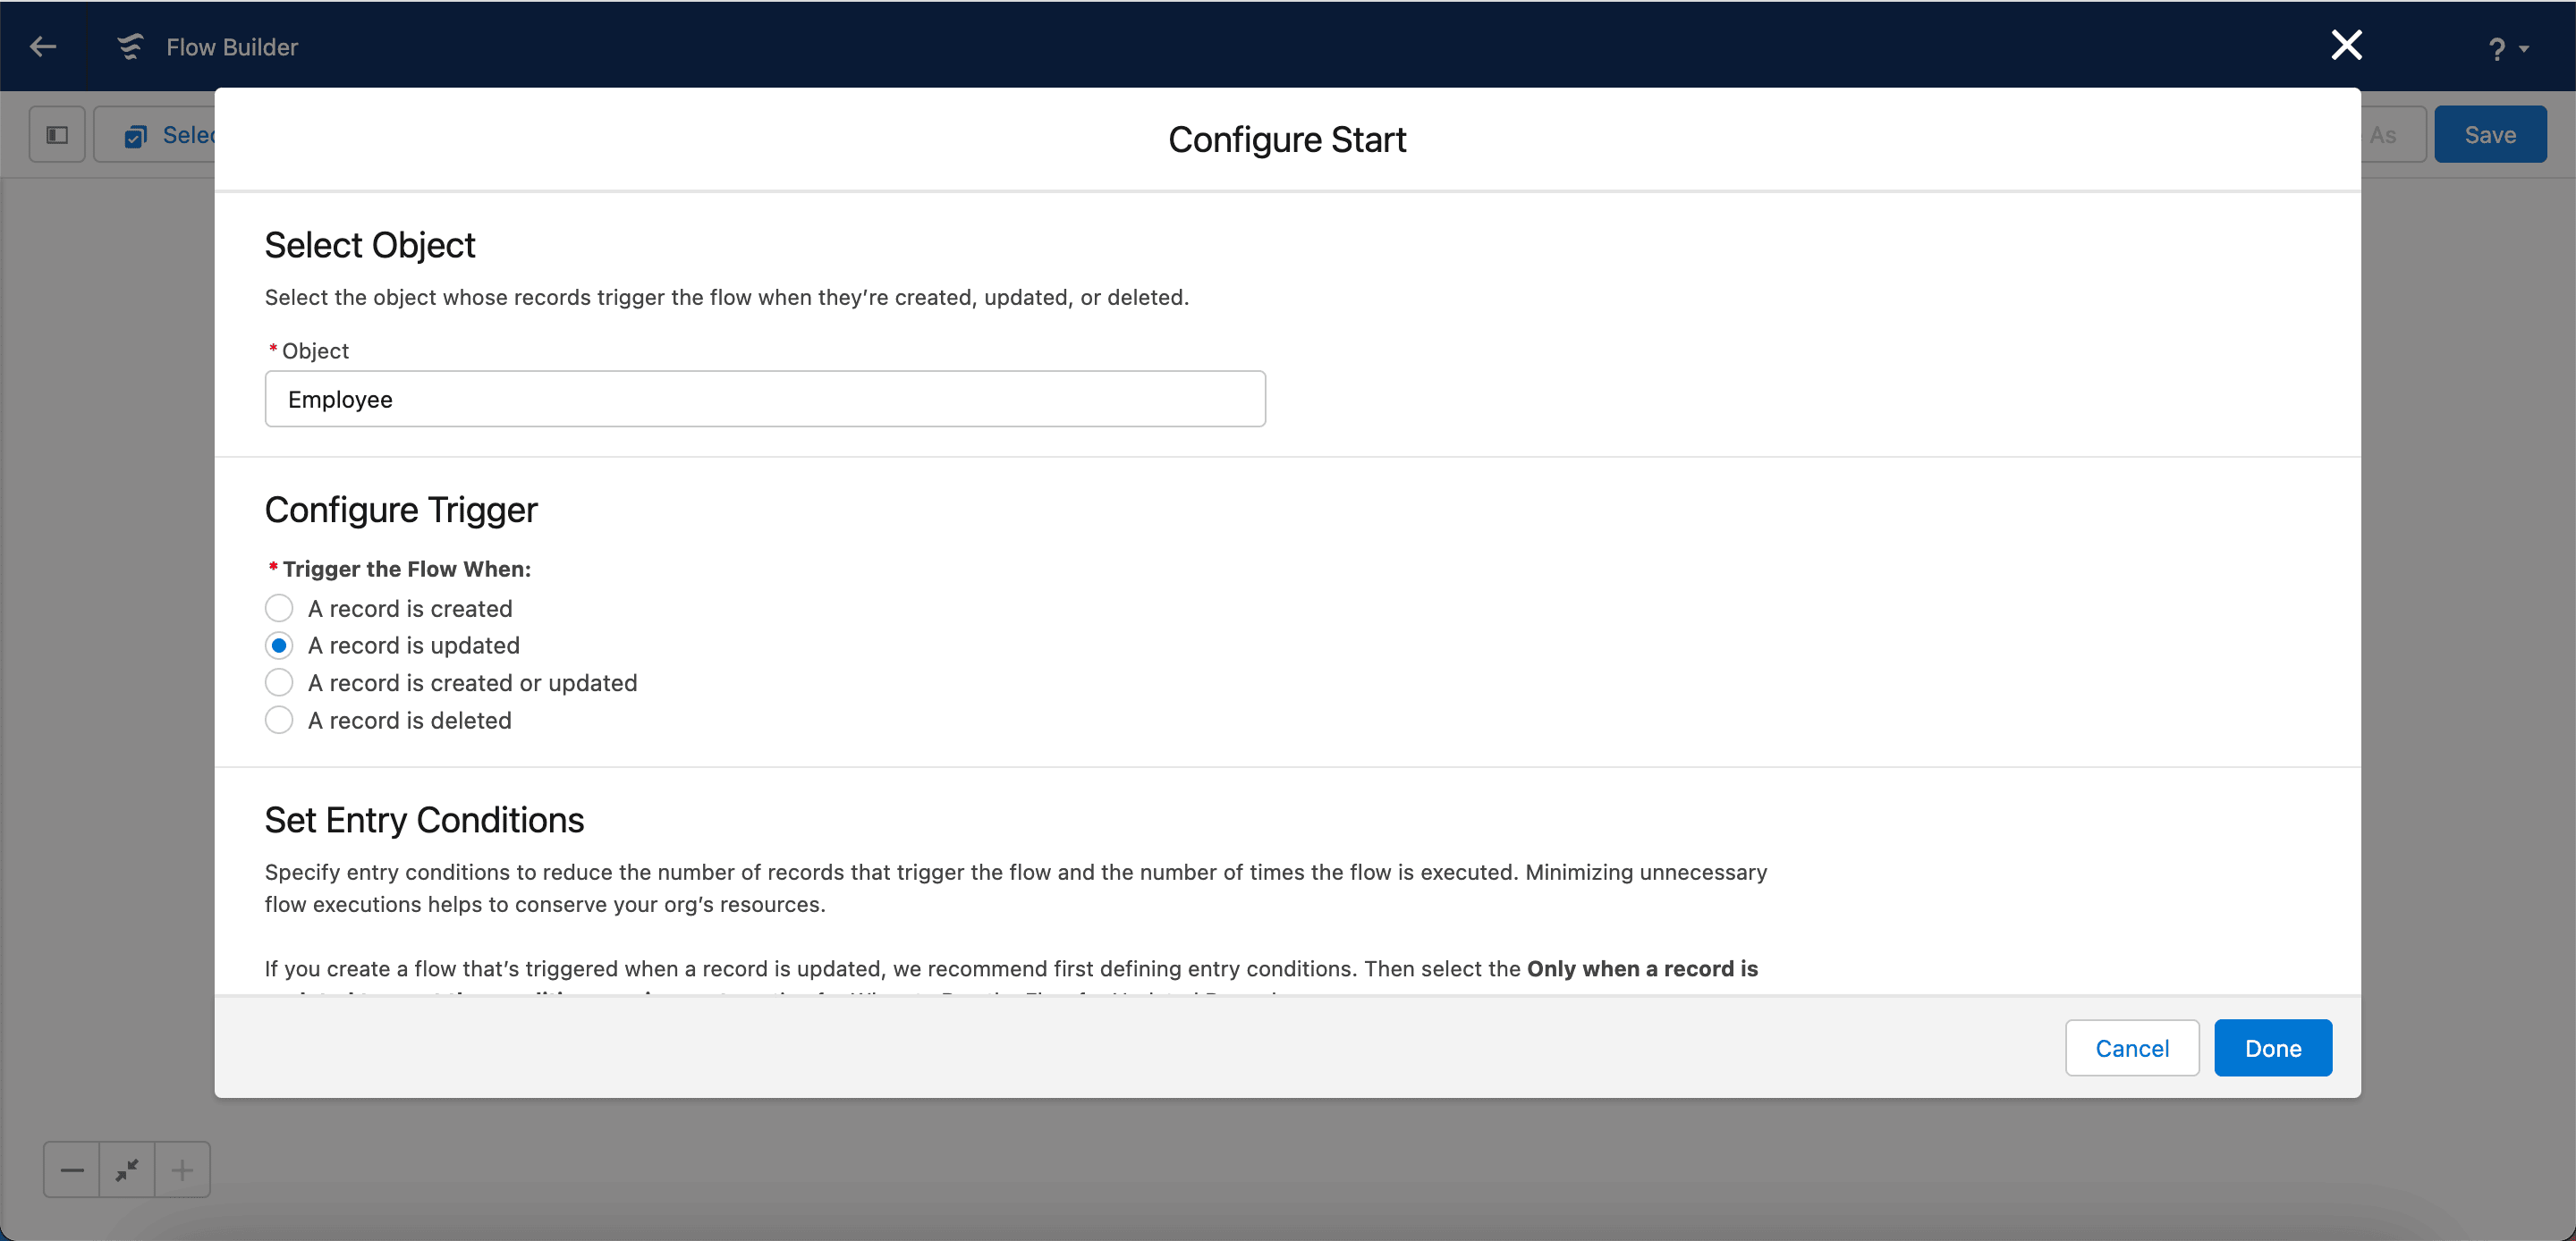
Click New Flow. When you open Flow Builder from the Employee object, Object is prefilled with Employee.
-
Under Configure Trigger, select Trigger the flow when a record is updated.
-
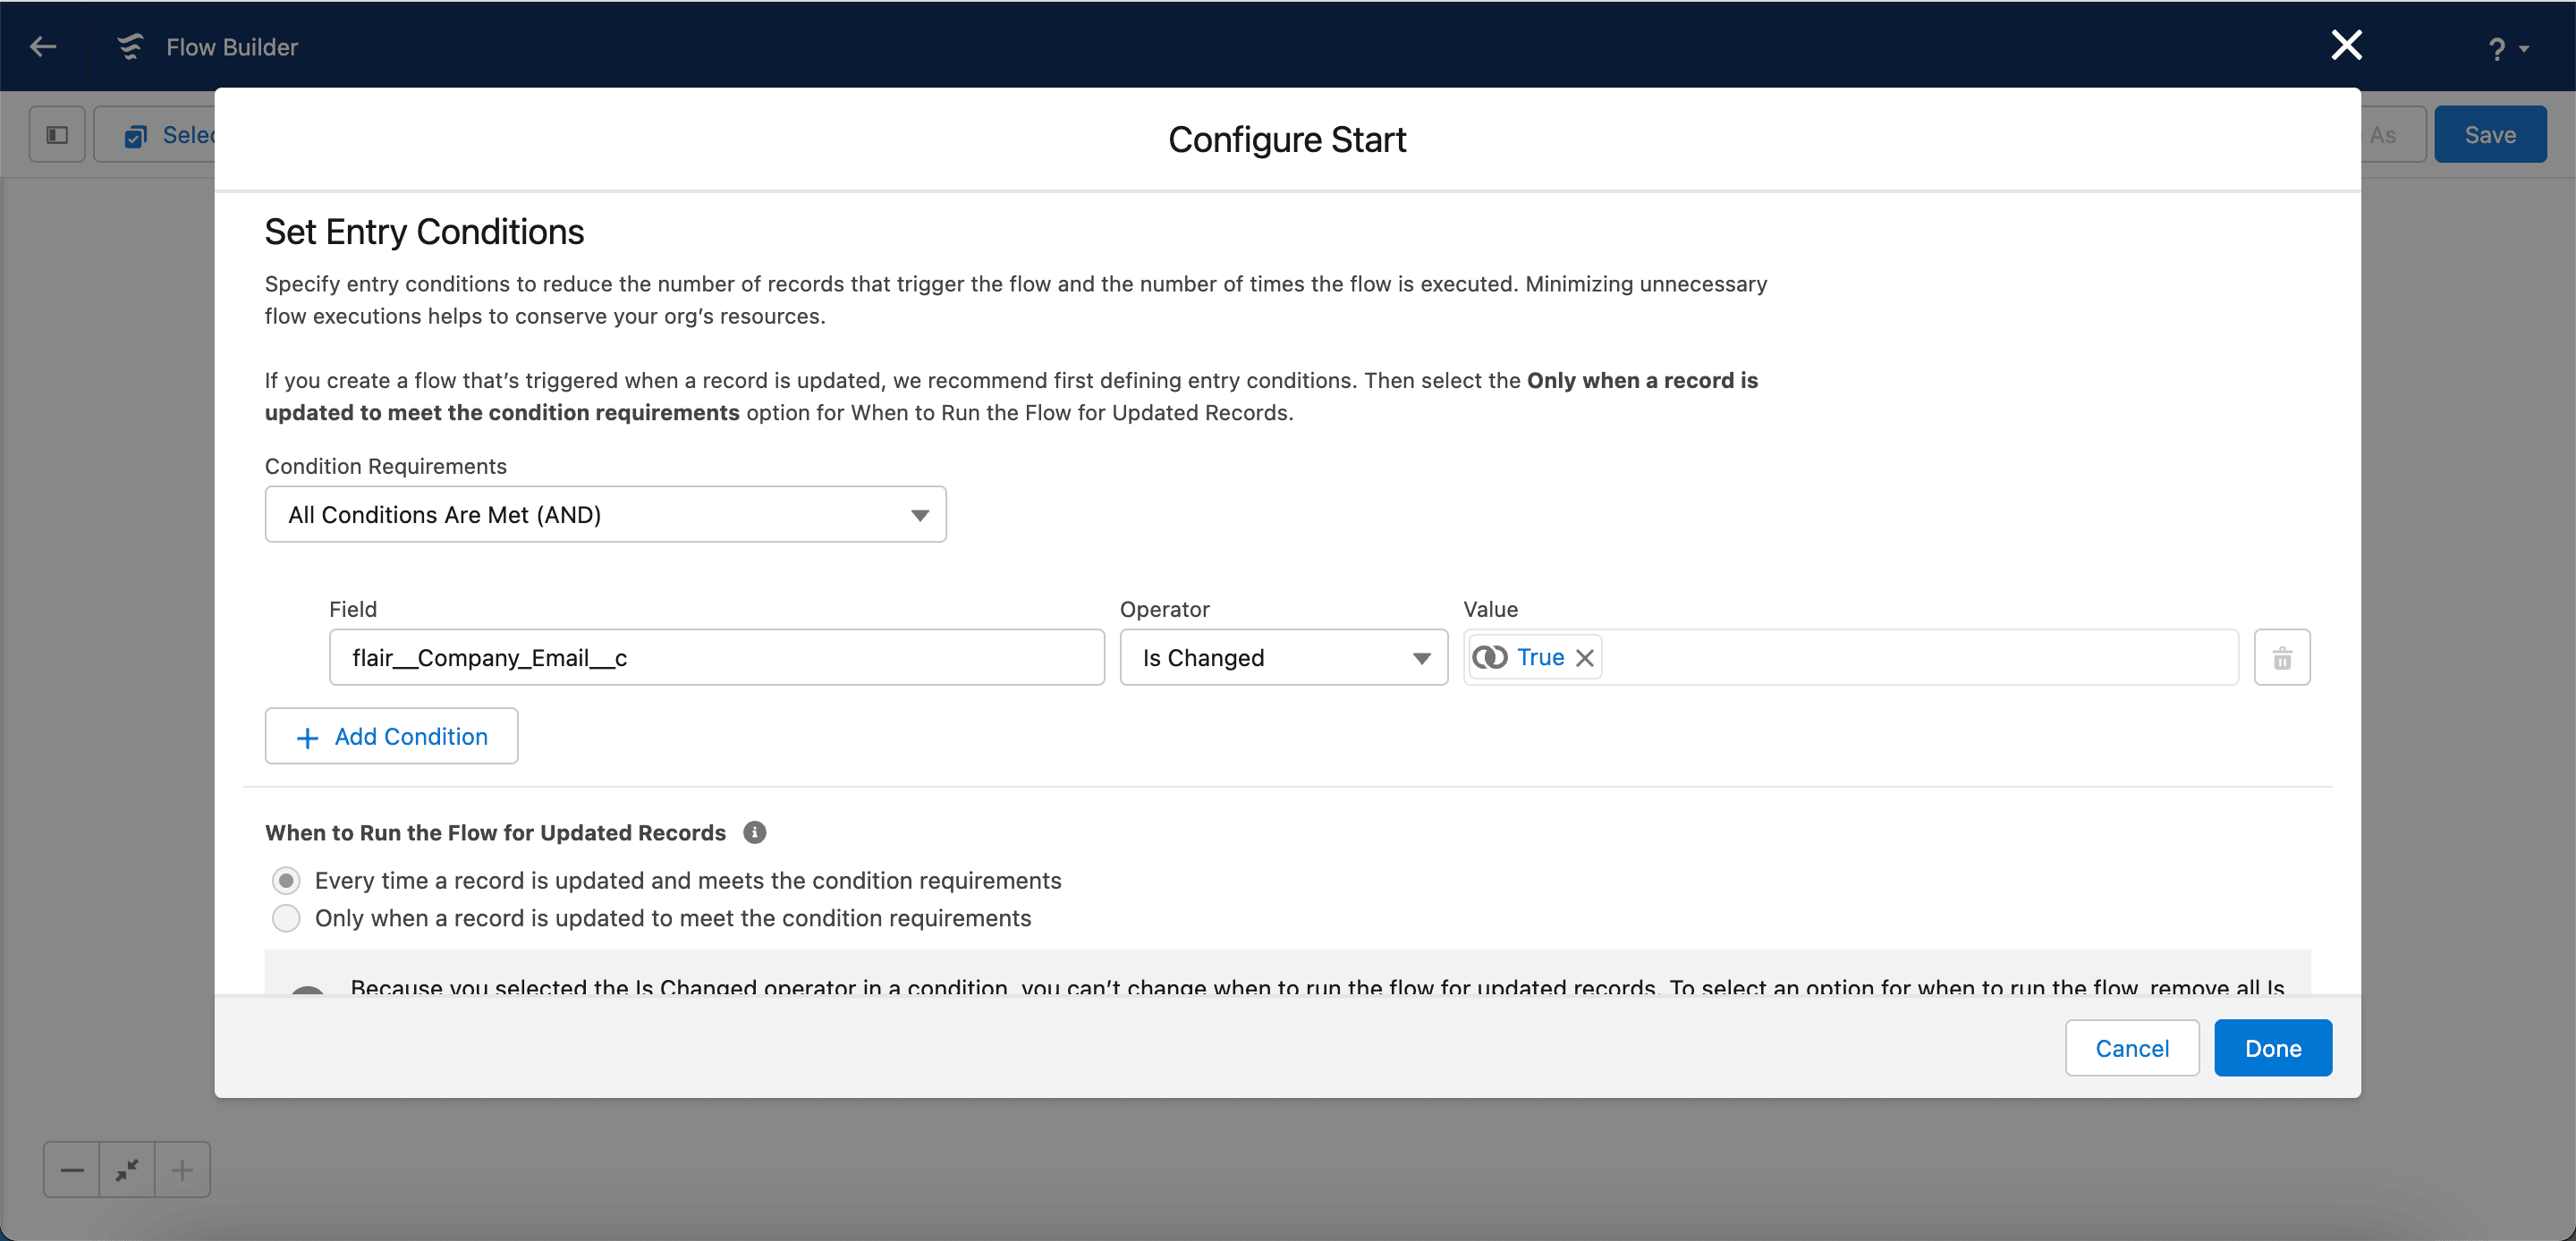
Under Set Entry Conditions, set Condition Requirements to All Conditions Are Met (AND).
-
Set Field to
flair__Company_Email__c. -
Set Operator to Is Changed.
-
Set Value to
True. -
Click Done.
-
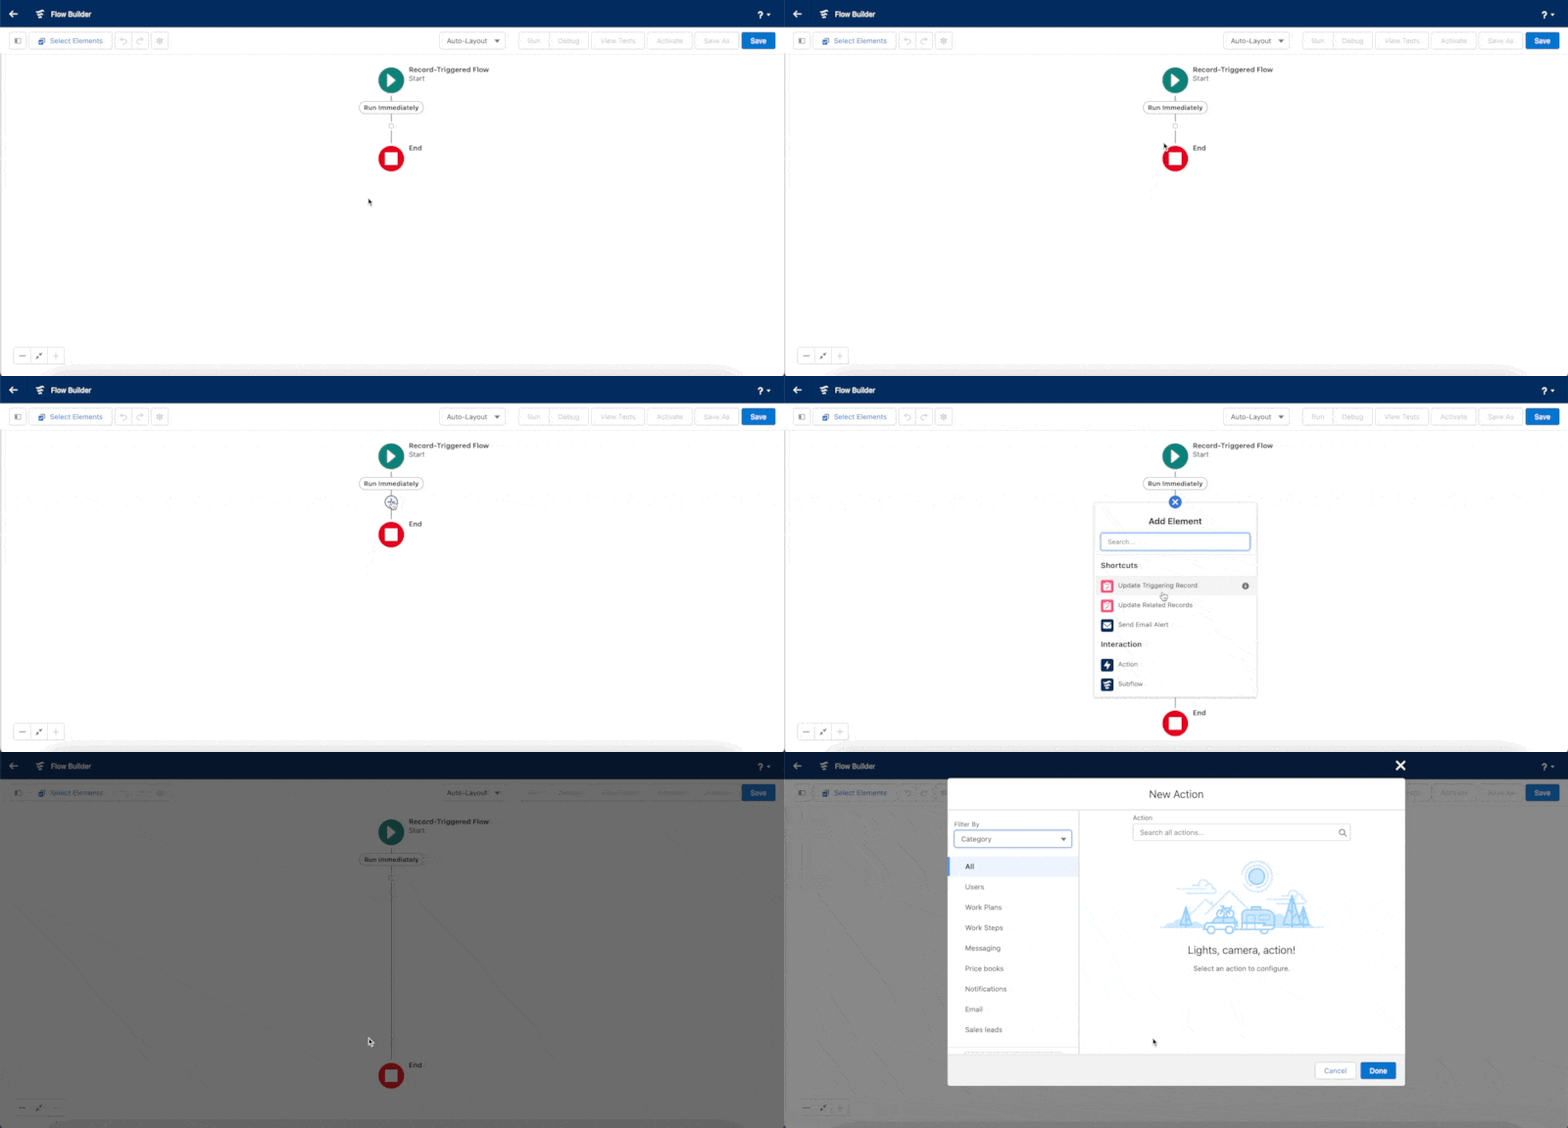
Between Run Immediately and End, click the add-element circle.
-
Select Action.
-
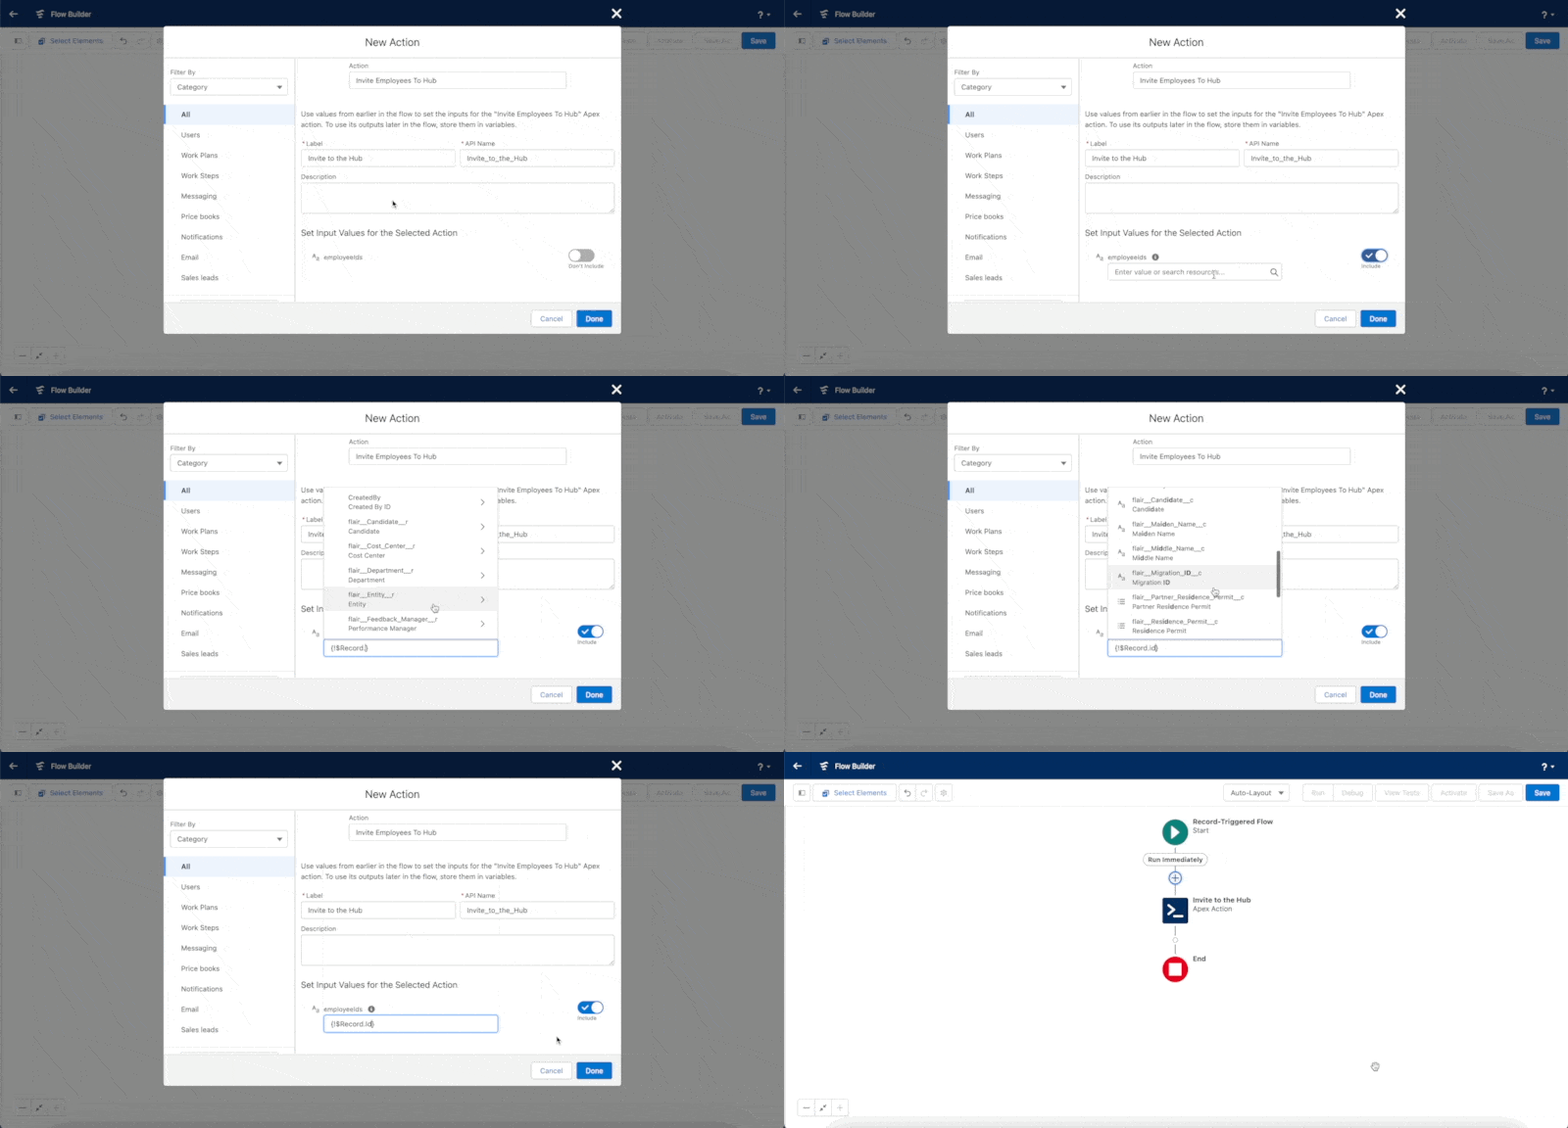
Search for and select Invite Employee To Hub.
-
Enter a Label, such as
Invite to the Hub. Salesforce fills API Name from the label. -
Optional: Enter a Description.
-
Under Set Input Values for the Selected Action, enable employee IDs.
-
In employeeIDs, select $Record → Record ID.
-
Click Done.
-
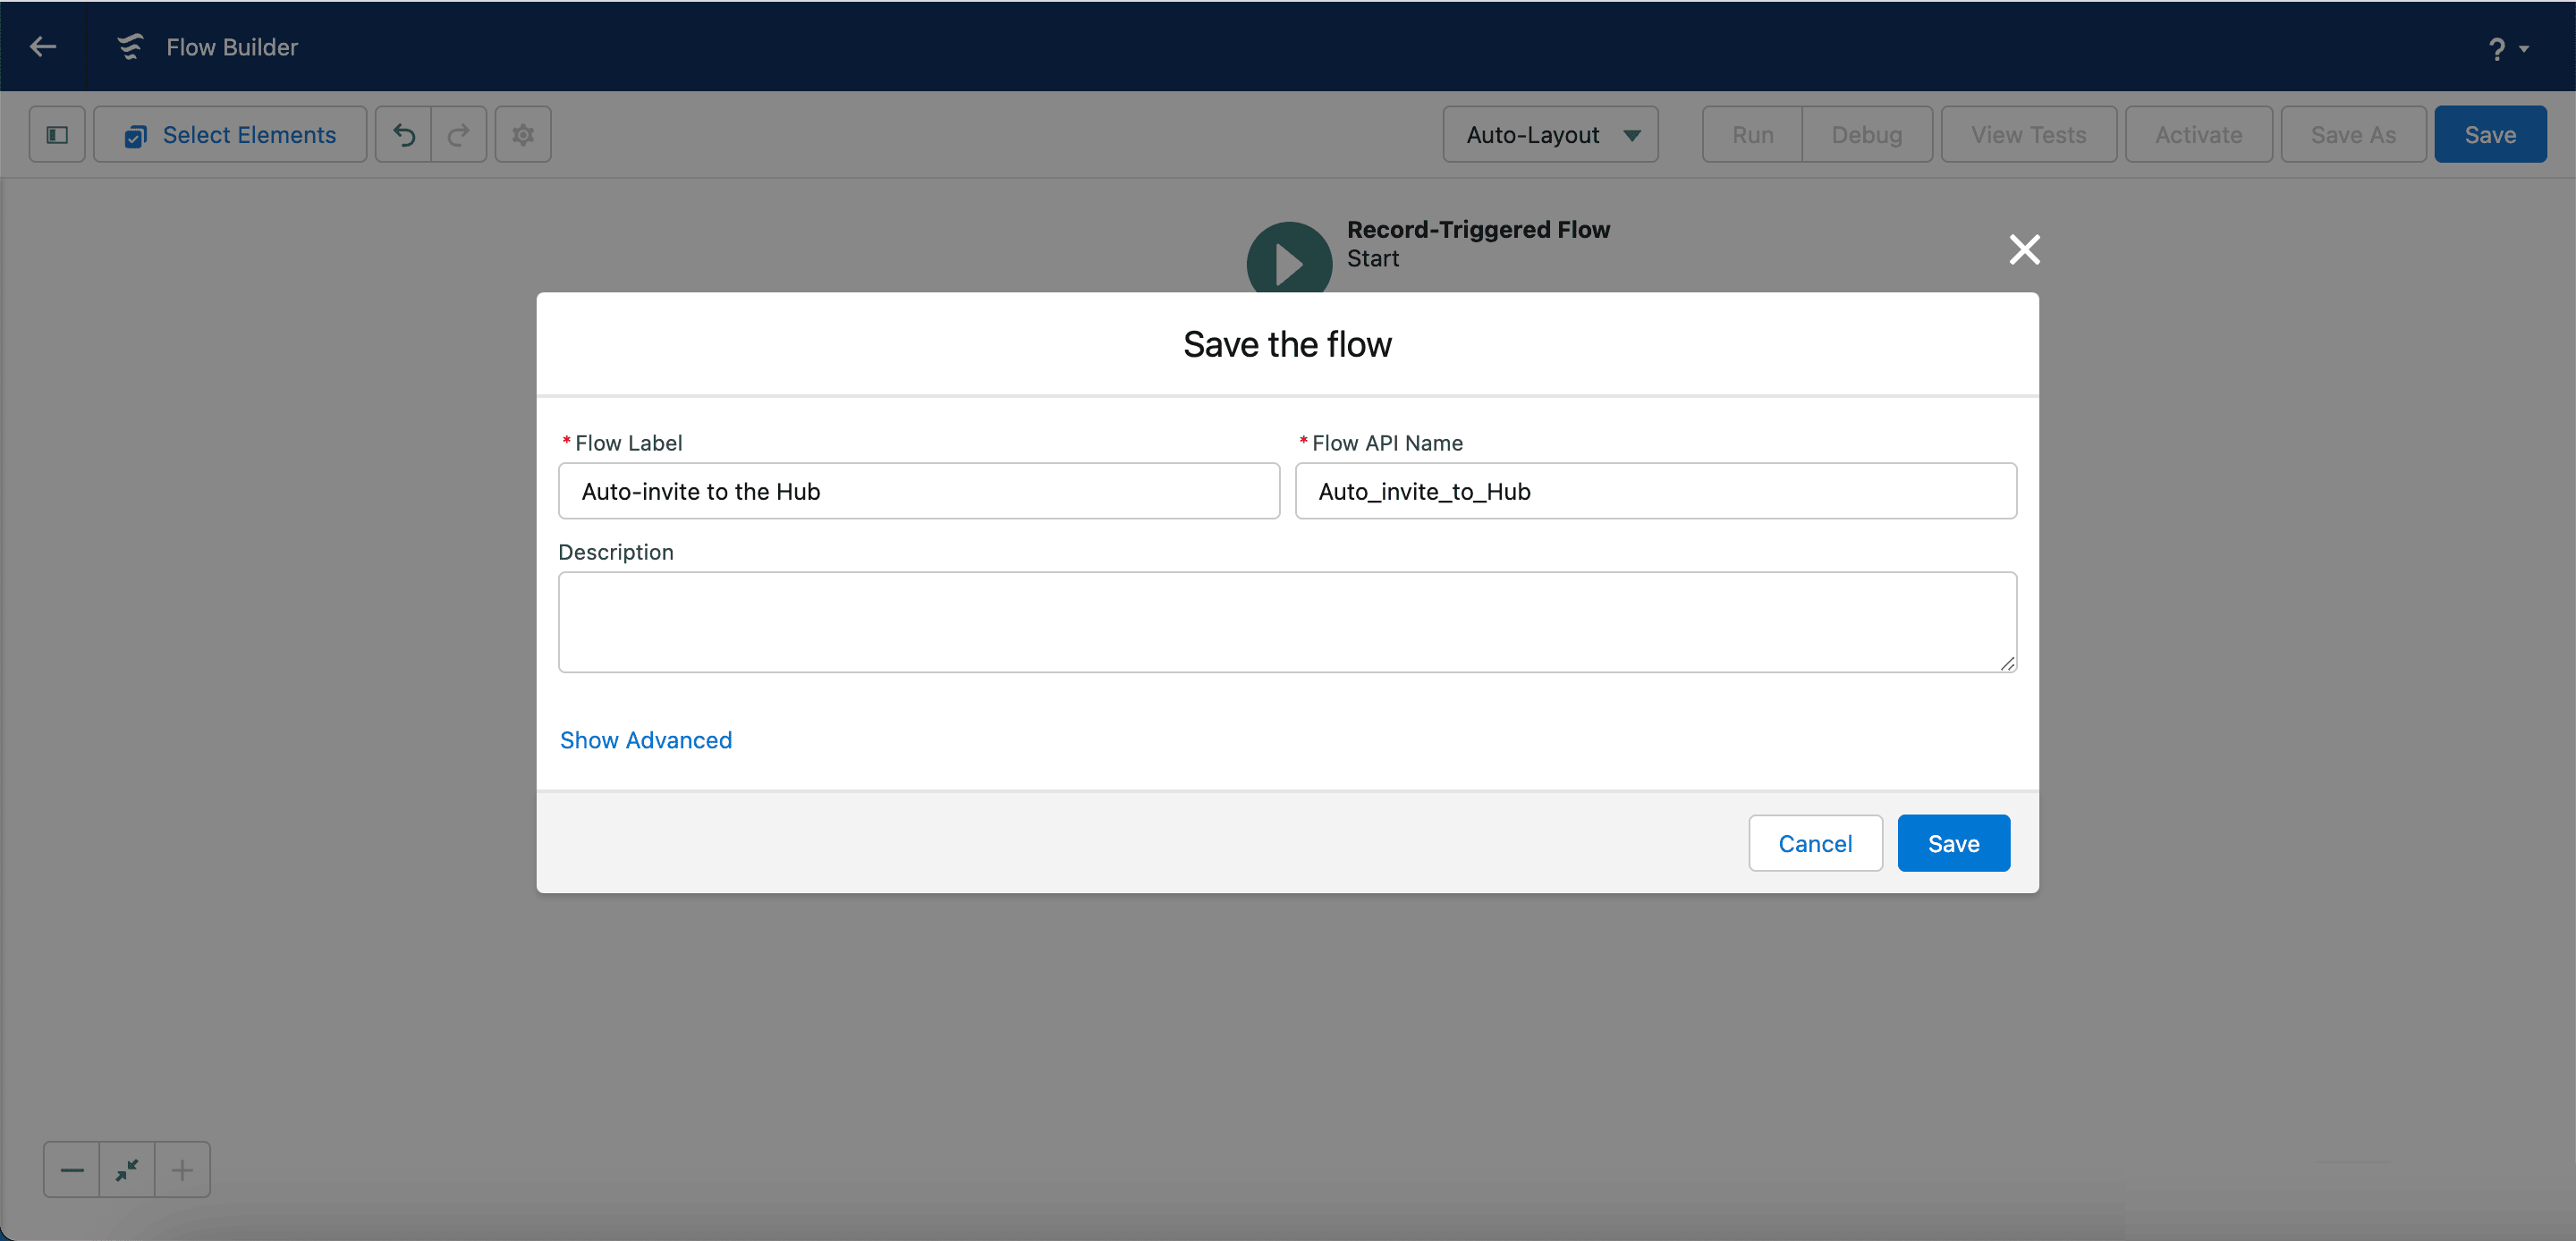
Click Save.
-
Enter a Flow label. Salesforce fills Flow API Name automatically.
-
Click Save.
-
Click Activate.
When Company Email changes on an employee record, the employee receives an invitation at the new address.
Troubleshooting
An invitation link cannot be copied
Confirm that Lightning Web Security (LWS) is enabled. LWS controls whether the invitation link can be copied, but it does not control whether Salesforce sends the invitation email.
Employees do not receive invitation emails
- If no notifications arrive, verify email authentication and deliverability, including DKIM and SPF.
- If other notifications arrive but Hub invitations do not, check the current user's permissions. Hub invitations use the current user's permissions.
- Use Reset Password in the Employee Hub as a diagnostic step. Password resets run in the integration-user context.
If the problem continues, contact flair Support.
Employees cannot sign in to the Employee Hub or mobile app
- Test the sign-in in Google Chrome to rule out a browser-specific problem.
- Enable cookies and JavaScript.
- Clear the browser cache.
- Confirm that the integration user is active and has the required permissions.
- If your organization uses SSO, confirm that the employee's SSO configuration is active.
- Match the capitalization of the login email to the email on the employee record.
- Resend the invitation from the employee record in Salesforce.
- Confirm that the underlying Salesforce user is active.
A password-reset email has no reset link
SSO users authenticate through the identity provider and do not use a flair password, so their emails do not include a password-reset link. Direct the employee to your organization's SSO portal. If SSO is not intended, review the SSO settings for the affected employee.
The SSO option is missing
Employees must use the company-specific domain, such as https://yourcompany.hub.flair.hr/login. The generic https://hub.flair.hr/ URL does not support an organization's SSO configuration. Follow Configure single sign-on for the Employee Hub to find the domain.
Salesforce uses the wrong Employee Hub data layout
The page-layout name determines which Employee Hub layout Salesforce uses. If more than one layout has a name such as Employee Hub, rename or delete the layouts you no longer need.
For record-specific layouts, include the exact record-type name. For example, use Employee Hub: Global or Employee Hub: Switzerland.