View absences in the Attendance calendar
The Absences tab in Attendance shows employees' absences on a scrollable calendar or in a table. This guide covers switching views and time ranges, filtering employees, and reviewing, approving, or editing an absence in the details panel without leaving the page.
Salesforce users with the Absences Manager custom permission. Approving and rejecting from the details panel is available to the approver of a pending request.
Before you begin
- Your permission sets include the Absences Manager custom permission, for example through Flair Absence Manager, Flair Manager, or Flair Employee Management. Without it, the Absences tab doesn't appear in Attendance.
Open the absences calendar
- In the flair HR app, open Attendance.
- Click the Absences tab. The calendar opens on the current month.
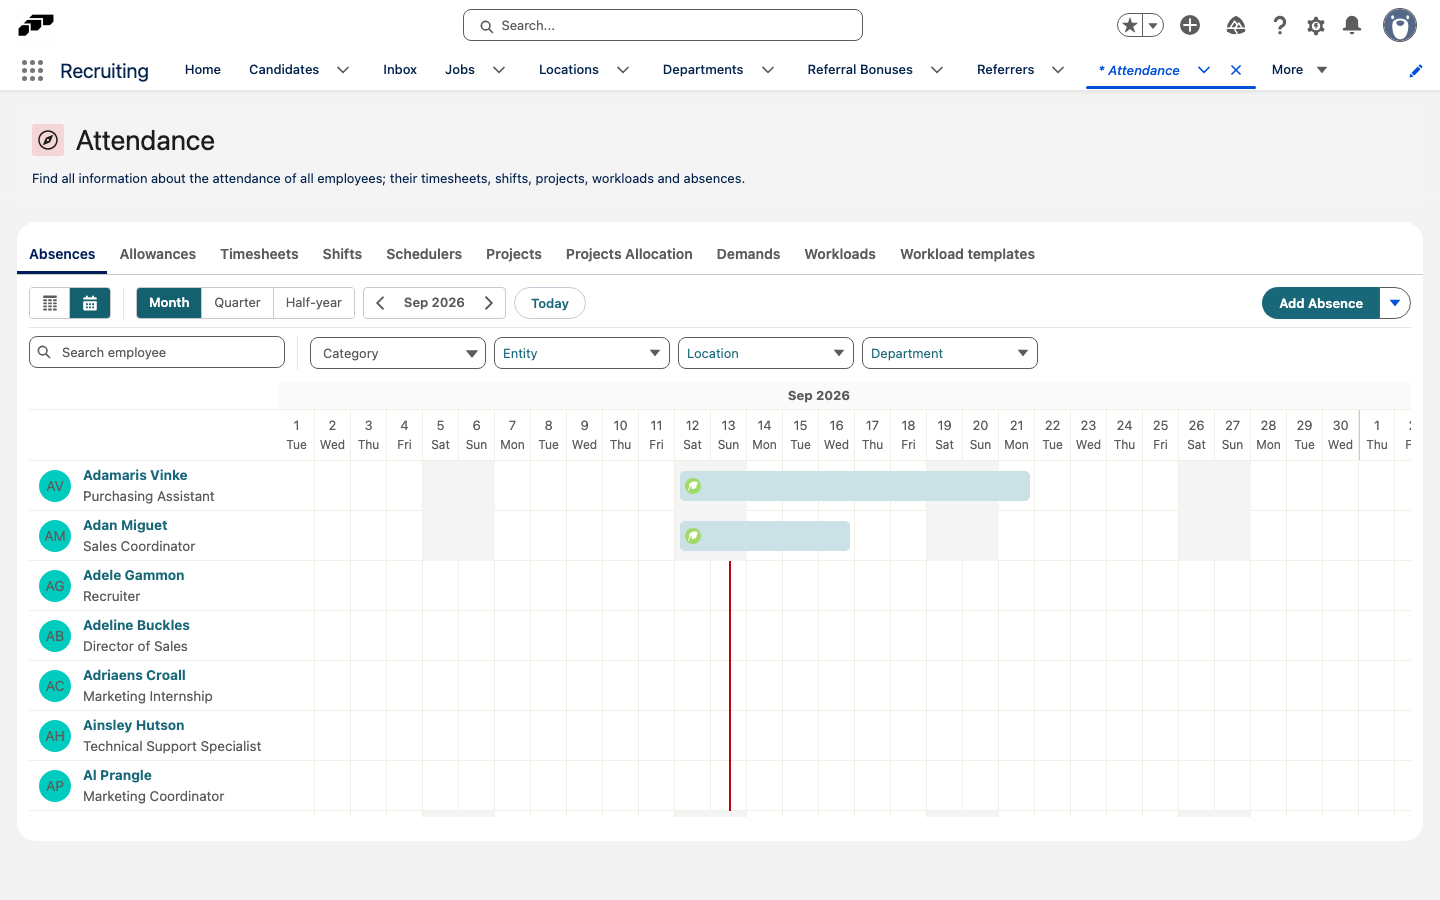
The calendar lists employees who are employed during the loaded period, sorted by name, with their pending and approved absences. Rejected absences don't appear. More employees load as you scroll down.
Employee names and job titles stay in place while you scroll sideways, and the date header stays in place while you scroll down. Long names and job titles are shortened; hover over them to see the full text. An absence that runs across the end of a month appears as one continuous bar.
- To see an absence's category, Amount, Working amount, dates, and approval status, hover over its bar.
Switch between calendar and table view
- To switch views, click the Table view or Calendar view icon at the start of the toolbar.
The table lists each absence with its Employee, Start, End, Category, Amount, Working amount, and Status. Below the table, a count shows how many employees are loaded. To load the next employees, click Load more.
Change the time range
The time range buttons work differently in each view:
| Option | Calendar view | Table view |
|---|---|---|
| Month | Widest day columns, arrows move one month | Lists one month |
| Quarter | Narrower day columns, arrows move three months | Lists three months |
| Half-year | Narrowest day columns, arrows move six months | Lists six months |
| Yearly | Not available | Lists twelve months |
- Click Month, Quarter, Half-year, or, in table view, Yearly.
- To move forward or back by the selected period, click the arrows next to the period label.
- To return to the current month, click Today.
In calendar view, you can also scroll sideways through time. Further months load as you reach them. If you switch from table view at Yearly to calendar view, the calendar uses Half-year.
To see all of one employee's absences for a year, switch to table view, click Yearly, and search for the employee.
Filter the list of employees
The second row of the toolbar filters which employees and absences appear in both views:
| Filter | What it does |
|---|---|
| Search employee | Shows employees whose name contains the text you enter. |
| Category | Shows only absences of the selected absence category. Employees without a matching absence stay in the list. |
| Entity | Shows employees of the selected entity. |
| Location | Shows employees at the selected location. |
| Department | Shows employees in the selected department. |
- To remove all filters at once, click Clear all. The button appears while a filter is active.

Review an absence in the details panel
-
Open the absence:
- In calendar view, click the absence bar.
- In table view, open the row's action menu, and select Details.
The absence details panel opens, and the calendar or table stays where you left it. The panel header shows the absence category, employee, dates, and approval status.
-
Optional: To read or post comments on the absence, click Comments.
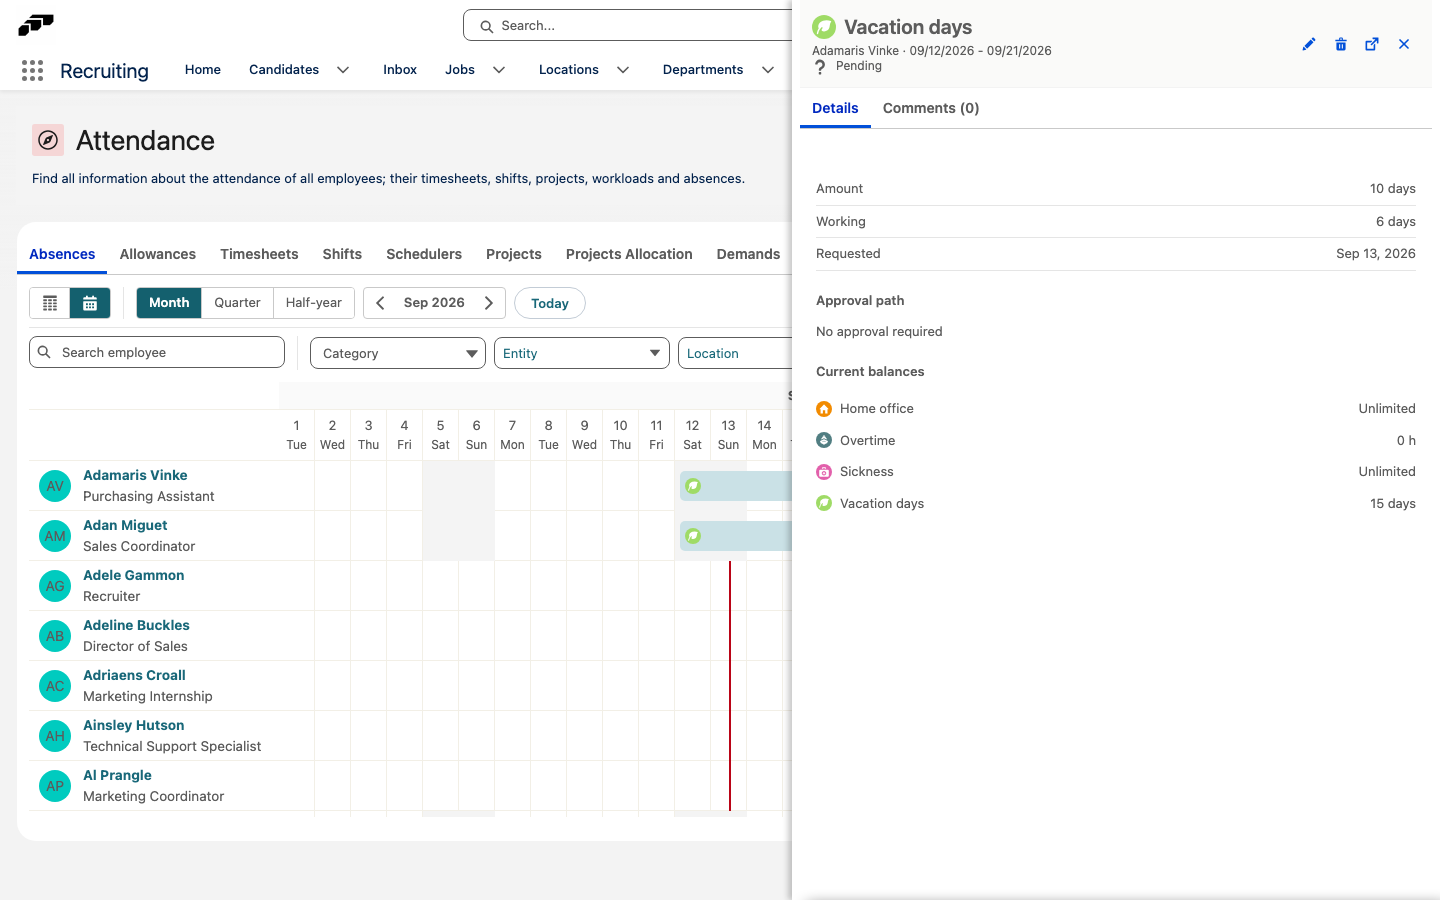
The Details tab shows:
| Section | What it shows |
|---|---|
| Amount | The absence amount. For an hourly absence over several days, click (variable times) to see the times for each day. |
| Working | The absence's working amount, as stored in the Working Amount field on the absence record. |
| Requested | The date the absence was requested. |
| Substitute | The substitute, if one is set. |
| Note | The note on the absence, if there is one. |
| Approval path | The requester and each approver's decision in step order, the step rule (for example, Any one approver or All approvers), and approvers' comments. |
| Current balances | The employee's balance for each of their active absence categories. Categories without a limit show Unlimited. |
Approve or reject an absence from the panel
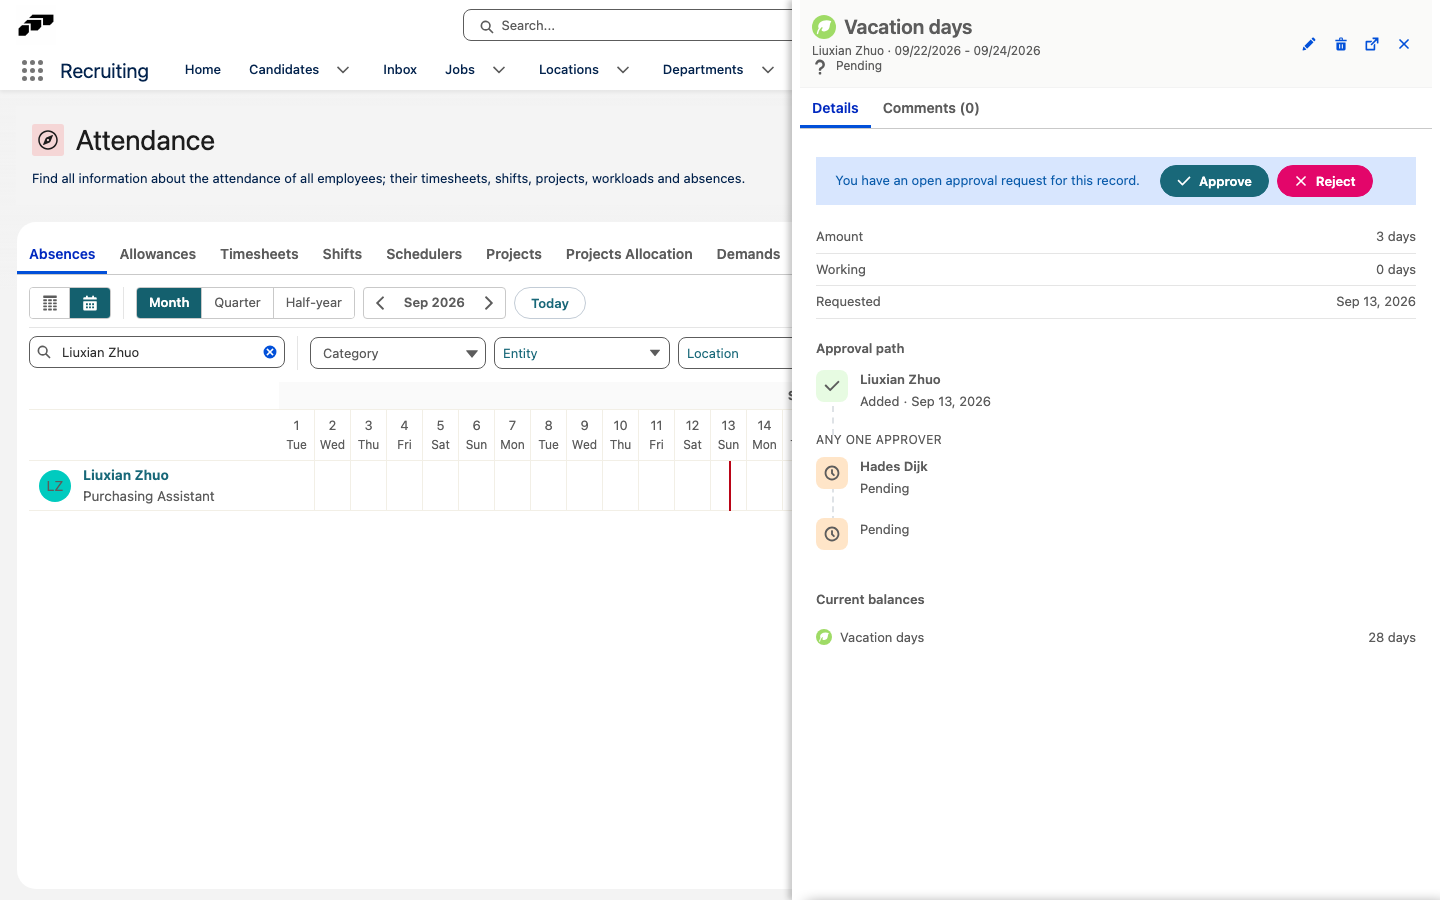
When you're the approver of a pending request for the absence, the Details tab shows the message "You have an open approval request for this record." with Approve and Reject. This requires your Salesforce user to be linked to your employee record.
- Open the absence in the details panel.
- Click Approve or Reject.
- Optional: Enter a comment. For a rejection, add a reason.
- Confirm the dialog. flair records your decision and updates the Approval path.
Edit or delete an absence from the panel
Use the icons in the panel header:
- To change the absence, click Edit, update the absence form, and save it.
- To remove the absence, click Delete, and confirm in Delete absence. The panel closes.
- To open the full absence record in a new browser tab, click Open record.
Add an absence from the calendar
- To create an absence for an employee, click Add Absence.
- To add a mandatory absence to a calendar, click the arrow next to Add Absence, and select Add Mandatory Absence. For the form, see Create a mandatory absence from a calendar.
Troubleshooting
An employee is missing from the calendar
- Check whether a search or filter is active, and click Clear all.
- Check the employee's start and end dates. The calendar only lists employees who are employed during the loaded period.
- In a large organization, narrow the list with search or a filter. The calendar stops loading more employees after a limit for one combination of search and filters.