Use and configure the Employee Hub and mobile app
The Employee Hub is flair's web-based employee self-service portal for everyday HR tasks outside Salesforce. Information and actions synchronize immediately with the flair apps in Salesforce. The flair mobile app provides common employee and manager actions on your phone.
Employees and Managers use the Employee Hub and flair mobile app. The cards and tabs available in the mobile app depend on your organization's configuration. HR Admins and the Integration User configure the Employee Hub in Salesforce.
Before you begin
- Your Integration User has activated the Employee Hub.
- If the Integration User leaves your organization, assign the role to another user to maintain Hub access and functionality.
Activate the Employee Hub
- As the Integration User, use the Setup Assistant on the flair HR home page to enable the Hub and invite employees. For the complete procedure, see Get started with flair.
Navigate the Employee Hub
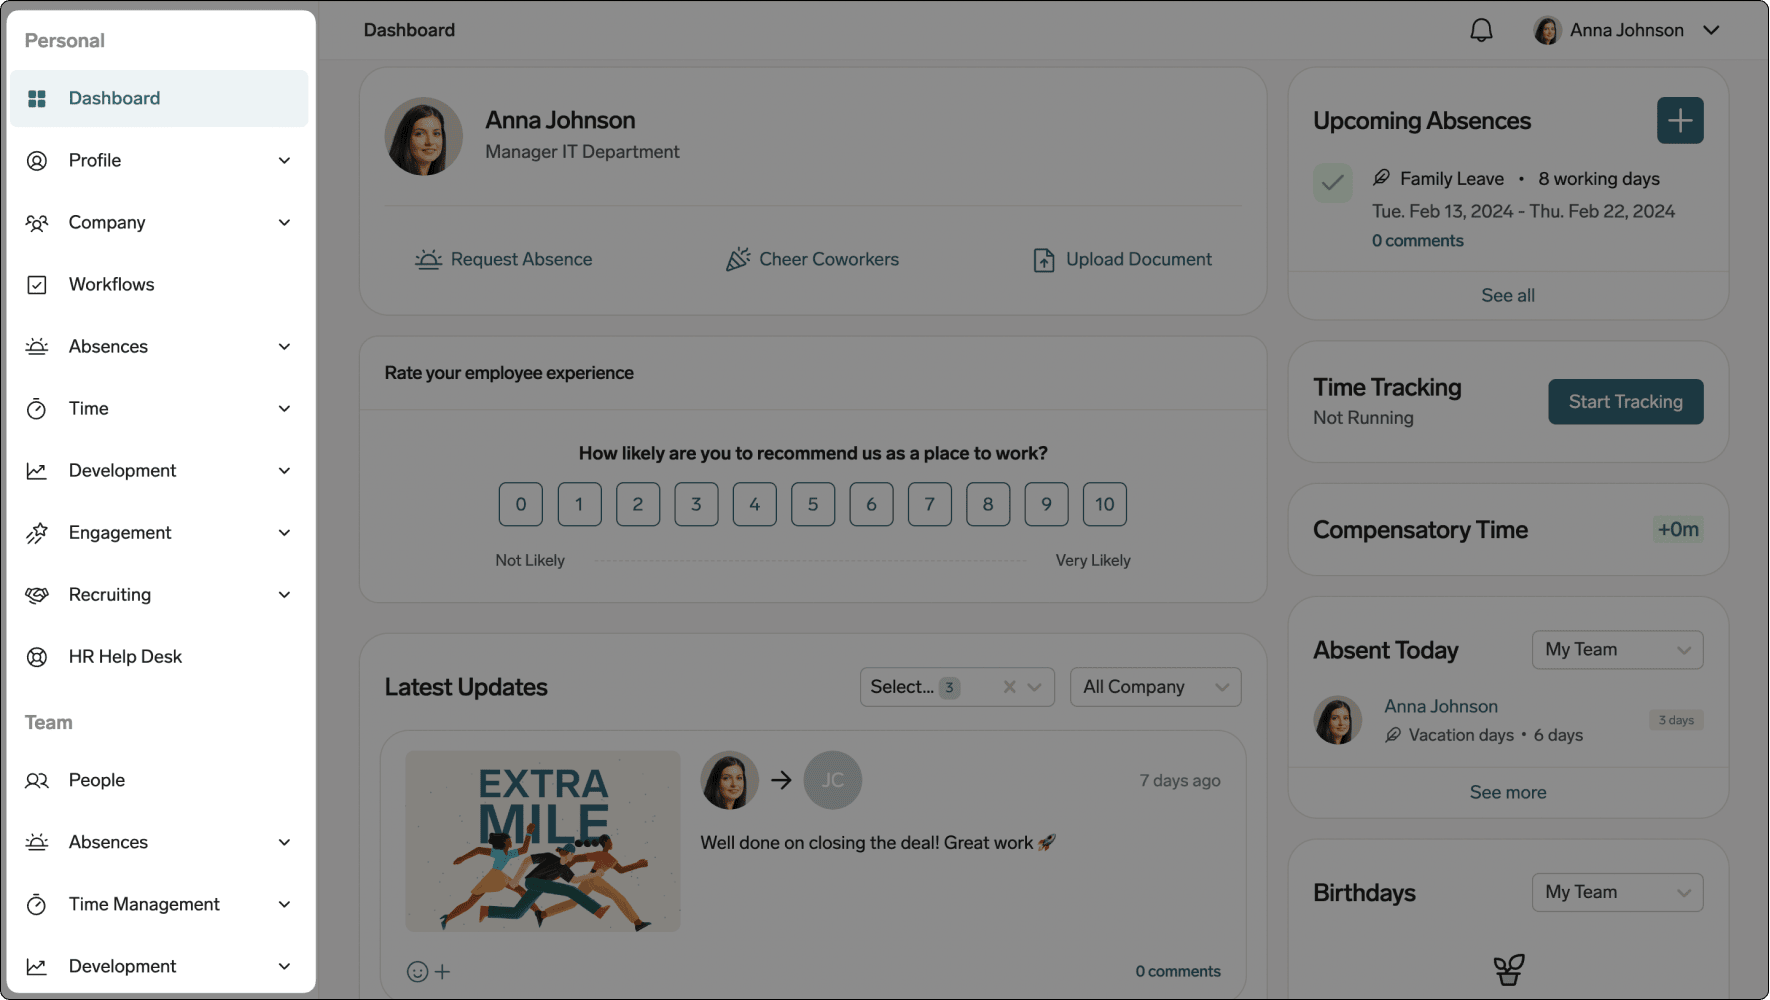
The side menu separates your own features under Personal from manager features under Team. The navigation bar remains visible and shows your location, such as Absences → Calendar.
Use the dashboard
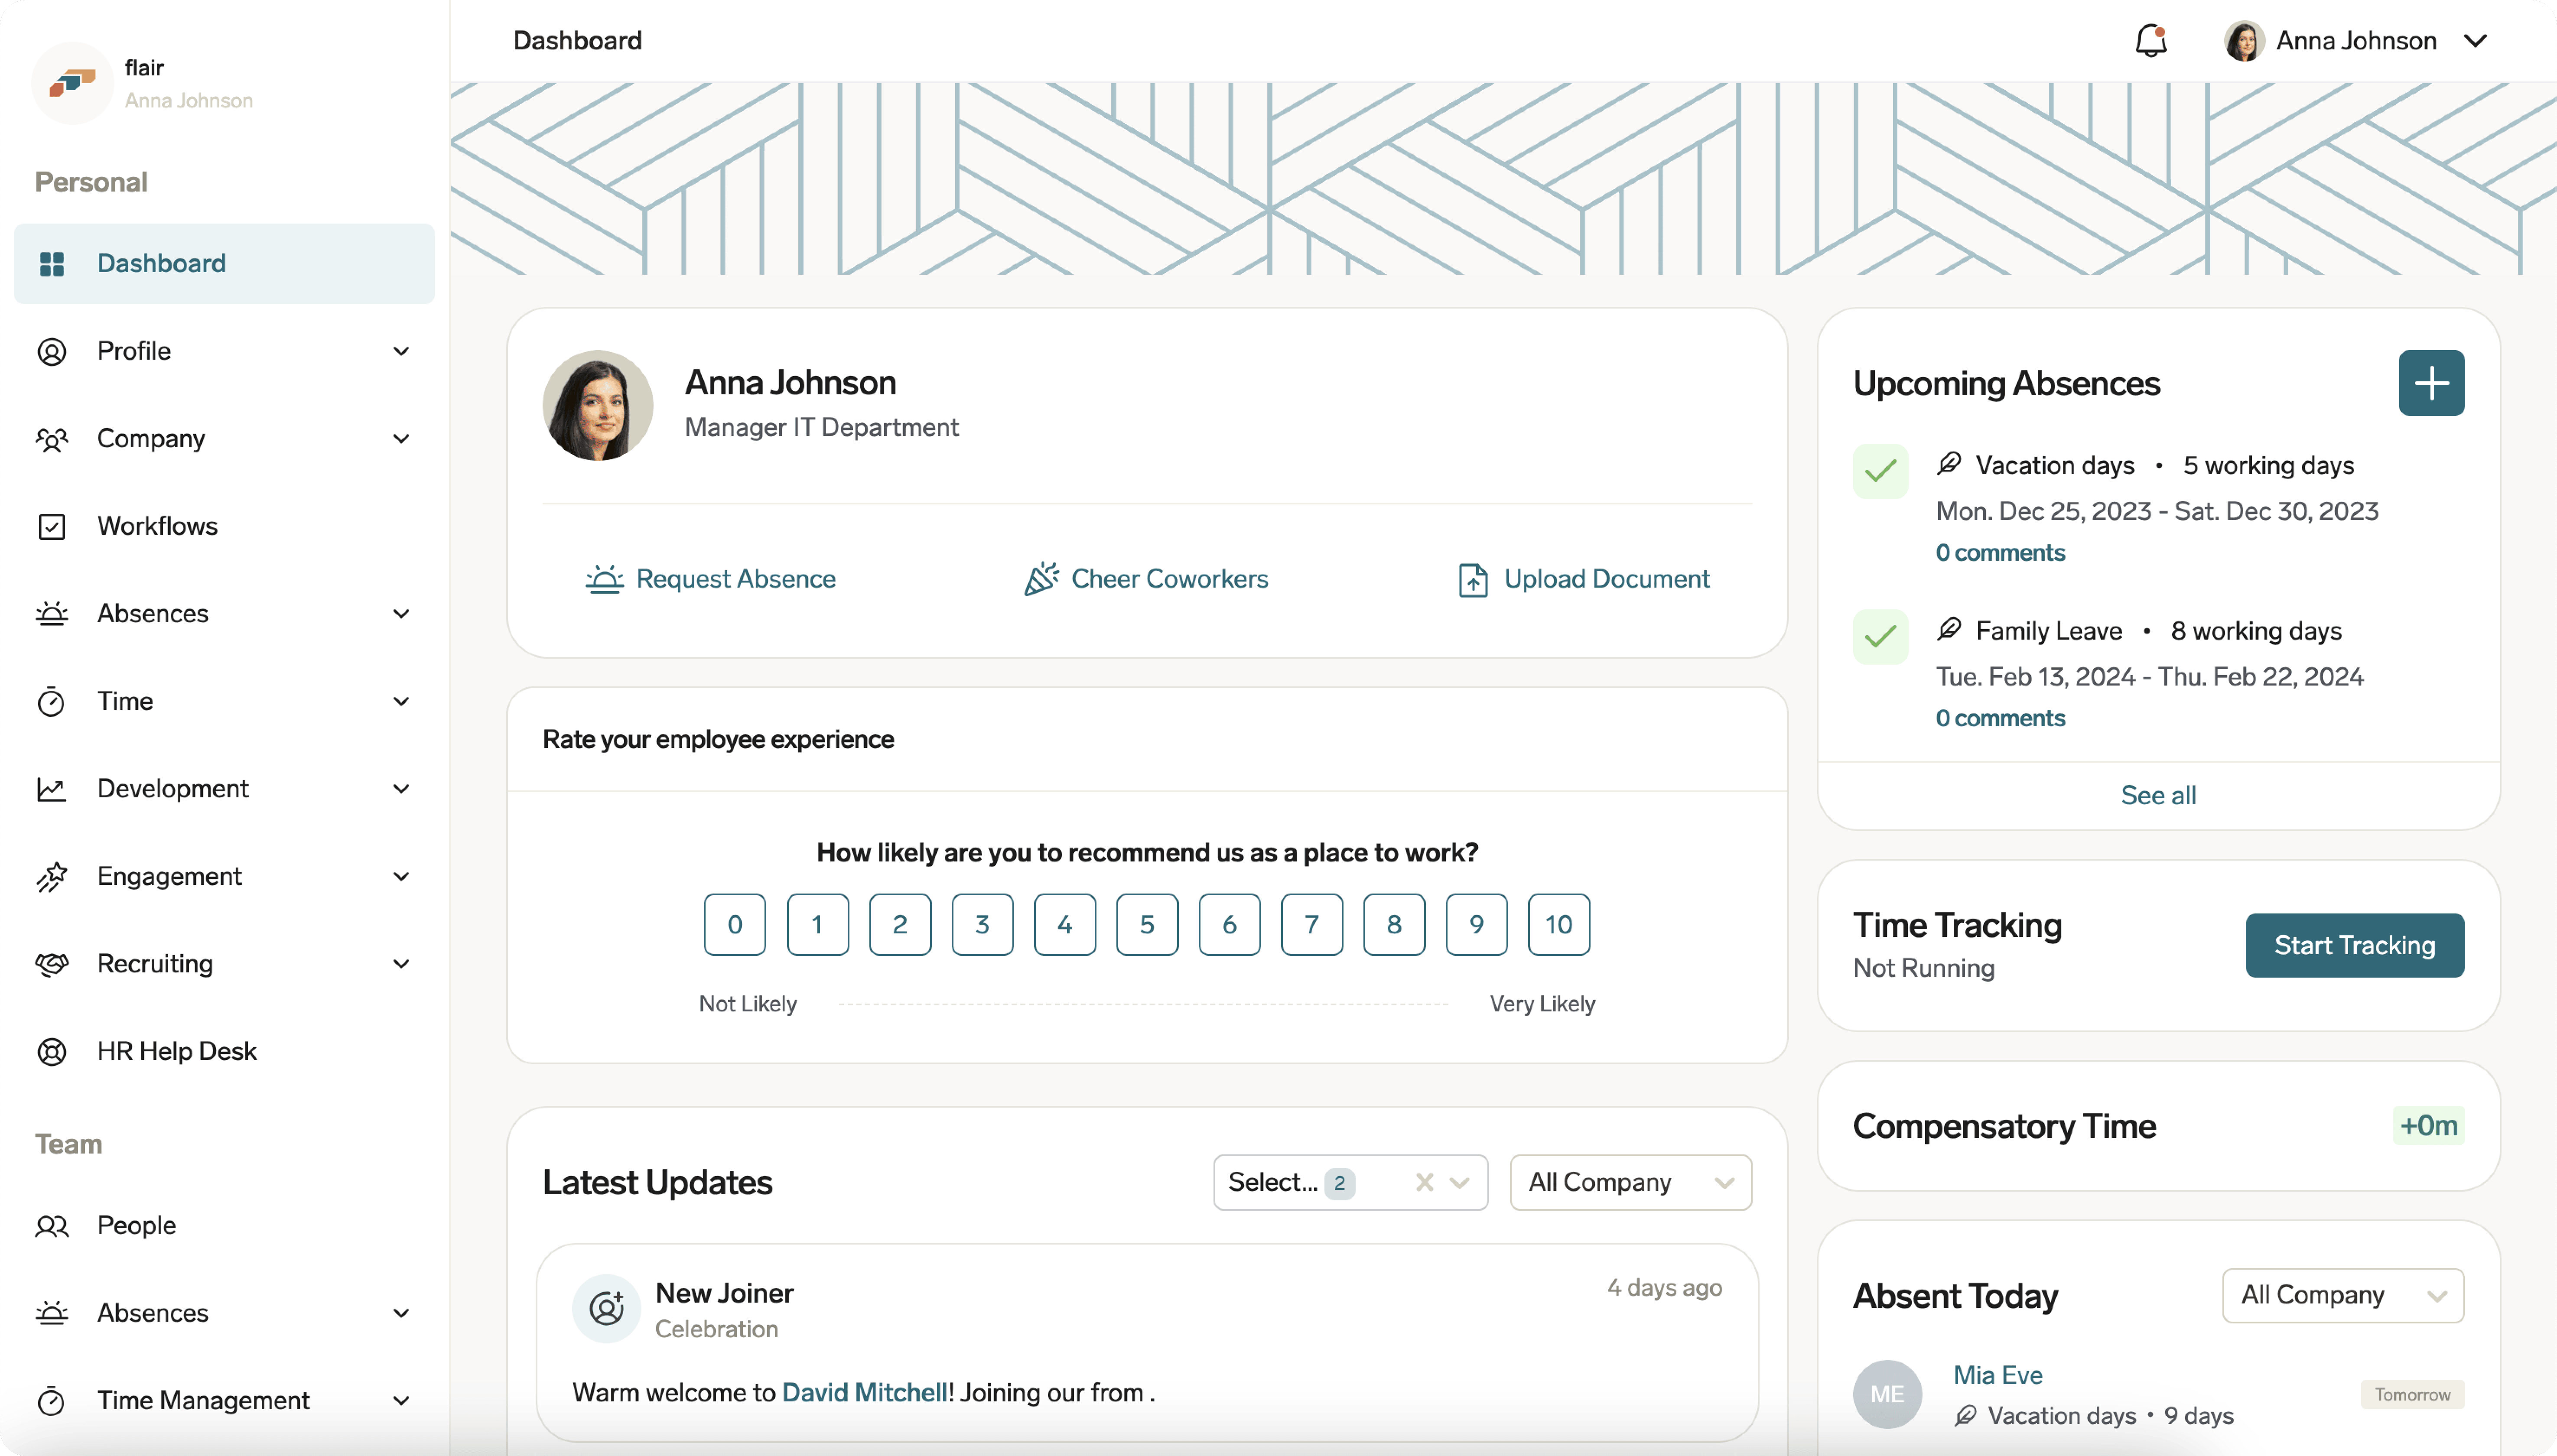
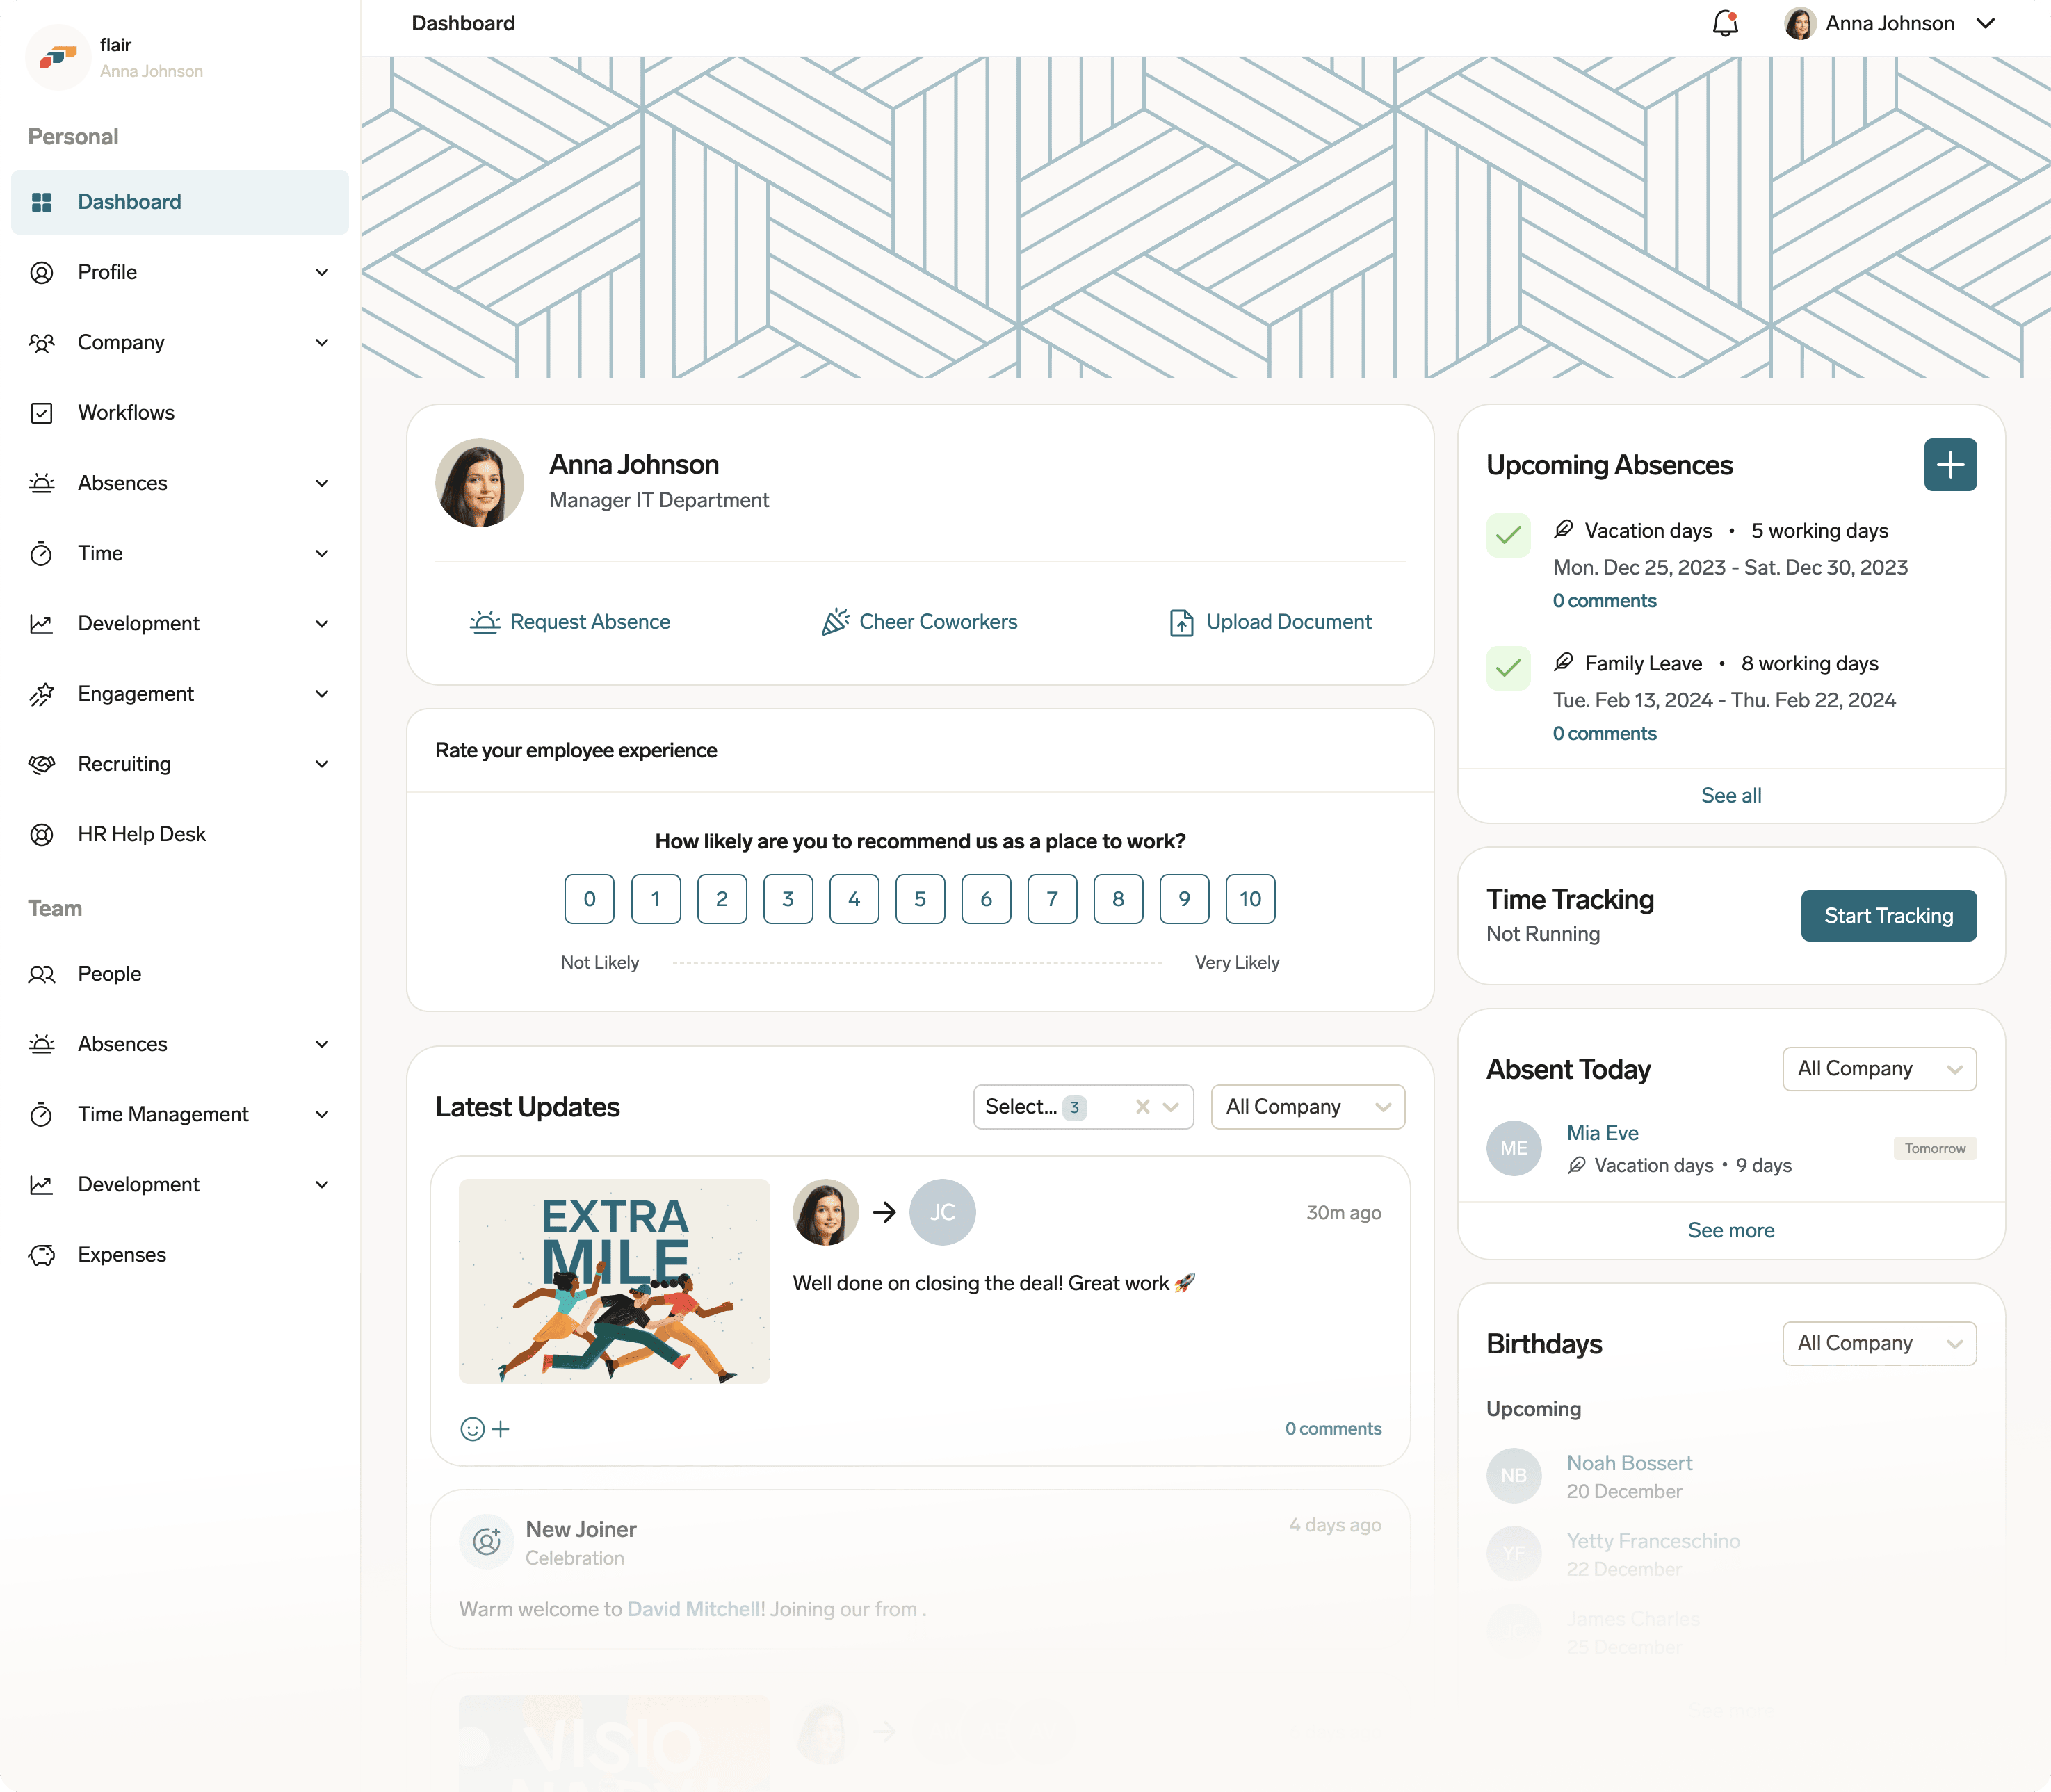
The Hub dashboard provides these widgets. Some appear only when the related feature is available to you or when there is something to show:
| Widget | What it does |
|---|---|
| Welcome! | Appears while your onboarding workflow is in progress. Start Onboarding opens your onboarding tasks. |
| Quick Links | Shows the links your HR Admin adds to the dashboard. A group expands to show its links. |
| Latest Updates | Shows company announcements, Cheers, and new joiners, with update-type and company-or-team filters. |
| Upcoming Absences | Shows planned and requested absences and their approval status. The plus icon starts a request. |
| Time Tracking | Starts the time tracker and shows your current tracked time. |
| Next Meeting | Shows the date, time, and reviewer of your next meeting in an ongoing performance review cycle. The calendar menu offers Add to Google Calendar, Copy URL for your calendar, and Download .ics calendar file. |
| Compensatory Time | Shows your available balance in each absence category used for compensatory time. When time balance is enabled for you, a Time Balance row shows your current time balance. If your balance is positive and your organization allows self-service withdrawal, click Withdraw to withdraw from your balance. |
| Public Holidays | Shows upcoming public holidays for your location. |
| Absent Today | Shows colleagues who are absent today. |
| Birthdays | The birthday widget. Shows colleagues' upcoming birthdays. Colleagues who hide their birthday don't appear in birthday lists. HR Admins can hide the widget with Hide Home Birthdays Card. |
| Anniversaries | Shows colleagues' upcoming work anniversaries. |
| End of Probation | Direct managers and HR managers only. Lists employees whose probation period ends, grouped under Today and Upcoming. Click See more for the full list. |
On large screens, the card with your name and position also has Request Absence, Cheer Coworkers, and Upload Document buttons, depending on which features are available to you.
Open your profile information
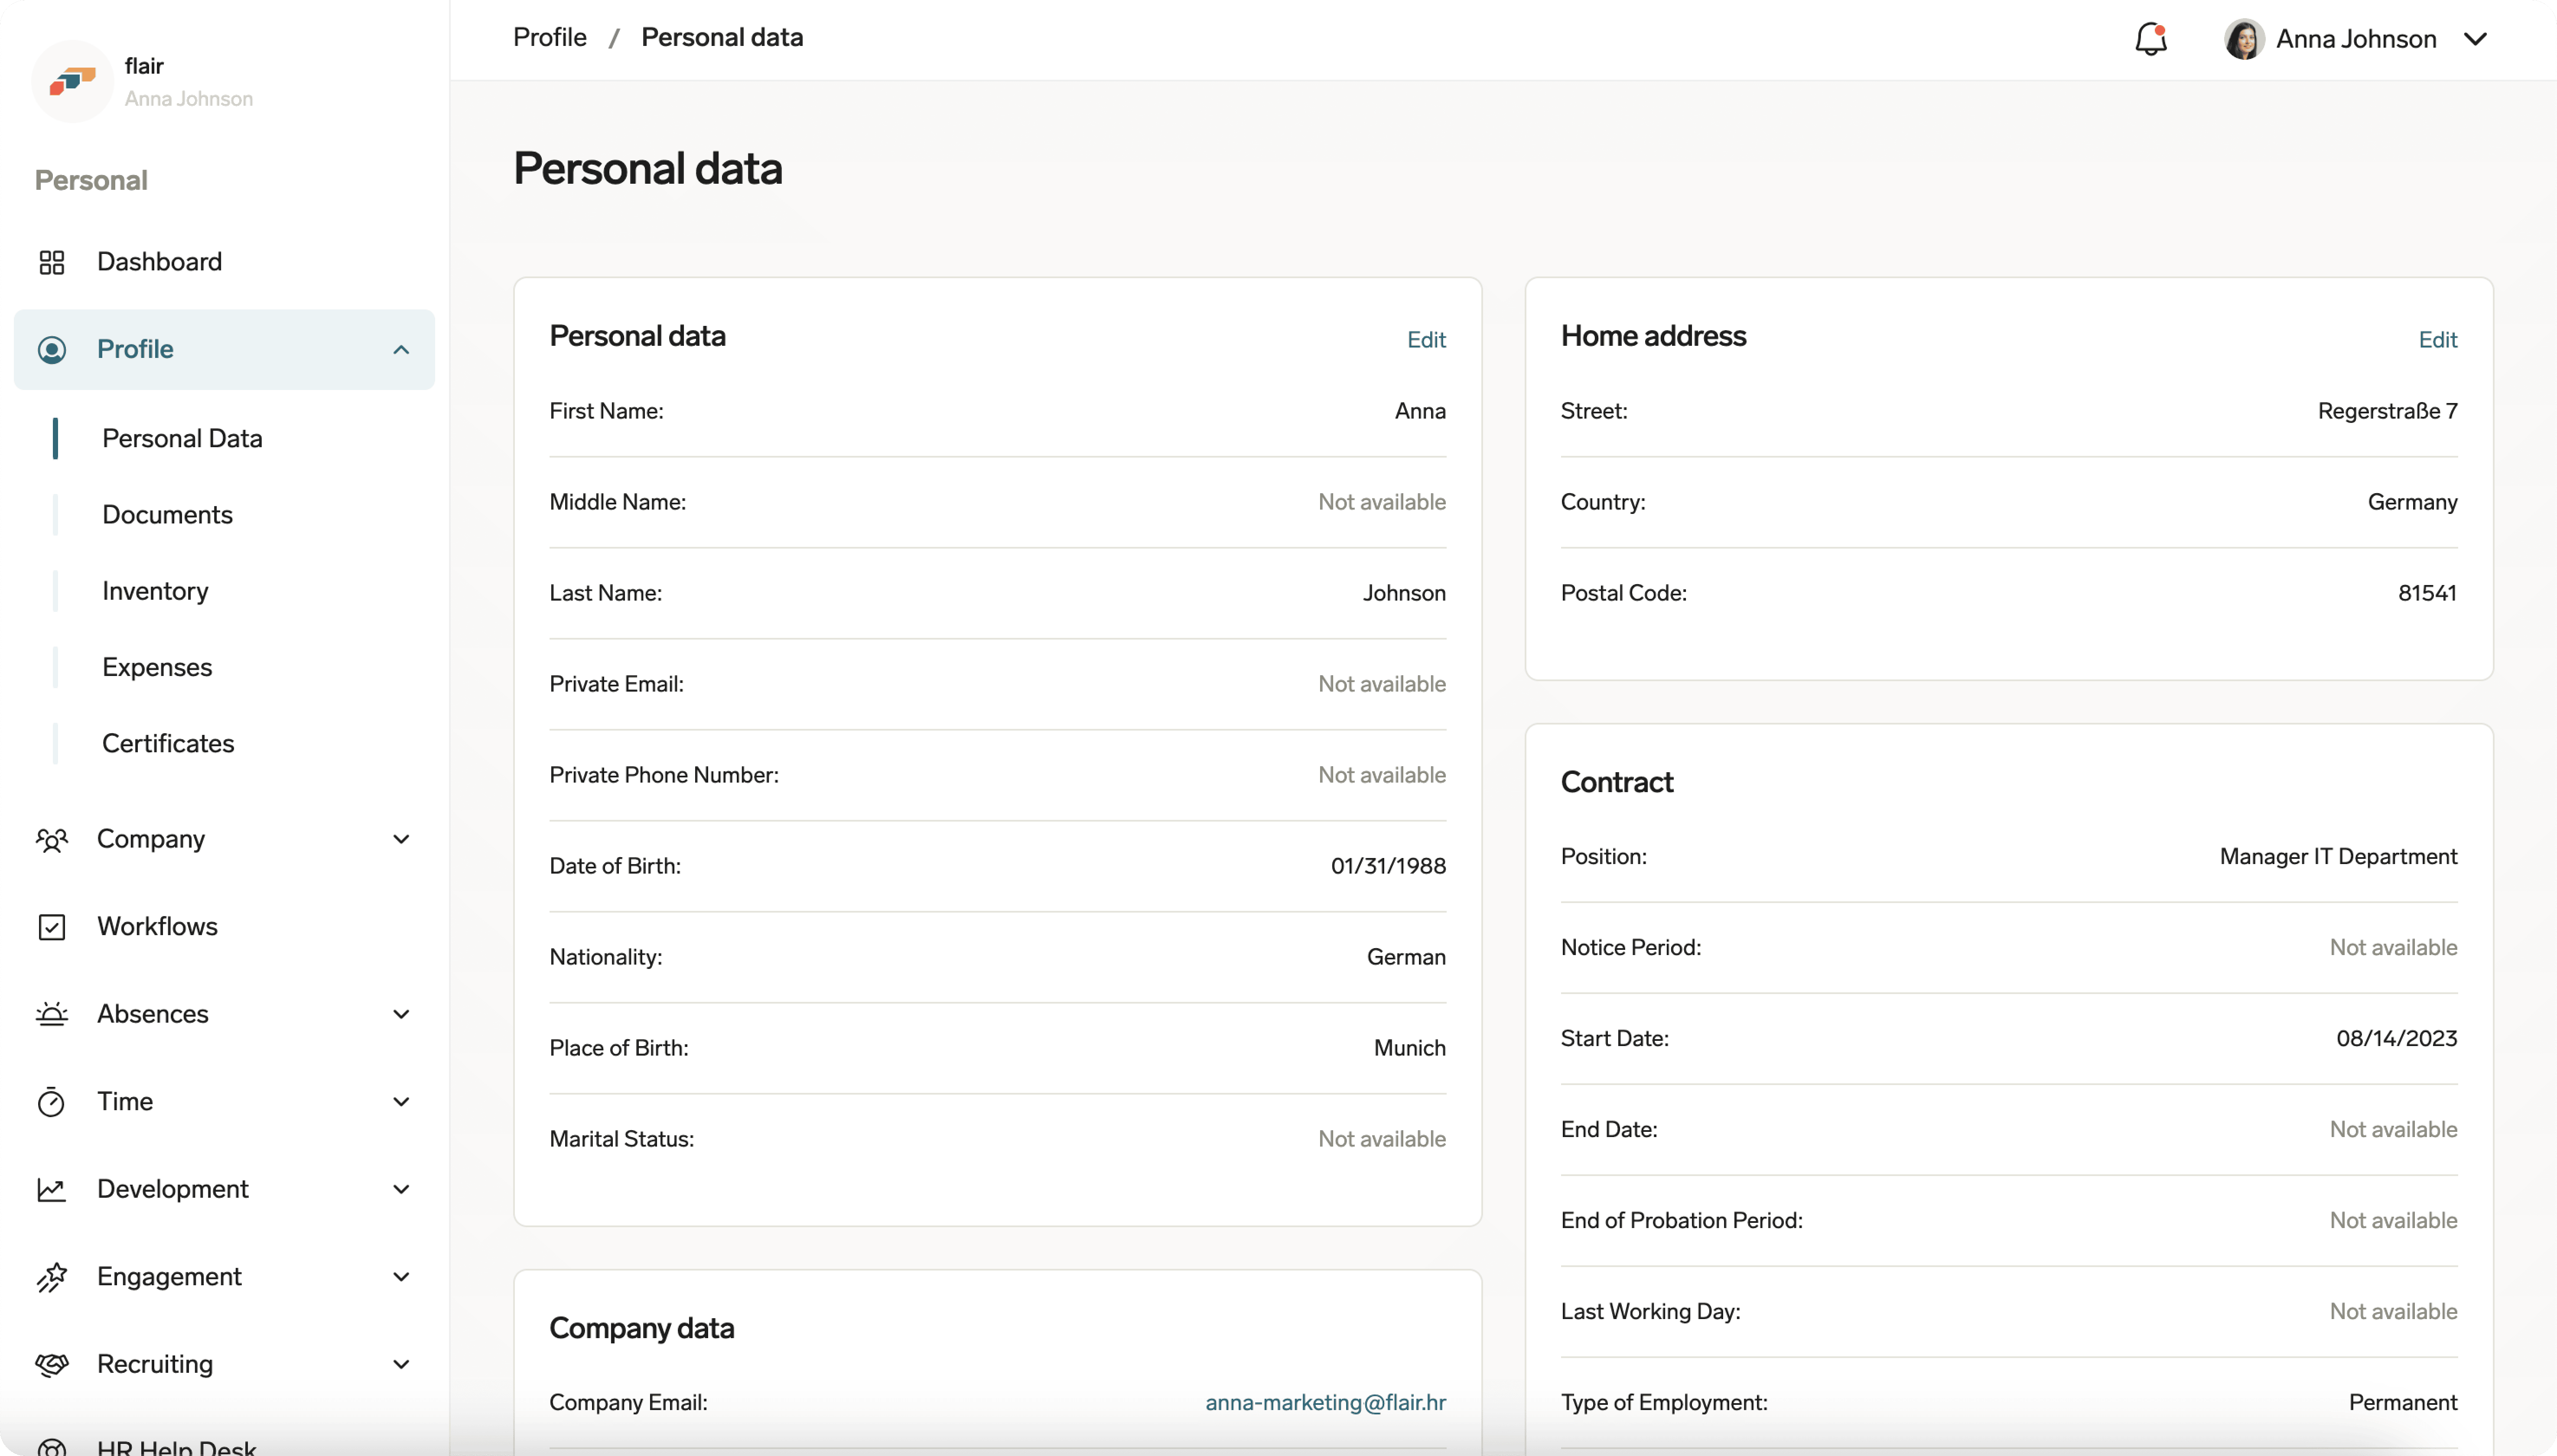
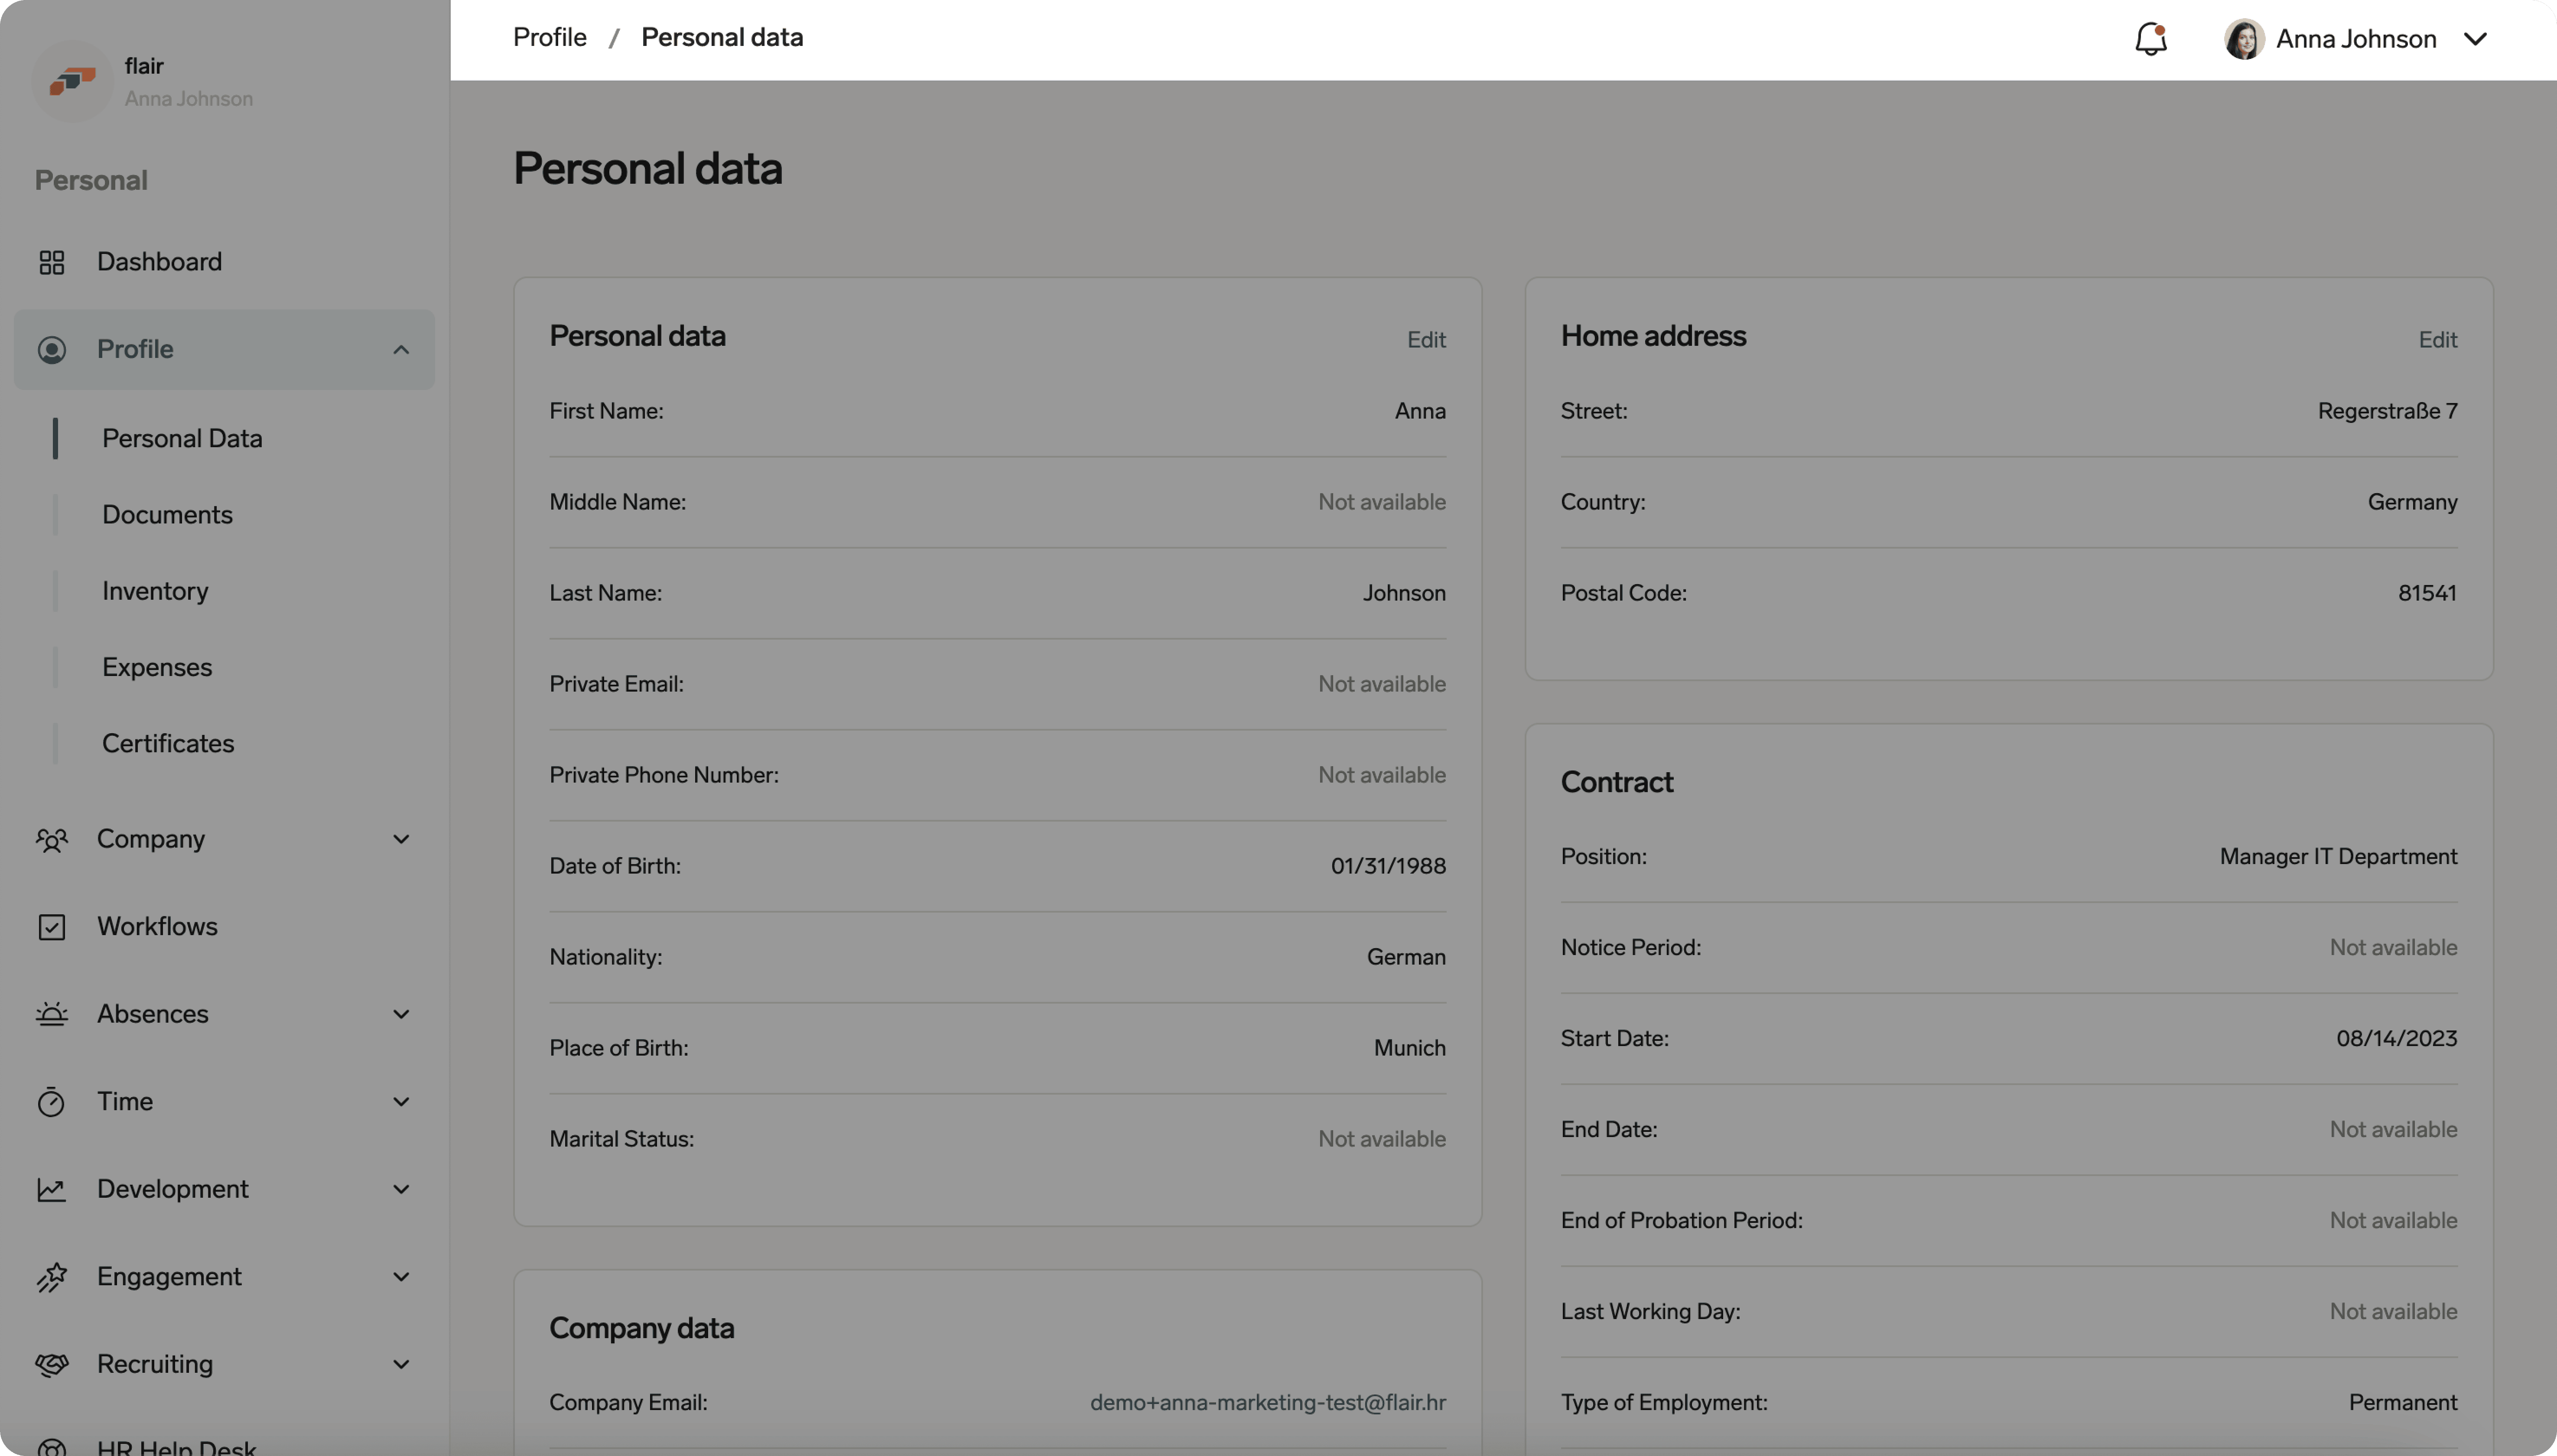
The Profile page contains these areas:
| Area | What you can do |
|---|---|
| Personal Data | View and update contact, bank, and tax information. |
| Documents | View, organize, download, and upload personal and company documents. |
| Inventory | View assigned work equipment, serial numbers, issue dates, and available support resources. |
| Expenses | View details for submitted company expenses, including travel and accommodation. |
| Certificates | View or upload certificates for skills and training, including files and links to online certificates. |
Personal Data has two tabs: Details, for contact, bank, and tax information, and Profile, for your education and work experience.
To change your profile photo, click your name and click Change avatar. If the option is missing, or only lets you remove your photo, your HR Admin has restricted profile photo changes for you.
Add education and work experience to your profile
- In the Employee Hub, open Personal Data, then click the Profile tab.
- In Experience, click Add Experience. Enter the title, company name, dates, and other details, then click Confirm. The entry appears in the Experience timeline.
- In Education, click Add Education. Enter the degree, school, dates, and other details, then click Confirm. The entry appears in the Education timeline.
- To change an entry, click its pencil icon, update the details, then click Confirm.
- To remove an entry, click its trash icon, then confirm the deletion.
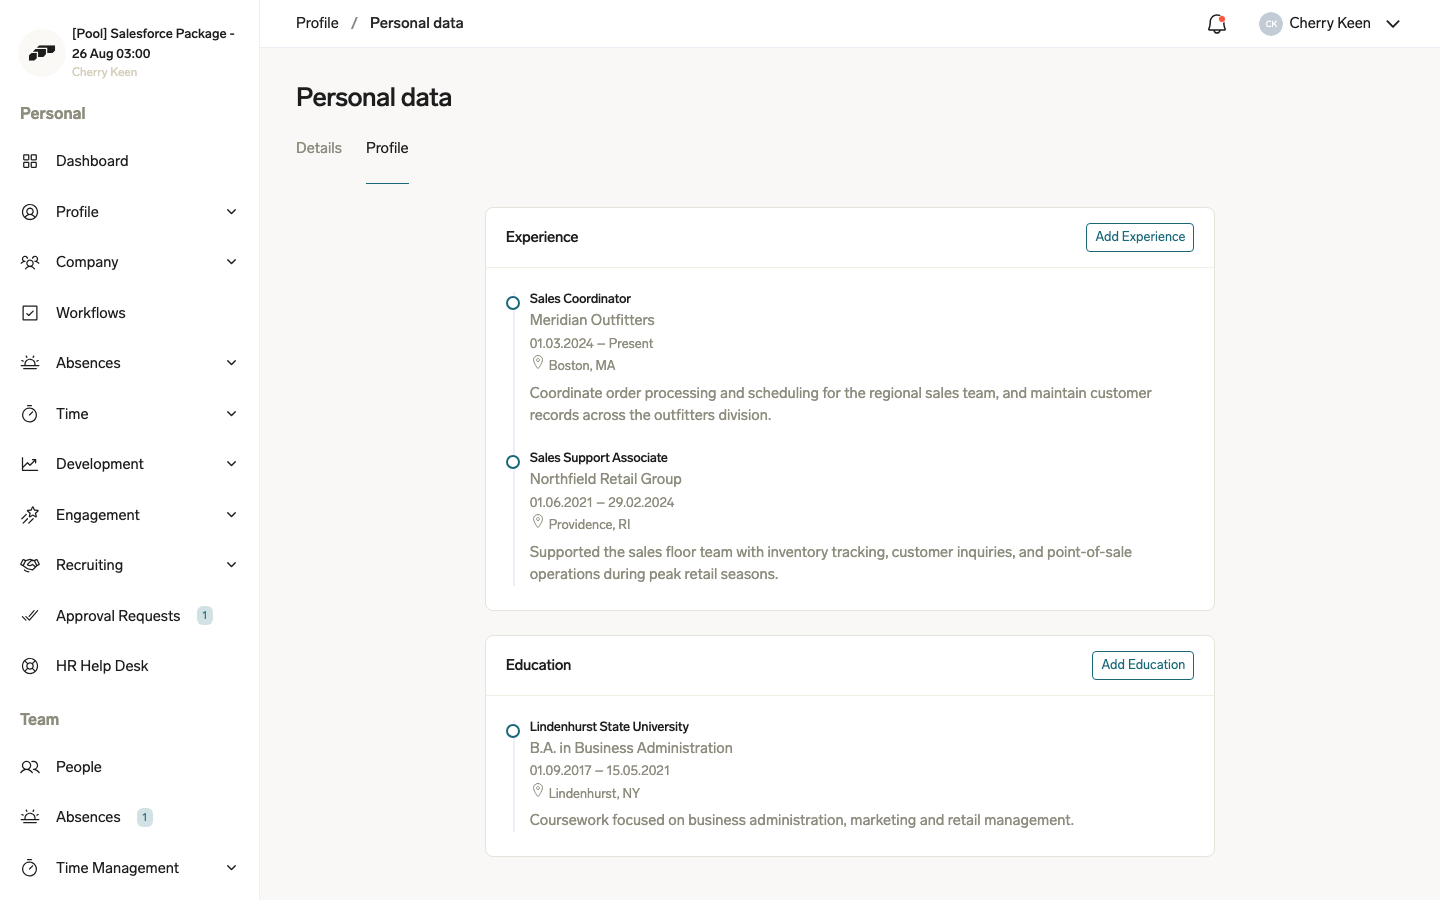
HR Admins can hide the Profile tab for specific employees or groups by selecting Hide Employee Profile in an Employee Hub feature set. See Configure the Employee Hub menu.
View education and experience on Employee and Talent records
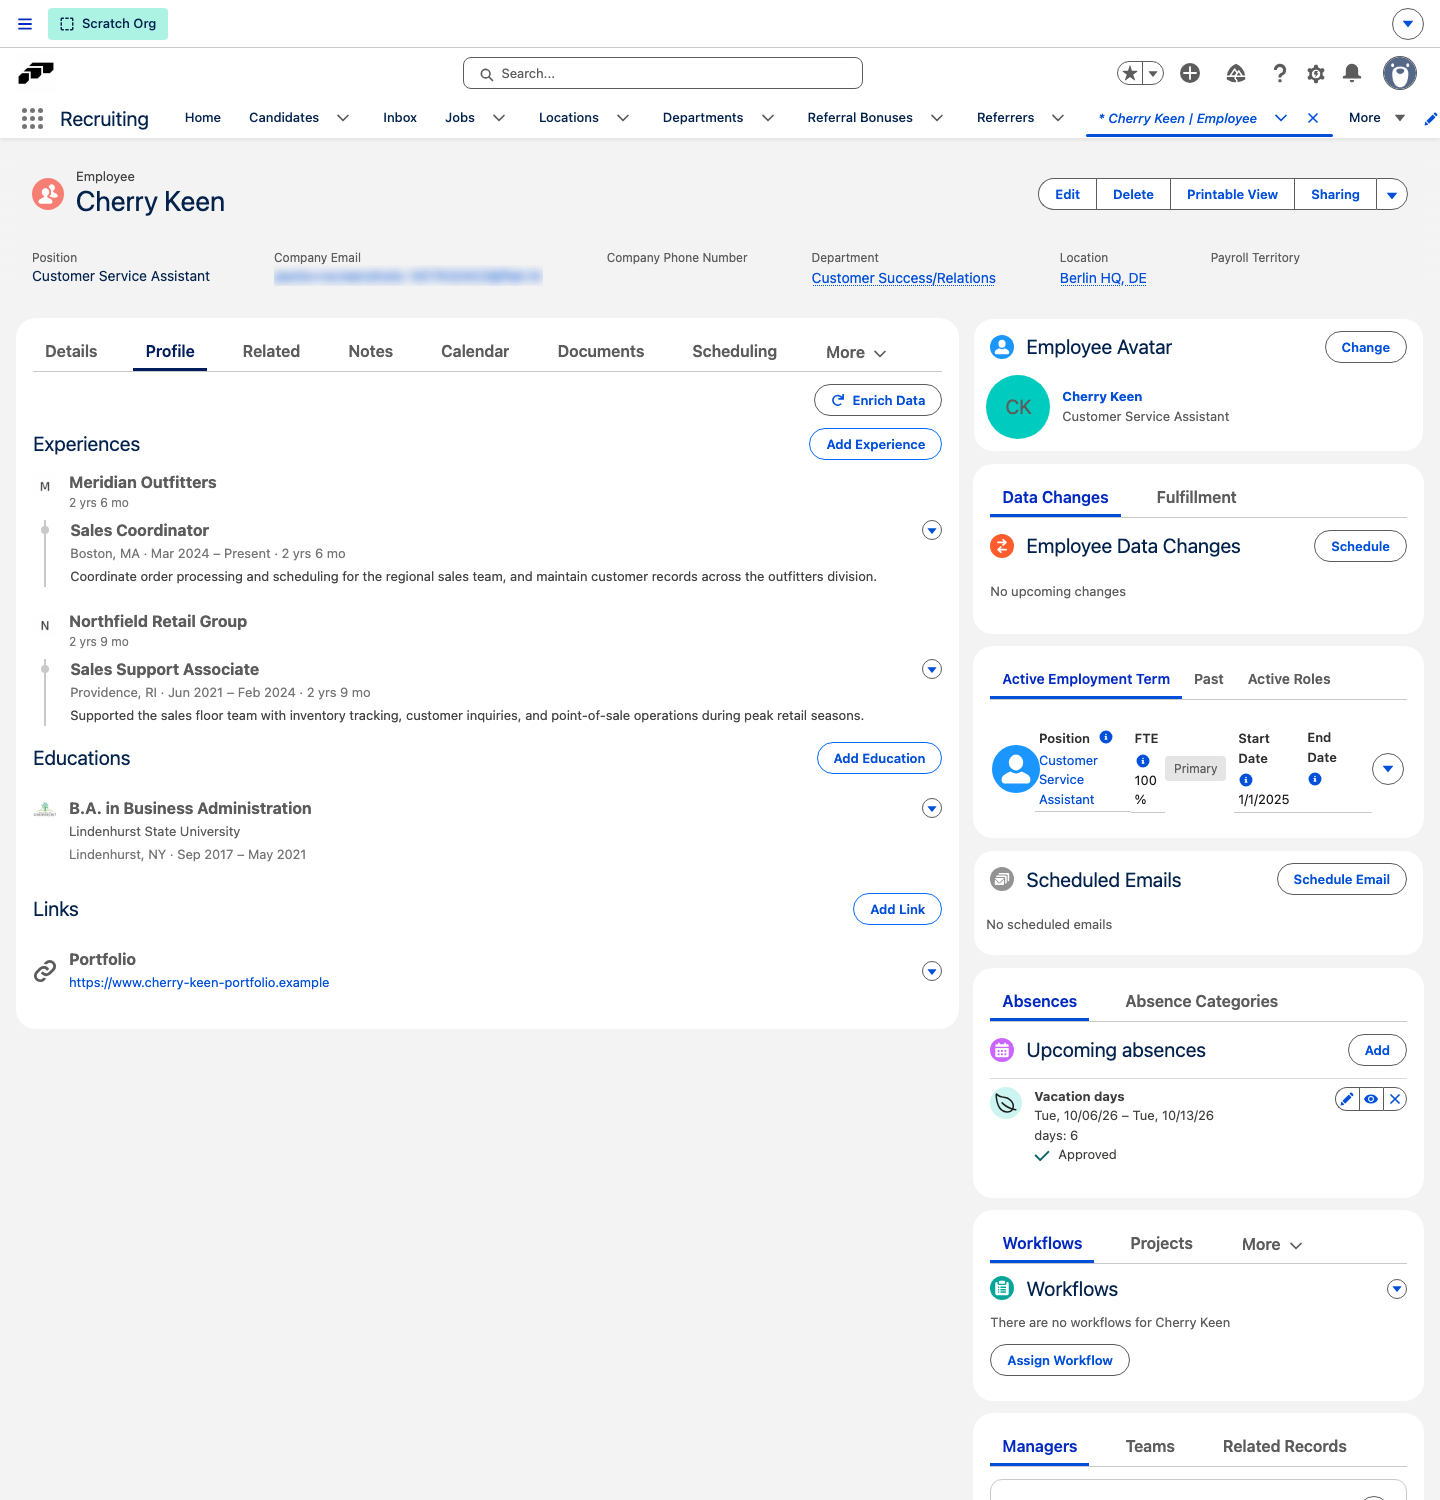
HR Admins and Recruiters see the same education and work experience on the corresponding Employee or Talent record in Salesforce.
- In Salesforce, open an Employee or Talent record.
- Click the Profile tab. The Experiences, Educations, and Links cards show the person's work history, education, and any added links.
- To add an entry, click Add Experience, Add Education, or Add Link on the relevant card.
- To change or remove an entry, open its actions menu and select Edit or Delete.
Find company information
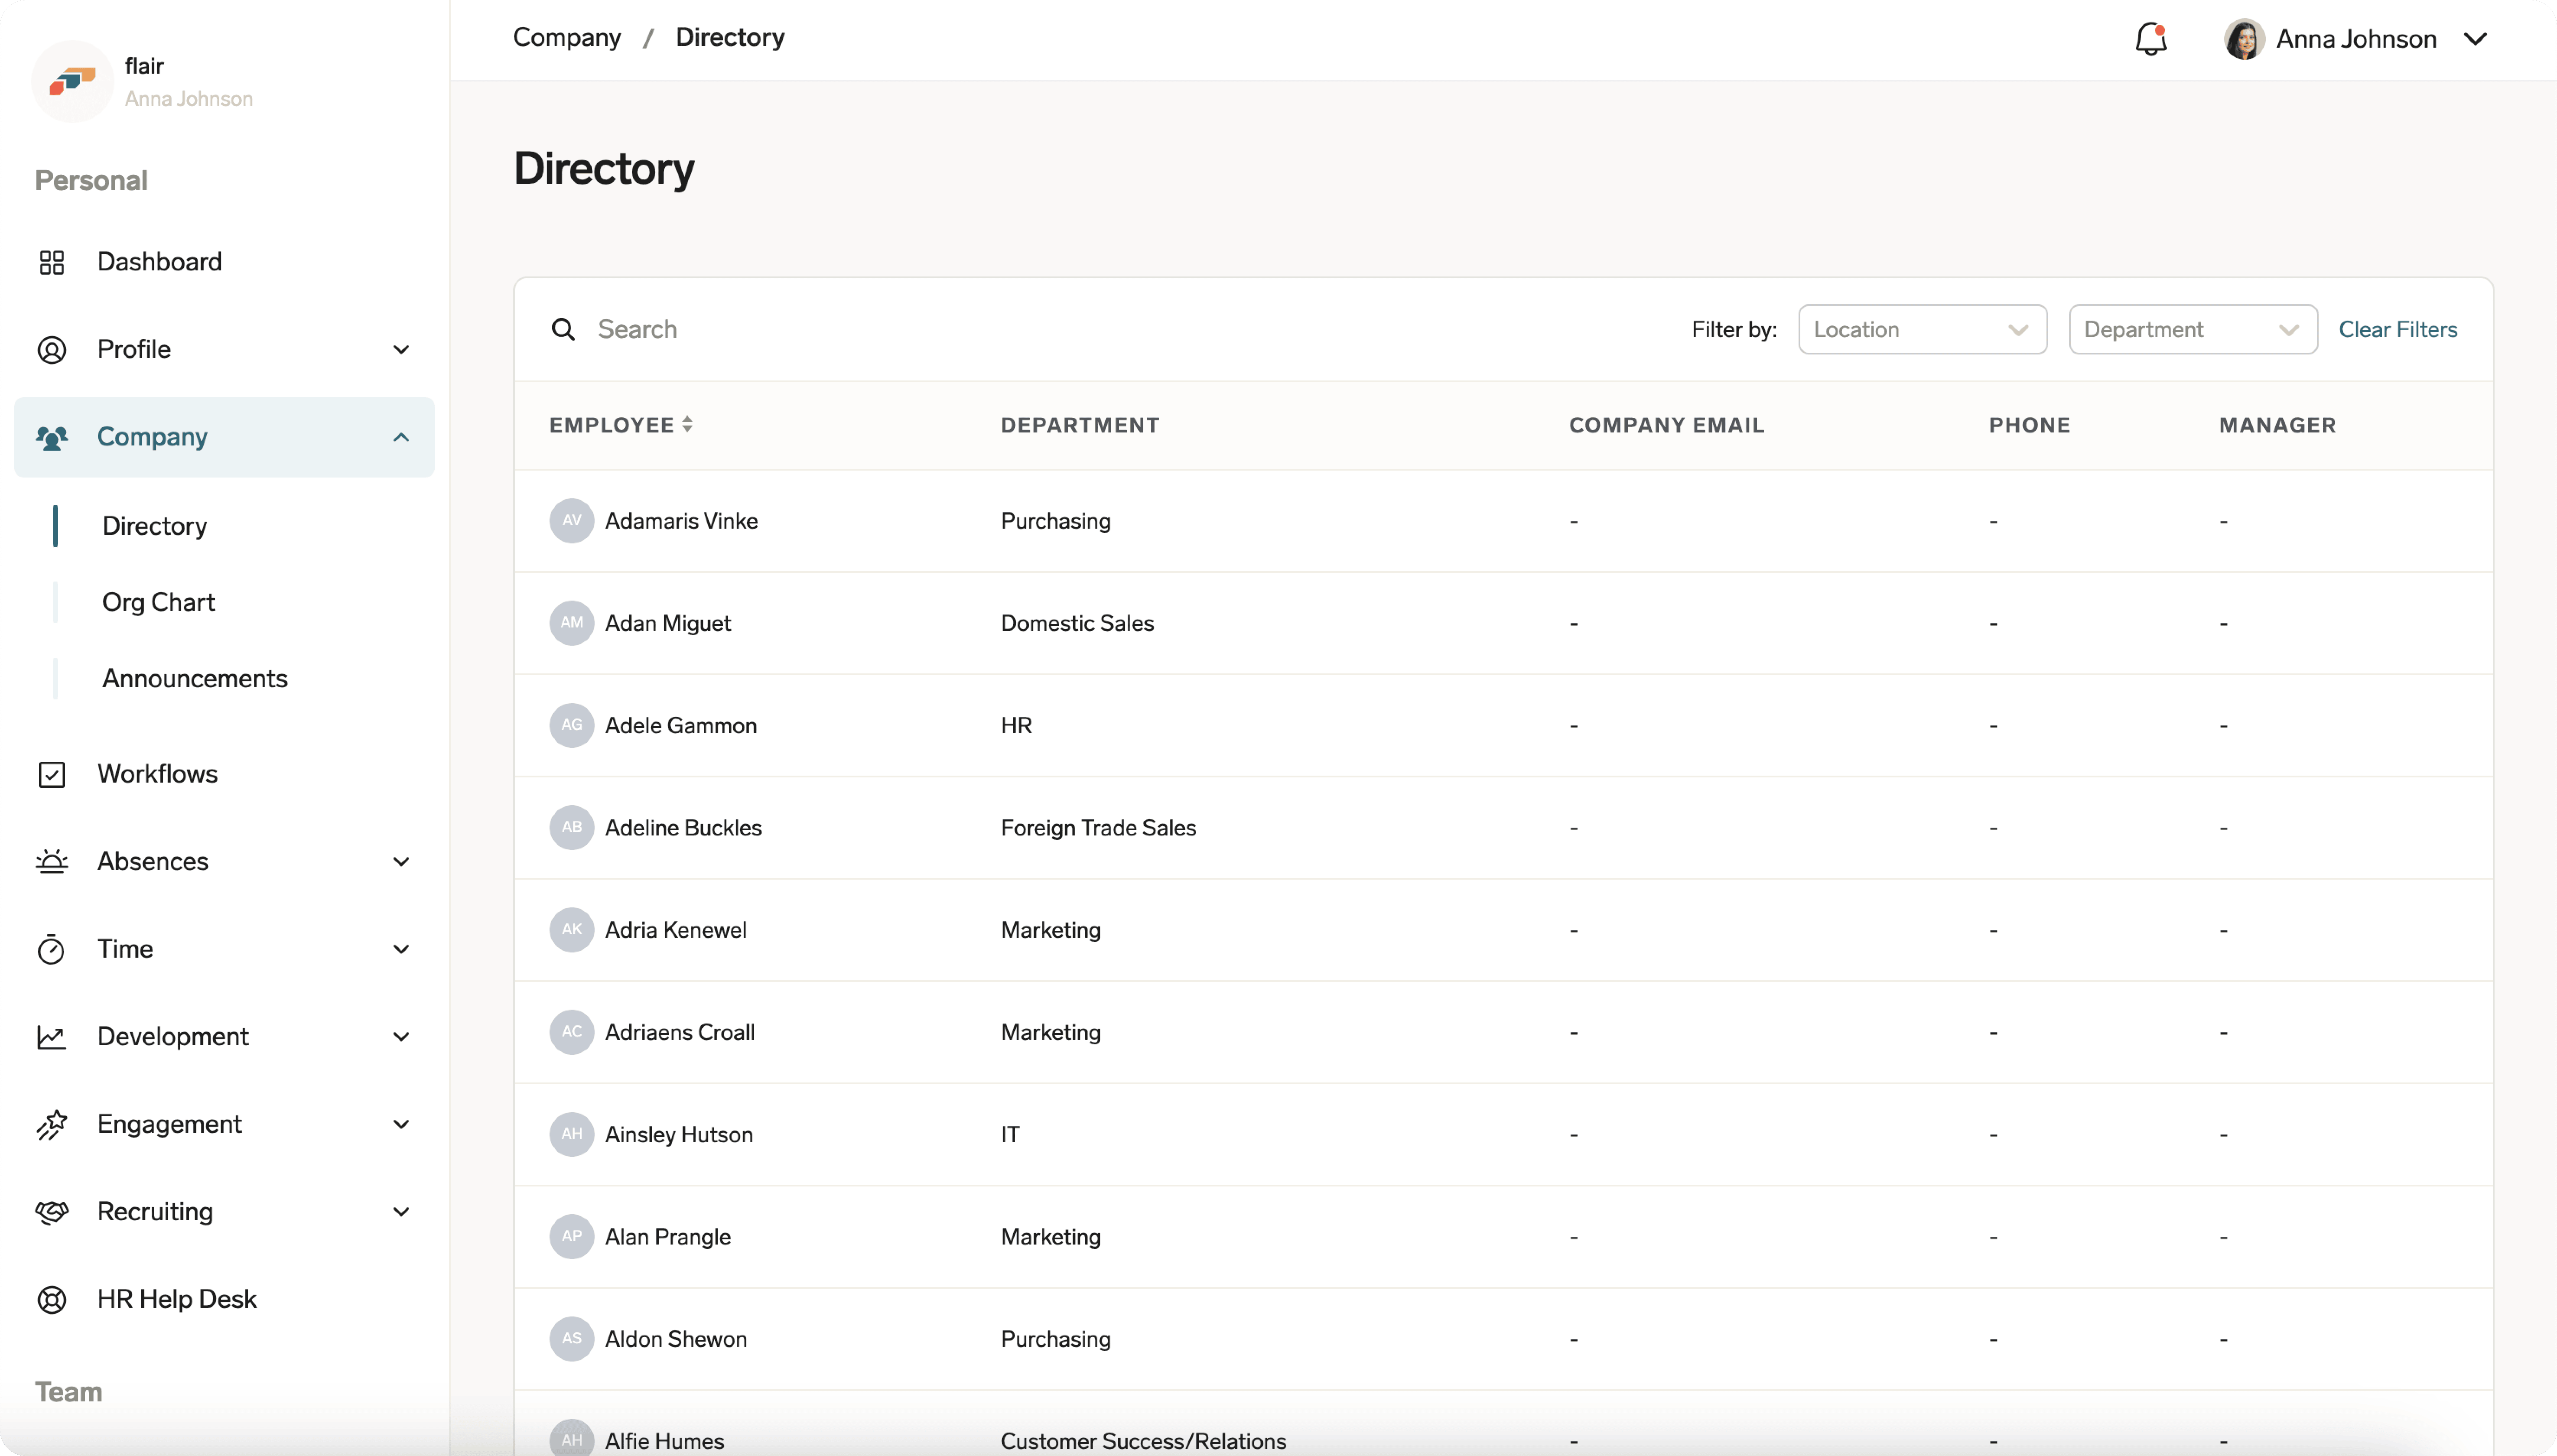
- Directory — find employee contact details, or filter employees by the fields your admin configured, such as location, department, and team.
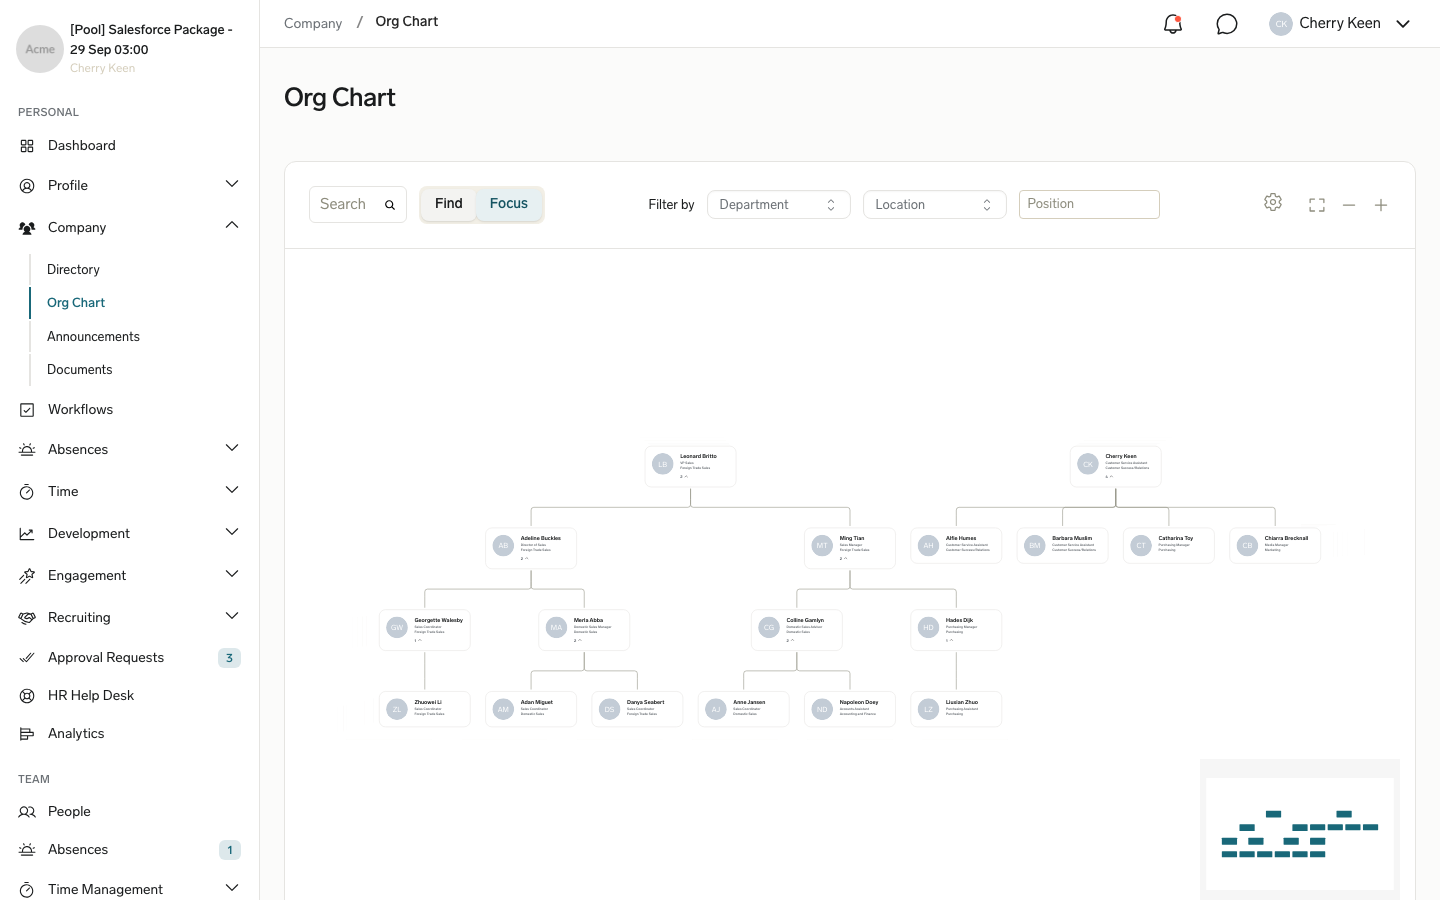
- Org Chart — view the organization structure, team membership, and reporting lines, or filter it by department, location, team, and position.
- Announcements — view, comment on, and react to company announcements.
Complete workflows
The Workflows page lists workflows assigned to you. The overview shows the next due date and completion status.
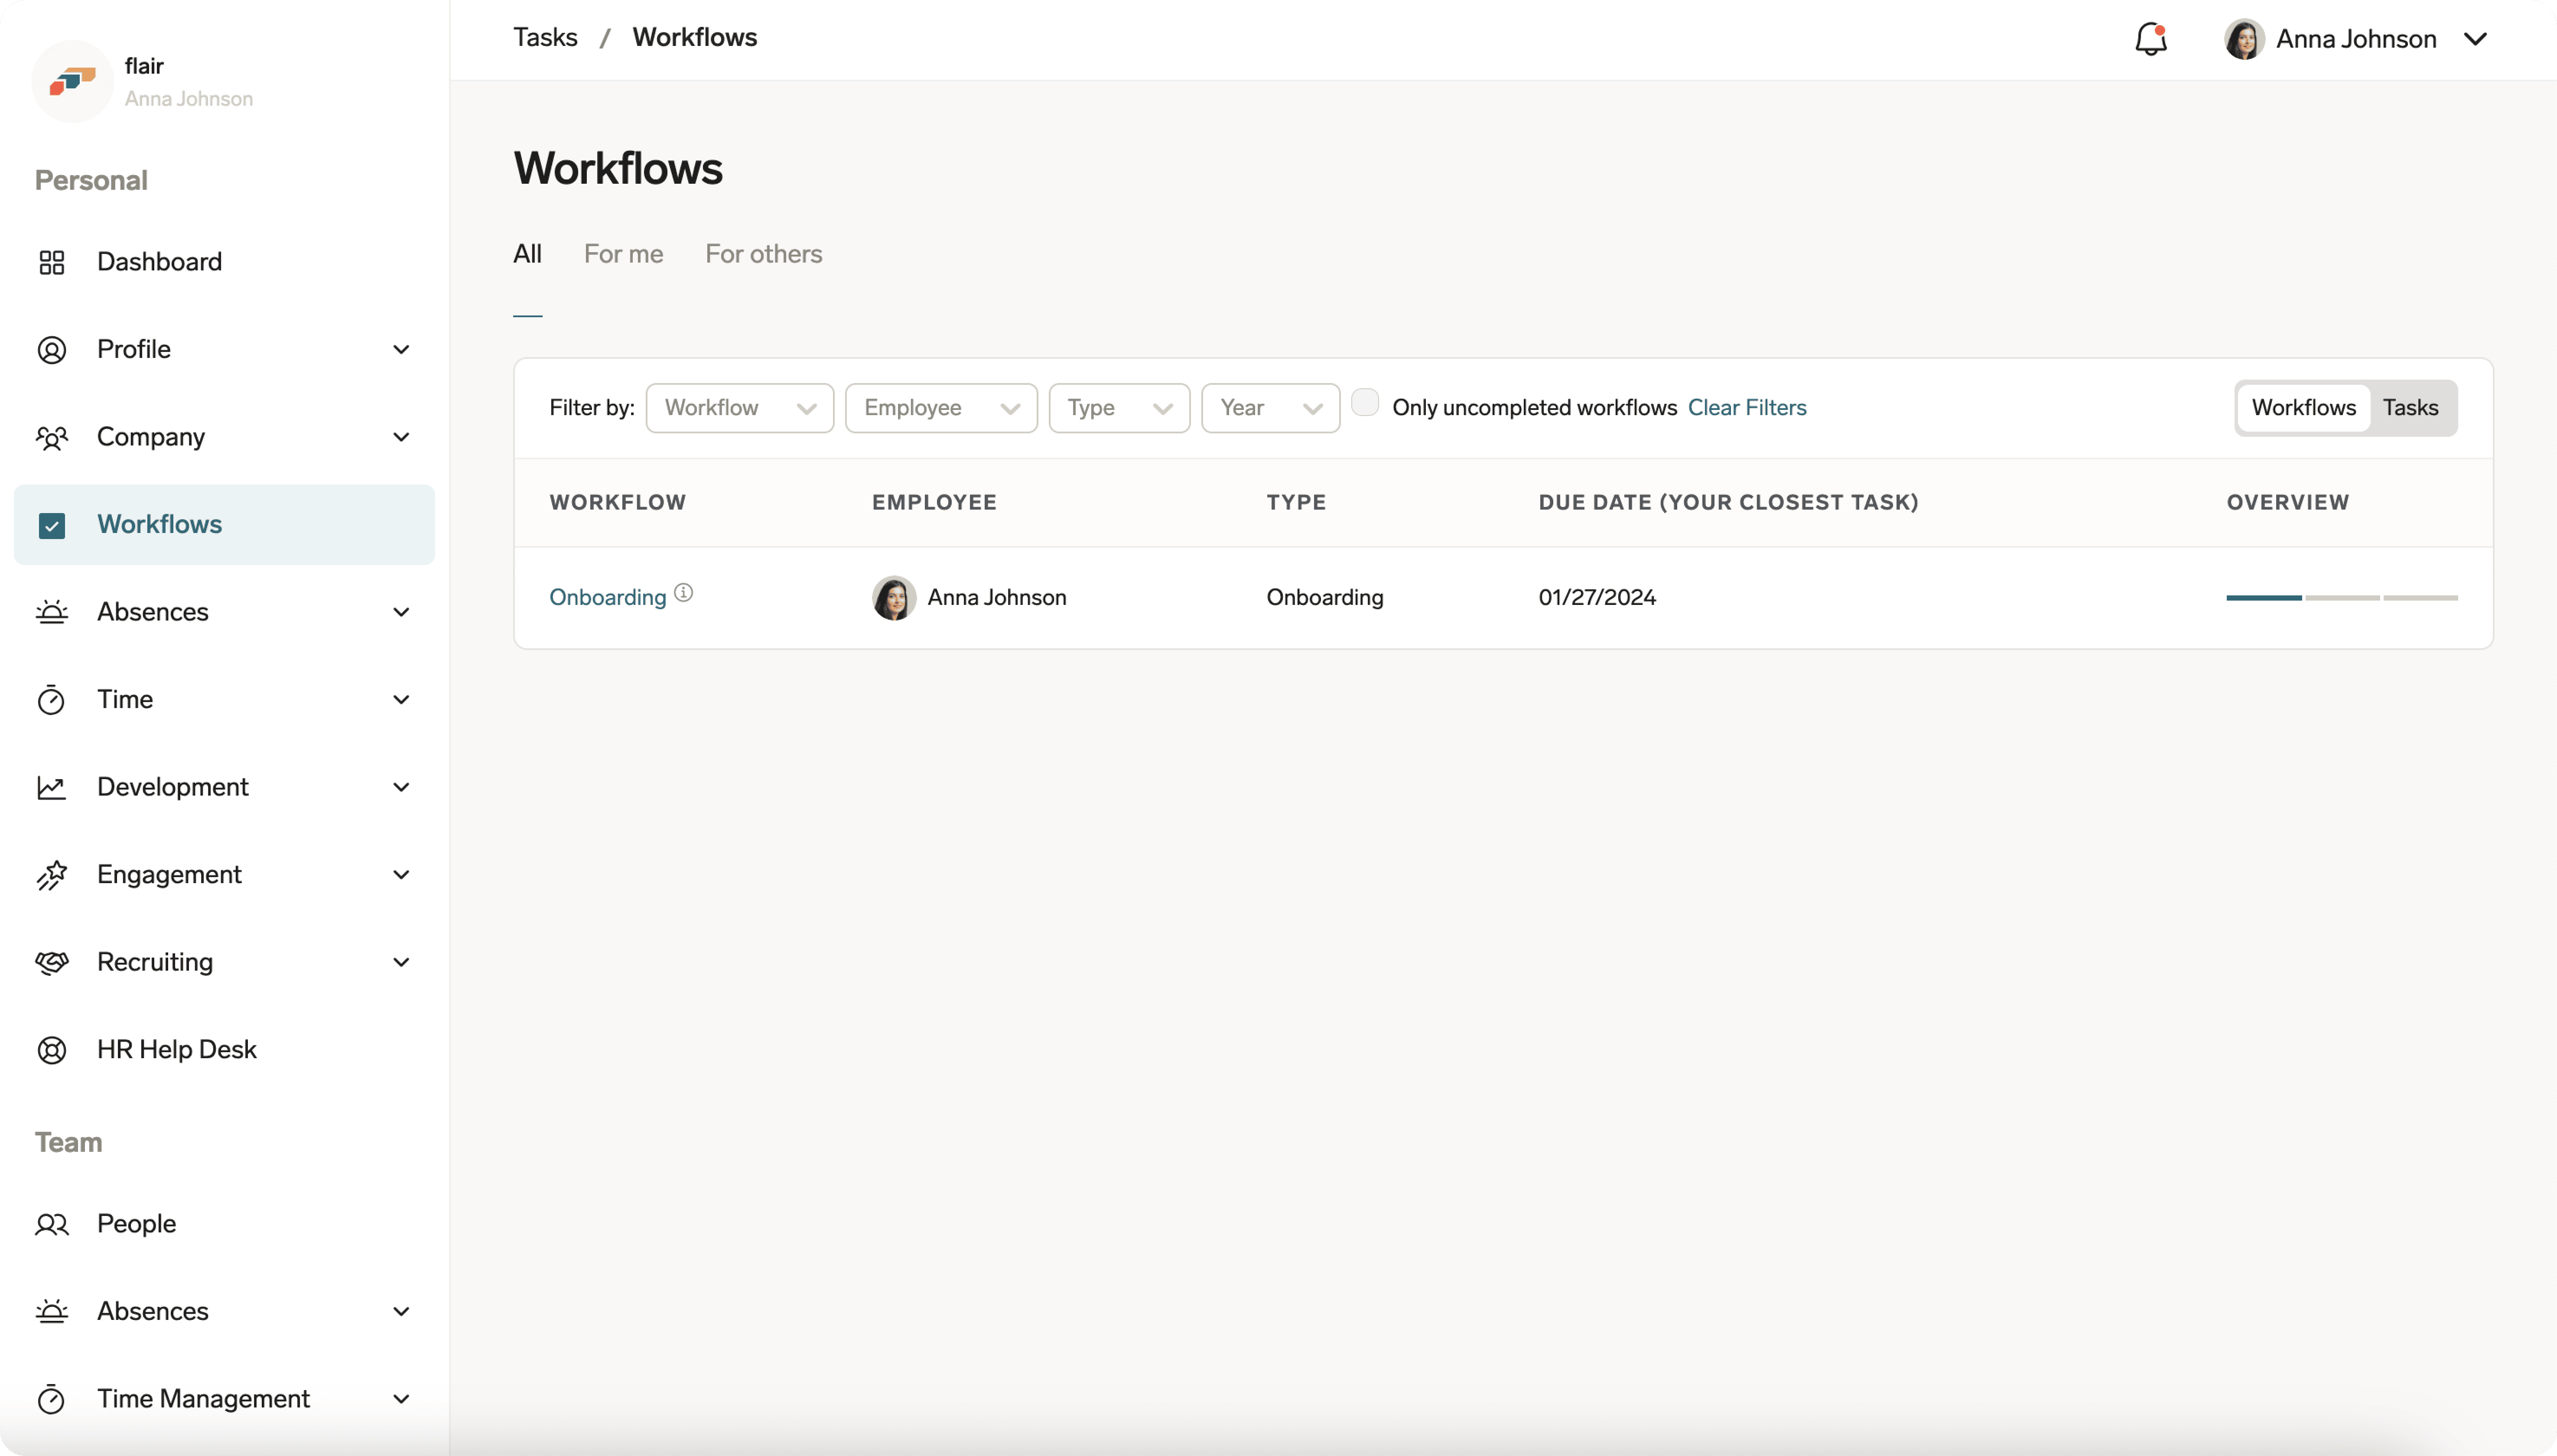
For task instructions, see Complete and manage workflows.
Manage absences and time
Use Absences to view and manage time off. See Absence Management overview for absence tasks.
Use Time for these working-time features:
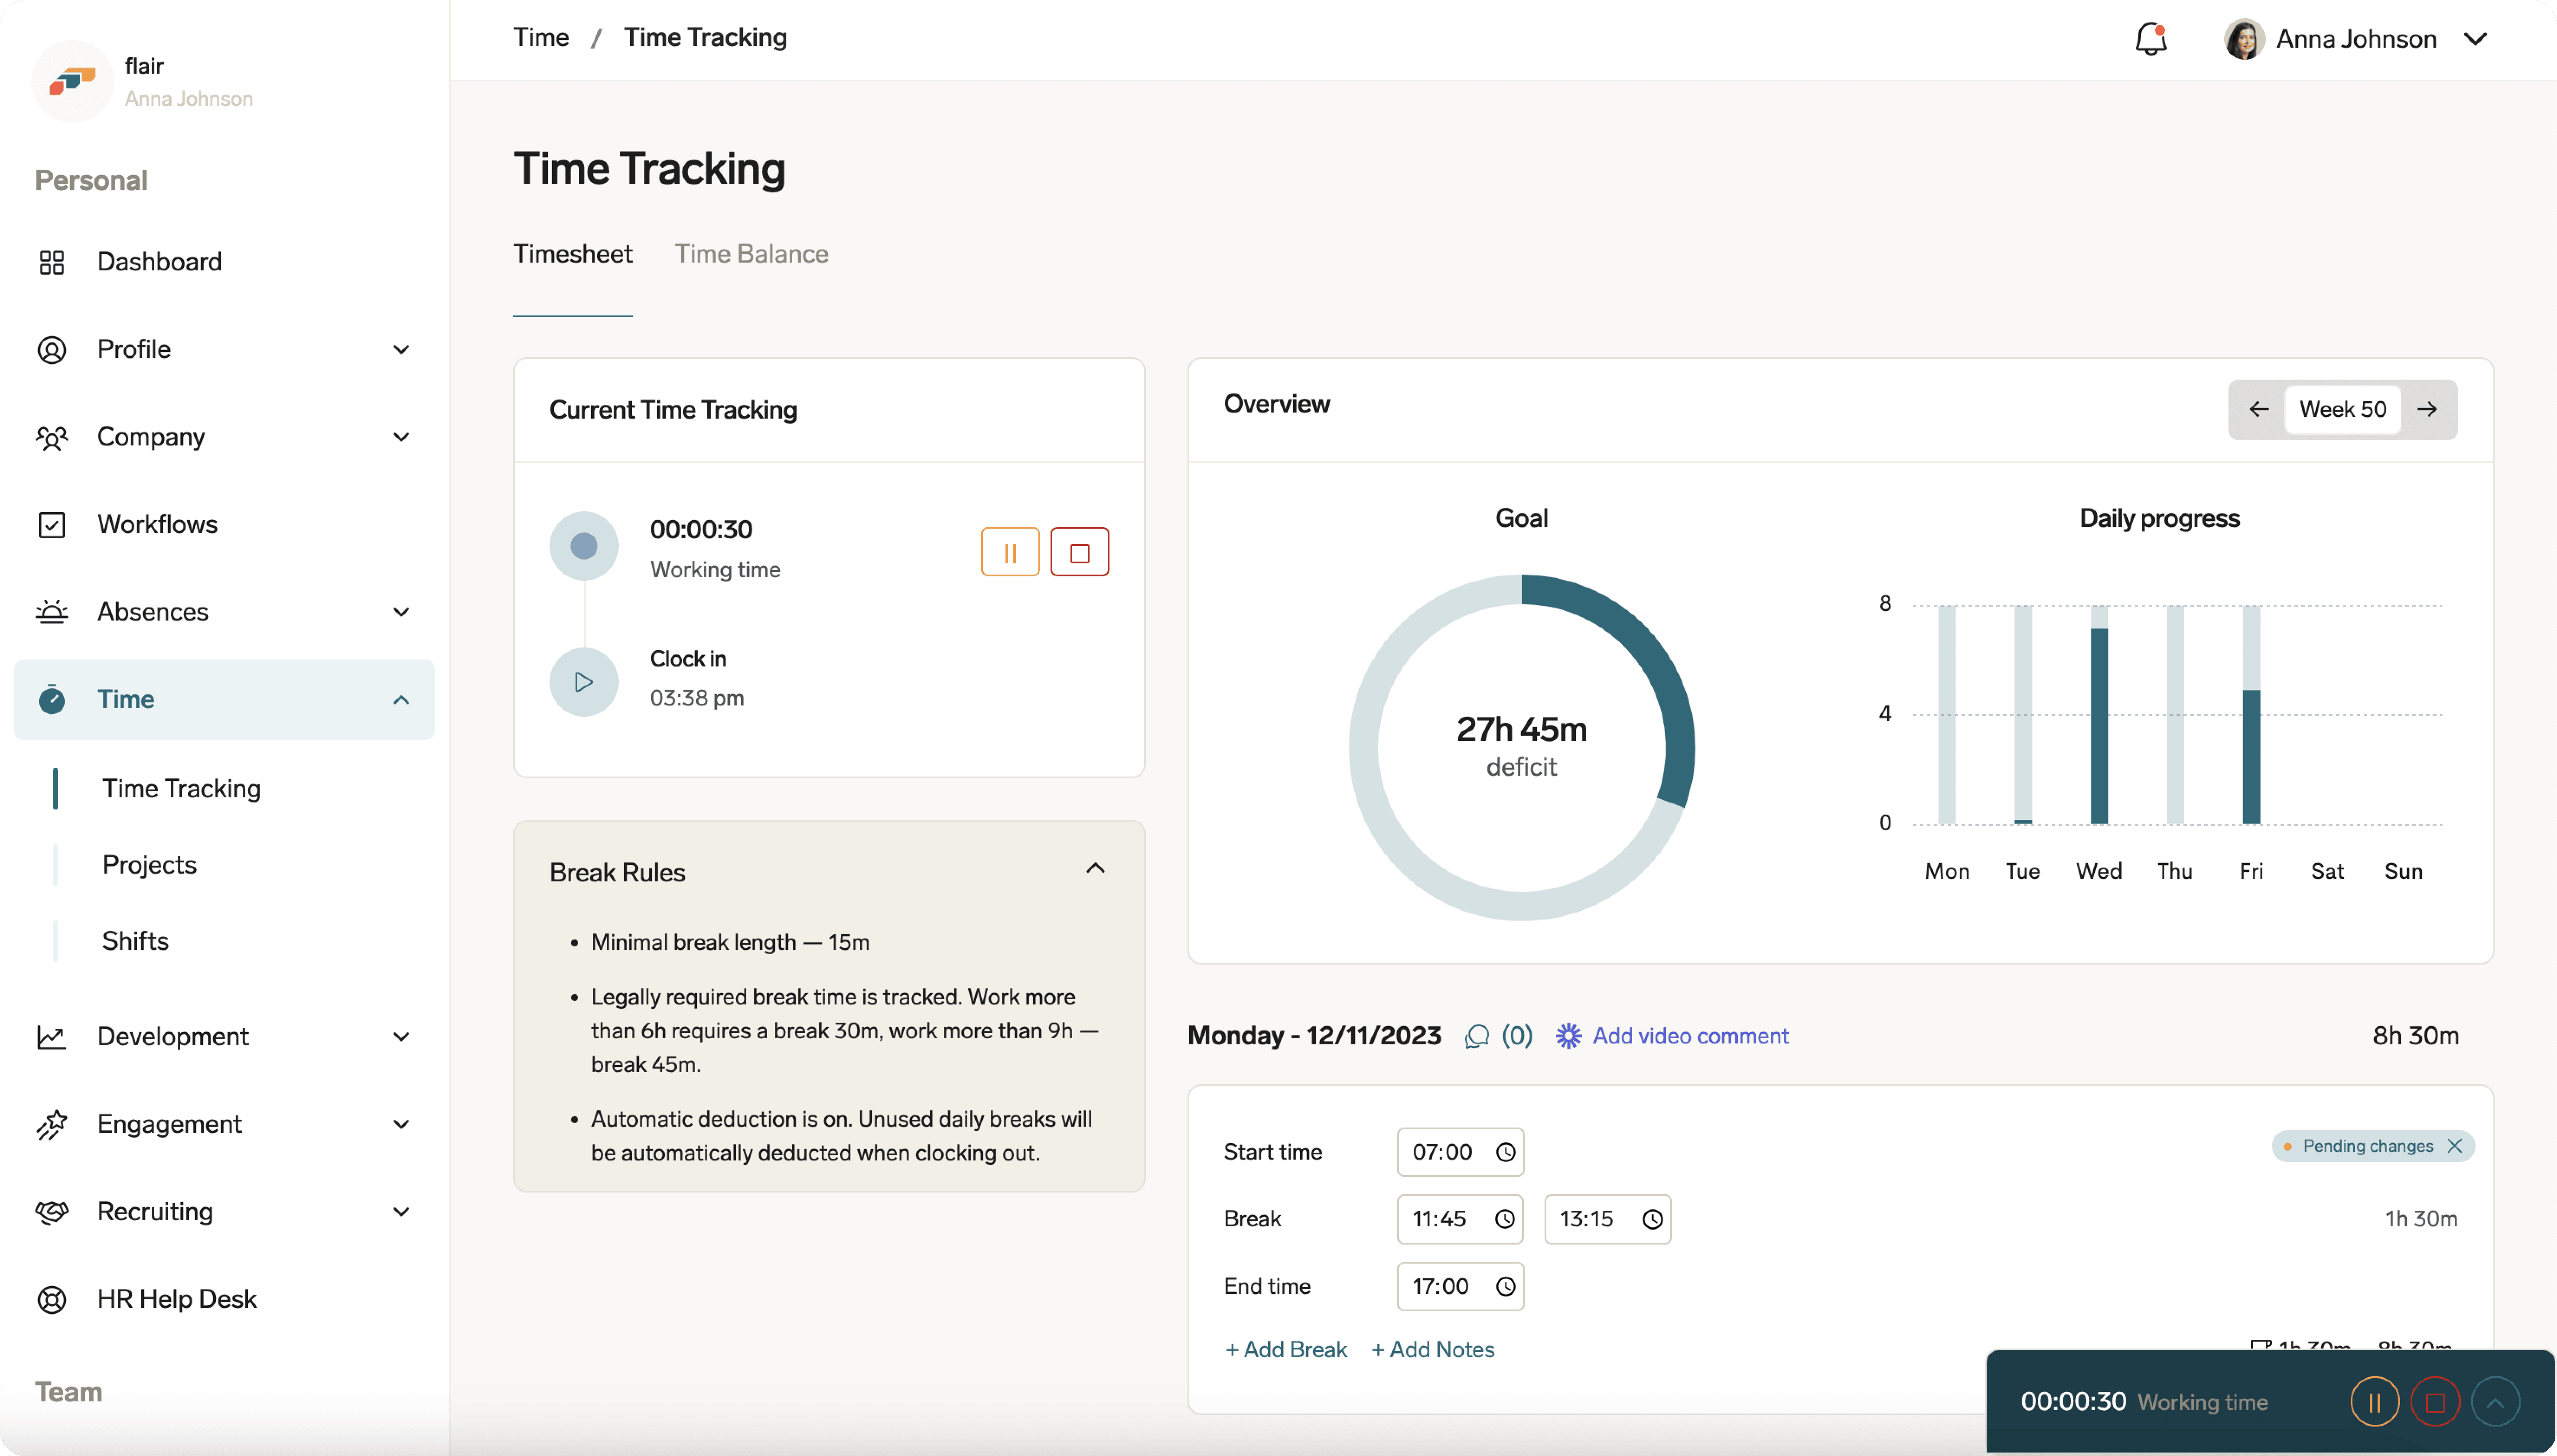
- Time Tracking — start, pause, or stop the timer; view the current week; and add time entries manually.
- Projects — track time for a project or customer.
- Shifts — view your shifts and colleagues' shifts, request an available open shift, and check shift requirements.
Manage your team
Managers see additional options under Team. Time Management includes these areas:
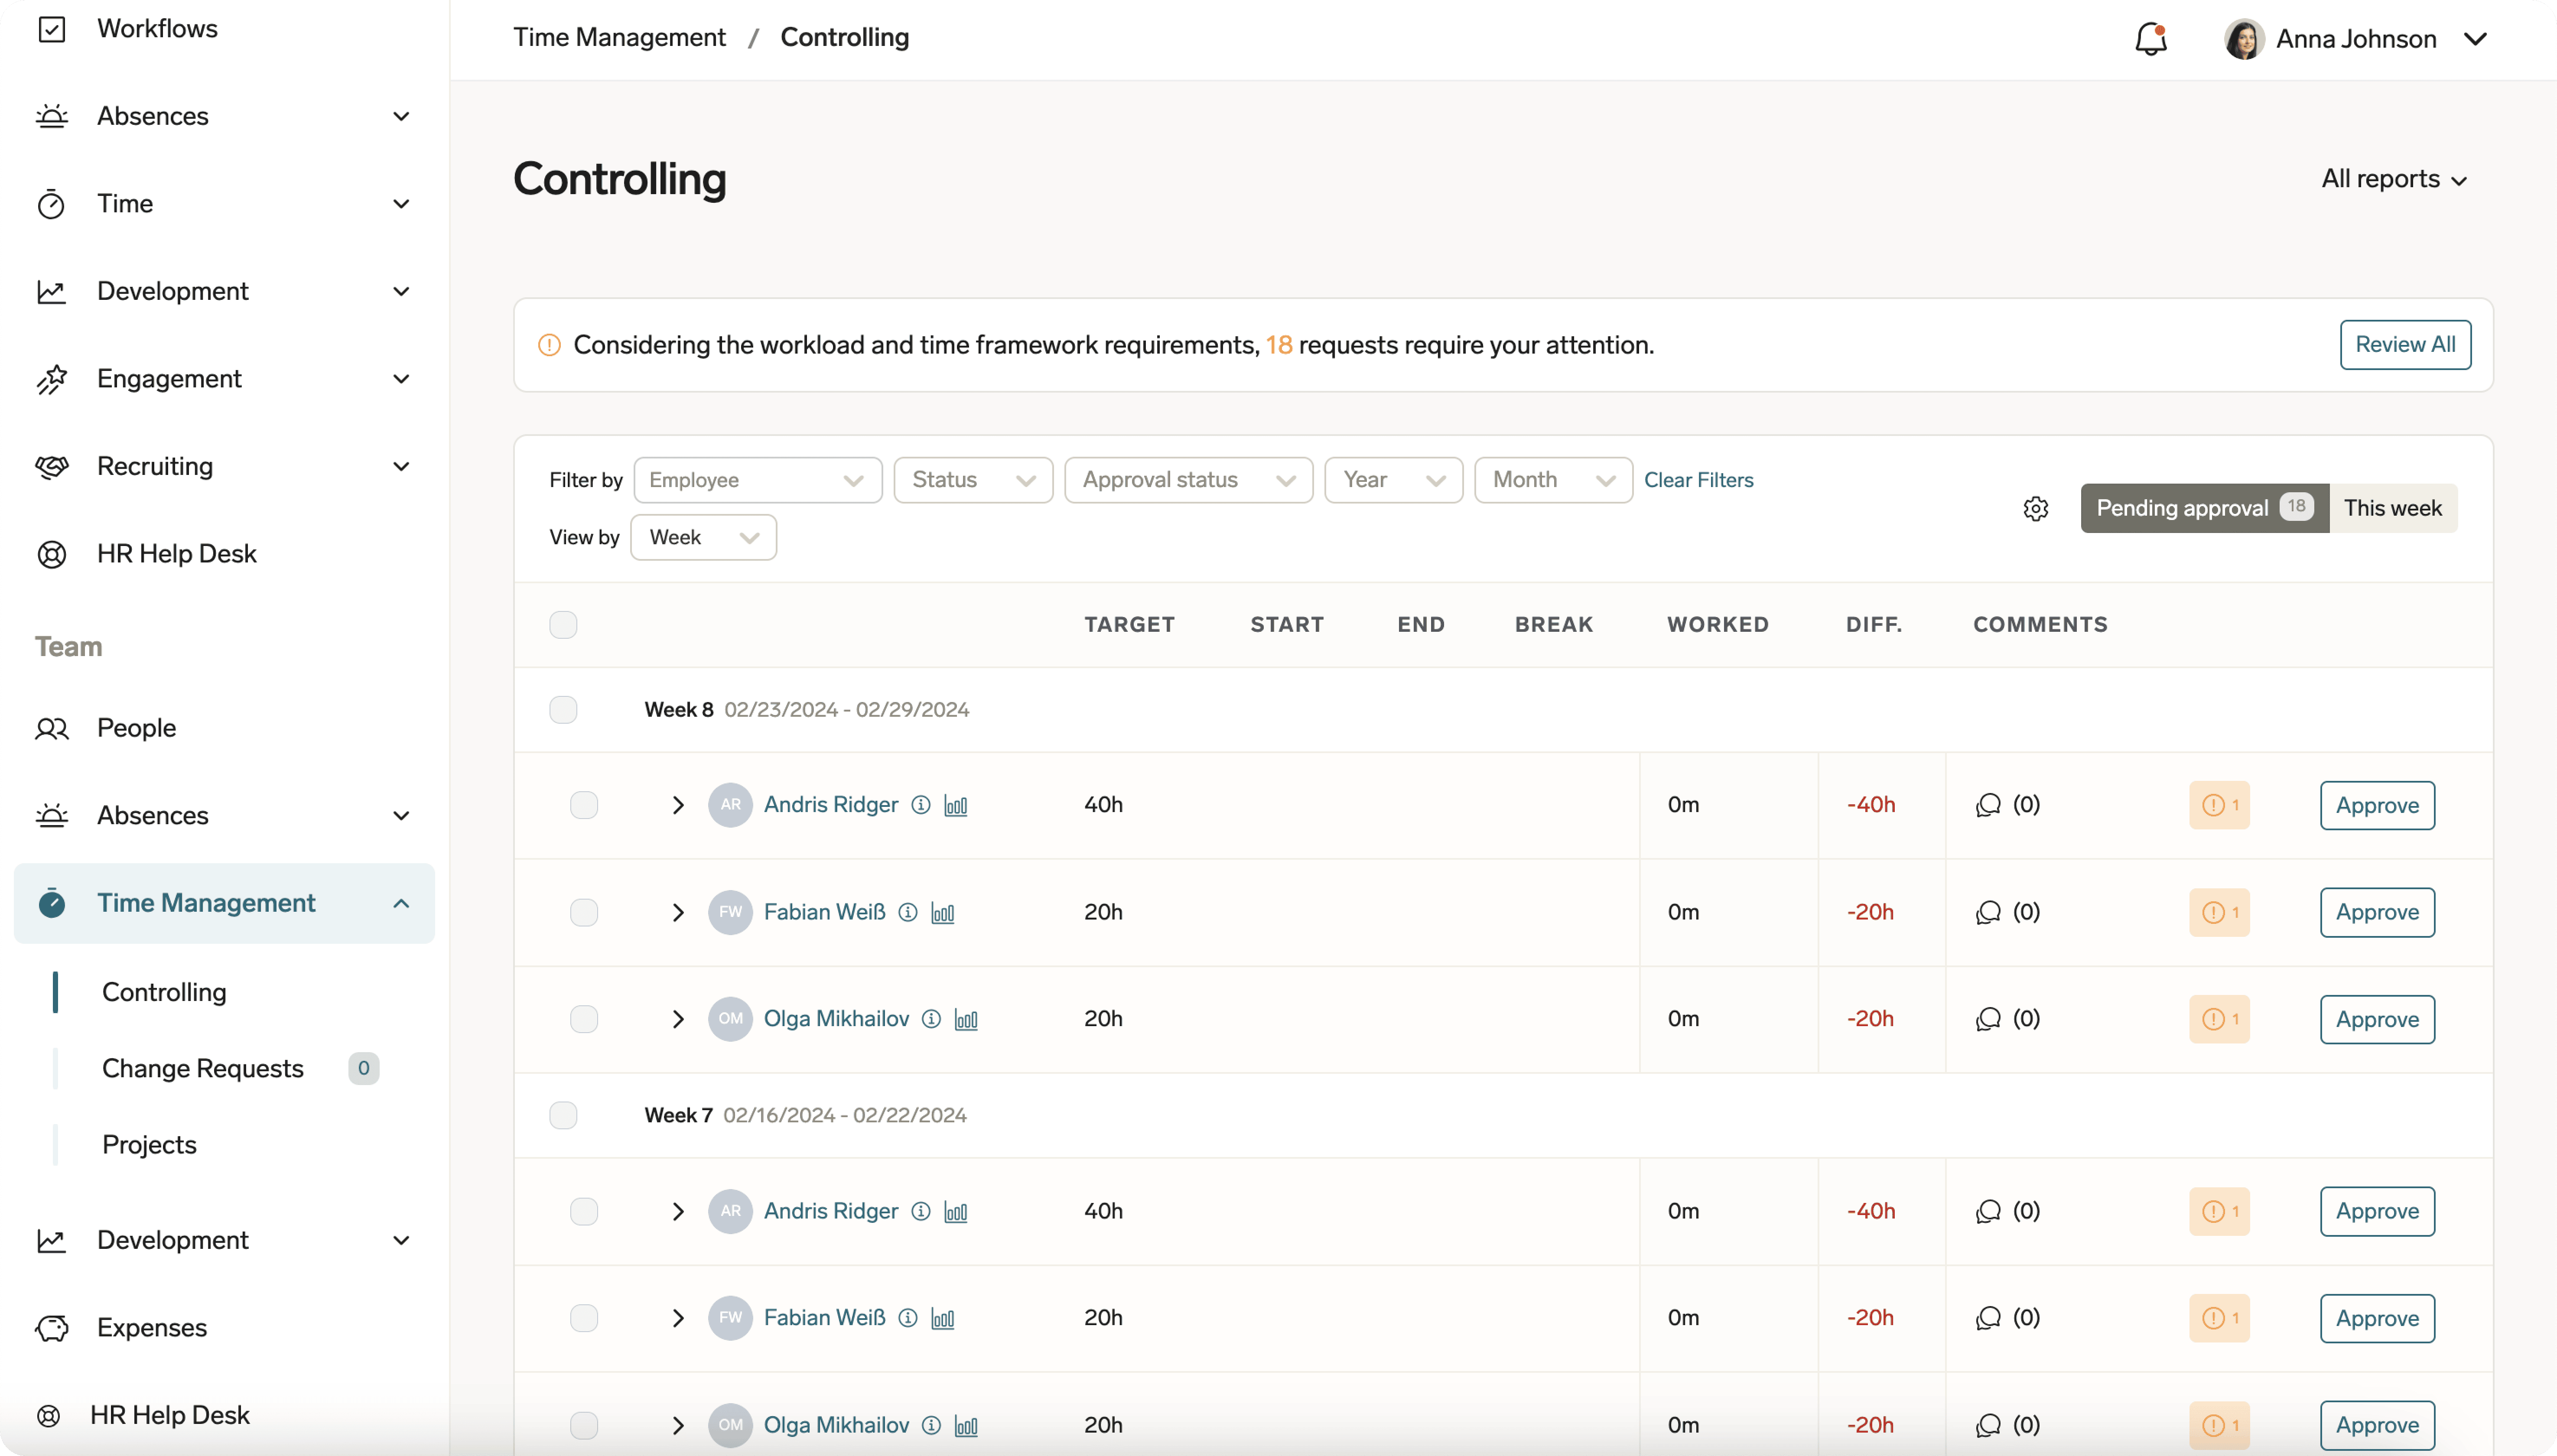
- Controlling — review team hours and discrepancies by week, filter timesheets, and approve time entries.
- Change Requests — review changes to manually entered or adjusted time when approval is required.
- Projects — review project- or customer-based time for your team.
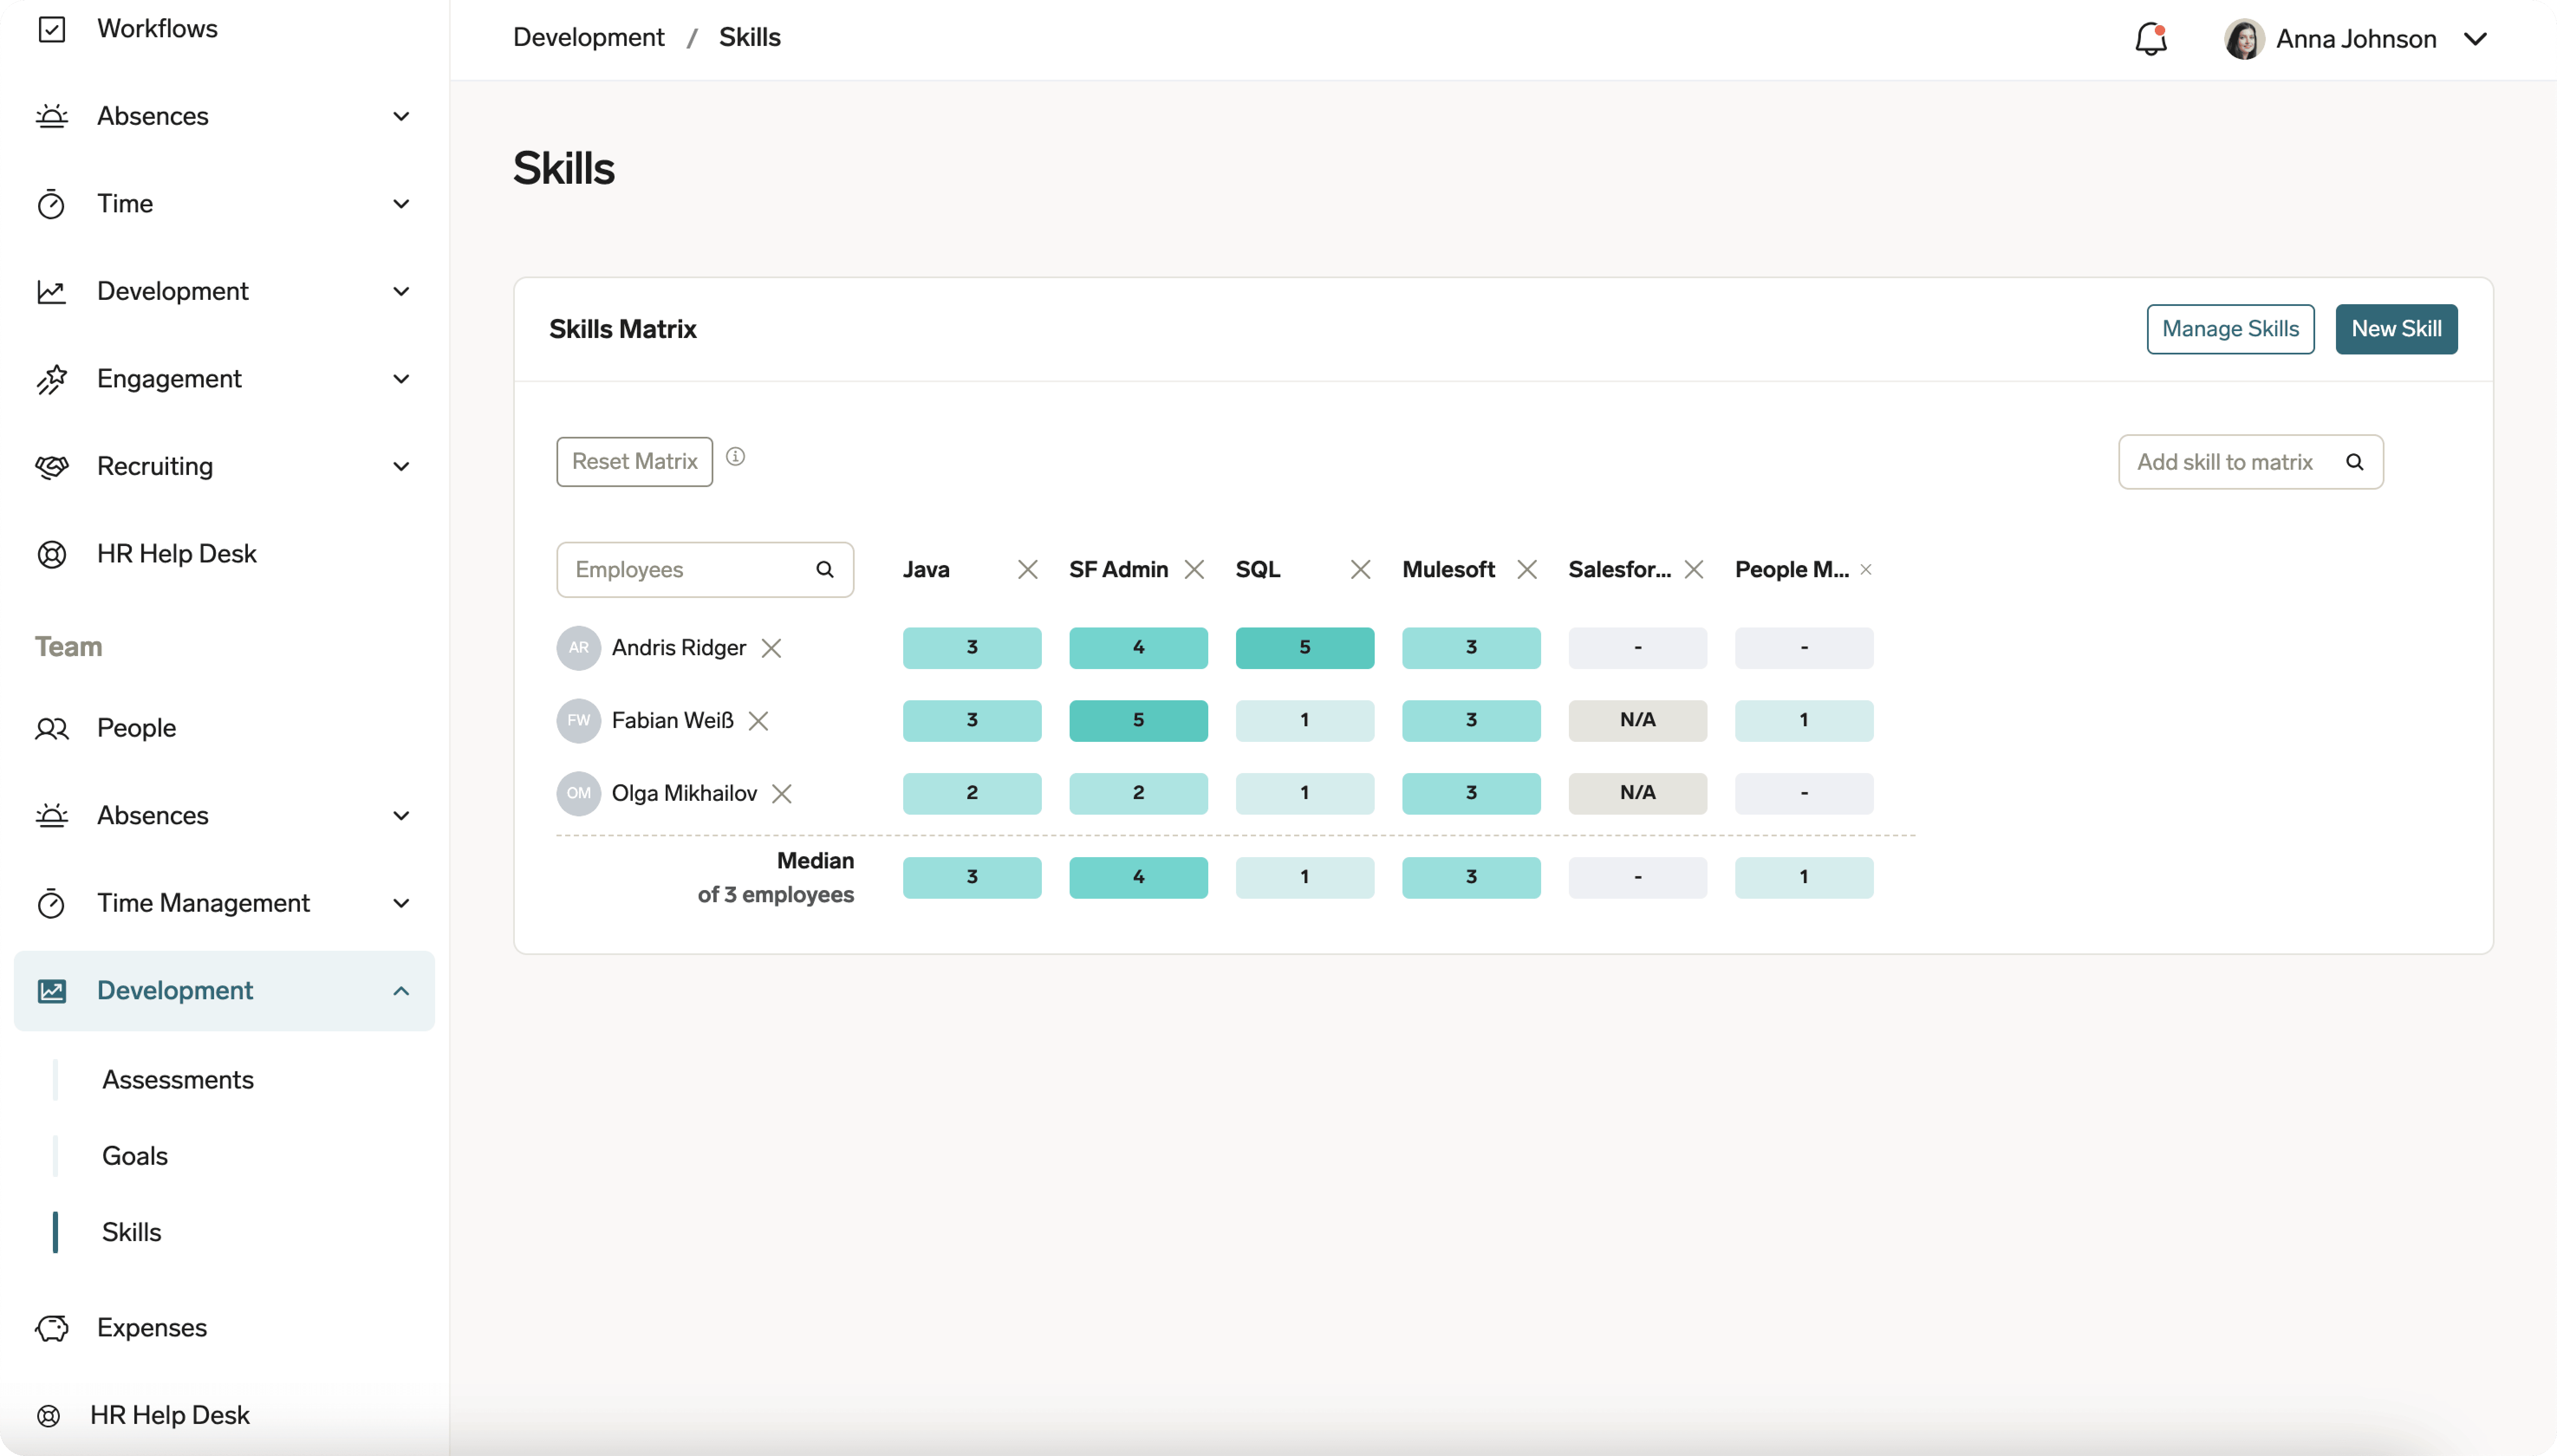
The Development area includes these manager features:
- Assessments — complete performance reviews for team members.
- Goals — set team goals and track progress.
- Skills — view or adjust team skills and use the skills matrix to identify training requirements.
Use engagement and HR services
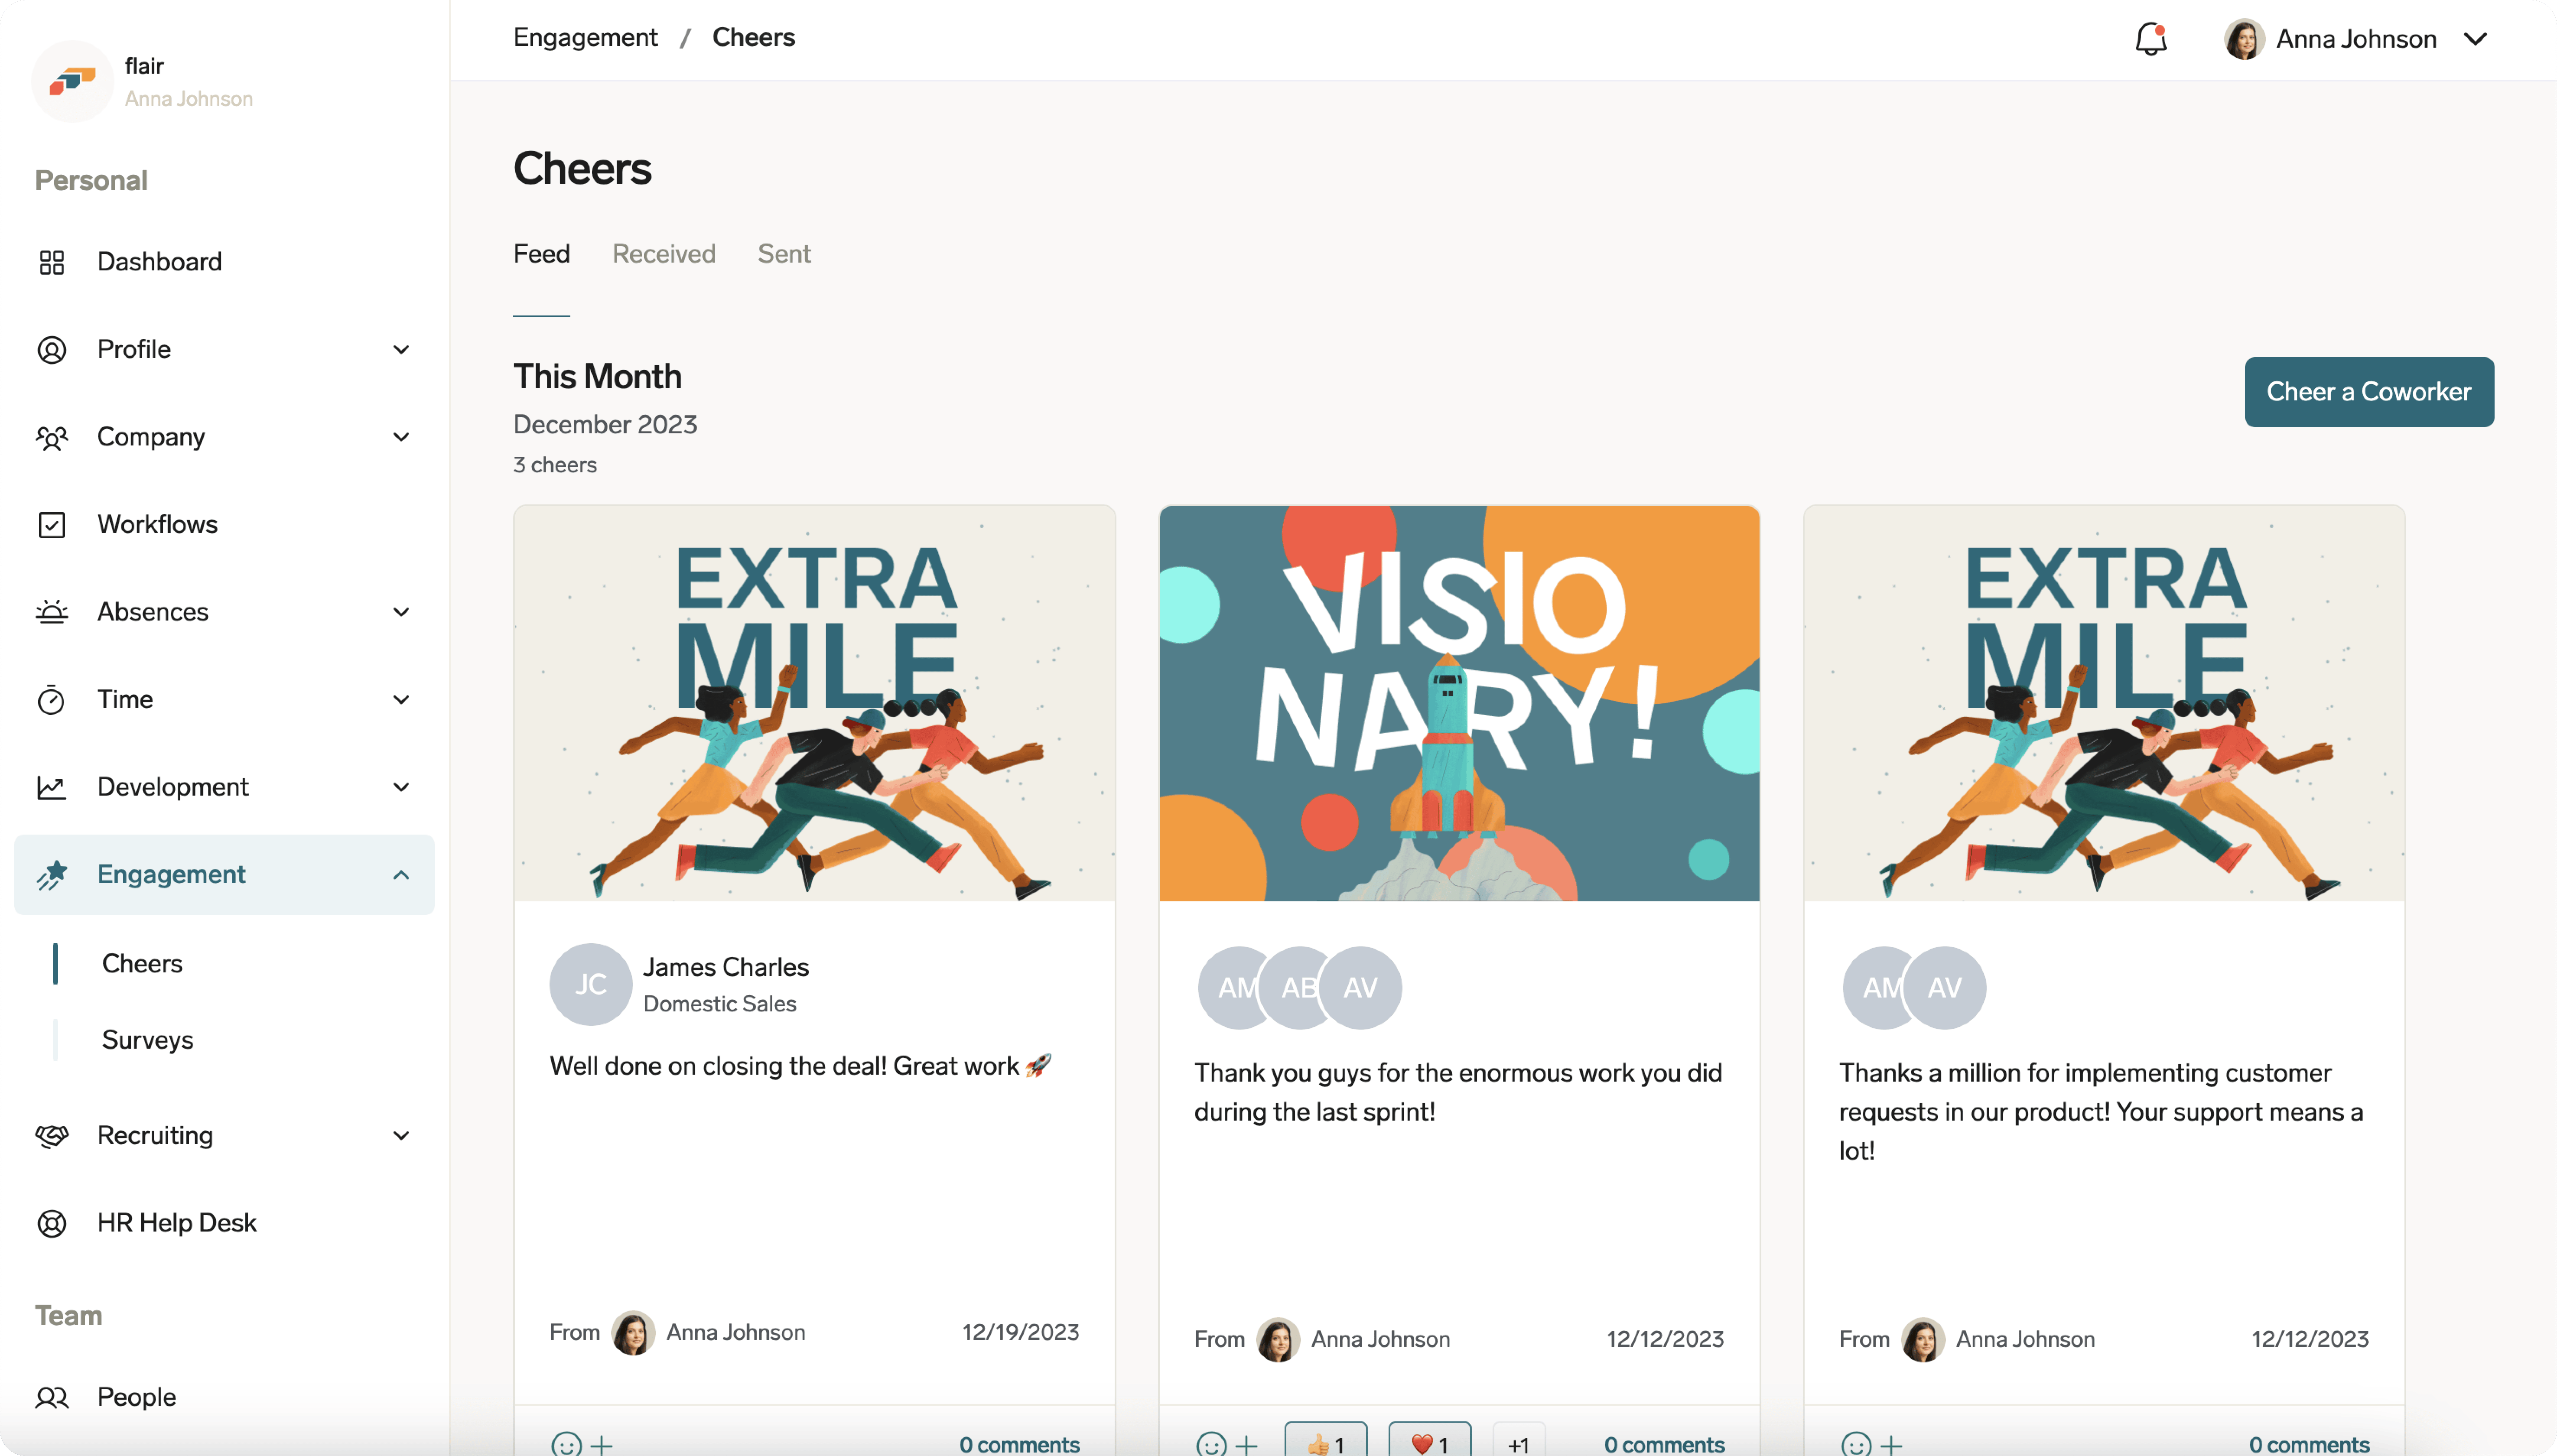
In Engagement, send a Cheer with an optional image or video, or complete a survey.
Use Chats in the top navigation to message colleagues. See Chat with colleagues in the Employee Hub.
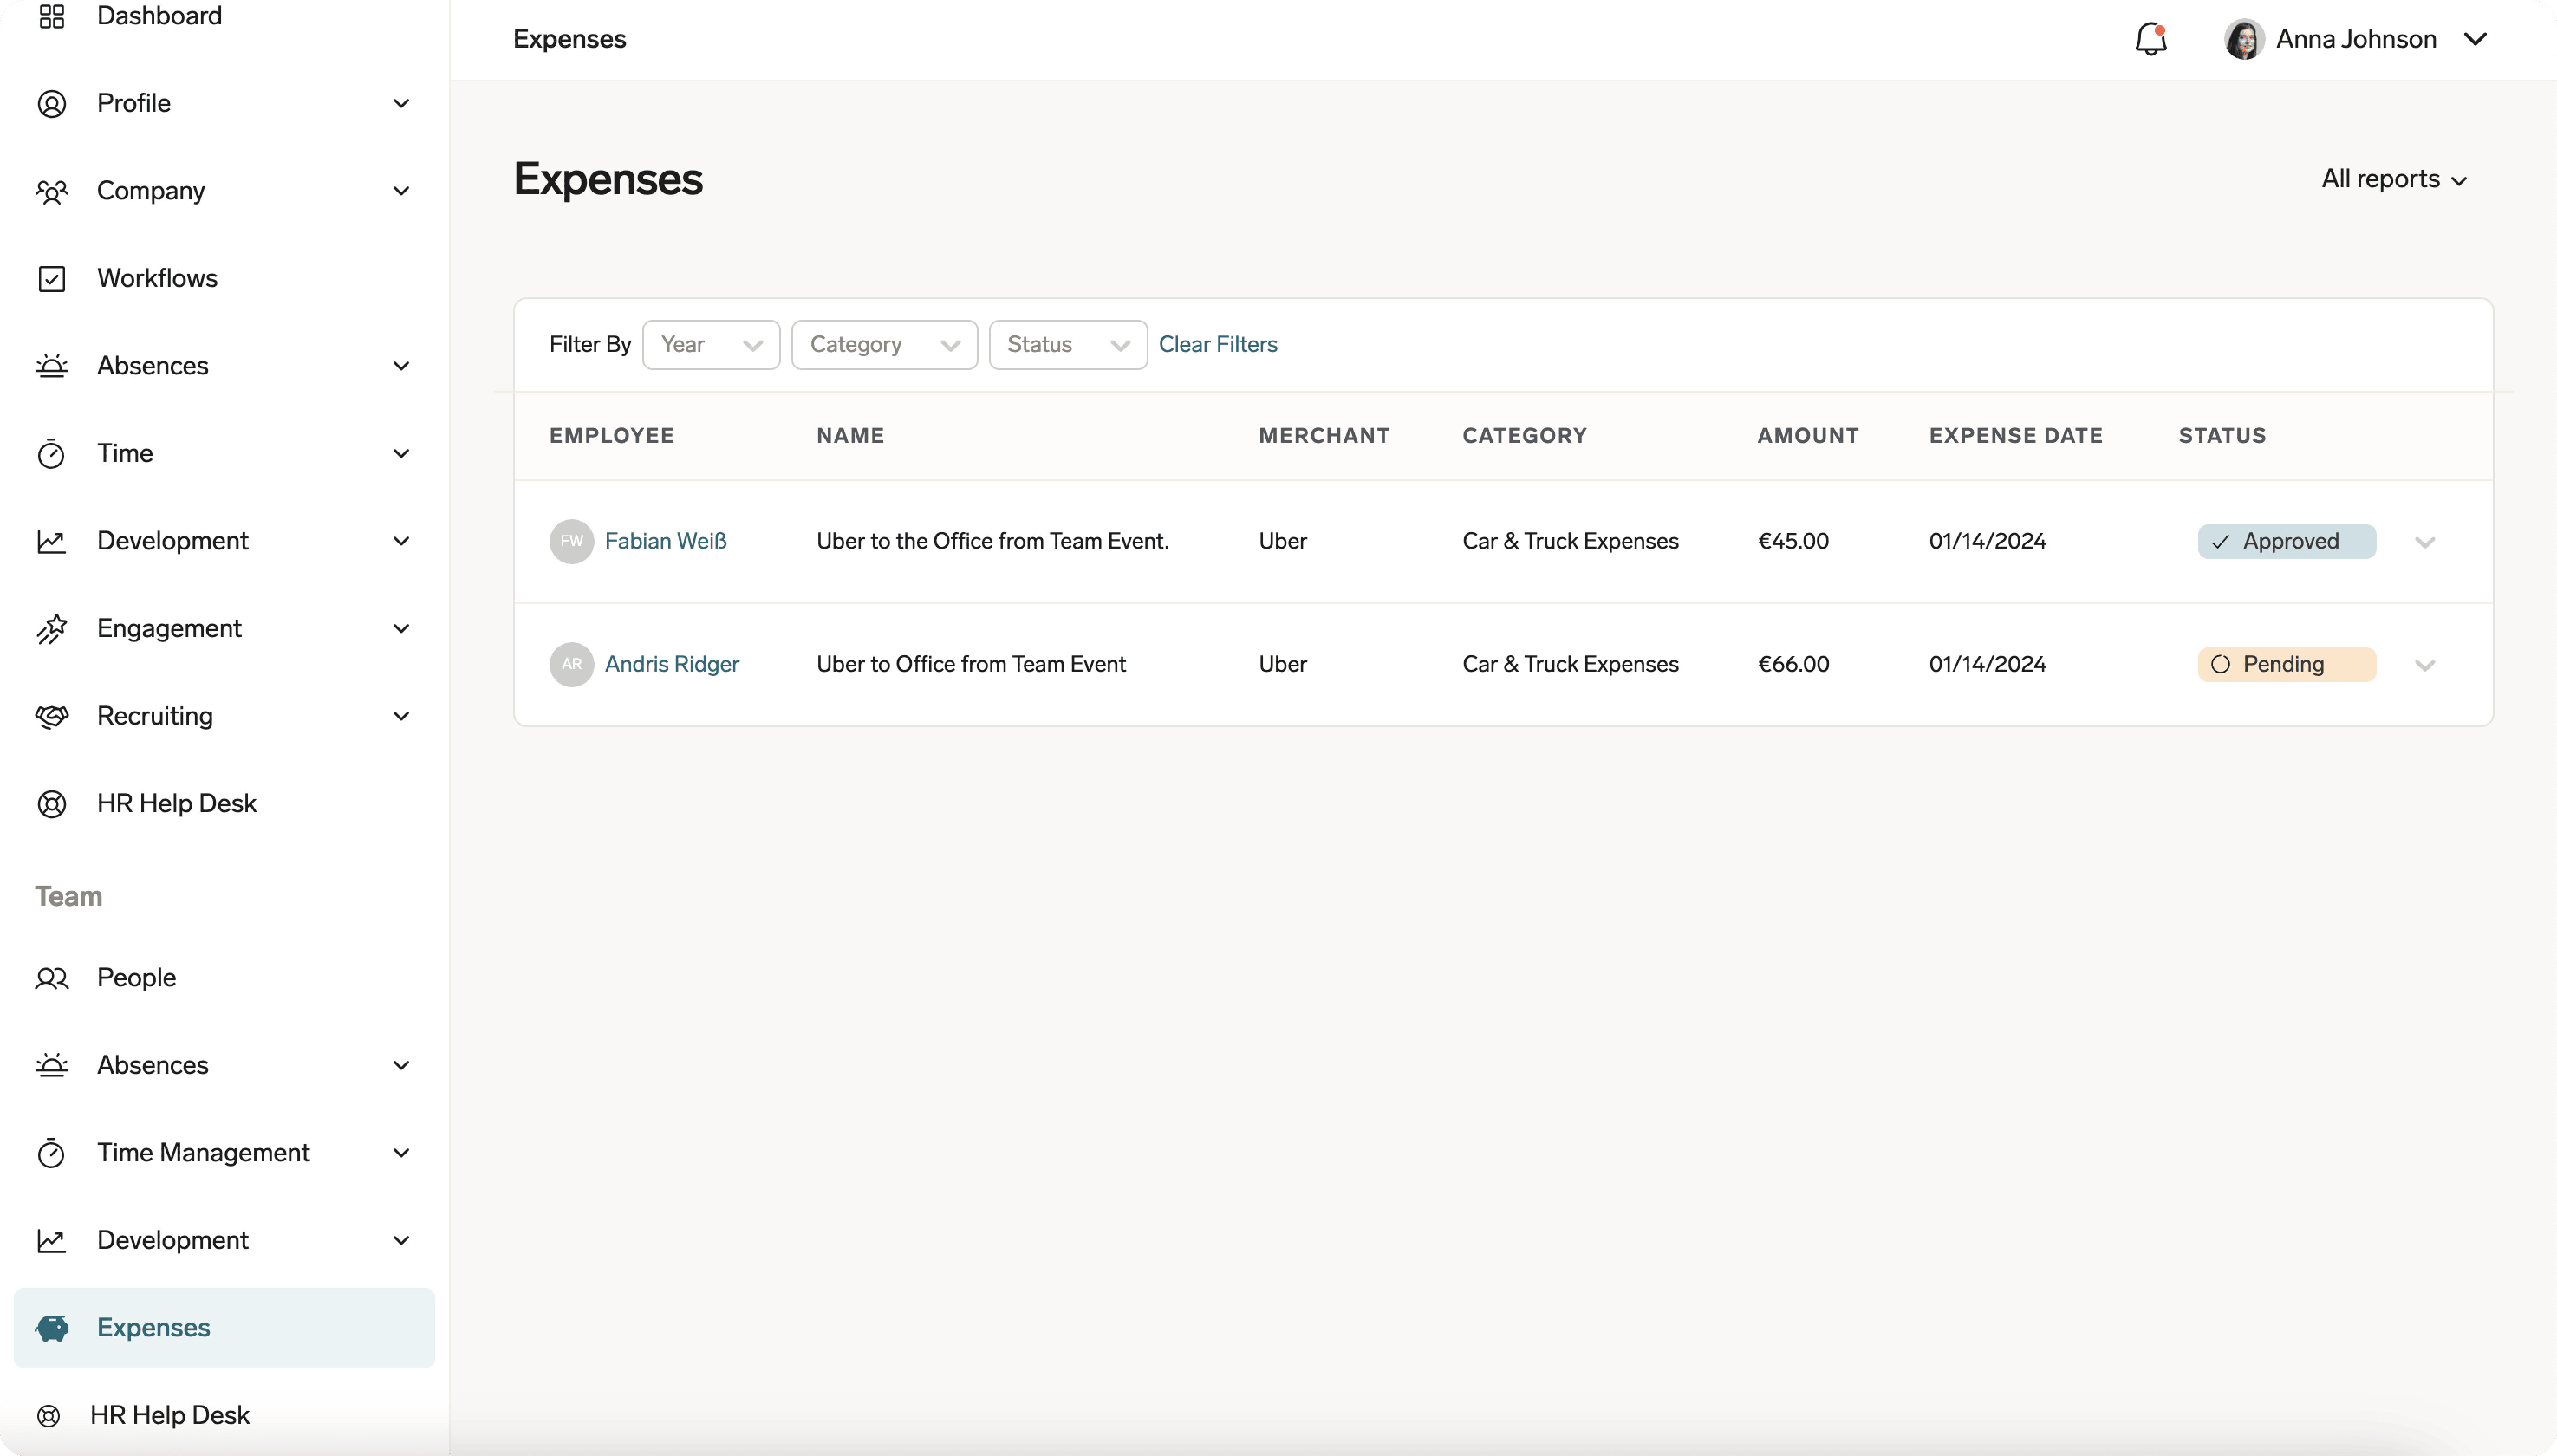
Managers use Expenses to review team expense requests and adjust their status before reimbursement.
If you participate in recruiting, use Recruiting to evaluate candidates and submit application feedback.
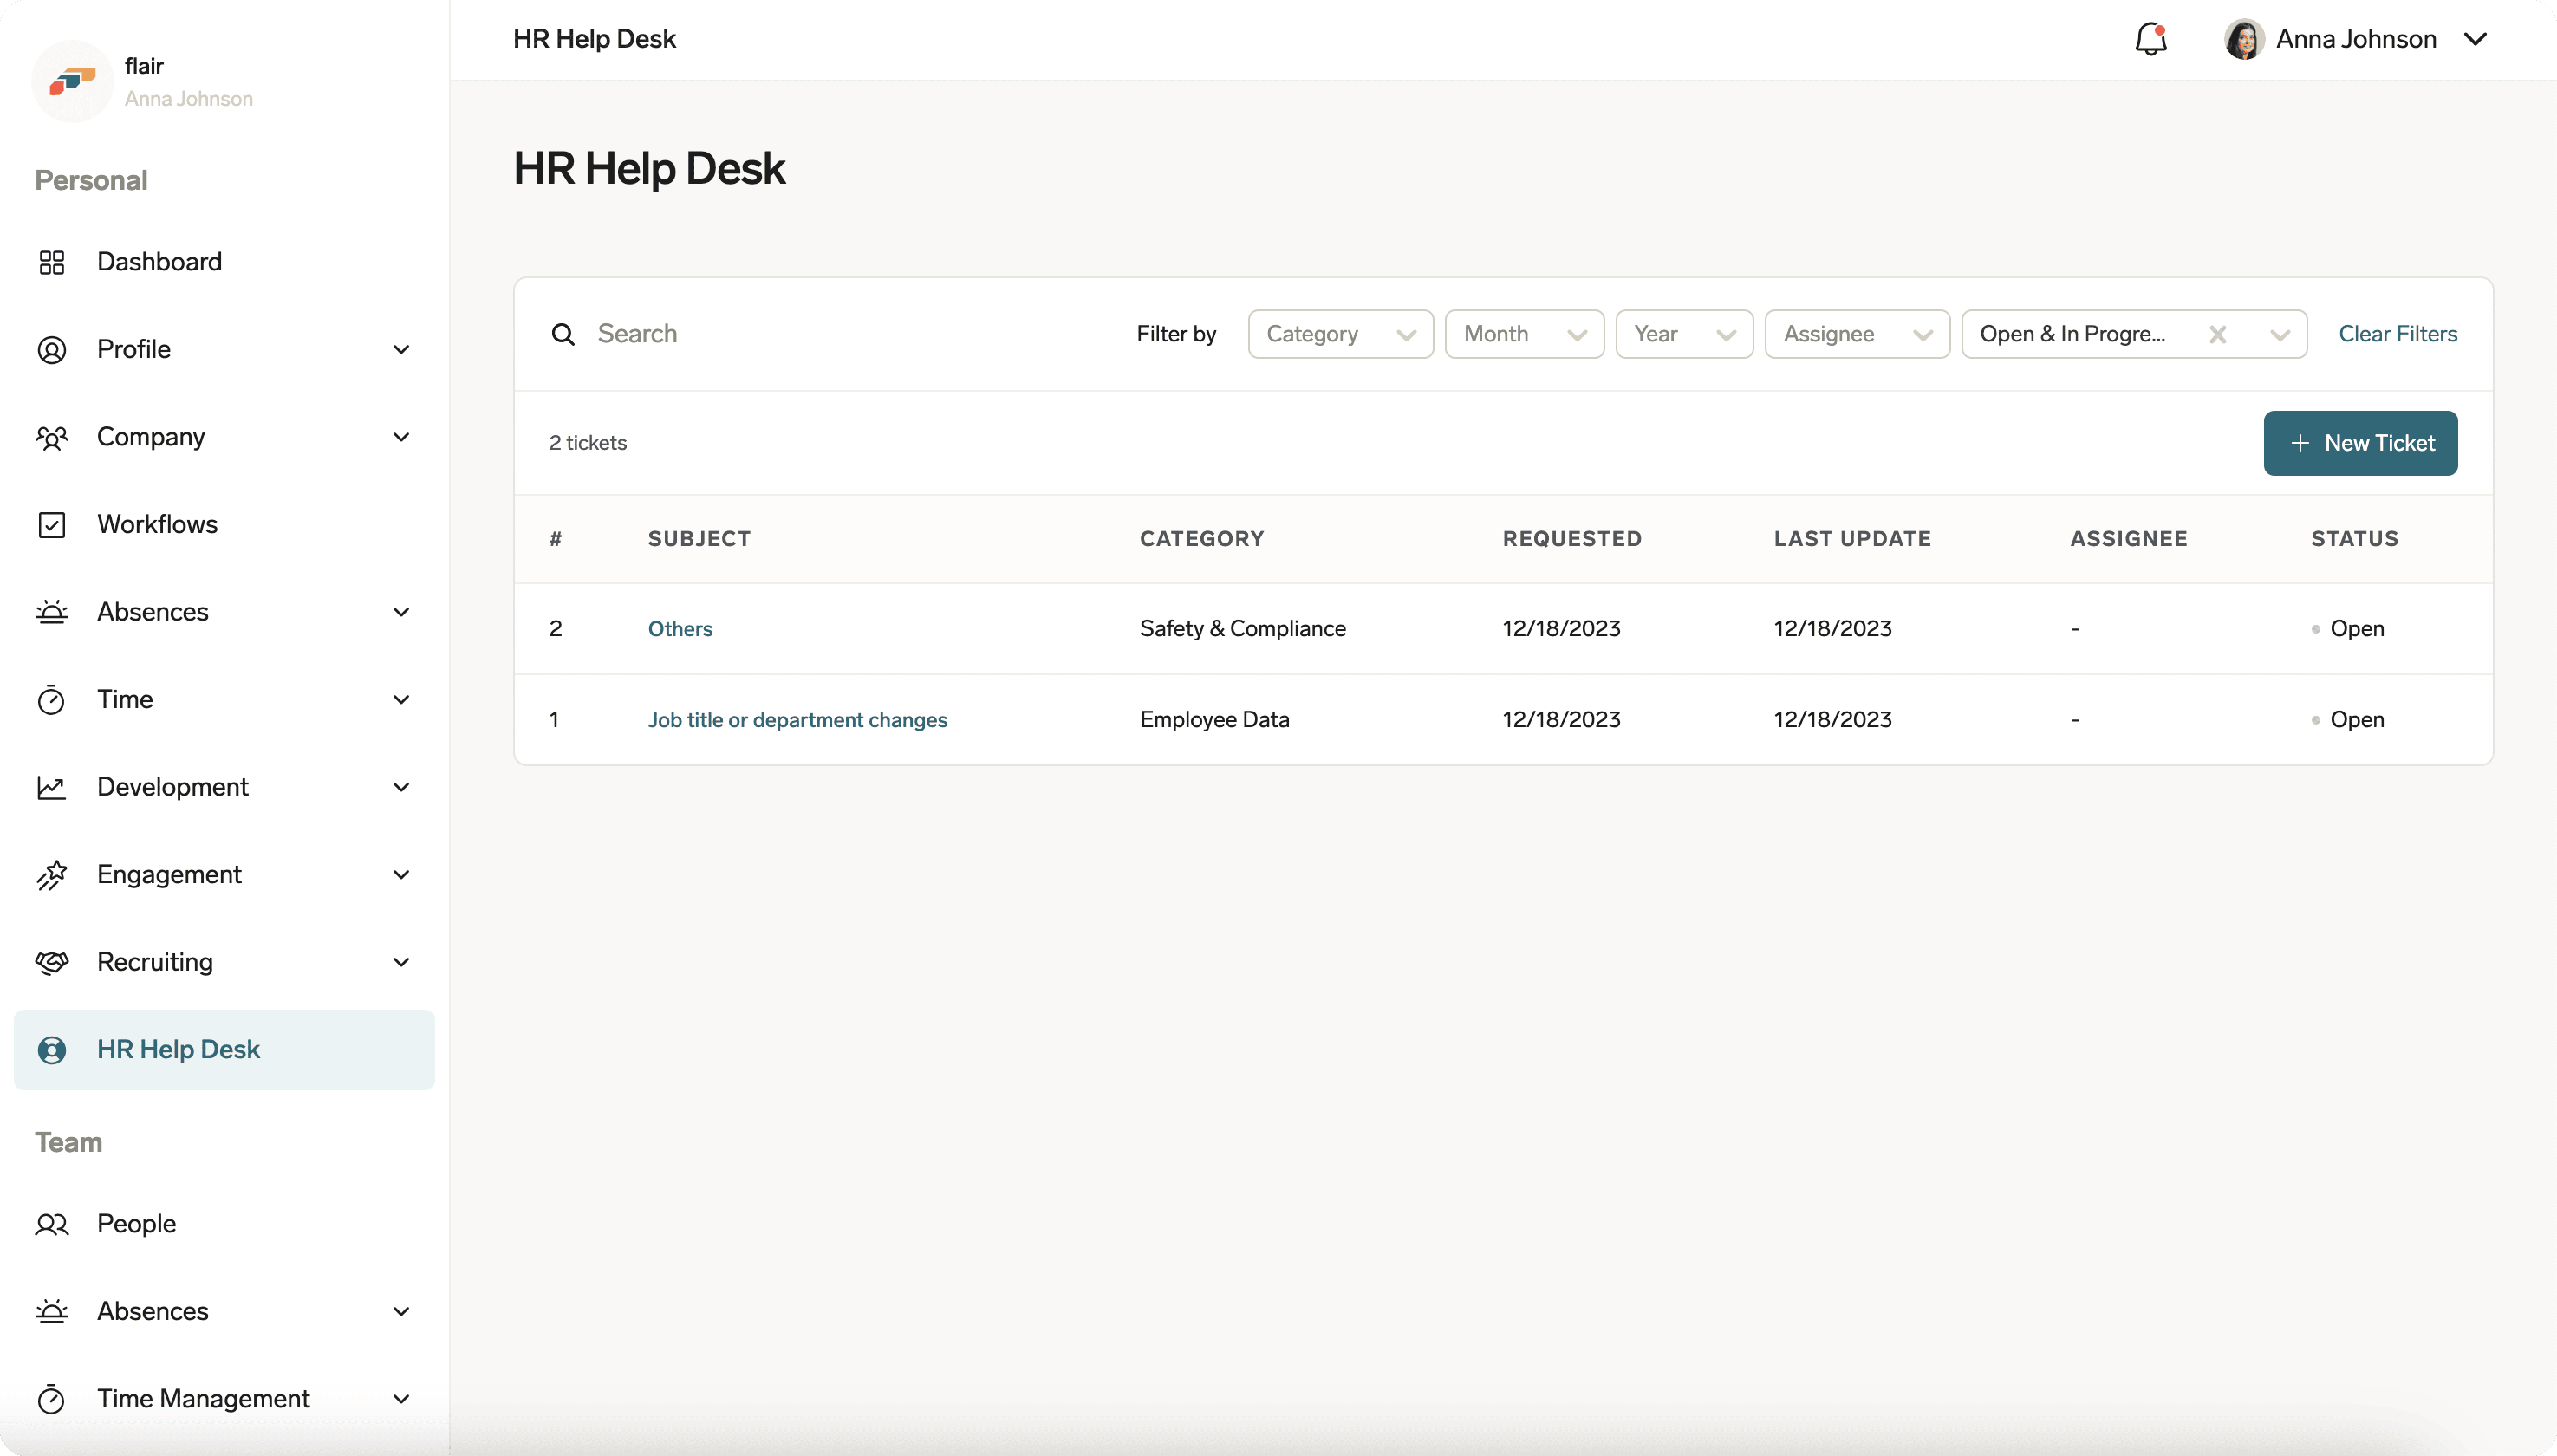
Use HR Help Desk to submit an HR or IT request. If your organization enables anonymous reporting, you can also submit a safety or compliance concern without disclosing your identity.
Use the flair mobile app
Use the flair mobile app to review employee information, open workflows, and access common actions from your phone. The Home dashboard brings current cards and shortcuts into one place.
Sign in to the mobile app
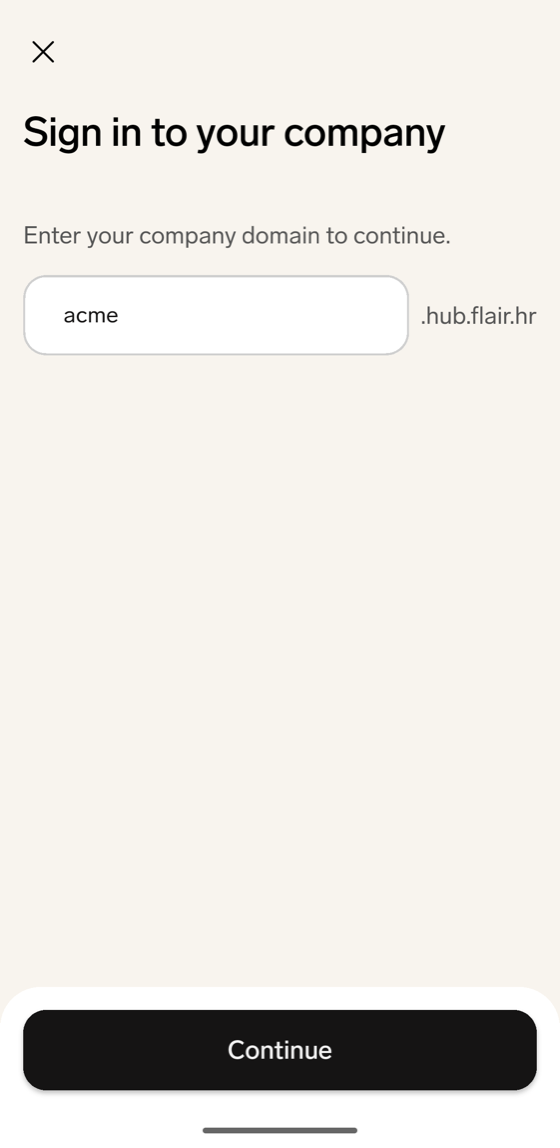
The first time you sign in, the app asks for your company domain, the first part of your Hub URL (yourcompany in https://yourcompany.hub.flair.hr).
- Install the flair mobile app for iOS or Android.
- Open the flair mobile app and tap Get Started.
- On Sign in to your company, enter your company domain, or paste your full Hub URL, and tap Continue. The app remembers the domain and fills it in the next time you sign in. To sign in to a different company, change the domain on this screen.
- Choose how to sign in. The screen shows only the sign-in methods your company uses:
- To sign in with a password, enter your Email address and Password, then tap Continue. If you forgot your password, tap Forgot password?.
- To use single sign-on, tap the button with your sign-in provider's name. If your company offers several providers, each has its own button. The provider's sign-in page opens outside the app, in your phone's browser or your provider's app, so you can use an account already signed in on your device. After you sign in, the app opens.
If the app shows "We couldn't find this company. Check your domain and try again.", check the domain with your HR team.
After you sign in, the app asks for permission to send notifications on iOS and on Android 13 or later. To receive push notifications, allow it. On Android 12 or earlier, notifications are allowed without a prompt. For details, see Receive push notifications in the mobile app.
Reset your password in the mobile app
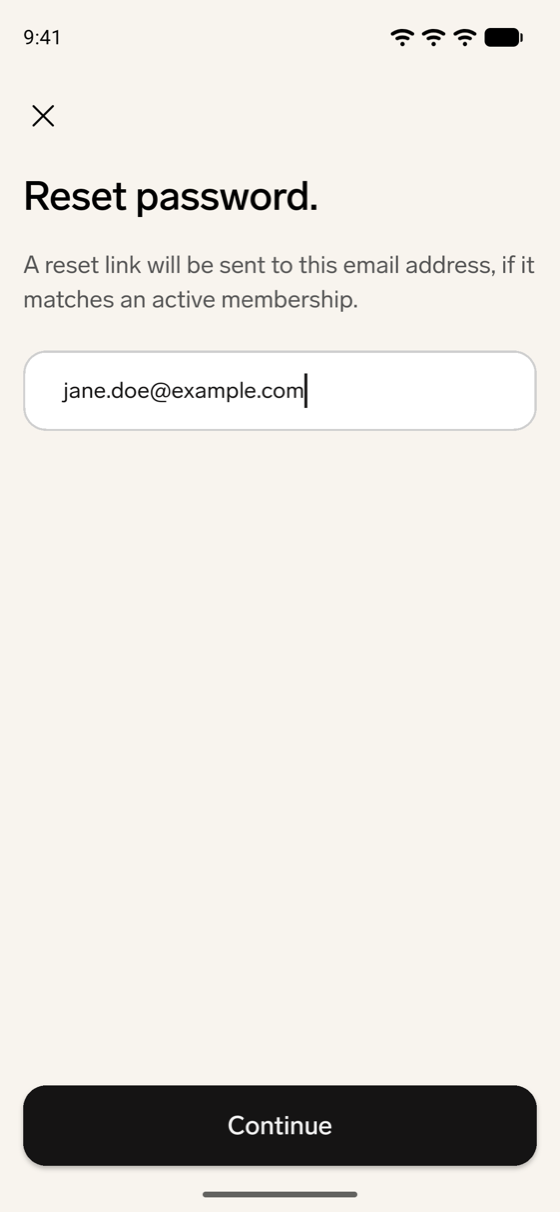
If you sign in with a password and have forgotten it, request a reset link from the sign-in screen.
- On the password sign-in screen, tap Forgot password?.
- On Reset password., enter your email address and tap Continue. The reset link is sent only if the address matches an active Employee Hub account.
- On Check your inbox, tap Back to Log in.
- Open the link in the email. It opens the Employee Hub in your browser, not the app. Enter your new password, which needs at least 8 characters, and click Reset my password. Only the link from your most recent request works, and only once.
- Sign in to the app with your new password.
If the email doesn't arrive, ask your HR Admin to reset your Employee Hub password.
Open the mobile app
- Sign in to the flair mobile app.
- To open the dashboard, tap Home.
- To switch areas, tap Workflows, Absences when it is available, or More. To start a new request, tap Add.
Add a request from the Add menu
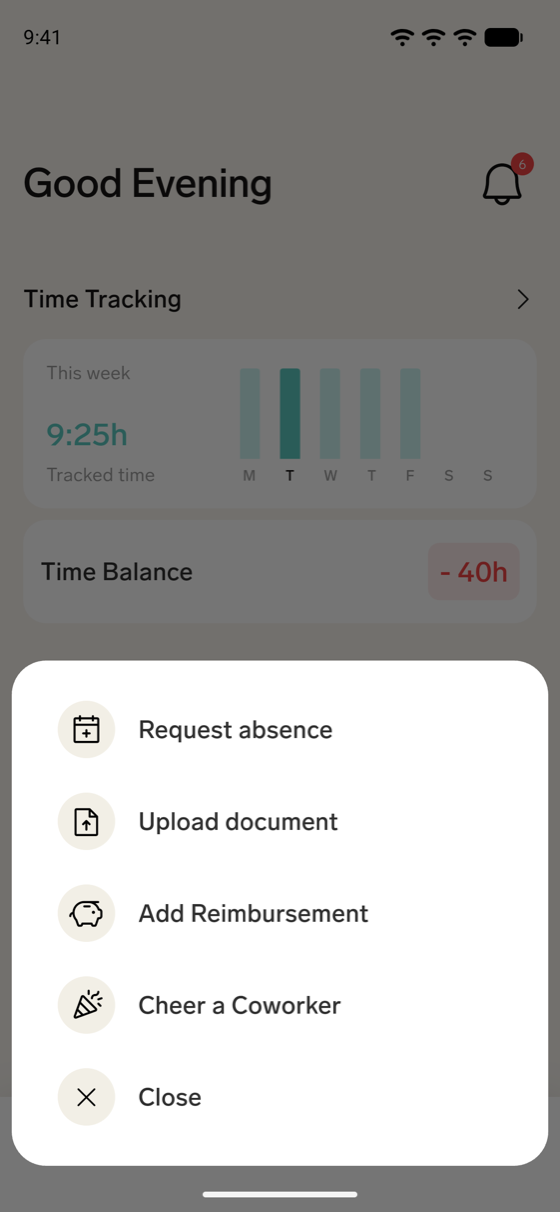
Tap Add in the middle of the bottom navigation to start common tasks from anywhere in the app. The menu offers the following:
- Request absence opens the absence request form. See Request an absence in the mobile app.
- Upload document opens the document upload. See Manage documents in the mobile app.
- Add Reimbursement starts a new Reimbursement expense. See Create an expense in the mobile app.
- Cheer a Coworker opens a new Cheer. This option is missing when your HR Admin hides Cheers for you. See Send a Cheer on mobile.
To leave the menu without choosing an action, tap Close. Only Cheer a Coworker follows your HR Admin's Employee Hub feature settings; the other options always appear. See Check what the settings hide in the mobile app.
Use the Home dashboard
-
On Home, scroll through the dashboard cards.
-
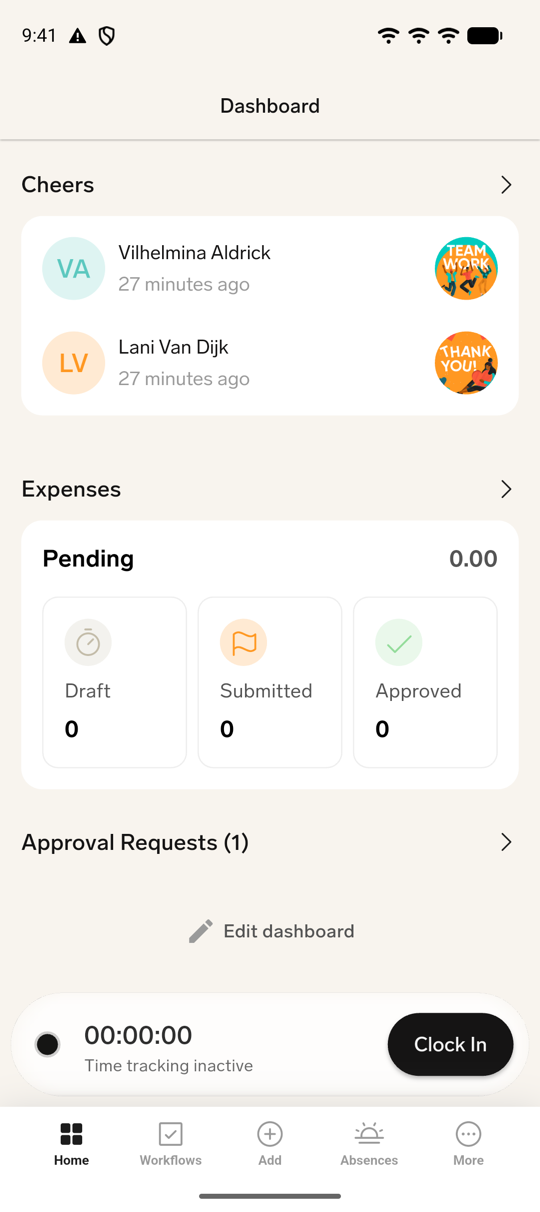
Review the cards available to you. The dashboard can include the following:
- Welcome! appears at the top during your onboarding when your onboarding workflow is set to show the dashboard widget. Tap Start Onboarding, or Continue Onboarding once you've opened it, to open the workflow.
- Out today shows employees who are absent today.
- Upcoming time away shows your next absence. Tap the heading to open Absences. If you have no upcoming absence, tap Add an absence to request one.
- Time Tracking shows your Tracked time for the current week or month, depending on your work schedule, with a chart of Work Time, Overtime, and Deficit. Tap the card to open Time Entries.
- Celebrations (the birthday and anniversary card) shows upcoming celebrations, such as birthdays and anniversaries. Tap the heading to see the full list grouped by week, where you can search by name or tap My location, My department, or My teams to narrow it.
- Latest updates shows company announcements.
- Your next shift shows your next scheduled shift when Shift Planner is available. Organizations using the Legacy Shift Planner can see a shifts card instead.
- Public Holidays shows upcoming public holidays and opens the public holiday screen when you select its heading.
- Cheers shows recognition posts.
Other cards can include workflows, expenses, approval requests, and projects.
-
To reload the dashboard data, pull down on Home and release.
Customize the dashboard
- On Home, tap Edit dashboard.
- In Edit Dashboard, review the widgets listed under Enabled and Order.
- To show or hide a widget, tap its visibility control. Some widgets cannot be disabled.
- To change the order, drag a widget using its handle.
- Tap Save. The dashboard uses the selected visibility and order.
Find colleagues in the directory
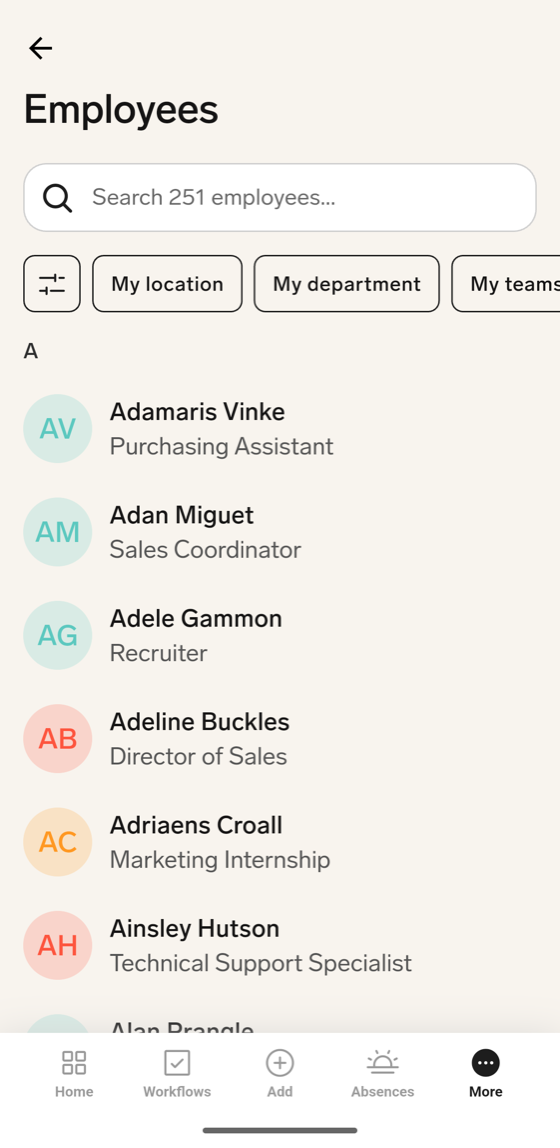
The mobile directory lists your active colleagues alphabetically, grouped by the first letter of their first name.
- Tap More, then tap Directory. If Directory is missing, your HR Admin has hidden it for you.
- To find someone, enter a name in the search field at the top of Employees.
- Optional: To narrow the list, tap My location, My department, or My teams, or open the filters and select a Location, Department, or Team.
- Tap a colleague to open their details. The screen shows their position and, under Company data, their Company Email, Company Phone Number, Start Date, Reports to, Department, and Location. If the colleague is absent, a notice shows when they return.
- Optional: To contact the colleague, tap Call or Email. These buttons appear when the colleague has a company phone number or email.
View and edit your information
Changes you make in the mobile app are sent for approval as an employee data change request. Your record updates after the request is approved.
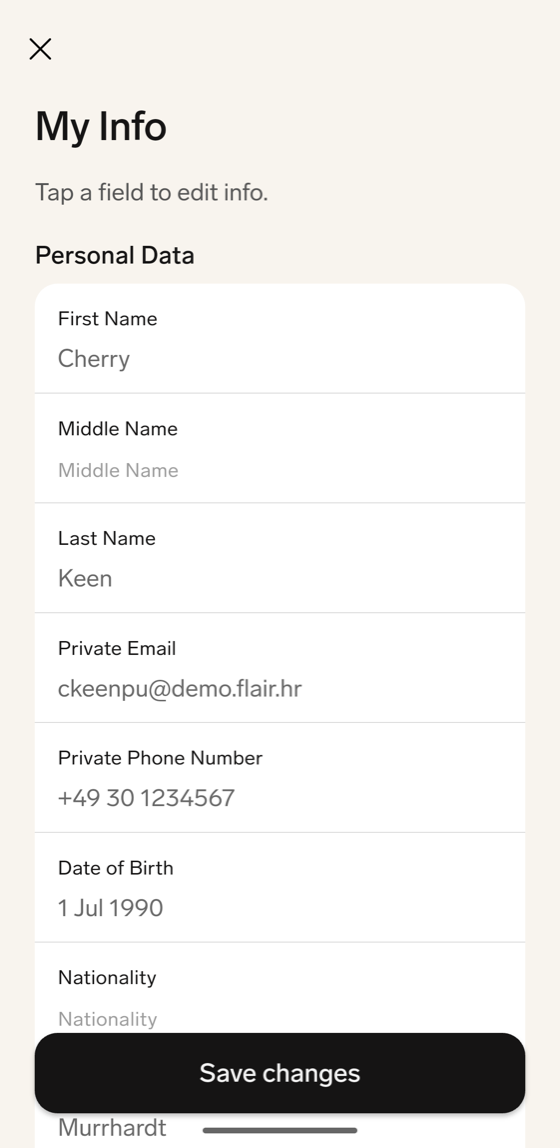
- Tap More, then tap My Info. If My Info is missing, your HR Admin has hidden personal data for you.
- Tap a field to edit it. Read-only fields can't be changed.
- Enter the new value.
- Repeat for any other fields you want to change.
- Tap Save changes. The app shows "Change has been saved".
If you leave the screen with unsaved changes, the app asks "Do you want to exit without saving changes?". Tap Exit to discard your changes, or Cancel to keep editing.
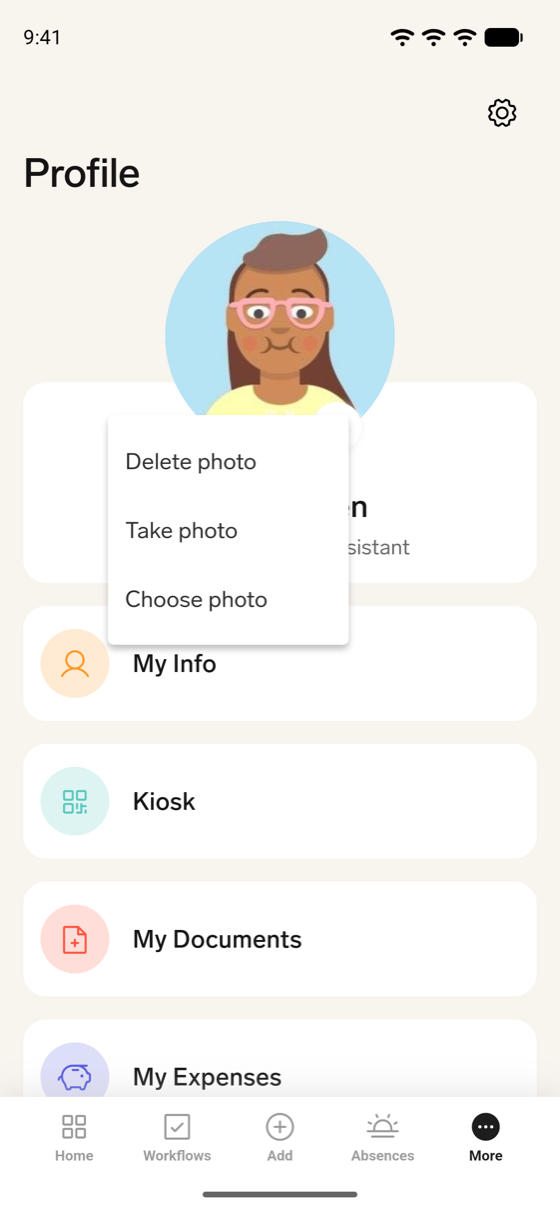
Change your profile photo in the mobile app
- Tap More. Your photo appears at the top of Profile.
- Tap the pencil icon on your photo.
- To add a new photo, tap Take photo or Choose photo, then take or select the picture. The app shows "Your profile picture has been updated successfully."
- Optional: To remove your current photo, tap Delete photo. This option appears only when you have a photo.
If the pencil icon, Take photo, or Choose photo is missing, or Delete photo is missing although you have a photo, your HR Admin has blocked profile photo changes. See Stop employees from changing their own profile photo.
Sign out of the mobile app
- Tap More.
- Tap Logout.
- In the confirmation dialog, tap Confirm. The app returns to its welcome screen. If your phone is online, it also stops receiving flair push notifications.
The app also signs you out, without a message, when your session can no longer be renewed, for example after you haven't opened the app for a long time. The app returns to its welcome screen. Sign in again; if that fails, contact your HR Admin.
Configure the Employee Hub menu
HR Admins can create feature sets that control which options appear in the Hub side menu.
-
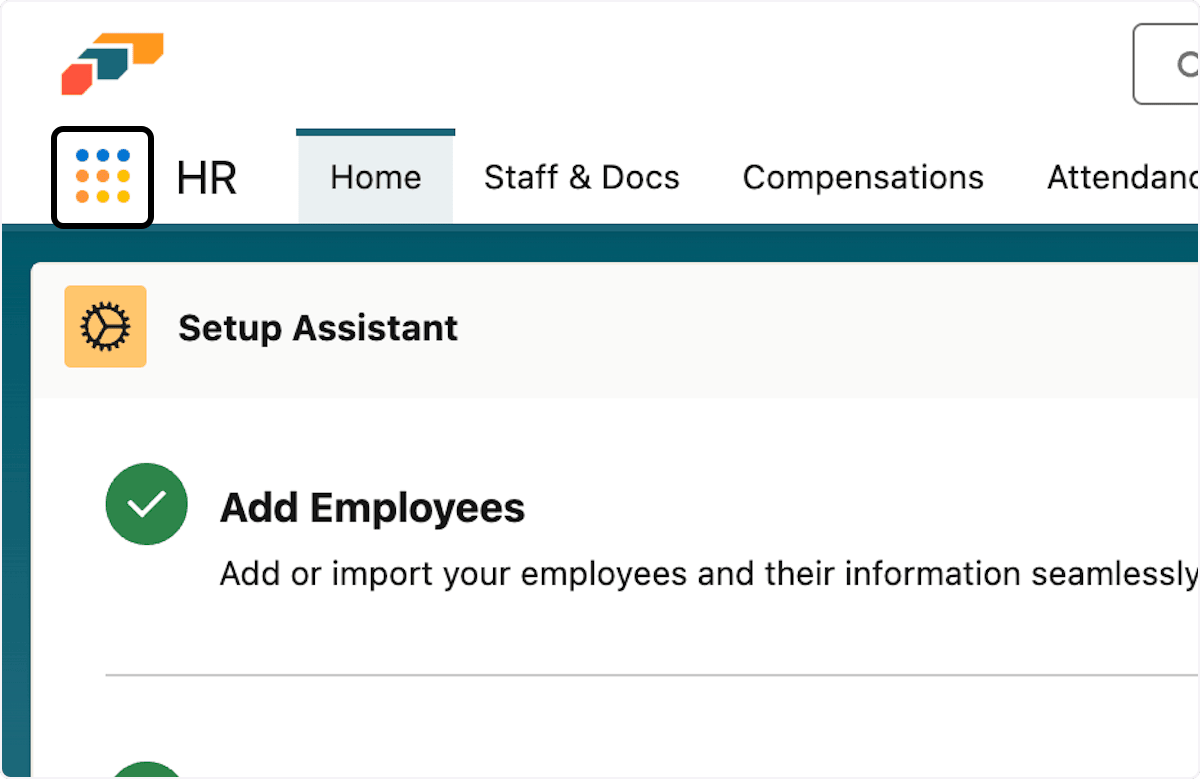
In Salesforce, open the App Launcher (⋮⋮ grid icon).
-
In search, enter
hub.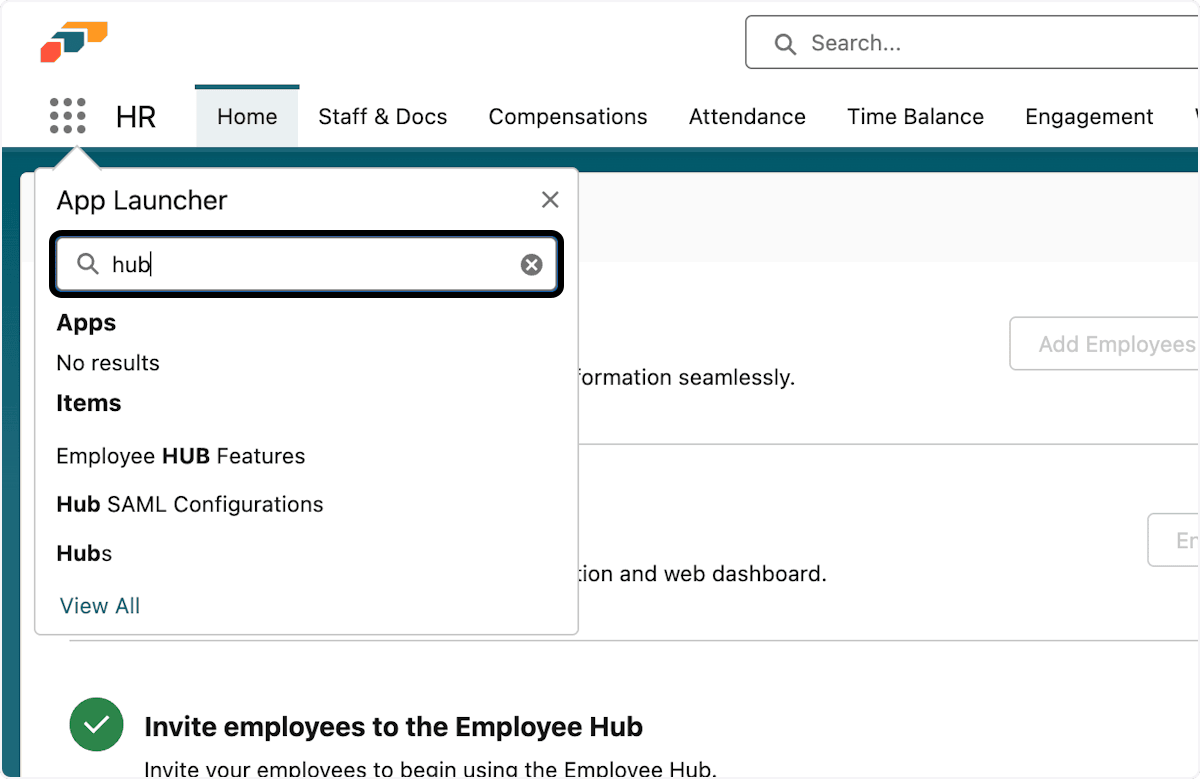
-
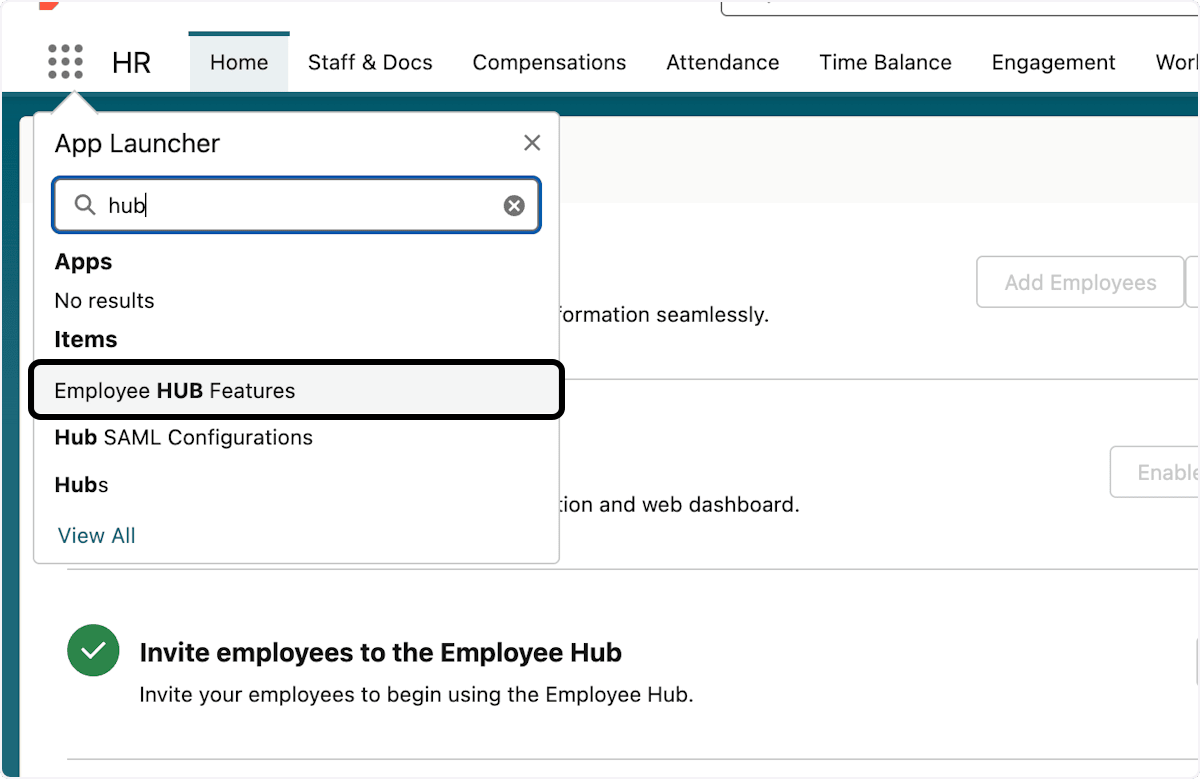
Open Employee HUB Features.
-
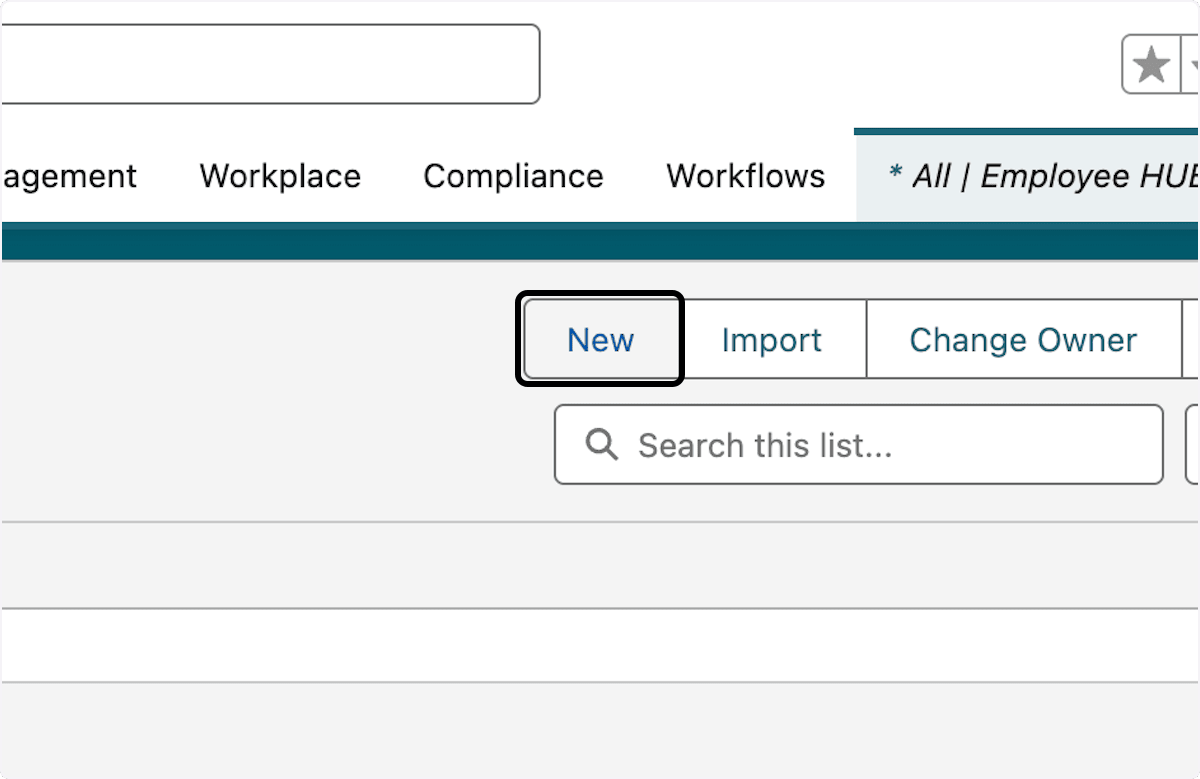
Click New.
-
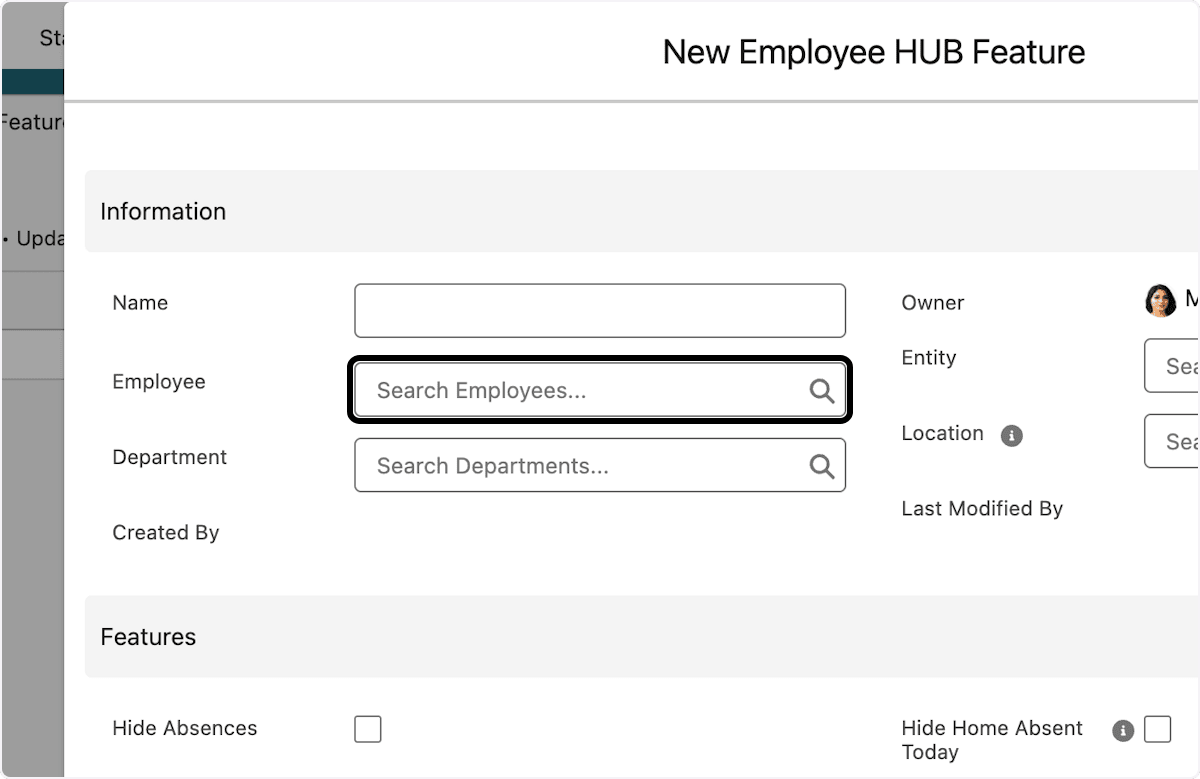
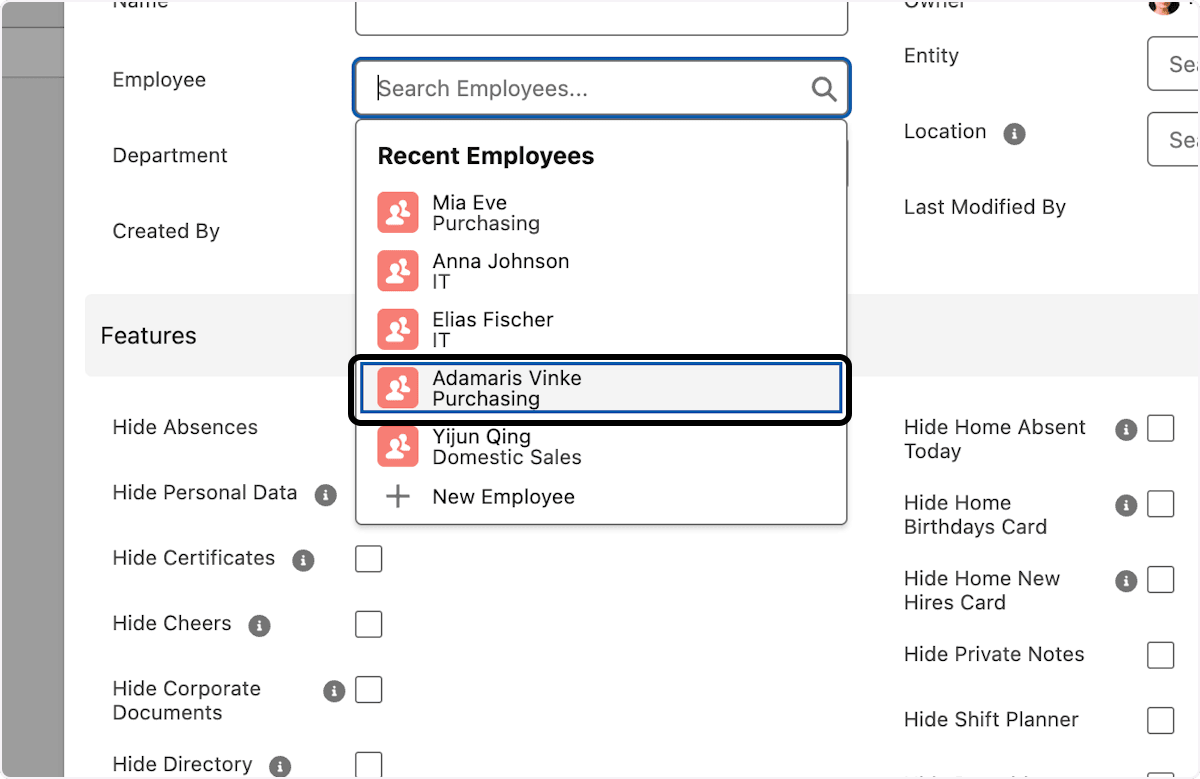
Click Search Employees.
-
Select each employee who should receive the feature set.
-
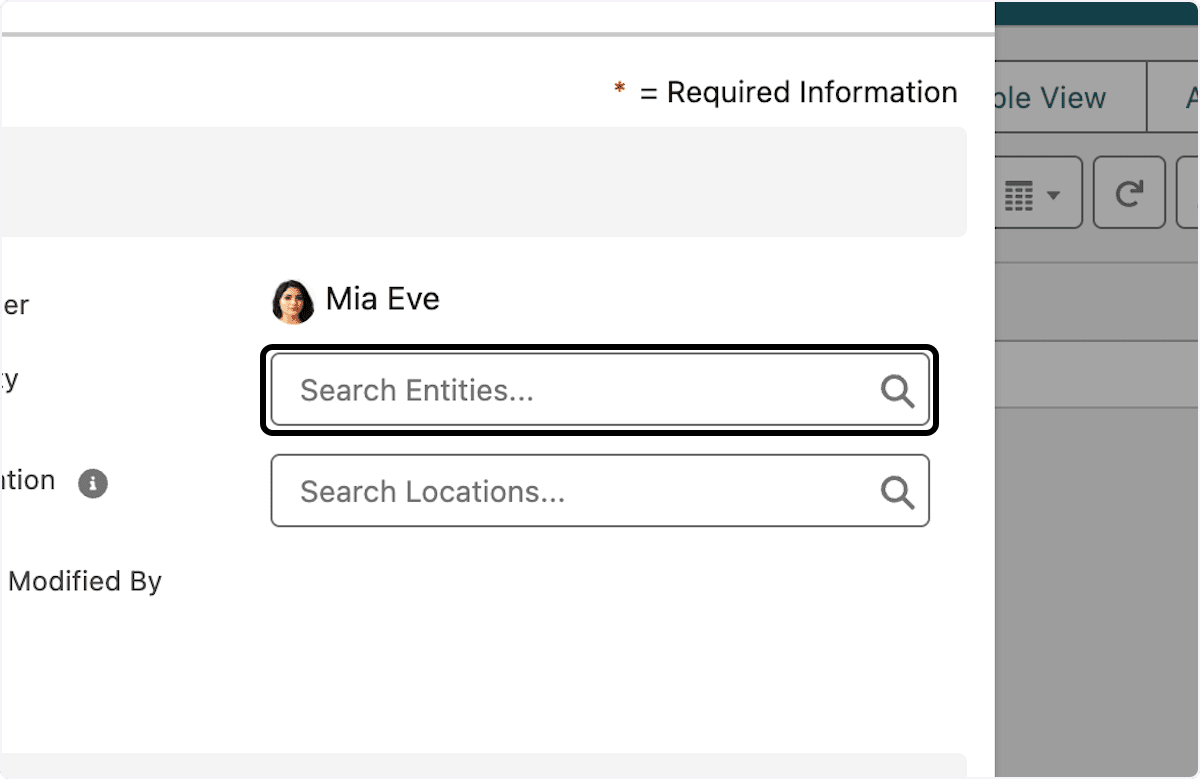
Optional: Select a department, entity, or location to apply the feature set to a group instead.
-
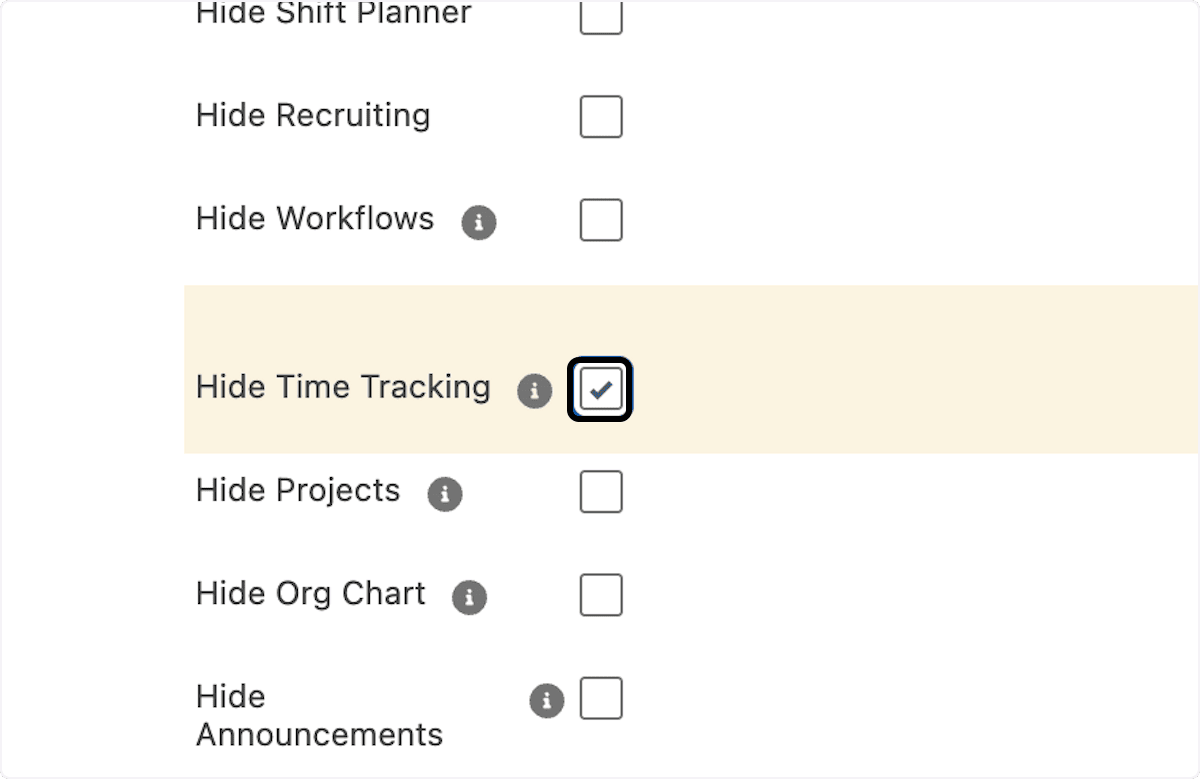
Select or clear the feature settings.
-
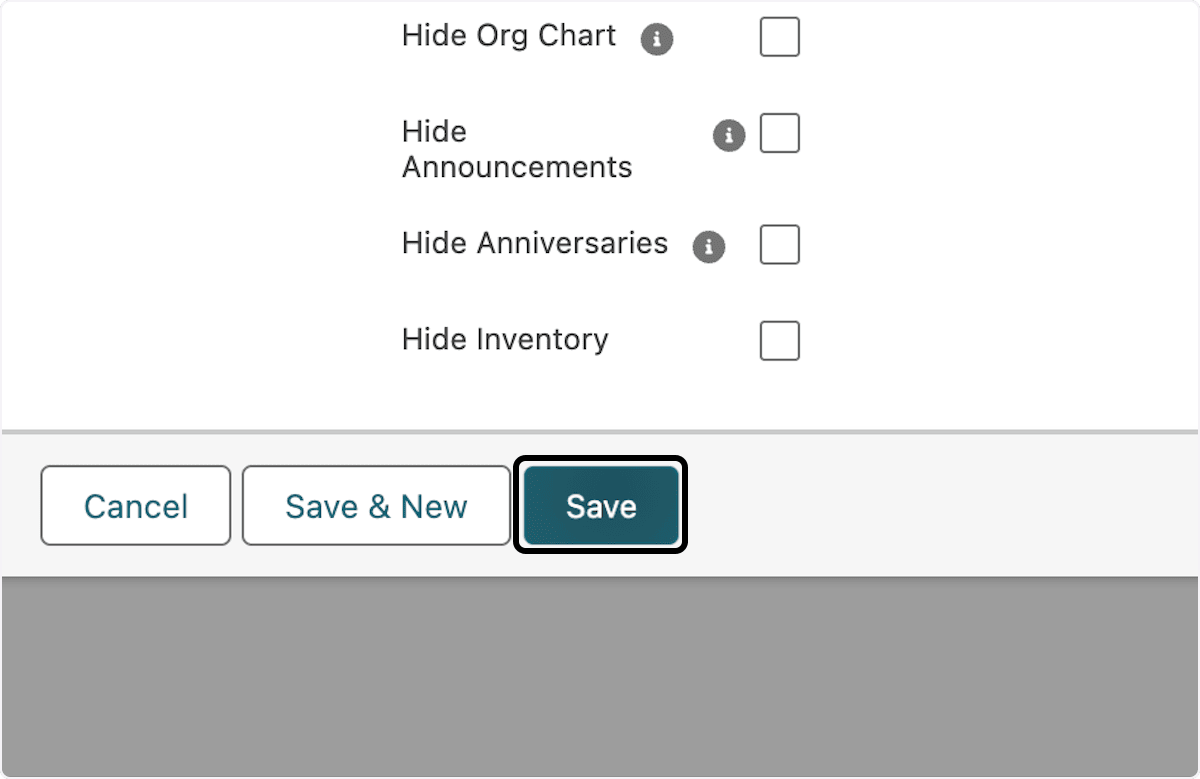
Click Save. The Hub applies the menu configuration to the selected employees or groups.
Choose the feature-set scope
When you click New, the window contains Information and Features.
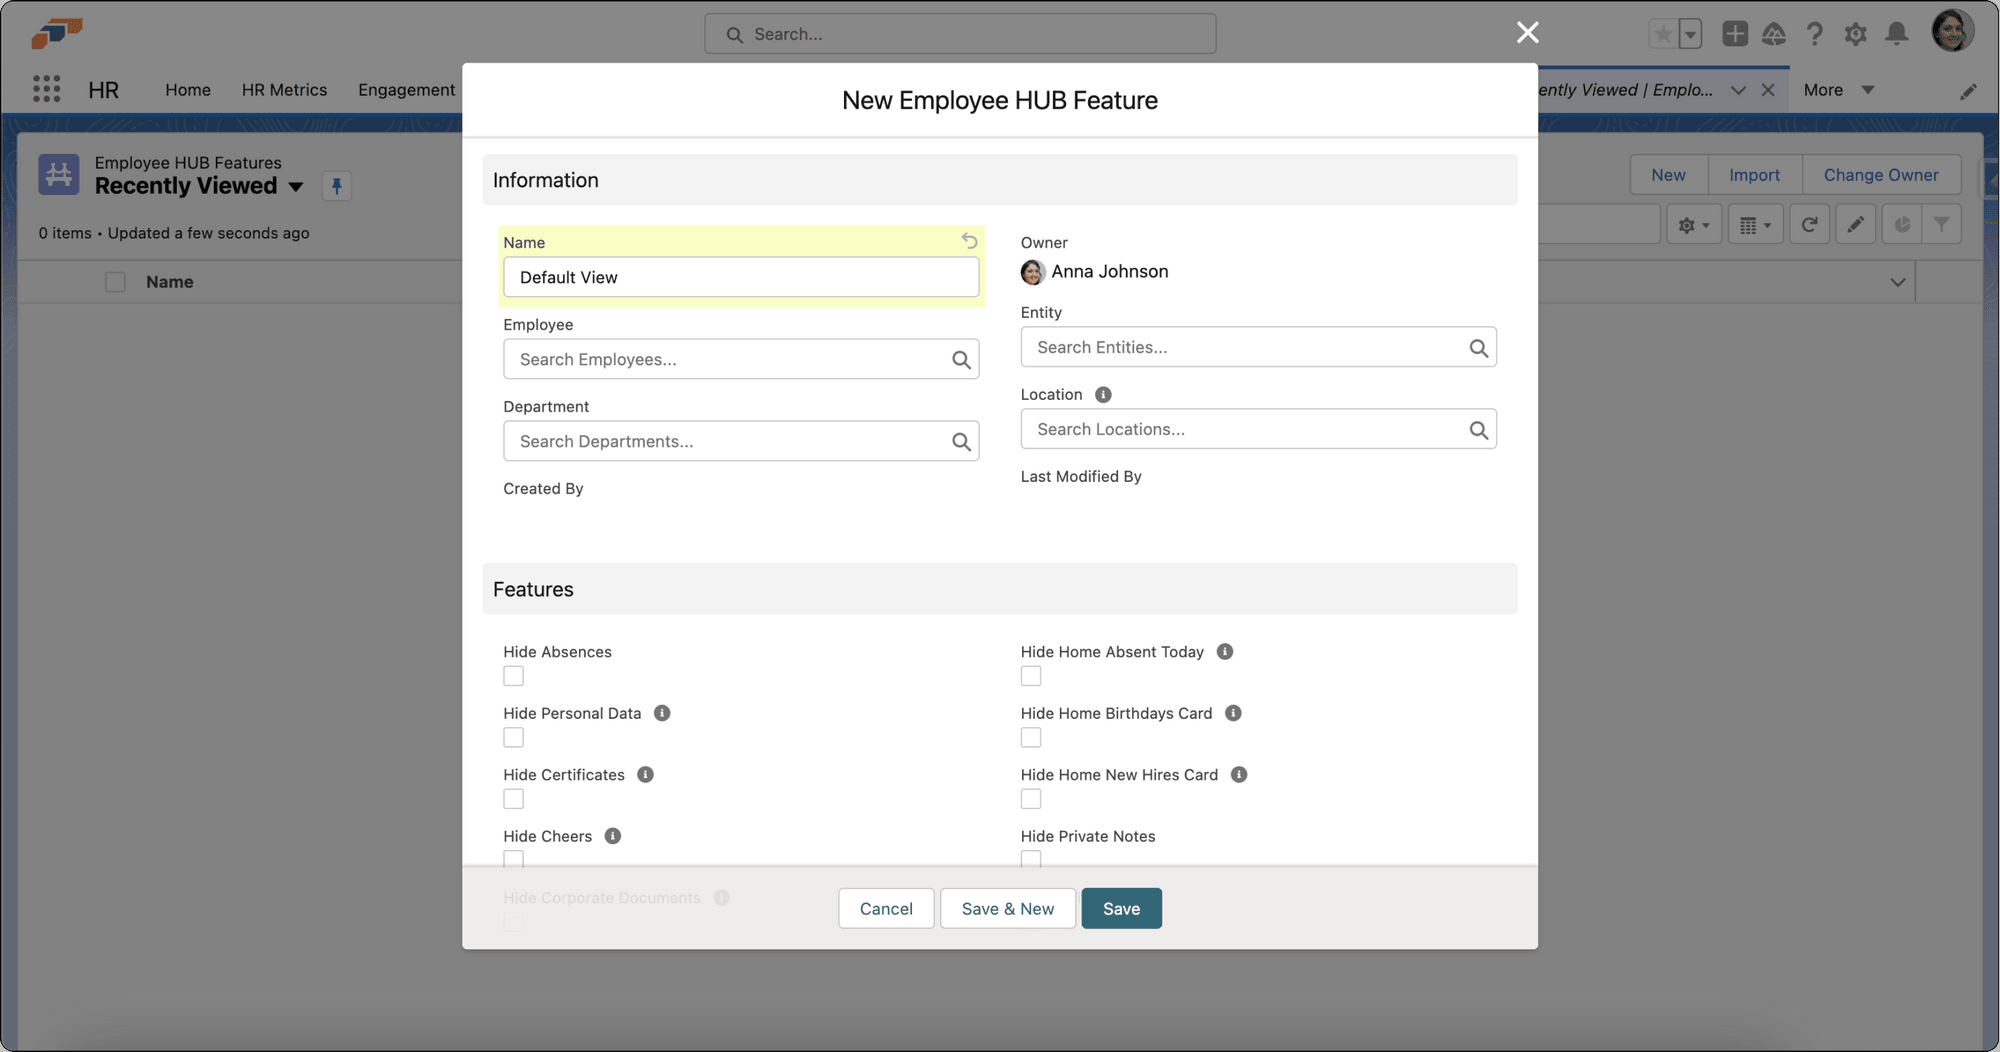
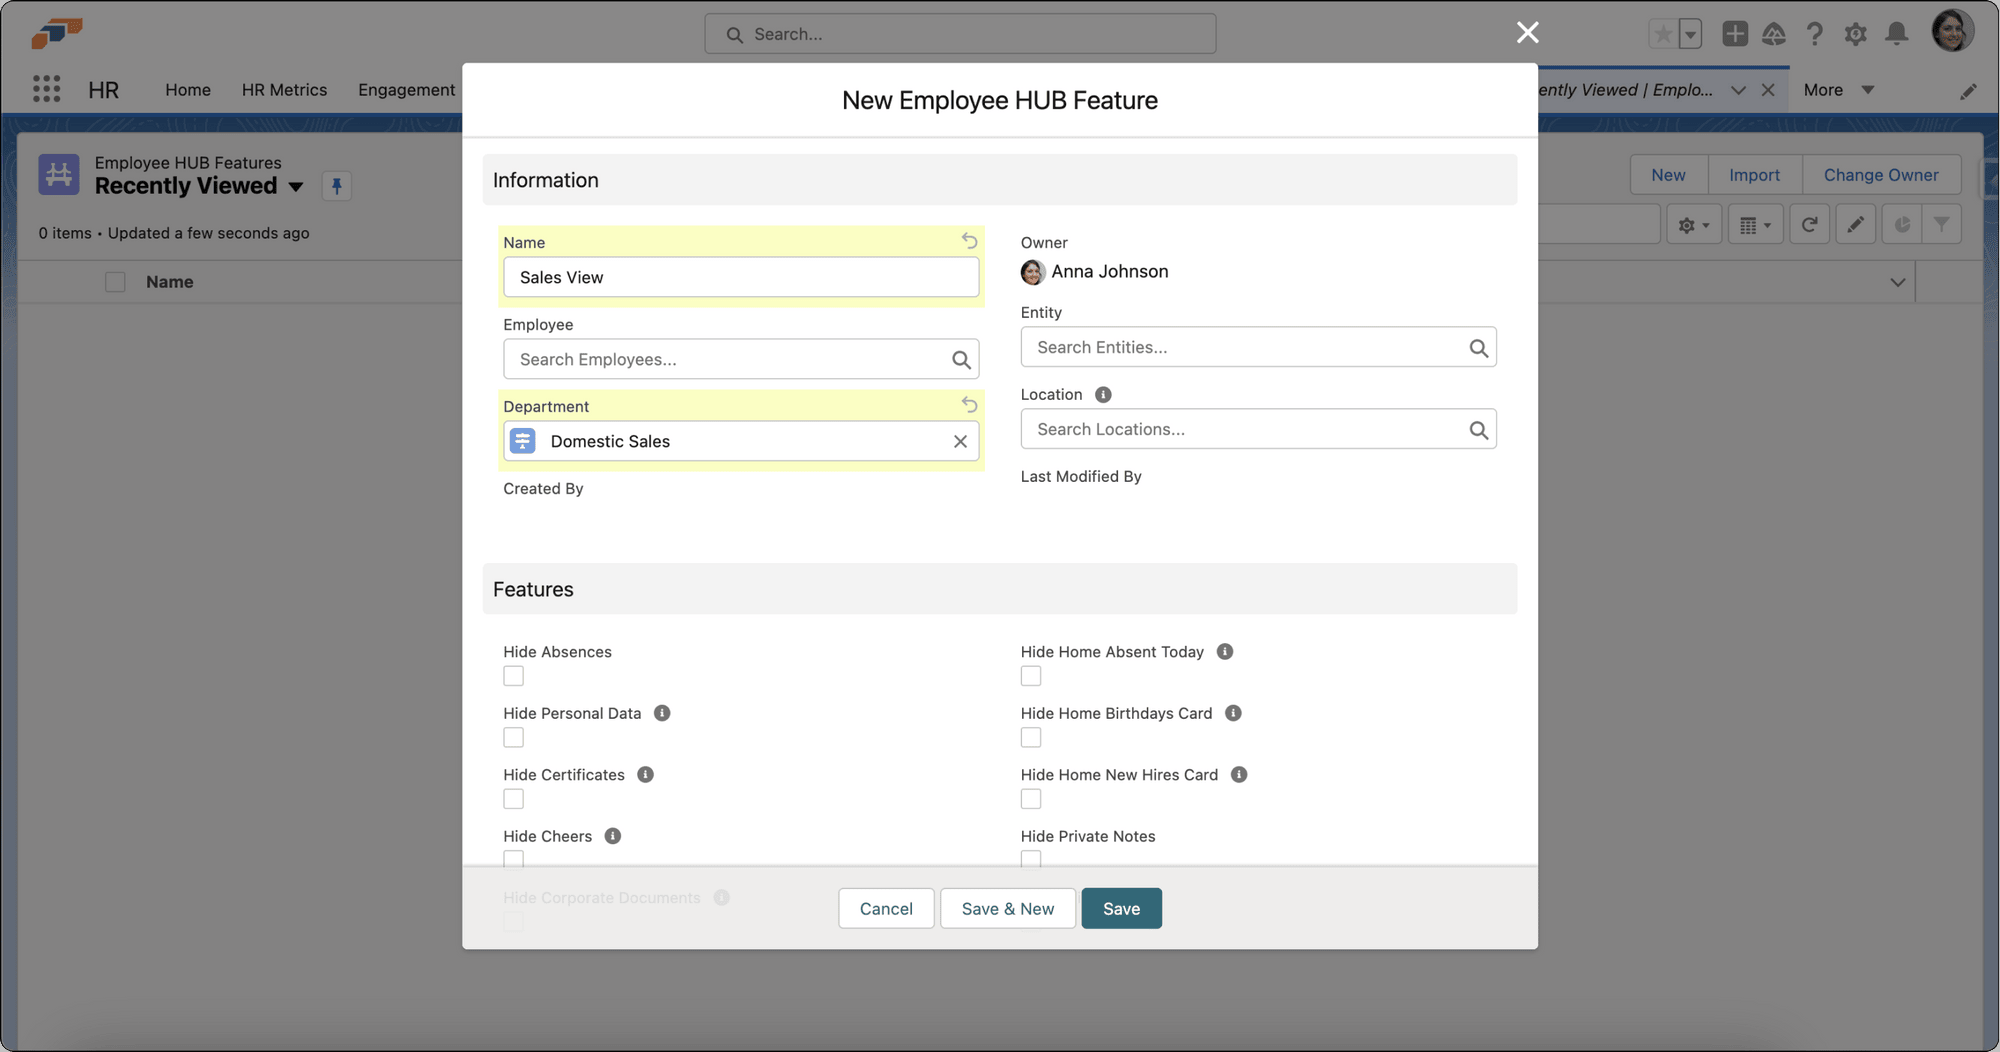
In Information, enter a name such as Default View or Sales View. Select employees, departments, entities, or locations. If you make no selection, the view applies to all employees.
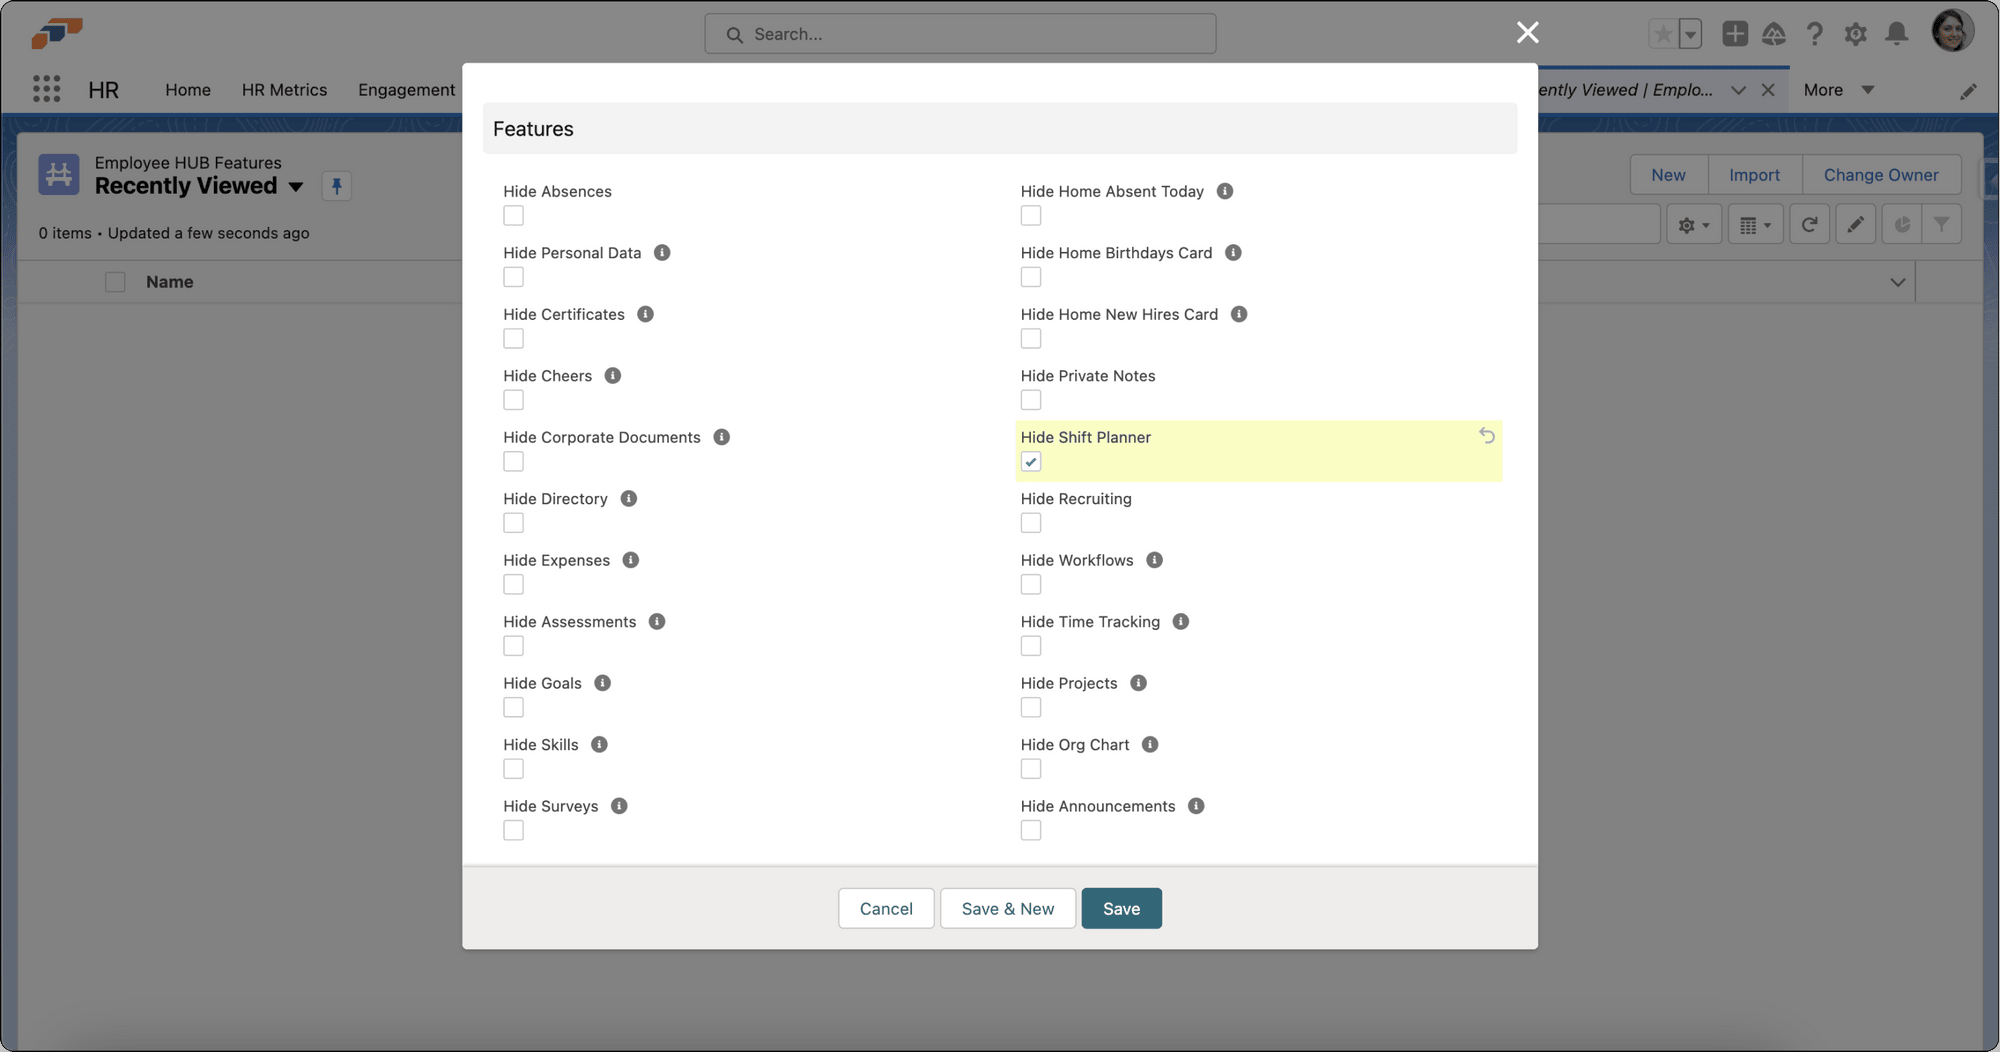
In Features, select the checkboxes for features you want to hide. For example, hide Shift Planner for teams that do not work in shifts.
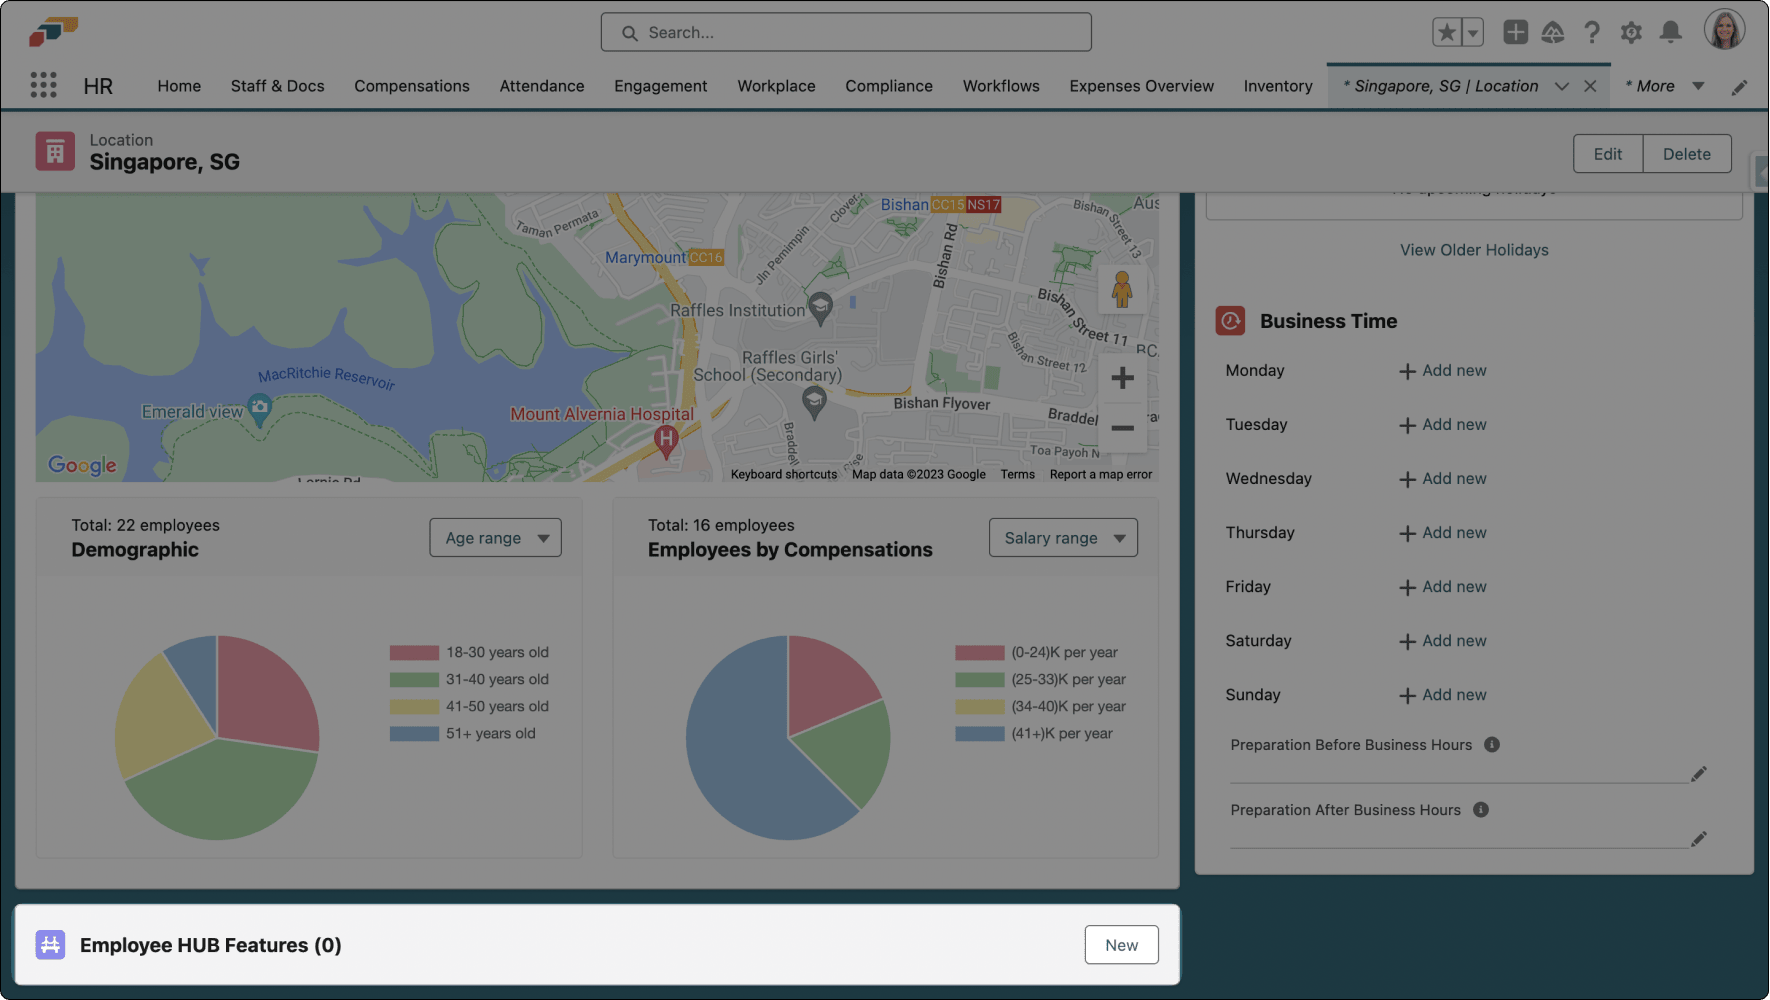
You can also configure feature visibility at the bottom of a location record or on the Employee Hub Features tab of an employee record.
Change the Hub domain
- In flair HR, go to HR Admin → General → Settings.
- Find Domain.
- Enter a domain such as
yourcompany. The Hub URL becomeshttps://yourcompany.hub.flair.hr/. - Save the settings. The Hub uses the new domain.
Set the inactivity timeout
The security timeout cannot be disabled.
- In flair HR, go to HR Admin → Hub Settings → Security.
- In Inactivity Timeout, enter the required duration.
- Save the settings. The Hub ends inactive sessions after that duration.
Update your Employee Hub settings
-
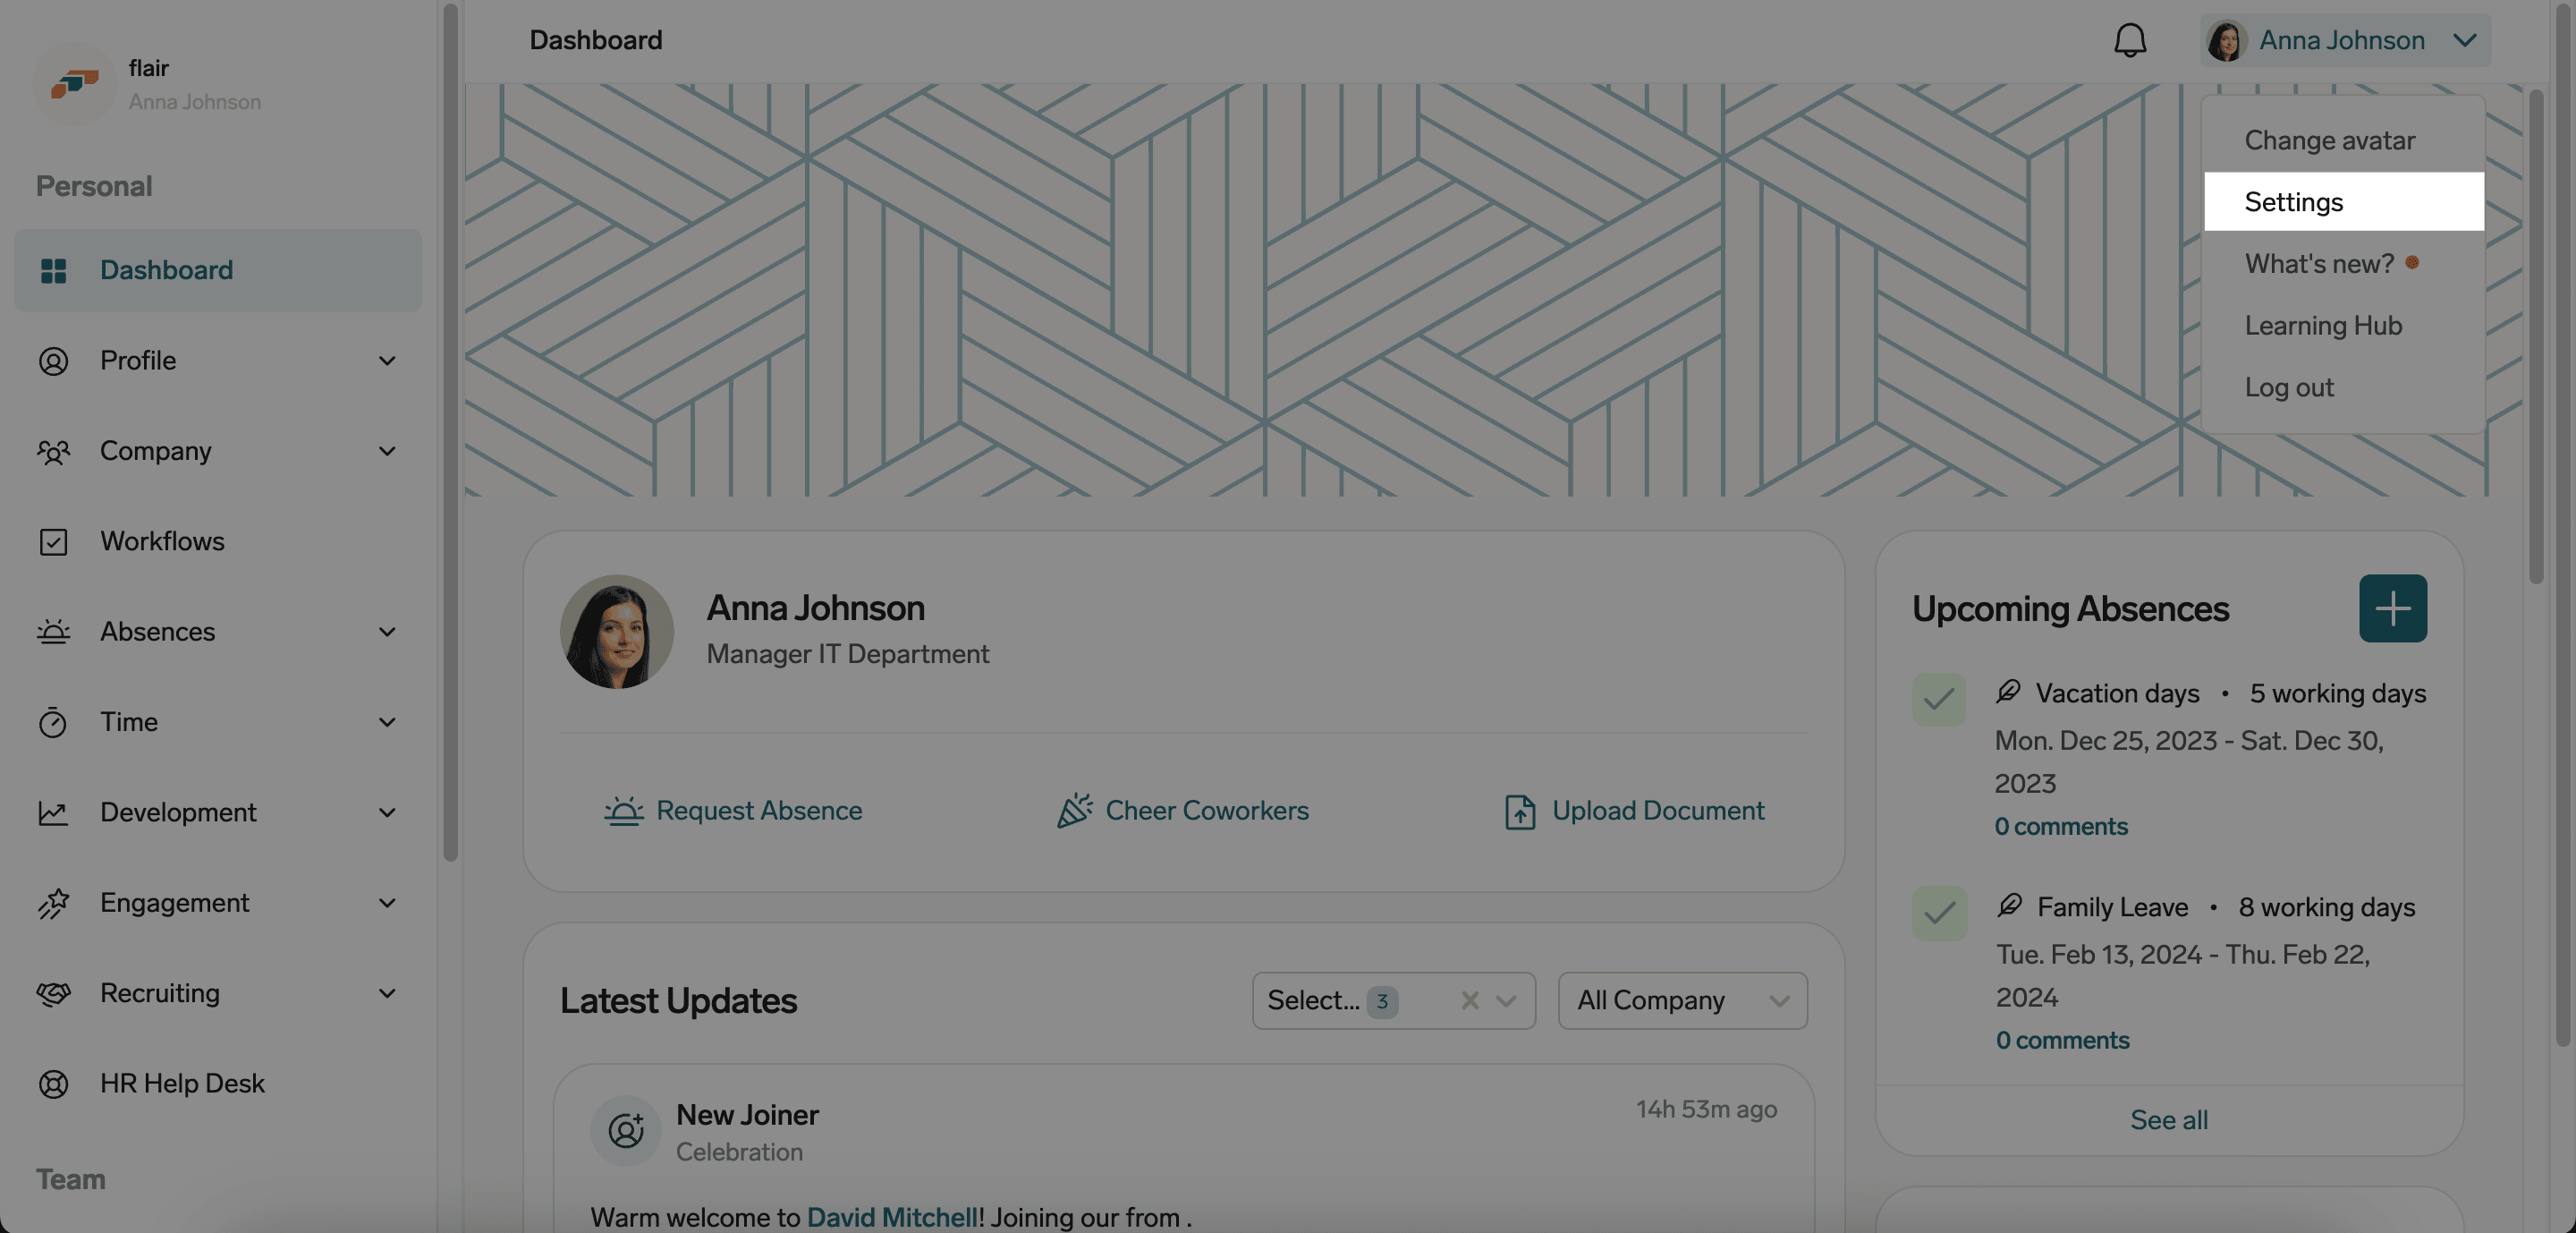
In the Employee Hub, click your name.
-
Click Settings.
-
Open one of these sections:
Section What it controls General Hub language and date format, and the Birthday switch. English uses DD/MM/YYYY; English (US) usesMM/DD/YYYY. Eight languages are available.Notification Settings Email, Slack, and mobile notifications for events such as approved absence requests, approved timesheets, comments, and assigned shifts. Customer Support Temporary flair Customer Support access to your Hub account.
Hide your birthday from colleagues
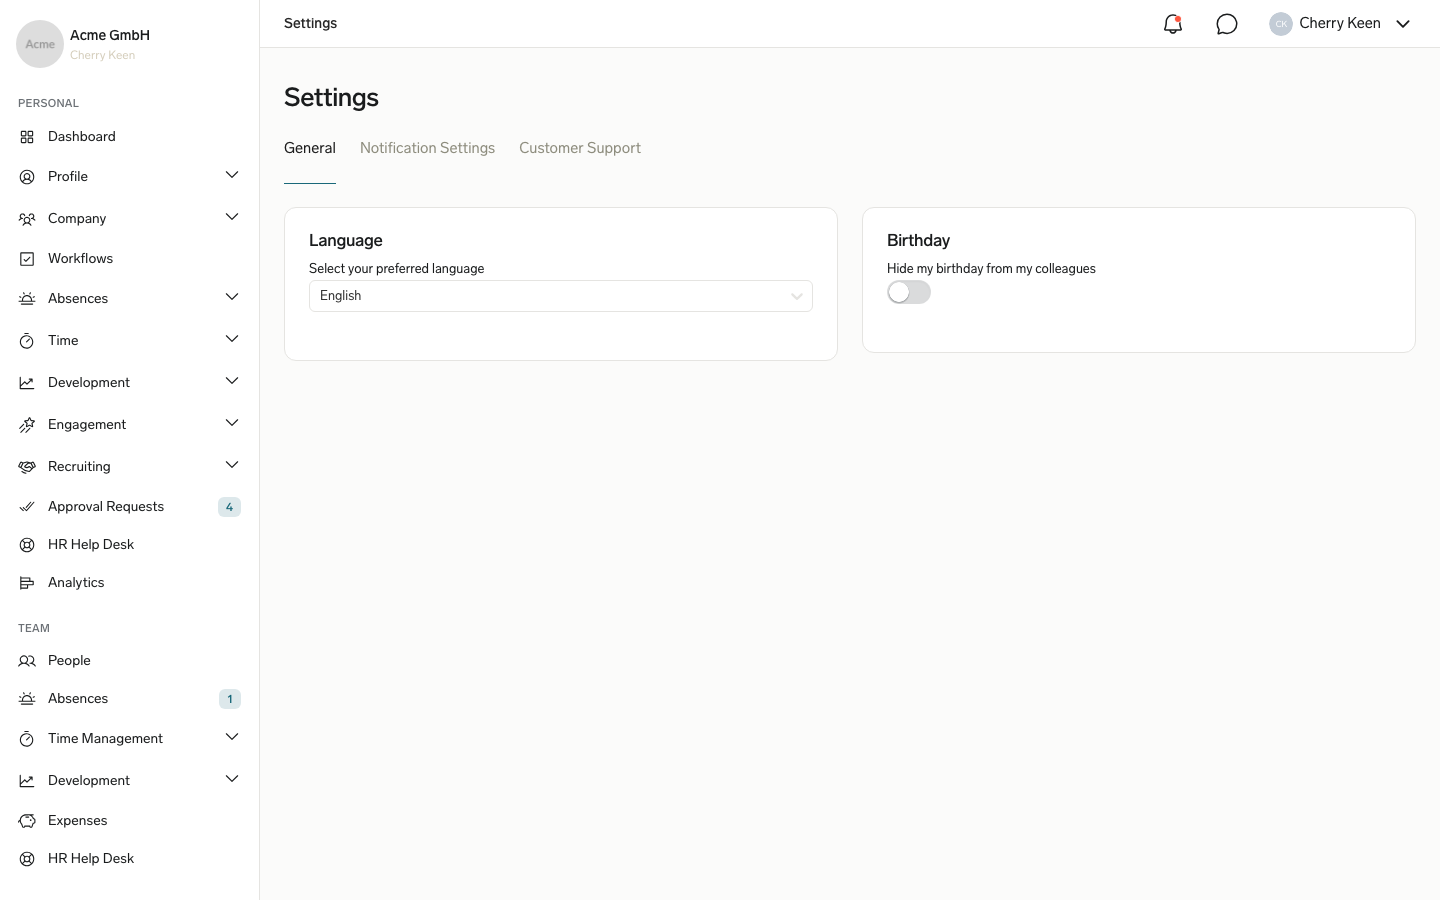
- In the Employee Hub, go to Settings → General.
- In Birthday, turn on the switch next to Hide my birthday from my colleagues. The change saves immediately, and your birthday no longer appears in your colleagues' birthday lists.
To show your birthday again, turn the switch off.
Manage your notifications
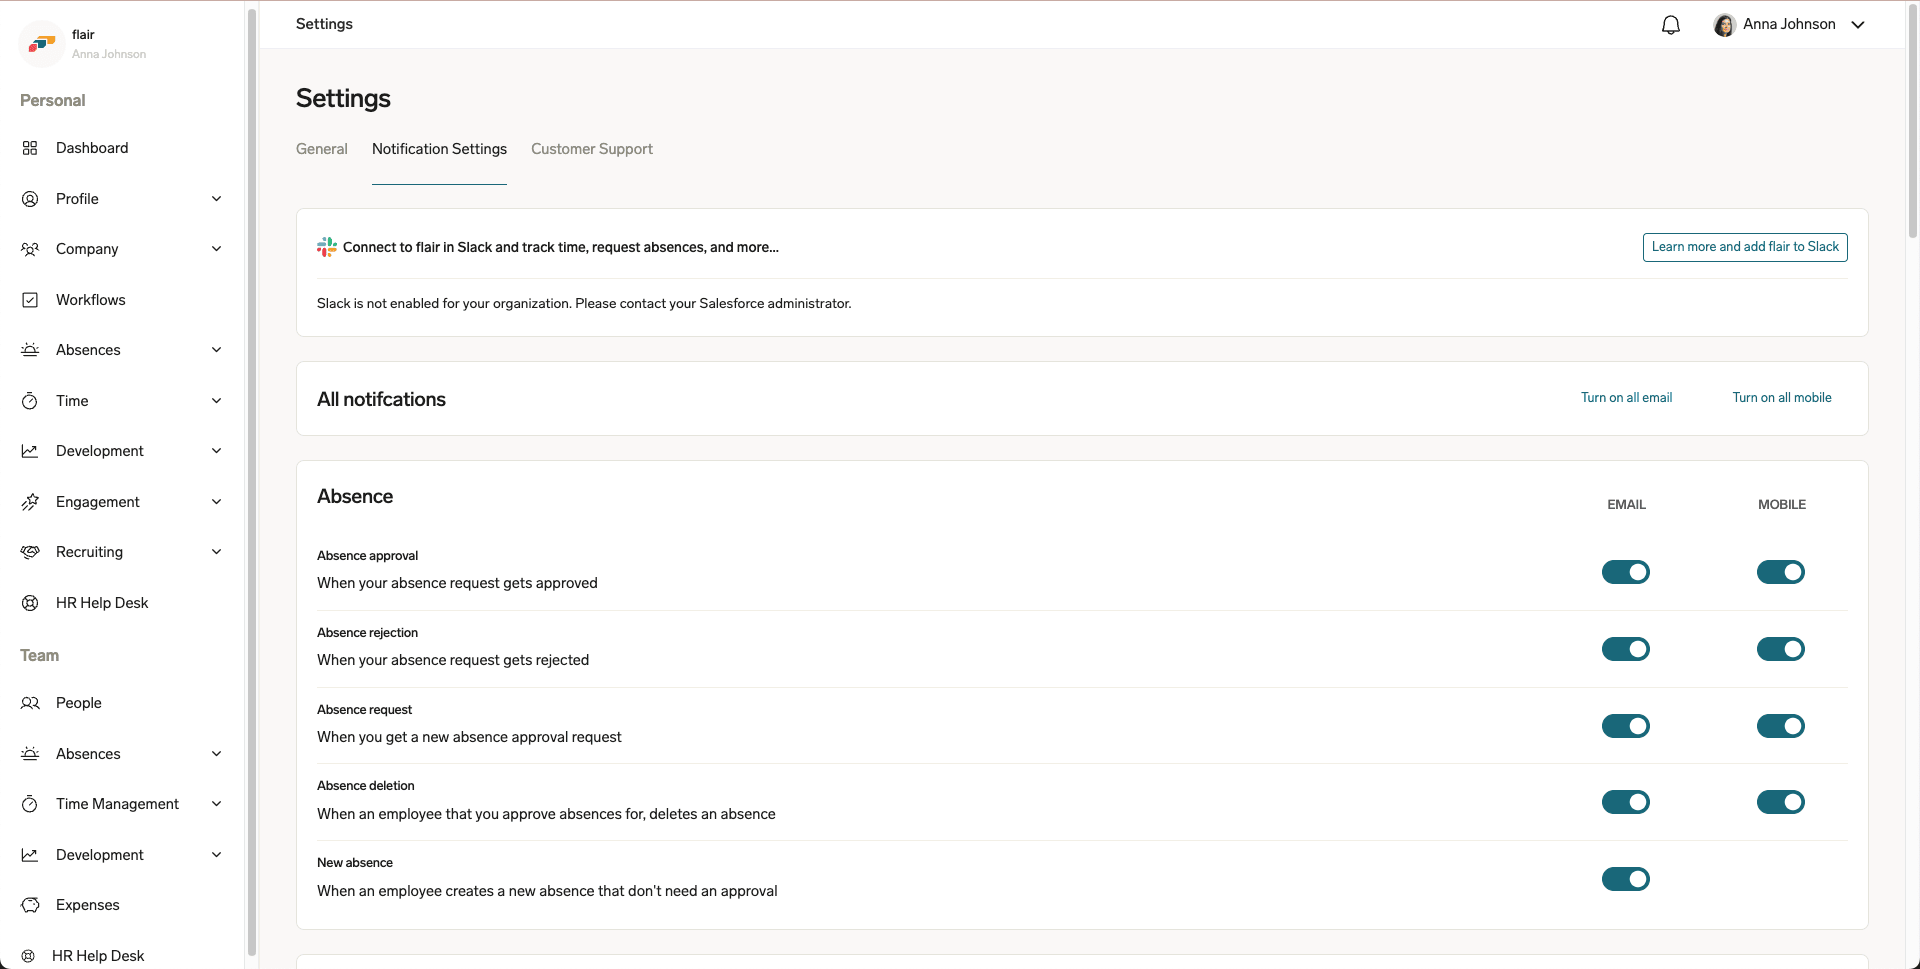
- In the Employee Hub, go to Settings → Notification Settings.
- Select a category, such as Workflows, Absences, or Documents.
- Enable or disable email, Slack, and mobile notifications for the category.
- To stop all email notifications, disable the option for all email notifications.
- Save your settings.
Work through notifications in the Employee Hub
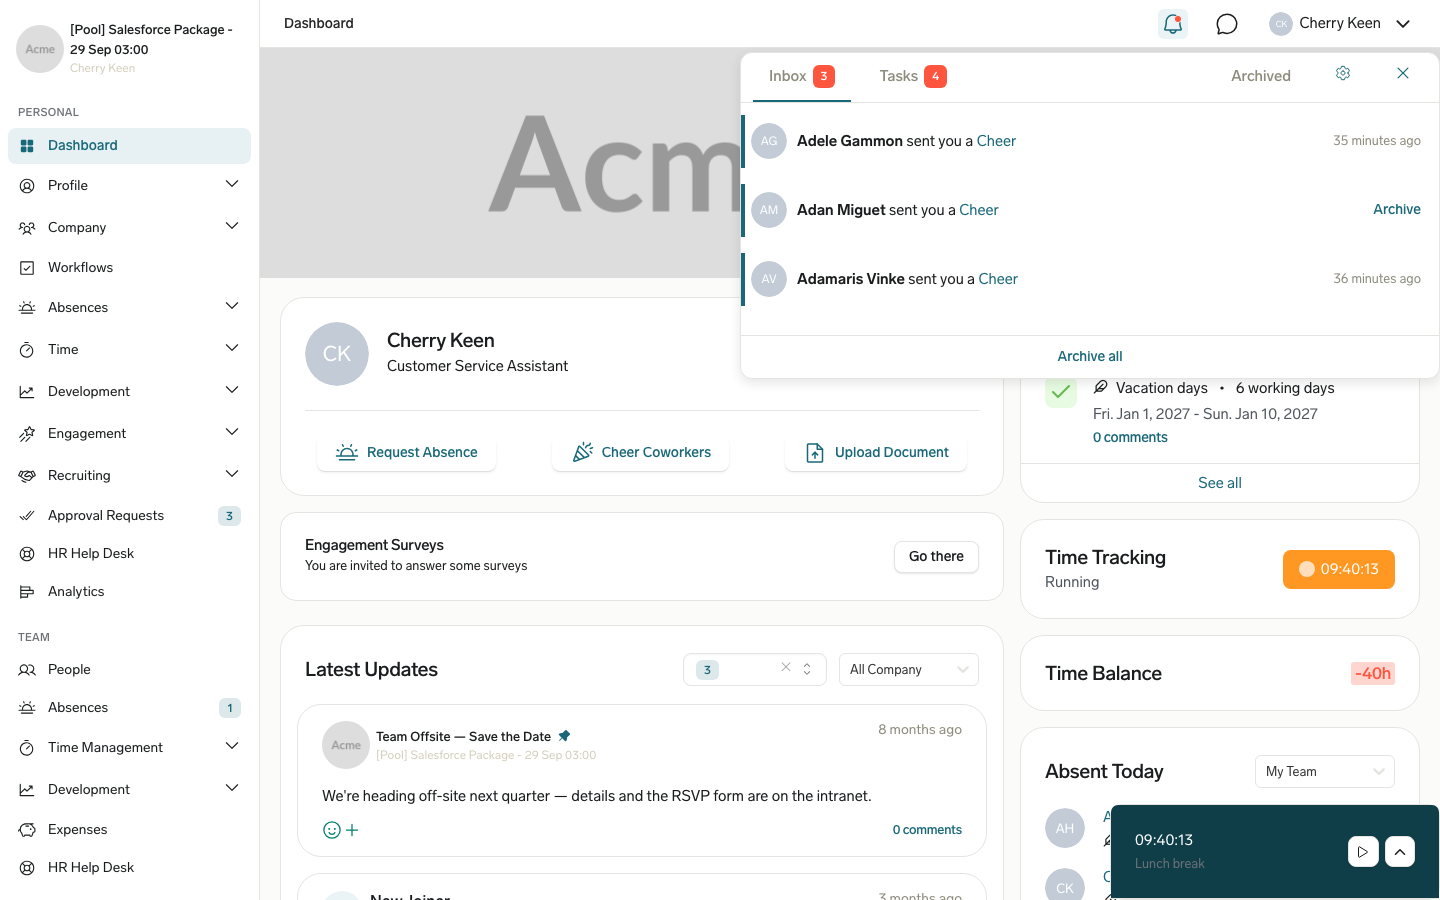
Click the bell icon at the top of the Employee Hub to open the notifications panel. It has three tabs:
- Inbox lists updates for you, with a counter for unread notifications.
- Tasks lists items that need your action. A red bar marks tasks that are due soon.
- Archived lists notifications you have archived.
To act on a notification, hover over it:
- On the Inbox or Tasks tab, click Archive to move it to Archived.
- On the Tasks tab, click Open to go to the item that needs your action.
- On the Archived tab, click Unarchive to move it back.
To clear your inbox at once, click Archive all at the bottom of the Inbox tab. To change which notifications you receive, click the settings (gear) icon in the panel header. It opens Notification Settings. When you close the panel by clicking the bell icon again or anywhere outside the panel, your inbox notifications are marked as read, as are your task notifications if you opened the Tasks tab.
Work through notifications in the mobile app
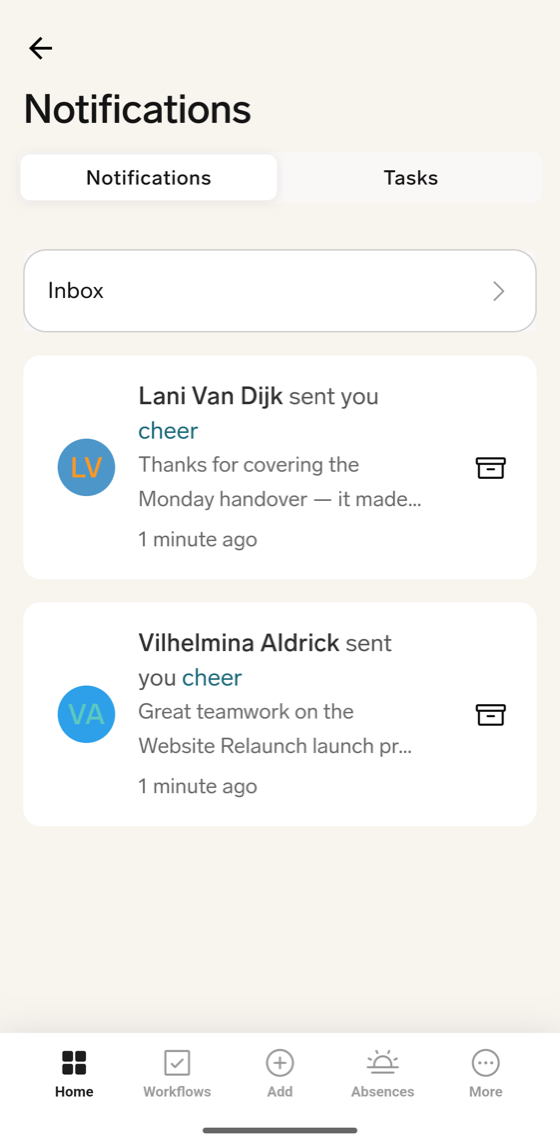
In the mobile app, tap the bell icon on the home screen to open Notifications. The Notifications tab lists your inbox, and Tasks lists items that need your action. Tap Inbox to switch to Tasks or Archived, and tap the archive icon on a notification to archive it. When your inbox holds more than two notifications, tap Archive All at the bottom of the list, then confirm with Archive All. To restore an archived notification, switch to Archived and tap the unarchive icon on it. The app shows "Notification unarchived", and the notification leaves Archived.
To change the app language, tap More in the bottom navigation, tap the gear icon, and then tap Language. The app opens its page in your device settings, where you choose the language.
To grant or revoke temporary Hub access, follow Get started with flair.
Receive push notifications in the mobile app
The flair mobile app sends push notifications for the categories you enable for mobile in Notification Settings.
-
Sign in to the mobile app. On iOS and on Android 13 or later, the app asks for permission to send notifications. On Android 12 or earlier, there is no prompt because notifications are allowed by default.
-
If prompted, allow notifications. Your phone is now registered for flair push notifications. If you deny the permission or turn off notifications for the flair app, the phone receives none; to change this later, allow notifications for the flair app in your phone's settings.
-
Tap a push notification to open the related item:
- An absence notification opens the absence details.
- An approval request notification opens the approval request.
- A time entry or time entry change request notification opens its details.
- A workflow notification opens the workflow.
- A comment notification opens the comment thread.
- A Cheer notification opens the Cheer, or Cheers if the Cheer can't be loaded.
- A shift transfer notification opens the shift transfers inbox on the Received or Sent tab, with the request open.
Other notifications, such as chat messages or notifications about a deleted absence or time entry, open the app without a specific screen.
When you sign out of the app while your phone is online, your phone stops receiving flair push notifications until you sign in again.
Get notified about new chat messages
When your organization uses chat, flair can alert you about unread messages by email, Slack, or mobile notification, and show unread signals in your browser. These alerts are skipped when you have already read the message in the Hub.
- In the Employee Hub, go to Settings → Notification Settings.
- Select the Chat category. This category appears when Chat is available for your audience.
- Enable or disable email, Slack, and mobile notifications for New chat message. The toggles save immediately.

For recipients with an active Employee Hub connection, flair sends an email, Slack, or mobile alert only if they have not read the message within a short grace period of about two minutes. Recipients without a live connection can receive the alert immediately. If you read the conversation in the Hub first, you receive no alert.
Read the in-browser chat signals
While you have the Employee Hub open, unread chat messages appear as browser signals so you notice them without switching to the chat panel:
- The browser tab title shows the unread count, such as
(3) Employee HUB | flair.hr. - A red dot appears over the flair icon on the tab.
- A short sound plays when a new message arrives.
- When the Hub tab is not focused, a desktop notification appears for a new message.
Your browser asks for permission to show desktop notifications the first time you open the chat panel. This permission controls desktop notifications only. The chime has no in-product setting; mute or block sound for the flair site or browser tab in your browser to stop it.
For chat features and message management, see Chat with colleagues in the Employee Hub.
Reset an Employee Hub password
- In flair HR, go to HR → Employees.
- Open the employee who needs a password reset.
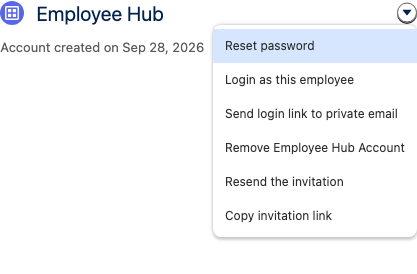
- On the Employee Hub card, open the actions menu.
- Select Reset password. The employee receives a reset email.
- Ask the employee to open the email link and enter a new password.
- Ask the employee to sign in with the new password.
Remove an employee's Employee Hub account
HR Admins can remove an employee's Employee Hub account without deleting the employee. The employee loses access to the Employee Hub, and all their data stays in Salesforce.
- In flair HR, go to HR → Employees.
- Open the employee whose account you want to remove.
- On the Employee Hub card, open the actions menu.
- Select Remove Employee Hub Account. This option appears when the employee has registered a Hub account or your organization uses SAML sign-in.
- In the confirmation dialog, click Yes, Remove Account. A success message confirms that the Hub account was removed.
To give the employee access again, invite them to the Employee Hub again.
View reports in Analytics
In Analytics, employees see flair Reports about their own data, and managers also see reports about their team. HR Admins choose which reports appear in the Employee Hub. For the full guide, including publishing reports to the Hub, see Use Analytics in the Employee Hub.
Request Employee Hub account deletion
- As an Employee, ask your employer to delete your account. You can't delete it yourself: Delete account at the bottom of More in the flair mobile app opens a flair help page and doesn't delete anything.
- As an HR Admin, to remove only the employee's Hub access and keep their data in Salesforce, follow Remove an employee's Employee Hub account. To delete the employee record itself, follow Delete an employee.