Employees & Team Structure
This comprehensive guide covers how team logic works in flair and how to manage employees, from creating employee records to tracking their history and managing reporting structures.
Understanding Team Structure
Several structural elements in Salesforce influence what you see in the Employee Hub and how teams are organized. Understanding these concepts will help you configure your organization effectively.
Company Structure (Manager Assignment)
- The company hierarchy—specifically, manager assignments—controls who sees whom in the Employee Hub.
- Example: A manager will see all employees directly assigned to them.
- Approval processes are also based on this hierarchy.
Team Logic in the Employee Hub (Widgets)
- Widgets like Anniversaries, Birthdays, or similar follow this hierarchy-based logic.
- Visibility includes direct reports and siblings (employees who share the same manager).
Teams as a Salesforce Object
- Teams created in Salesforce are central to other processes, such as:
- Assigning tasks or approvals to entire teams in workflows.
- Automations or reports that depend on these team groupings.
Departments
- Departments are primarily used for filtering and segmenting employees.
- Useful for:
- List views.
- Analytics and reporting.
Key Takeaway
The visibility logic in Employee Hub is primarily driven by manager hierarchy, but teams and departments play crucial roles in workflows, reporting, and filtering. If you see unexpected employees in a widget, it's likely due to how the company hierarchy or sibling logic is configured.
People Overview
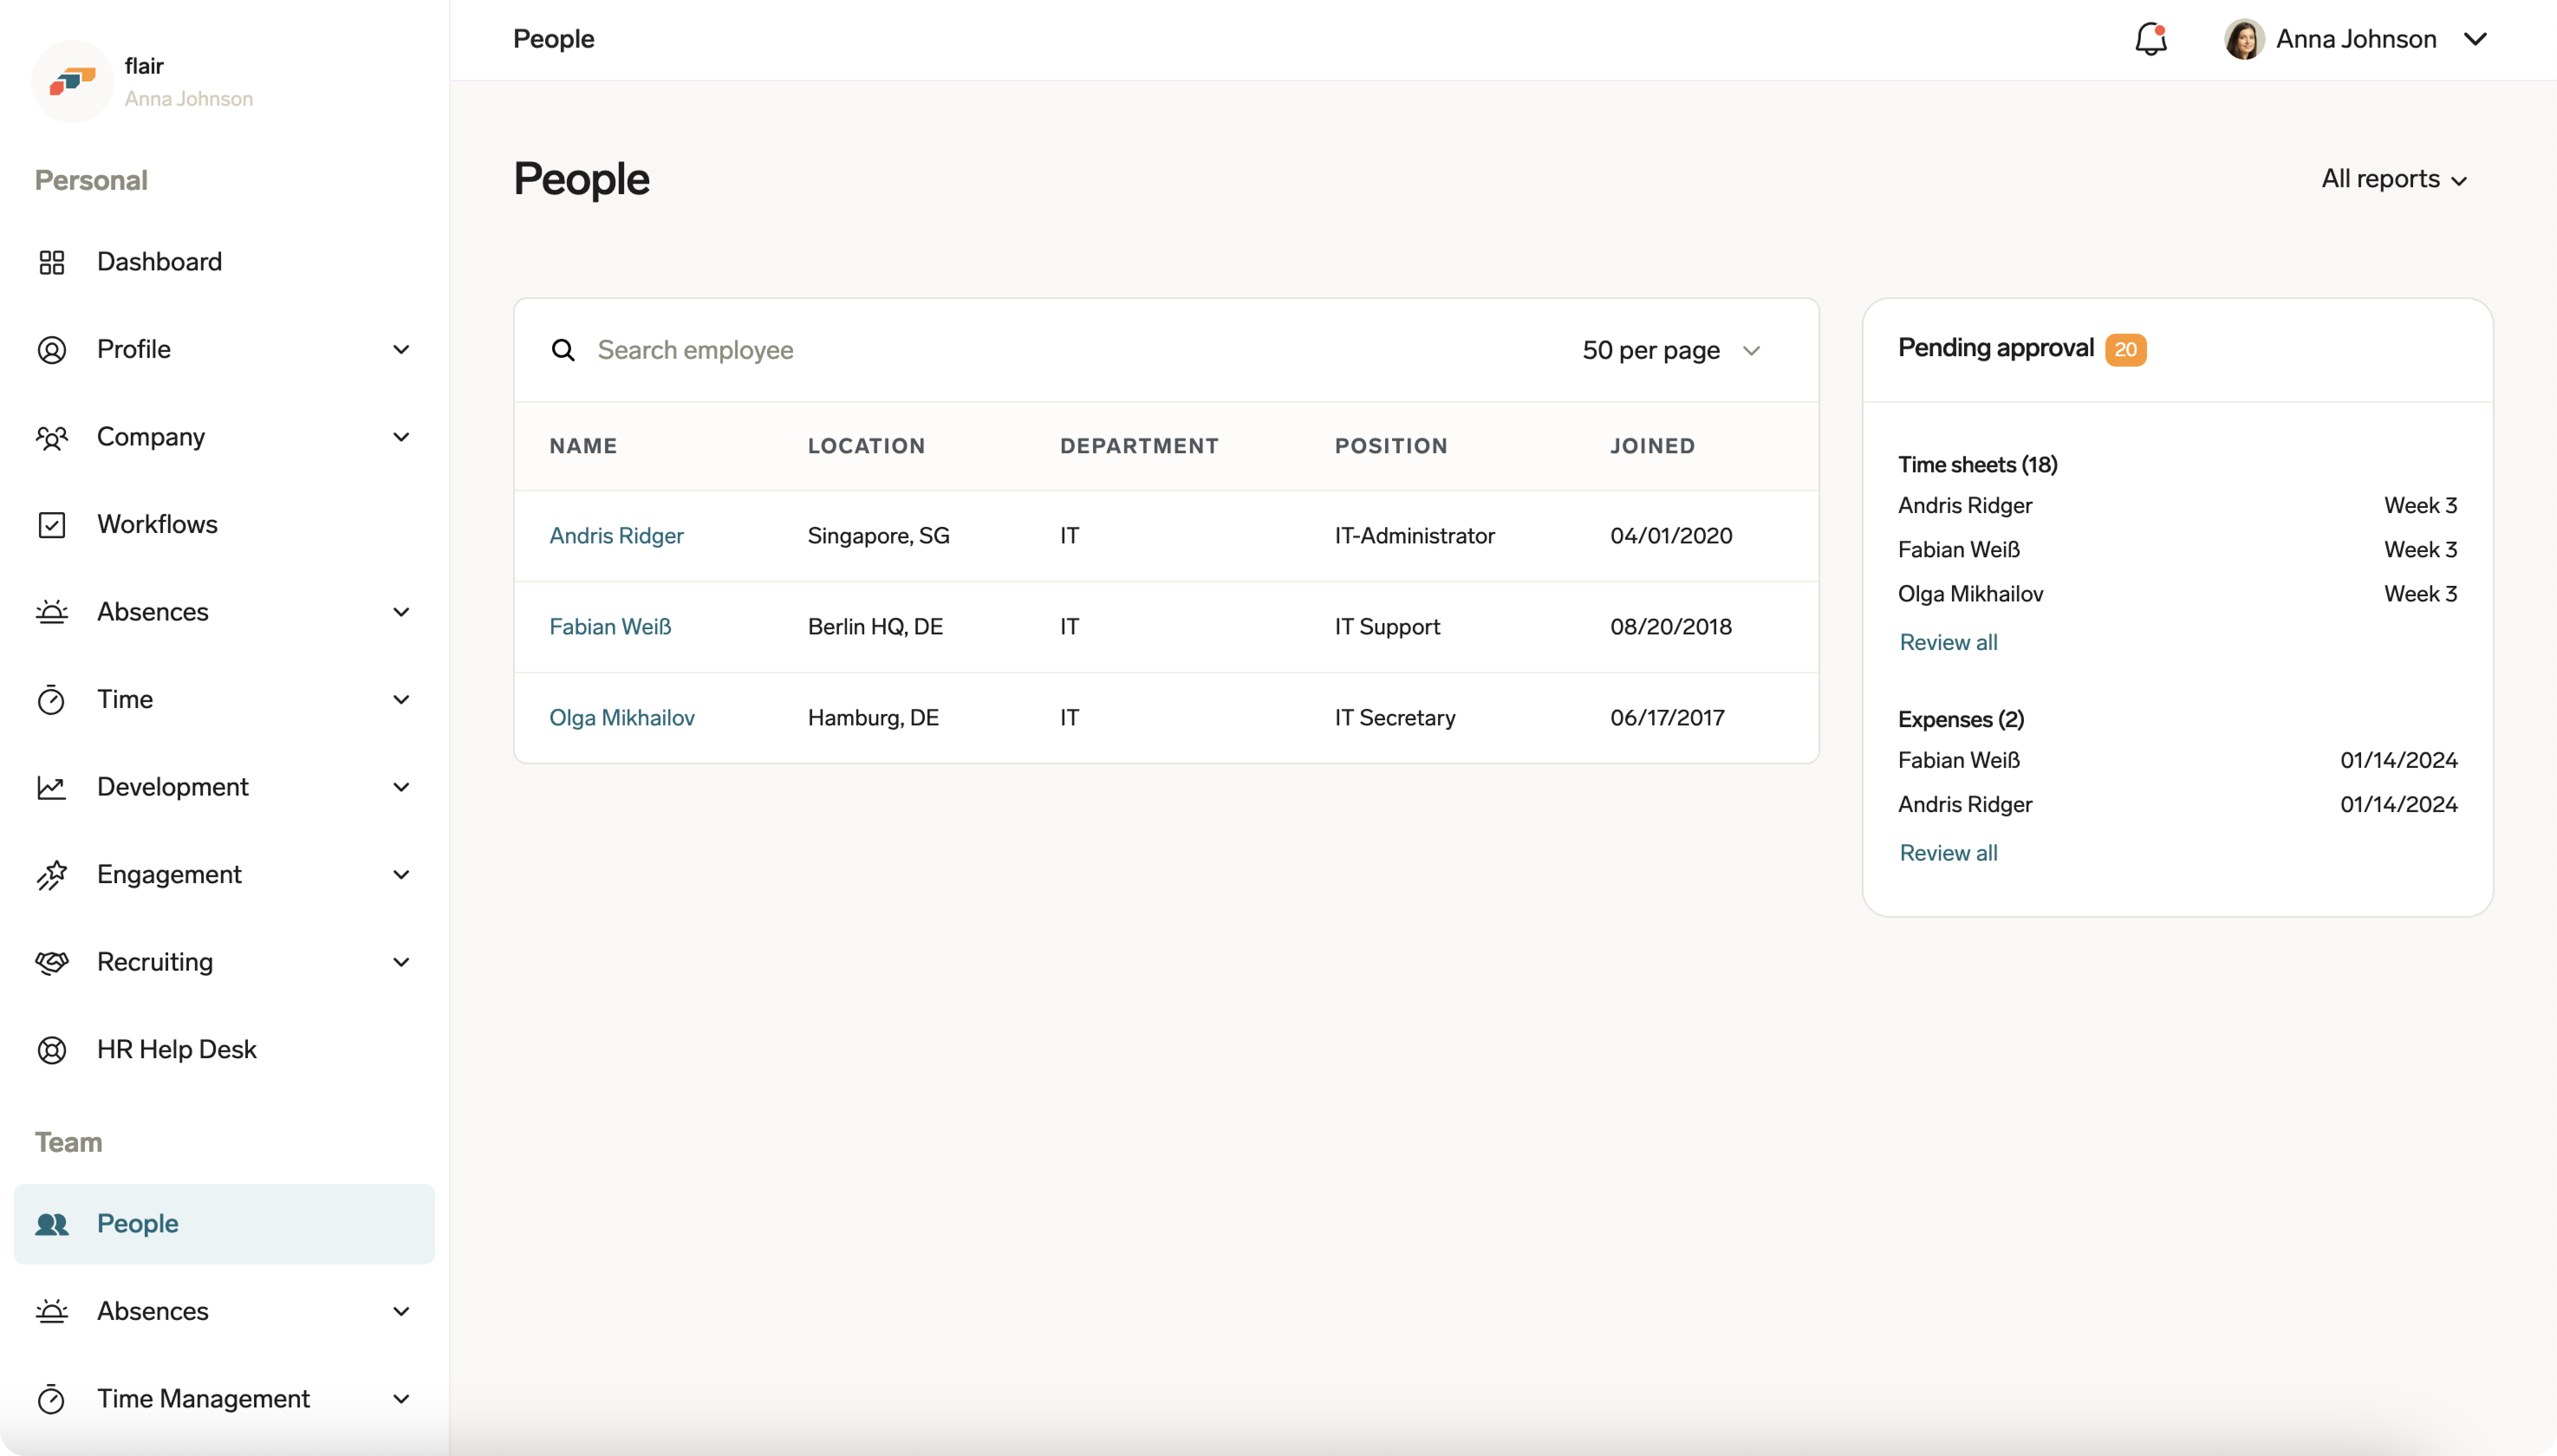
The People page gives you a helpful overview of your team. In the center, you will see the people who are part of your team. Clicking on their name will show you additional details related to that person, including their personal details, timesheets, and history.
On the right side of the people page, you can see a brief overview of items requiring your approval, such as timesheets, expenses, and absence requests.
Creating an Employee
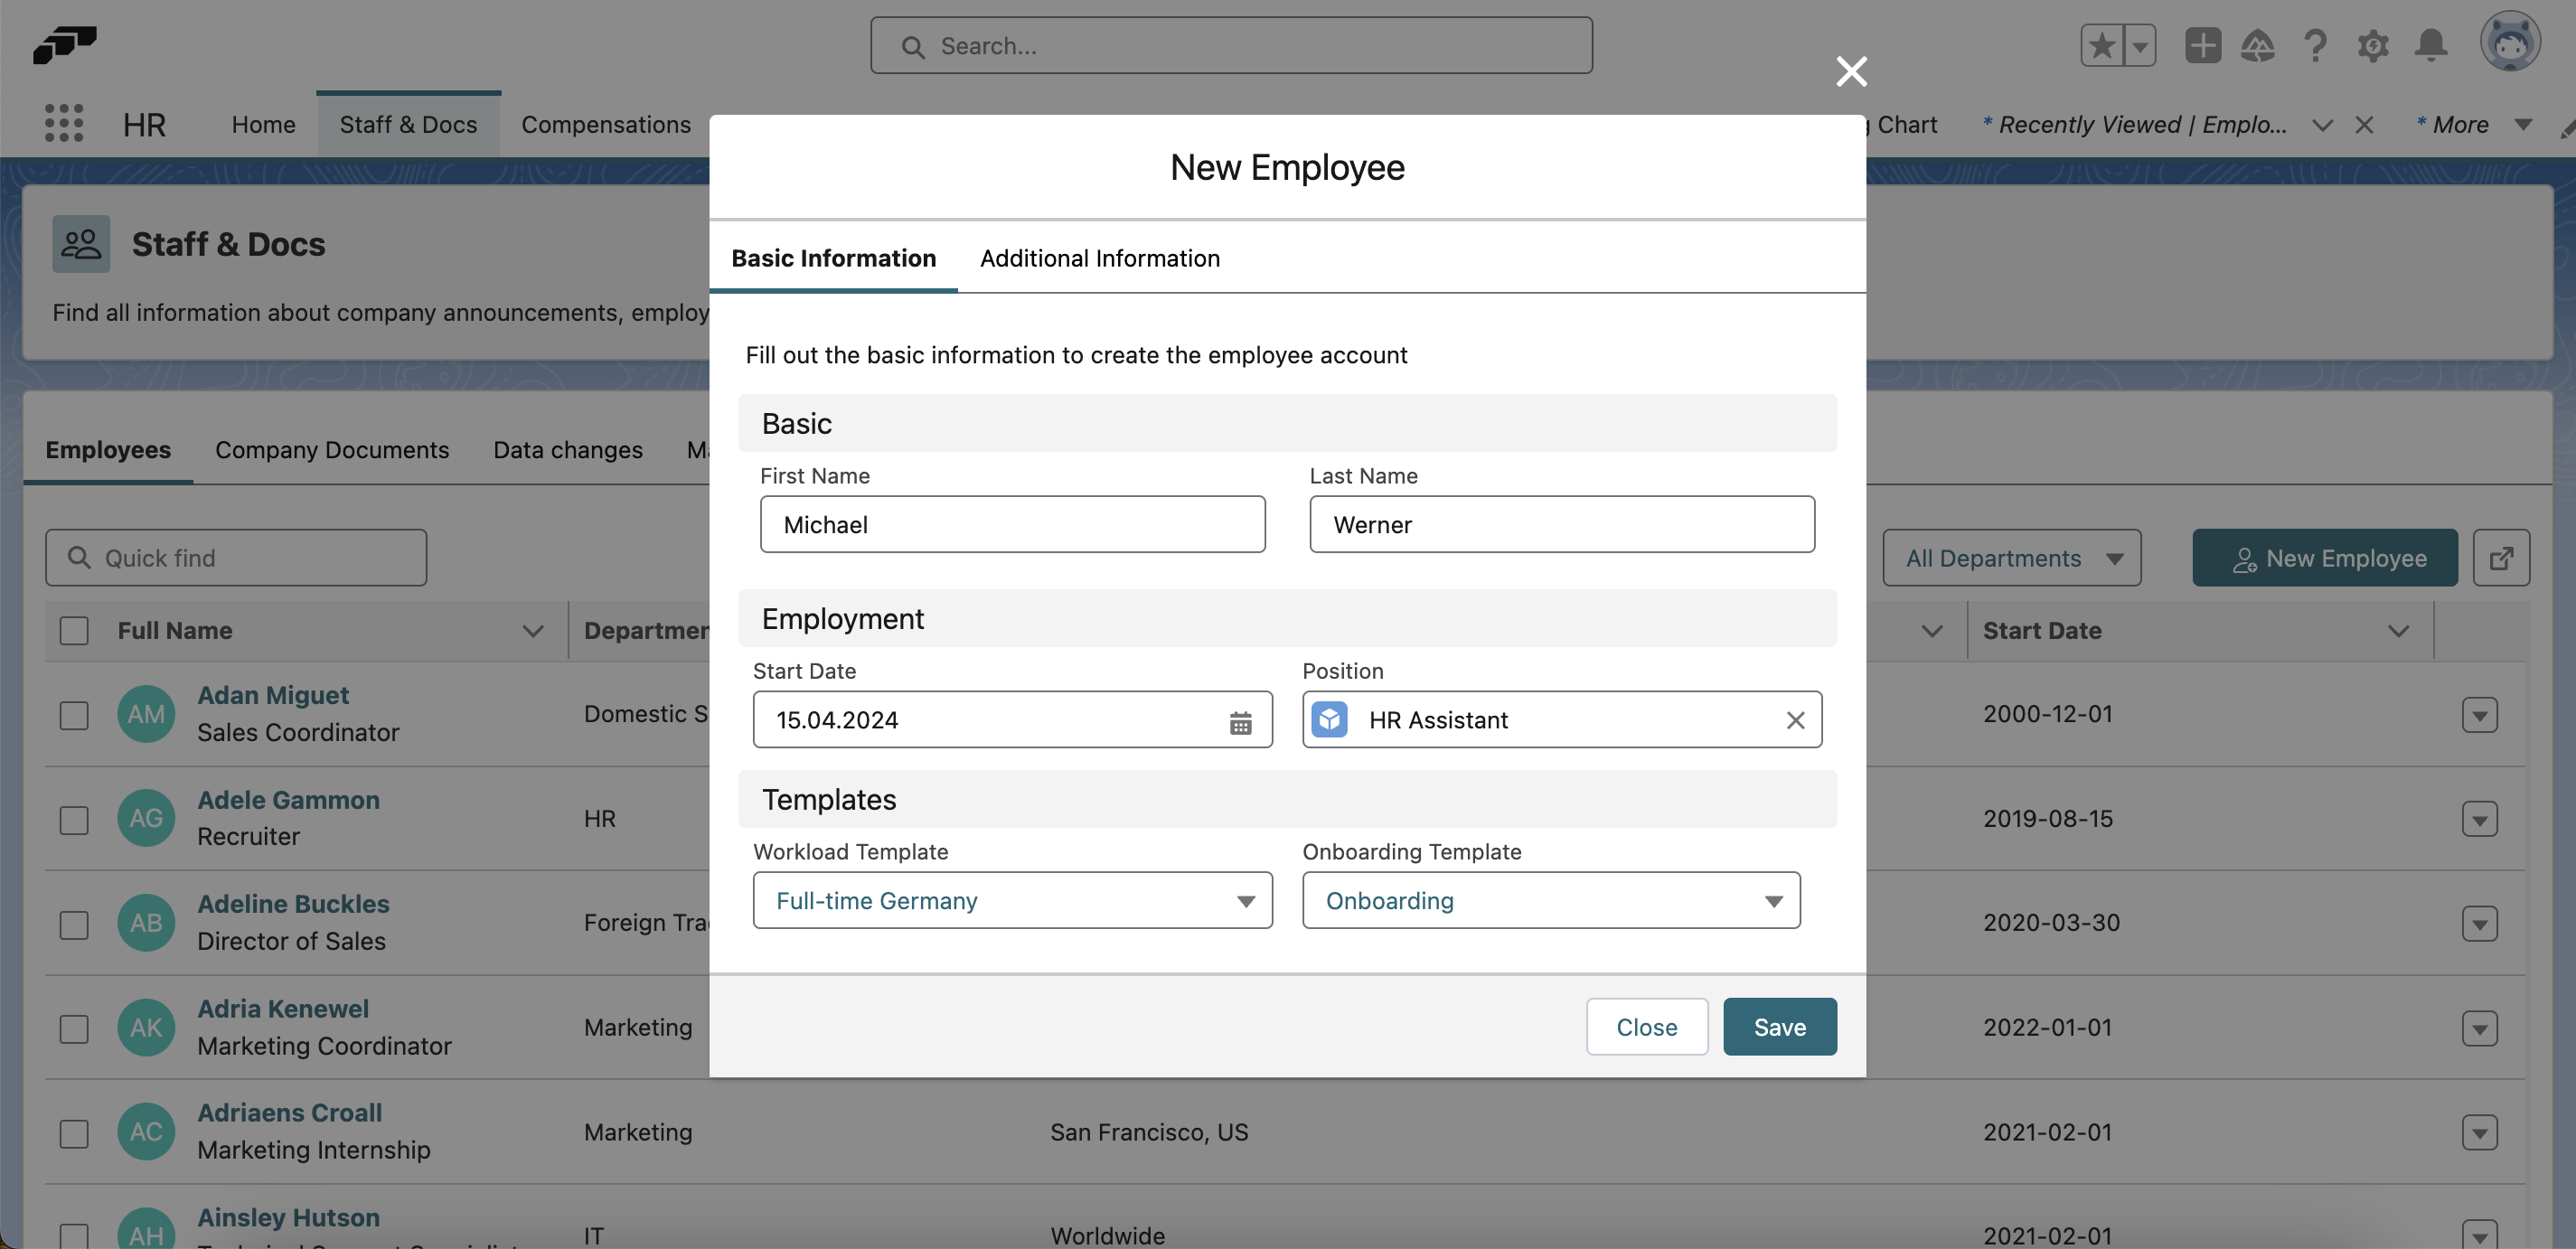
To create a new employee in flair, open the Staff & Docs tab in the HR app and click the New Employee button. You can also click New on the Employees page.

You can fill in Basic Information such as Name, Start Date, Position, and Workload Template. Selecting the Additional Information tab will allow you to enter a company email address and phone number for this employee.
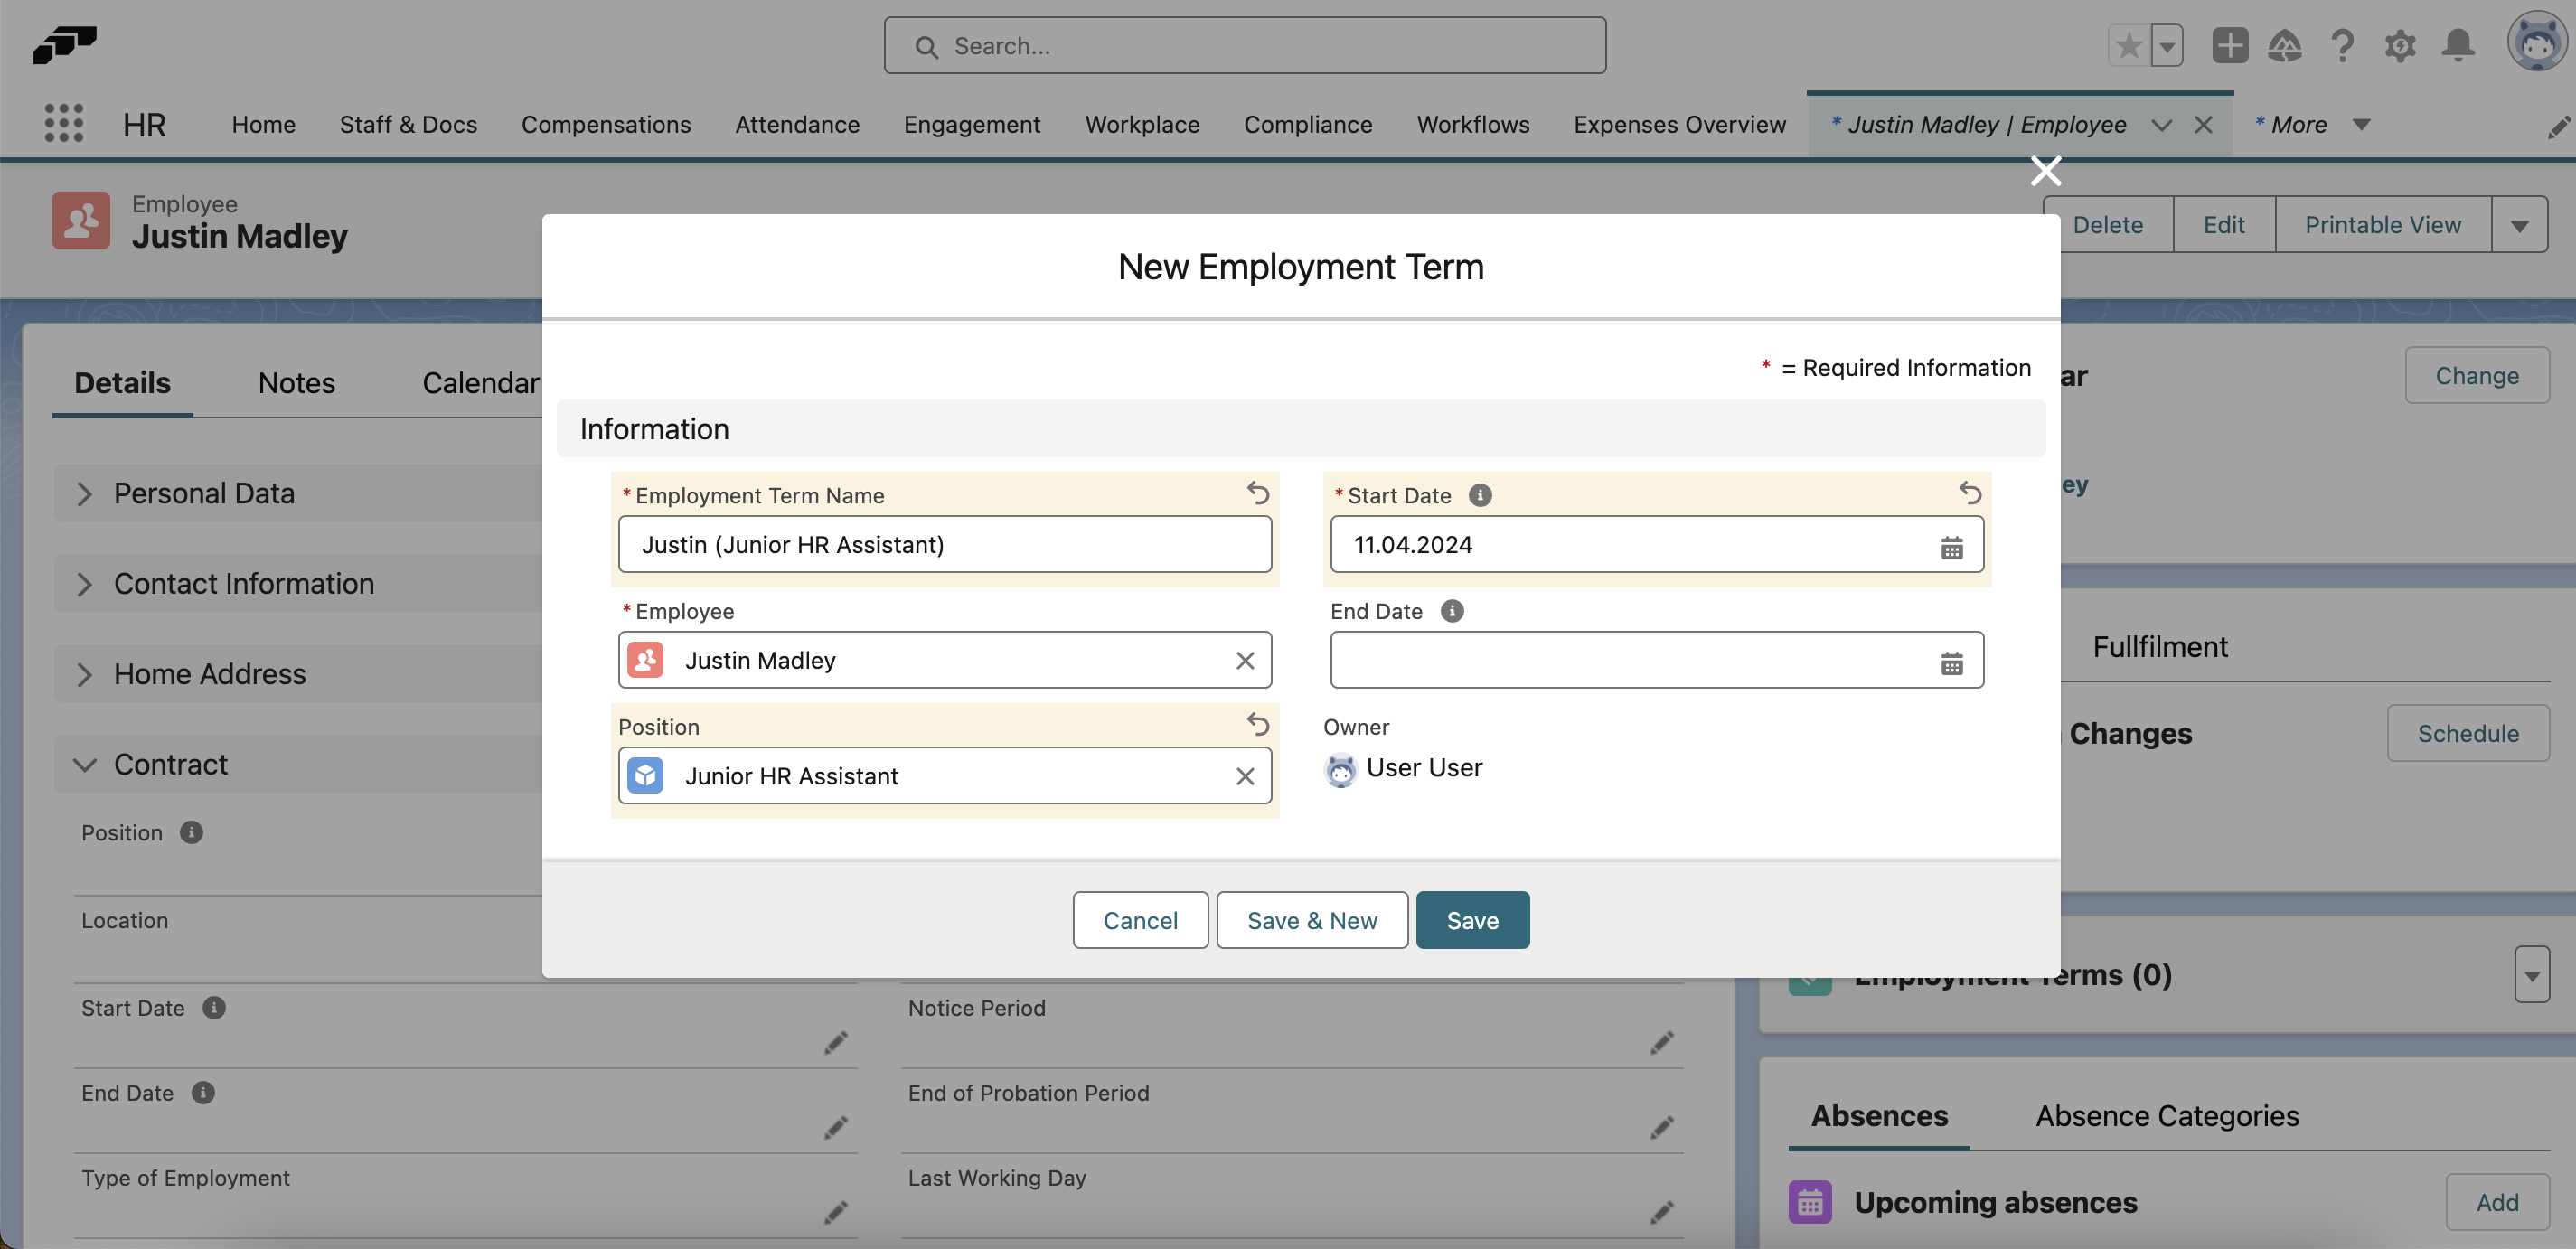
If you created an employee without a Position, you can later select one by opening the Employee record and clicking New in the Employment Terms section.
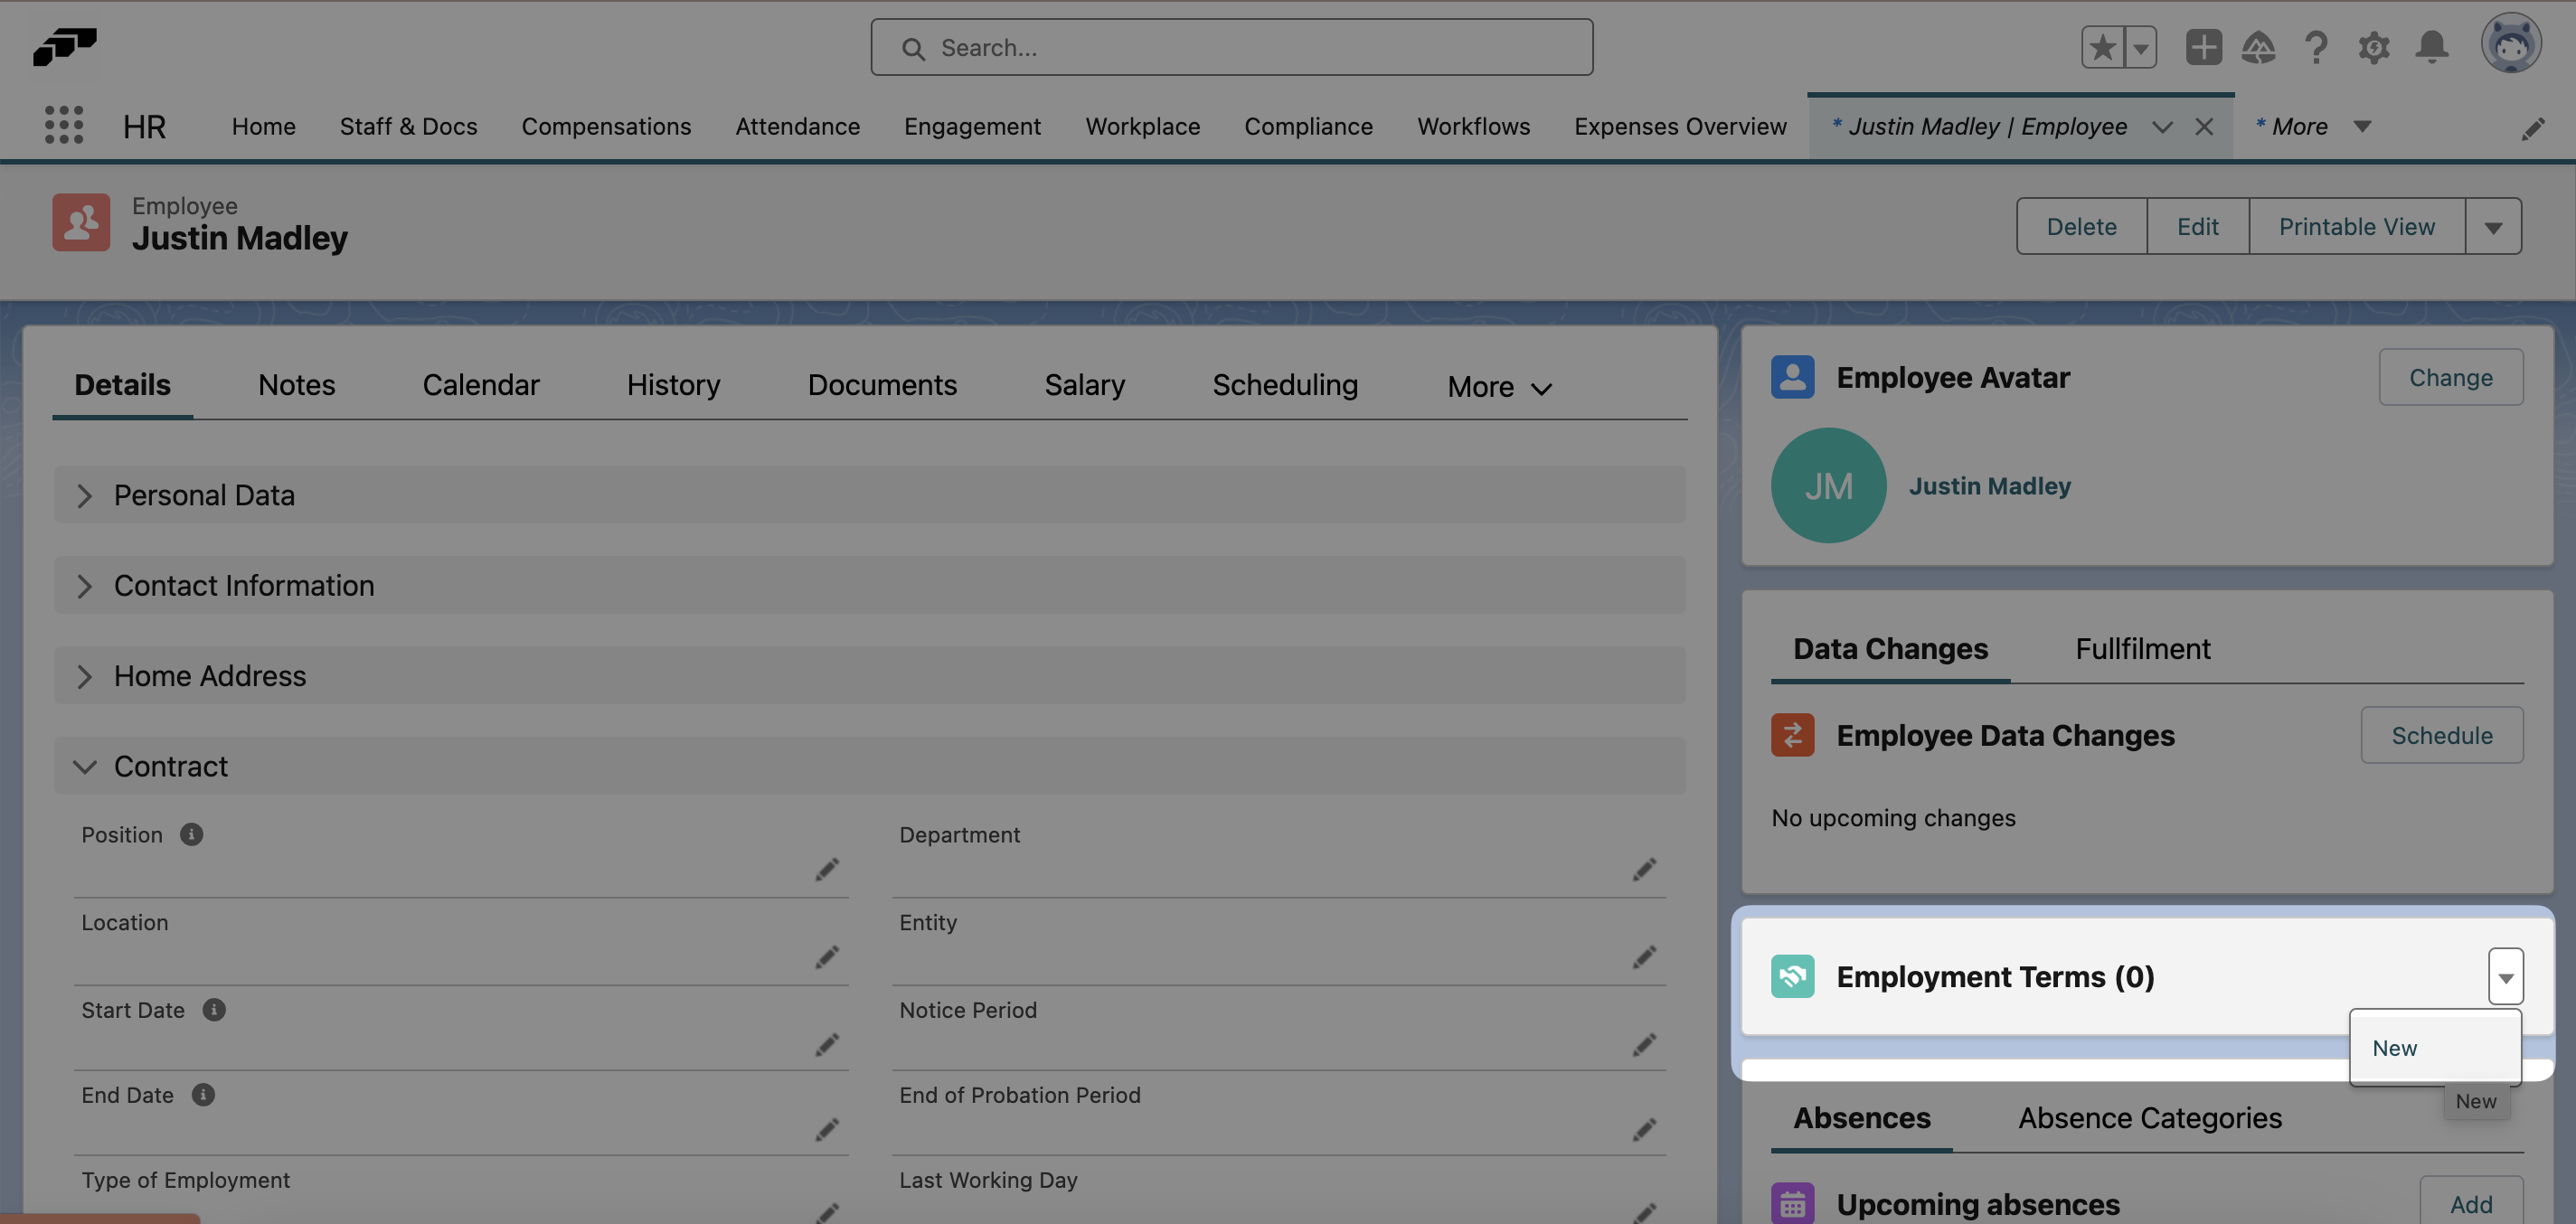
Choose a name for the Employment Term so it can be easily identified. Then select a Start Date and Position. For the Position, you can either choose an unfilled Position from from the dropdown list or select New Position. Then click Save.
Adding Individual Staff Using Employee Records
When you have enabled the Employee Hub using the Setup Assistant, it is possible to add individual staff using employee records.
- Employee Record: Visit the employee's record of a newly hired staff member on the flair HR app.
- Company Email: Give the employee a valid company email address in the Contact Information section of the employee record.
Employee History
During an employee's time at your organization, many things may change: their salary, position, contact details, and manager. Using the Employee History feature, you can track all these changes in one simple view.
Employee History in the Hub
As a manager, you can view the history of any of your team members in the Employee Hub. In the Manager view, open the My Team tab and select any employee from your team. In the top navigation, select History. You will now see a chronological view of the selected employee's historical events, from most recent to earliest.
You can also select filters from the drop-down menu on the right side of the screen to specify which types of events show, such as manager changes, salary changes, and absences.
Employee History in Salesforce
You can also view an employee's history in Salesforce. In the flair HR app, select Employees from the top navigation bar and choose an employee. Click on the History tab to see previous events. Using the View dropdown, you can switch between a vertical list view or a horizontal timeline view.
In the vertical view, clicking on an event will show the previous data, what it has changed to, and who made the change. In the horizontal view, you can use the blue slider to view the changes on the timeline.
Changing a Manager
To change an employee's manager, you can either change the Parent Position or choose a new employee for the current Parent Position on the Company Structure page.
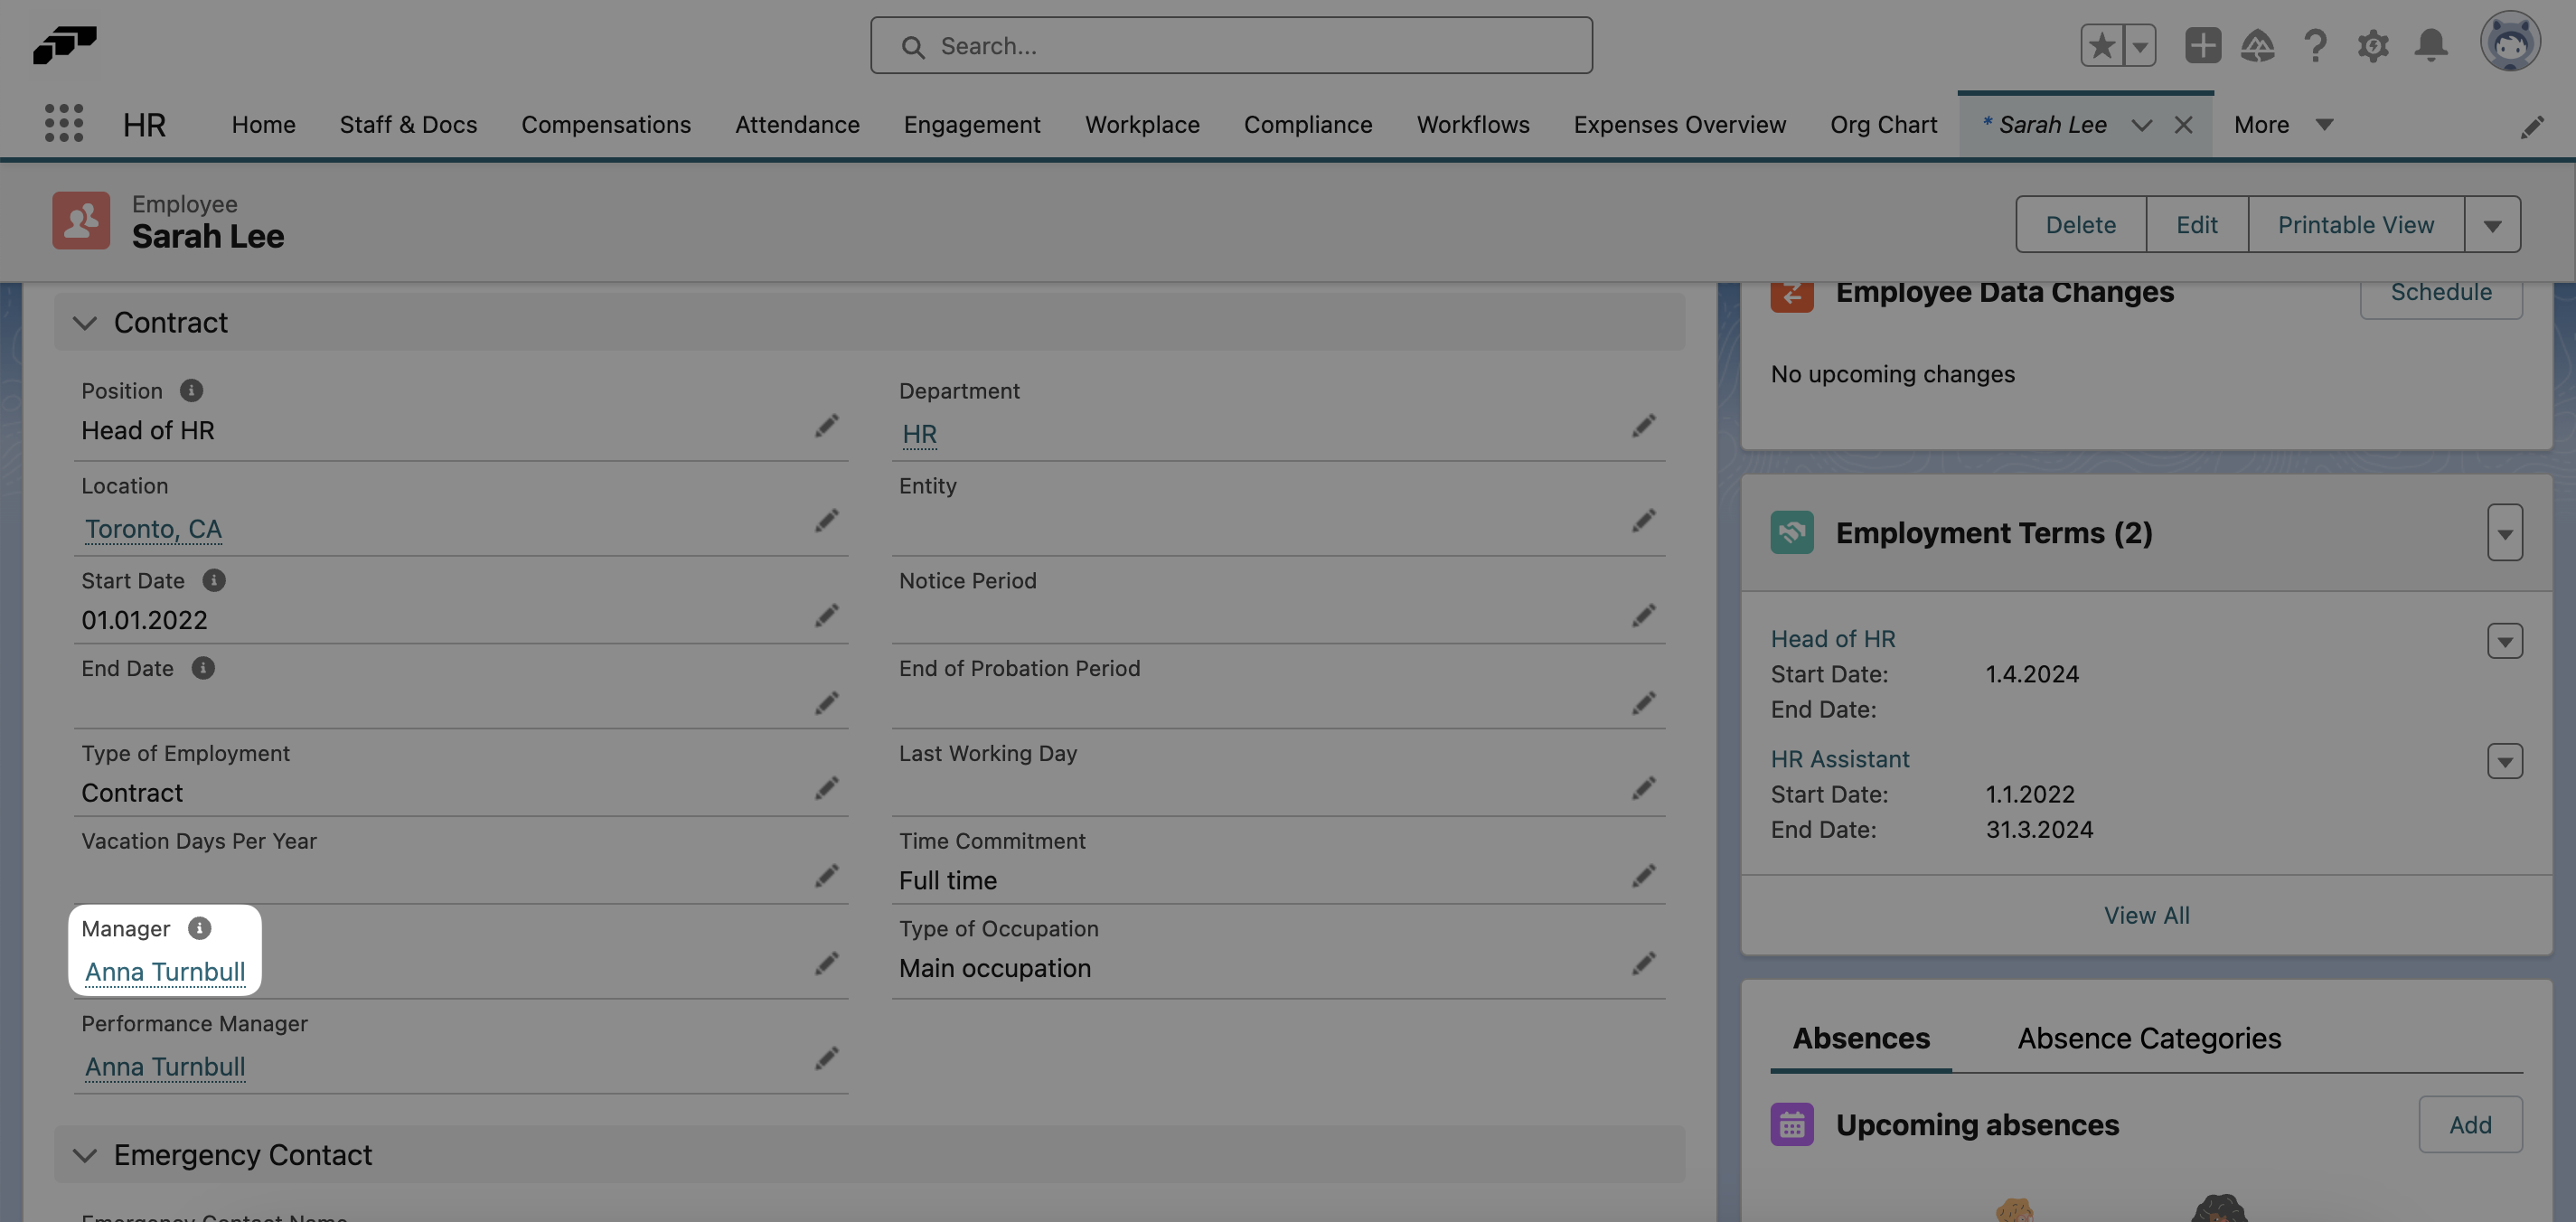
For example, Sarah Lee is the Head of HR, and she reports to the CEO Anna Turnbull. We can see this represented in Sarah's employee record.
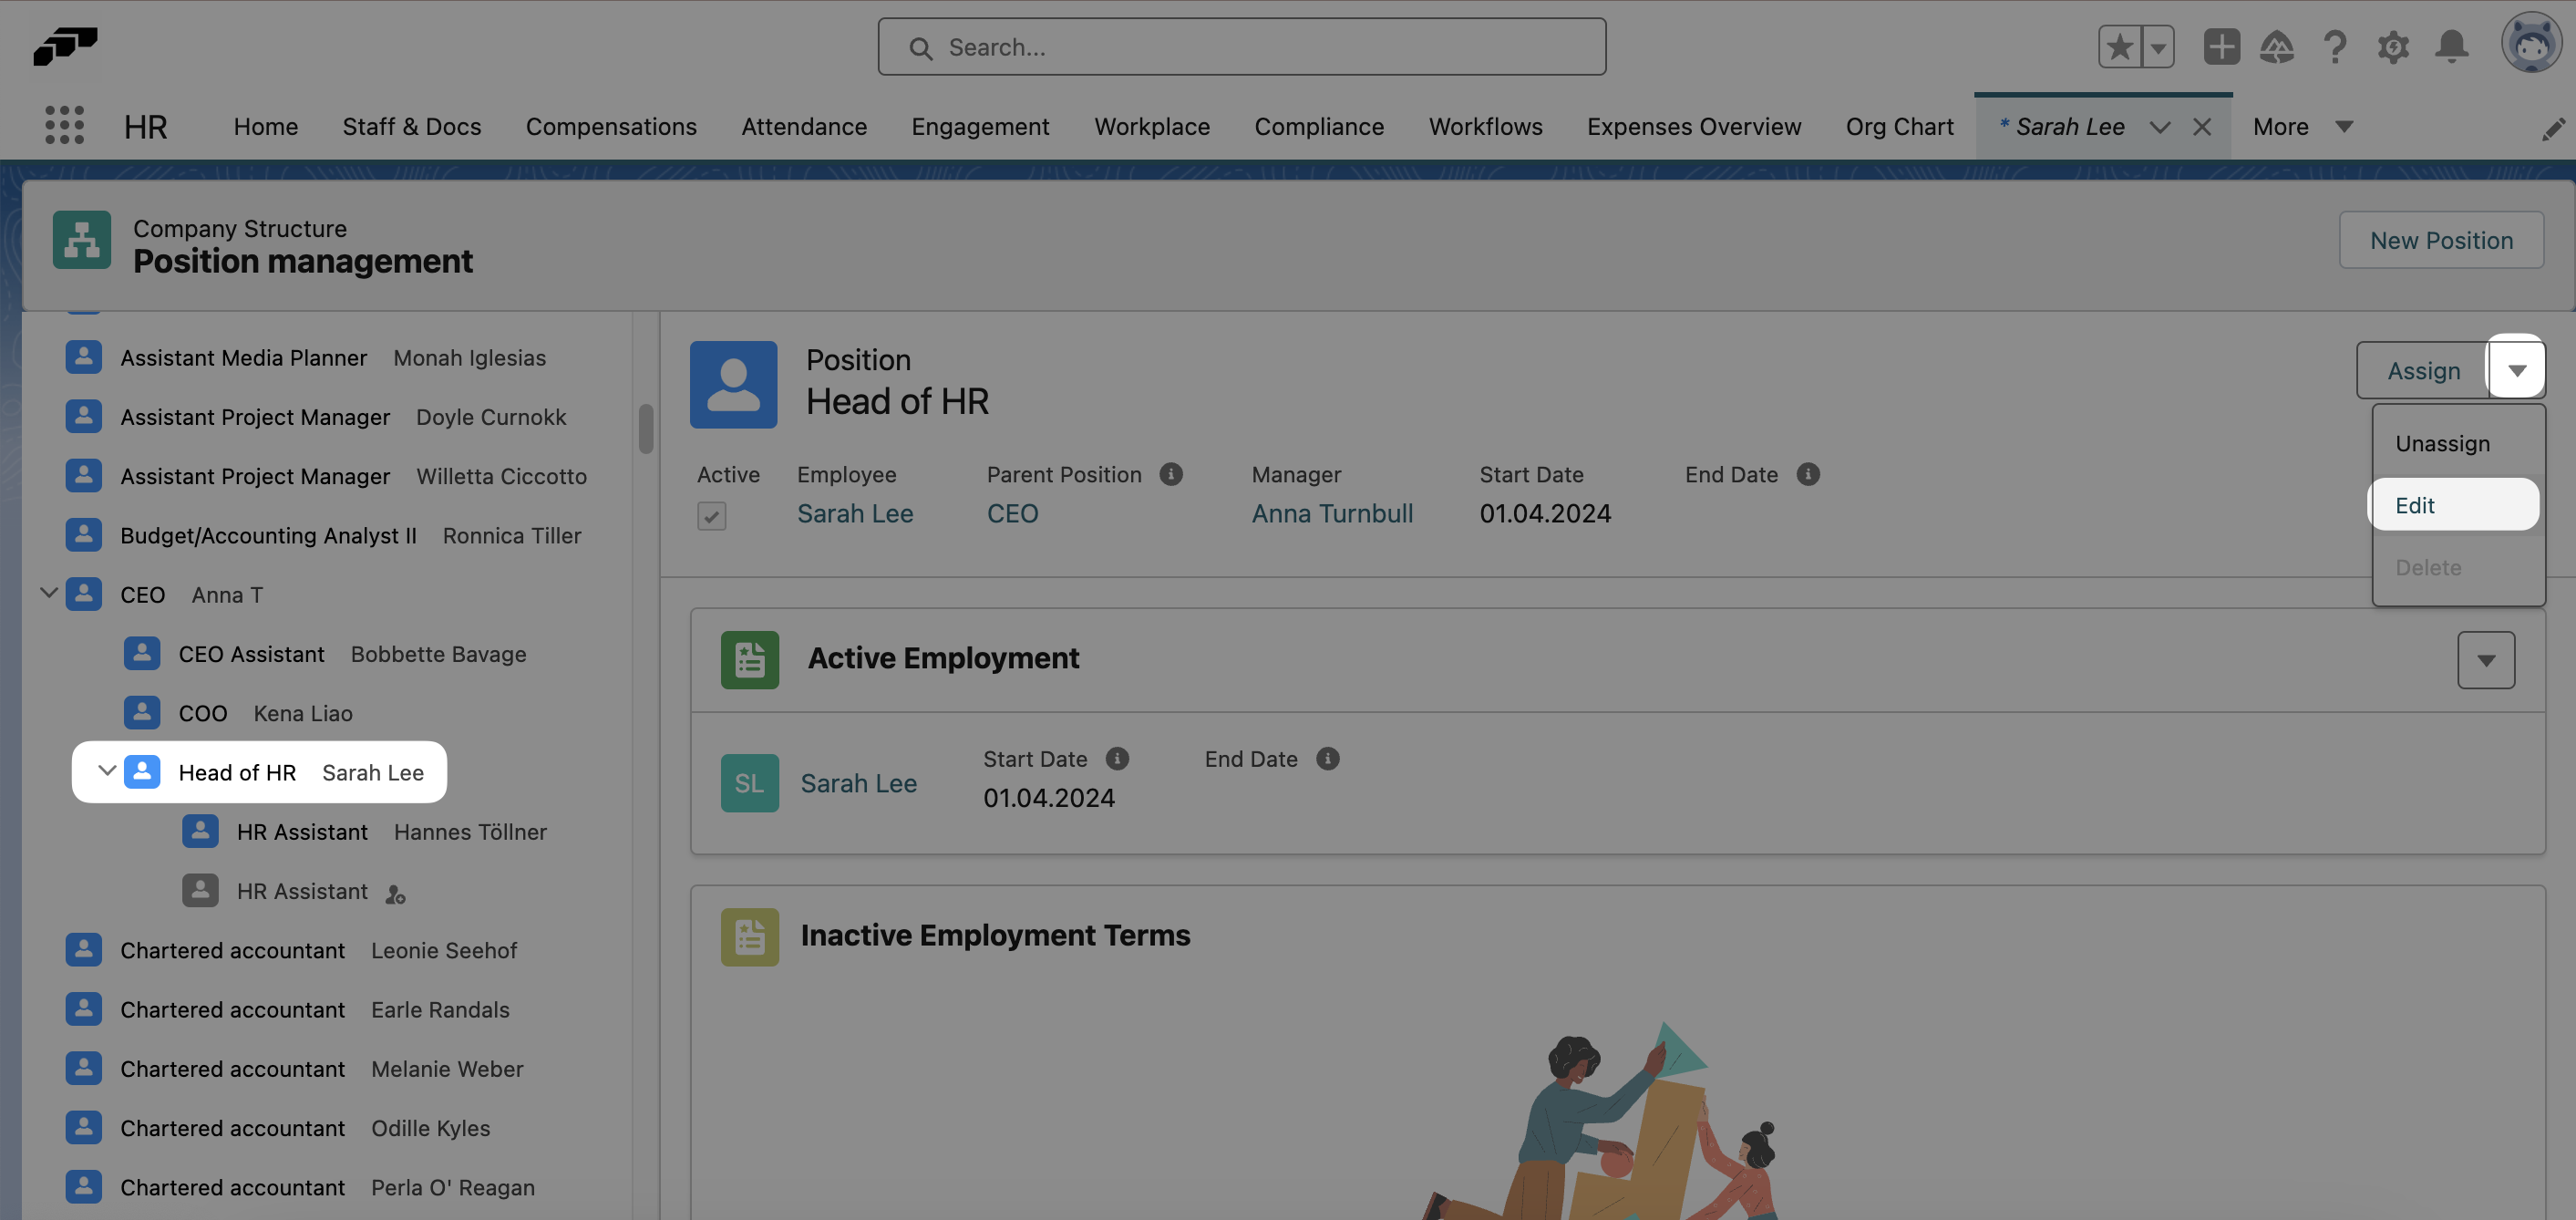
To improve efficiency, the company has appointed a new COO, Kena Liao. From now on, the Head of HR will report to the COO. To change the manager, go to the Company Structure page. Select the Head of HR position and click Edit.
Fixing Invalid Reporting Structure
Positions that are part of an invalid reporting structure appear at the bottom of the pane on the left side of the Company Structure page. Using the toggle labelled "Display positions with invalid reporting structure", you can view these positions.
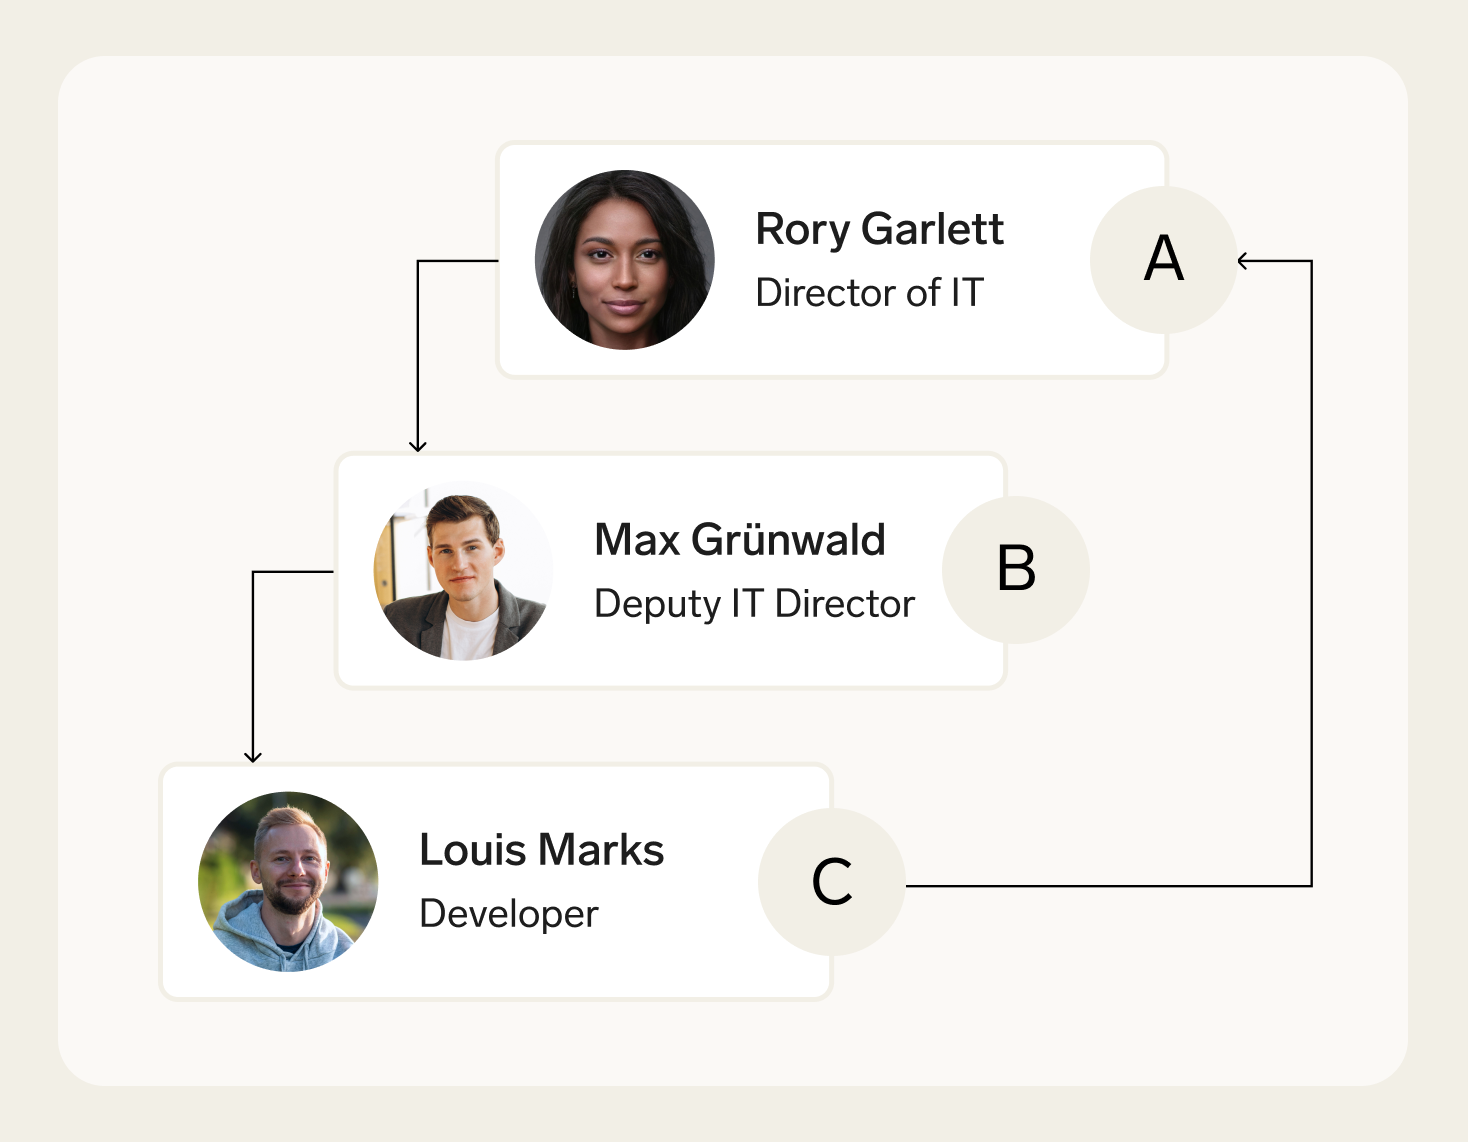
One example of an invalid reporting structure is a reporting loop, as shown in the example below. Louis Marks directly reports to Rory Garlett. However, Rory Garlett reports to Max Grünwald, who in turn reports to Louis Marks, creating a loop. This means that the three positions that are part of this loop (and any other positions that are connected to one of these looped positions) cannot be correctly displayed in the company structure.
To fix this issue, click on one of the positions affected and change the Parent Position so that the reporting structure no longer contains a loop.
Mass Updating Employee Data in Bulk
You can use the Salesforce Data Import Wizard to update employee data in bulk. This is a quick way to apply changes to multiple employee records at once using a CSV file.
Note: Manager, Start Date, and End Date cannot be changed directly on the employee record. Please adjust these via the Position or Employment Term instead.
Steps to Bulk Update Employee Data
- Navigate to Setup in Salesforce
- In the Quick Find box, type Data Import and select Data Import Wizard
- Scroll down and click Launch Wizard
- Select Custom objects, then scroll down and select Employees
- Click Update existing records
- Under Match by, select your matching criteria. While Name is the easiest option, Salesforce ID is the most accurate
- If you are not including relationship fields (such as Cost Center or Feedback Manager), you can leave the other matching fields as --None--
- Upload your CSV file
- Click Next
- Review the auto-mapping the wizard created. You can see examples to verify that columns are correctly mapped
- If you need to adjust any mapping, click Change and search for the correct field, then click Map to save
- Click Next, then click Start Import
After the import completes, you will be redirected to the import job overview where you can see if any records failed.
Exporting Employee Data
Exporting Specific Data via Salesforce Reports
flair includes several built-in reports ready for export, such as the Working Time Report, which displays working times and absences. If the built-in reports do not provide the data you need, you can create a custom Salesforce Report.
For example, to create an absences overview report:
- Create a report using the type Absences with Absence Days and Employee
- Define the following columns:
- Employee: Full Name
- Absence: Absence Name
- Employee Absence Category
- Absence Day: Absence Day Name
- Amount
- This allows you to filter by the respective absence category for a better overview
- Once the report is built, click Run and then export the data
Exporting All Data from flair
To back up all data stored in flair HR and flair Recruiting, you can export a complete CSV file from Salesforce.
- Navigate to Setup in Salesforce
- In the Quick Find box, type Data Export and select Data Export
- Click Export Now
- Ensure Unicode (UTF-8) is selected under Export File Encoding
- Check Include images, documents, and attachments
- Select which data you want to export. We recommend selecting all data to avoid losing any important information
- Click Start Export
The download link will appear at the bottom of the page under "Action" once the data is ready.
Finding Your API and flair Package Version
To find your current Salesforce API version and flair package version:
- Navigate to Setup in Salesforce
- In the Quick Find box, type API and select API
- Click Generate Enterprise WSDL
- Click Generate
The generated page will display your current API version and the package version of your flair installation.
Troubleshooting: Unable to Locate an Employee in the Company Structure
If you cannot find an employee in the Company Structure, check the following:
- Does the employee have an active employment term? Employees without an active employment term will not appear in the Company Structure. See Updating Employment Terms for more details.
- Are the start and end dates set correctly? Verify that the employment term's start date has passed and the end date (if applicable) has not yet been reached.
- Is there a feedback loop in the reporting structure? A reporting loop (where managers report to each other in a circular chain) will cause positions to appear as invalid. Check the org chart for circular references.
- Is there an active position available? If not, check under HR > Positions > Empty (List View) to find unassigned positions.
- Does the employee need a new position? If no suitable position exists, you can create a new position and assign a parent position (manager) to it.
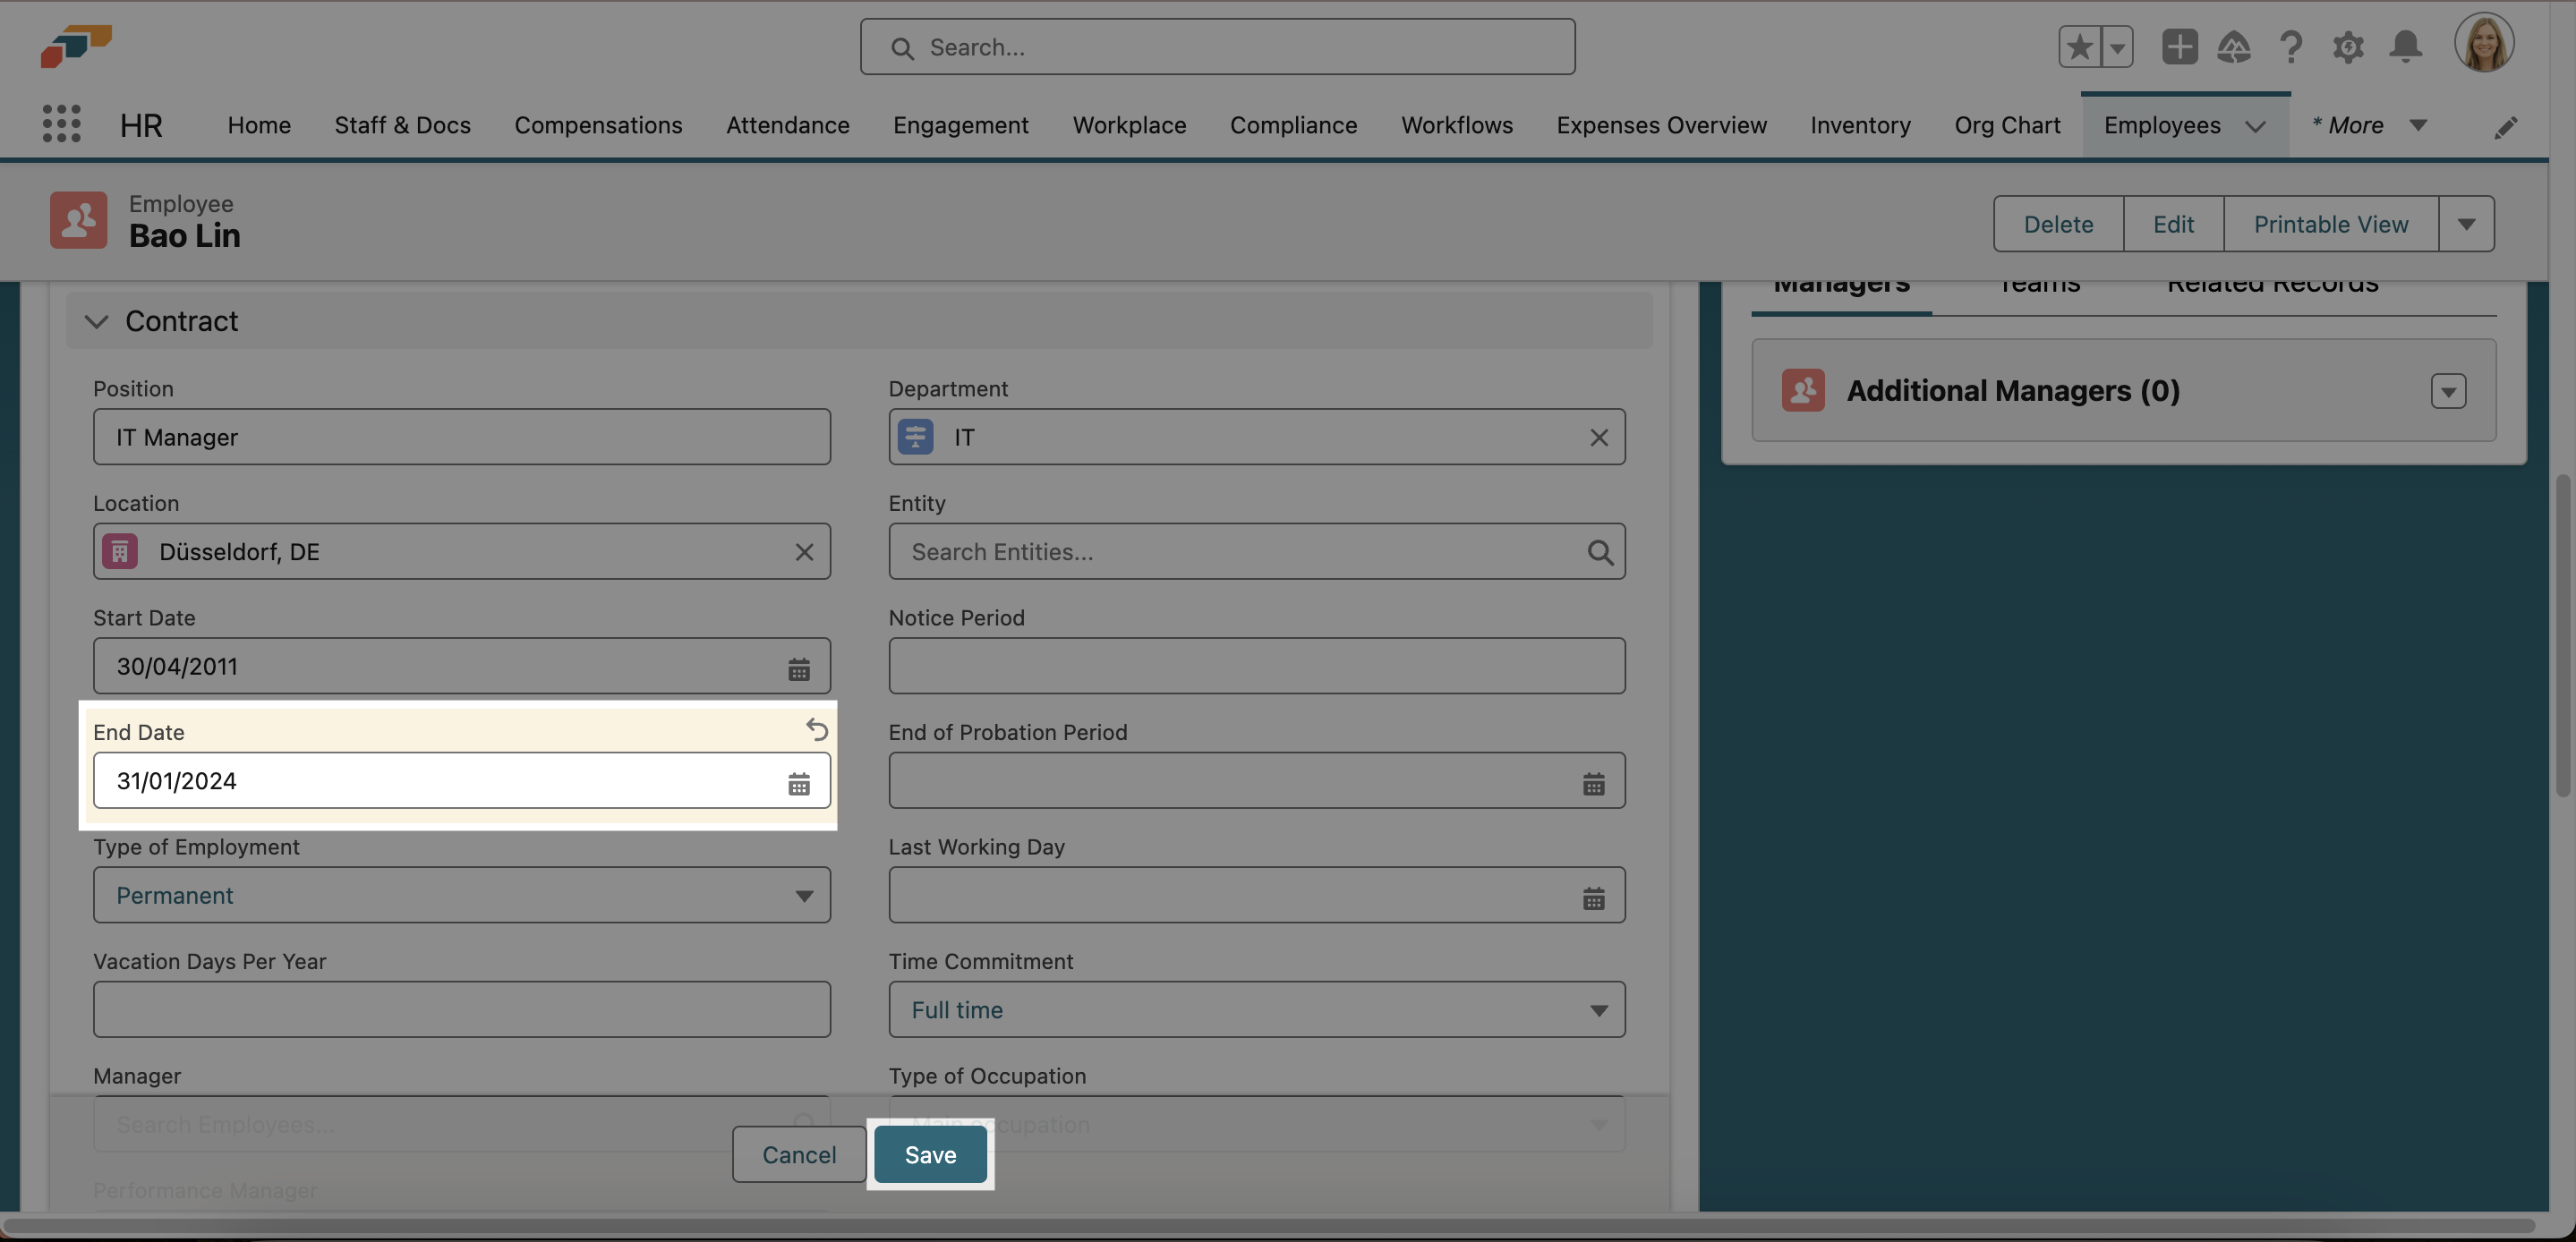
How To Delete an Employee
If an employee is leaving your company, you do not need to delete this employee from flair immediately. Instead, you can simply fill in the End Date field in the employee's record, and this employee will then be marked as no longer active.
There are, however, some cases where you may need to delete an employee record from flair entirely. For instance, if an new hire has signed a contract but changes their mind before joining your company.
We generally advise against deleting an employee record from flair when an employee leaves the company. This is because regulations often require you to store certain employee information for a specific time period after they leave the company. Please check which retention periods apply to your organization.
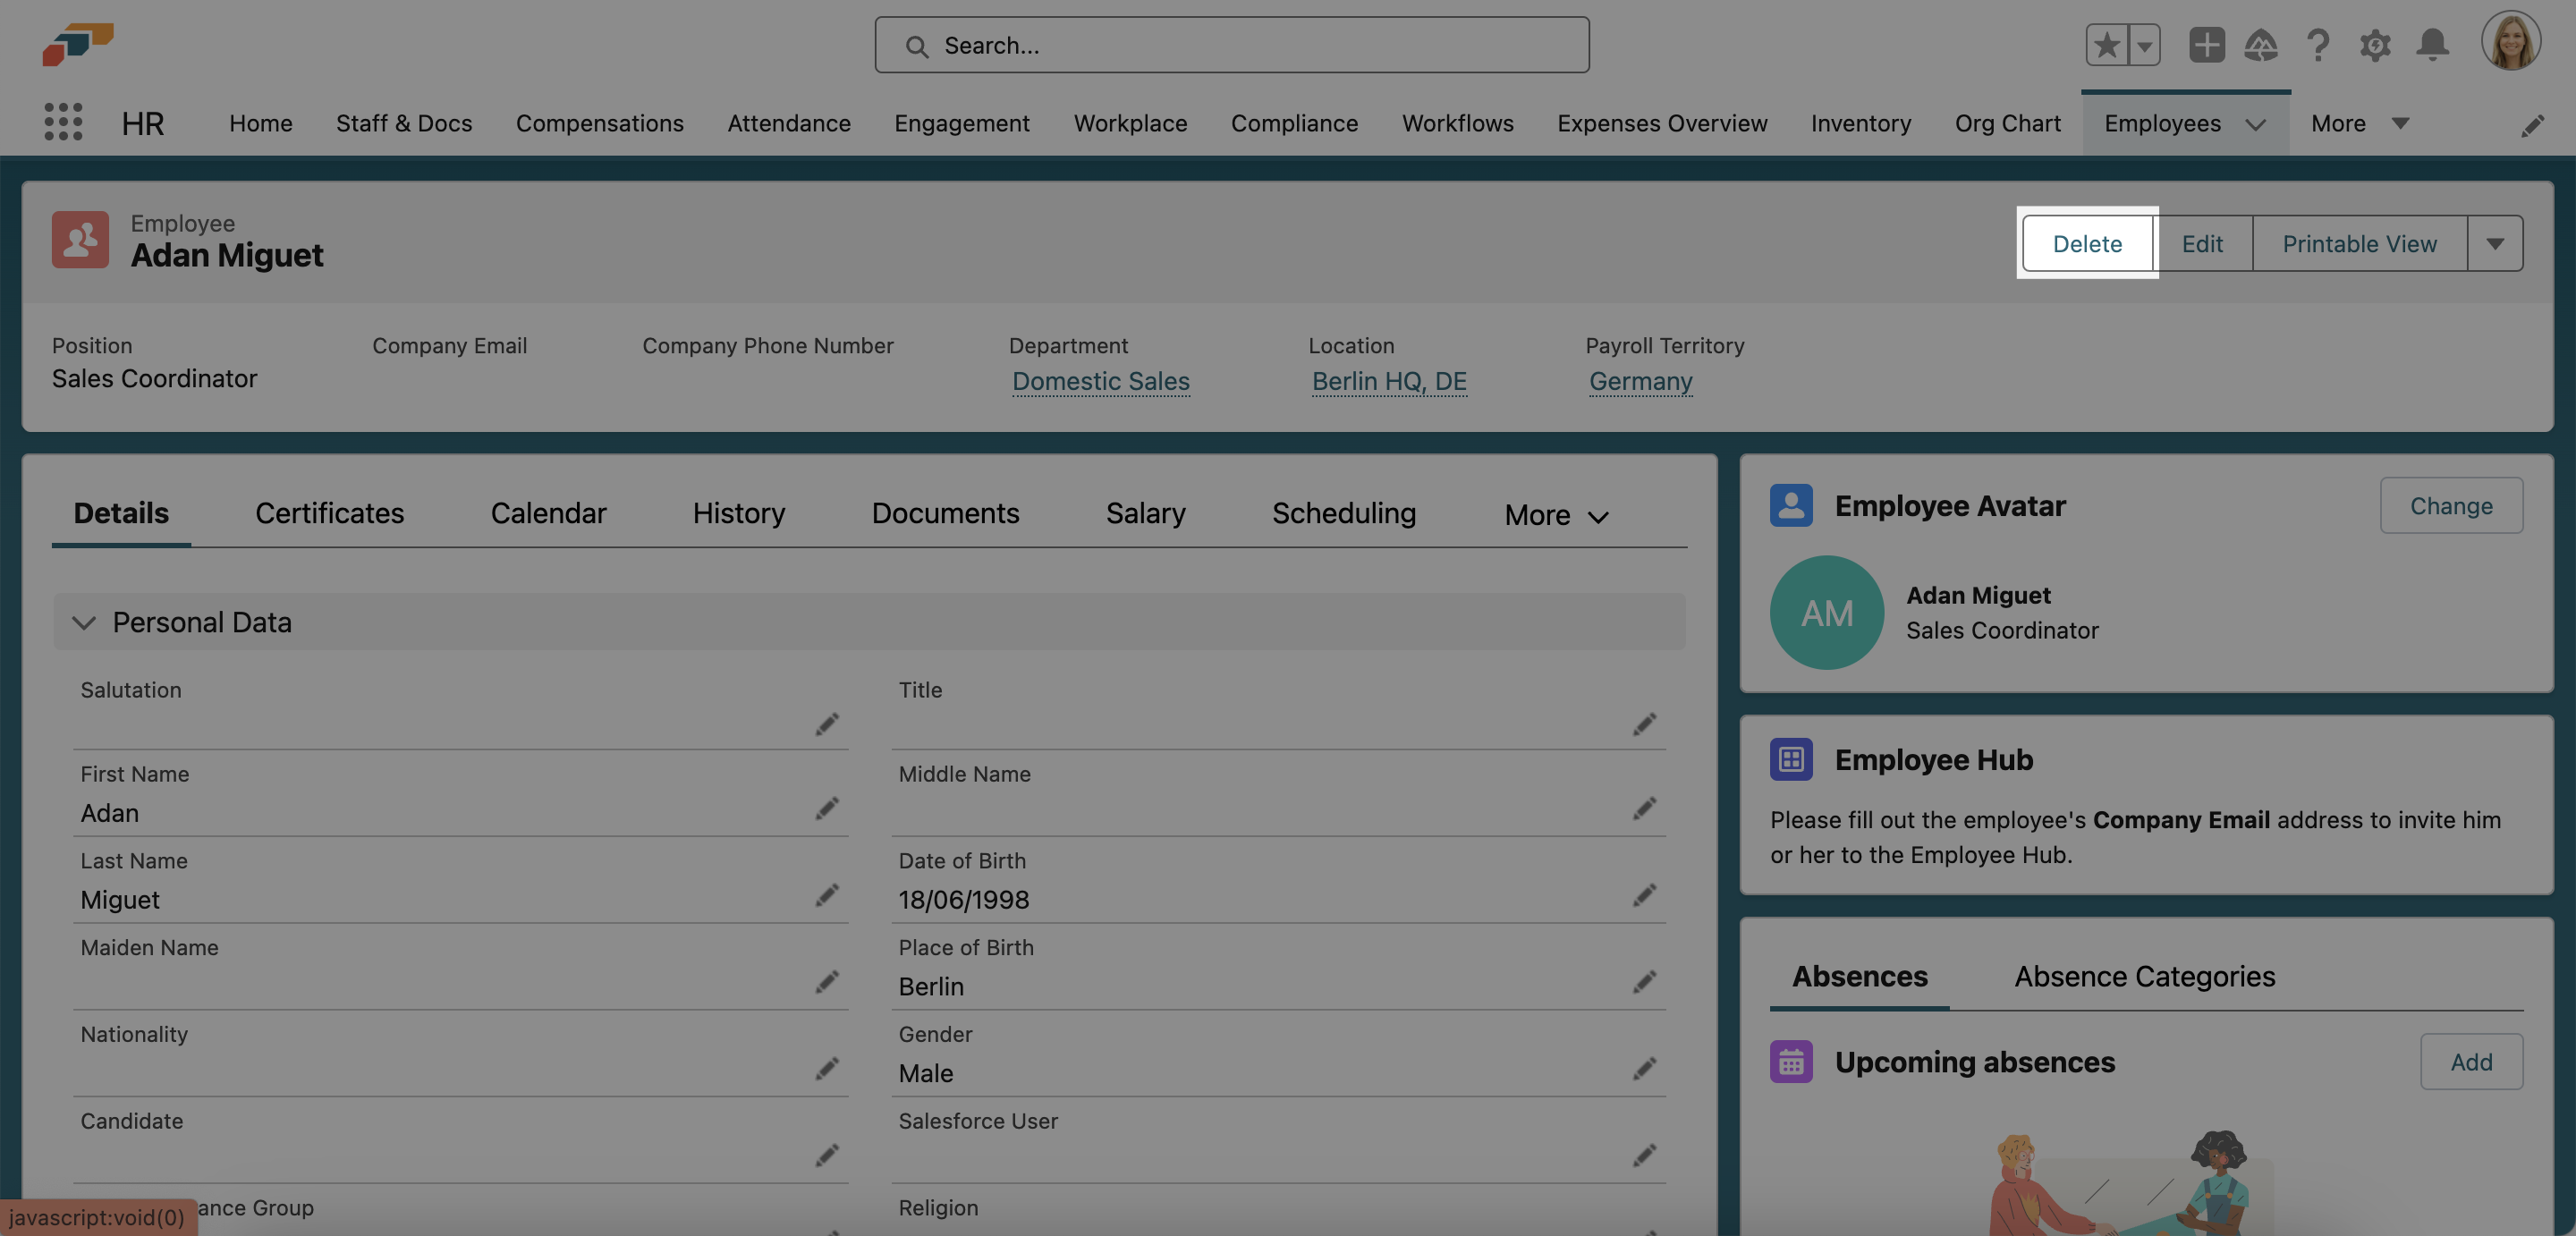
When you open an employee record in the Employees page in flair, you will see a Delete button next to their name. Clicking this button will result in an error message if the employee is associated with other records. To successfully delete the employee, you first have to delete these records.
The error message will give you a full list of the records associated with the employee. These will typically include timesheets, workloads, absence allowances, and performance reviews. All of these records will need to be deleted before you can delete the employee from flair.
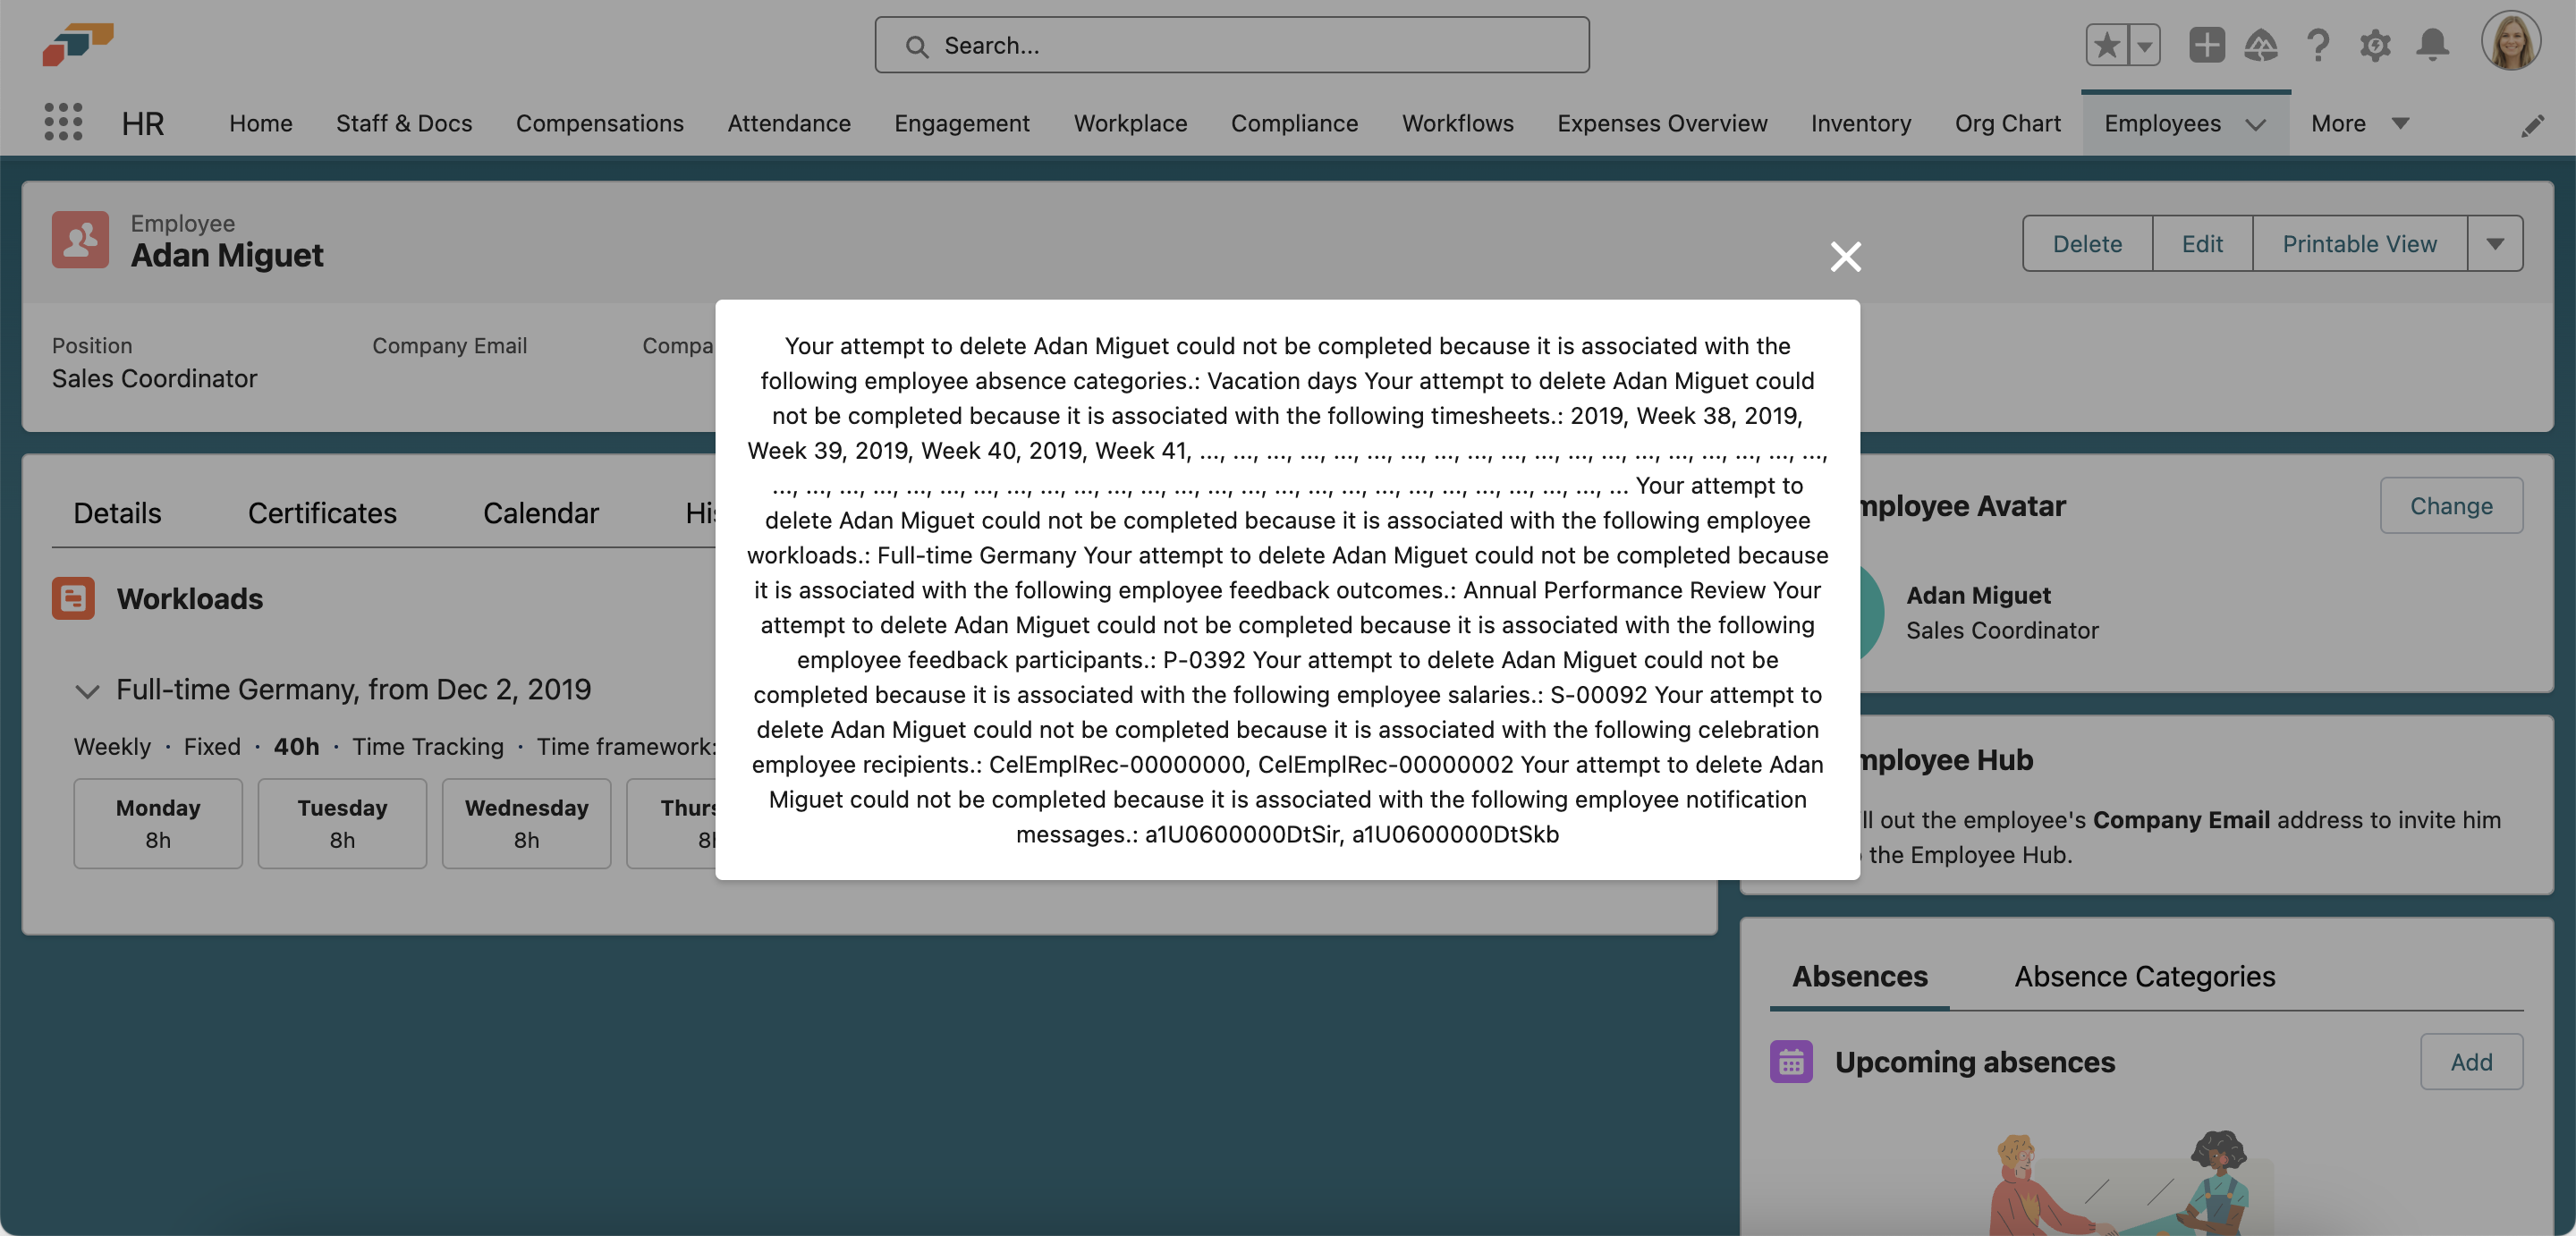
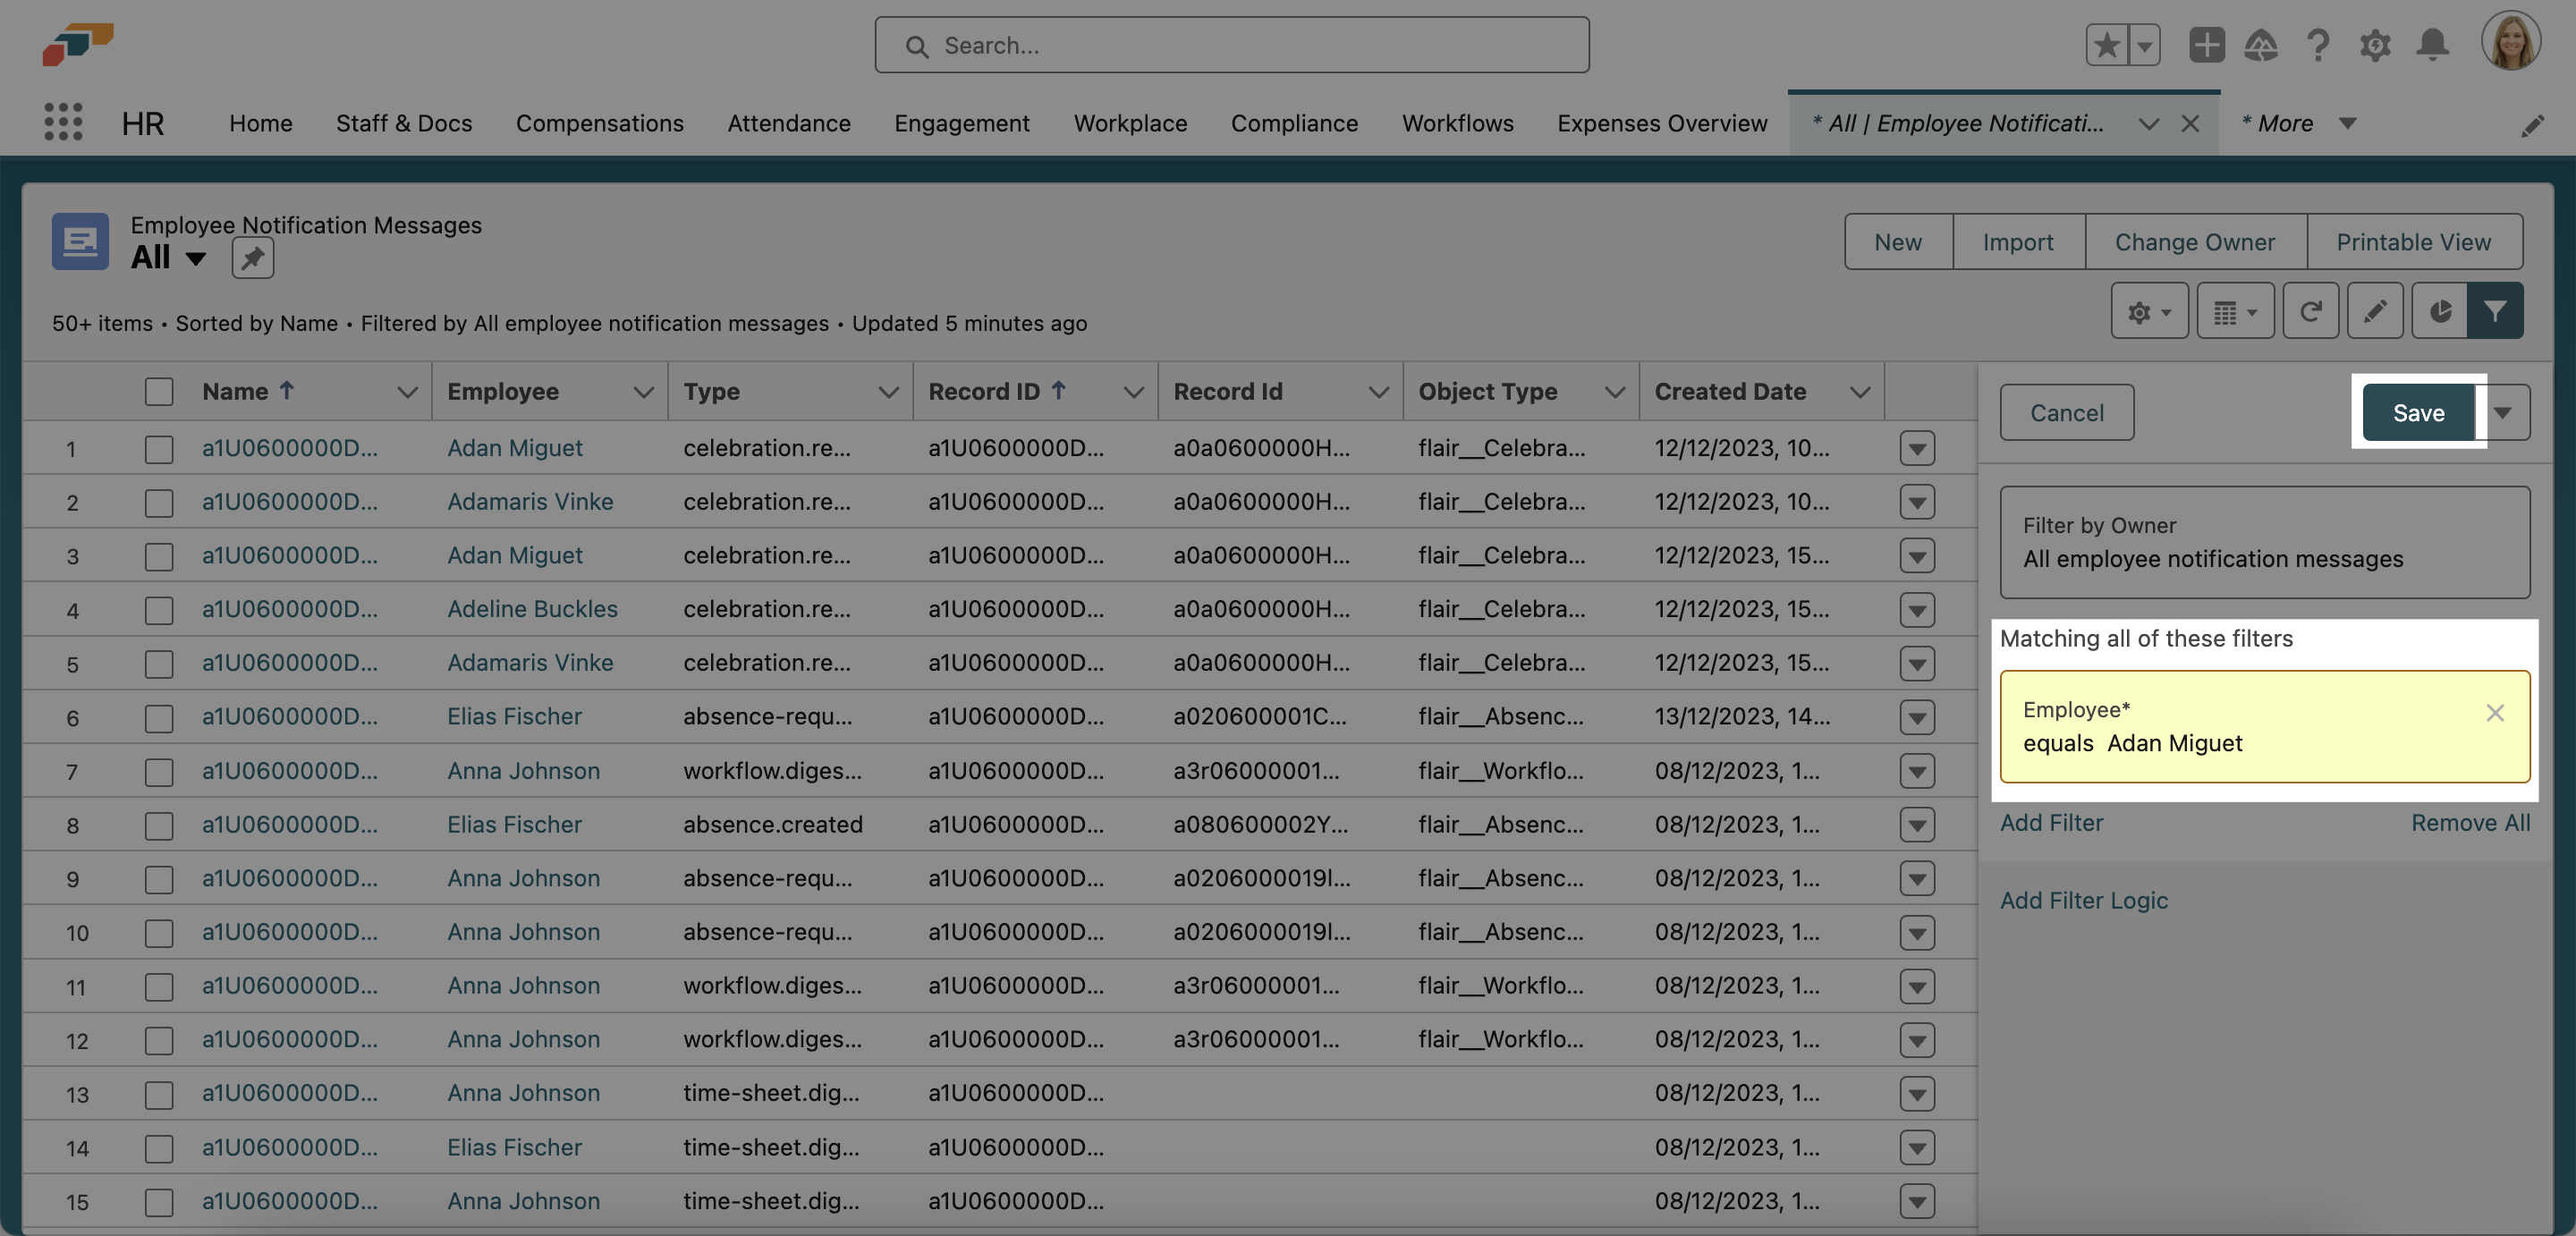
To help speed up deletion, you can use filters to quickly search for records associated with the employee. For example, in this error message, Adan Miguet's employee record cannot be deleted because it is still associated with employee notification messages named a1U0600000DtSir and a1U0600000DtSkb.
To delete these records, type Employee Notification Messages into the App Launcher. Select the All list view to display all records. Then click the funnel icon on the right to open the filter options and click Add Filter.
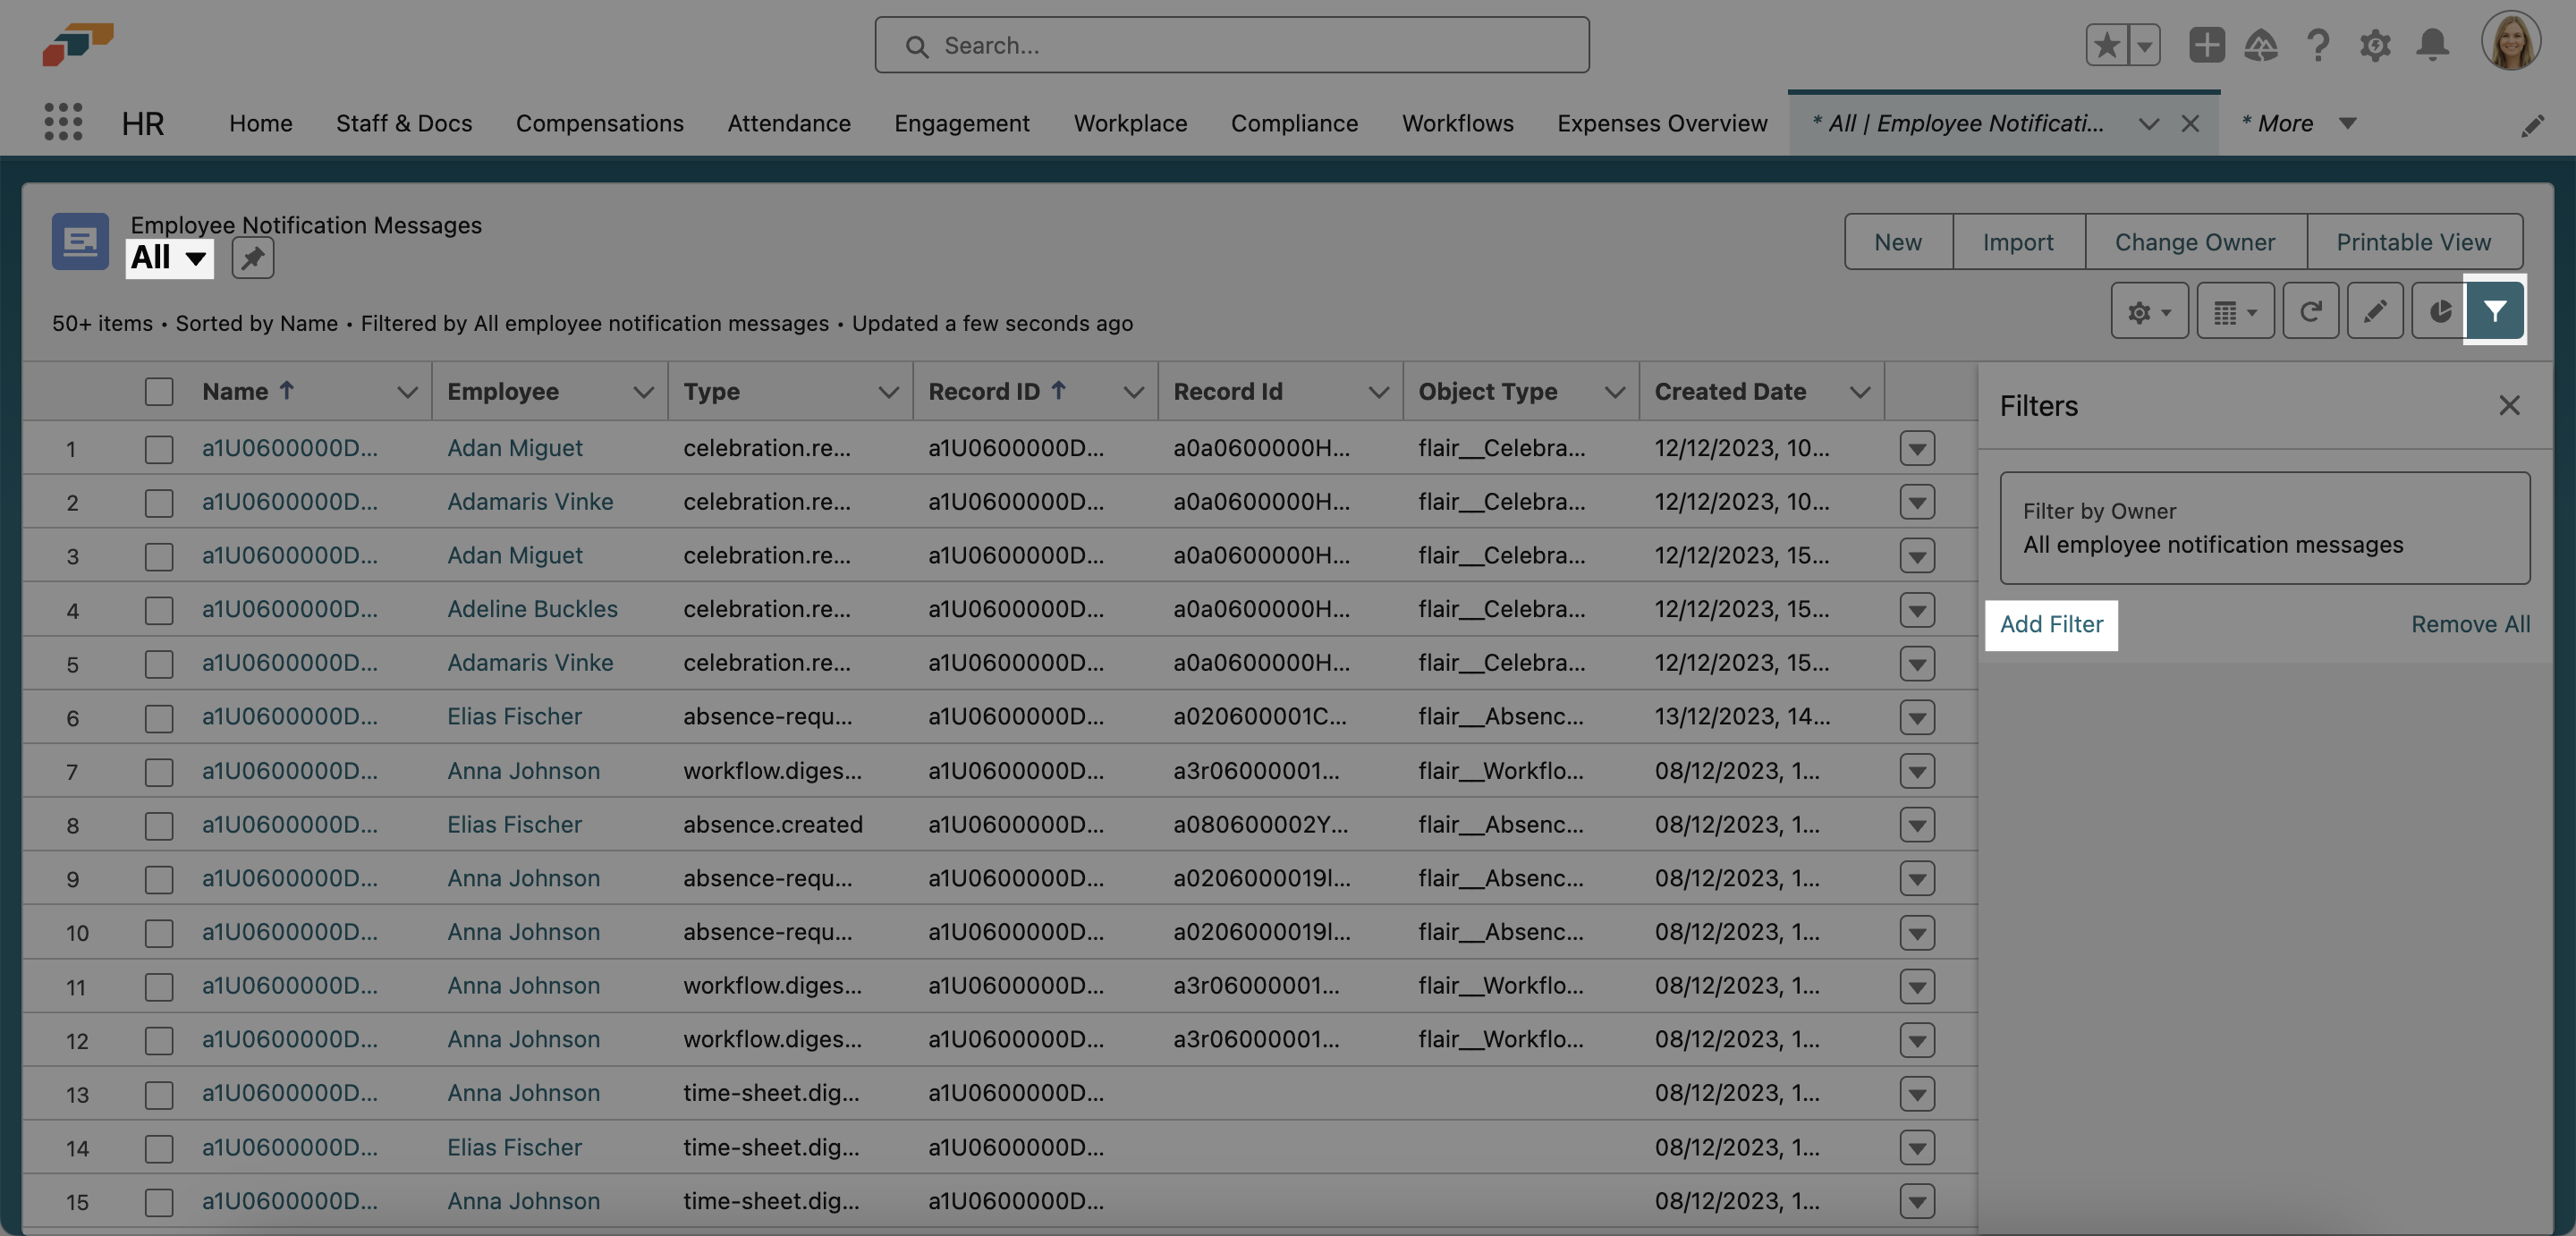
You can now refine your search in several different ways. For example, you could search for the exact record name as displayed in the error message, e.g. a1U0600000DtSkb. Or you could filter by the employee's name, as shown in this example. This will show you all the records of this type that are associated with the leaving employee, allowing you to delete them faster.
You can repeat this process for other records types, such as timesheets or workloads.