Candidate Management
This comprehensive guide covers everything you need to manage candidates effectively in flair Recruiting, from viewing and organizing candidates to evaluating them and making bulk updates.
Viewing Candidates
The flair Recruiting app offers multiple view options to help you manage candidates efficiently. You can toggle between different views using the Display As option in the List View Controls bar.
Table View
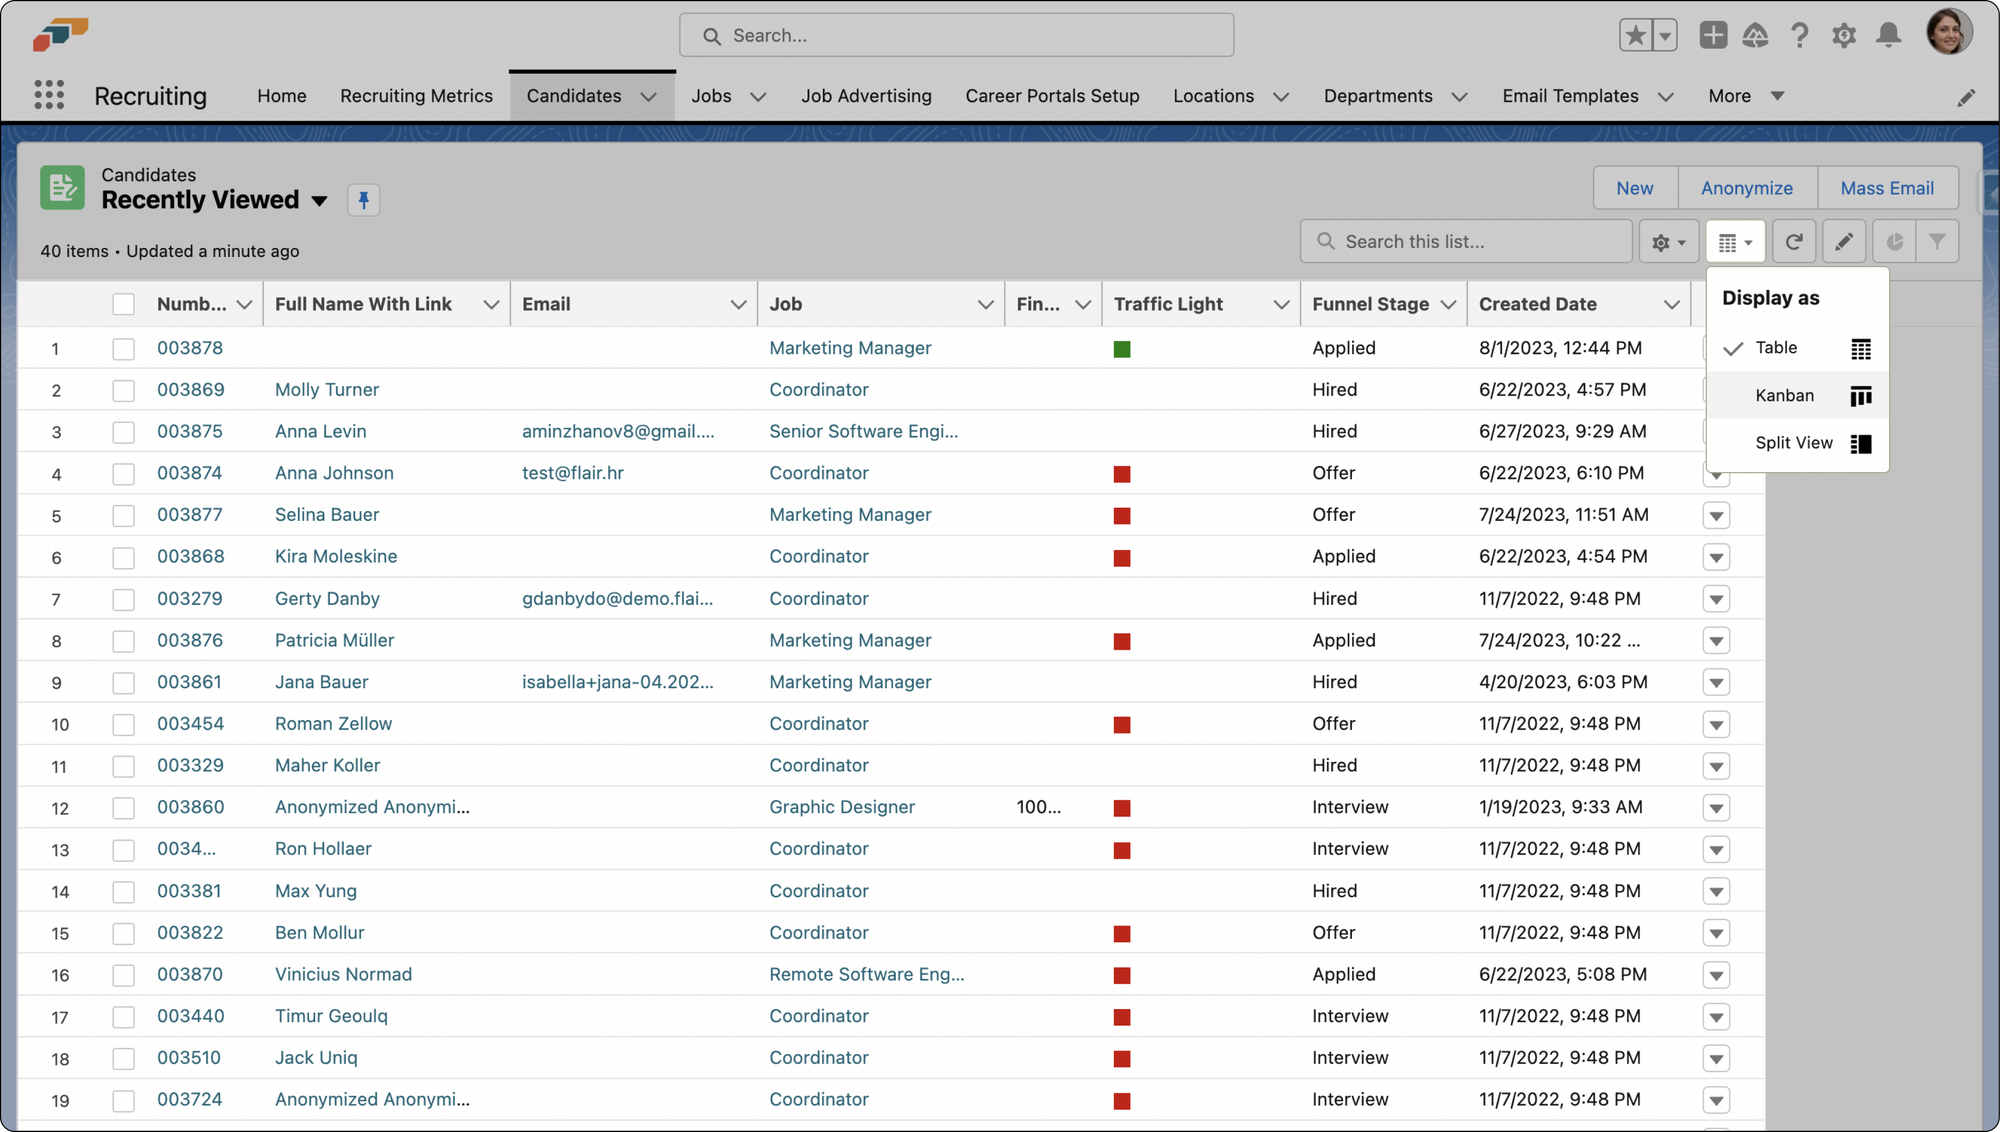
The Table view is the most common and traditional view for displaying records in Salesforce. It presents data in a tabular format with rows and columns, resembling a spreadsheet or a database table.
Accessing the Table View: When assessing candidates in the flair Recruiting app, the Table View will be your default view. However, if you ever need to revert to this view, simply go to the Display As icon in the List View Controls bar and select the Table view.
Kanban View
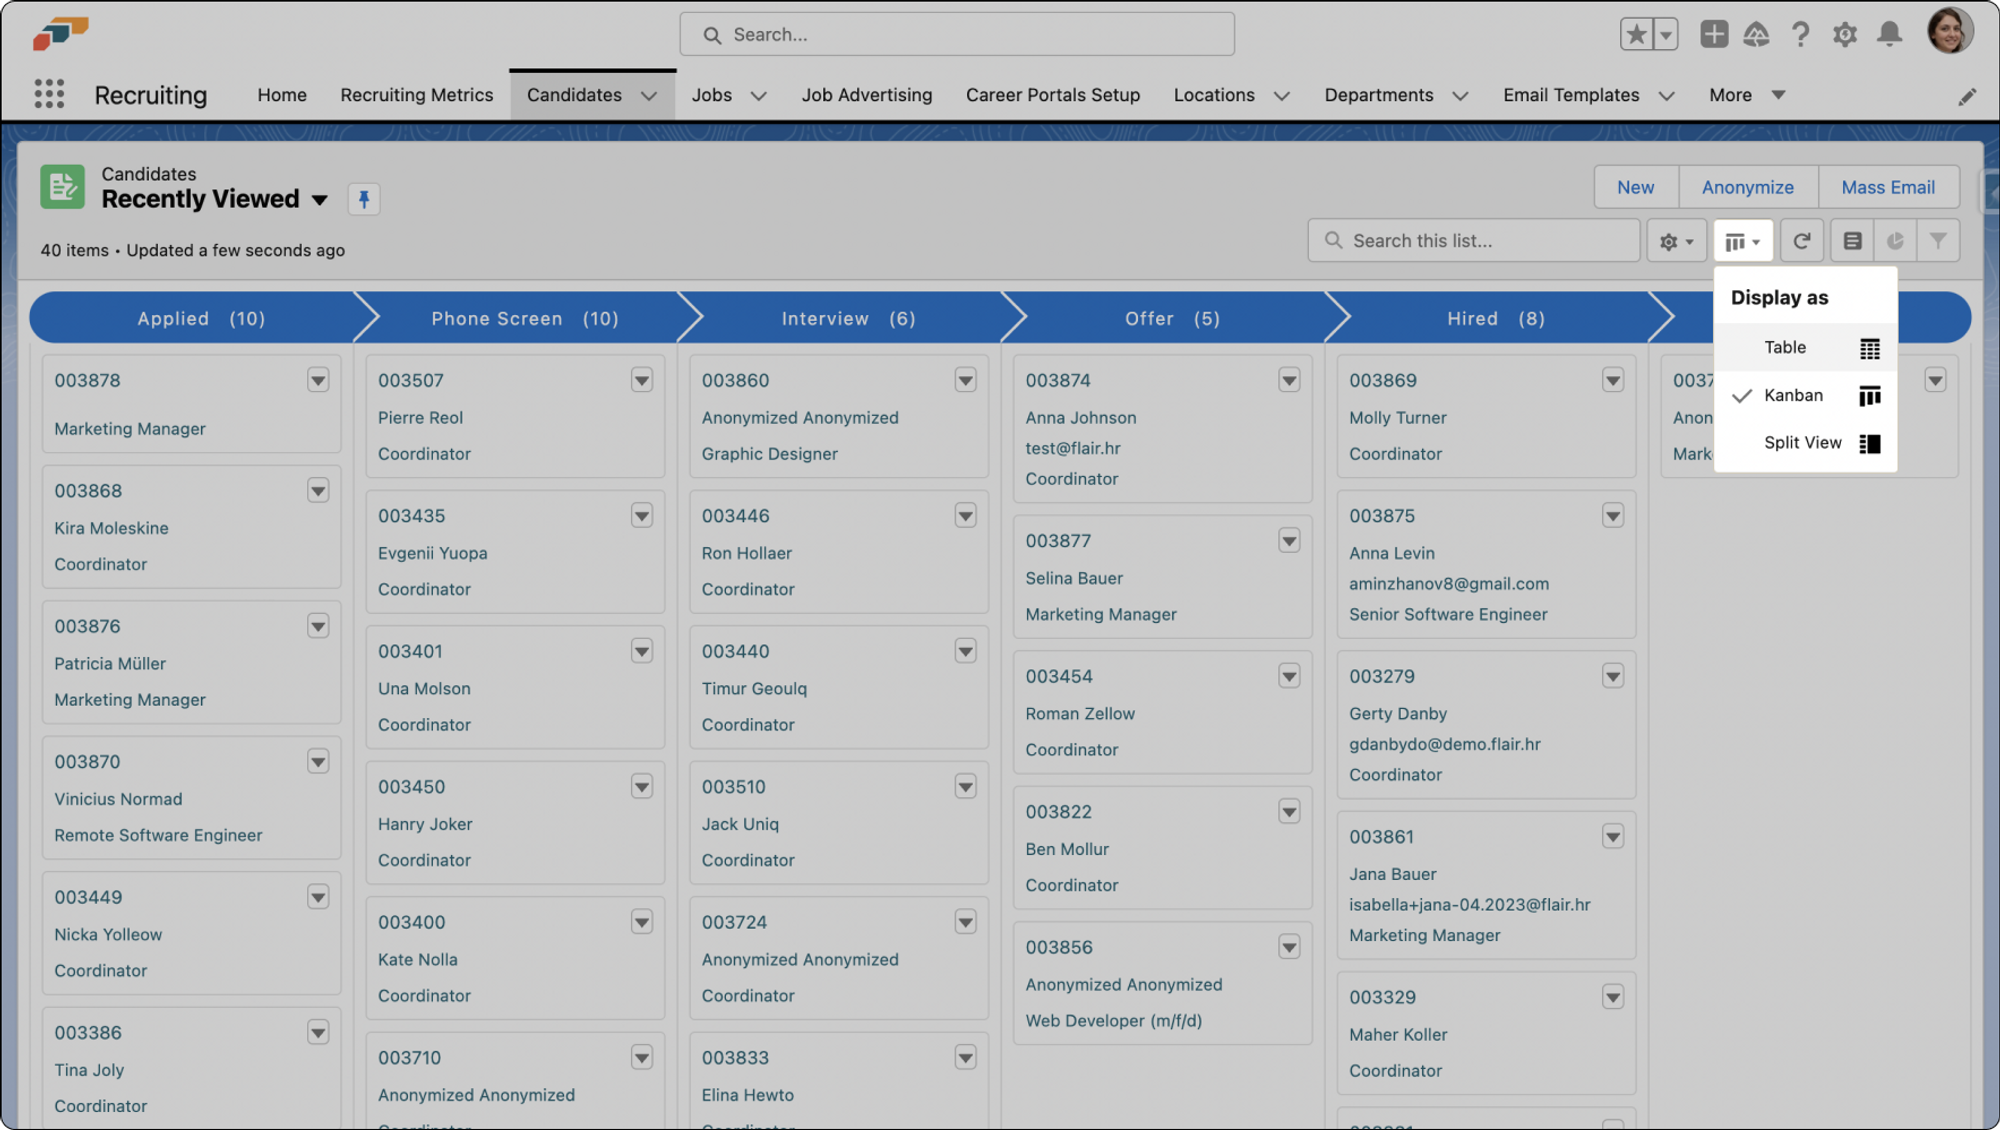
Kanban boards employ cards, columns, and swimlanes to assist teams in effectively visualizing and managing workflows. The view can be effective for charting the progress of work using different columns. For example, in the Candidates section of flair Recruiting, you may wish to organize potential hires into stages such as Applied, Phone Screen, Interview, Offered, Hired, and Rejected.
Accessing the Kanban View: To switch your view to Kanban view, simply select the Display As option on the List View Controls bar and choose Kanban. The job records page offers two different views for managing candidates: Kanban view and Table view. You can toggle between Kanban and Table views using the view selector on the job records page. Both views display the same candidate information in different formats.
Using Kanban View
Moving Candidates Between Stages:
- Drag and drop candidates from one column (stage) to another
- This updates the candidate's application stage automatically
Rearranging Within Stages:
- You can rearrange candidates within the same column/stage
- This helps prioritize candidates within each stage of your hiring process
- Changes are saved automatically to your local computer
Customizing the View:
- Column Display: Choose what information to show on candidate cards (e.g., LinkedIn, email)
- Hide Fields: Remove fields you don't need to see
- Filters: Apply filters to show specific candidates
- Search: Use the search function to quickly find specific candidates
Data Persistence: All your view preferences and candidate arrangements are saved locally on your computer, so your customizations persist between sessions.
Benefits: The Kanban view provides a visual pipeline for managing candidate flow through your hiring process, making it easy to see where each candidate stands and move them through stages efficiently.
Split View
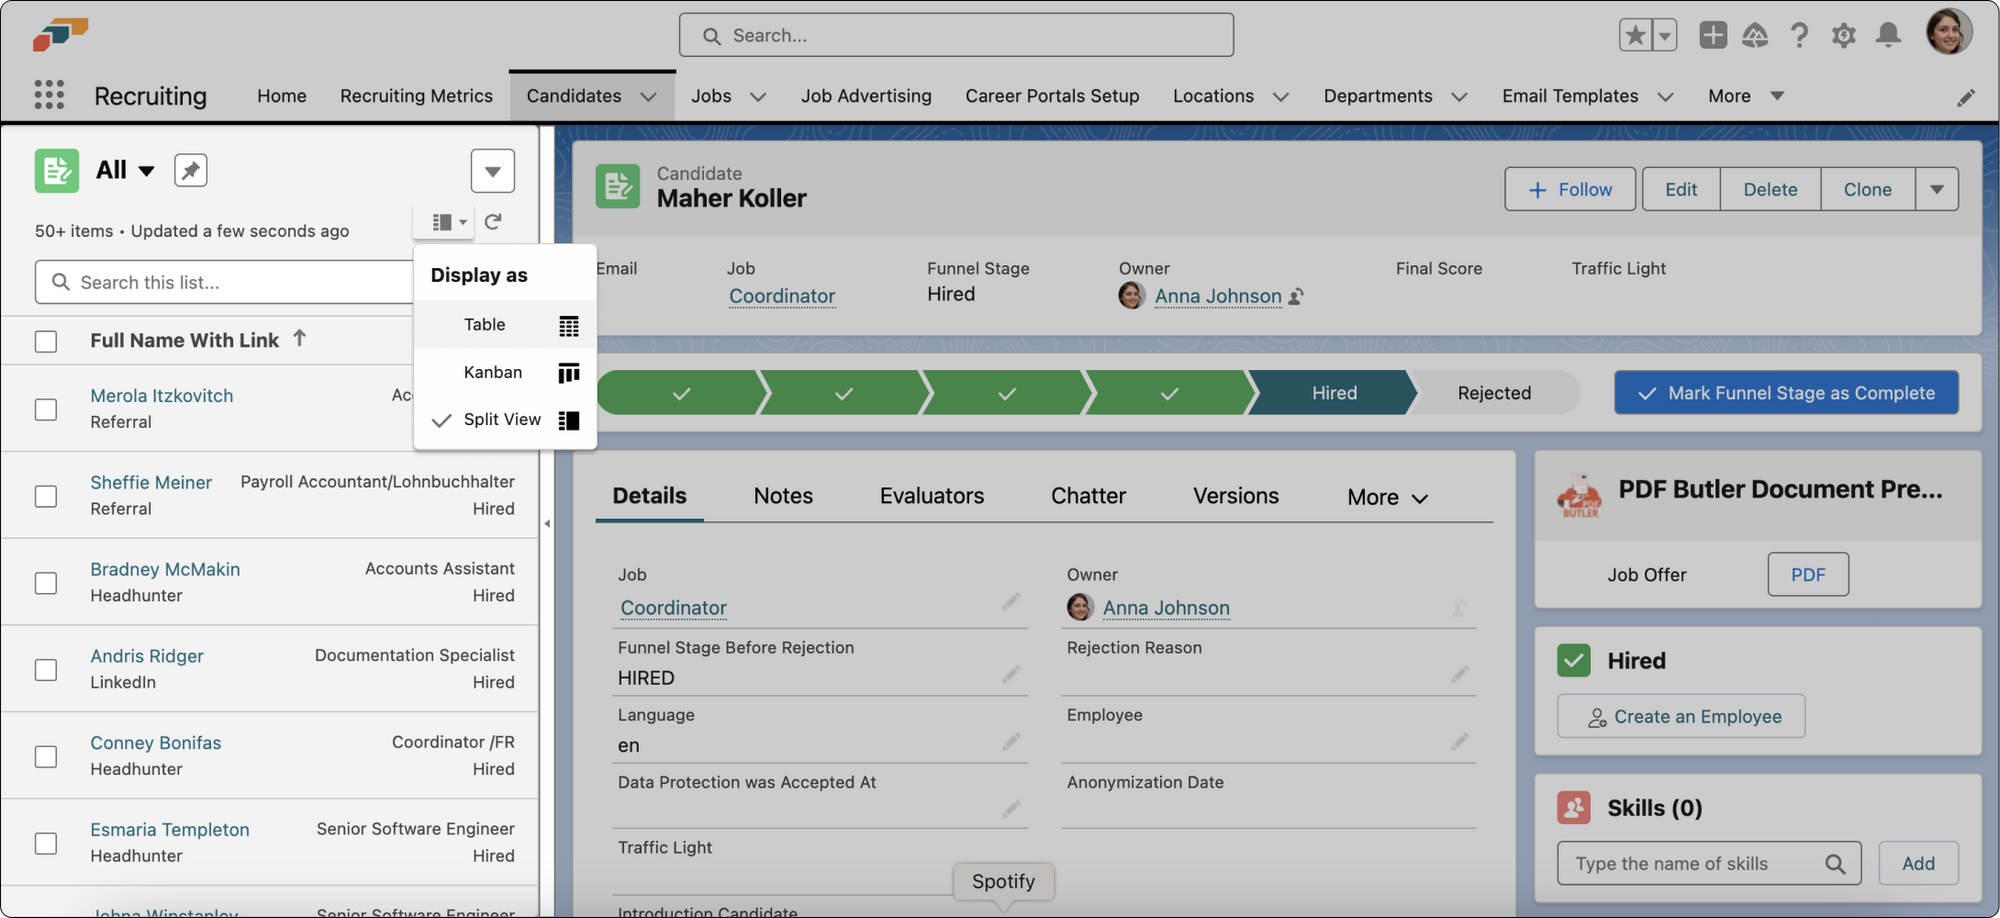
Selecting Split View will divide your screen into two sections: the left pane and the right pane. Split View enables you to multitask and see two different records at the same time. Split View is useful for reviewing records or quickly scanning through a collection of them, without the need to switch back and forth between the list and the records.
Accessing Split View: In the List View Controls menu, locate the Display As tab, which provides various list views for your data. Simply select Split View and your screen will be divided into two.
Candidate Evaluations
Having a fair and consistent process for evaluating candidates is key to hiring the right employees. Find out how to create tailored evaluation templates, assign evaluators, and use our browser extension to streamline your hiring process.
Creating an Evaluation Template
In the flair Recruiting app, click the Evaluations tab in the navigation bar. Select Evaluation Templates and then New Evaluation Template.
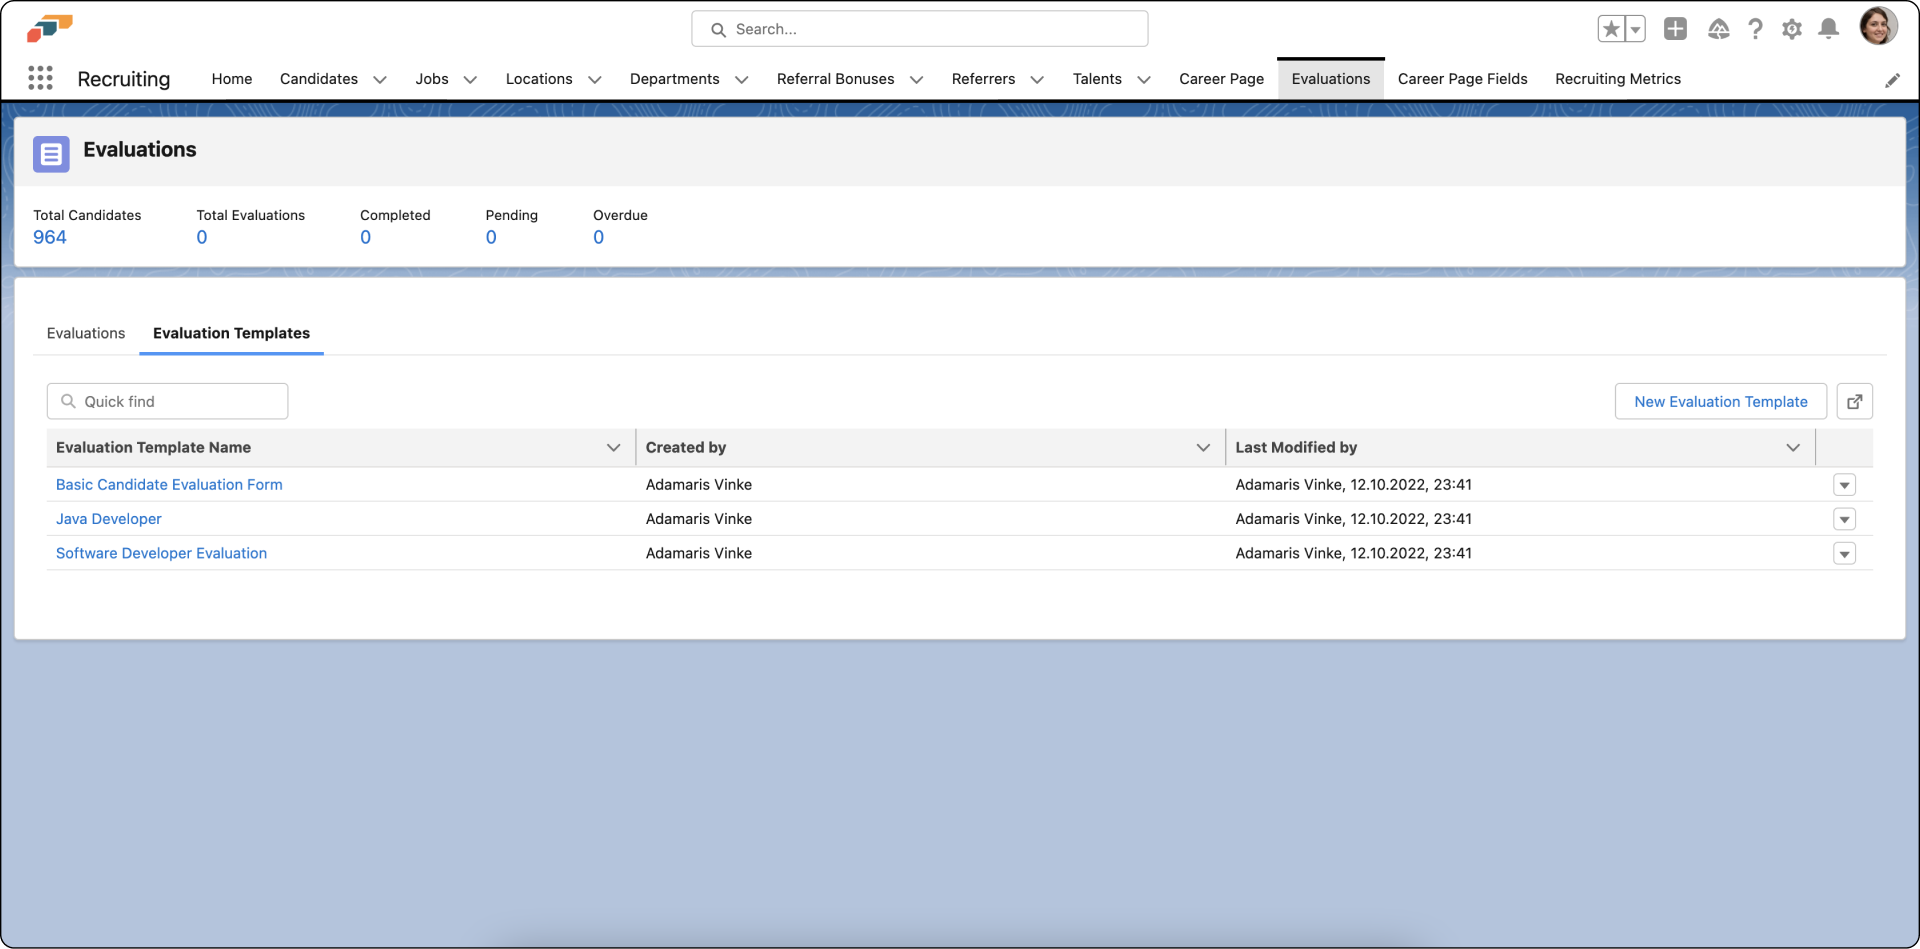
Give your template a name and click Save. Your template will now appear in the list. Click on it to start creating your template. You can then add different types of questions.
Single Choice: The evaluator can select one answer. Click Add Option to define possible answers.
Multiple Choice: The evaluator can select multiple answers. Click Add Option to define possible answers.
Scorecard: The evaluator gives the candidate a score for multiple items. Click Add Item to add the items you want the evaluator to assess.
Free Text: The evaluator can type any answer to the question
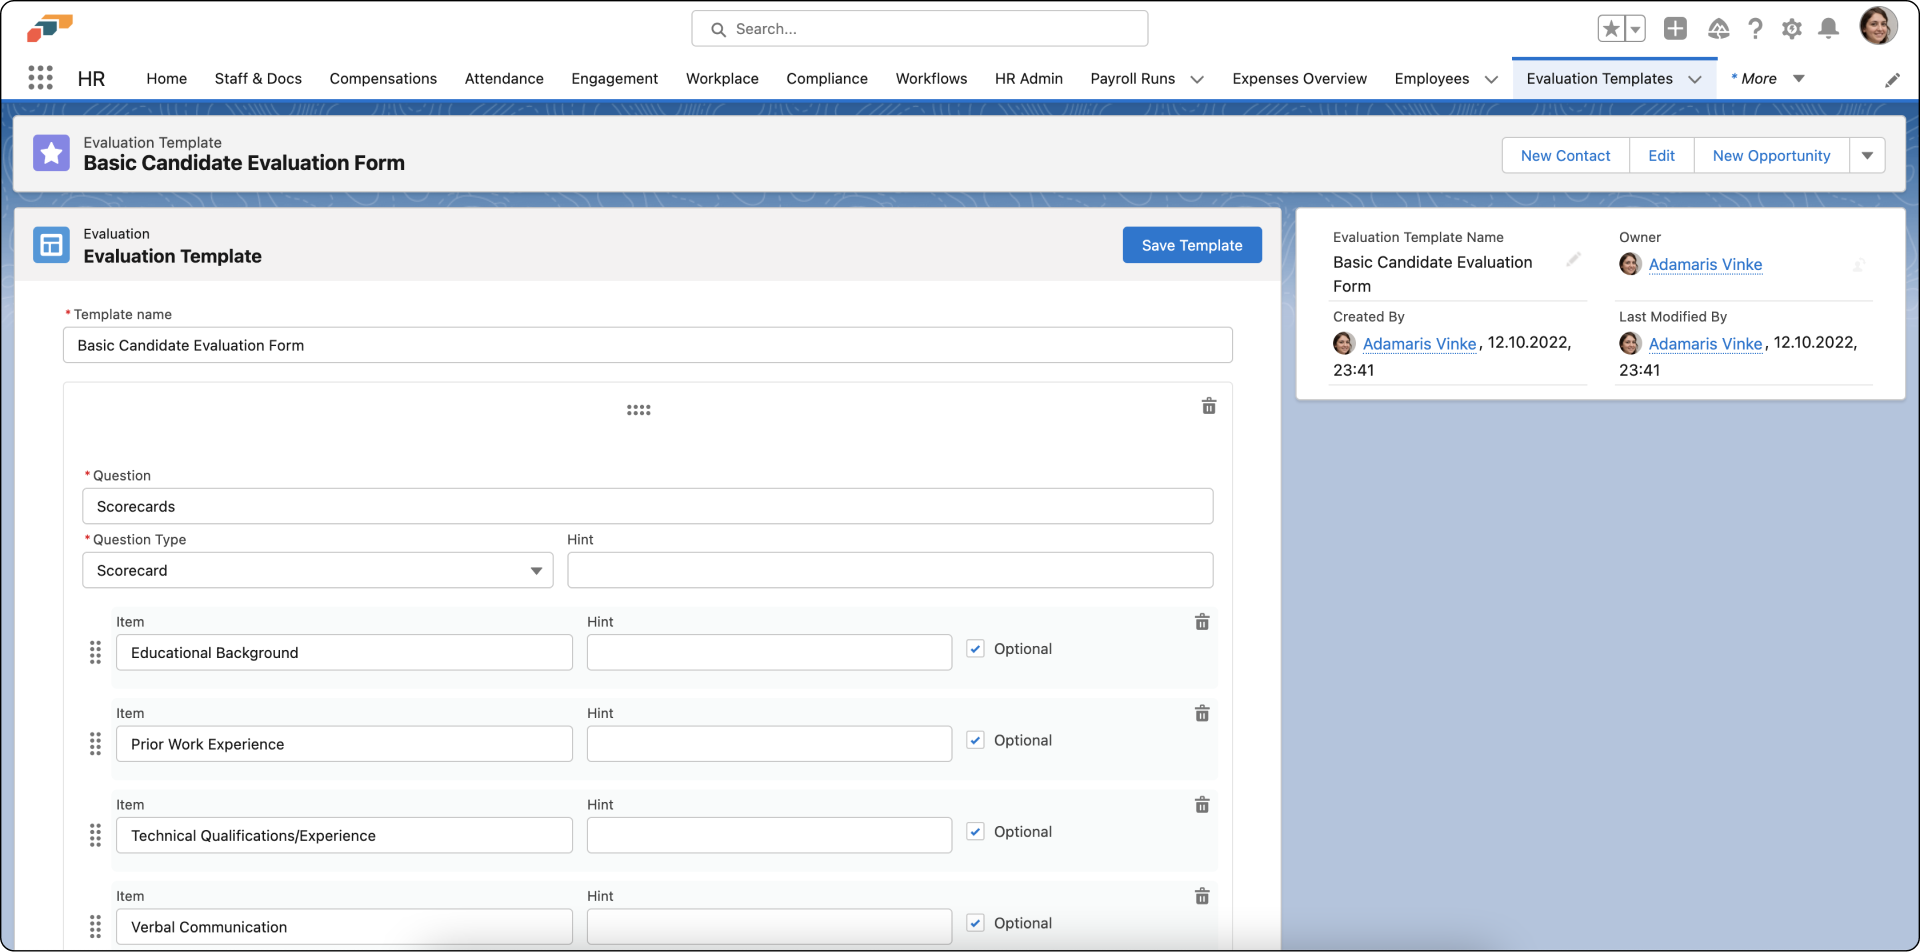
For each type of question, you can make the question optional or mandatory and add hints to help the evaluator.
You can also delete questions by clicking the trashcan icon. Change the order of questions by clicking on the drag handle dots at the top of each question card and move the question to a new position.
Once you're finished, click Save Template and your evaluation template will be ready to use.
Assigning Evaluators and Evaluations
To assign evaluators and evaluation templates to candidates, go to the Jobs section of the flair Recruiting app.
Select a job and then go to the profile of the candidate you want to assign an evaluator to. Click the Evaluators tab and then Add New Evaluator. Select an evaluator, choose an Evaluation Template, and if needed, set a Due Date for the evaluation.
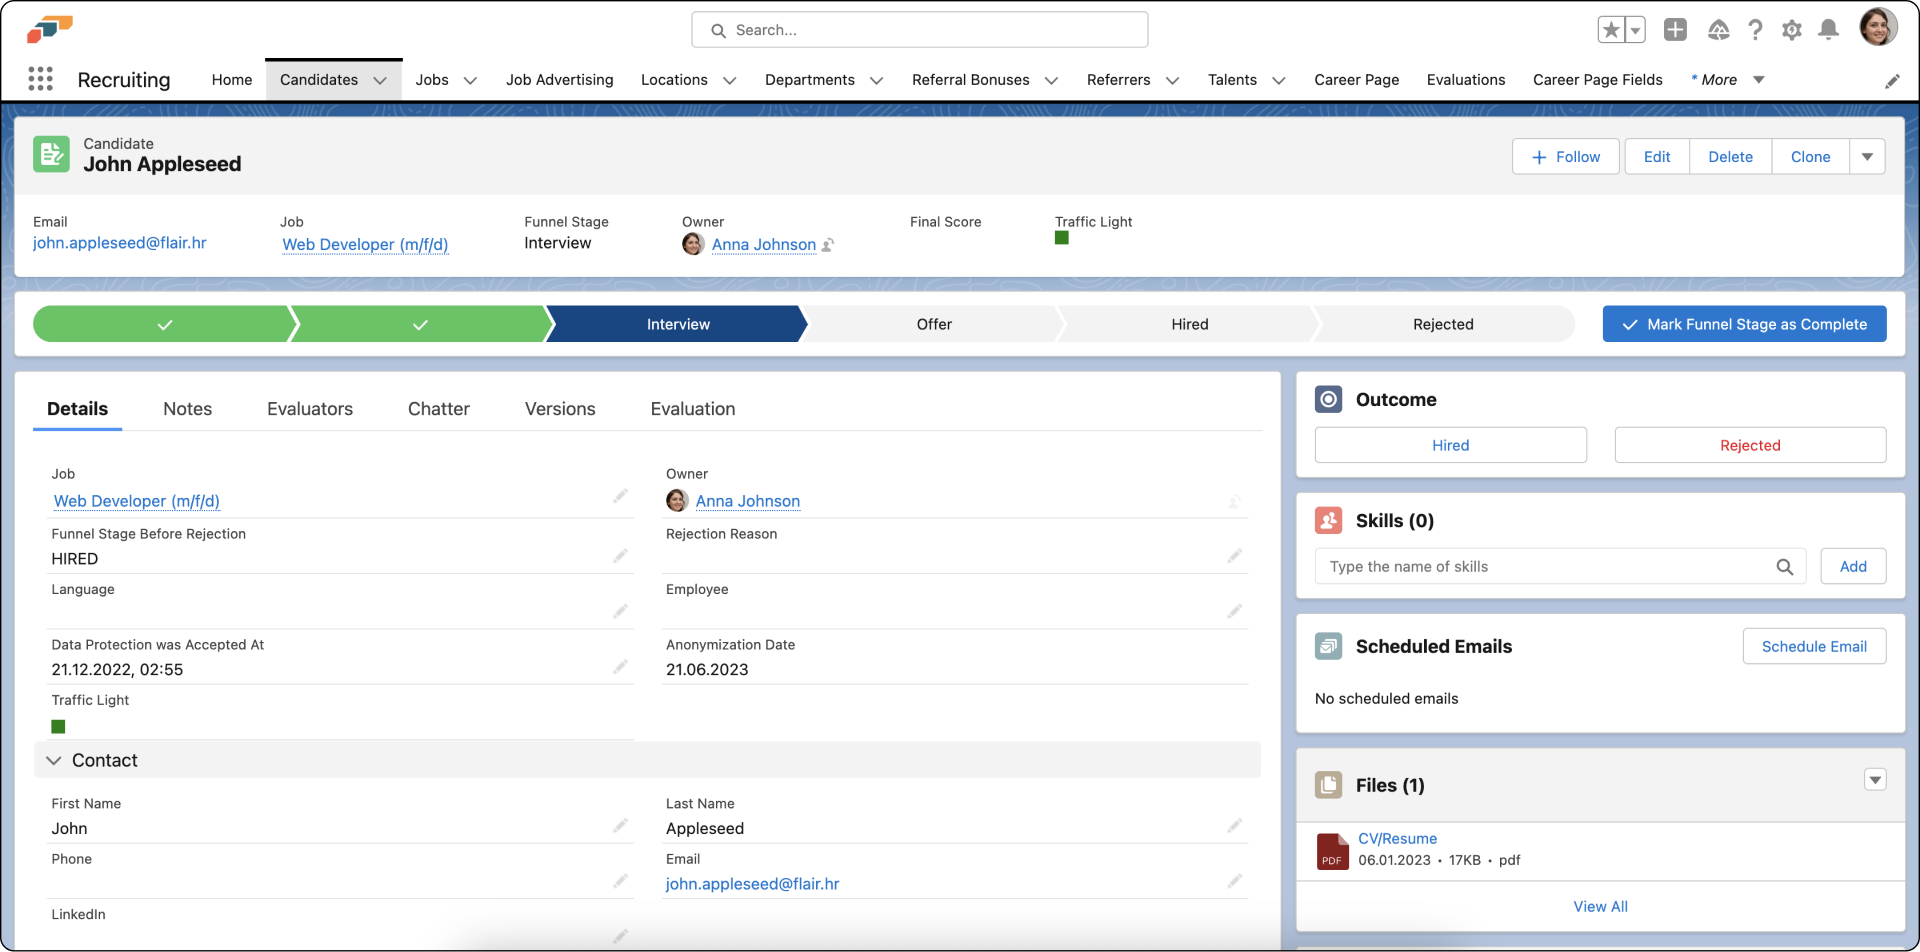
You can also use the Candidates tab to directly find a candidate you wish to assign an evaluator to.
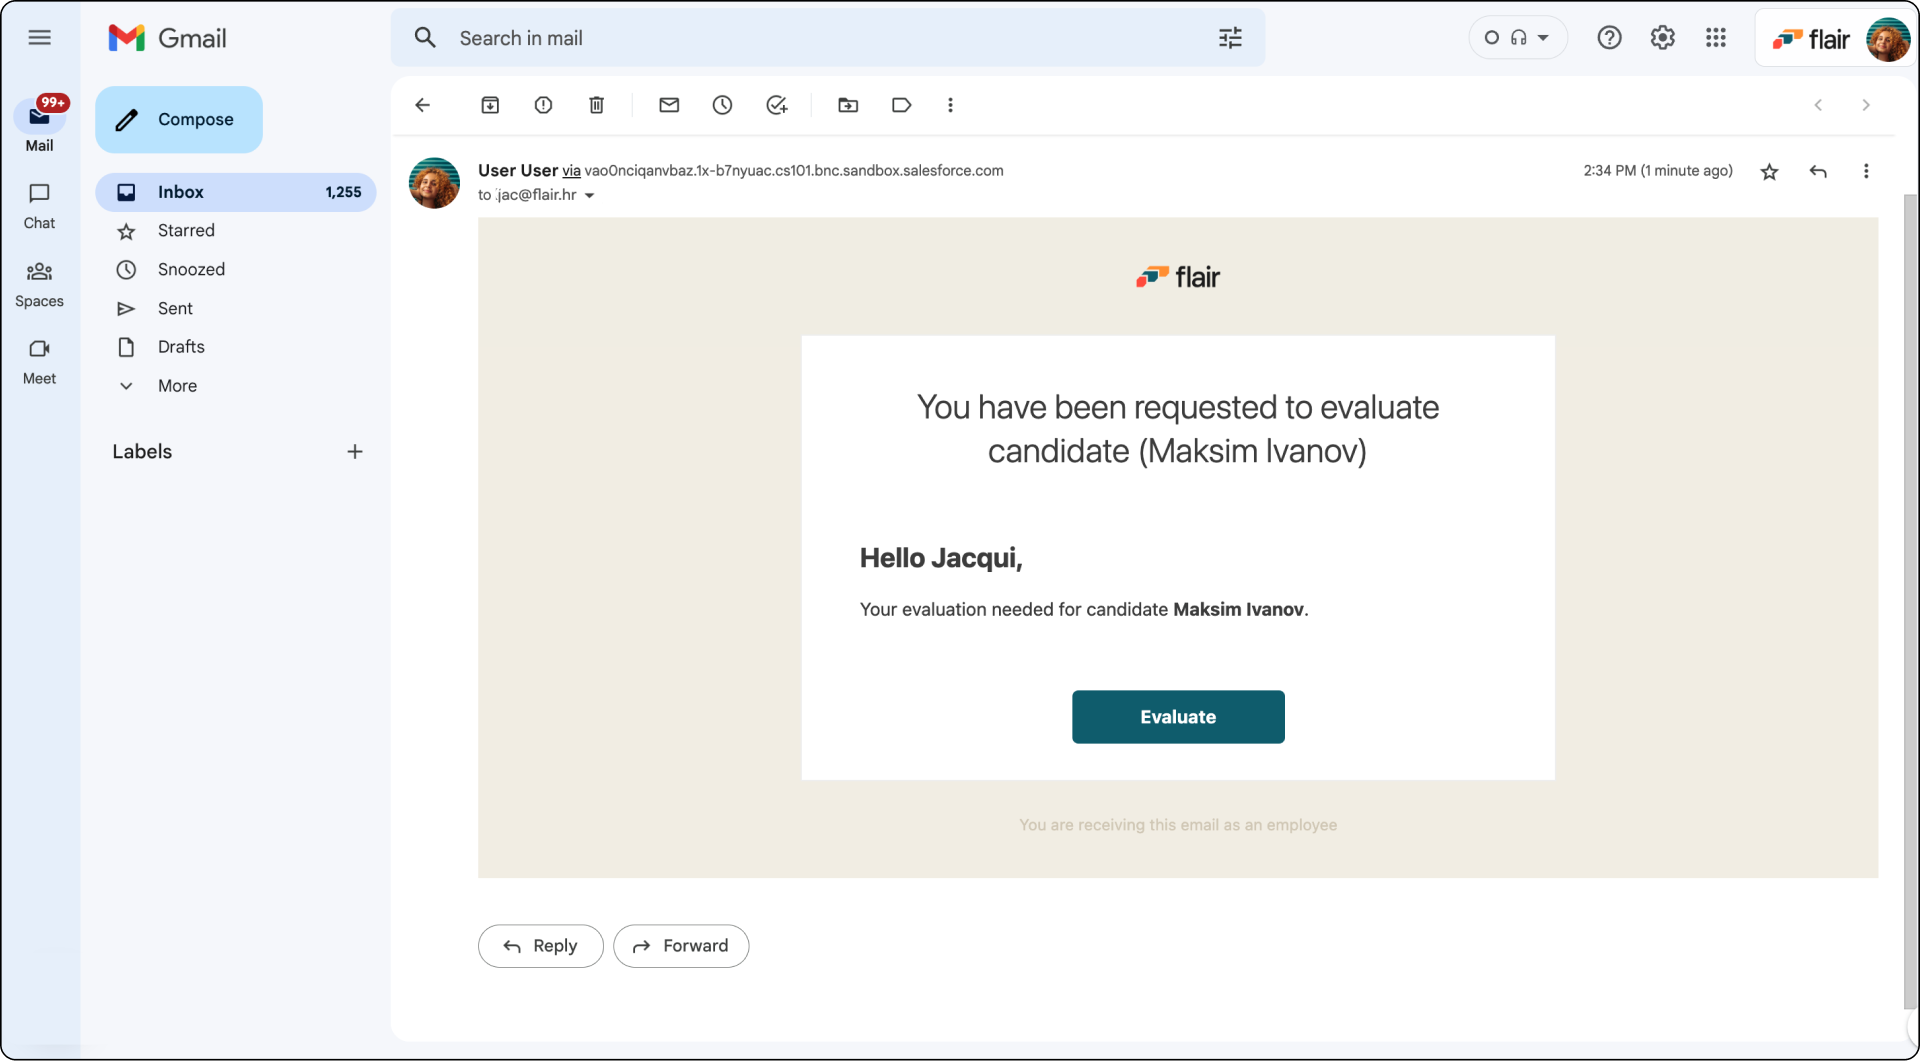
How To Evaluate a Candidate
Once you assign an evaluator and an evaluation template, an email invite will be sent out to the evaluator. Clicking the Evaluate button will take the evaluator to the Employee Hub, where they can assess the candidate.
In the Employee Hub, you will see a list of candidates to evaluate. This table shows you useful information, such as application stage, job, and the evaluation's due date, score, comments, and status.
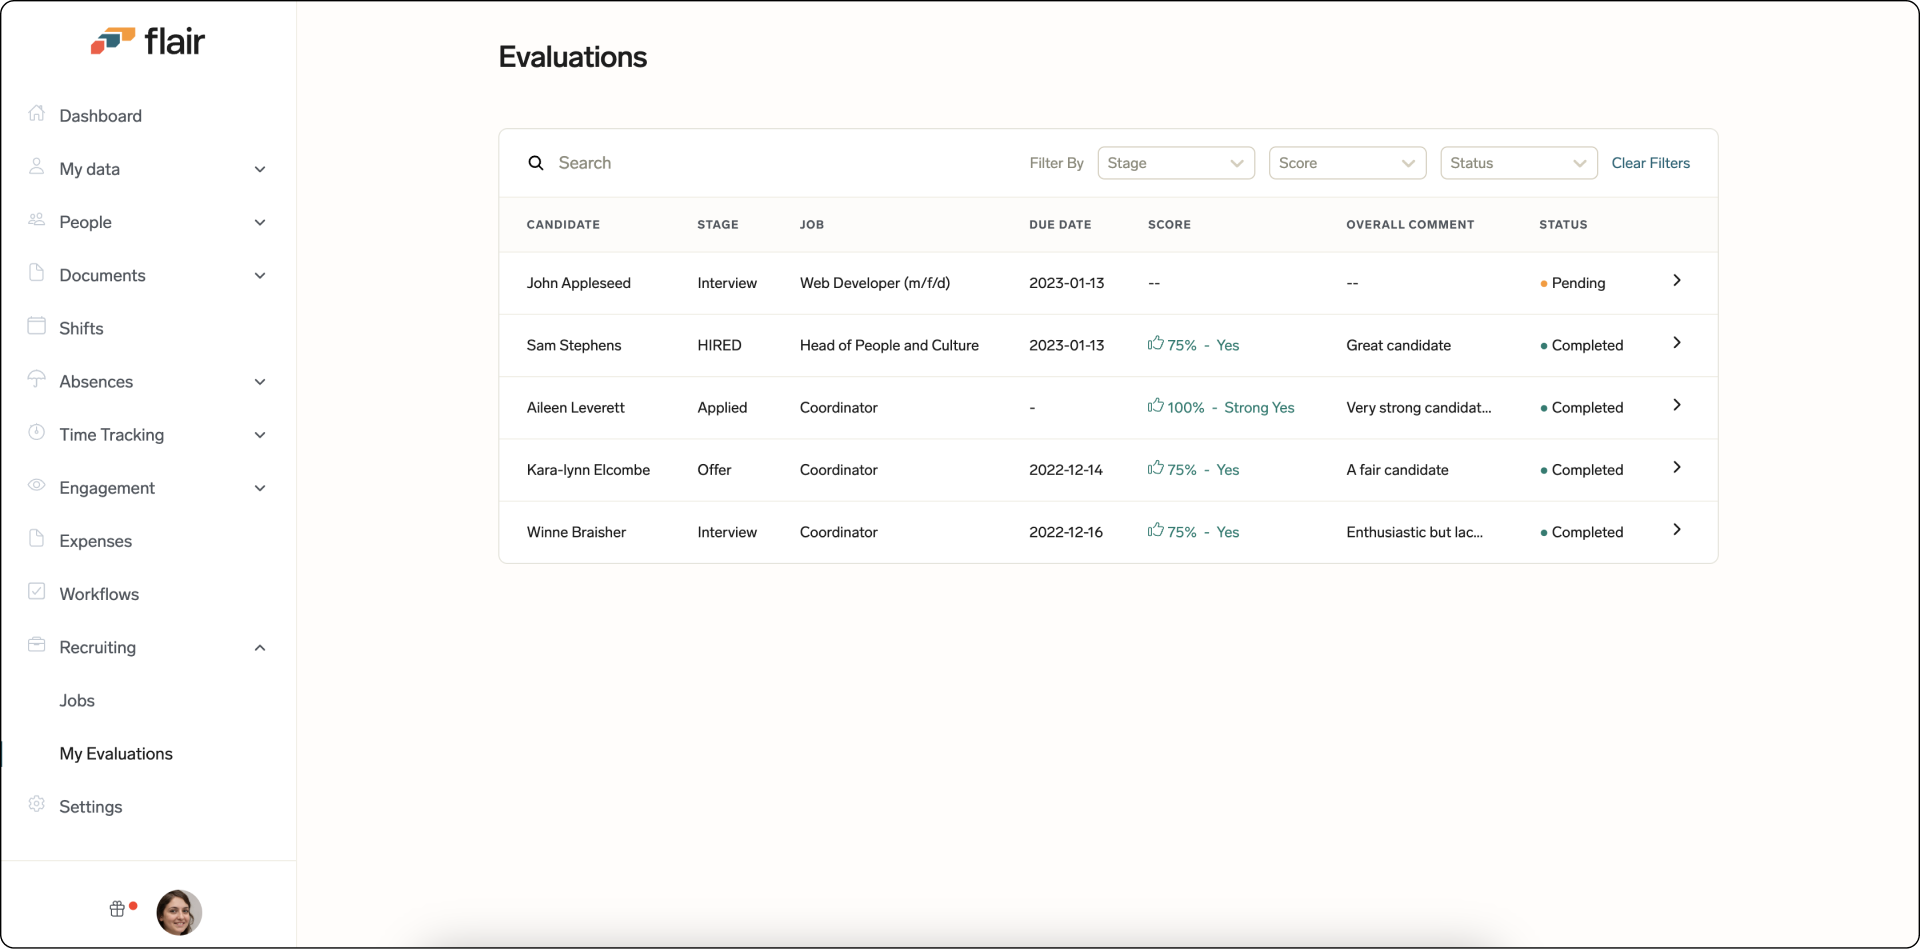
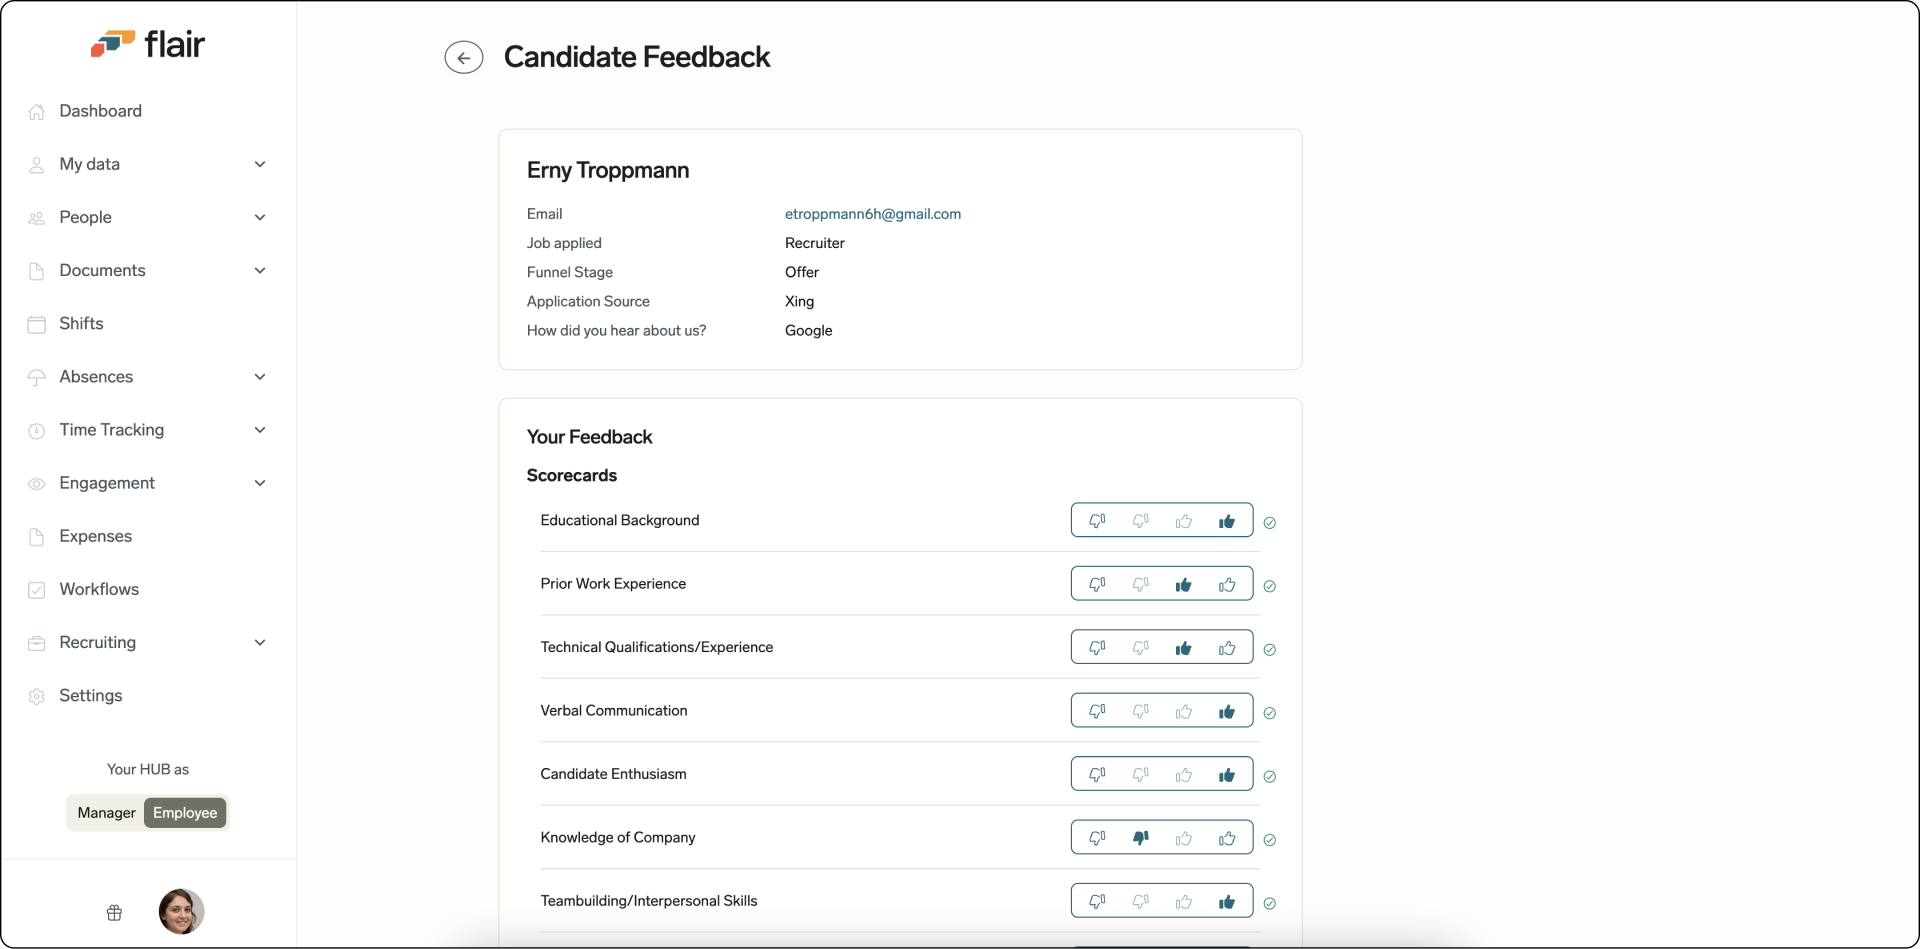
When you click on a candidate, you'll see their information at the top of the evaluation form. The evaluation questions will appear below and you can start submitting your feedback. Finally, you can add your overall recommendation and write any final comments.
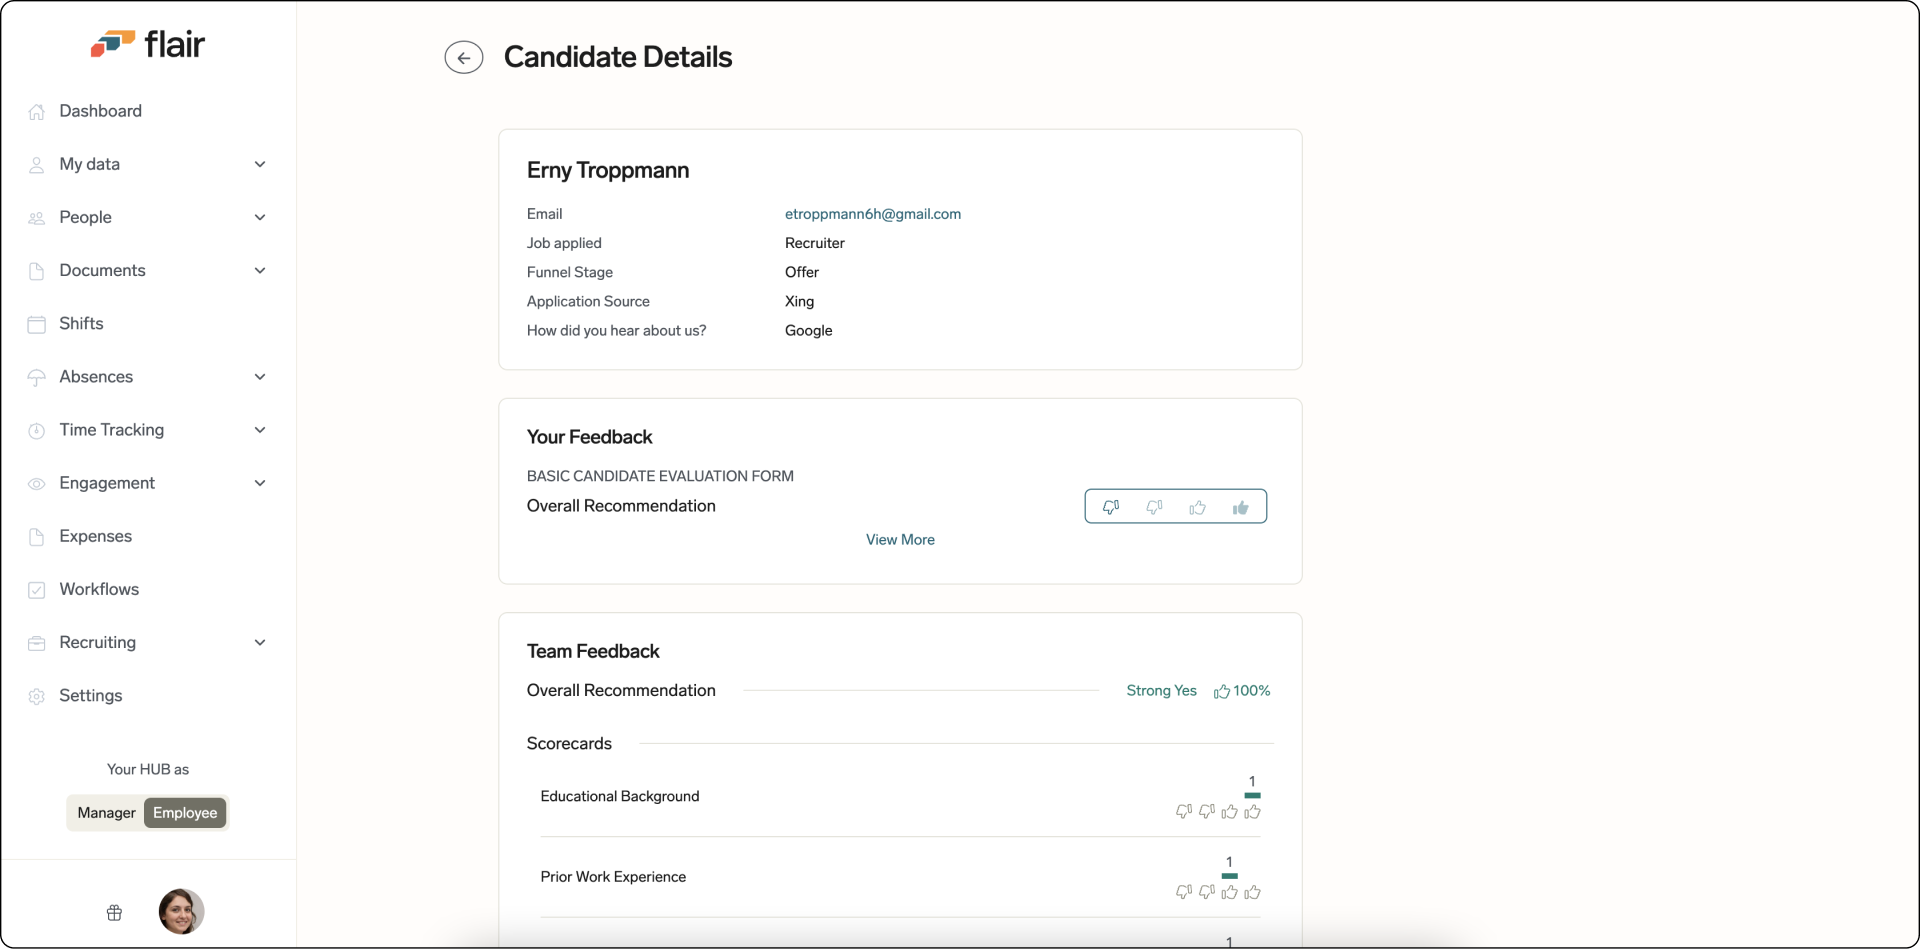
Below Your Feedback, you can also see an overview of your team's feedback on the same candidate, as well as an Overall Recommendation score.
Viewing Colleague Comments
In the Recruiting Module, access to candidate comments and evaluation notes is restricted based on evaluator assignment. Simply assigning a colleague as an evaluator does not automatically grant you visibility into their comments unless you are also designated as an evaluator for that candidate.
To view all evaluator comments and application details, you must be assigned as an evaluator for that specific candidate. This ensures confidentiality and relevance by only showing evaluation content to users directly involved in the review process.
Adding the Extension to Your Browser
You can download our flair Recruiting extension for Google Chrome from the Chrome Web Store. Download the extension here.
Once you have downloaded the extension, open the extension by clicking on the flair logo in your Google Chrome browser. If you have not pinned it to your navigation bar, you may first need to click the jigsaw piece to find the extension. Use your flair Employee Hub log-in details to sign in.
Adding a Talent's or Candidate's Details
Now you can add the details of the candidate or talent you have found: full name, email address, phone number, and a link to their LinkedIn profile. Optionally, you can add notes and select relevant skills from your flair Recruiting app.
Lastly, select whether to save the profile as a Talent or a Candidate. If you select Candidate, you will be able to assign a job for the profile from a drop-down menu and select the appropriate funnel stage. Click Create Candidate / Create Talent to save the profile directly to the flair Recruiting app.
Mass Edit Candidate Records
The table view now includes a mass edit feature that allows you to update multiple candidate records simultaneously. This feature saves significant time when making bulk updates and ensures consistency across multiple candidate records.
Accessing Mass Edit
- Navigate to the table view for candidates
- Select multiple candidates by checking the boxes next to their records
- Look for the mass edit option that appears when candidates are selected
Using Mass Edit
Selecting Candidates:
- Choose the candidates you want to update (e.g., candidates in "Phone Screen" and "Interview" stages)
- You can select candidates across different stages if needed
Updating Fields:
- Stage Changes: Update the final stage for all selected candidates (e.g., change all to "Rejected")
- Rejection reason: Add a rejection reason (e.g., "Better qualified candidate selected")
- Any other available candidate fields: Update any other fields that are available for bulk editing
Saving Changes:
- Click Save to apply all changes to the selected records
- All updates are processed automatically and simultaneously
- No need to send individual emails as required in previous versions
Candidate Questionnaire Fields
The information on the non-Salesforce fields is stored under the questionnaire tab in the candidate object.
Disabling Automatic Candidate Anonymization
According to data privacy regulations, candidates may require HR specialists not to store their data under specific circumstances.
If anonymization is enabled, a scheduled job will anonymize candidates after six months unless they opted-in to be stored in your system. To disable automatic anonymization:
- In Salesforce Setup, go to Custom Settings
- Click on Candidate Setting
- Click on the Manage button
- Click on Edit
- Check Disable Anonymization
- Then click on Save
Automatic candidate anonymization is now disabled. Candidates will not be automatically anonymized after six months unless you manually trigger the anonymization process.
Using Reference Skills to Match Candidates Against Job Requirements
Reference skills allow you to define the skills required for a job and then match candidates against those requirements.
Defining Job Skill Requirements
- Navigate to the Jobs section in the flair Recruiting app.
- Open a job record and go to the Skills tab.
- Add the required skills for the position.
Viewing Candidate Skill Matches
When viewing a candidate's profile, you can see how their skills match the job requirements:
- Matching Skills: Skills the candidate has that match the job requirements.
- Missing Skills: Skills required by the job that the candidate does not have.
- Other Skills: Additional skills the candidate has that are not listed in the job requirements.
You can also add skills directly to a candidate's profile from their record.
Adding Custom Columns to the Candidates Table View
You can add custom columns (such as LinkedIn profile or phone number) to the candidates table view by configuring custom metadata types in Salesforce.
- In Salesforce Setup, search for Custom Metadata Types in the Quick Find box.
- Find and click on the relevant metadata type for candidate table columns.
- Click Manage Records and then New.
- Configure the field name (e.g.,
flair__LinkedIn__c) and set the position to control the column order. - Save your changes.
The new column will now appear in the candidates table view in the flair Recruiting app.