Restrict a Career Portal to Approved Networks
Most career portals are meant for the whole world to see — but not all of them. If you run an internal job board, or a portal that should only be reachable from the office or over the company VPN, you can restrict access to specific networks with the Allowed IP Ranges setting.
Key Points at a Glance
- The setting is Allowed IP Ranges, found on the career portal in Salesforce.
- Both IPv4 and IPv6 addresses are accepted, as single addresses or as CIDR ranges.
- Separate multiple entries with commas or new lines.
- Leaving the field empty leaves the portal open to everyone — the restriction is opt-in.
- flair validates the entries when you save, so a malformed address is rejected there and then.
- Once set, visitors outside the listed networks cannot reach the portal.
Before You Start
A restriction is only as good as the ranges behind it. Before switching this on:
- Check your own public IP address, so the portal stays reachable for you while you set the restriction up.
- Ask your IT team for the office and VPN ranges, so that everyone who needs access is on the list.
A wrong range can lock out candidates and your own recruiters alike. Double-check every entry before you save.
Setting Allowed IP Ranges
- Open the career portal in Salesforce.
- Find the Allowed IP Ranges setting.
- Enter the networks that should be allowed to reach the portal.
- Save the career portal.
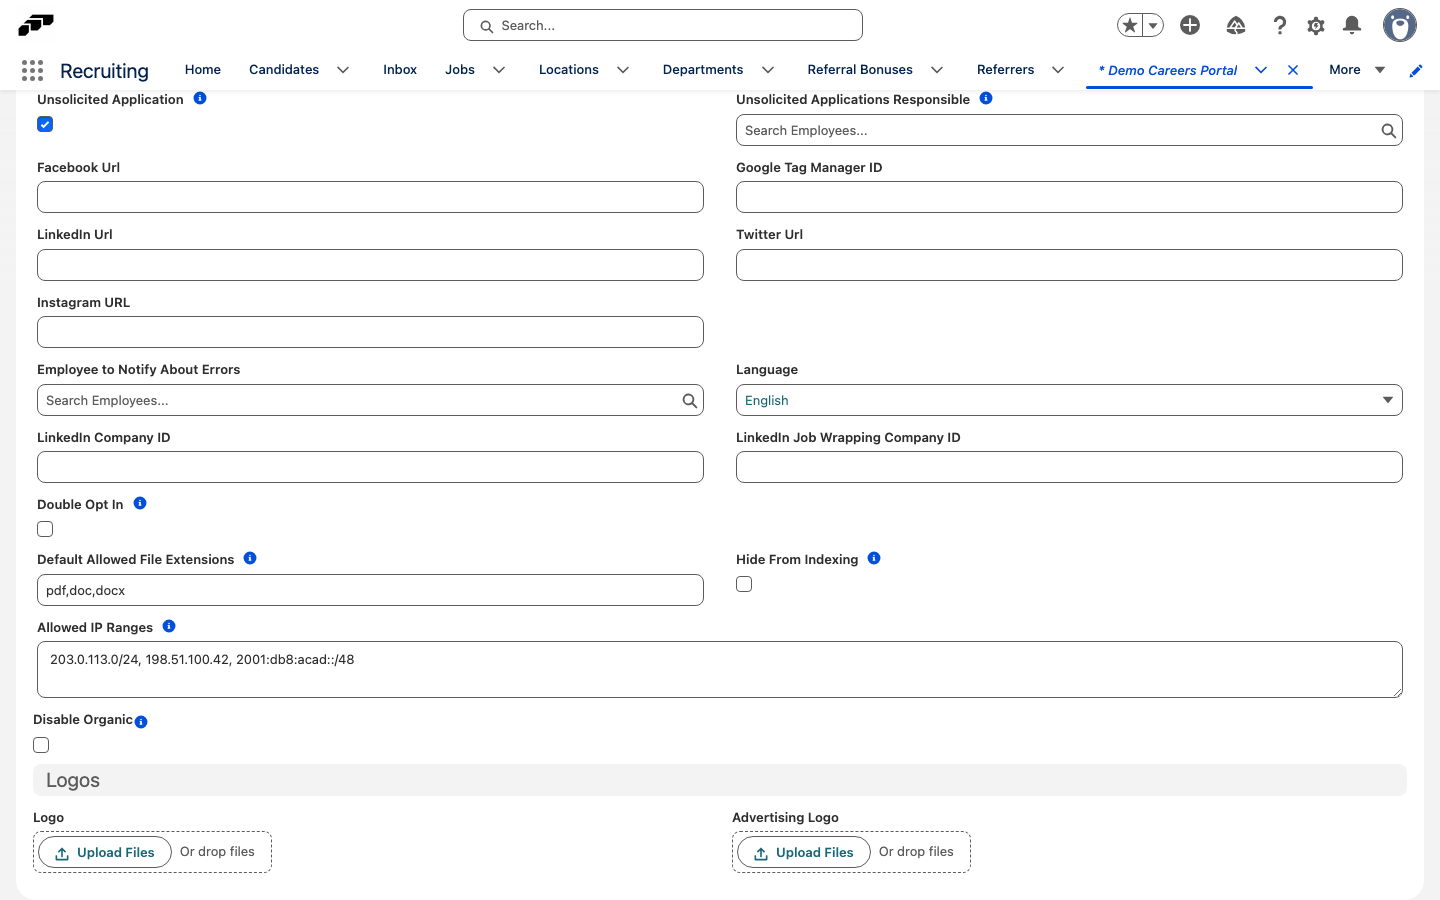
The field's help text reads:
"Restrict access to this career portal to specific networks. Enter IP addresses or CIDR ranges (IPv4 or IPv6) separated by commas or new lines."
What You Can Enter
You can allow:
- Single addresses — one specific IP address, for when the portal should be reachable from exactly one place.
- CIDR ranges — a whole network expressed in one entry, such as
203.0.113.0/24. - IPv4 or IPv6 — both address families are supported, and entries in both formats can sit in the same list.
To allow more than one network, separate the entries with commas or new lines — whichever you find easier to read.
Validation on Save
You don't have to be a network expert to use this setting safely. flair validates the entries when you save, so a malformed address is rejected there and then — not left sitting quietly in place to trip people up later.
What the Restriction Does
Once Allowed IP Ranges contains at least one entry, visitors outside the listed networks cannot reach the portal.
Two things worth remembering:
- The restriction applies only to the career portal it is set on — nothing else.
- The setting stays in effect until you change or clear it.
Leaving the Field Empty
This restriction is opt-in. An empty Allowed IP Ranges field leaves the portal open to everyone, so a portal with no entries behaves like any public career portal.
To lift the restriction later, clear the entries from the field and save.
Quick Checklist
Before you walk away from the settings page:
- Confirm the portal really is meant for a limited audience.
- Collect the public IP or the office and VPN ranges from IT.
- Enter them in Allowed IP Ranges, separated by commas or new lines.
- Save, and let flair's validation confirm that every entry is well formed.
- Verify that the portal still loads for someone inside an allowed network.