Configure single sign-on for the Employee Hub
Set up SAML single sign-on (SSO) so employees can access the flair Employee Hub with credentials from your identity provider. This guide covers Google, Salesforce, and Microsoft Entra ID.
Salesforce Admins who manage the Employee Hub and administrators for the selected identity provider.
Before you begin
- Find your Employee Hub domain in HR Admin → Hub Settings.
- Confirm that you can configure enterprise applications in Google Admin, Salesforce, or Microsoft Entra ID.
- Use a unique entity ID for each SAML provider when your organization configures more than one provider.
Configure SAML SSO with Google
After you enable Google SAML, Salesforce can no longer send manual Employee Hub invitations. Google manages all sign-ins.
-
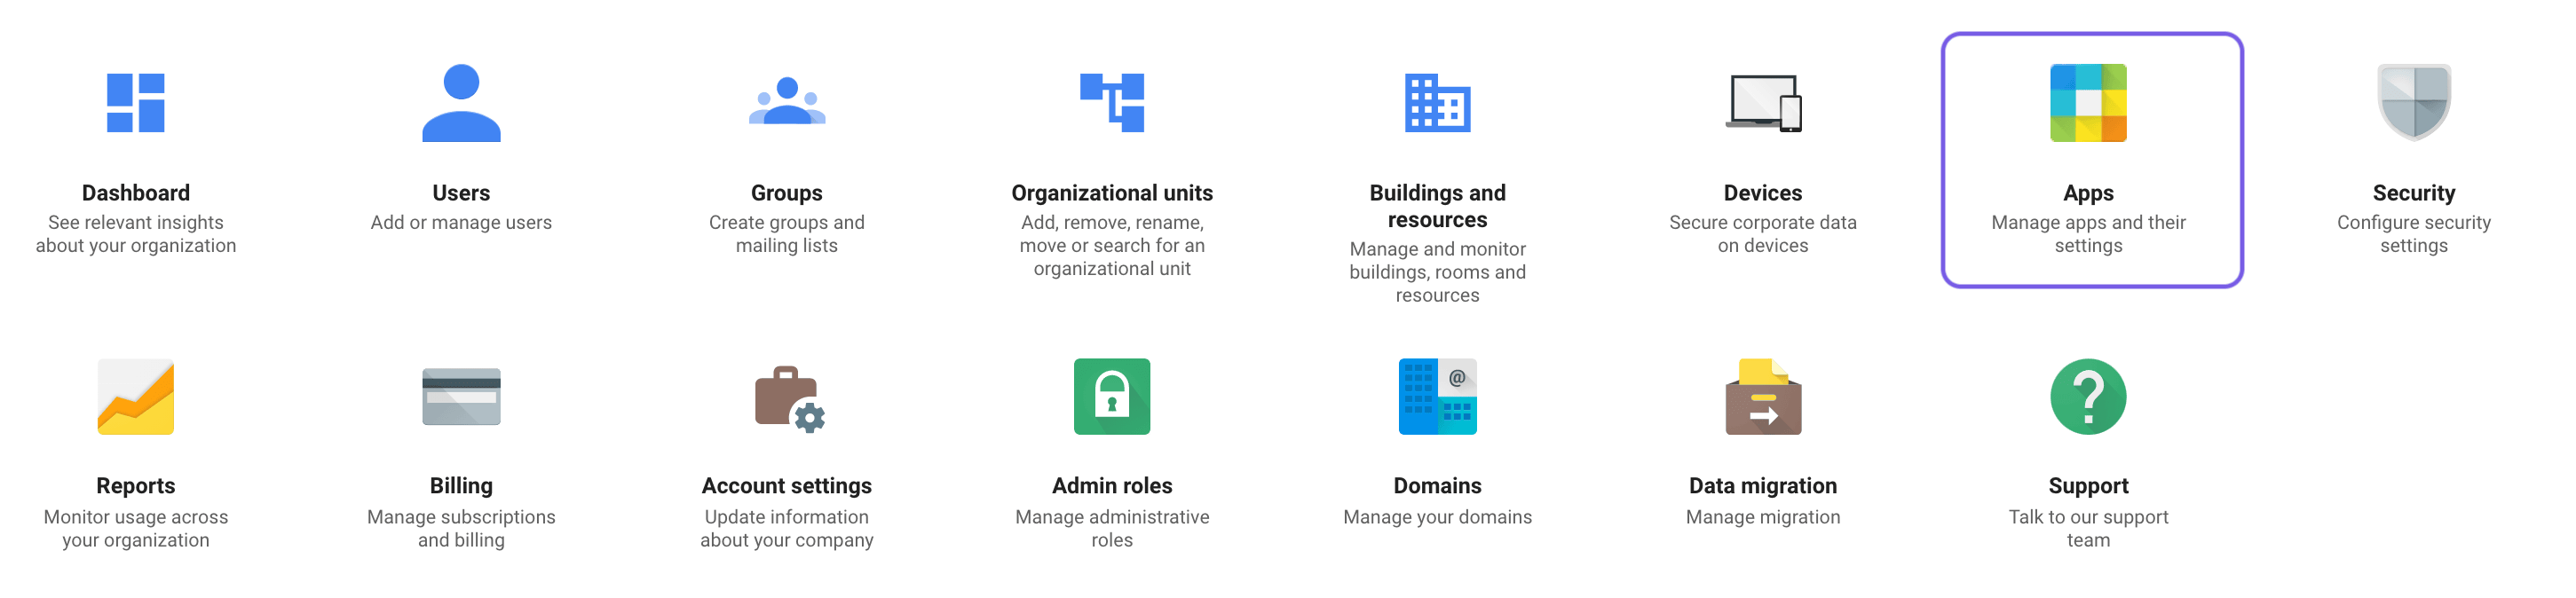
In the Google Admin console, select Apps.
-
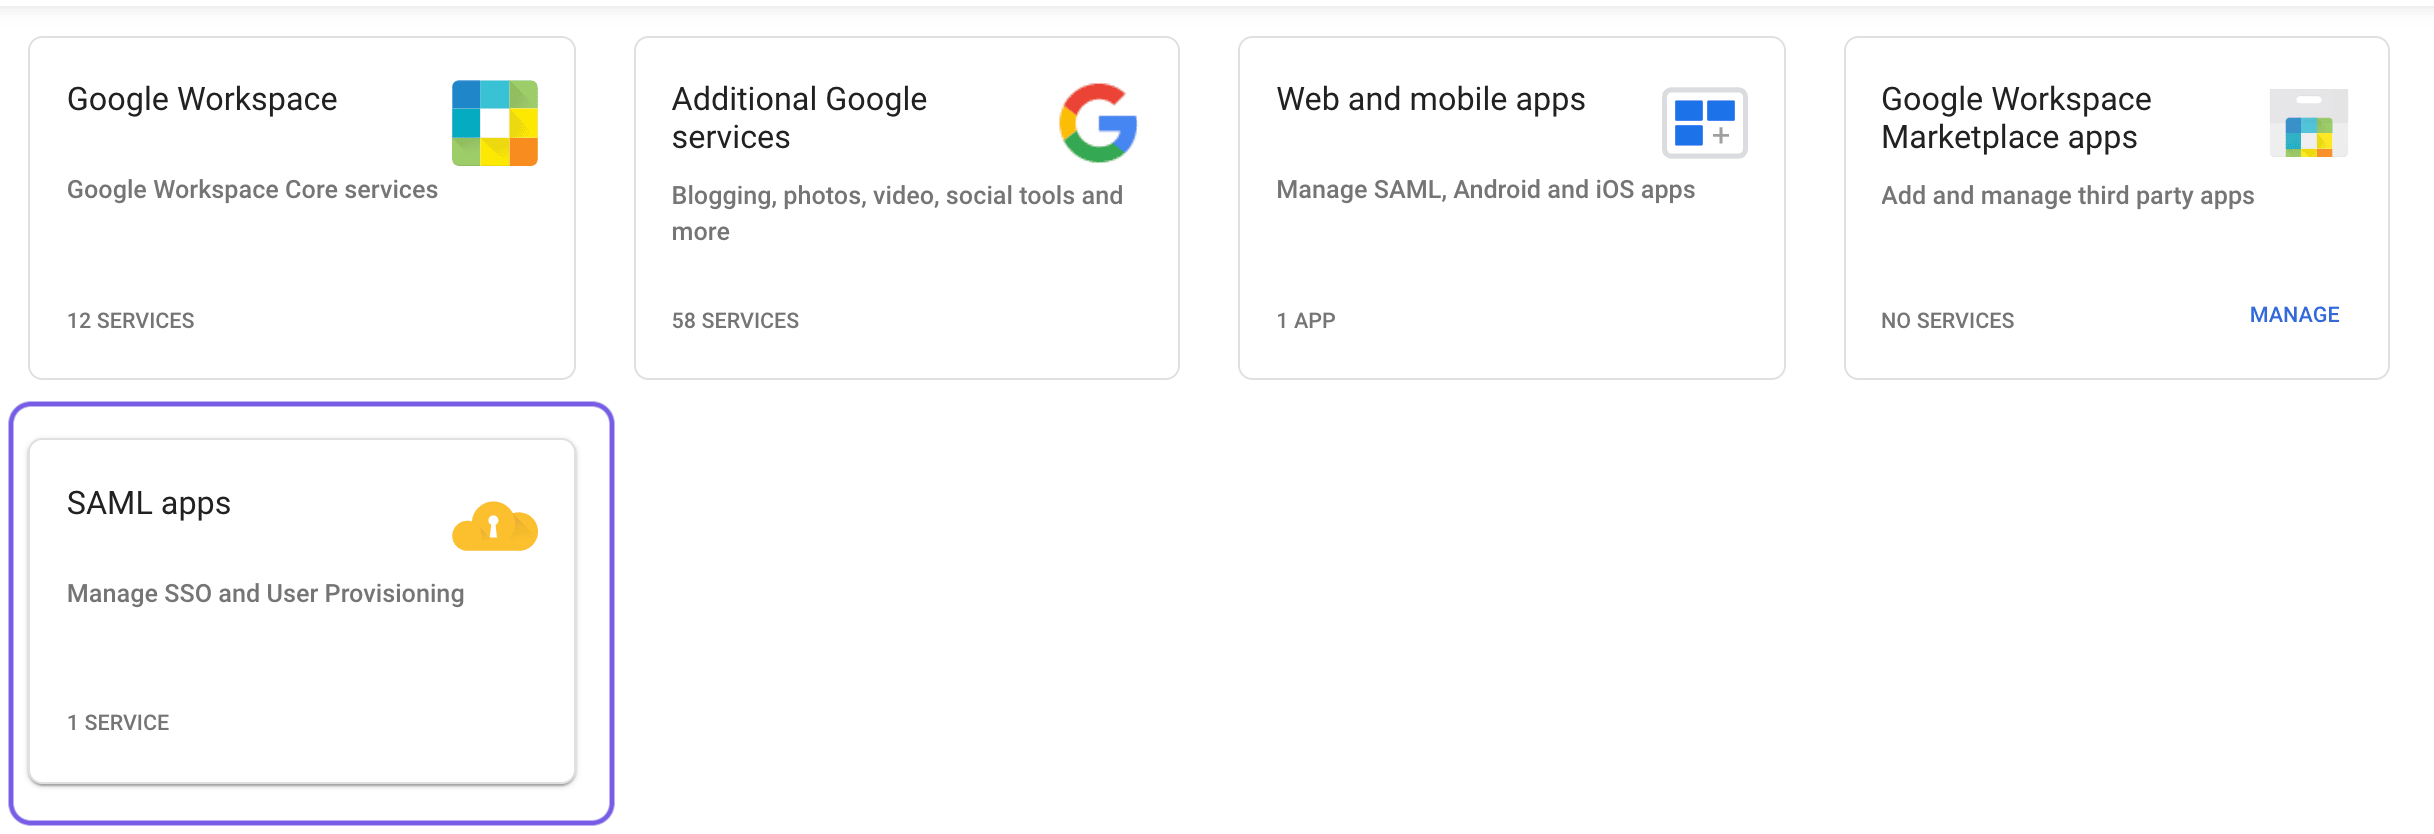
Click SAML apps.
-
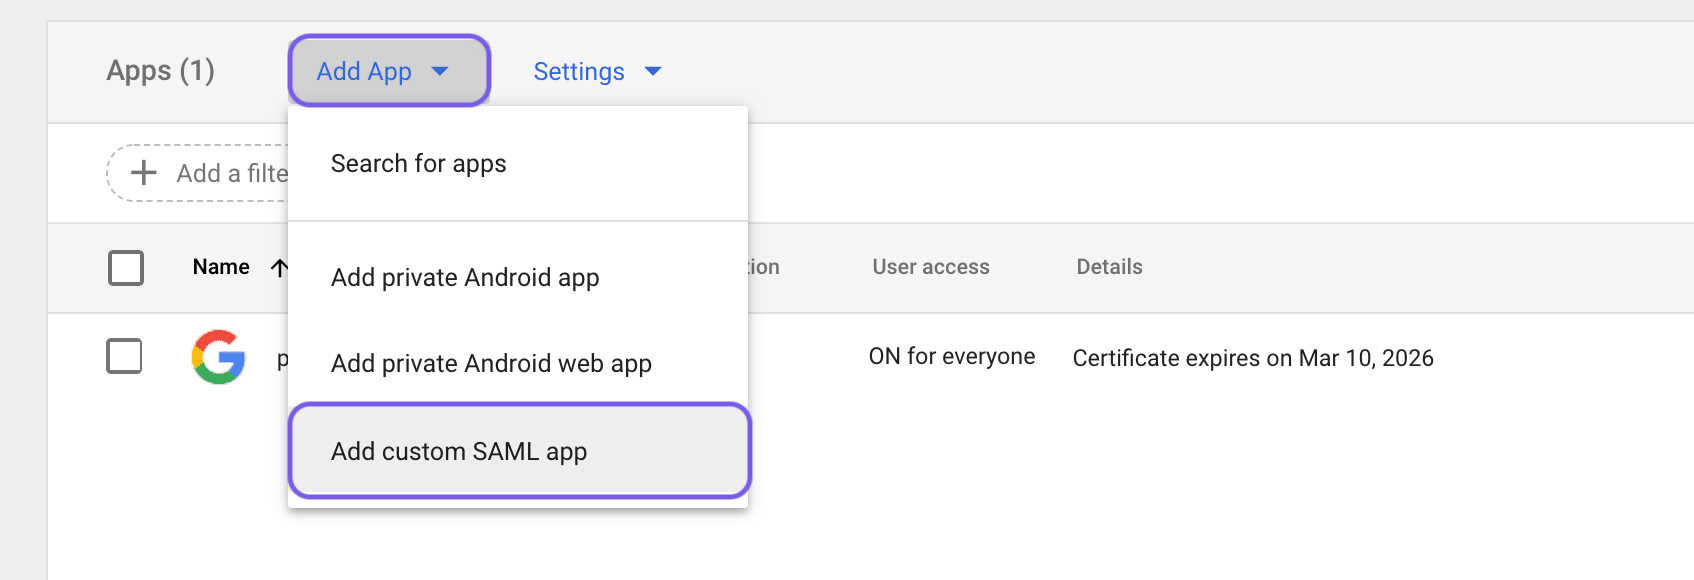
Select Add App → Add custom SAML app.
-
Enter the app details. Use
Employee Hubas the name if you want that name to appear in your Google Admin SAML app list. -
Enter the following service provider details:
Field Value ACS https://YOUR_INSTANCE.hub.flair.hr/_auth/saml/callbackEntity ID hubName ID format UNSPECIFIED Name ID Basic Information → Primary Email Replace
YOUR_INSTANCEwith the domain from your Employee Hub URL. -
Click Continue.
-
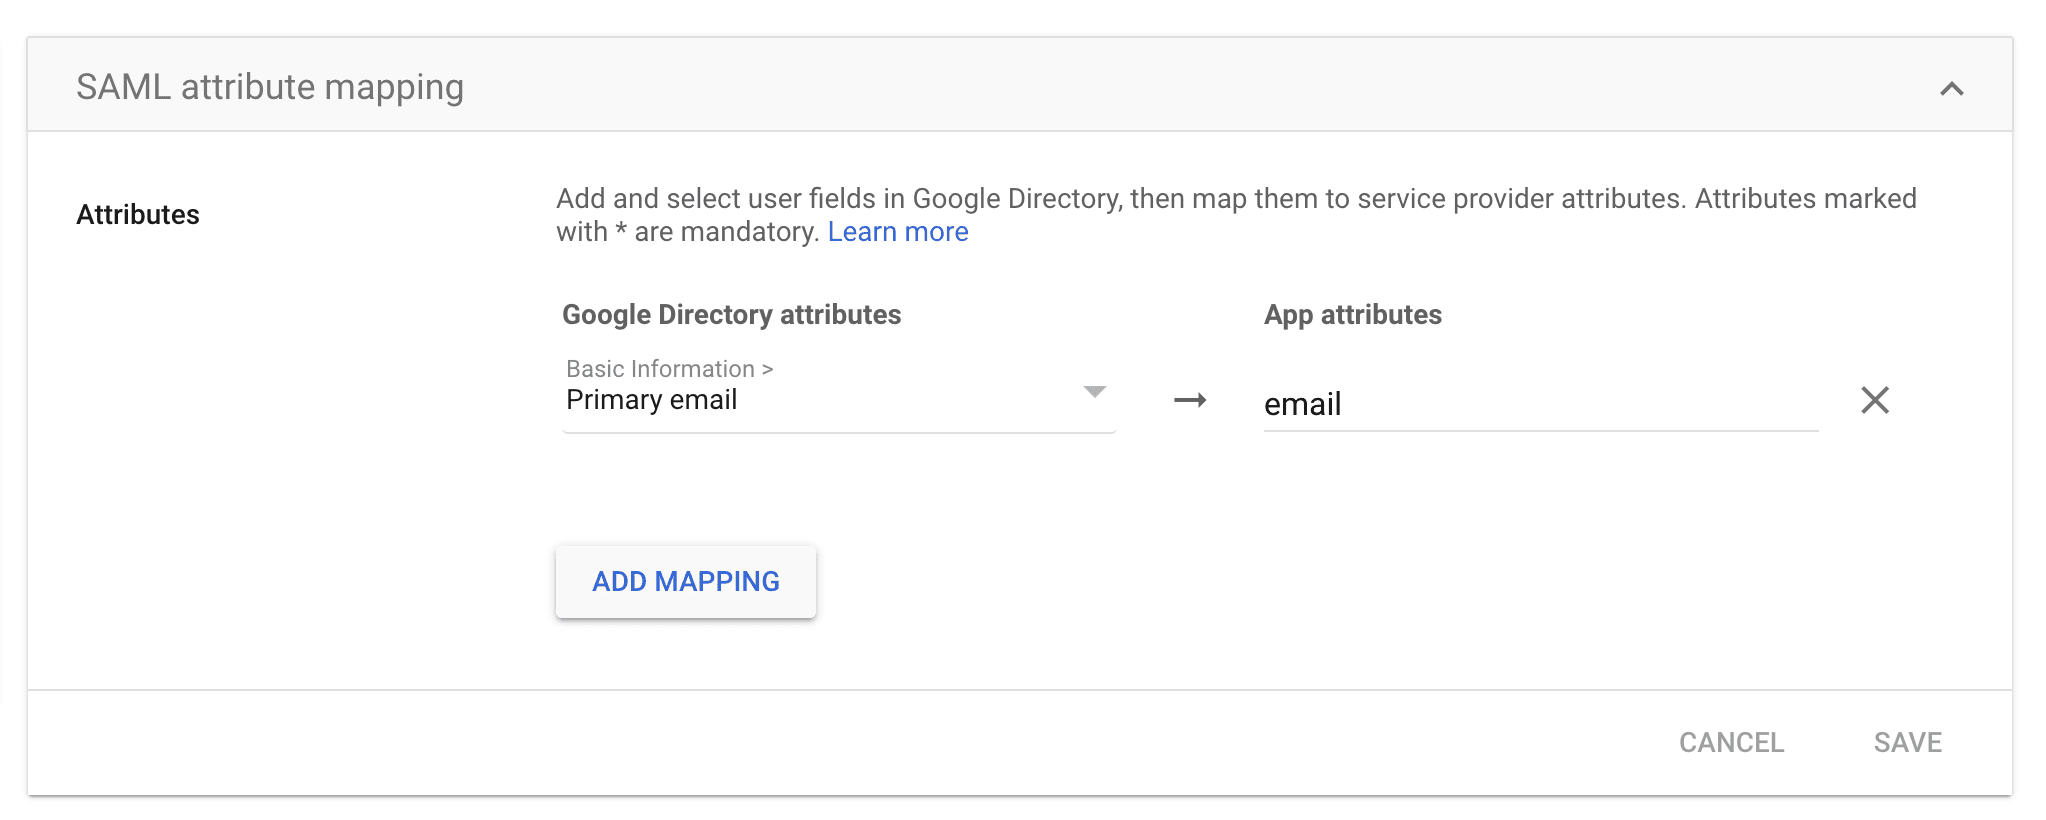
Map the email attribute.
-
Download the Google metadata.
-
In the flair HR app in Salesforce, open the App Launcher (⋮⋮ grid icon).
-
Open Hub SAML Configurations.
-
Click New.
-
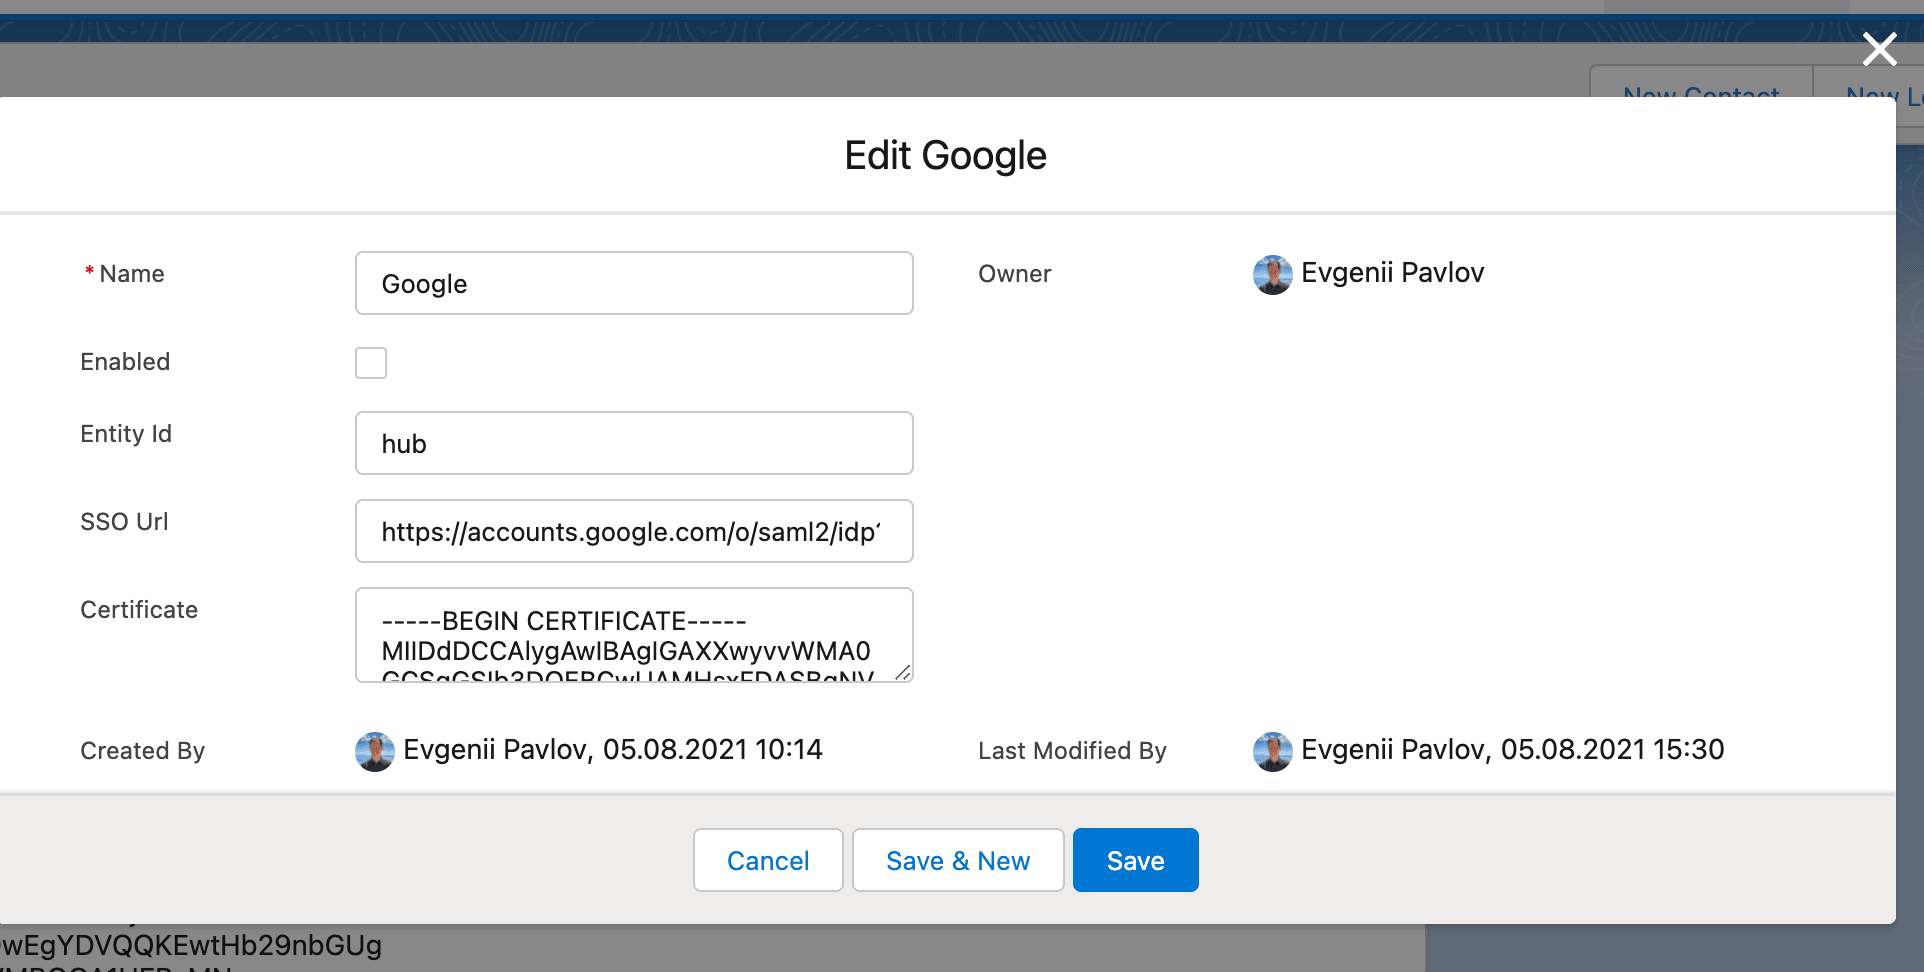
Enter a name, the Entity ID, the SSO URL, and the Certificate from Google.
-
Enable the configuration. Employees can now sign in at
https://YOUR_INSTANCE.hub.flair.hr/.
Configure SAML SSO with Salesforce
Configure Salesforce as the SAML identity provider, connect it to the Employee Hub, and grant users access to the connected app.

Enable Salesforce as an identity provider
-
In Salesforce Setup, enter
Identity Providerin Quick Find.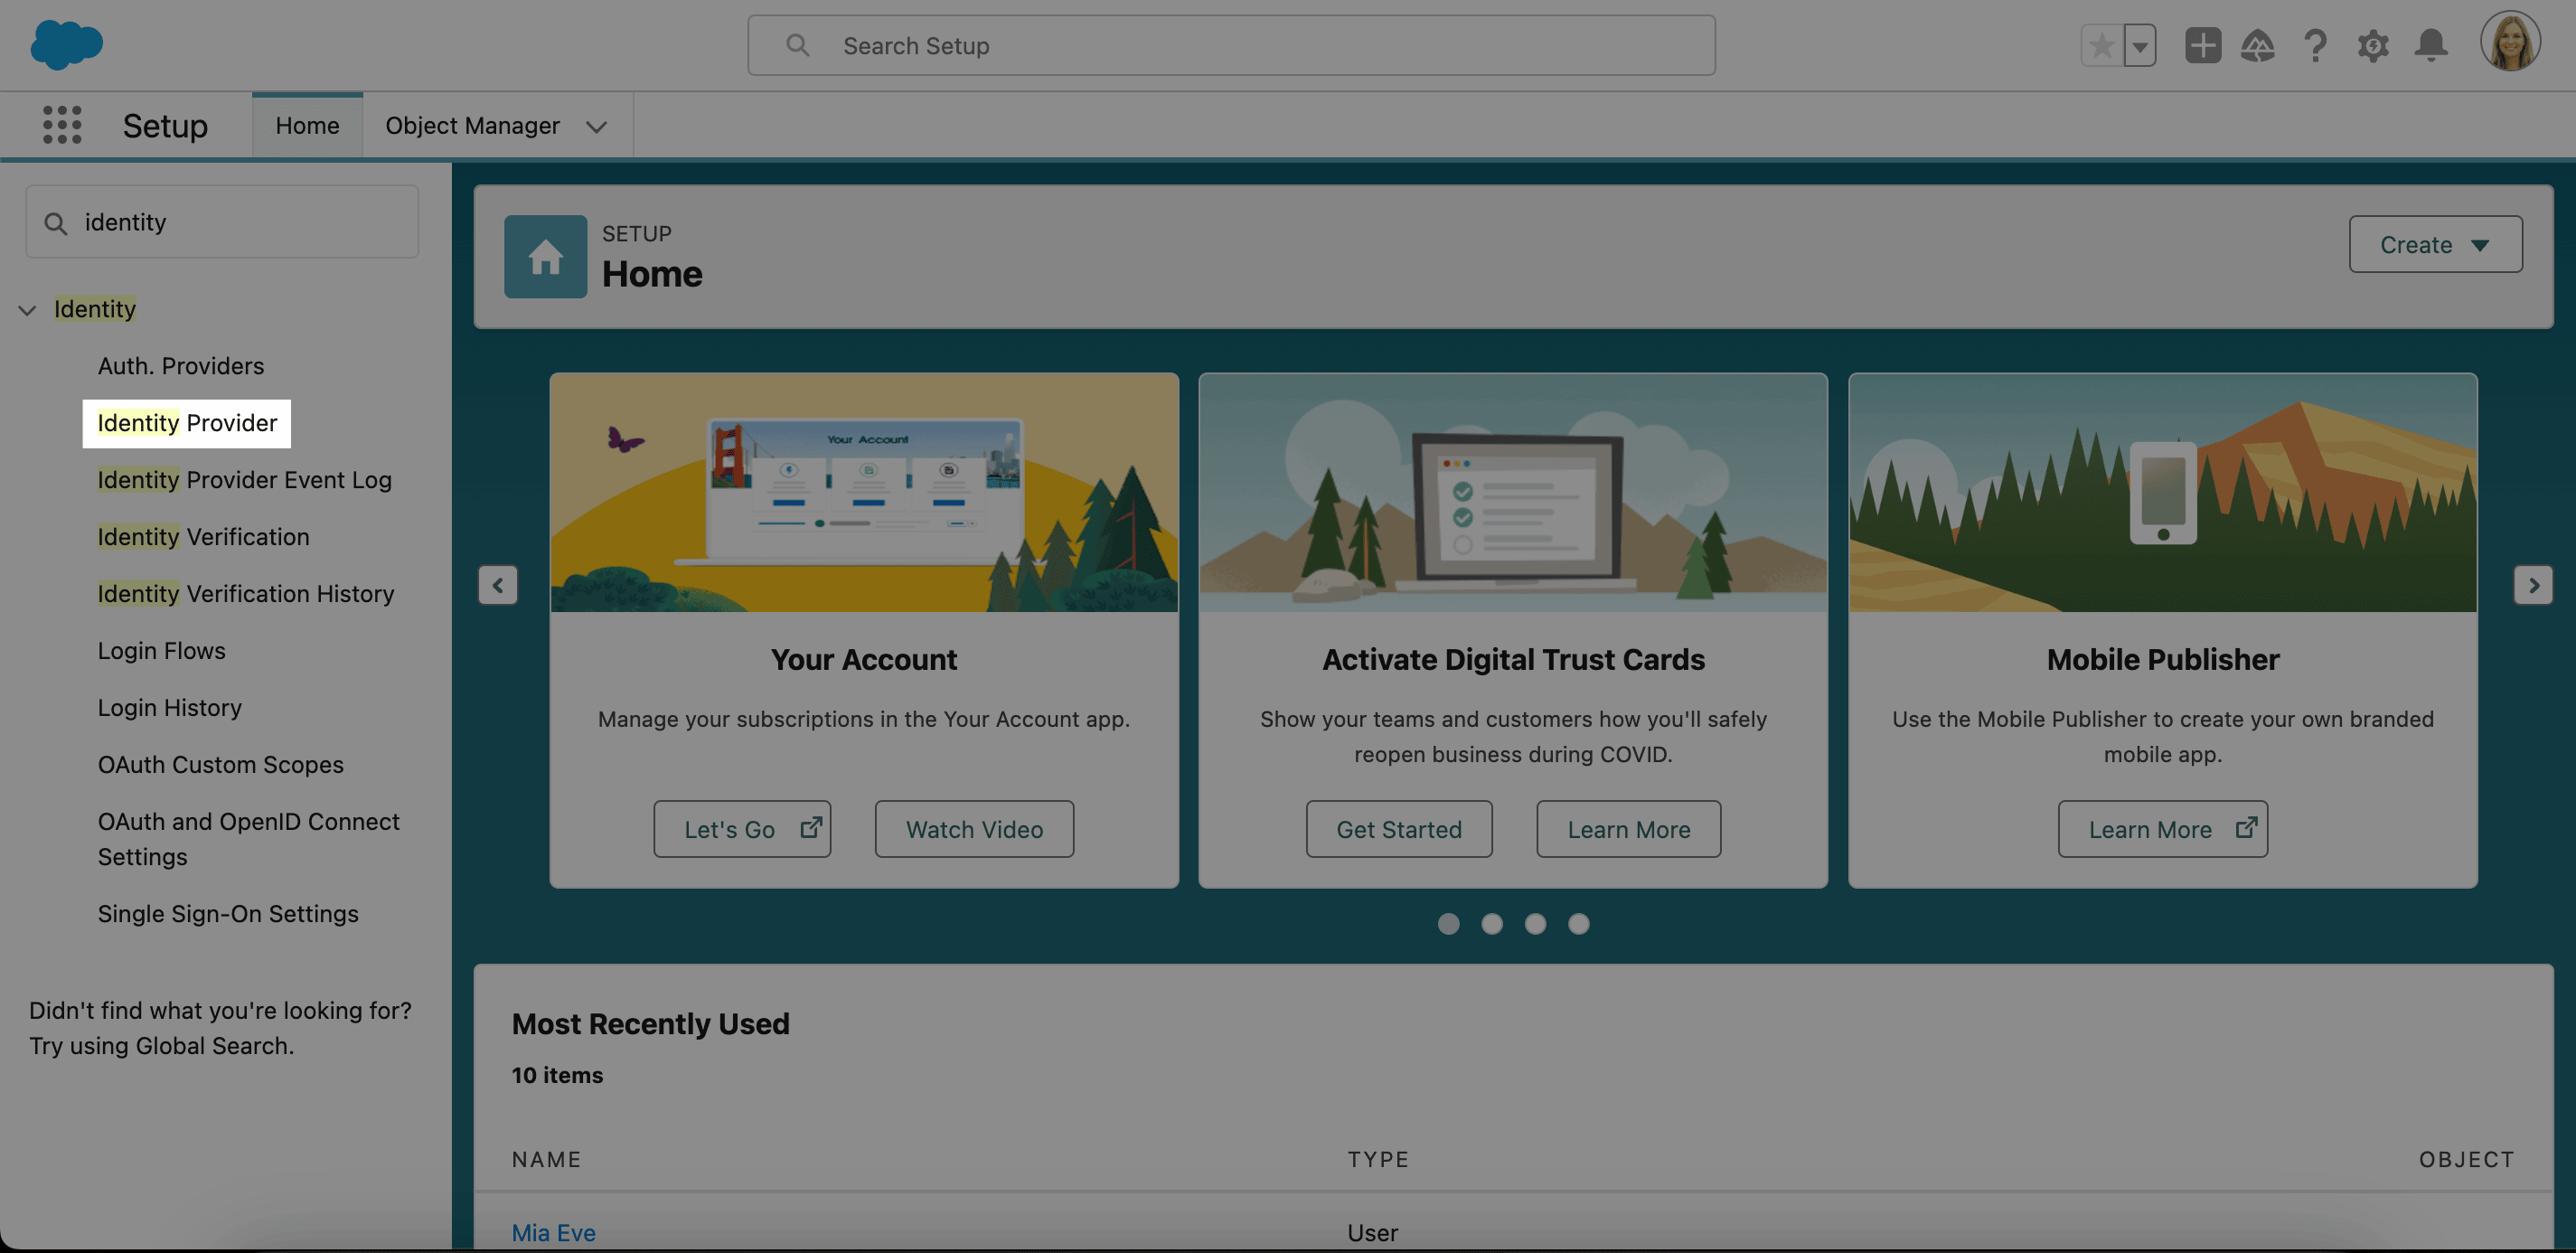
-
Open Identity Provider.
-
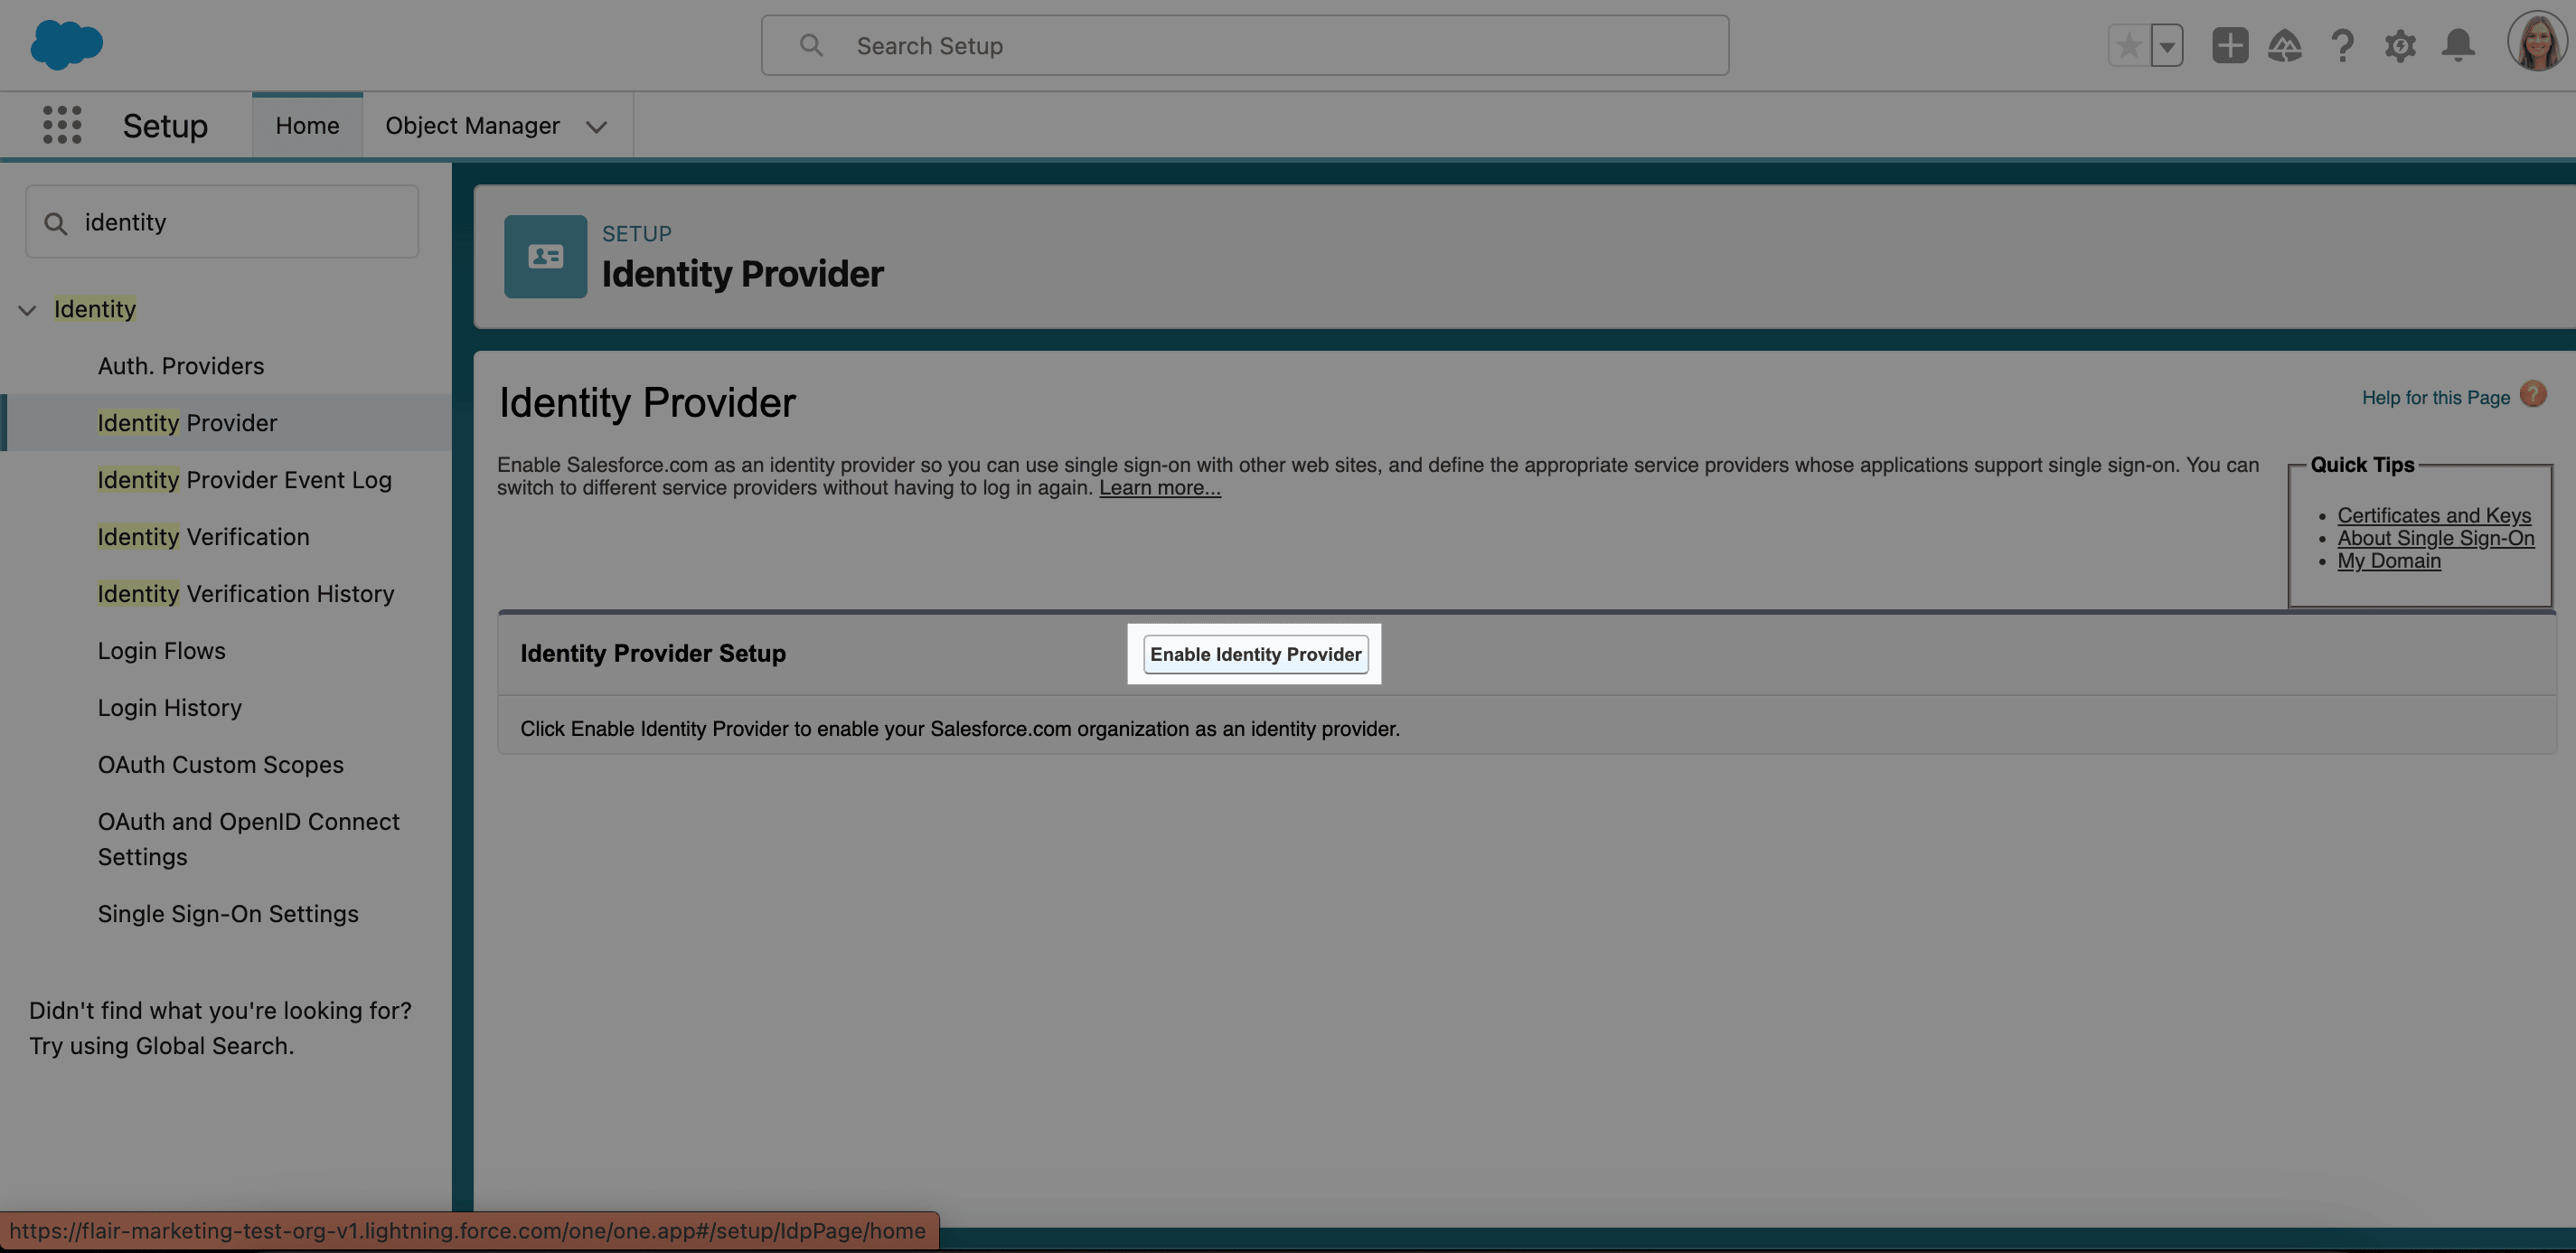
Click Enable Identity Provider.
-
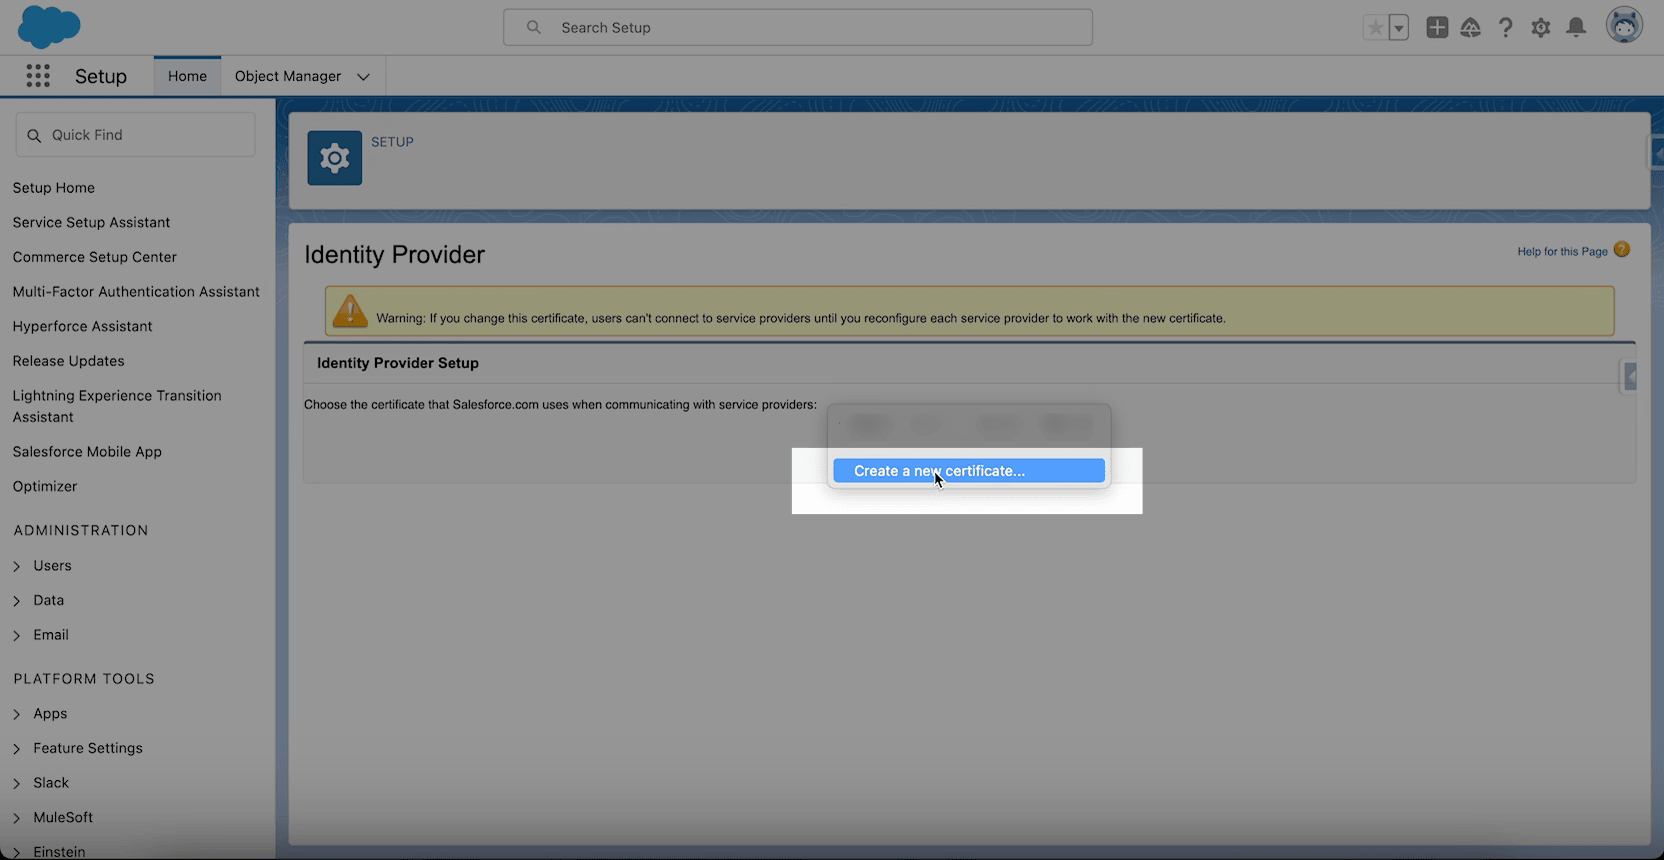
Select an existing certificate or click Create a New Certificate.
noteSalesforce documents the identity-provider setup in Enable Salesforce as an identity provider.
Connect the Employee Hub to Salesforce
-
In Salesforce Setup, enter
App Managerin Quick Find.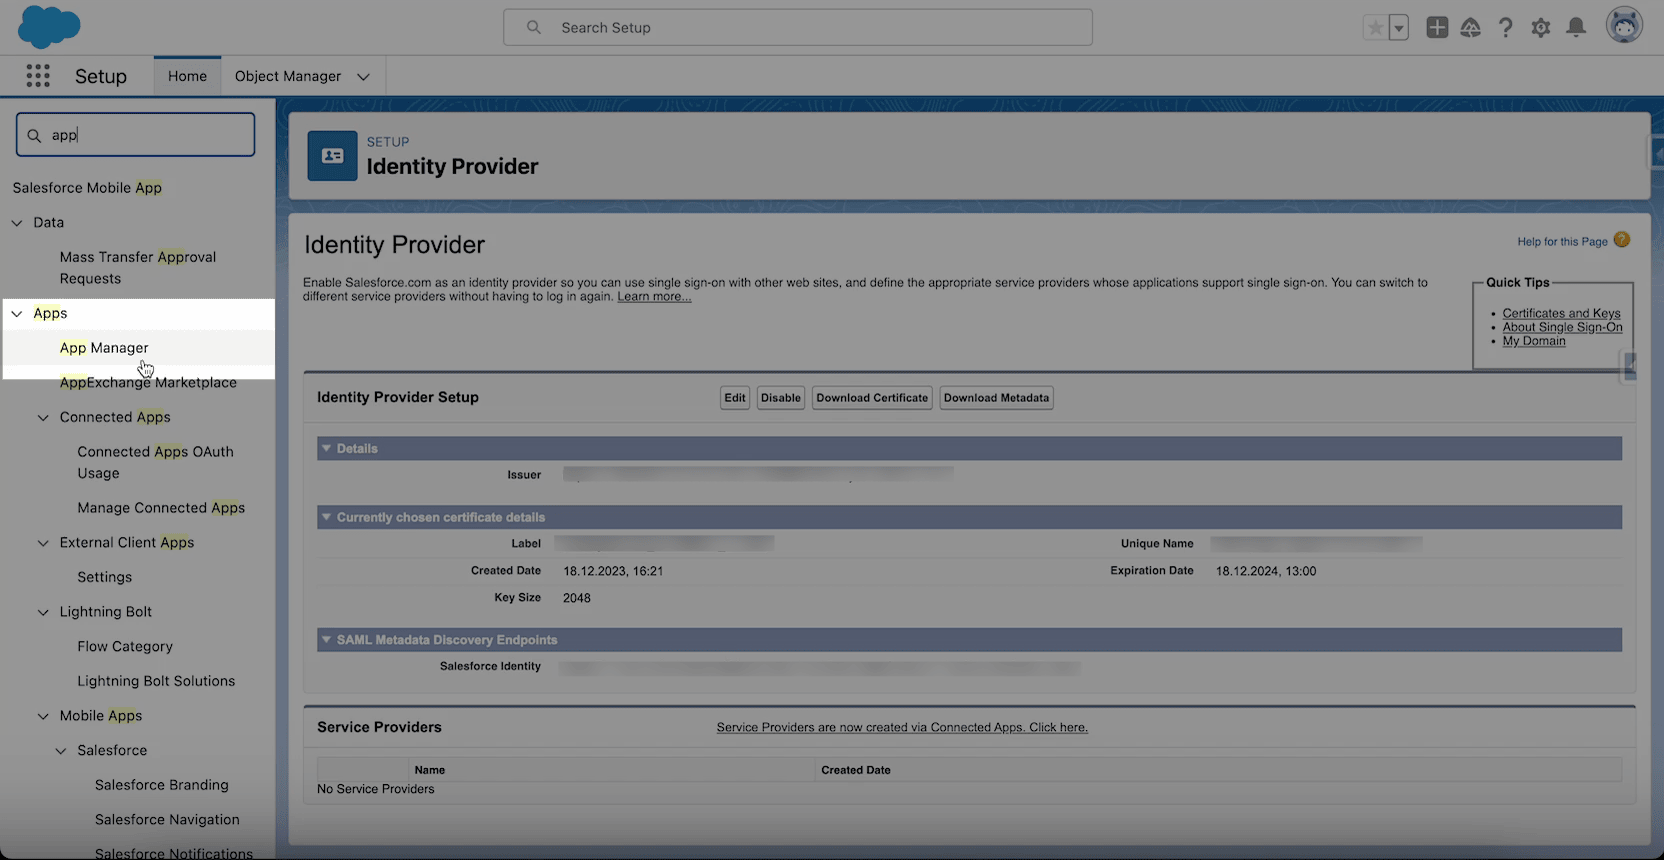
-
Open App Manager.
-
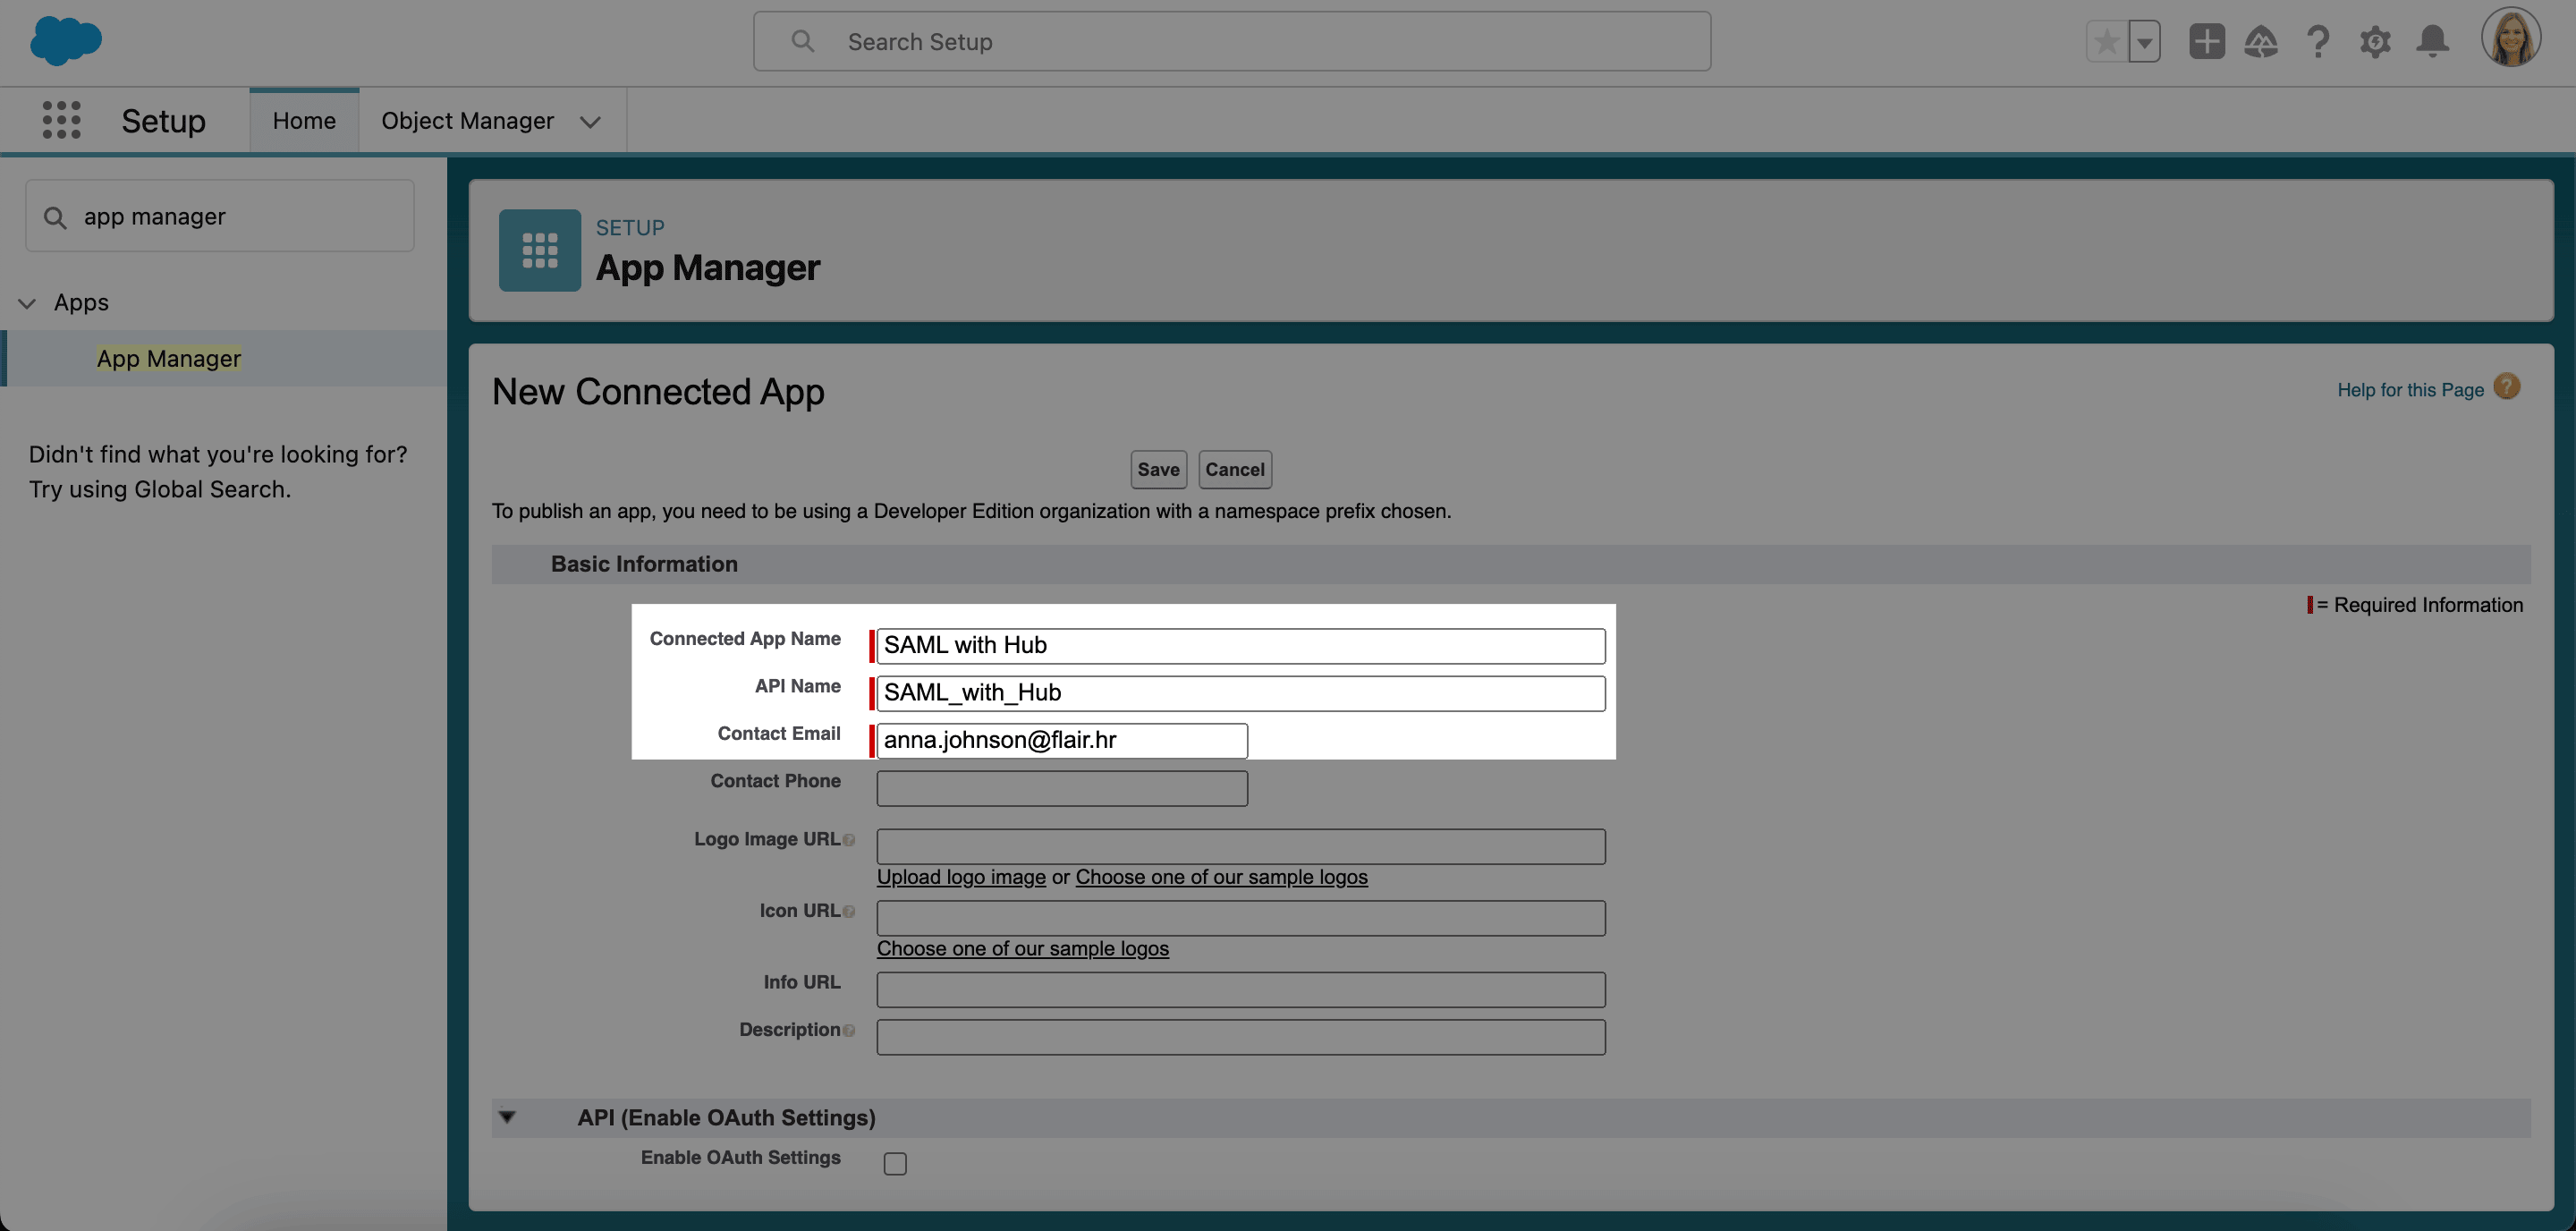
Click New Connected App.

-
Enter an app name, such as
SAML With Hub. Salesforce fills the API Name automatically. -
Enter a Contact Email.
-
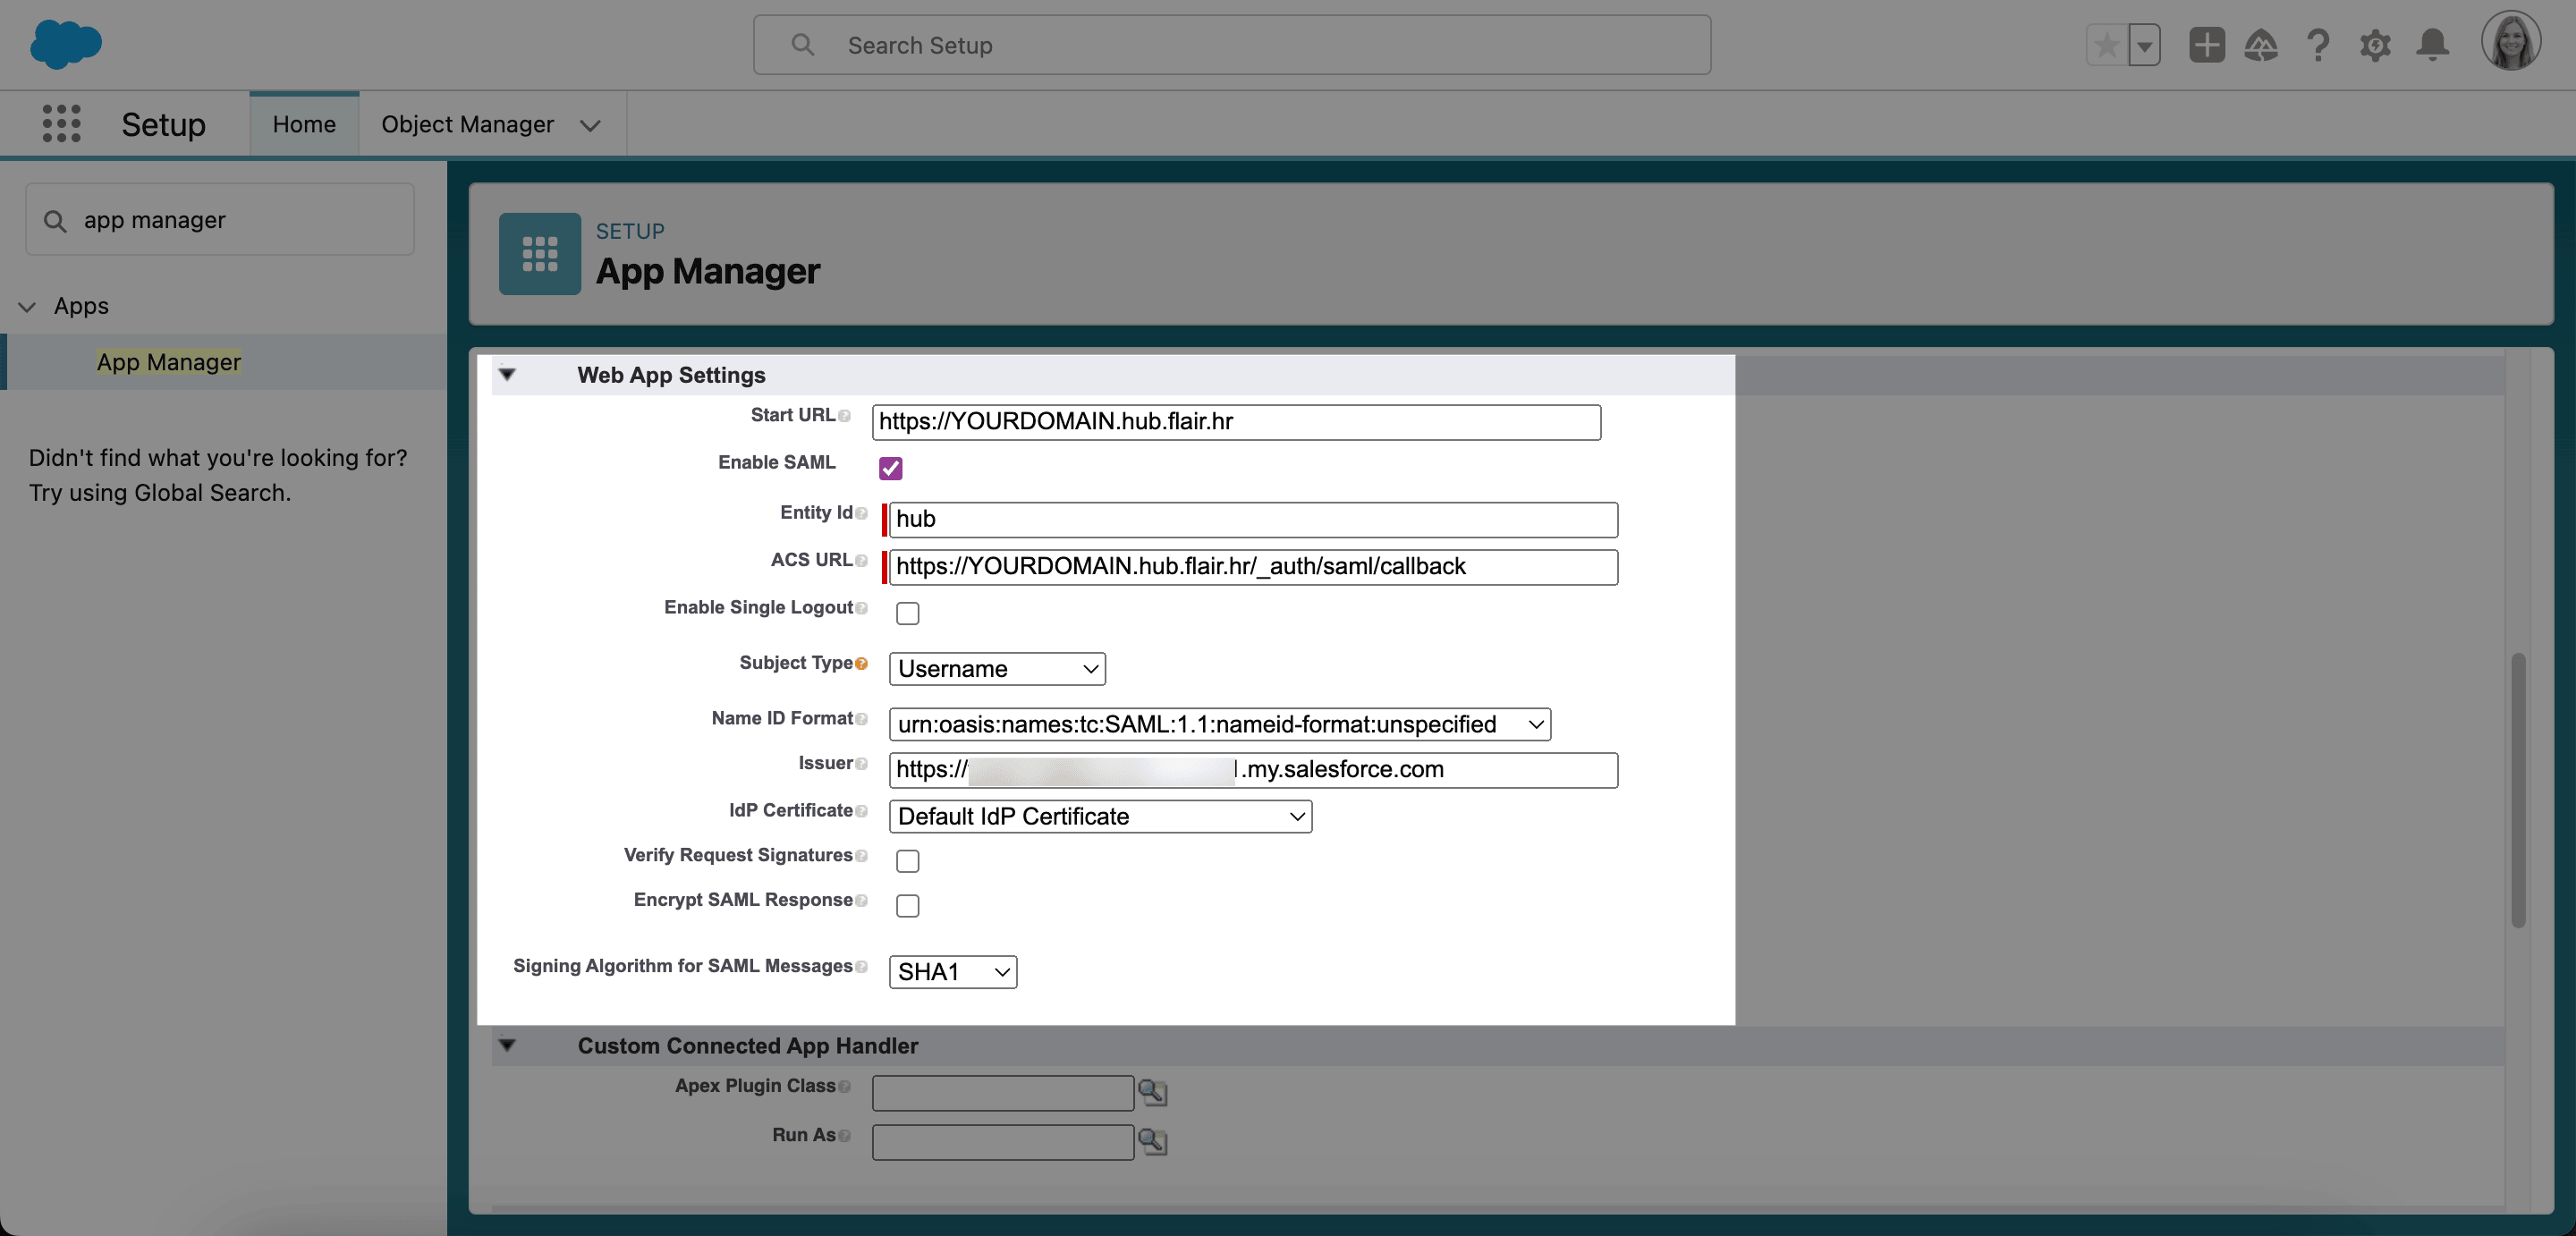
Under Web App Settings, select Enable SAML.
-
Configure the connected app fields:
Field Value Start URL Your Employee Hub URL, such as https://YOURDOMAIN.hub.flair.hrEntity ID An identifier such as hubACS URL https://YOURDOMAIN.hub.flair.hr/_auth/saml/callbackEnable Single Logout Leave cleared; single logout is not supported Subject Type Username Name ID Format The option ending in unspecifiedIssuer Keep the prefilled value IdP Certificate Select a certificate or keep Default IdP Certificate -
Keep the remaining fields unchanged.
-
Click Save. Salesforce displays a summary of the connected SAML app.
Add the Salesforce configuration to flair
-
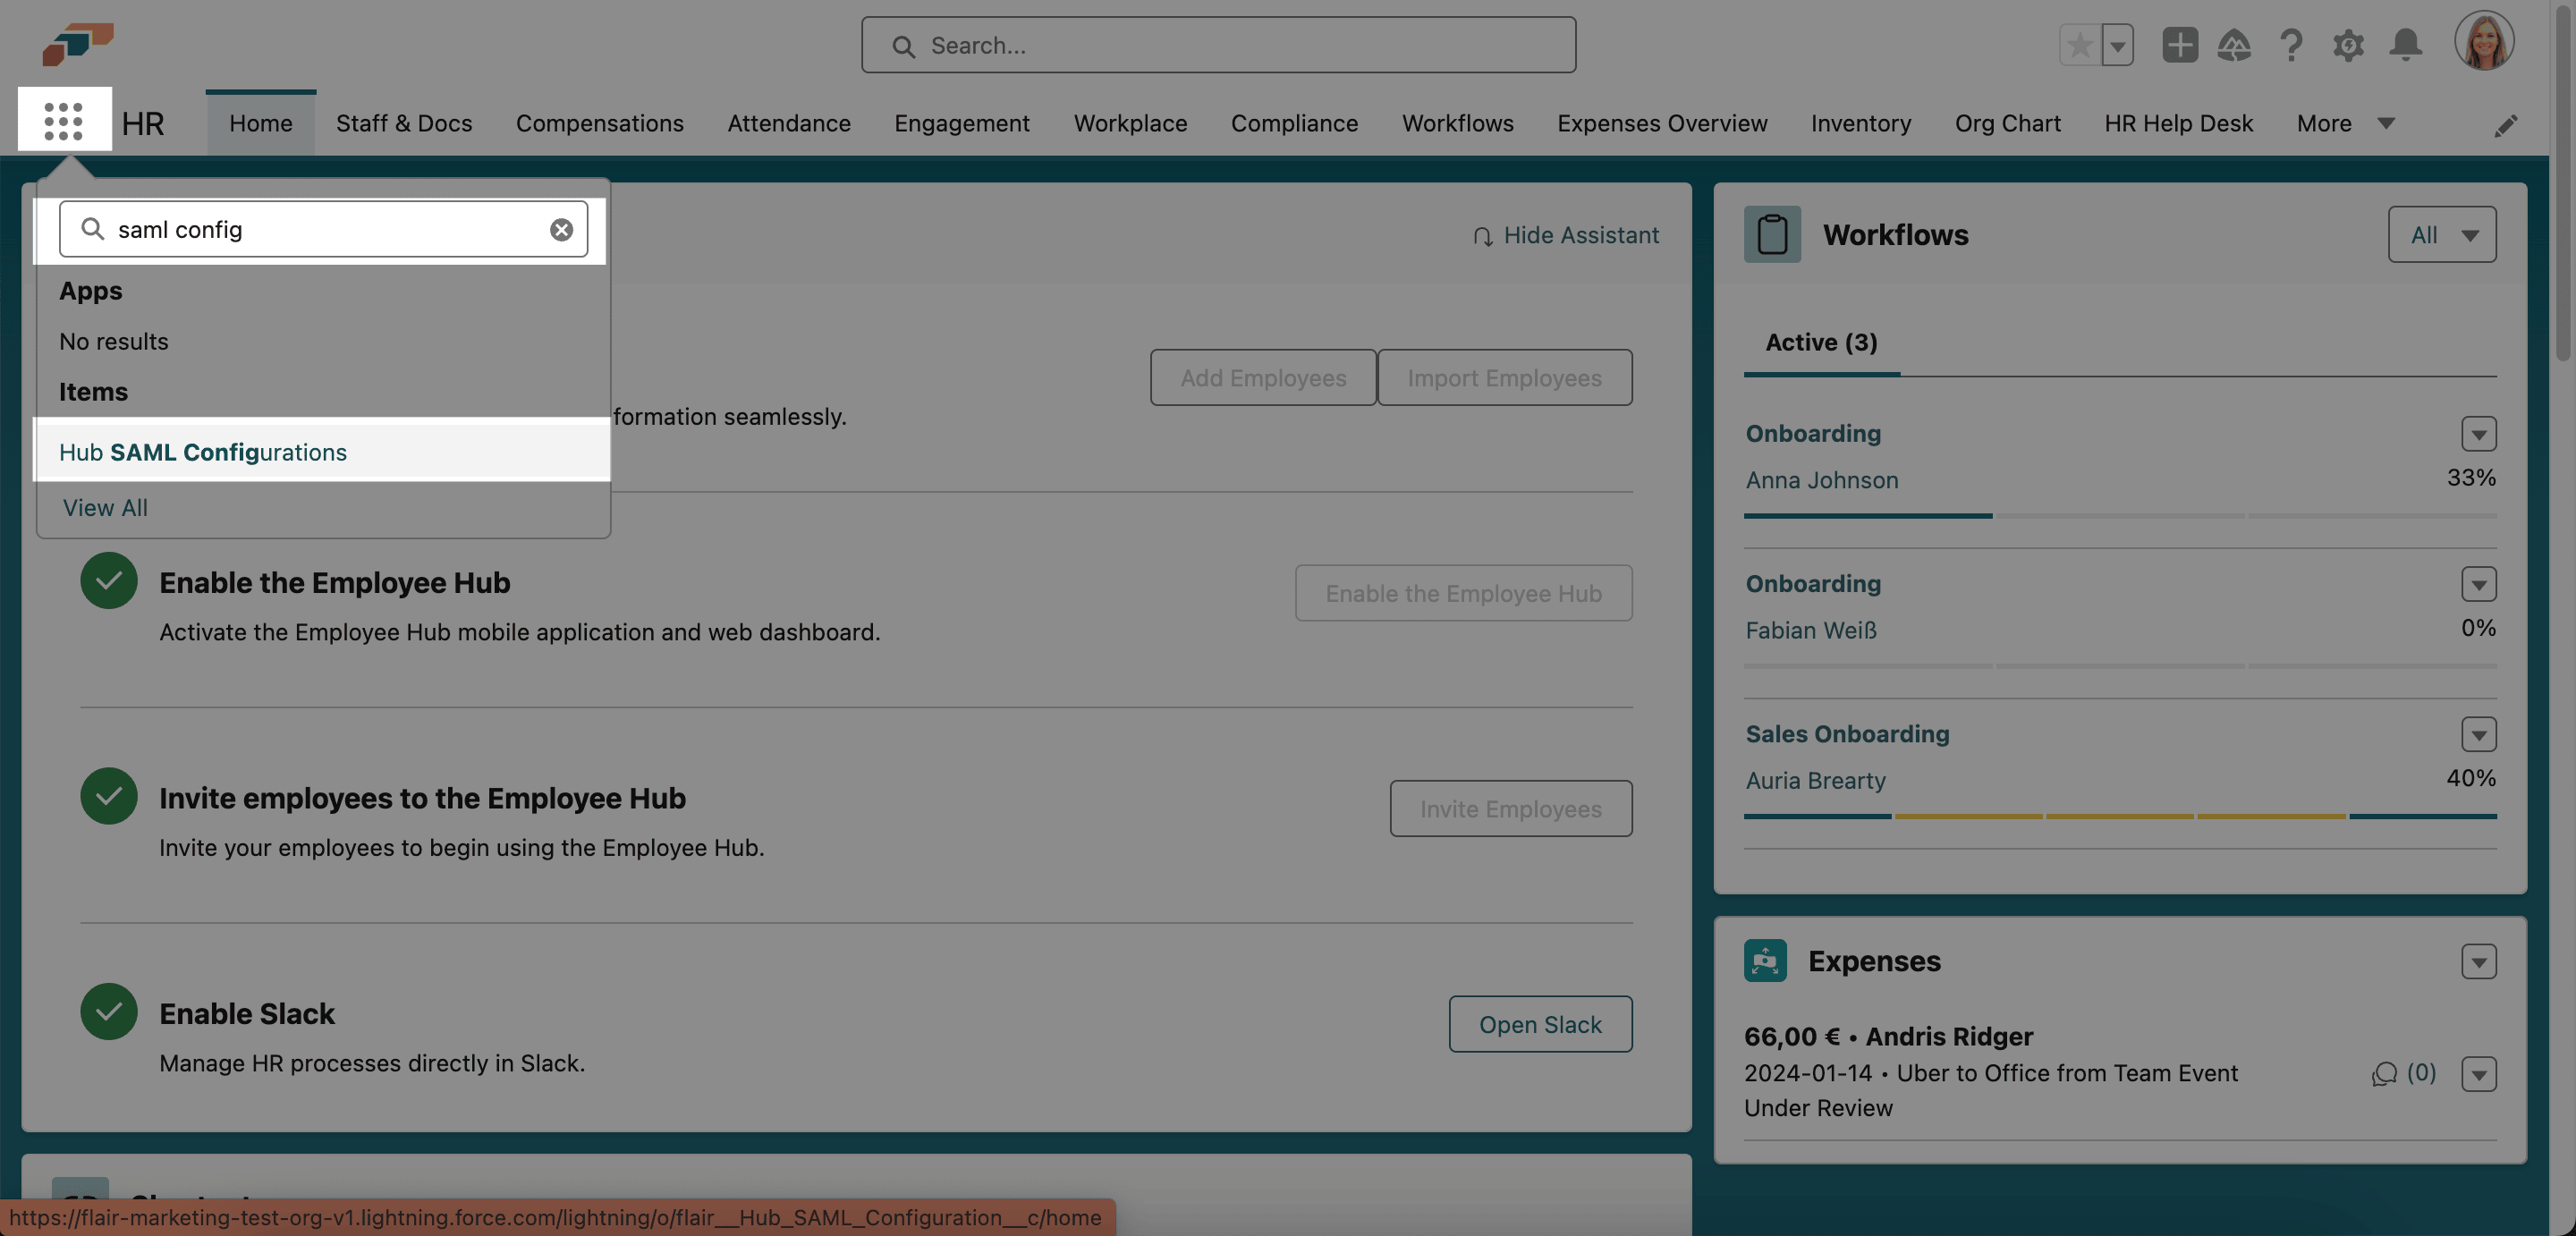
In the flair HR app, open the App Launcher (⋮⋮ grid icon).
-
Open Hub SAML Configurations.
-
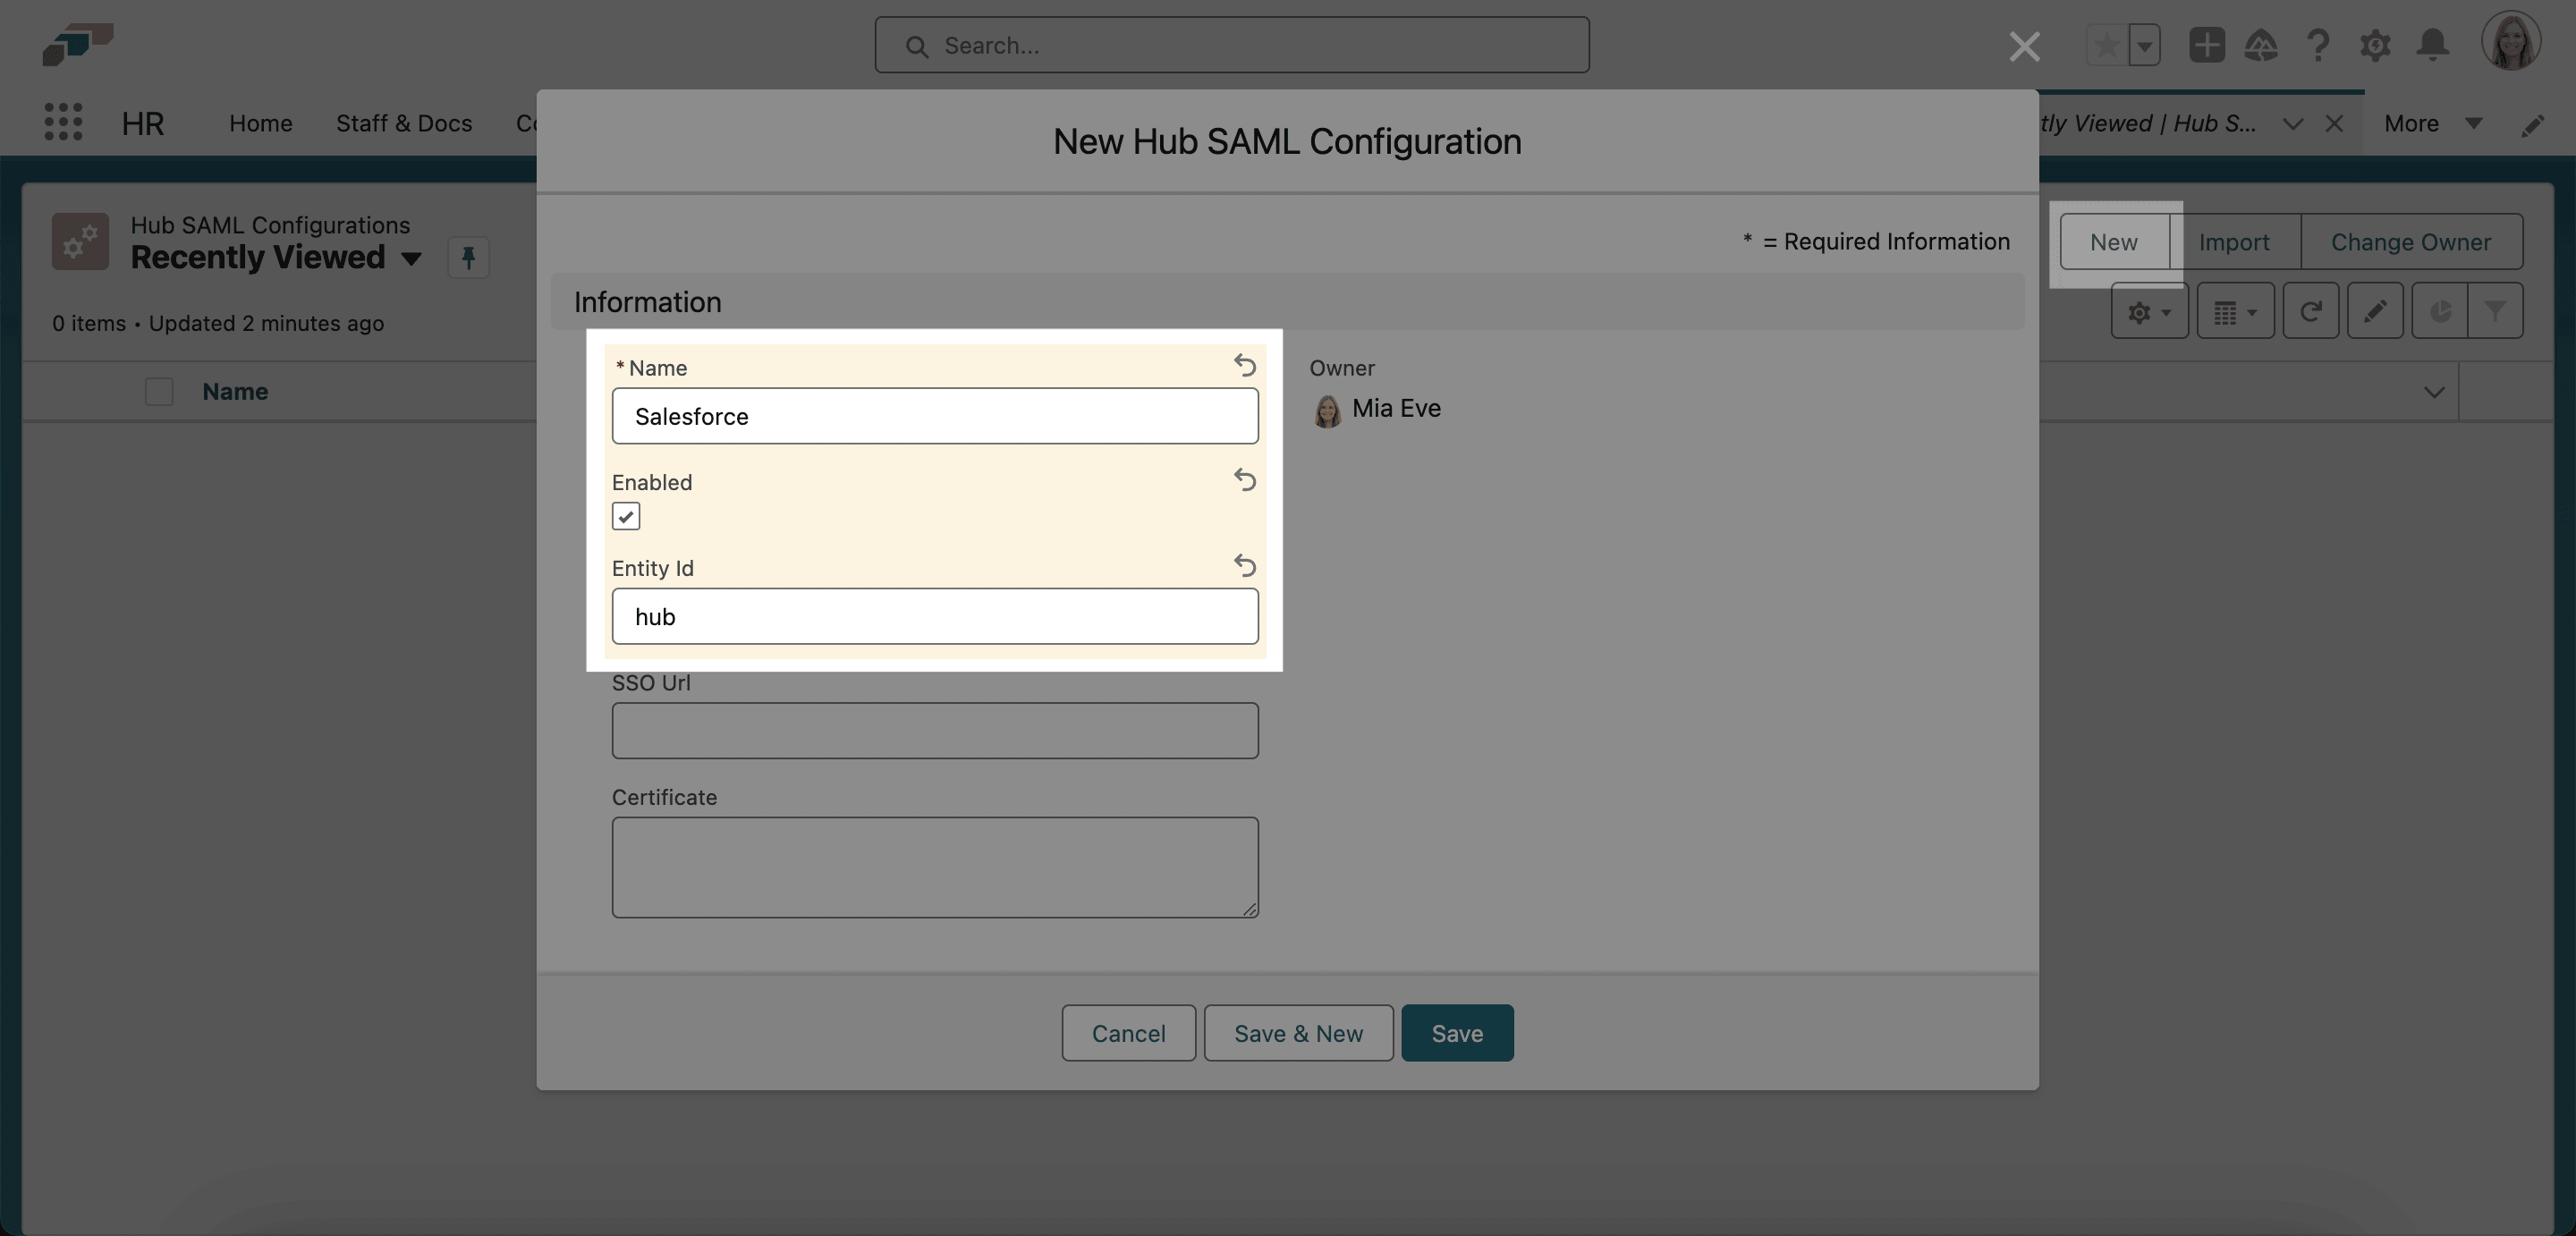
Click New.
-
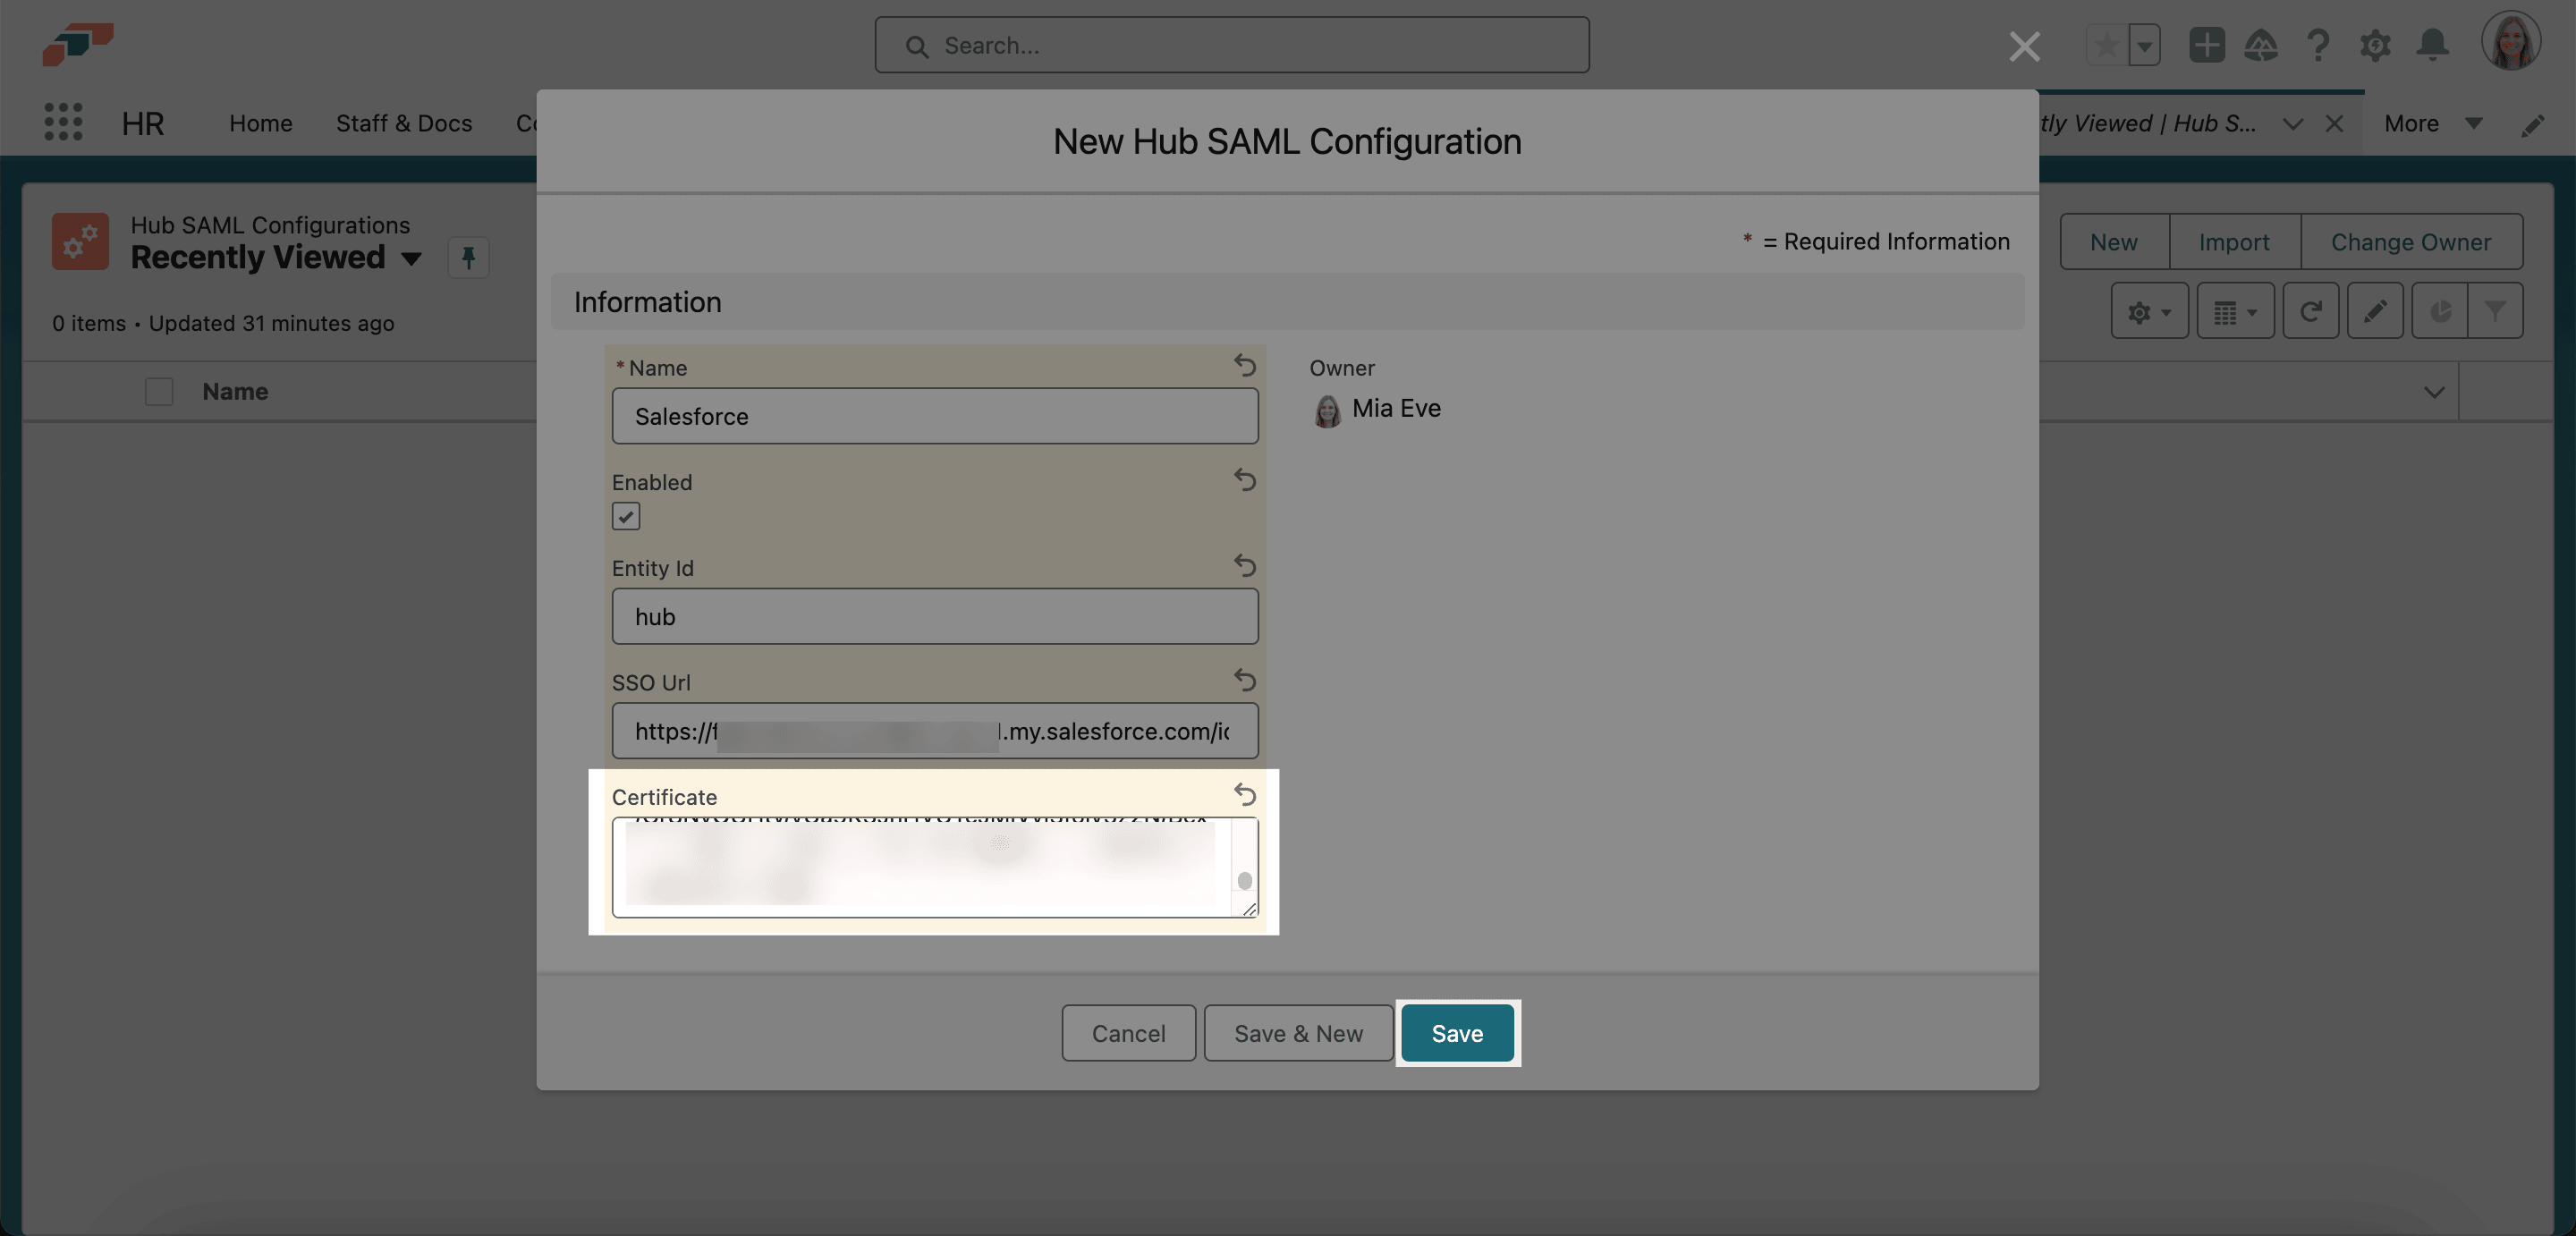
Enter a name, such as
Salesforce. -
Select Enabled.
-
In Entity ID, enter the value from the connected app.
-
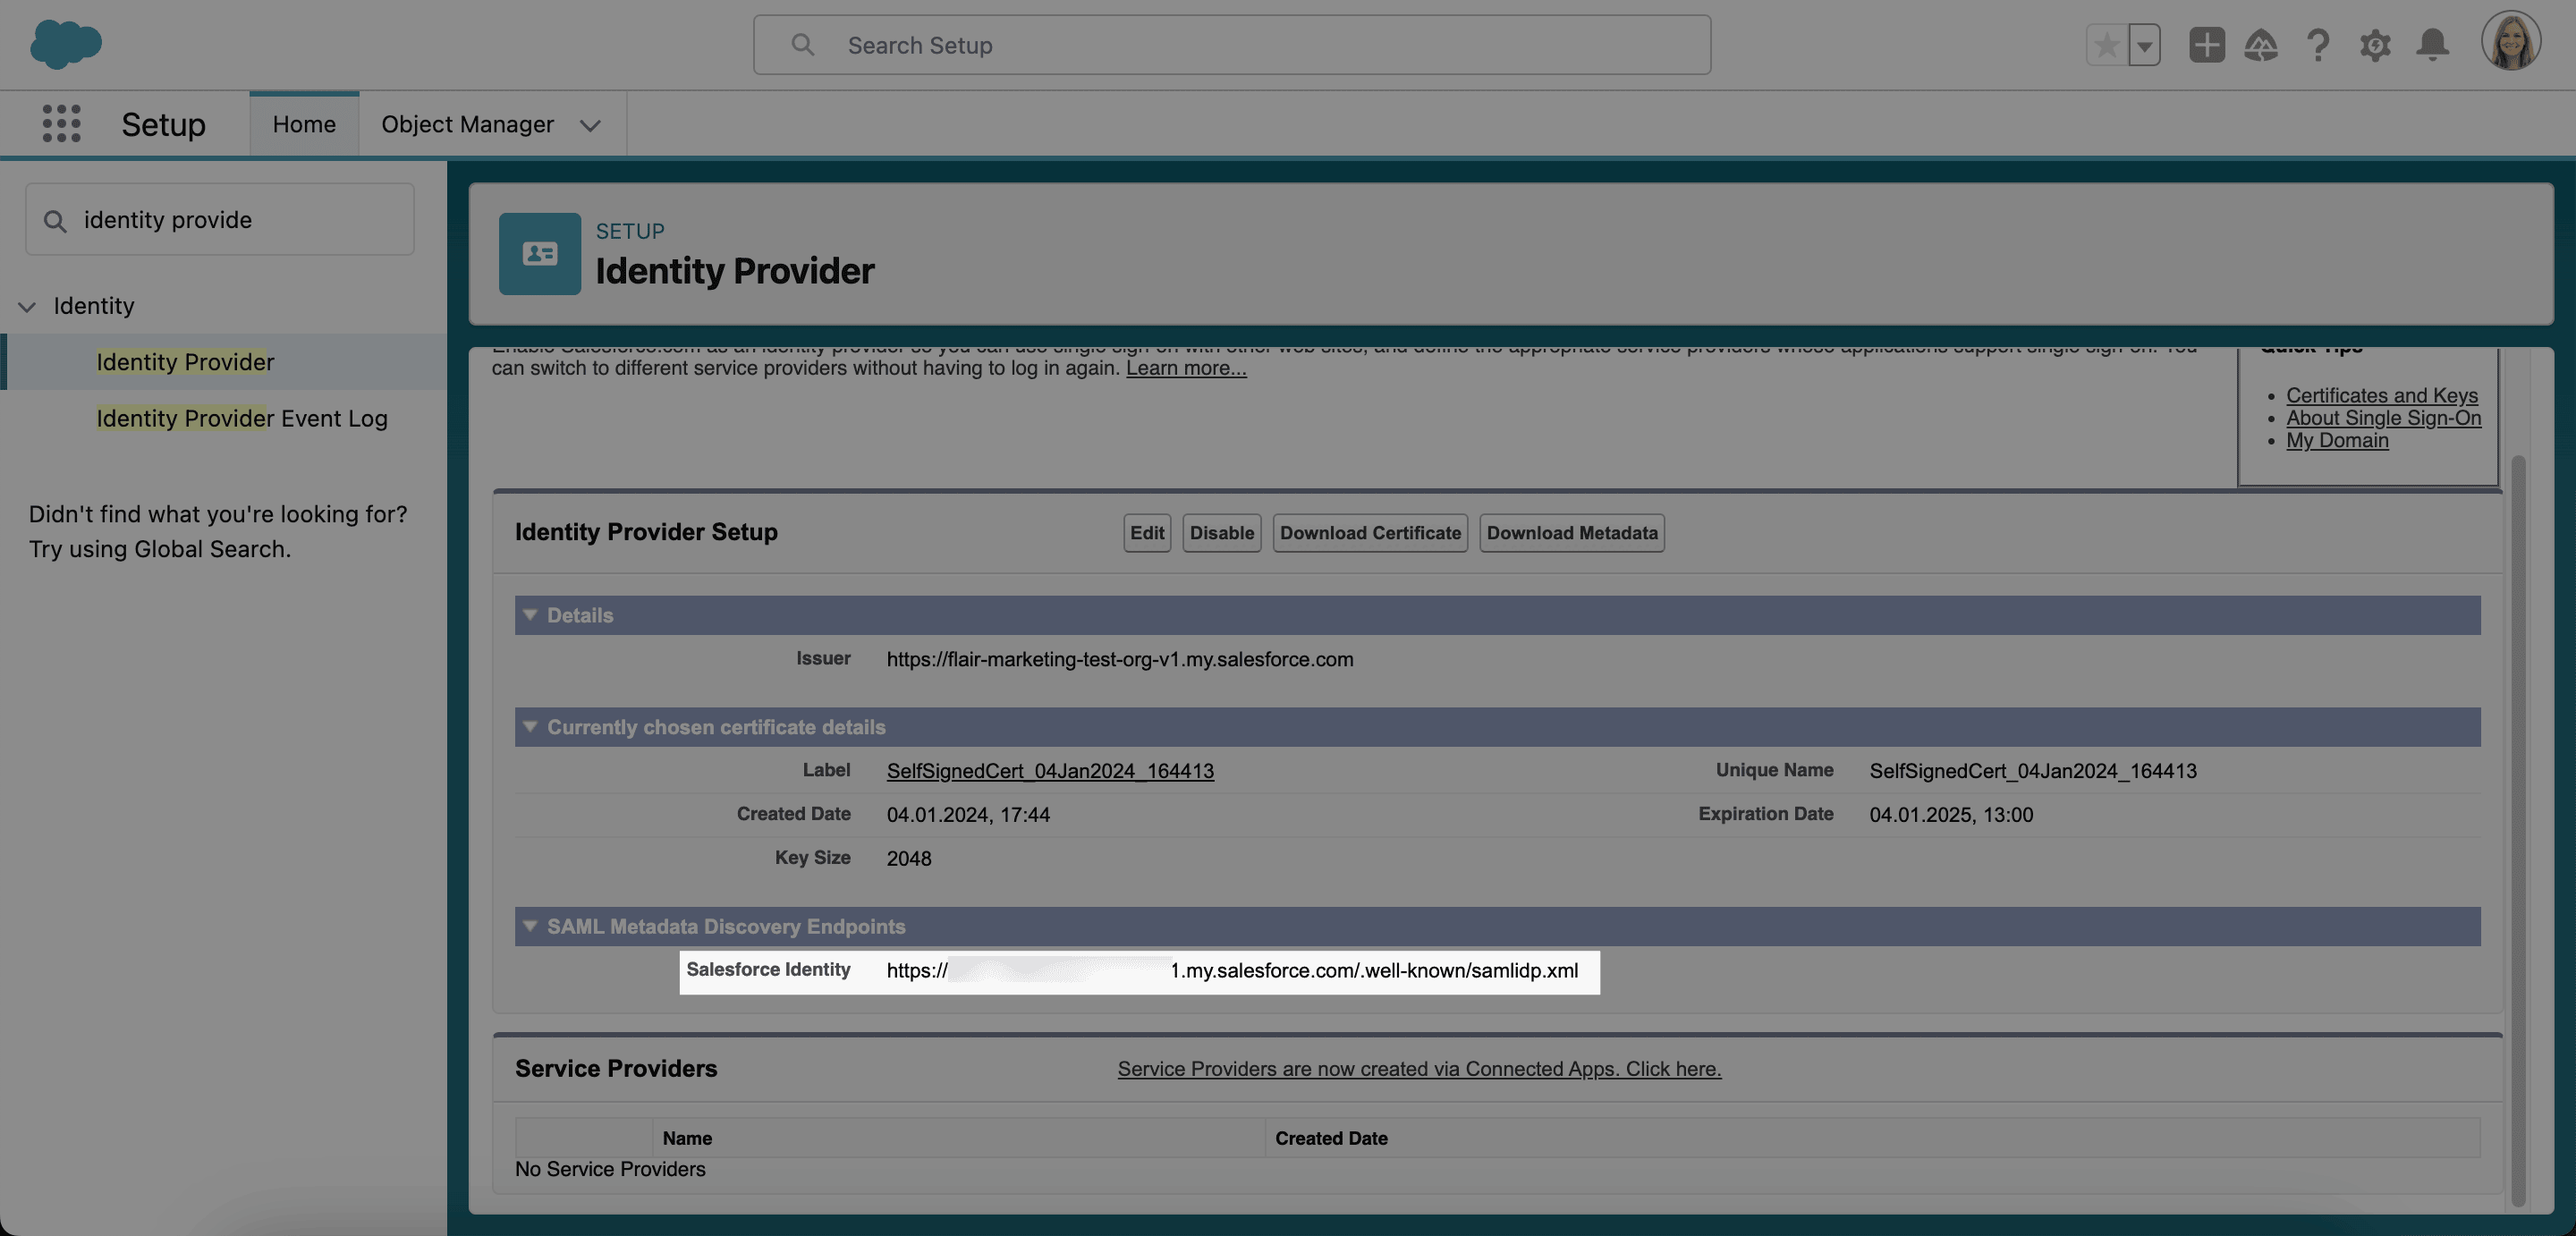
In Salesforce Setup, open Identity Provider.
-
Copy the URL next to Salesforce Identity.
-
Open the URL in a browser to display the XML file.
-
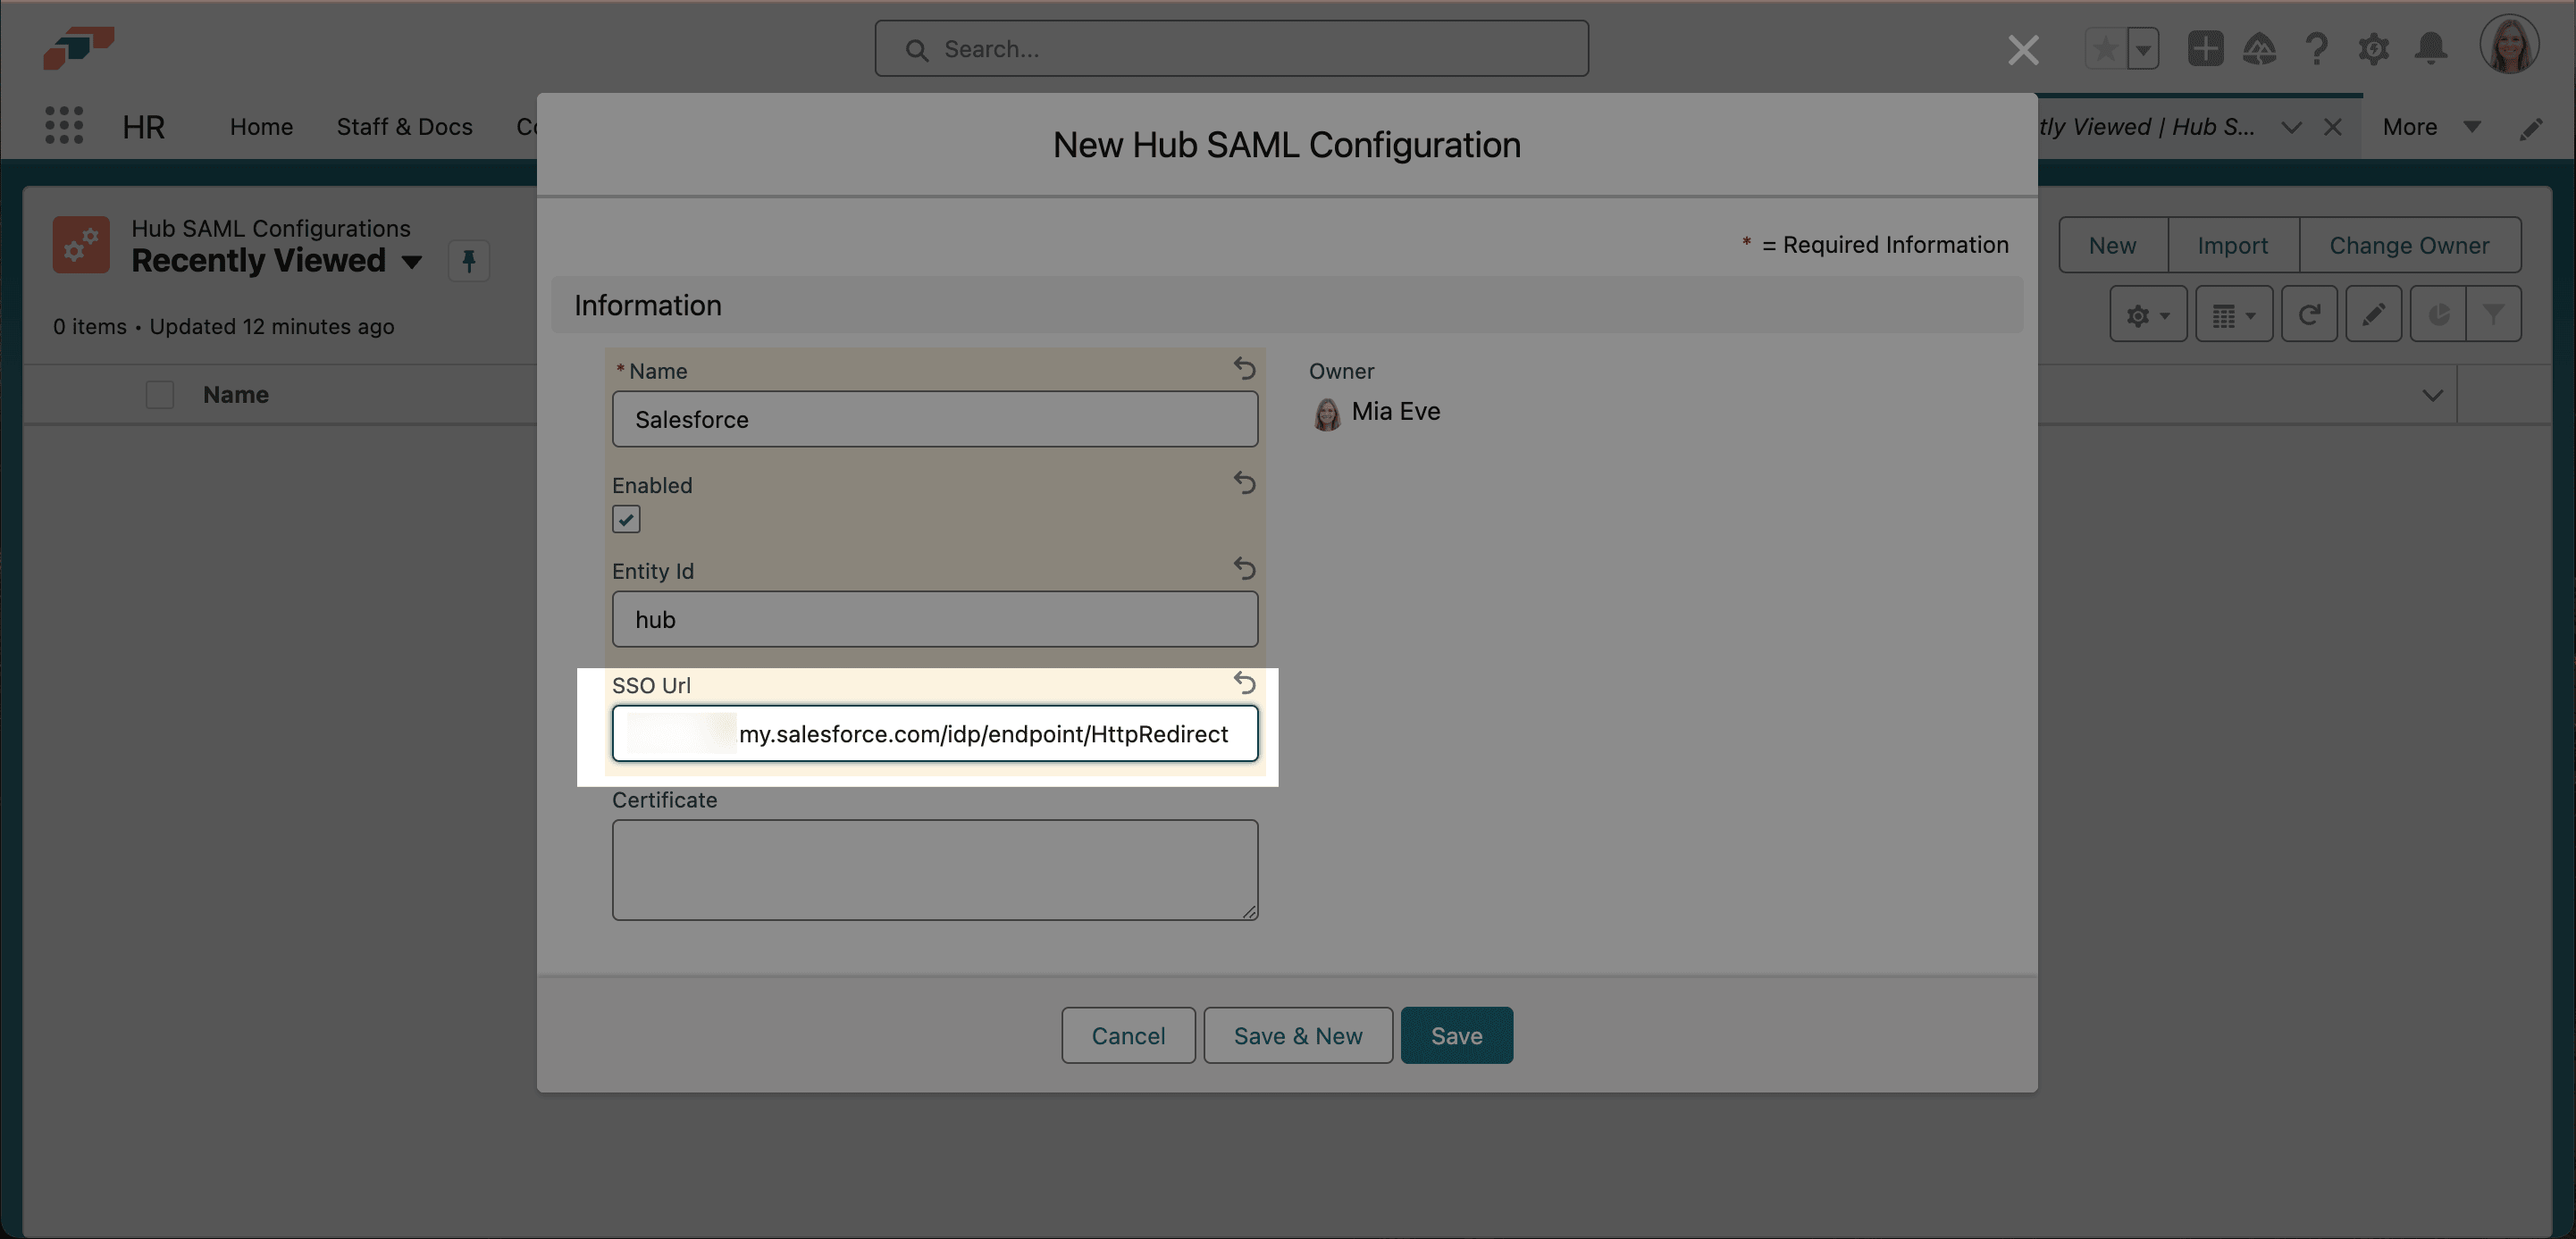
In the XML file, copy the last URL that ends in
/HttpRedirect. -
In the Hub SAML configuration, paste the URL into SSO URL.
-
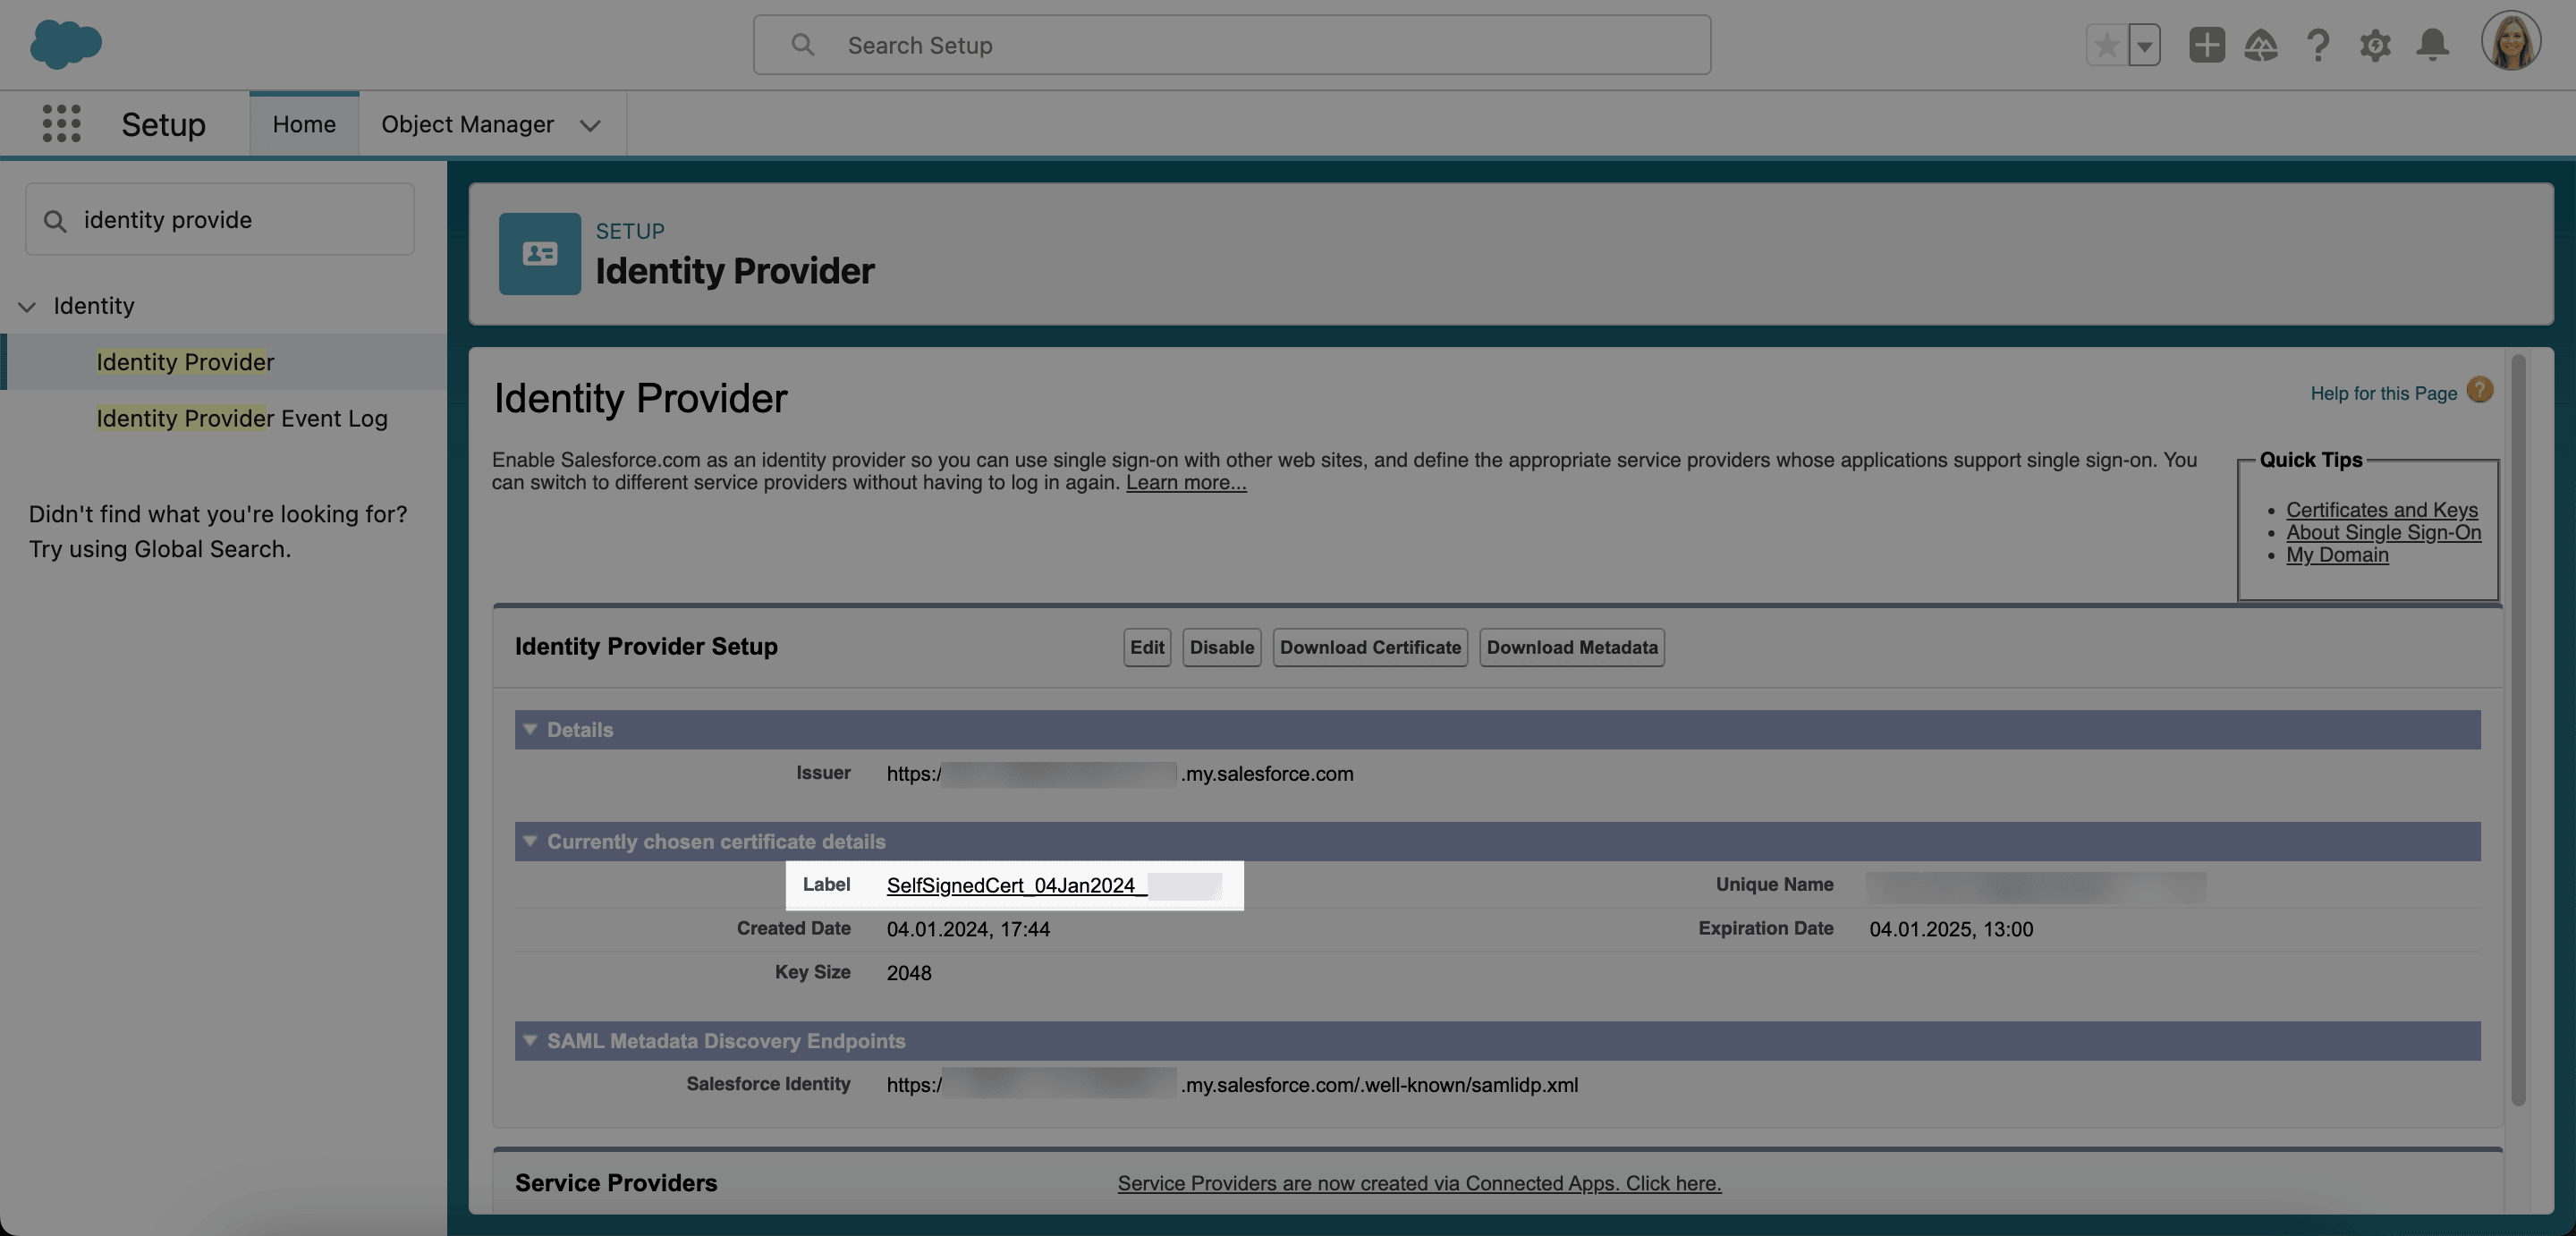
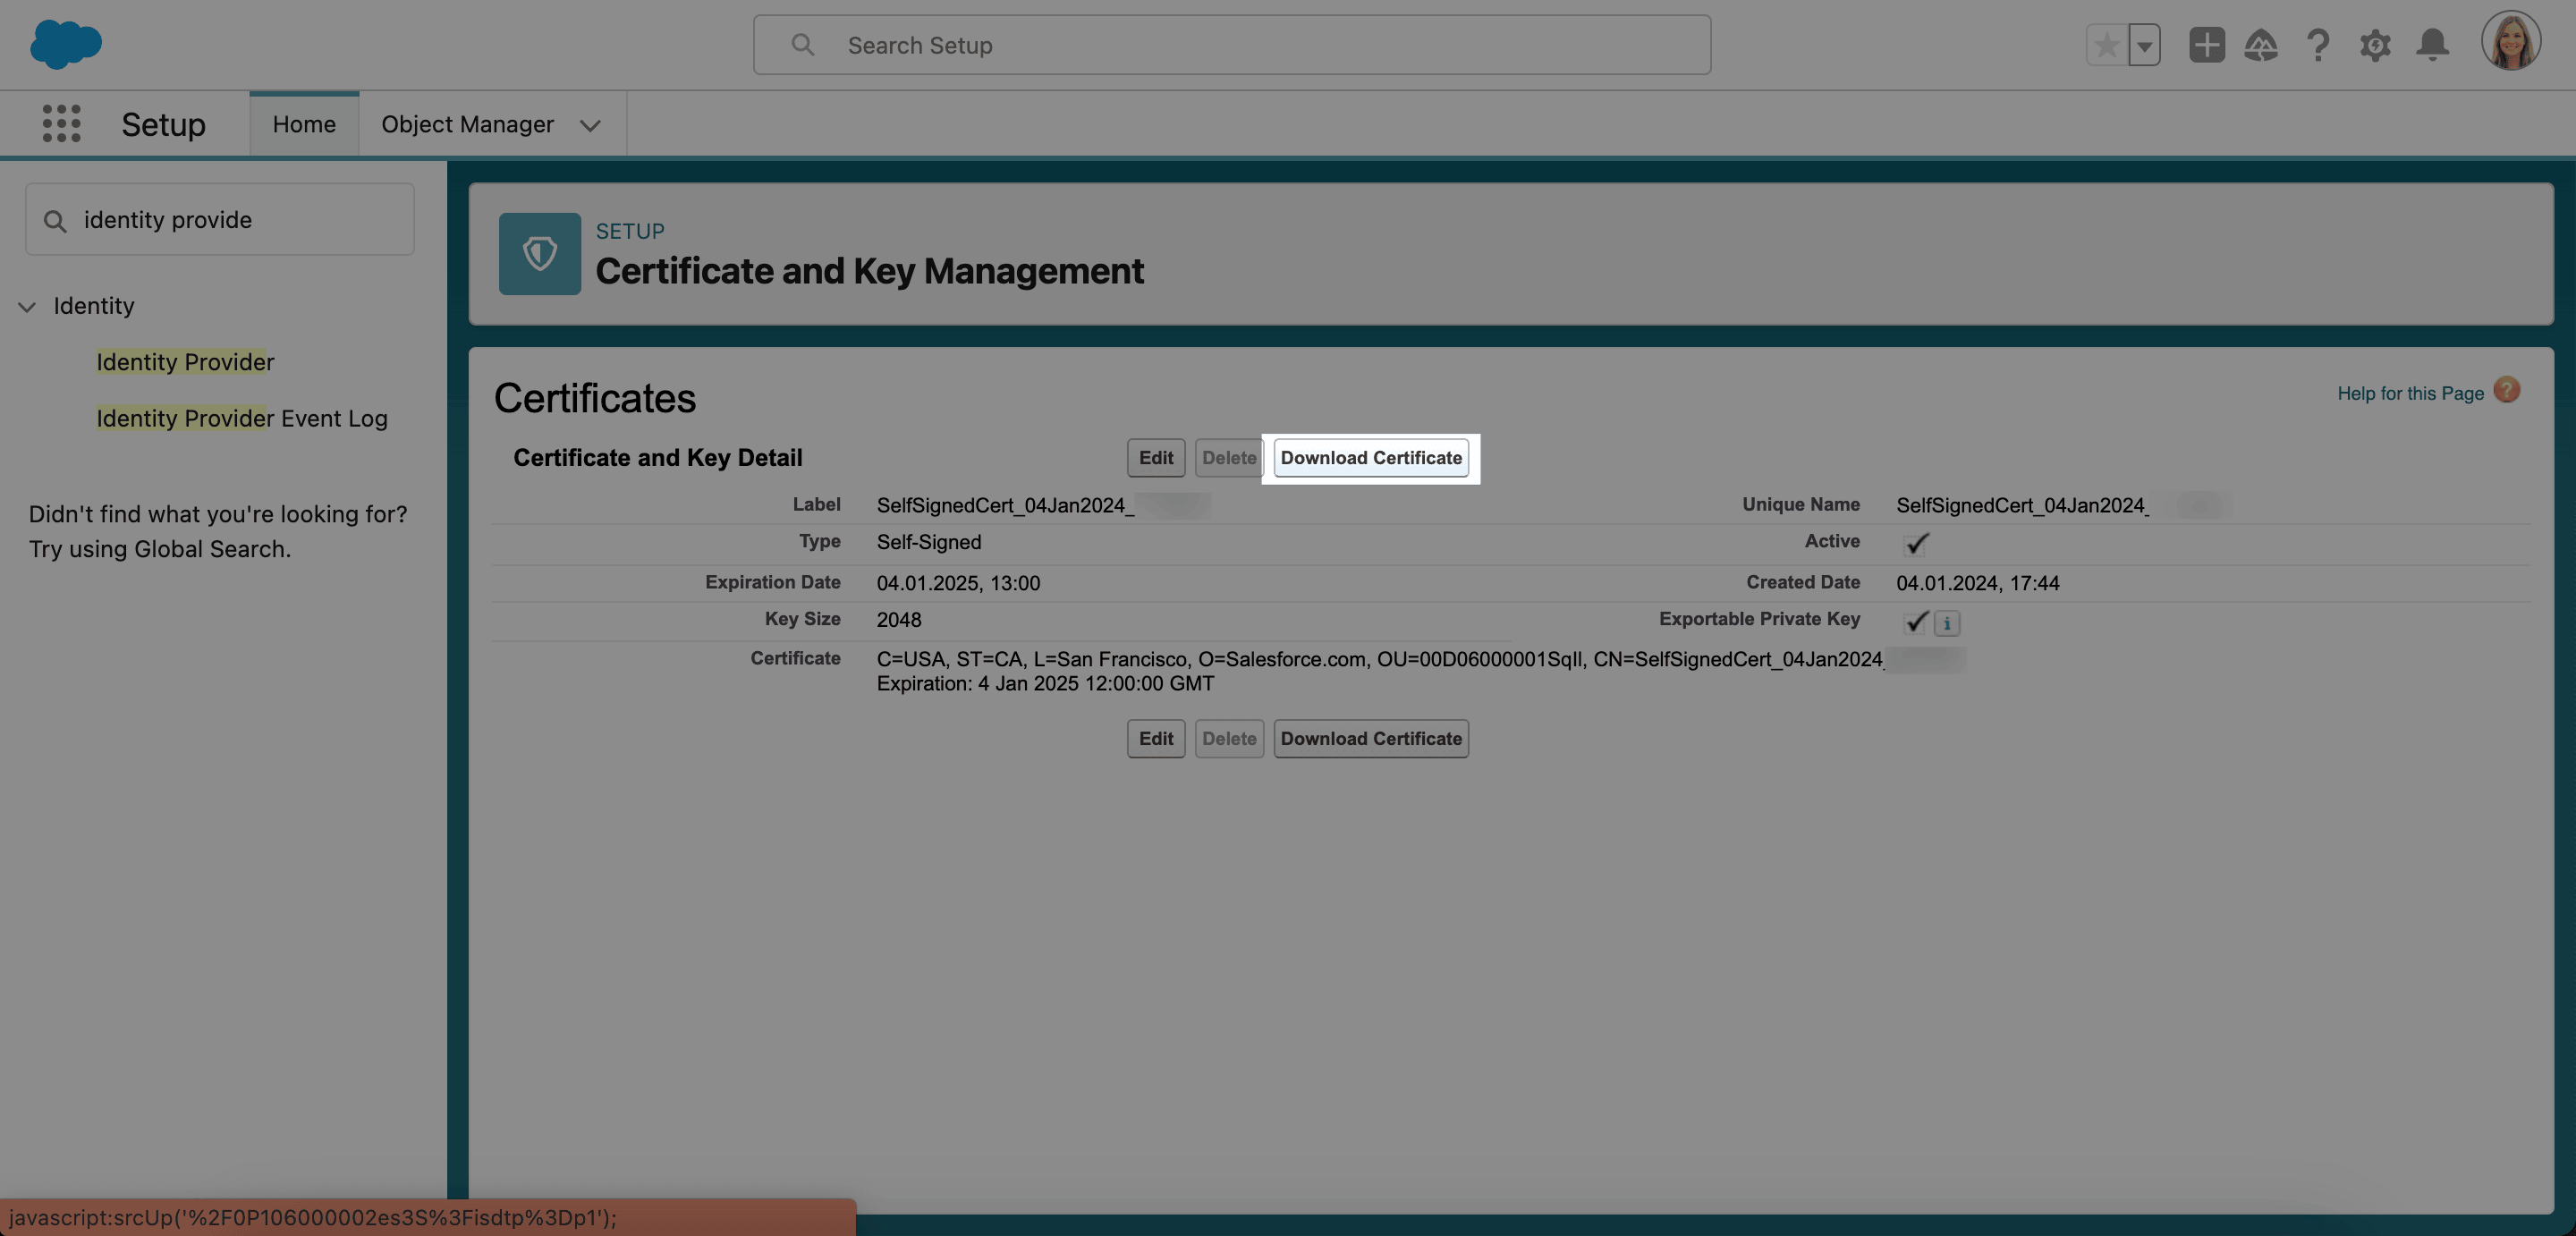
On the Salesforce Identity Provider page, click the link next to Label.
-
Click Download Certificate.
-
Open the
.crtfile in a code editor. -
Copy the certificate text.
-
In the Hub SAML configuration, paste the text into Certificate.
-
Click Save.
Grant users access to Salesforce SSO
-
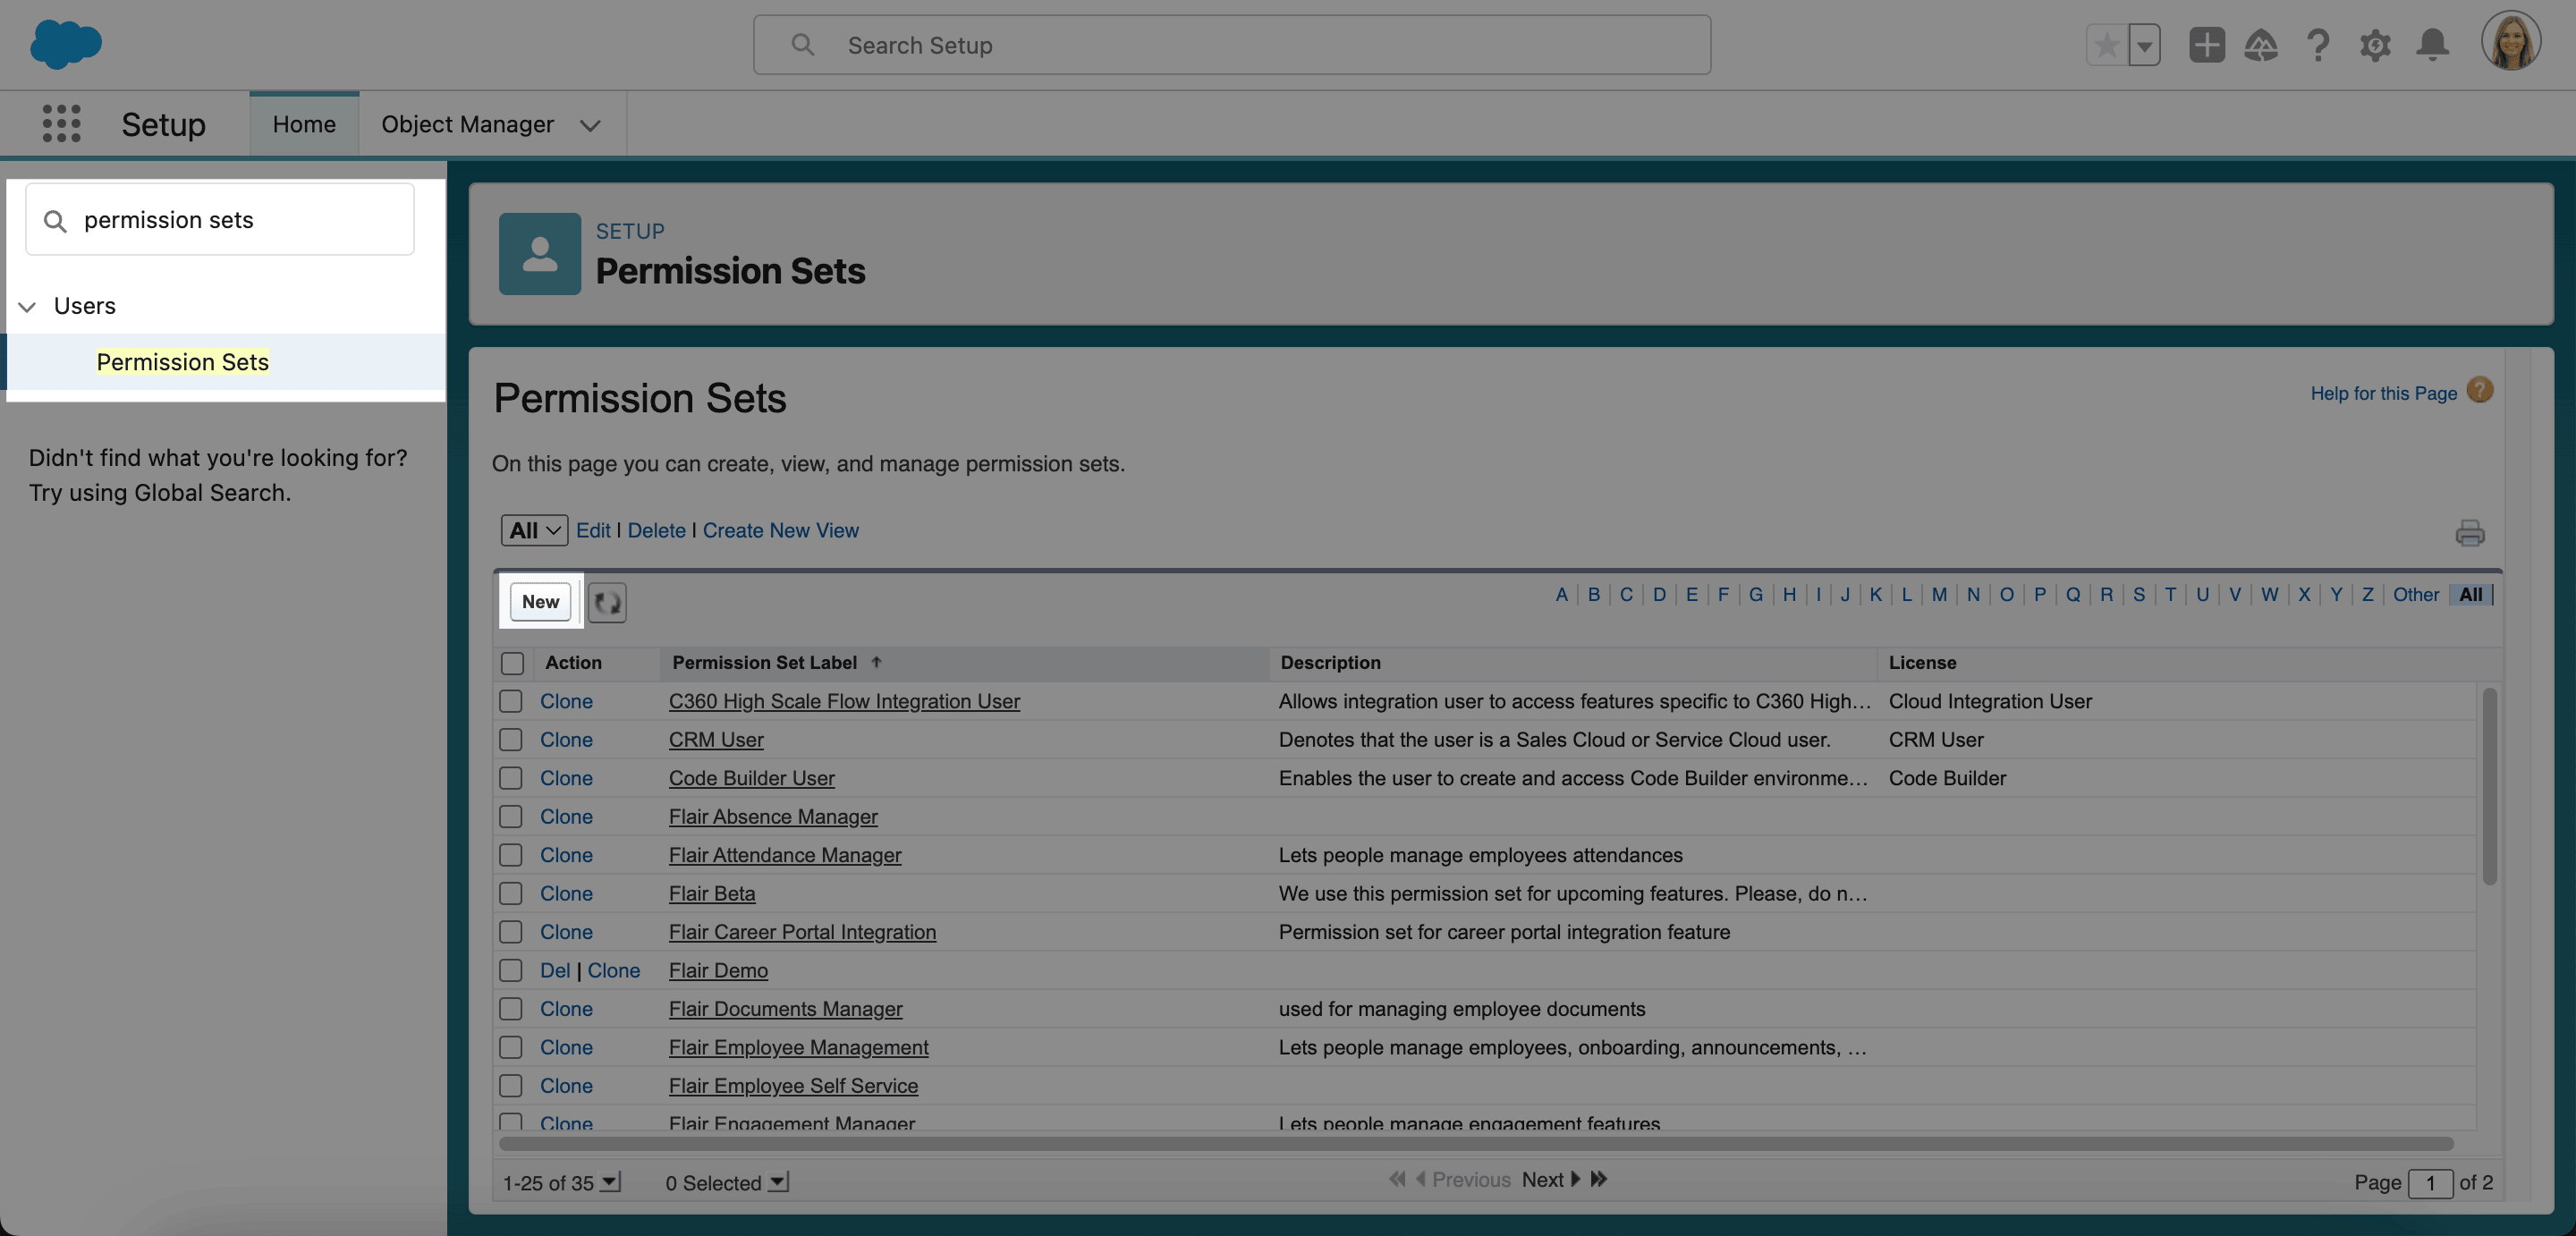
In Salesforce Setup, open Permission Sets.
-
Click New.
-
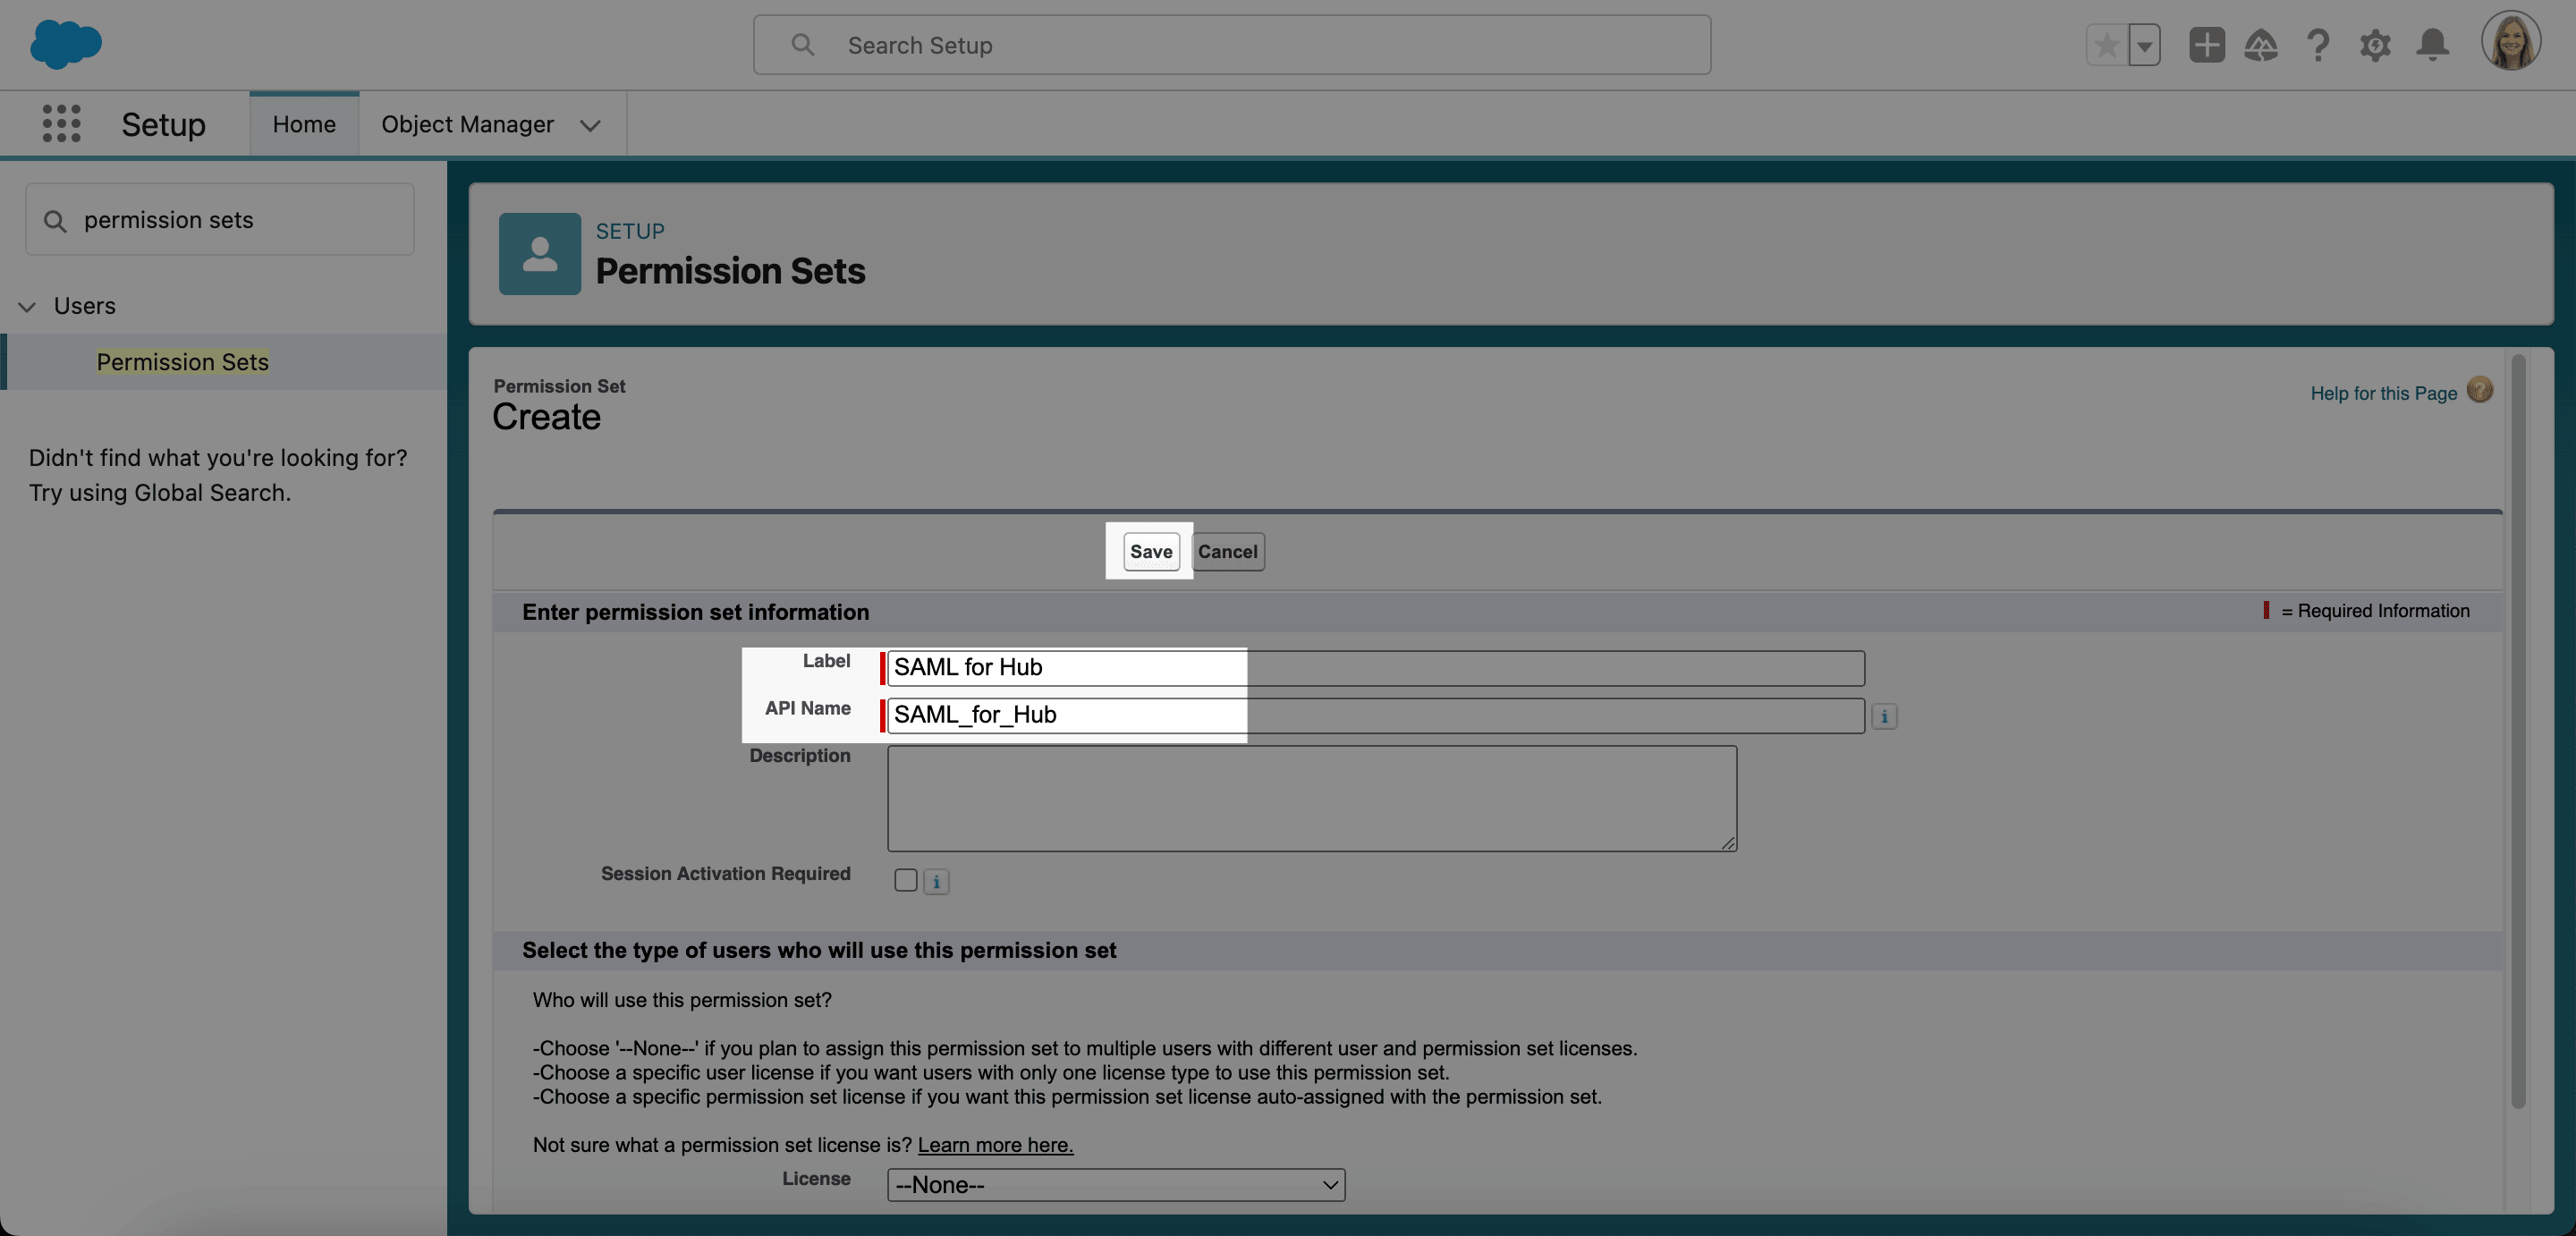
Enter a Label, such as
SAML for Hub. Salesforce fills the API Name automatically. -
Optional: Enter a Description.
-
Click Save.
-
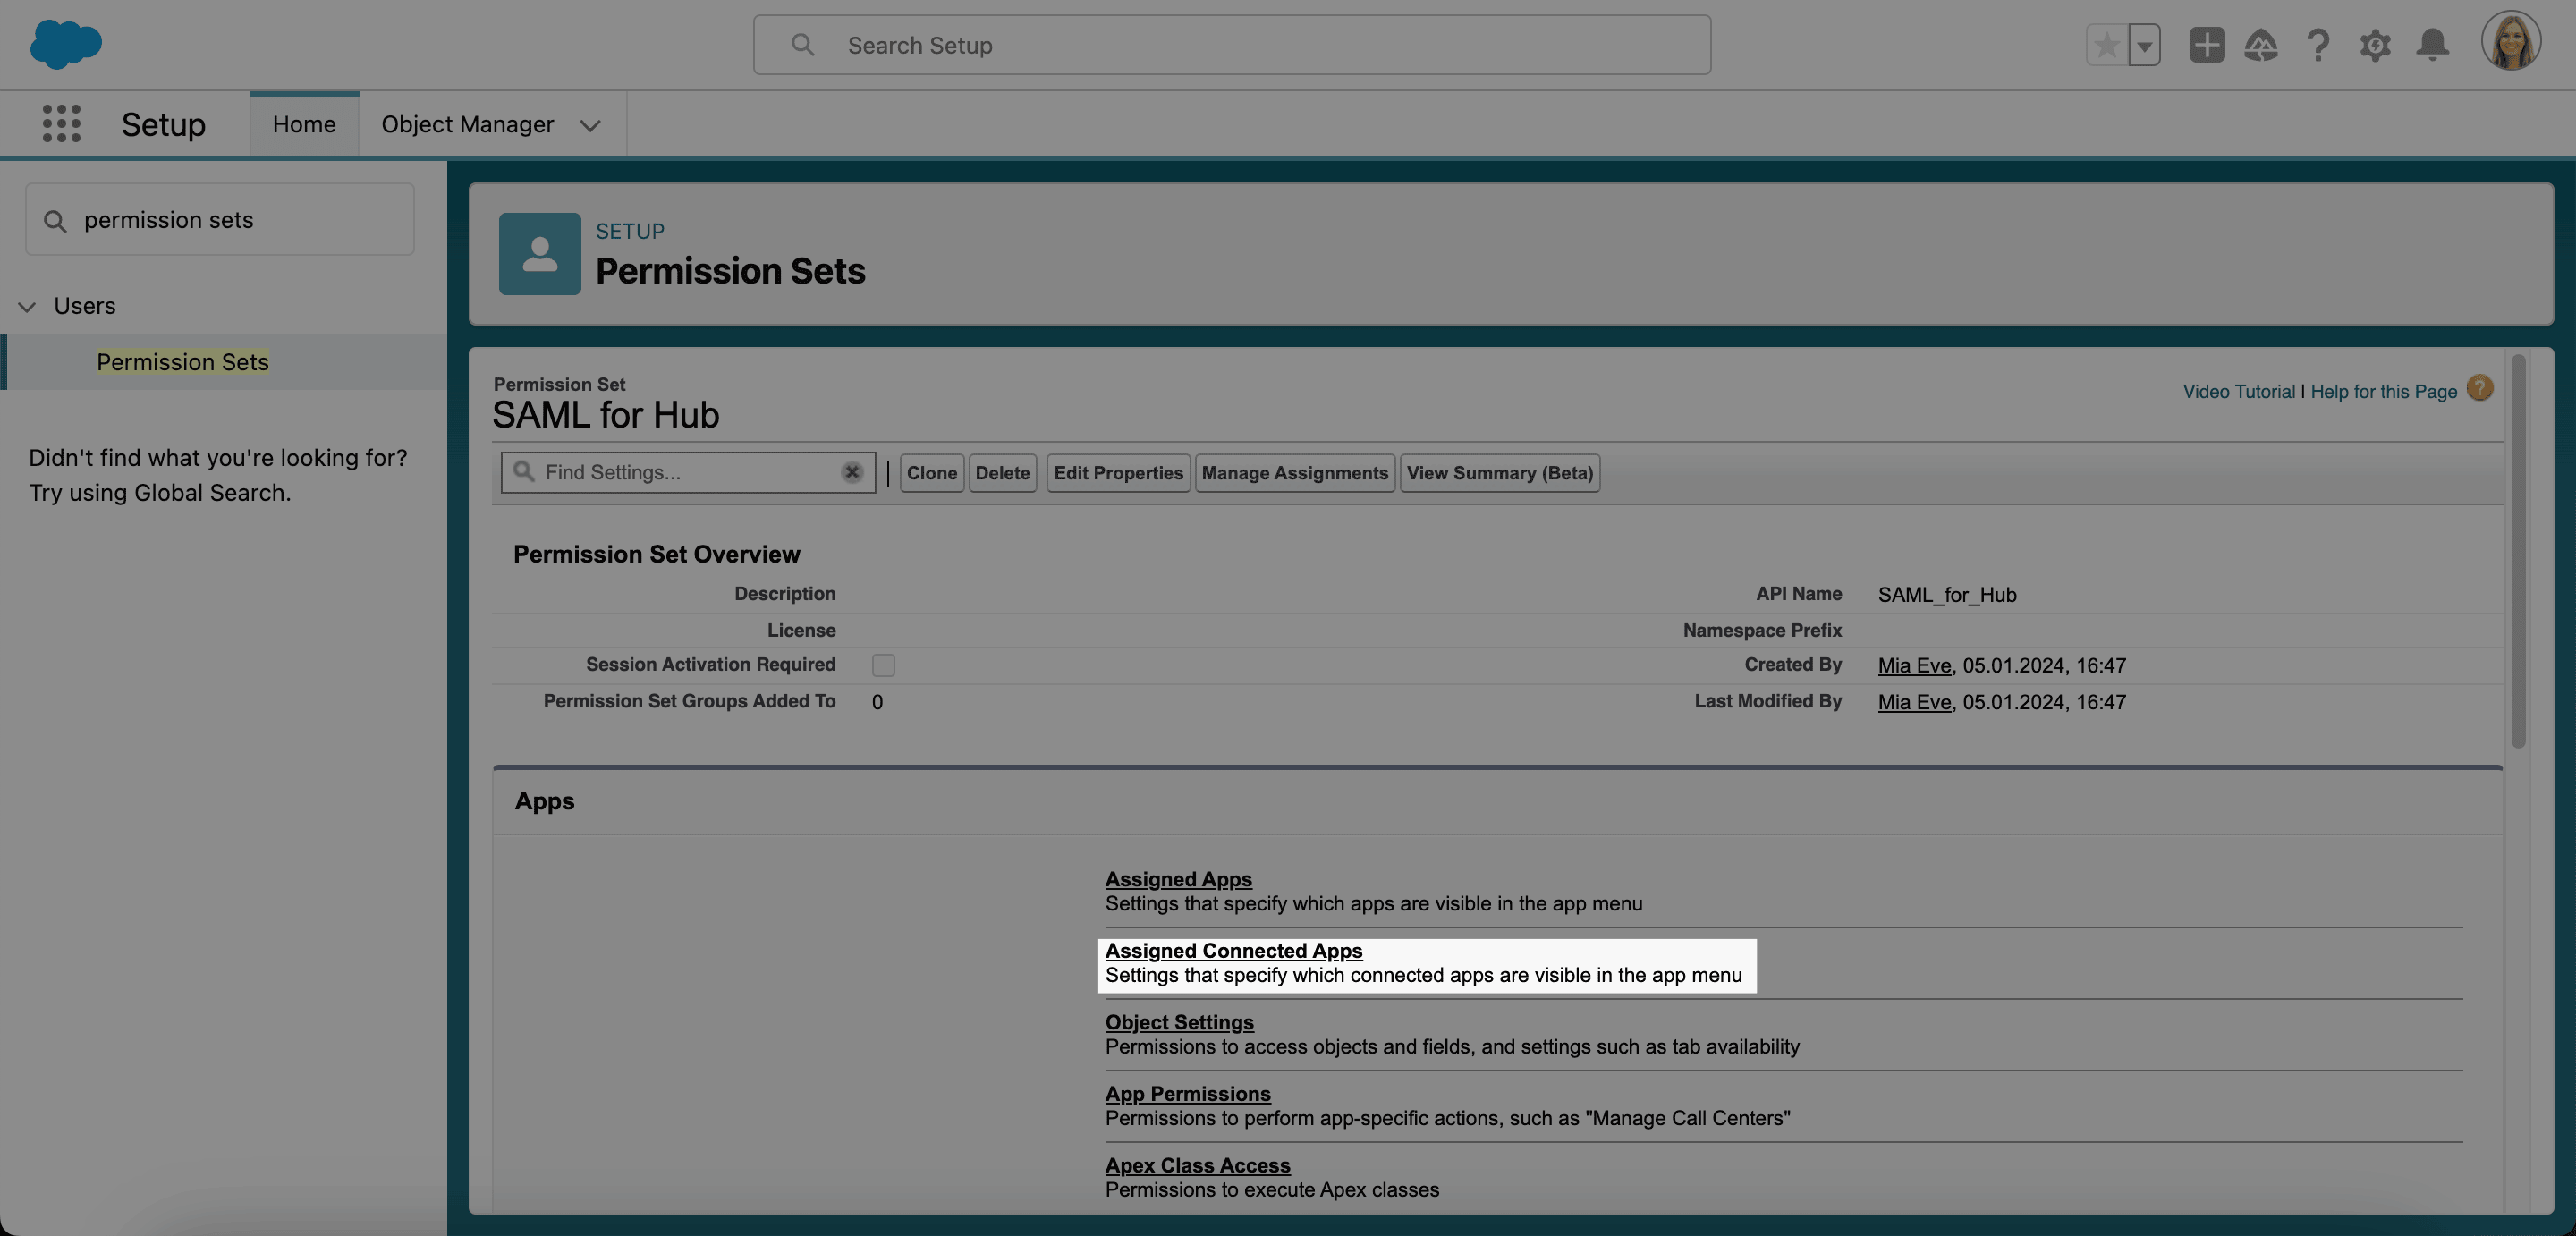
Under Apps, open Assigned Connected Apps.
-
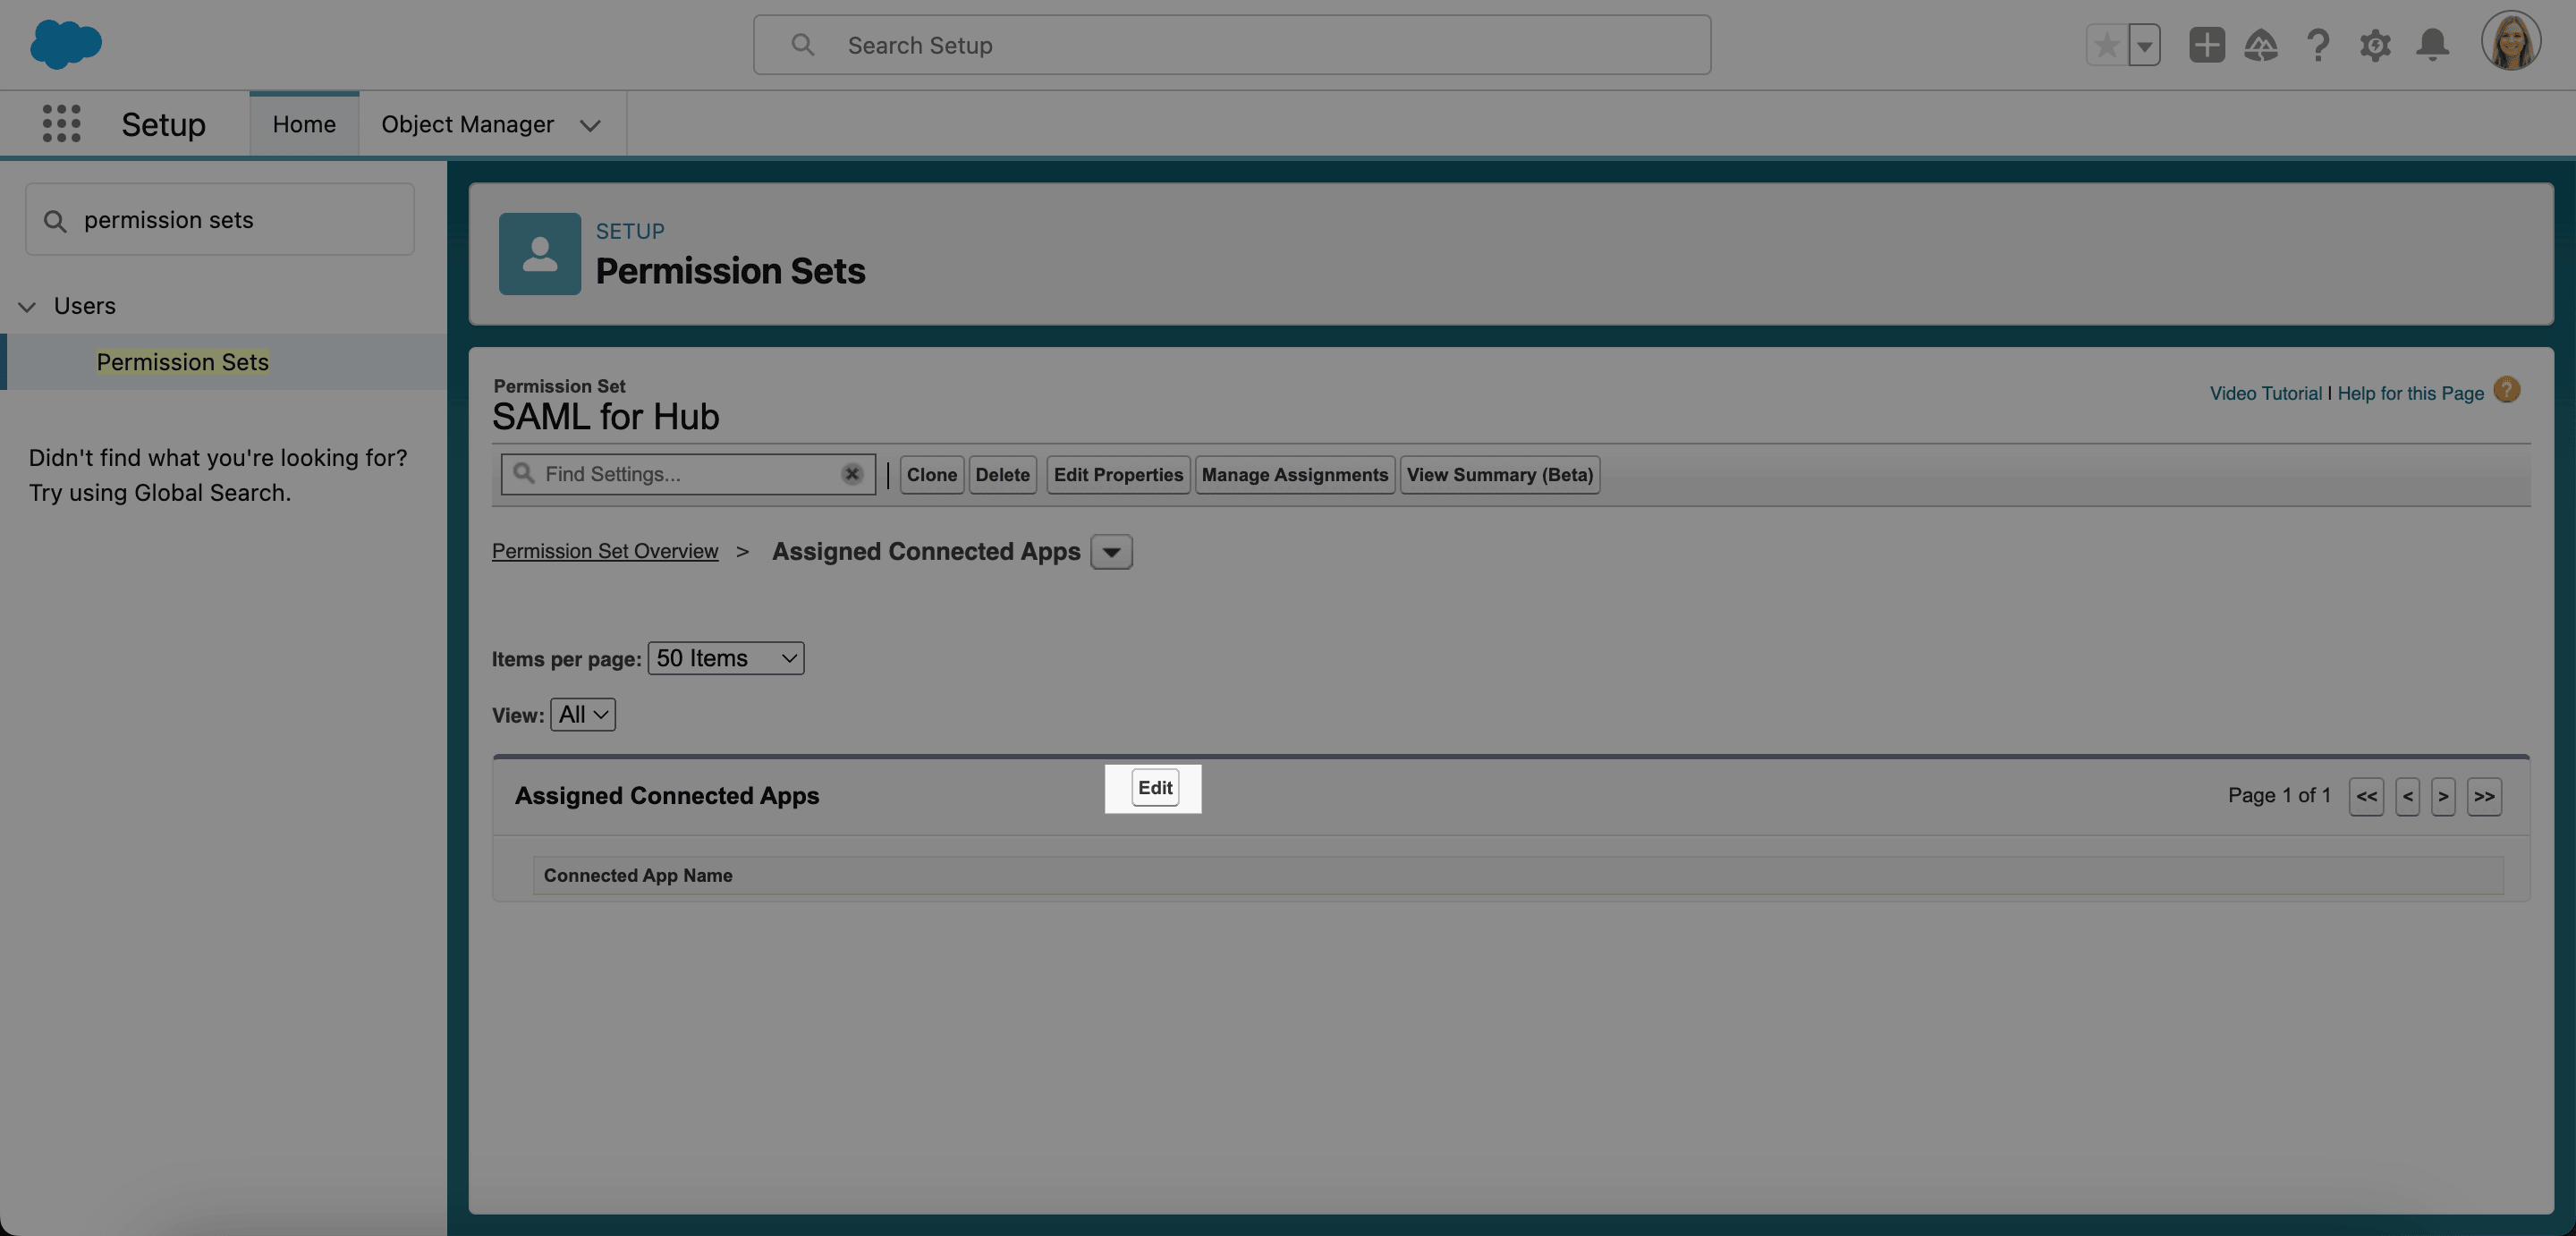
Click Edit.
-
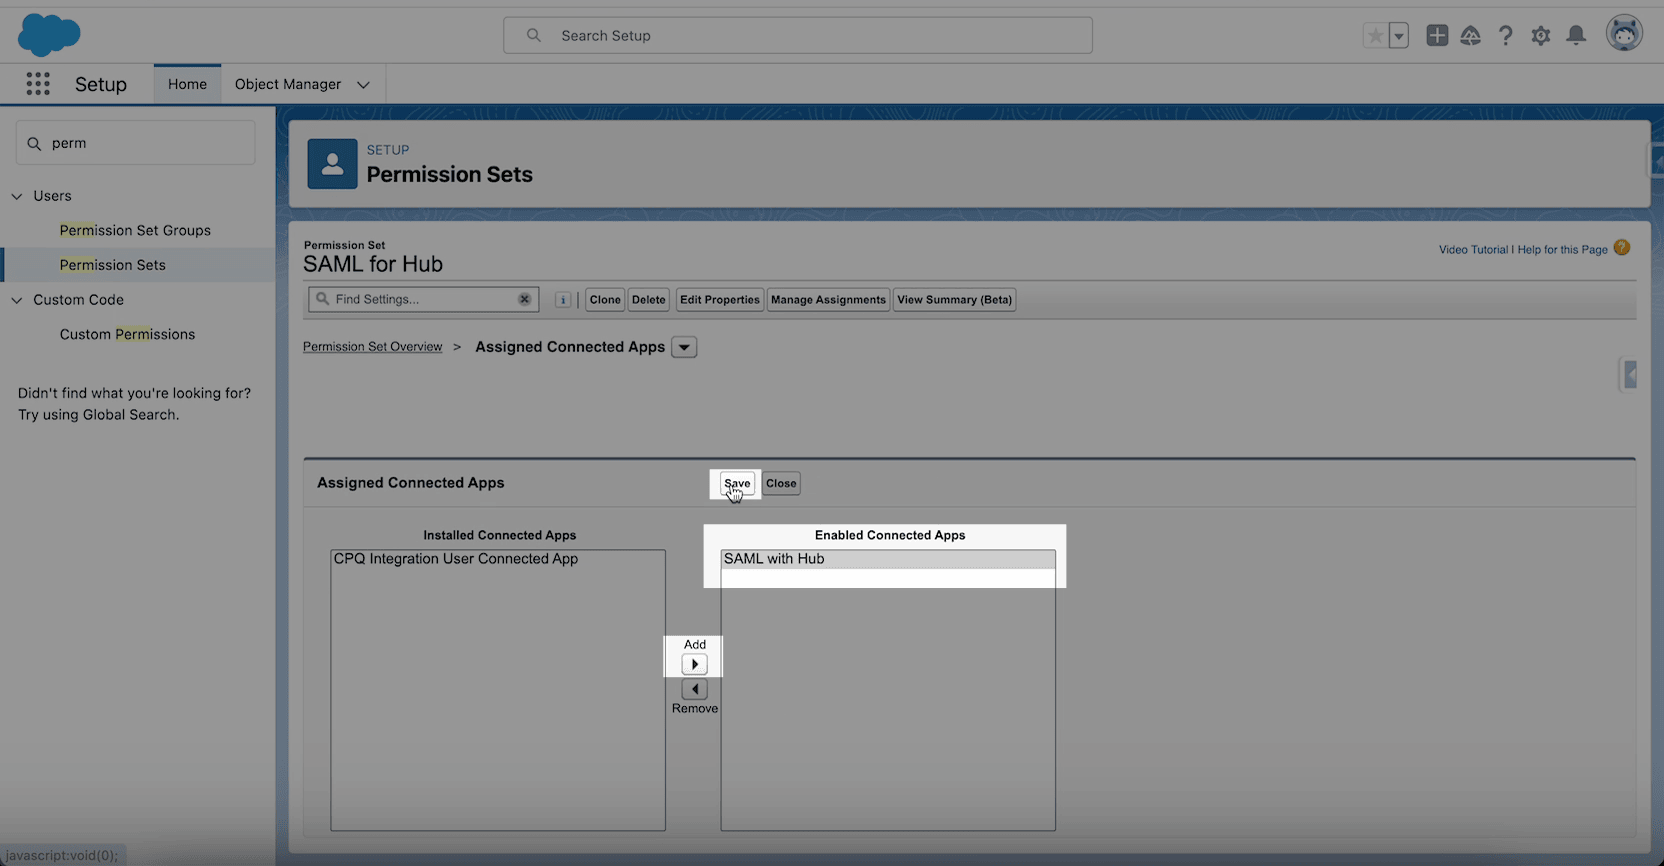
Add the SAML connected app to Enabled Connected Apps.
-
Click Save.
-
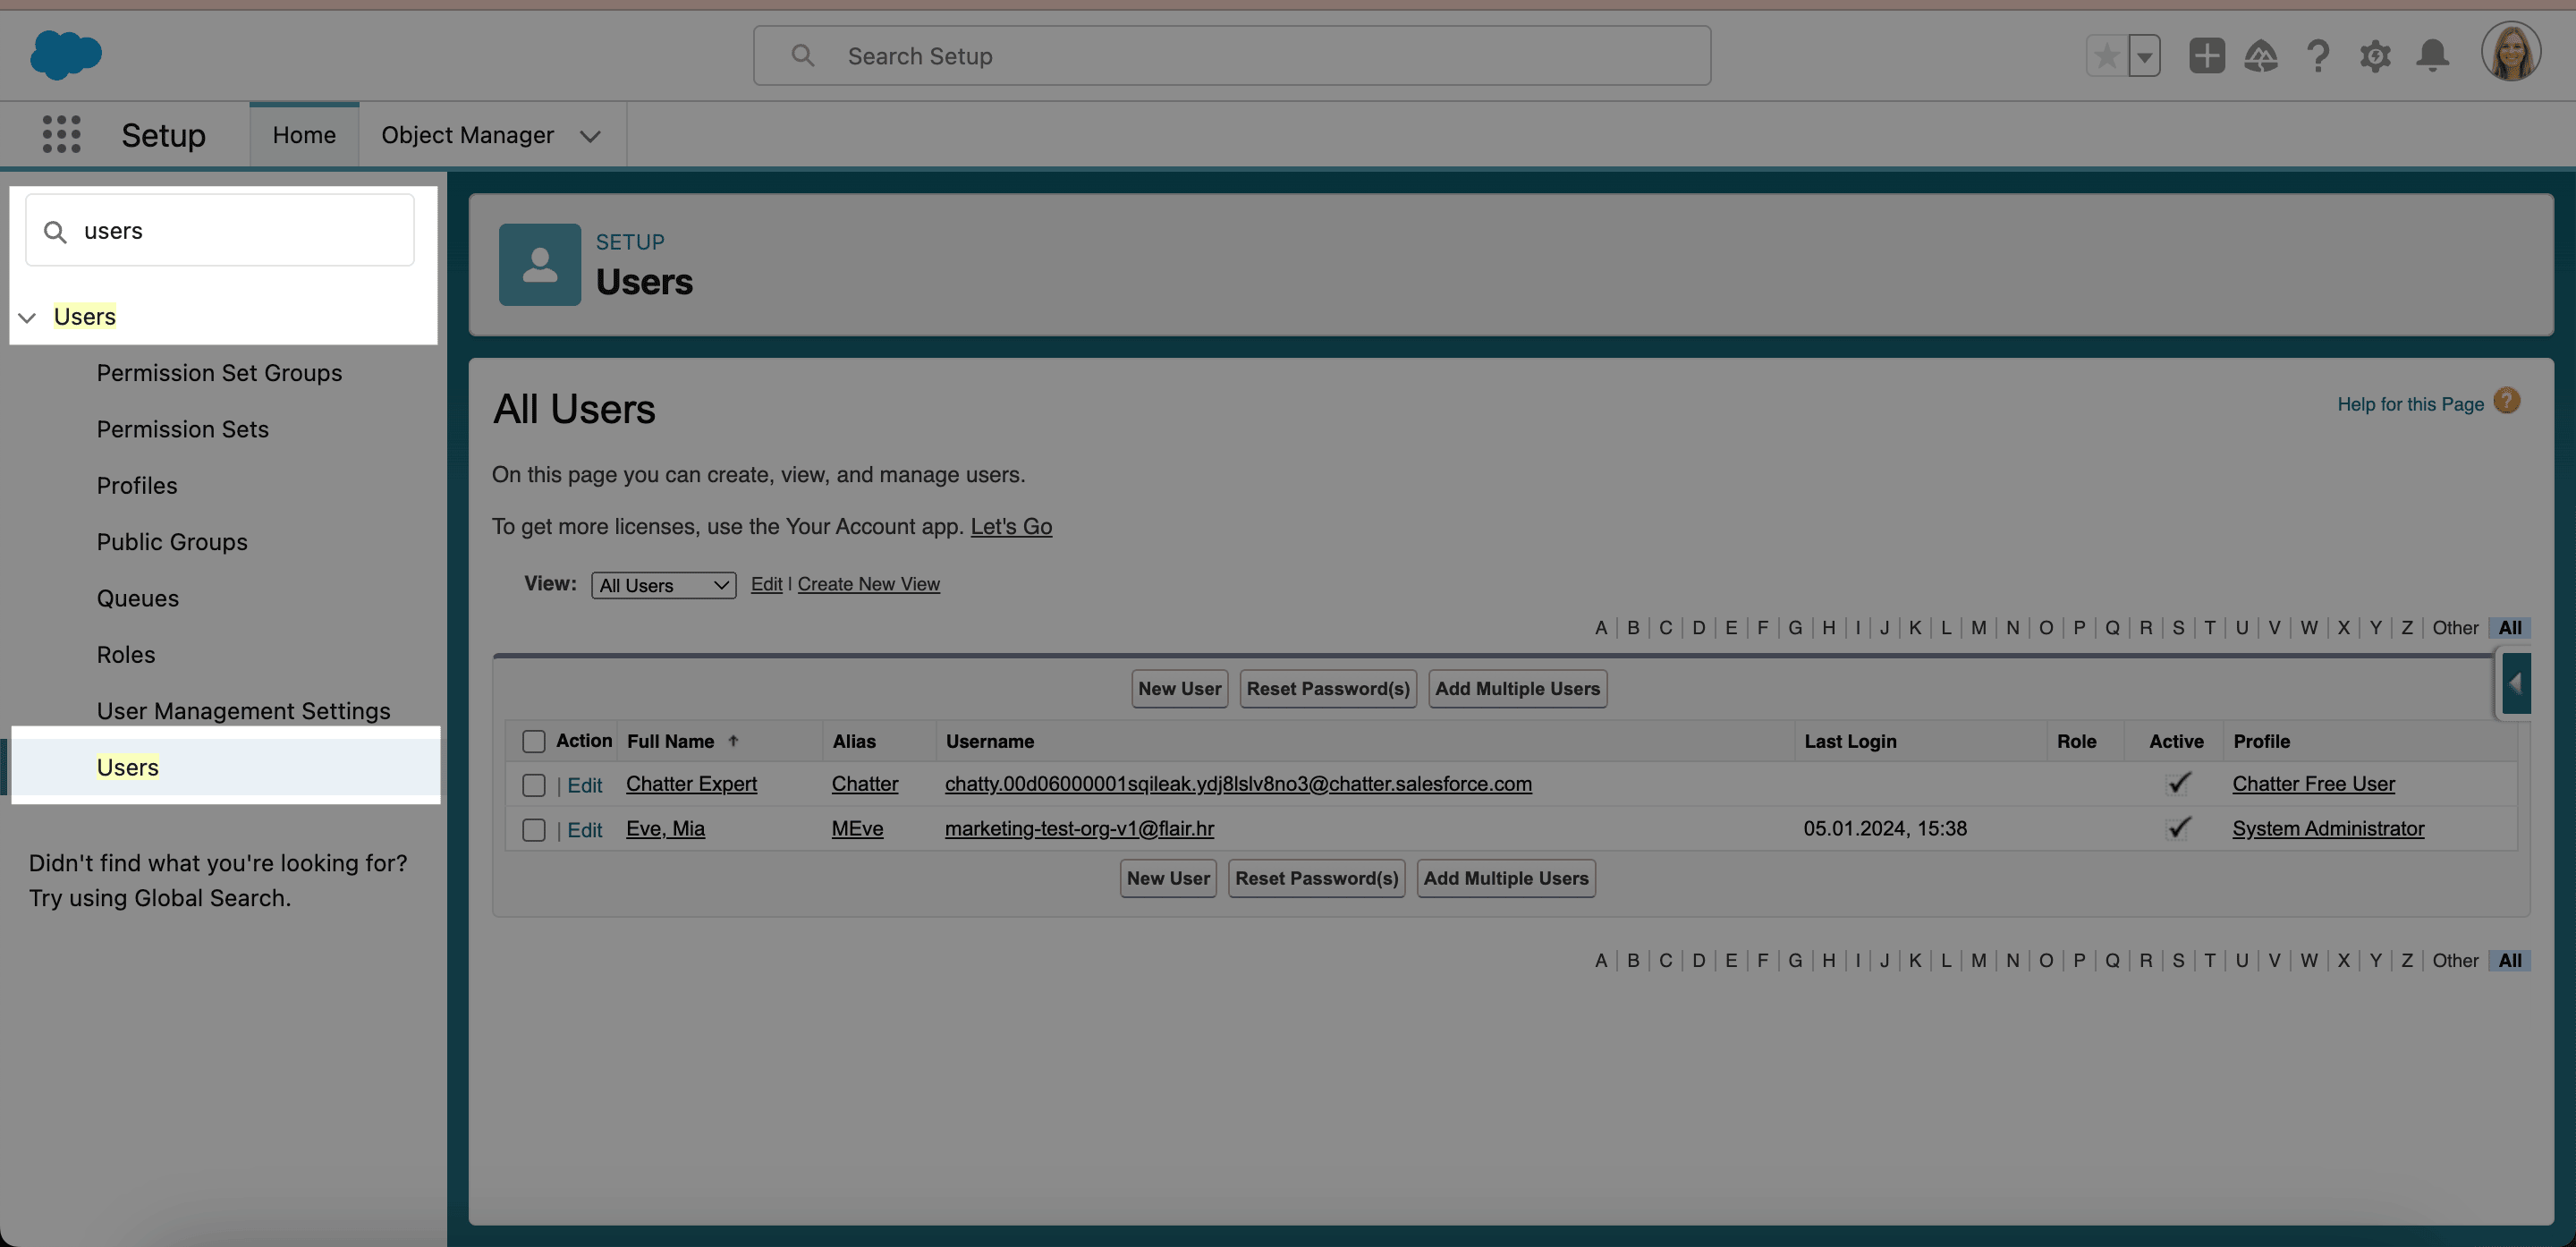
In Salesforce Setup, open Users.
-
Select the user who needs SAML access.
-
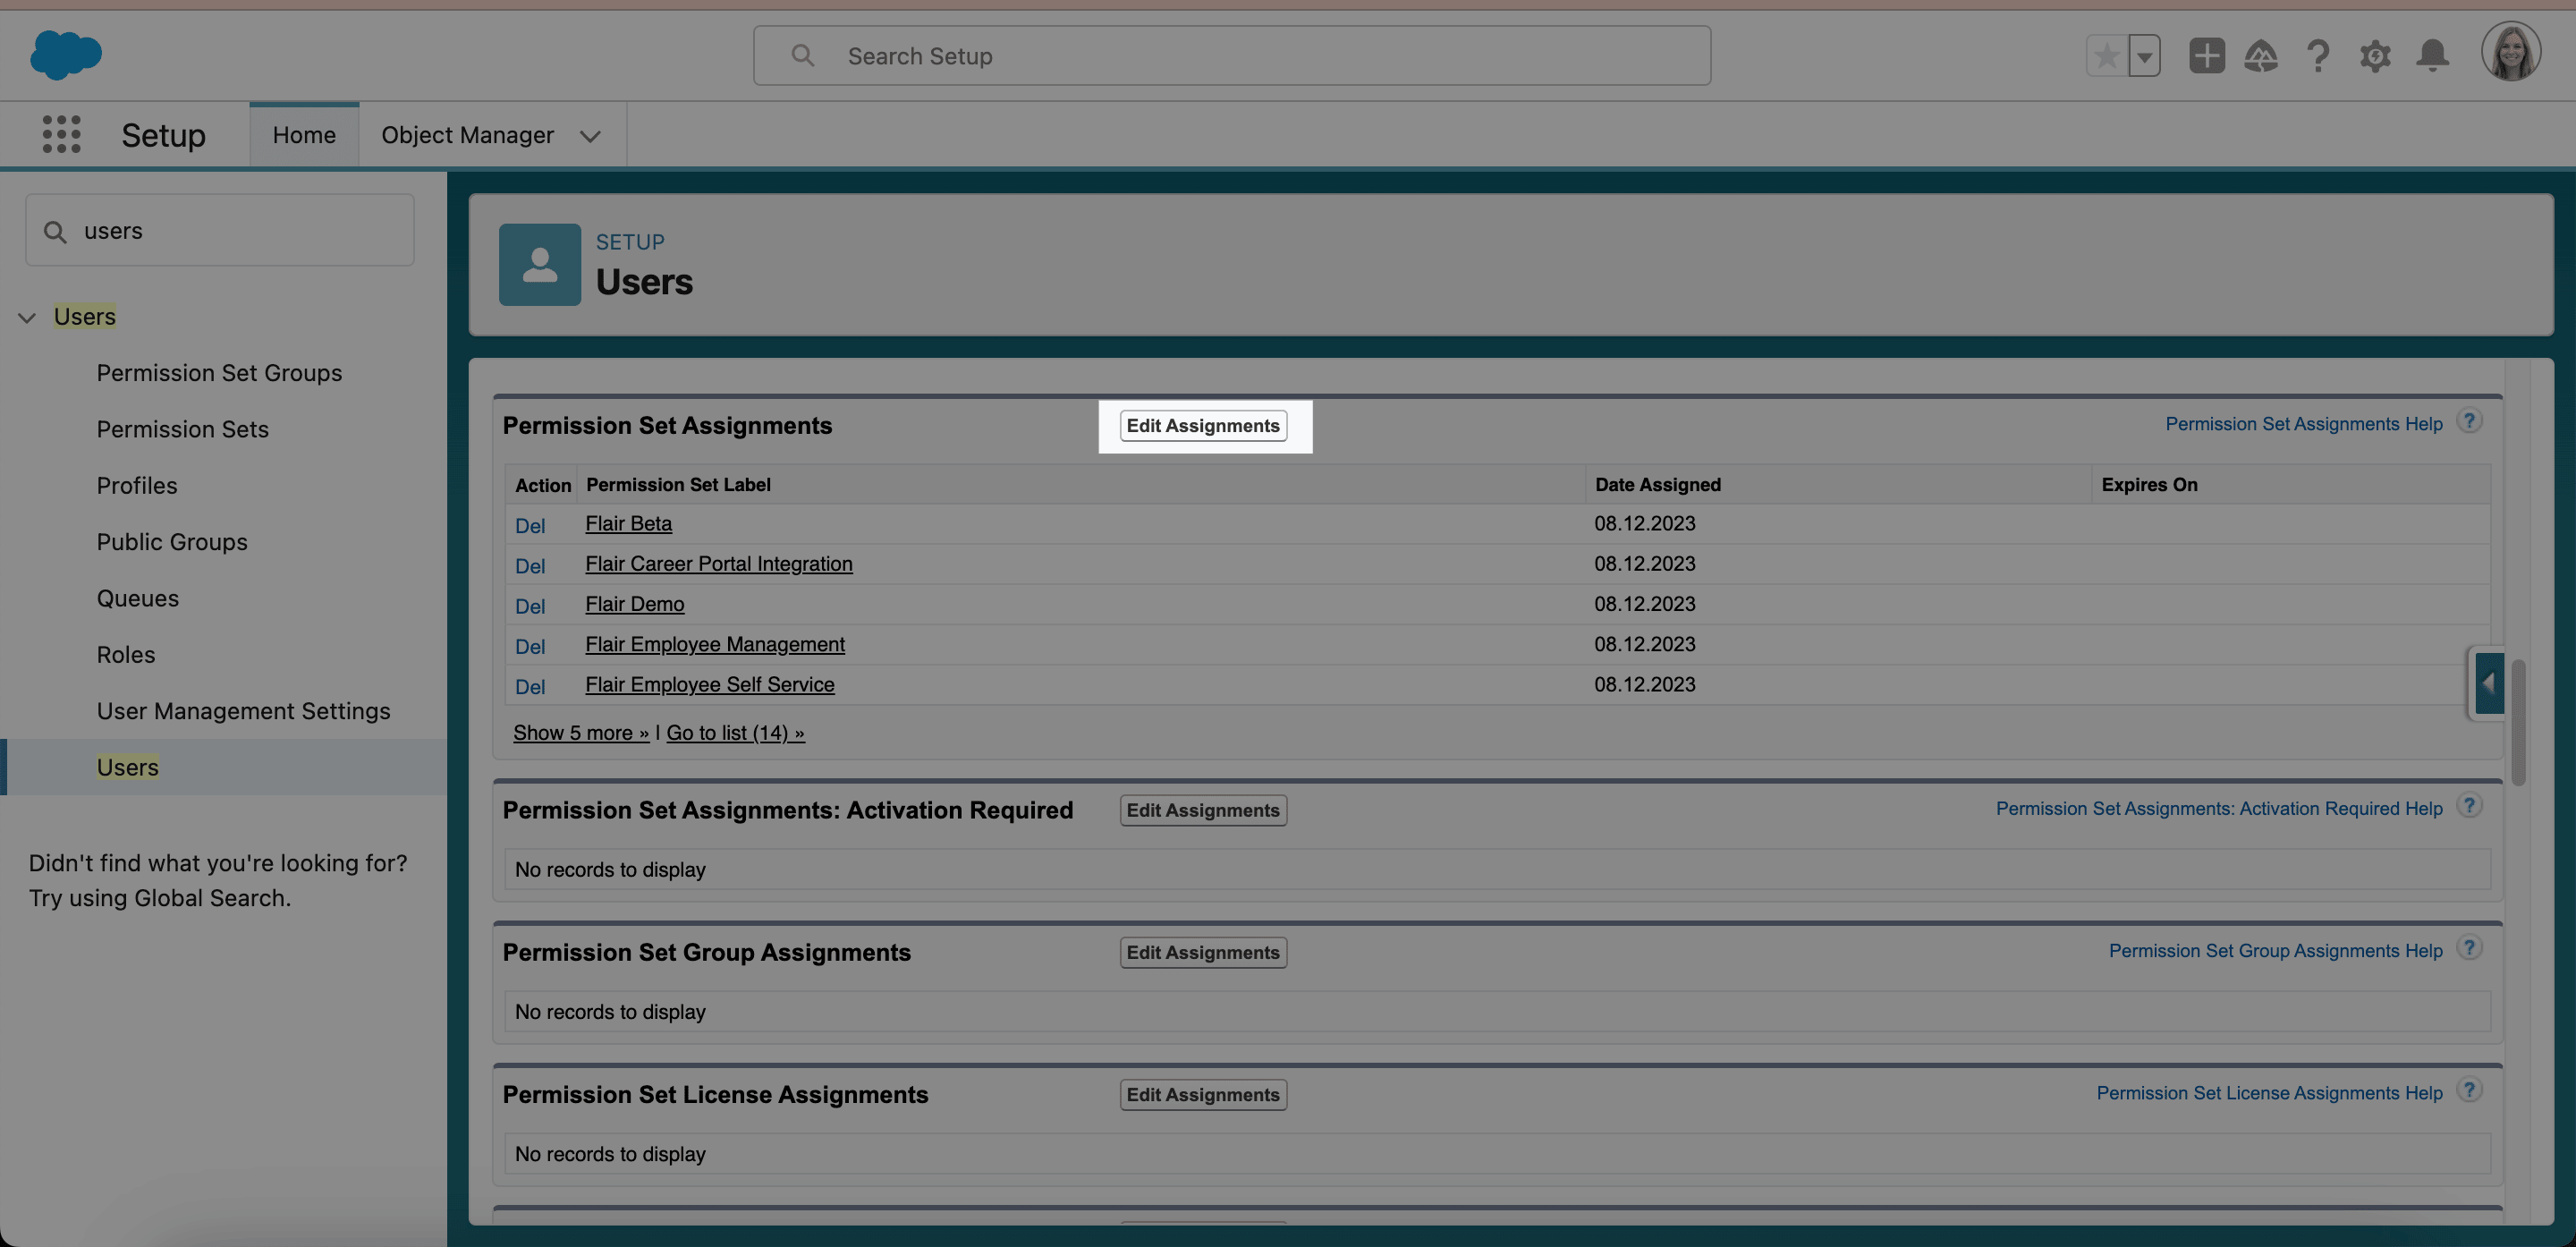
Under Permission Set Assignments, click Edit Assignments.
-
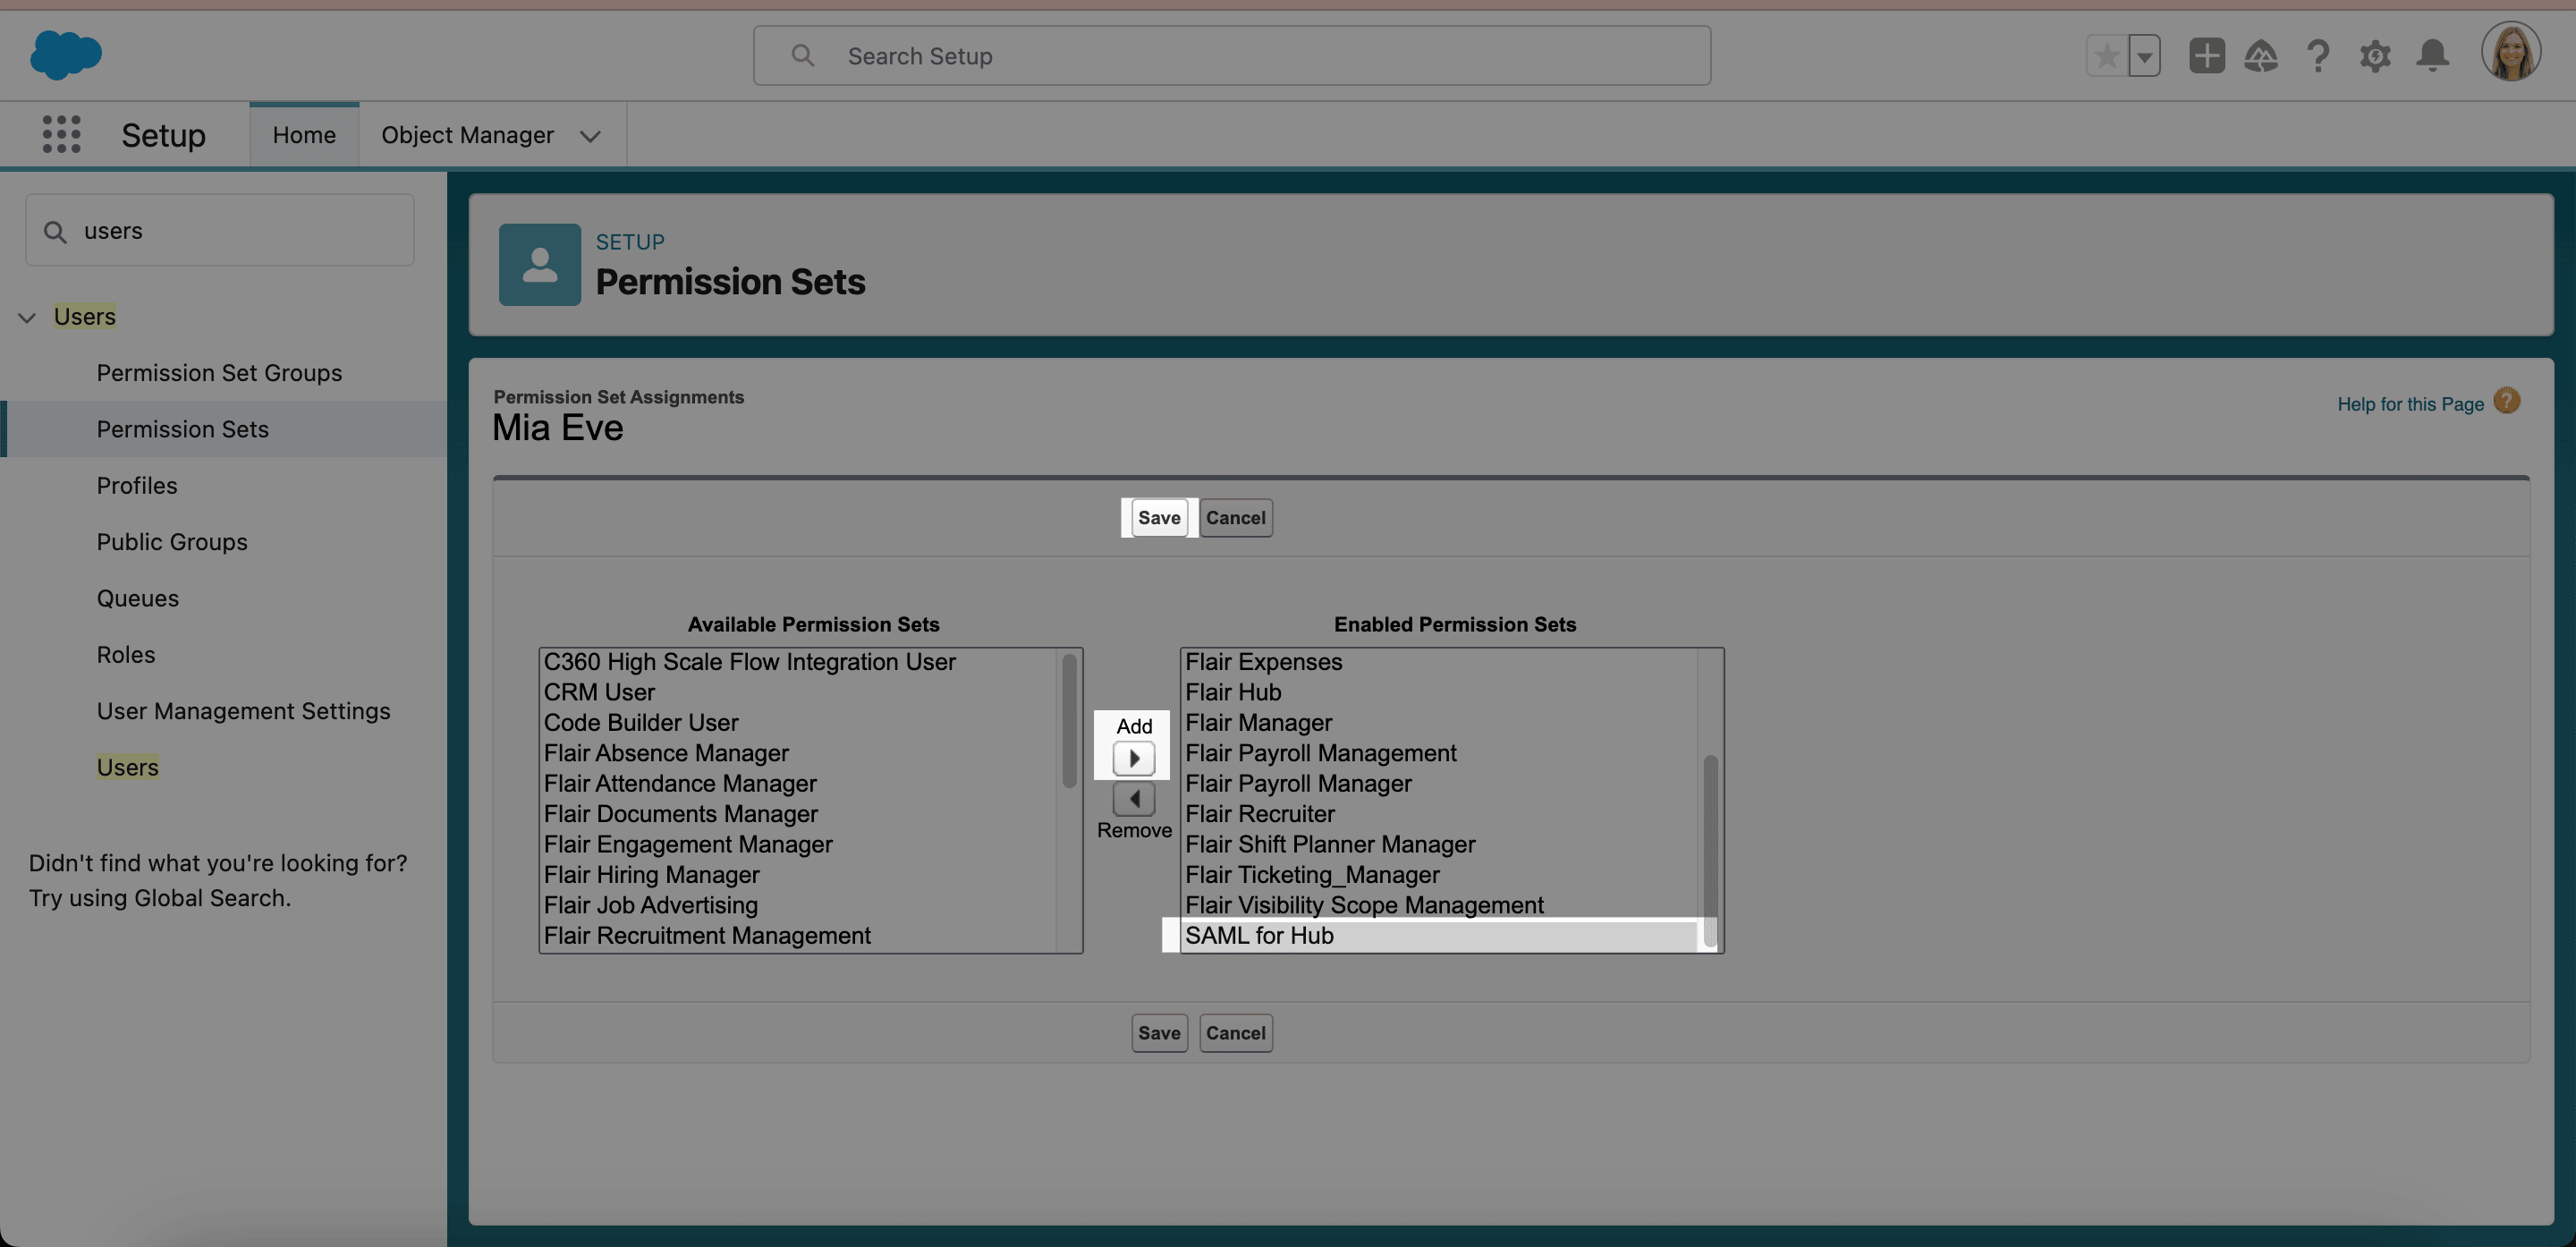
Add the SAML permission set to Enabled Permission Sets.
-
Click Save. The user can sign in to the Employee Hub with Salesforce credentials.
Configure SAML SSO with Microsoft Entra ID
Create an enterprise application in Microsoft Entra ID, add its SAML configuration to flair, and test employee access.
If your Salesforce org has multiple Employee Hubs, open the SAML SSO configuration record and set Hub to limit the login option to one Hub. Leave Hub empty to show it on every Hub.
Create the Microsoft Entra ID application
-
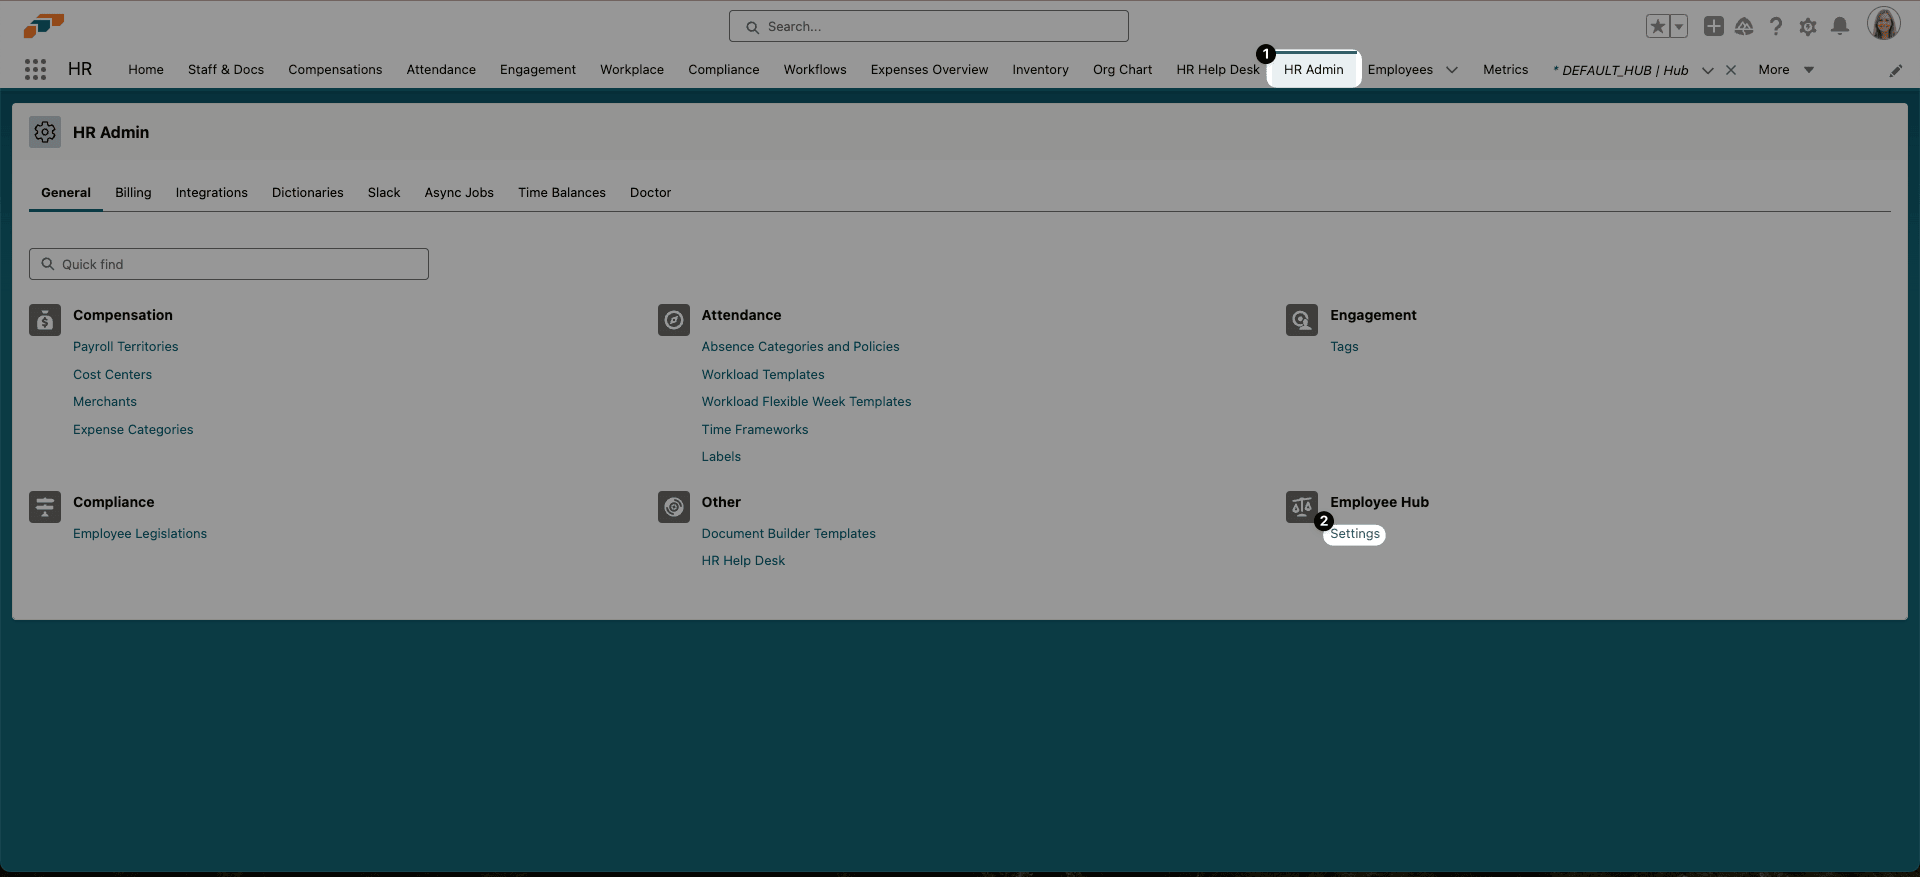
In the flair HR app, open HR Admin from the navigation bar or the App Launcher (⋮⋮ grid icon).
-
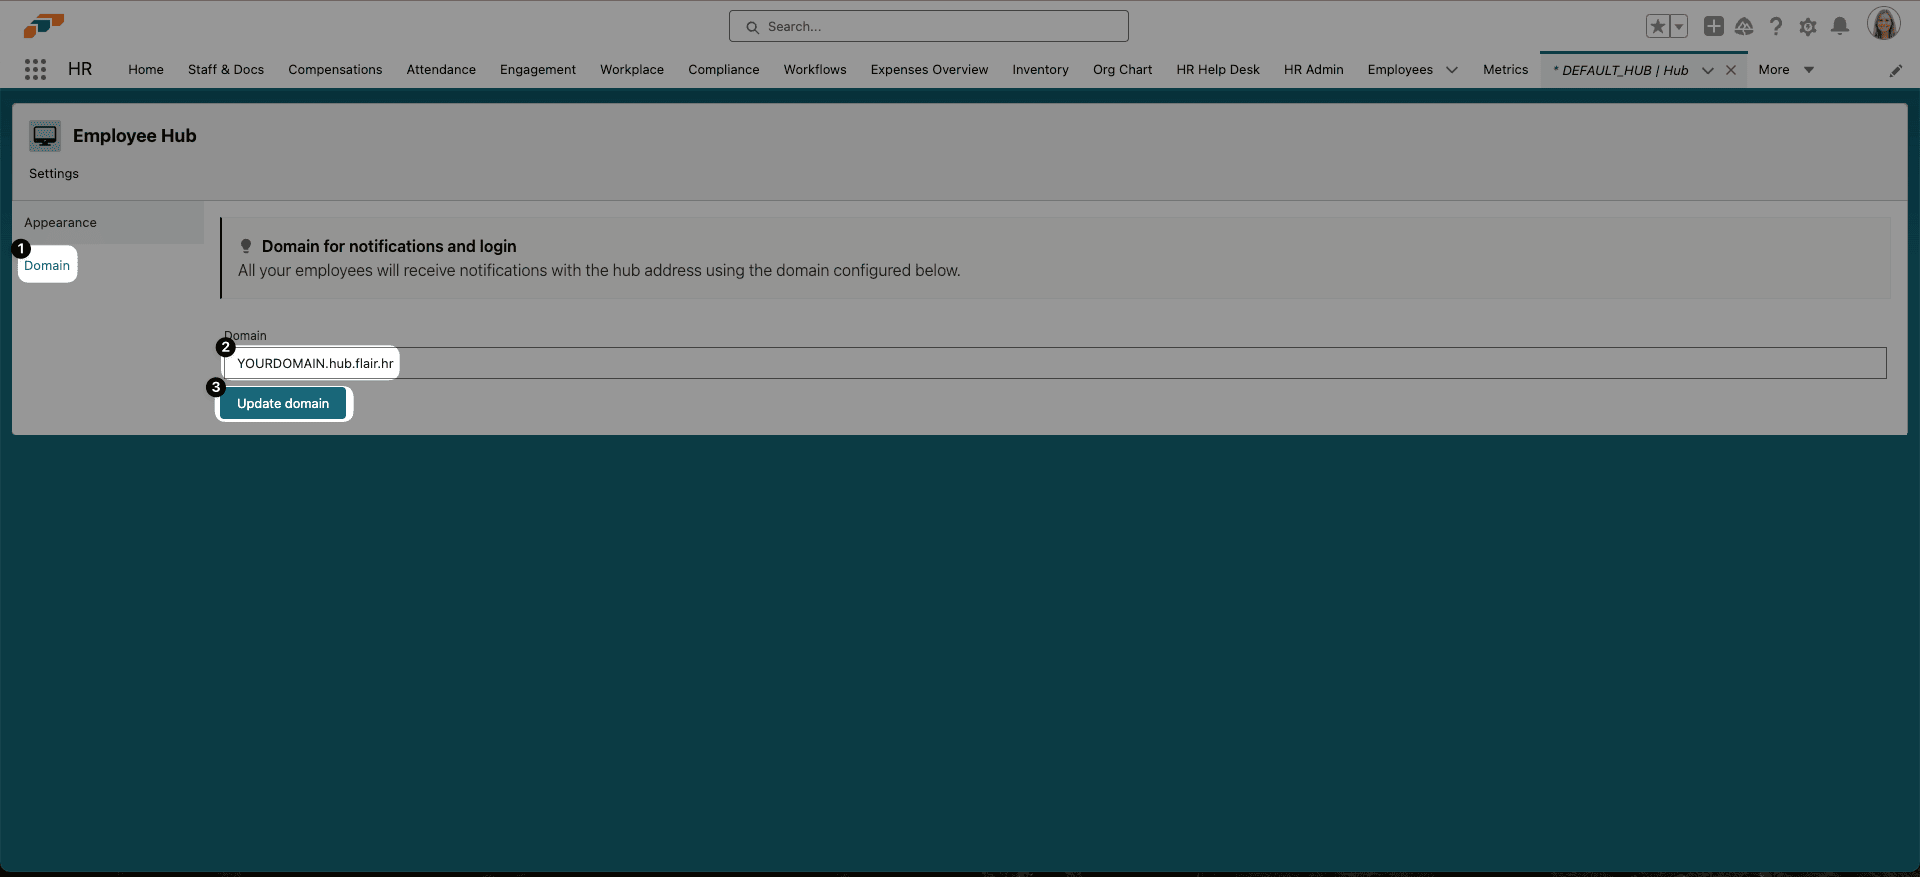
In the left menu, click Domain.
-
In Domain, enter your Employee Hub domain in the format
YOURDOMAIN.hub.flair.hr. -
Click Update Domain.
-
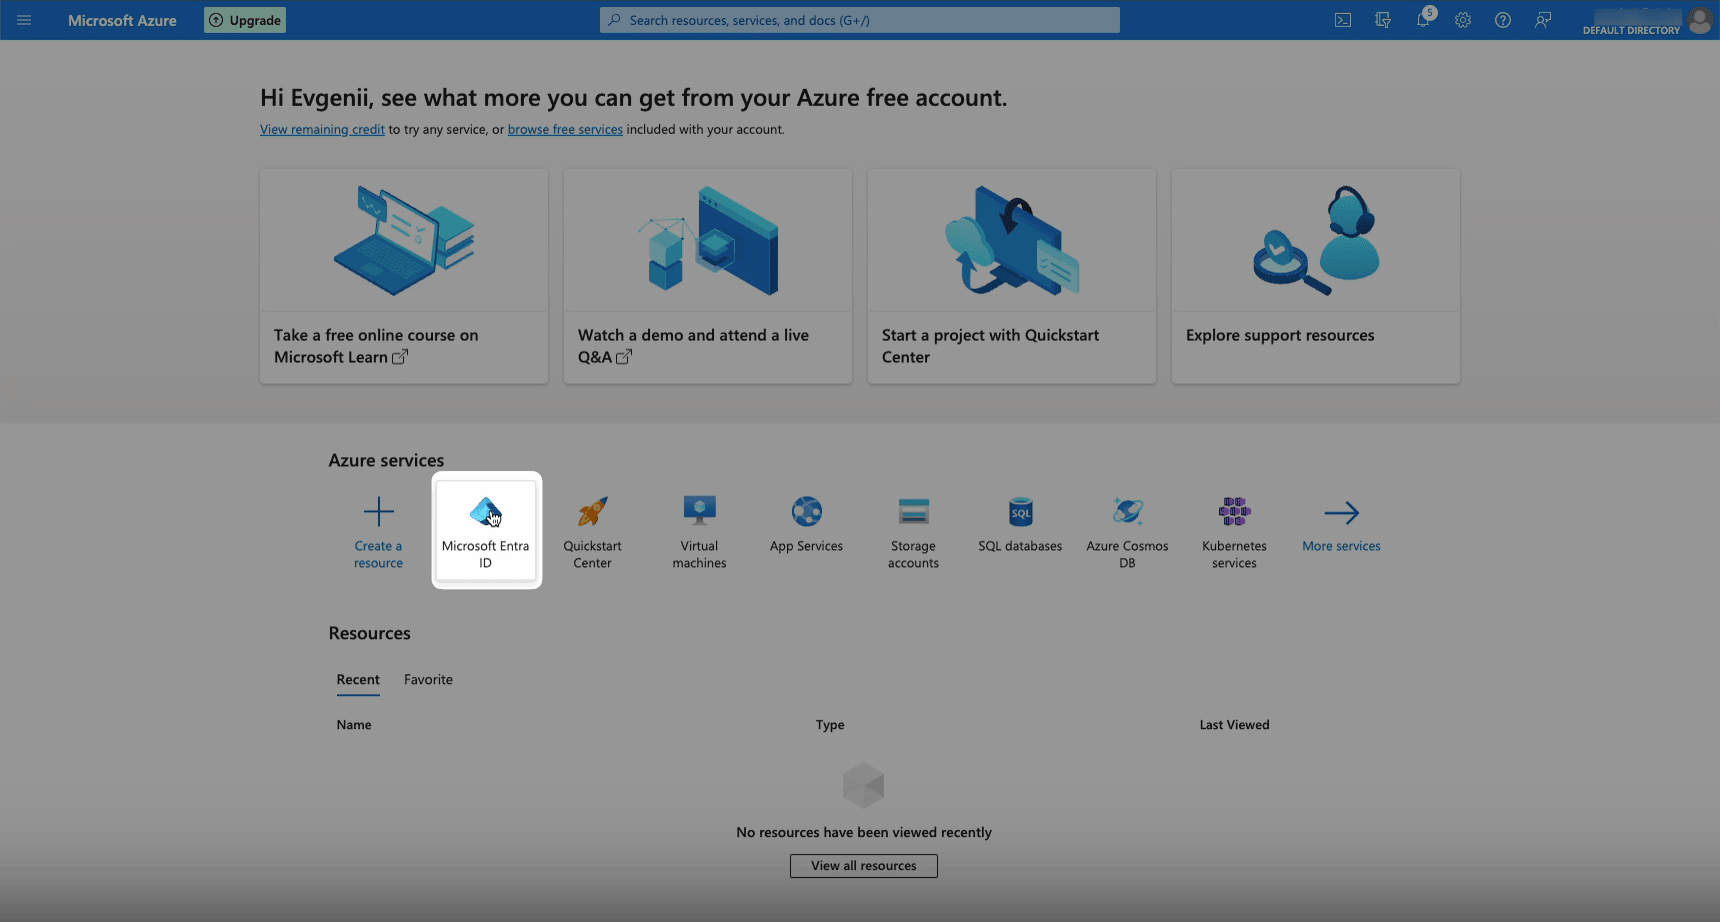
In Microsoft Azure, open Microsoft Entra ID.
-
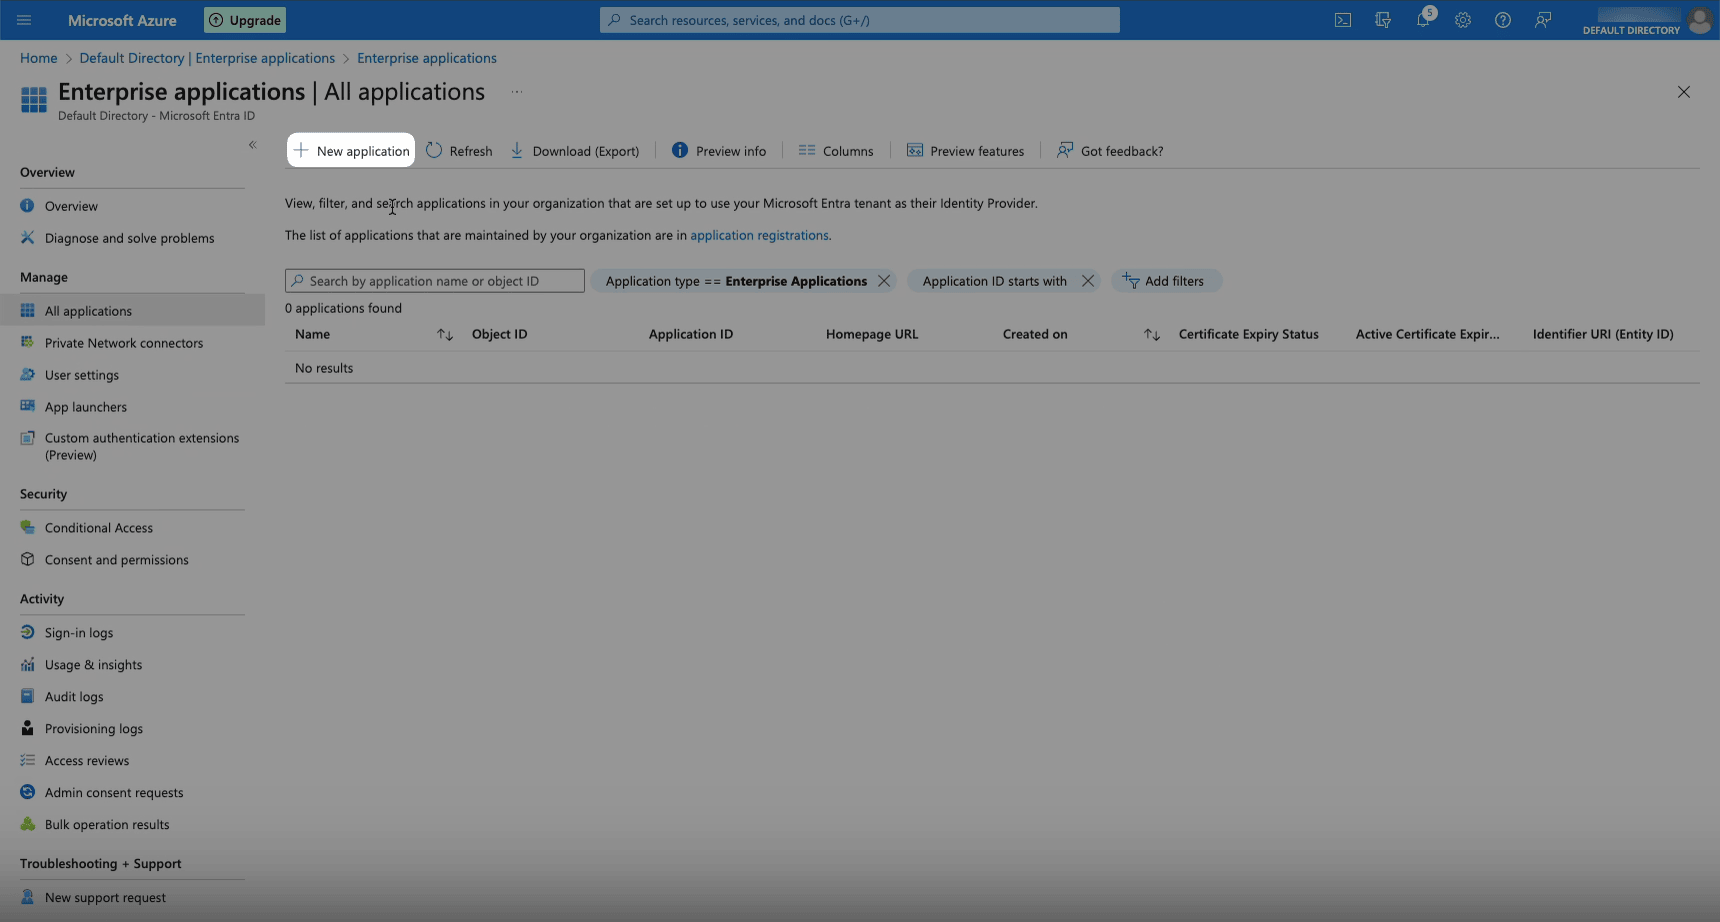
In the left menu, select Enterprise Applications.
-
Click New Application.
-
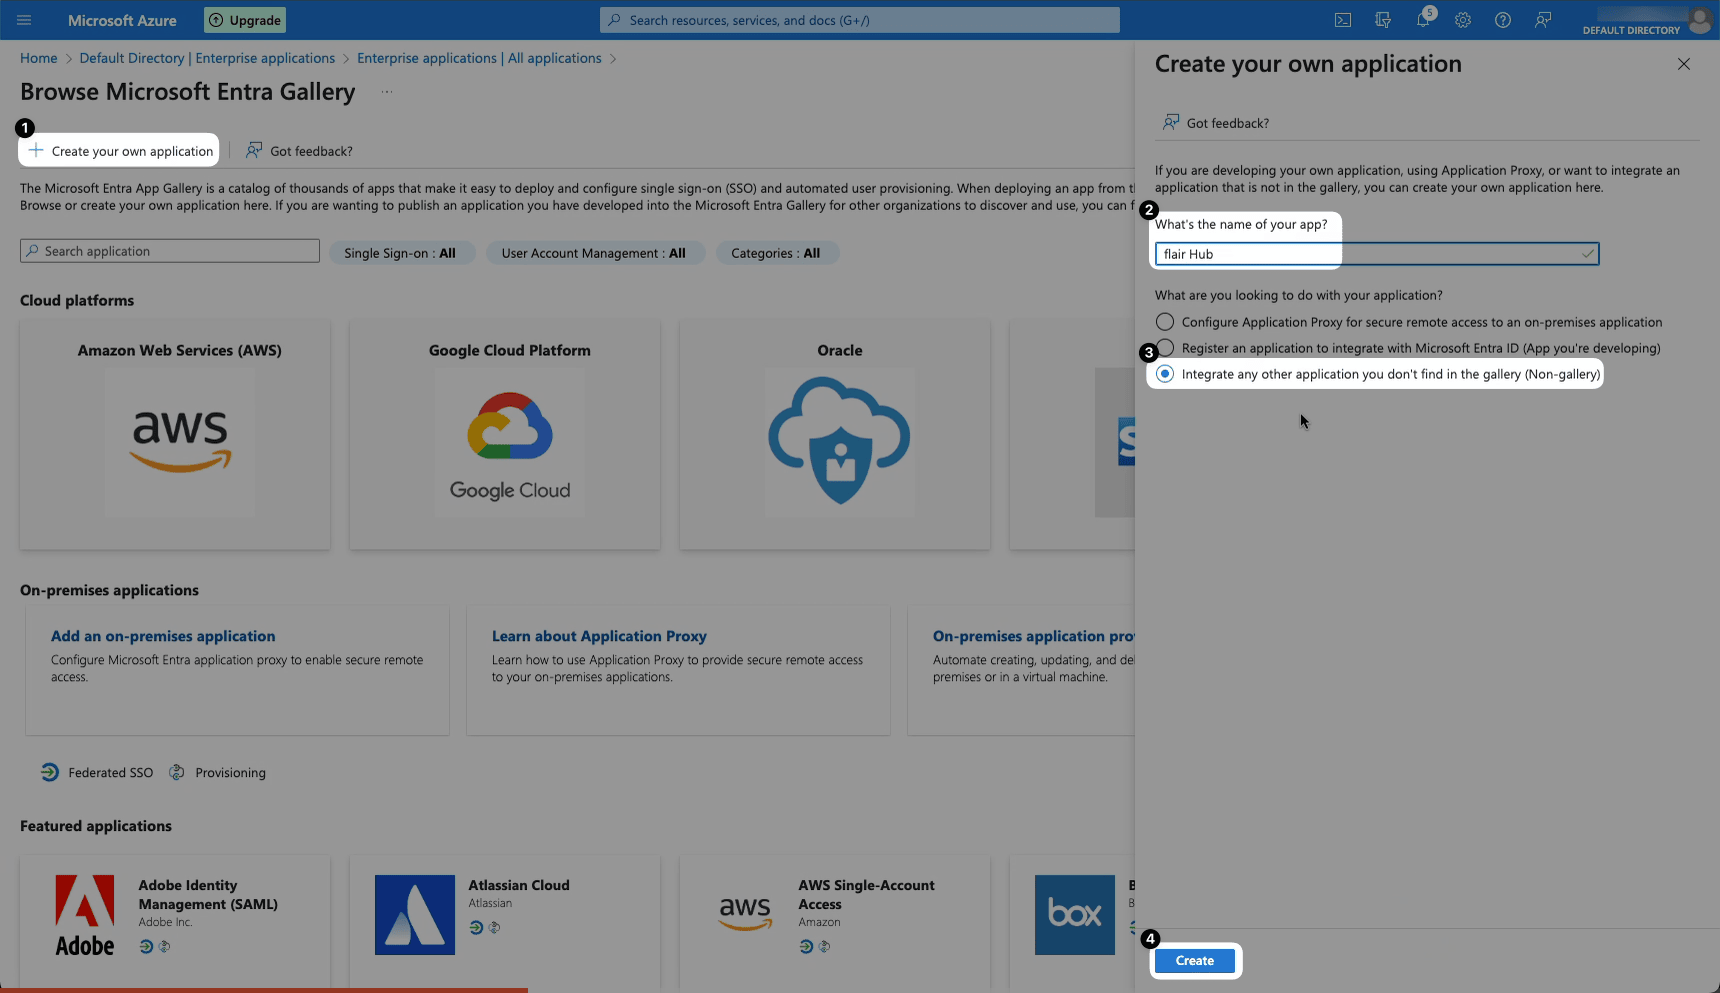
Click Create Your Own Application.
-
Enter an app name, such as
flair Hub. -
Select Integrate any other application you didn't find in the gallery (Non-gallery).
-
Click Create.
Add the Microsoft Entra ID configuration to flair
-
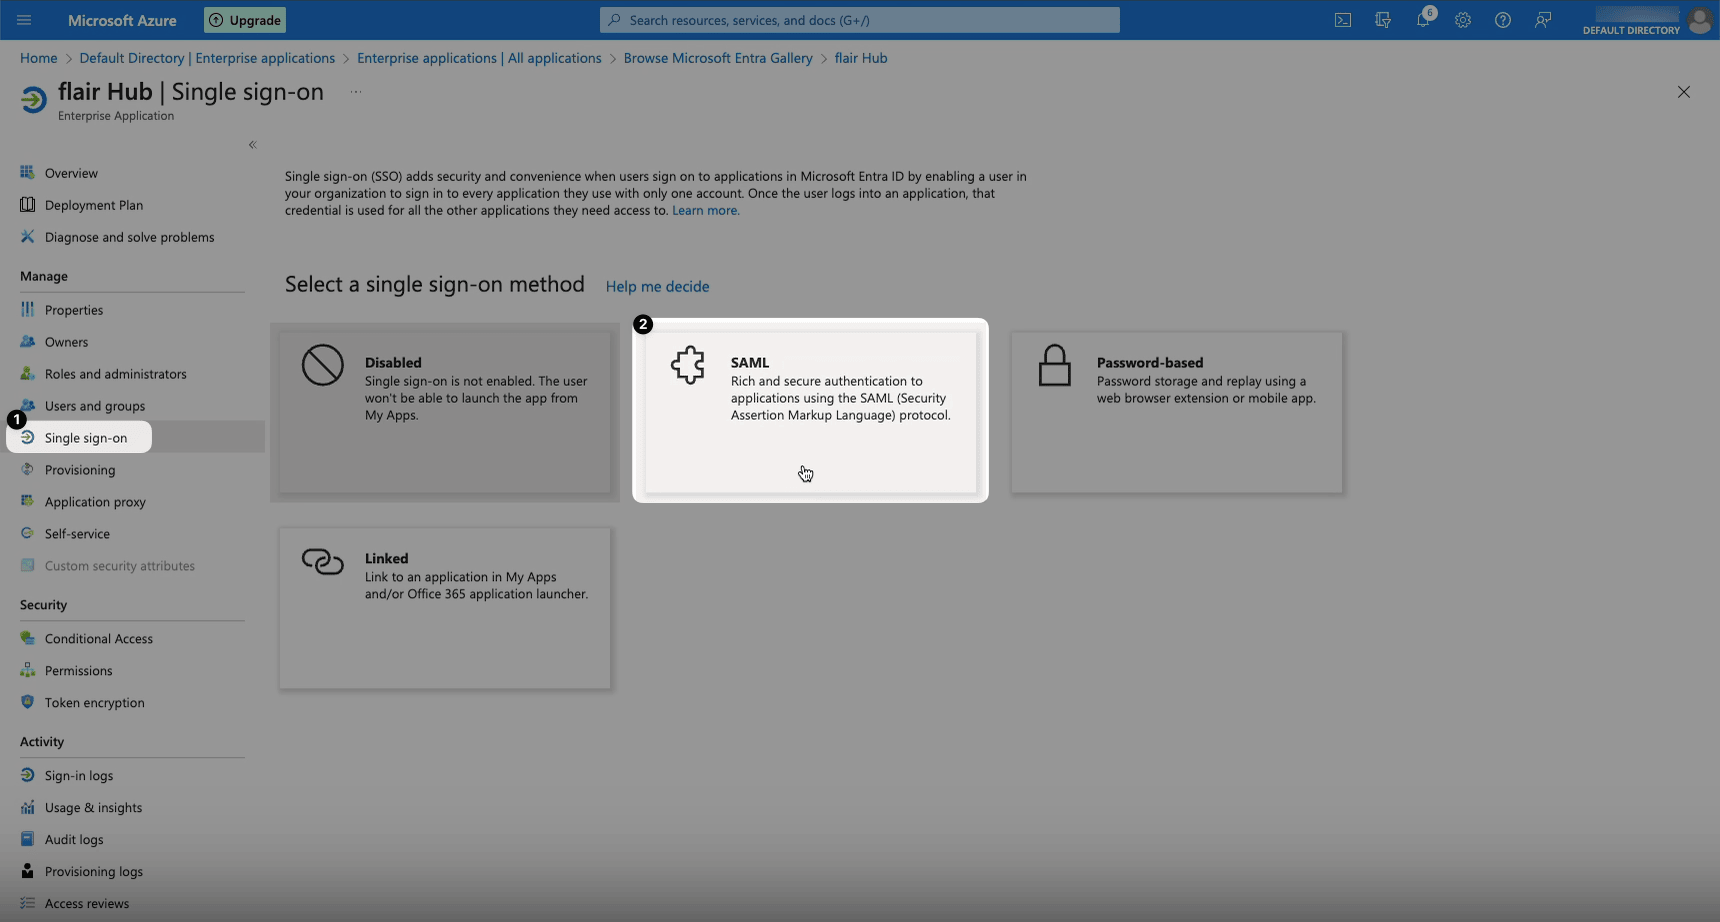
In the Microsoft Entra ID application, select Single Sign-On.
-
Select SAML.
-
In Basic SAML Configuration, click Edit.
-
Click Add Identifier.
-
Enter a unique entity ID, such as
hub. -
Click Add Reply URL.
-
Enter
https://YOURDOMAIN.hub.flair.hr/_auth/saml/callbackwith your Employee Hub domain. -
Optional: Enter a Sign On URL to change the sign-in page URL.
-
Click Save.
warningEach SAML provider must use a different entity ID. For multiple configurations, use values such as
hub1andhub2, and enter the matching value in Microsoft Entra ID and flair.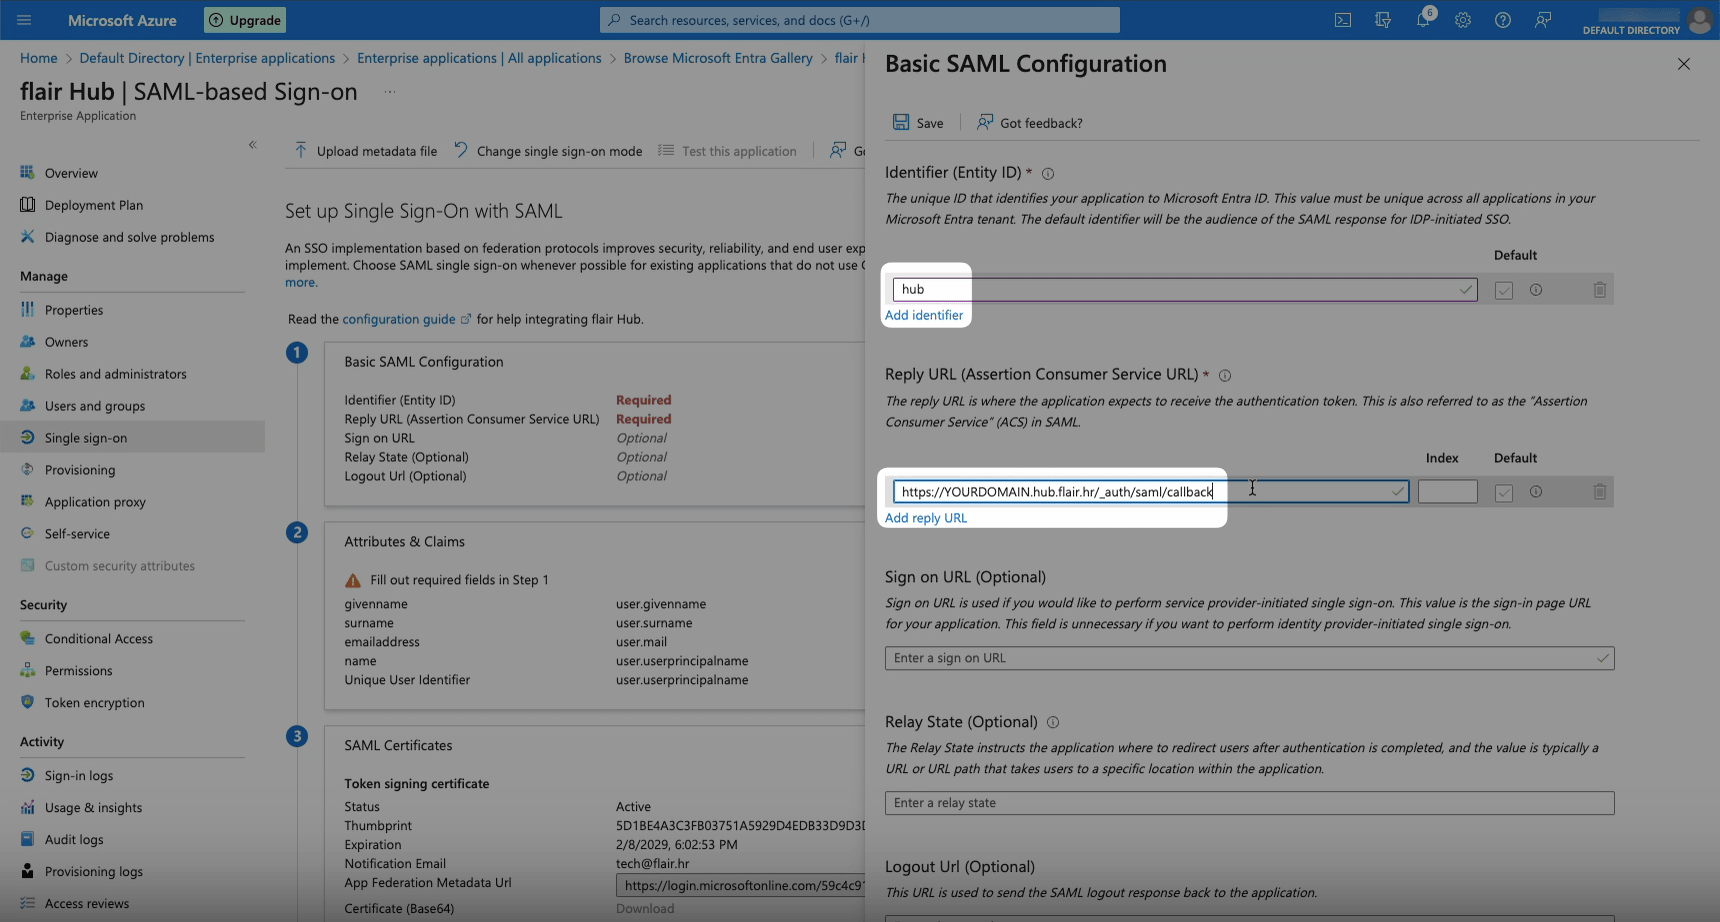
-
In the flair HR app, open the App Launcher (⋮⋮ grid icon).
-
Open Hub SAML Configurations.
-
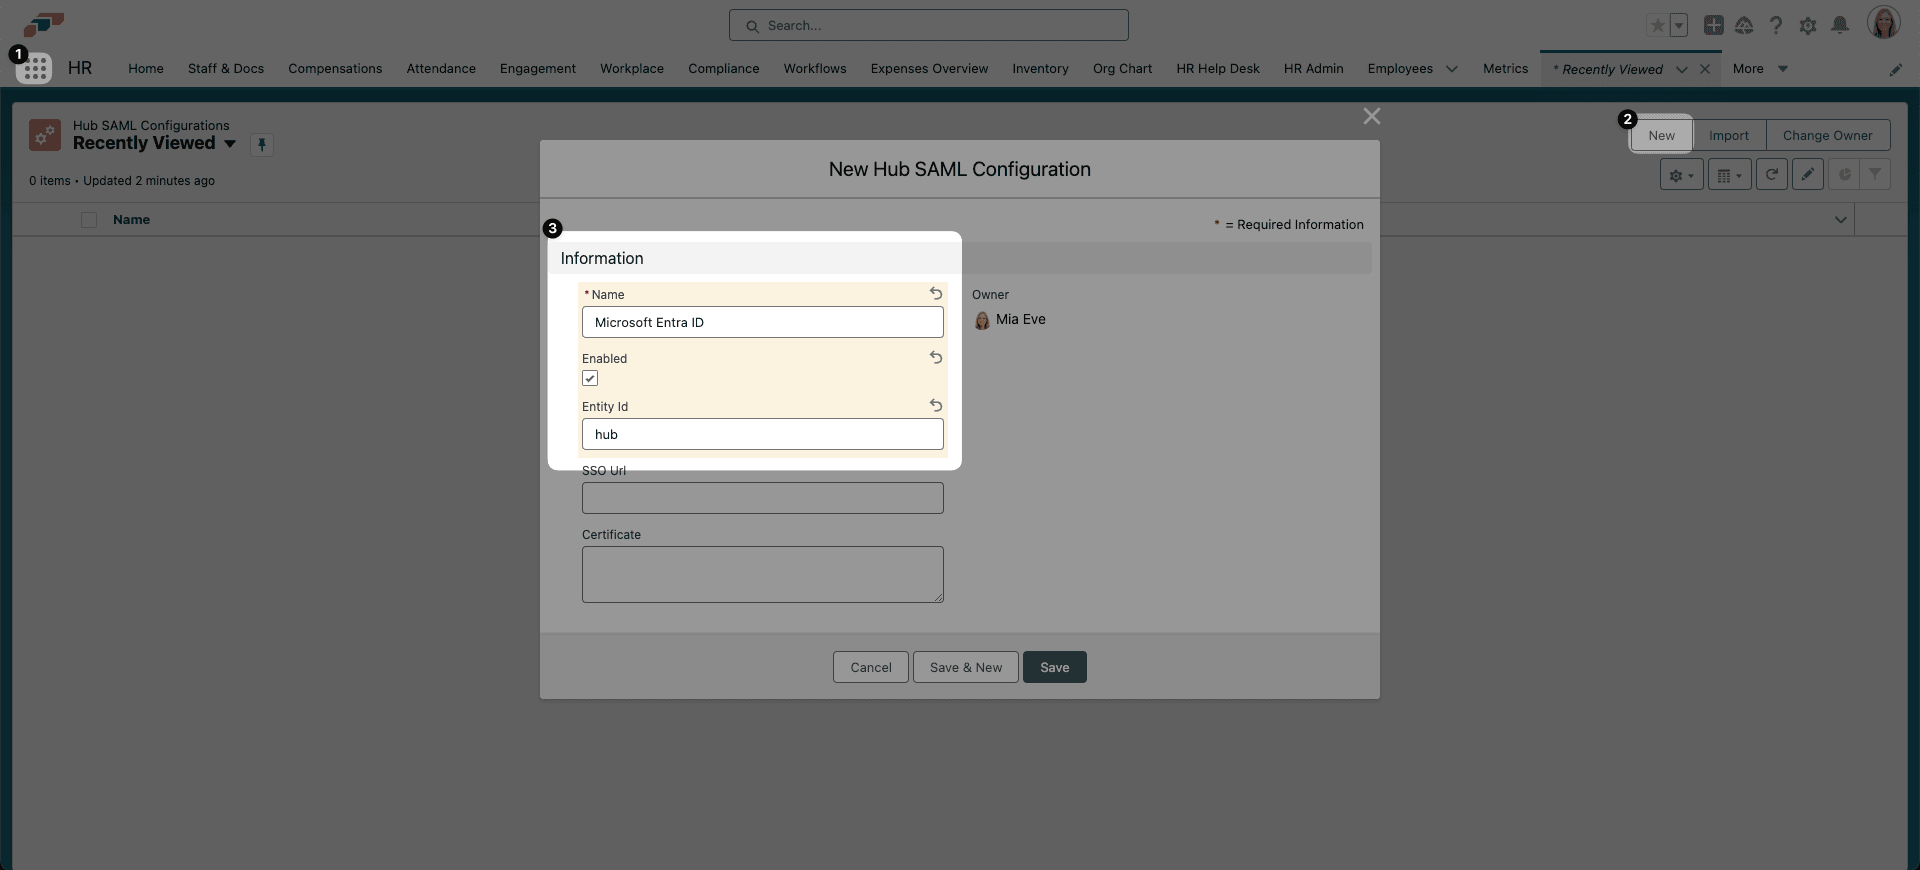
Click New.
-
Enter a Name, such as
Microsoft Entra ID. -
Select Enabled.
-
In Entity ID, enter the identifier from Microsoft Entra ID.
-
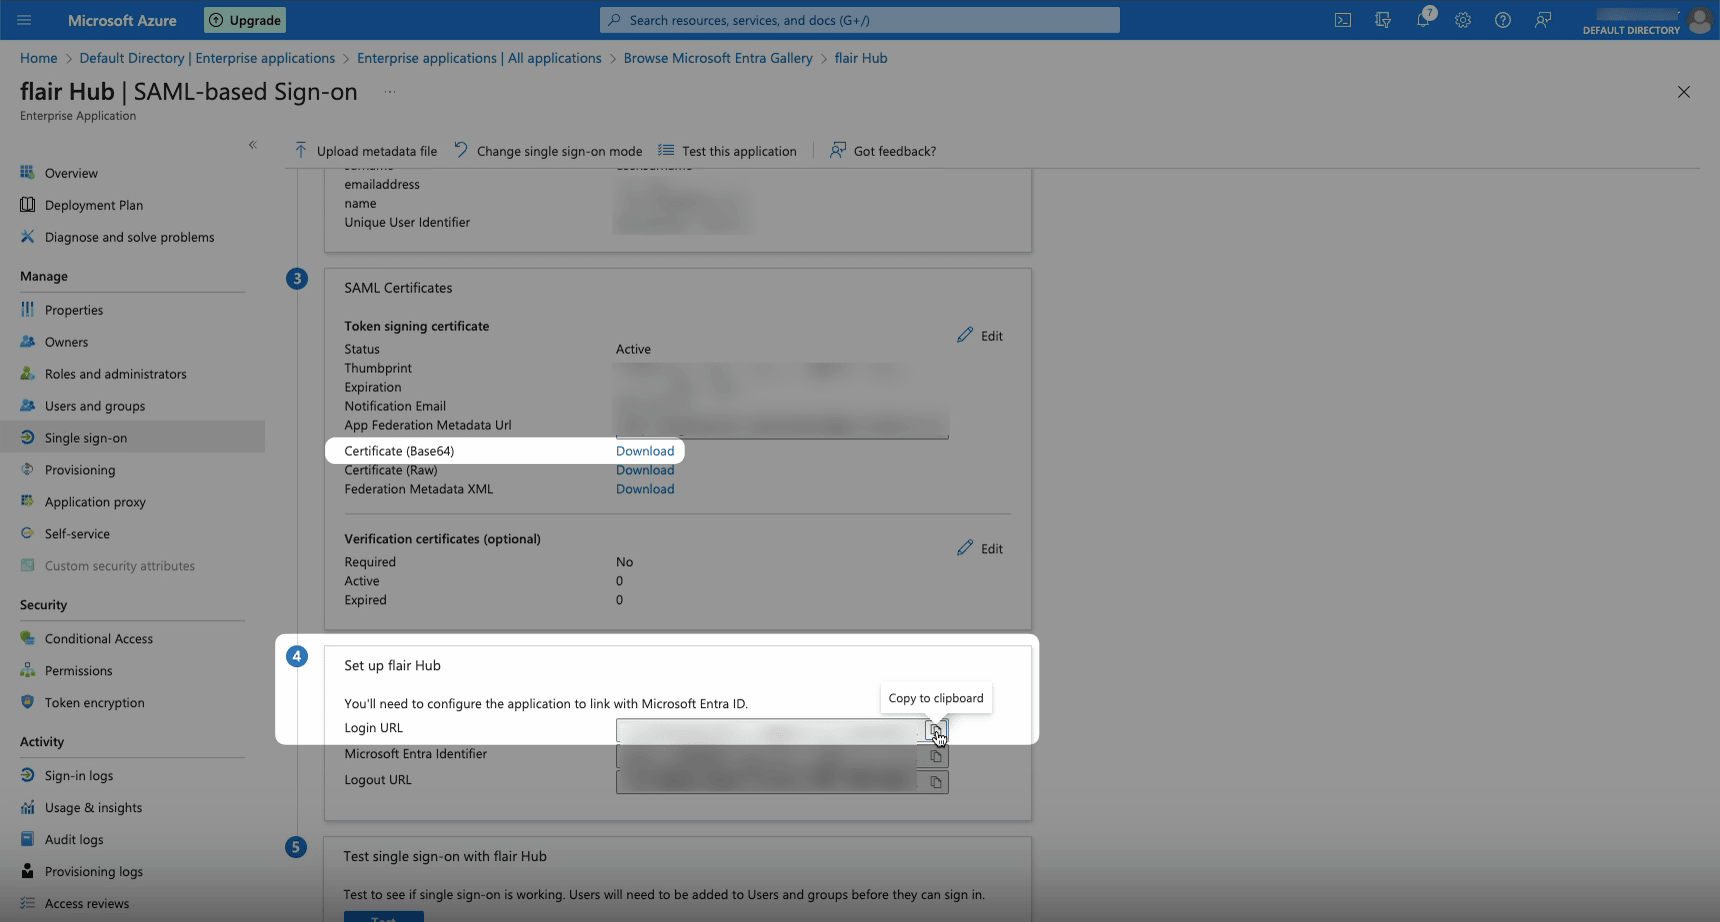
In Microsoft Entra ID, copy the Login URL from Set up flair Hub.
-
In flair, paste the URL into SSO URL.
-
In Microsoft Entra ID, under SAML Certificates, download Certificate (Base64).
-
Paste the downloaded certificate content into Certificate in flair.
-
Click Save.
-
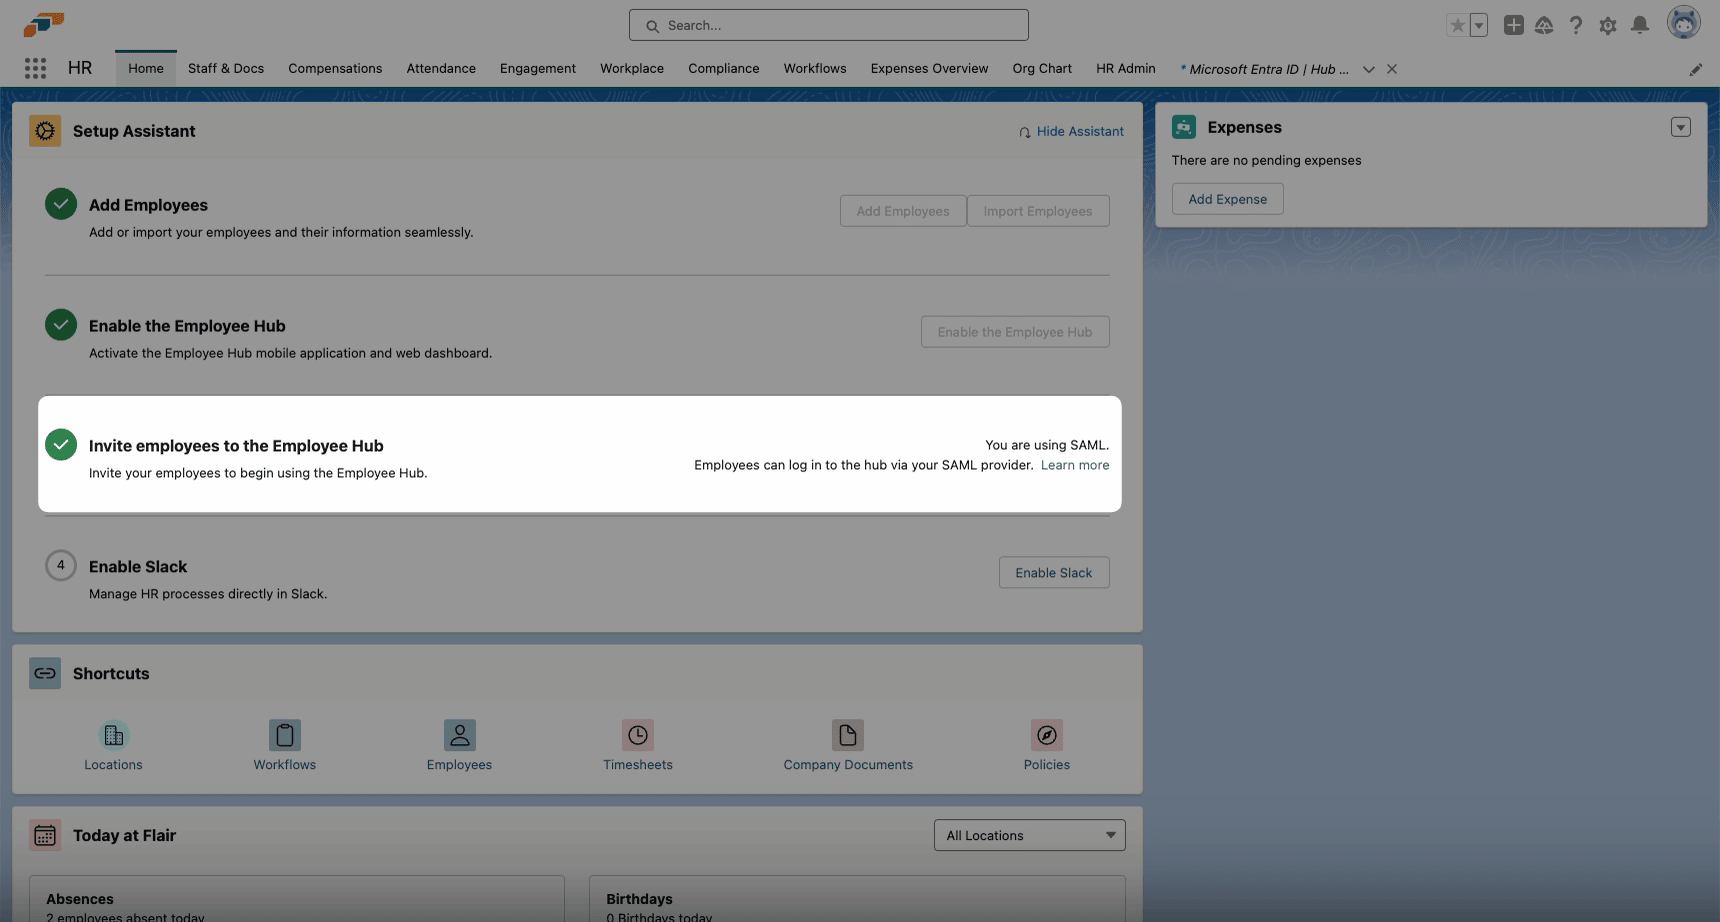
In the flair HR app, open Home. The Setup Assistant indicates that SAML login is active.
Add Microsoft Entra ID users and test SSO
-
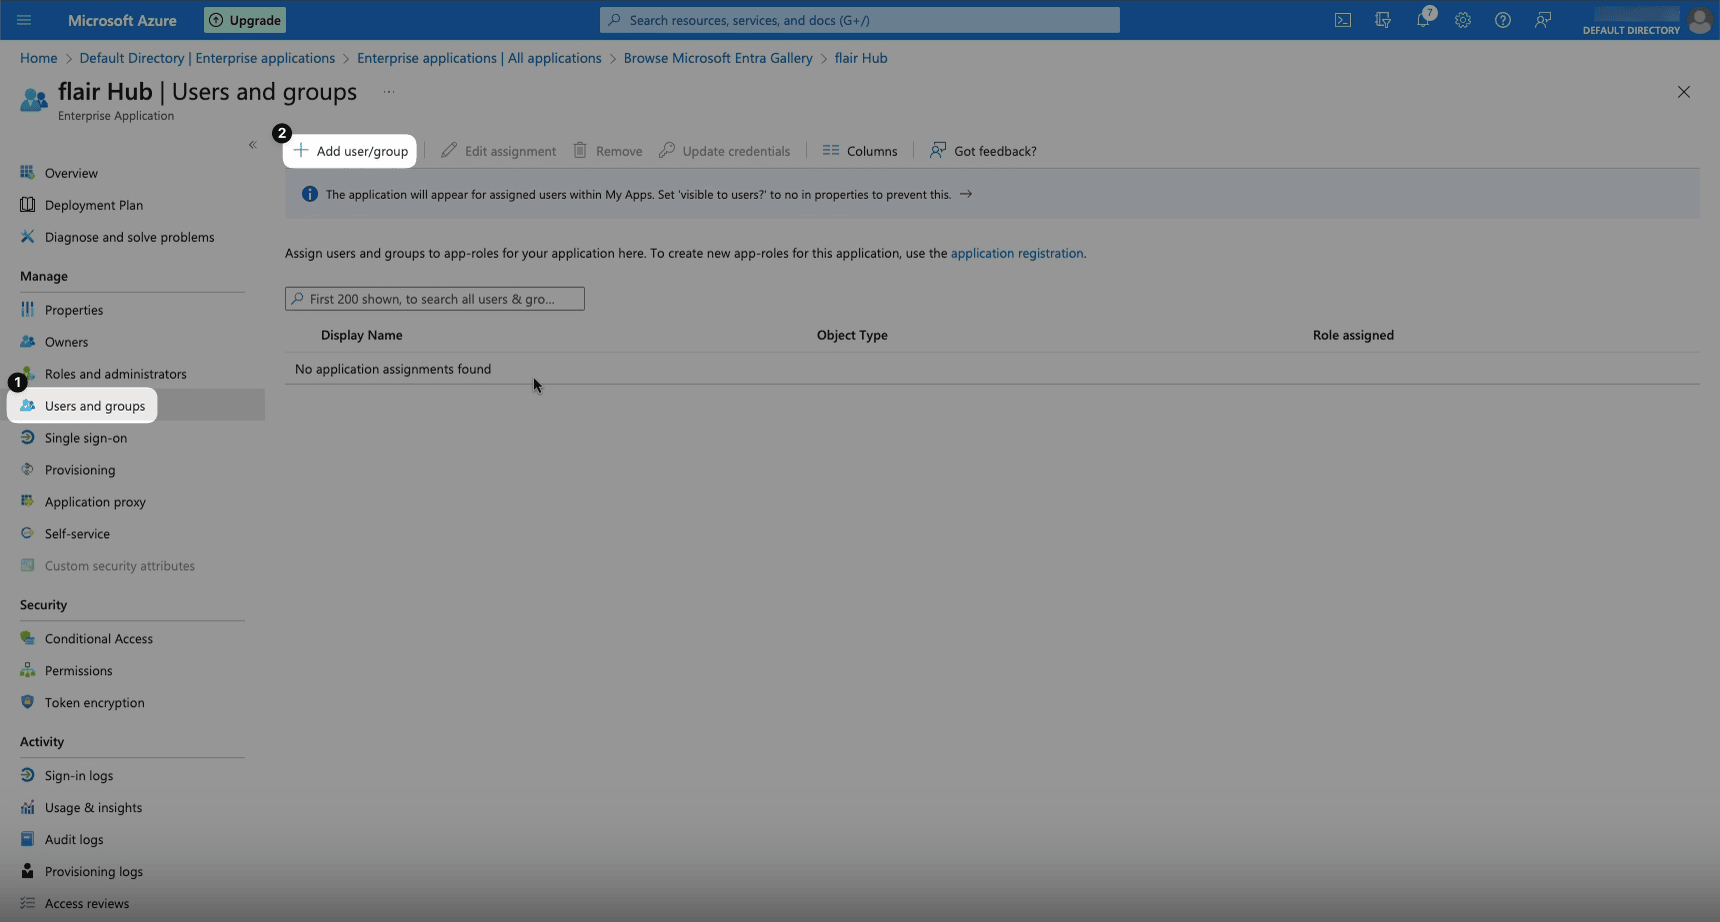
In Microsoft Entra ID, open Users and Groups.
-
Click Add User/Group.
-
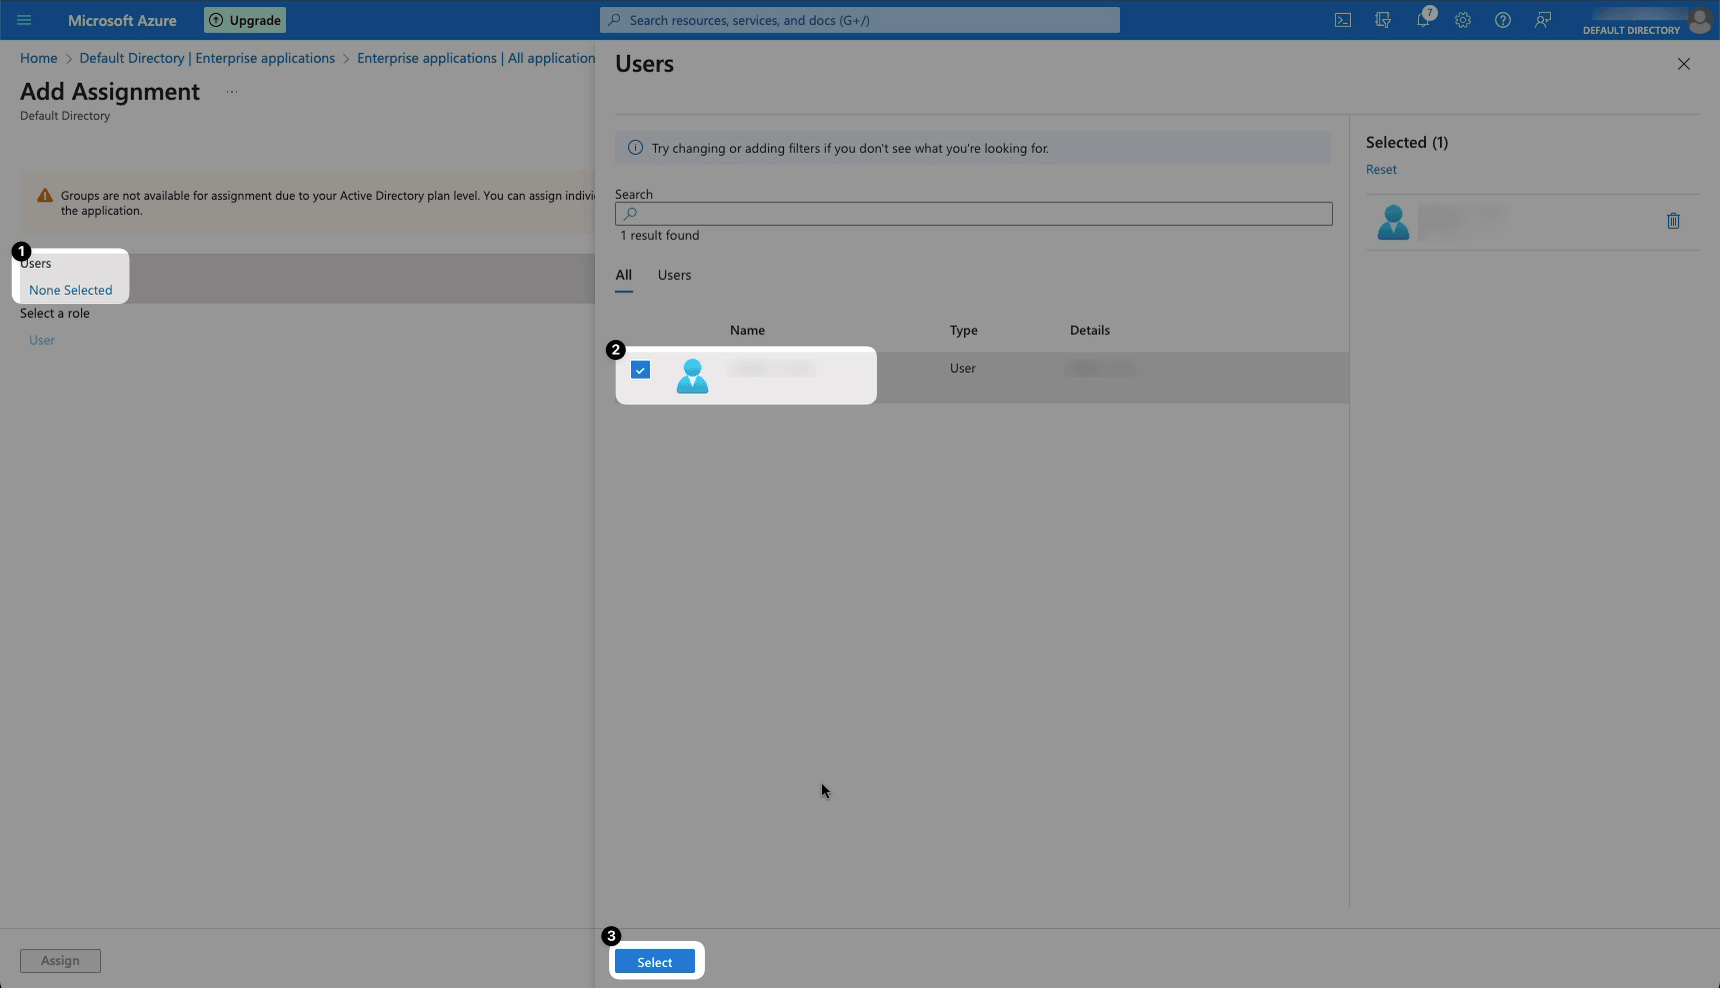
Select Users.
-
Select each user who needs SAML access.
-
Click Select.
-
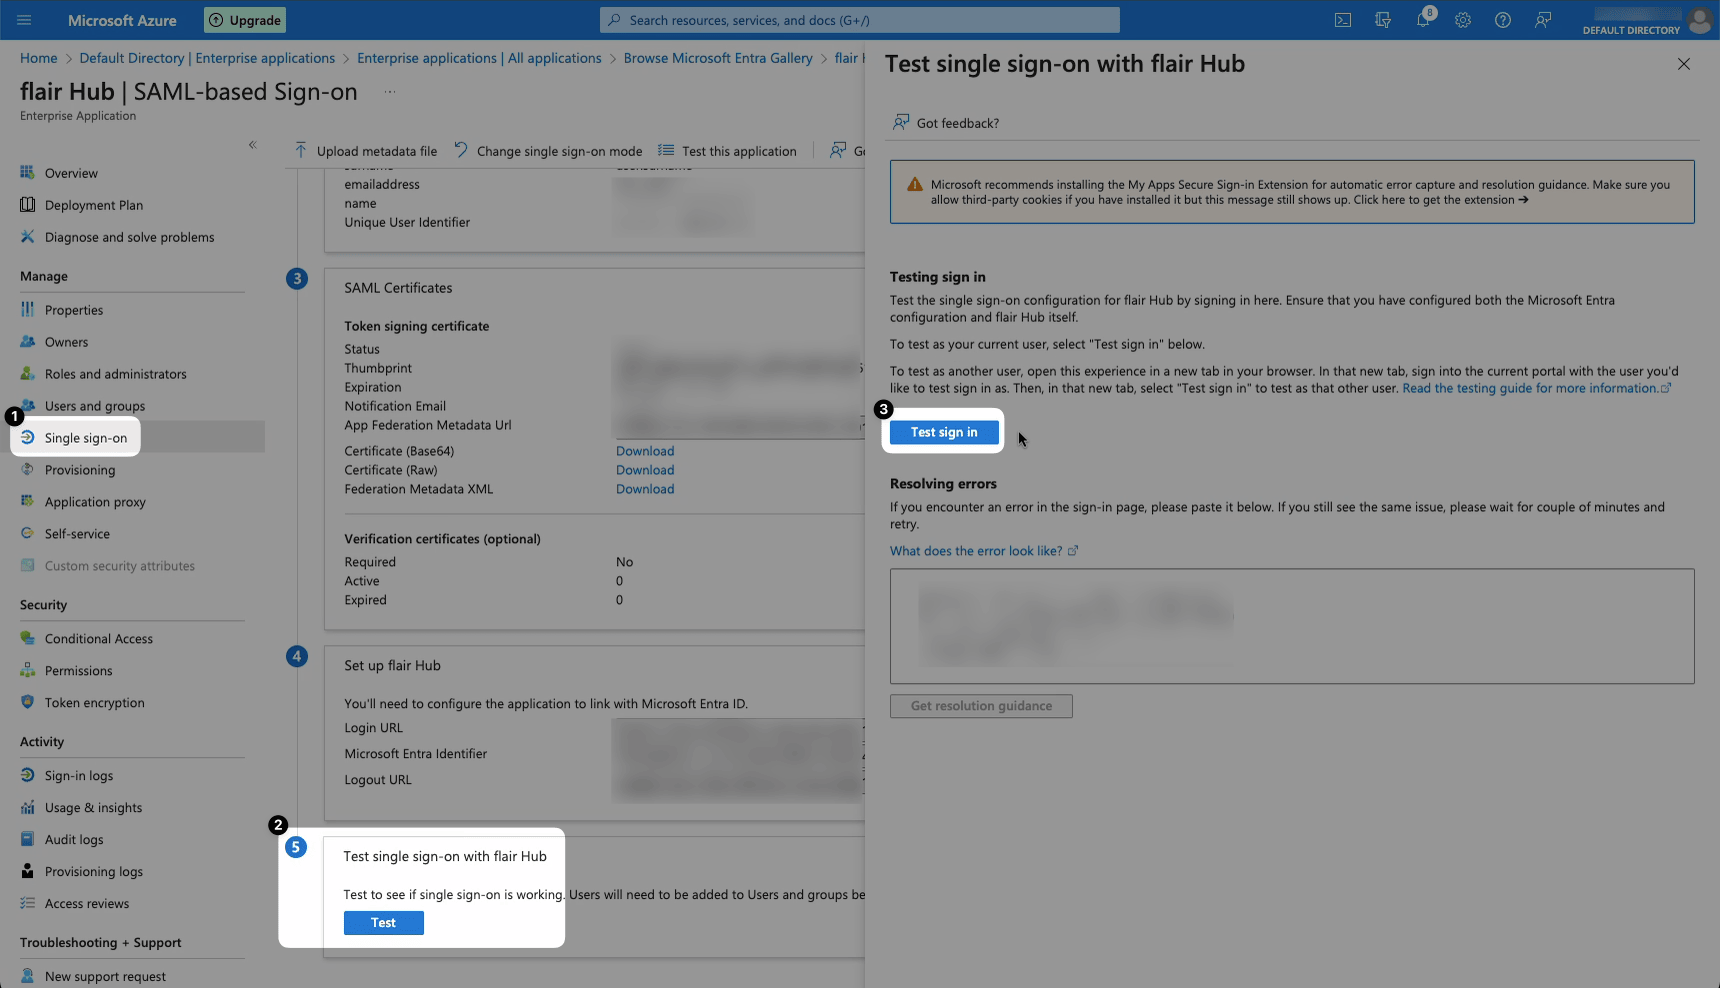
In the SAML application, open Single Sign-On.
-
Under Test single sign-on with flair Hub, click Test.
-
Click Test Sign In.
-
On the Employee Hub login screen, click Sign in with Microsoft Entra ID.
-
Select the Microsoft account to use. The Employee Hub opens for the selected user.

To configure native Microsoft sign-in in the Employee Hub mobile app, see Configure MSAL sign-in for the mobile app.
Choose where a login option appears
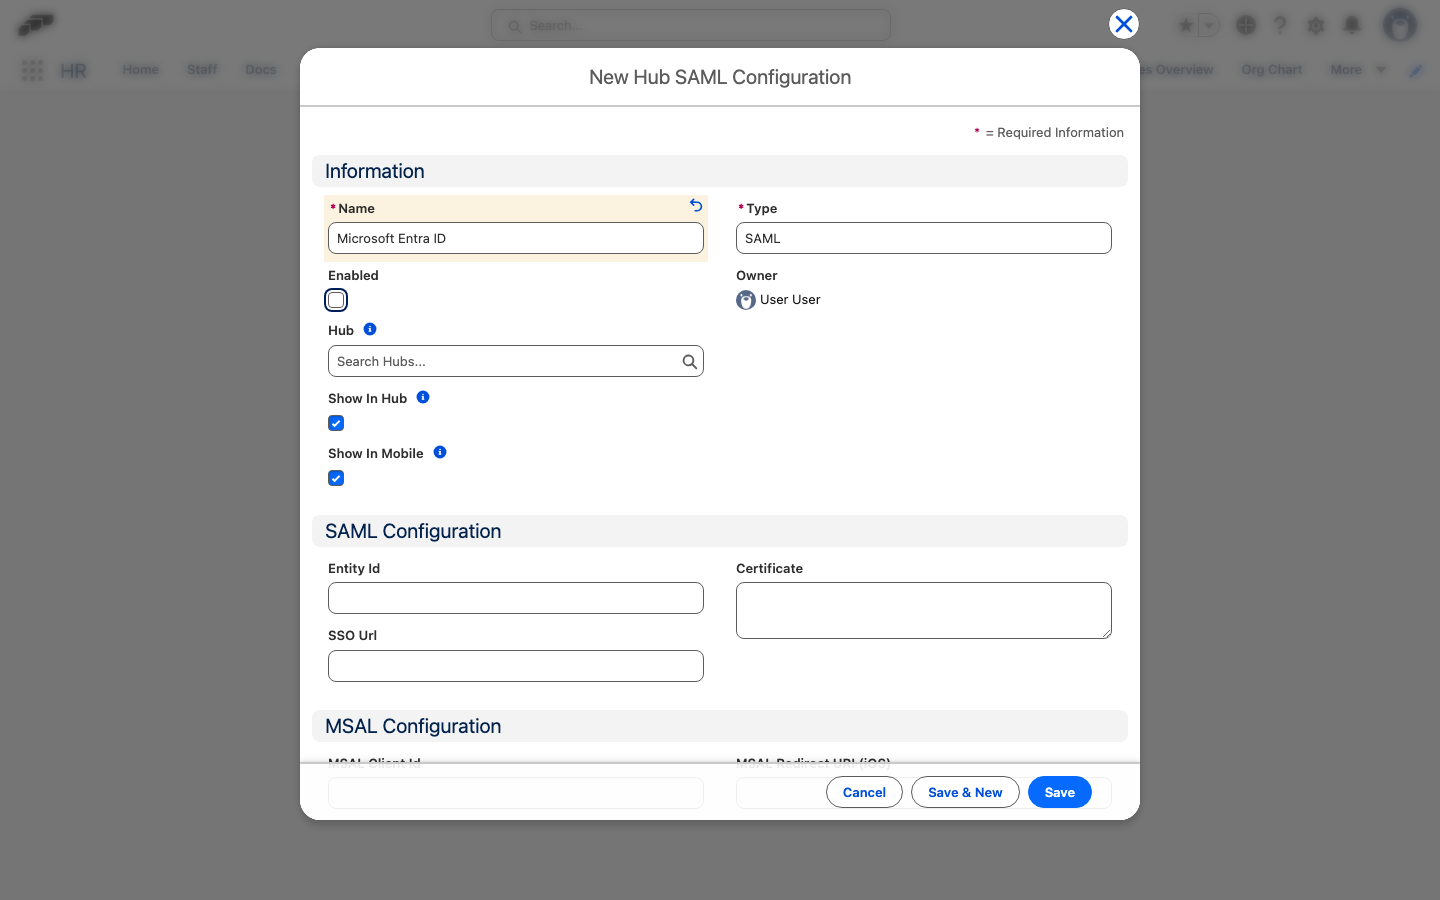
Each Hub SAML Configuration record, whether its Type is SAML, MSAL, PASSWORD, or EMAIL, can appear on the Employee Hub login page in the browser, in the mobile app, or both. For example, if you use SAML SSO in the browser and MSAL in the mobile app, hide the SAML option in the app so employees see only one Microsoft button there.
- In the flair HR app, open the App Launcher (⋮⋮ grid icon).
- Open Hub SAML Configurations, and then open the login option.
- Select or clear Show In Hub to show or hide the option on the Employee Hub login page in the browser.
- Select or clear Show In Mobile to show or hide the option on the mobile app login screen.
- Click Save.
Both checkboxes are selected by default. An option appears only where Enabled and the matching checkbox are both selected, and Hub still limits it to one Hub. If no option is shown on a platform, the password form appears there instead. Hiding an option only changes the login screen; it does not block that sign-in method.
Troubleshooting
The SSO option is missing and employees are asked for a password
Employees must use the custom Employee Hub domain after you configure SSO. The standard https://hub.flair.hr/ login page does not show your organization's SSO option.
- In HR Admin, open Hub Settings.
- Find Custom Domain.
- Add
/loginto that domain. For example, the SSO login fortest-for-SSO.hub.flair.hrishttps://test-for-SSO.hub.flair.hr/login. - Give employees the custom login URL and ask them to bookmark it.
If the option is still missing on the custom domain, open the login option's Hub SAML Configuration record and check that Show In Hub is selected. For the mobile app, check Show In Mobile.