Install and update flair in Salesforce
Install the latest flair package in Salesforce, give users package access, and keep Sandbox environments ready for updates. This guide also covers Salesforce access, security, connectivity, and package installation errors.
Salesforce Admins who can install packages, assign managed-package licenses, and change organization settings in Salesforce Setup.
Before you begin
- Confirm whether you are installing in a production organization or a Sandbox.
- Ask flair Support for the latest package installation link. The flair AppExchange listing describes supported languages, features, and compatible Salesforce products, but does not provide direct installation.
Install the flair package
-
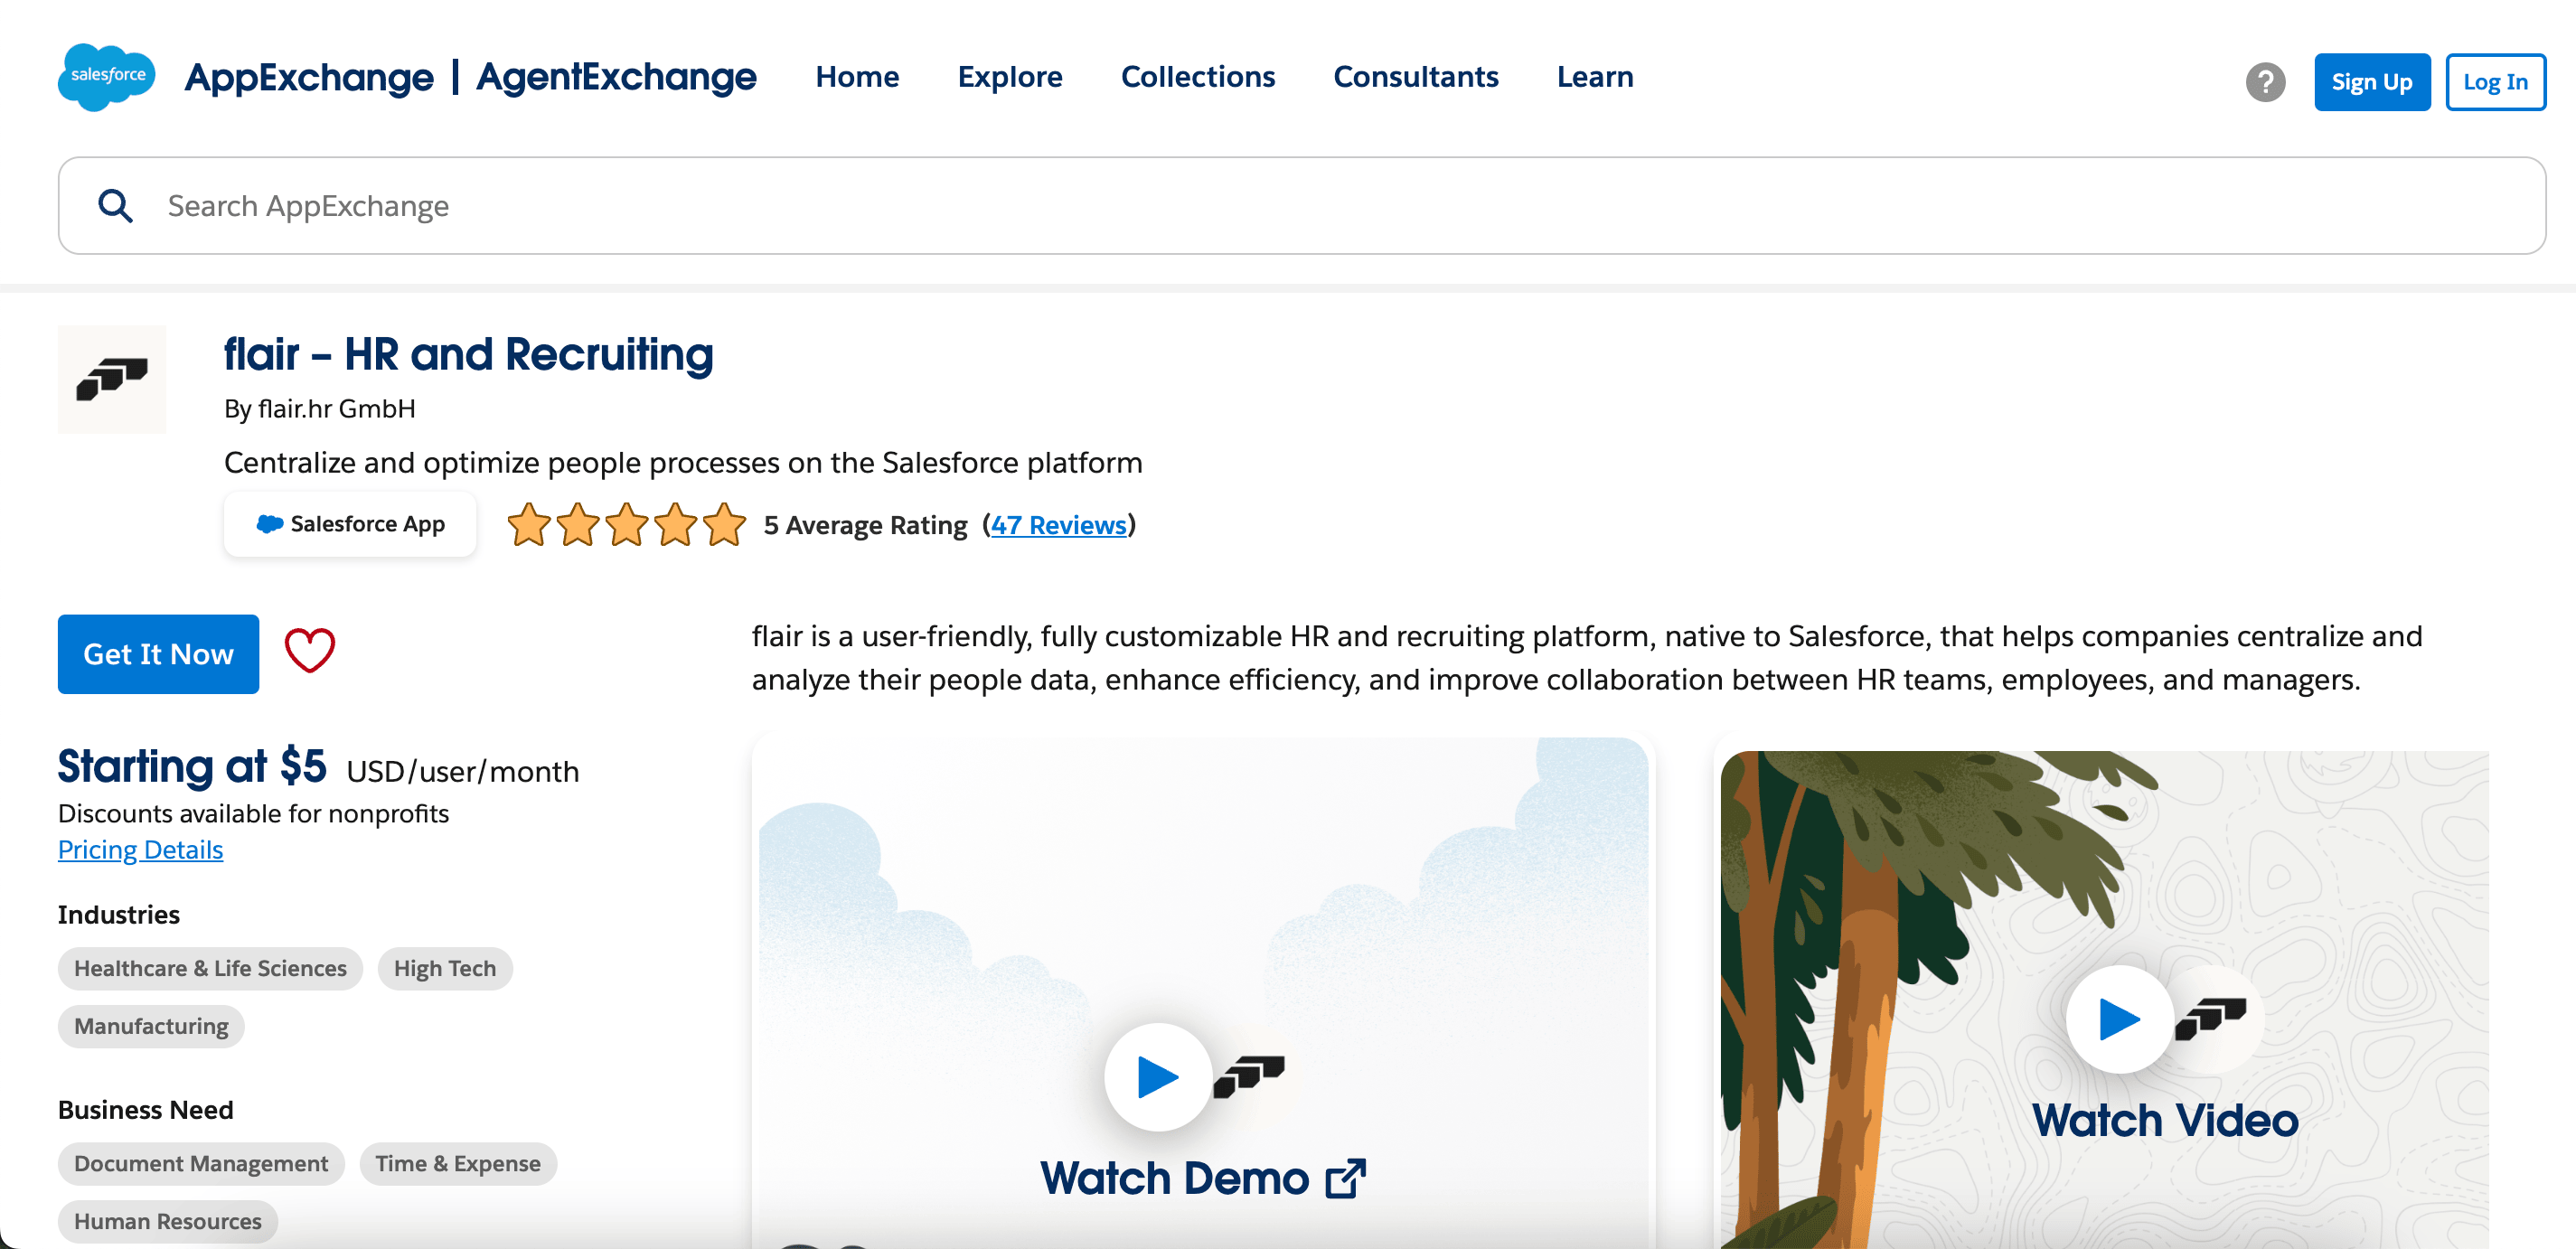
Review the flair listing on Salesforce AppExchange.
-
Request the latest package installation link from flair Support.
-
Open the installation link for your Salesforce organization.
-
Follow the Salesforce package installation flow.
Assign flair package licenses
Assign a managed-package license before a Salesforce user accesses flair.
-
In Salesforce Setup, enter
Installed Packagesin Quick Find.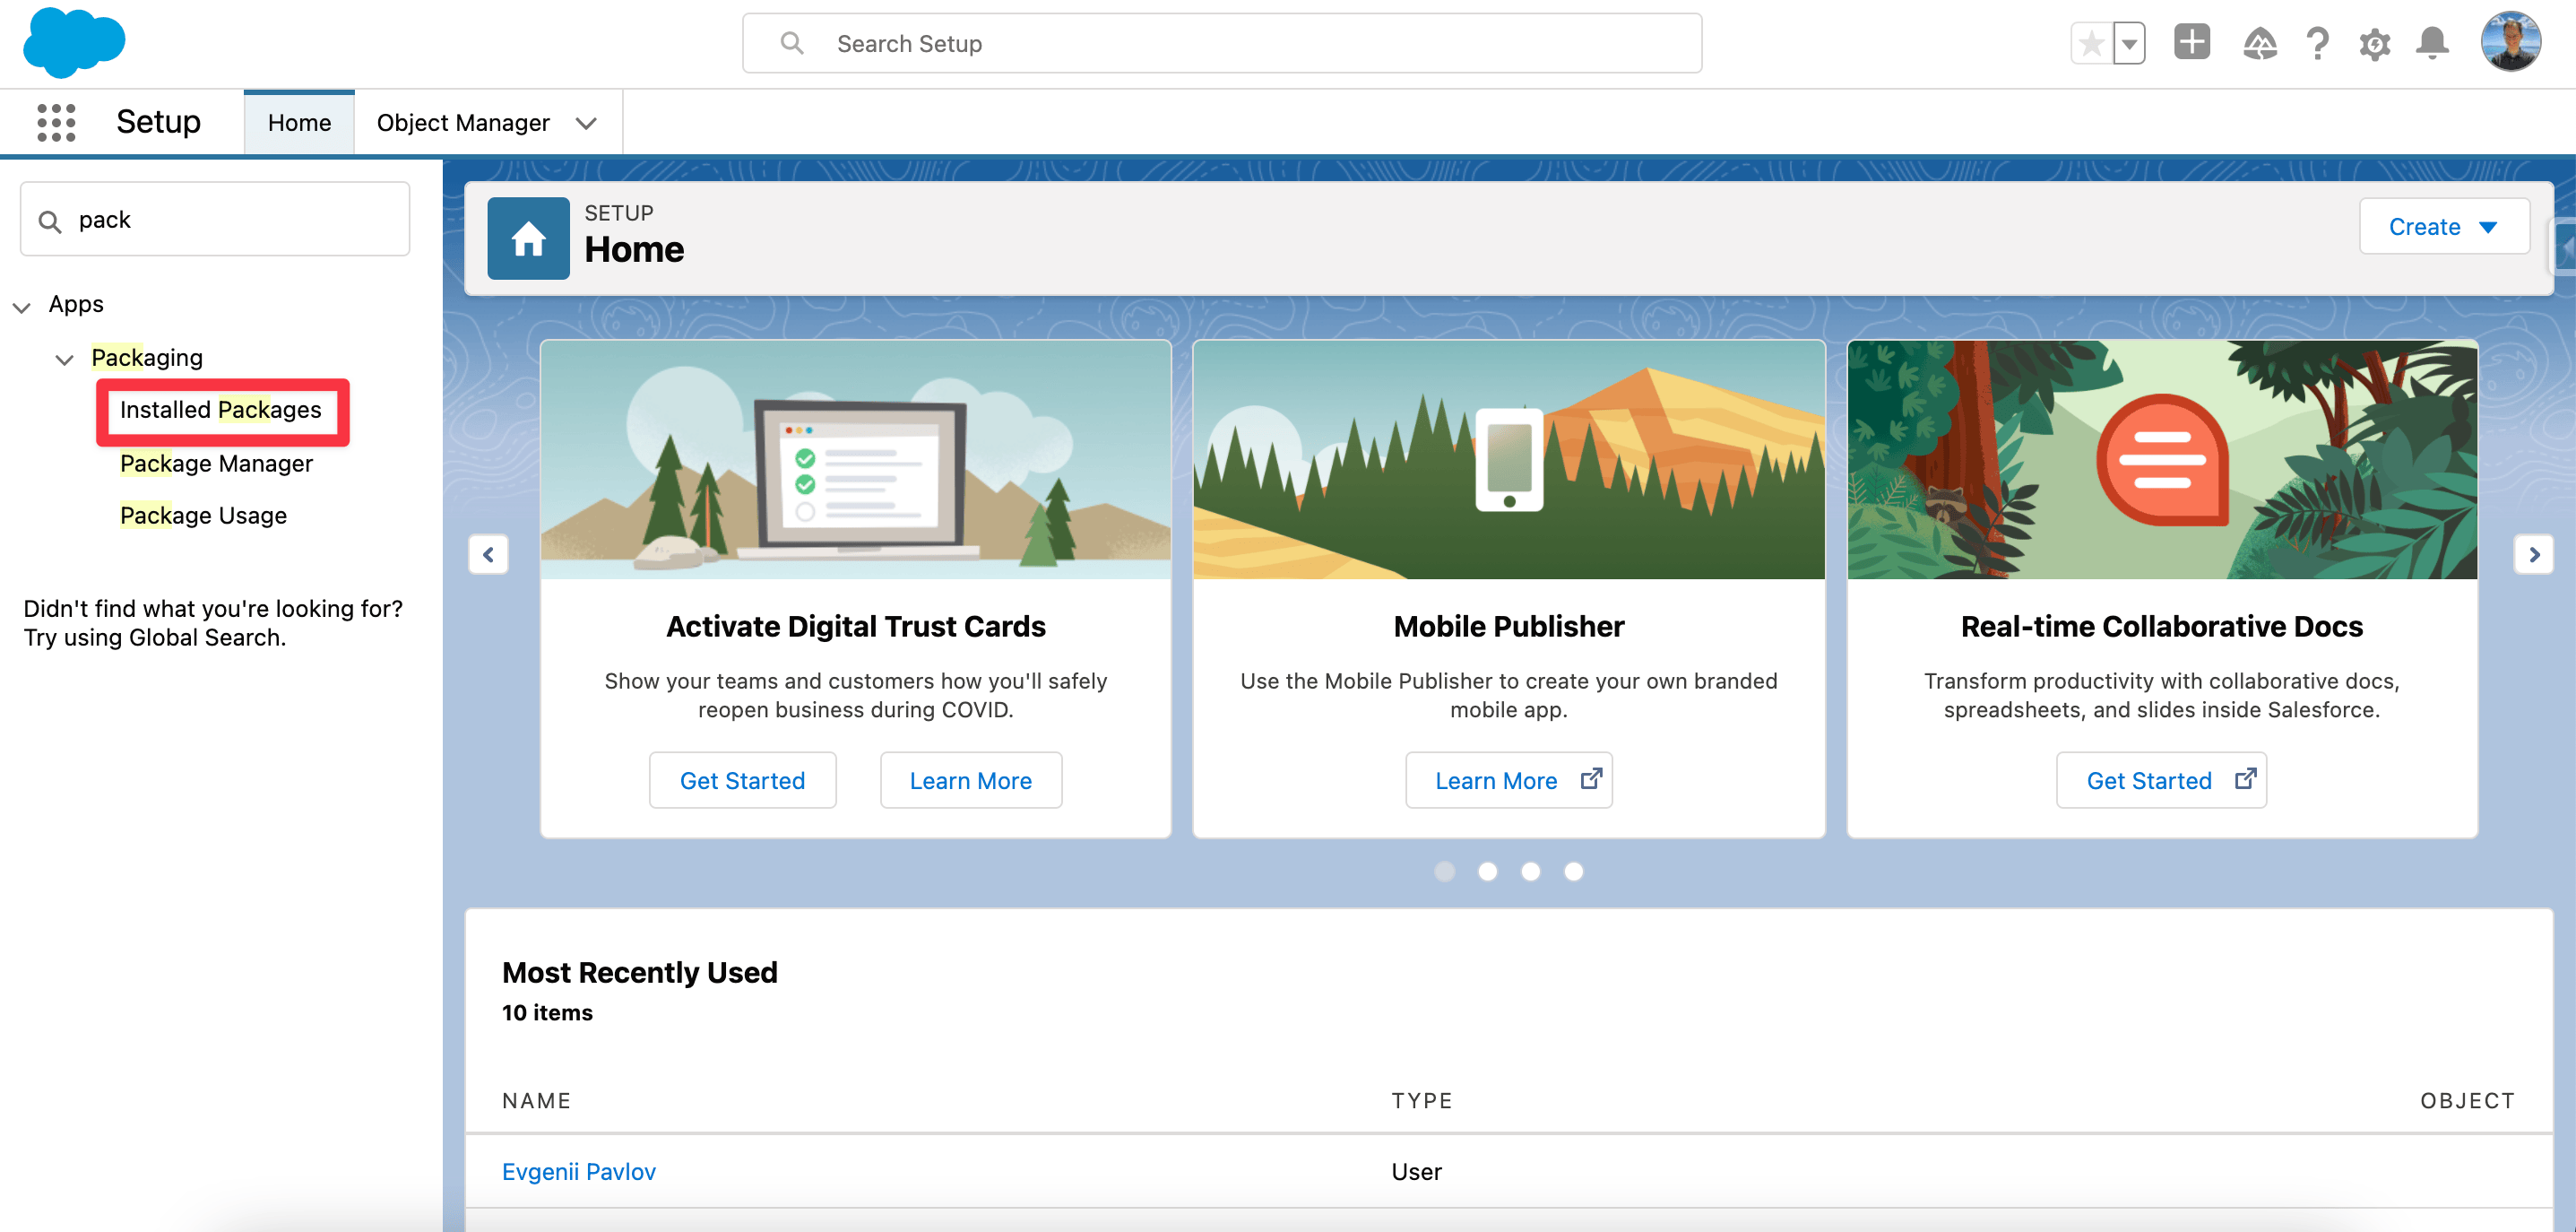
-
Open Installed Packages.
-
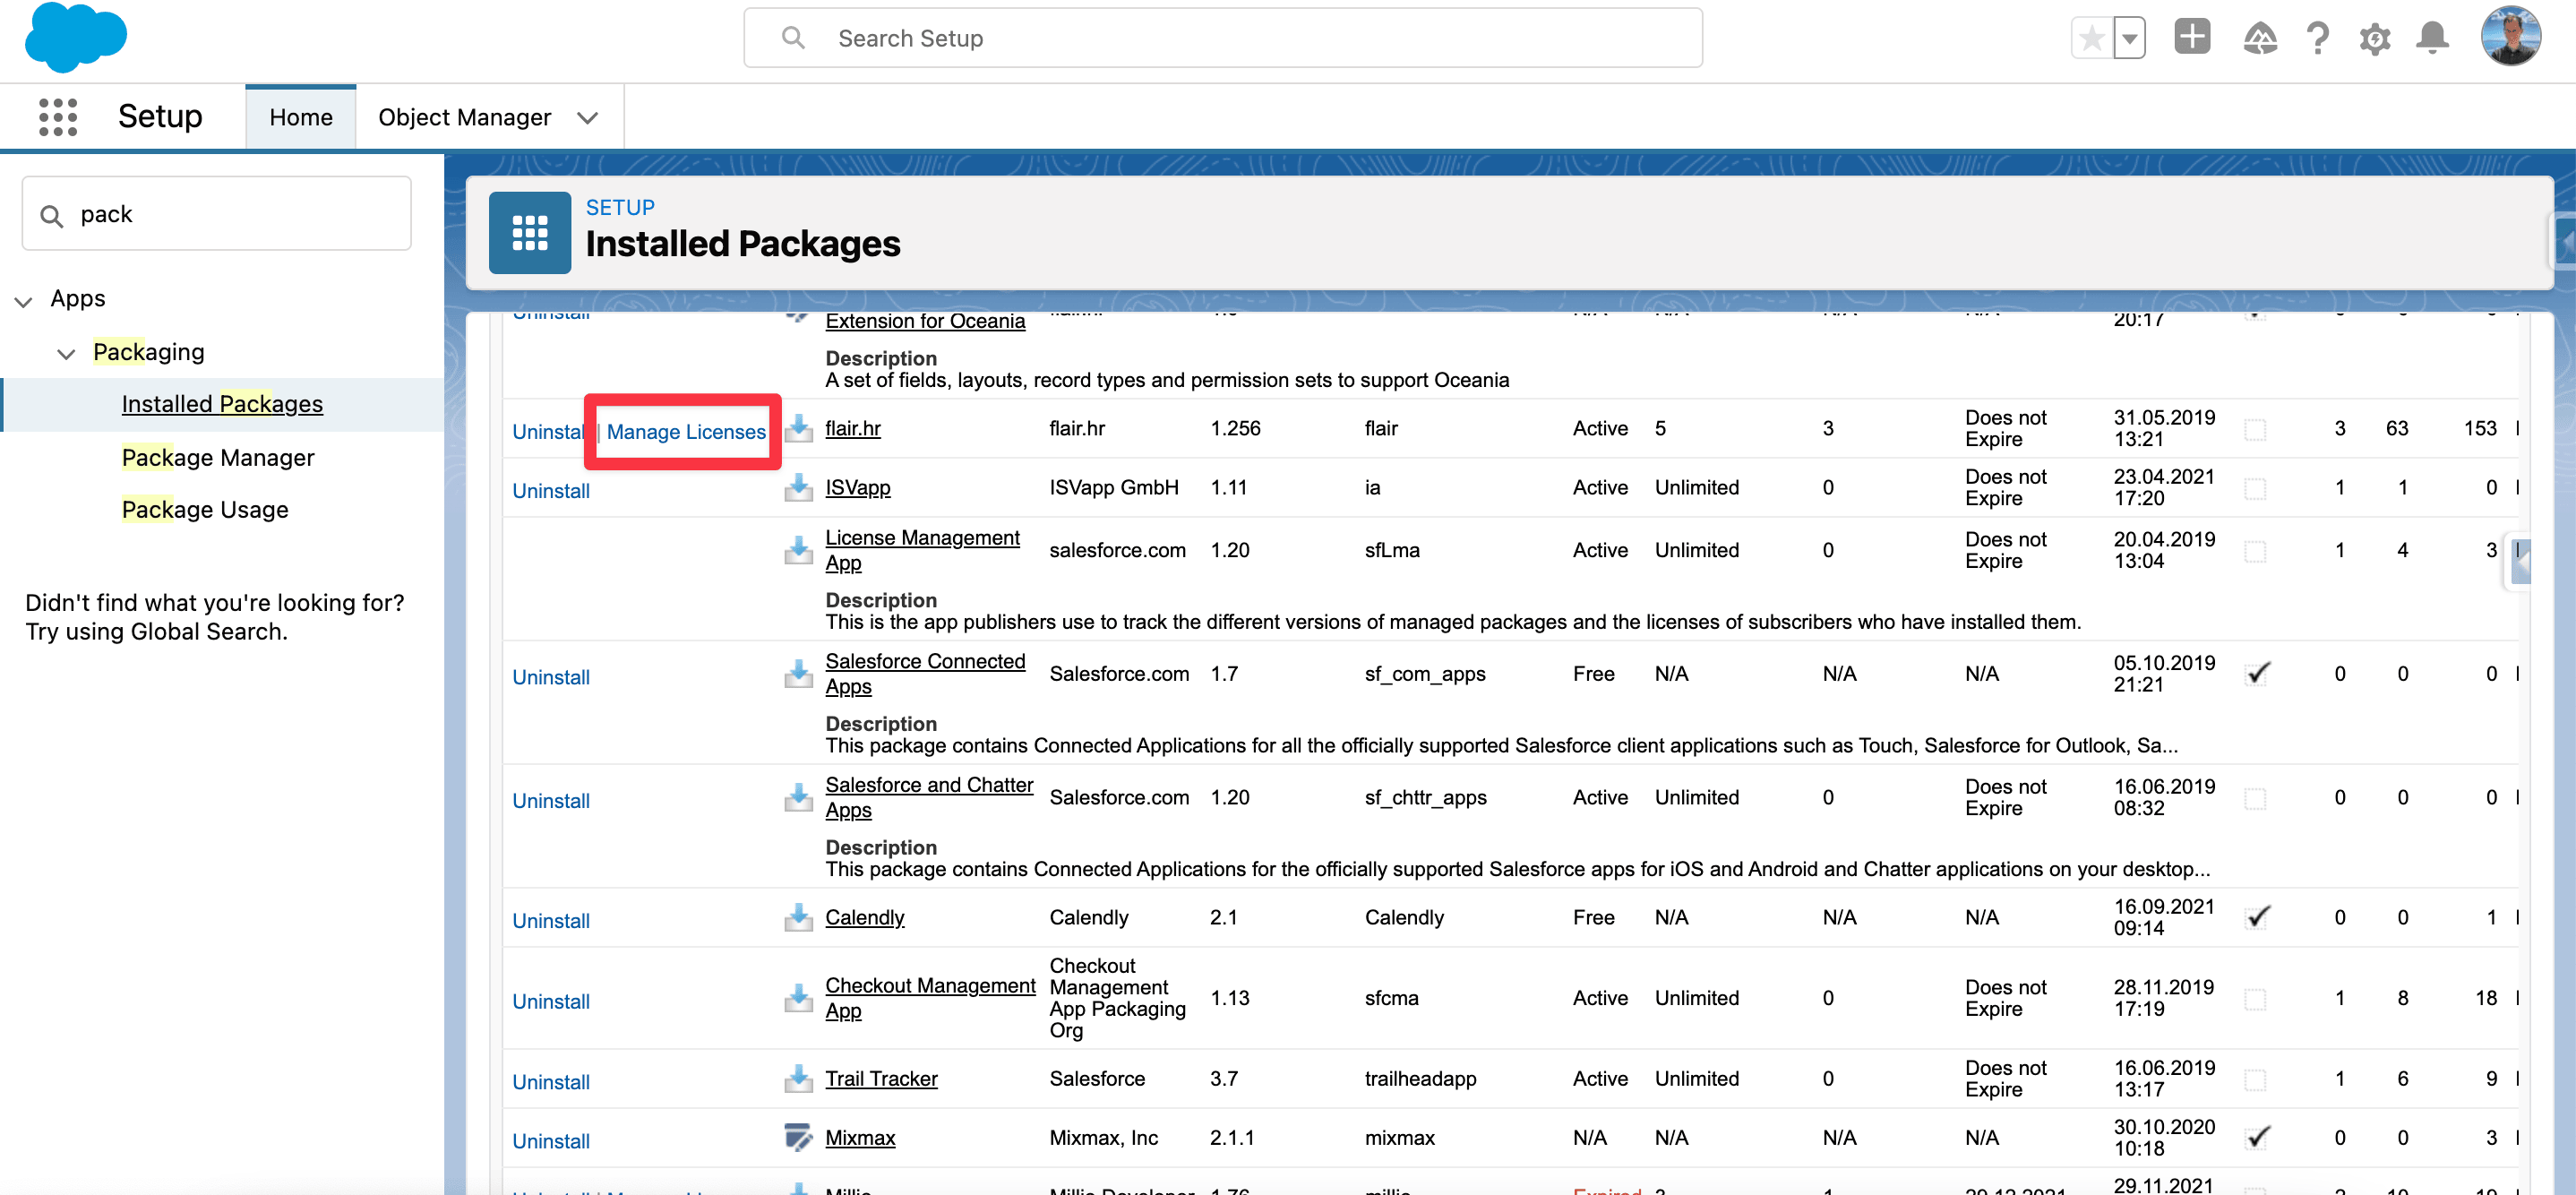
Find the flair.hr package.
-
Click Manage Licenses.
-
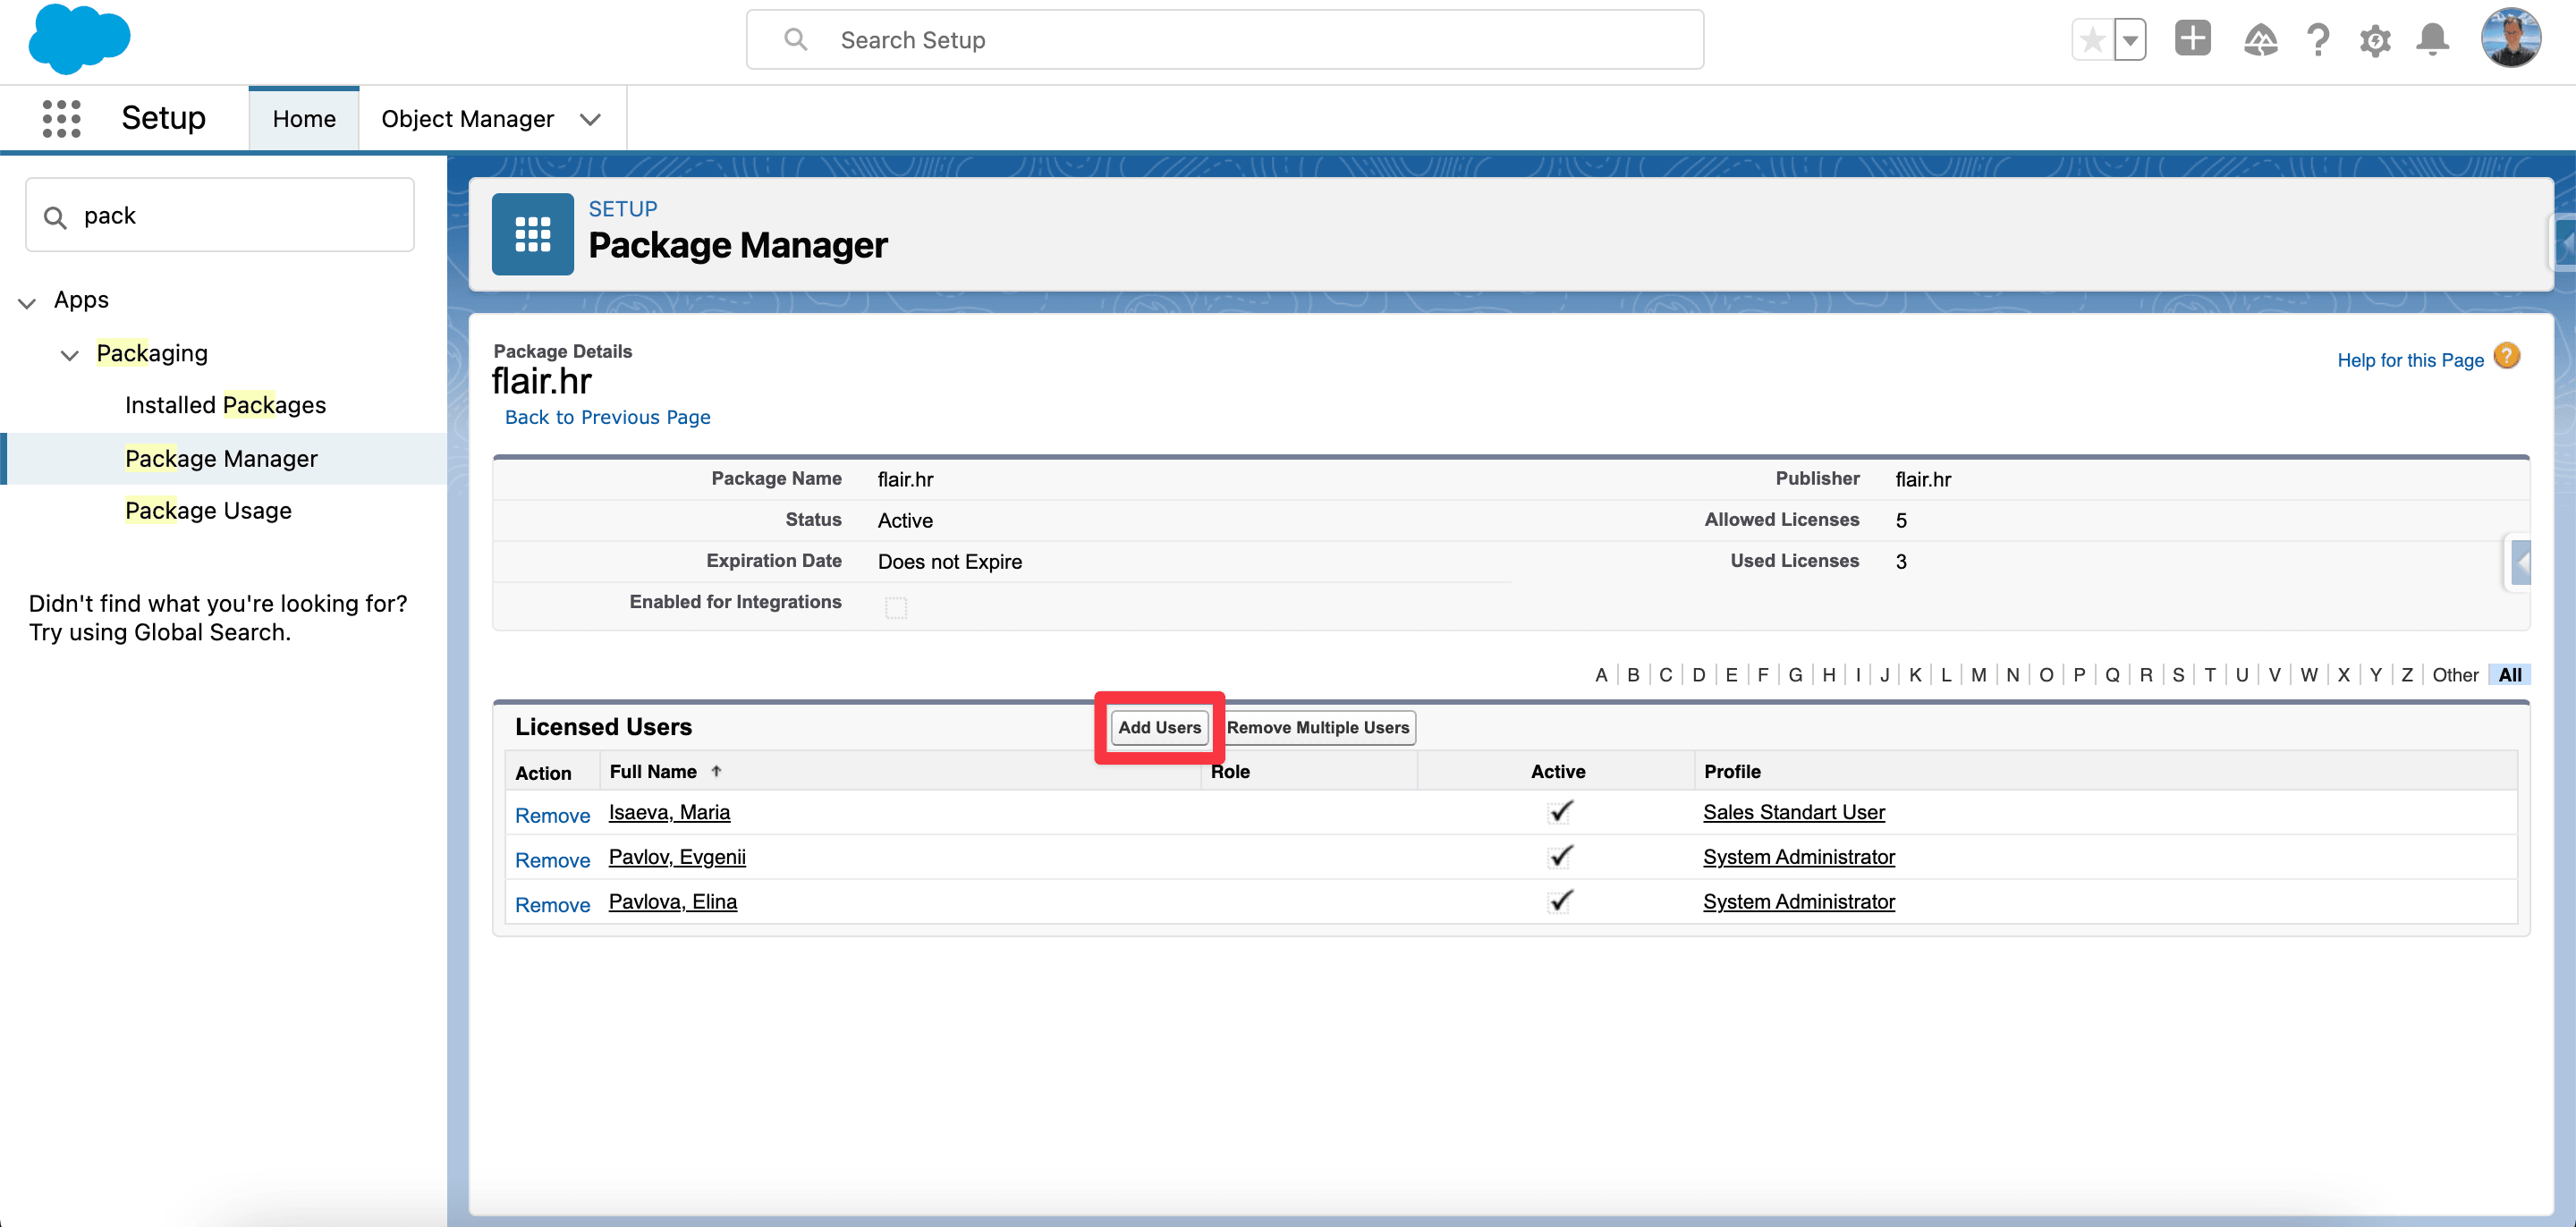
Click Add Users.
-
Select the Salesforce users who need access to flair.
-
Confirm the assignment. The selected users can access the flair package in Salesforce.
Enable automatic updates for a Sandbox
Automatic updates depend on Salesforce email deliverability. The setting applies to both production and Sandbox environments.
- In Salesforce Setup, enter
Deliverabilityin Quick Find. - Open Deliverability.
- Under Access to Send Email (All Email Services), select an access level that enables email.
- Click Save. If email deliverability is disabled, the Sandbox does not receive automatic updates after a flair Salesforce release.
Salesforce provides these access levels:
| Access level | What it does |
|---|---|
| No access | Allows password-reset emails and blocks other outbound email. |
| System email only | Sends system-generated email, including new-user notifications and password resets. This helps prevent a Sandbox from emailing real users. |
| All email | Allows all outbound email. This is the default for new organizations that are not Sandboxes. |
If Access Level is read-only, Salesforce has restricted changes for your organization.
flair announces major releases in What's New. You can test new features in a Sandbox before deploying them to your production environment. Contact flair Support to set up a Sandbox or ask about early feature access.
Install a package in a Sandbox
- Replace
https://login.salesforce.comin the package installation URL withhttps://test.salesforce.com. For example, usehttps://test.salesforce.com/packaging/installPackage.apexp?p0=04t2p000000l2cjinstead ofhttps://login.salesforce.com/packaging/installPackage.apexp?p0=04t2p000000l2cj.
Troubleshooting
Salesforce login fails
- Verify that the username and password use the correct capitalization, and reset the password if needed.
- If the account is locked, expired, deactivated, or missing its license, ask a Salesforce Admin to restore access.
- Confirm that the two-factor authentication method is available and that the login meets any IP-address or login-hours restrictions.
- Test a current browser in a private window, and check whether a VPN, firewall, proxy, cookies, or cached data prevents access.
- Check Salesforce Status for an instance outage or scheduled maintenance.
A flair component does not load or respond
Confirm that Lightning Web Security (LWS) is enabled for your Salesforce organization. flair Inventory and other newer Salesforce components require LWS; without it, components can render incorrectly, stop responding, or fail to integrate with other Salesforce elements.
flair cannot connect to external services
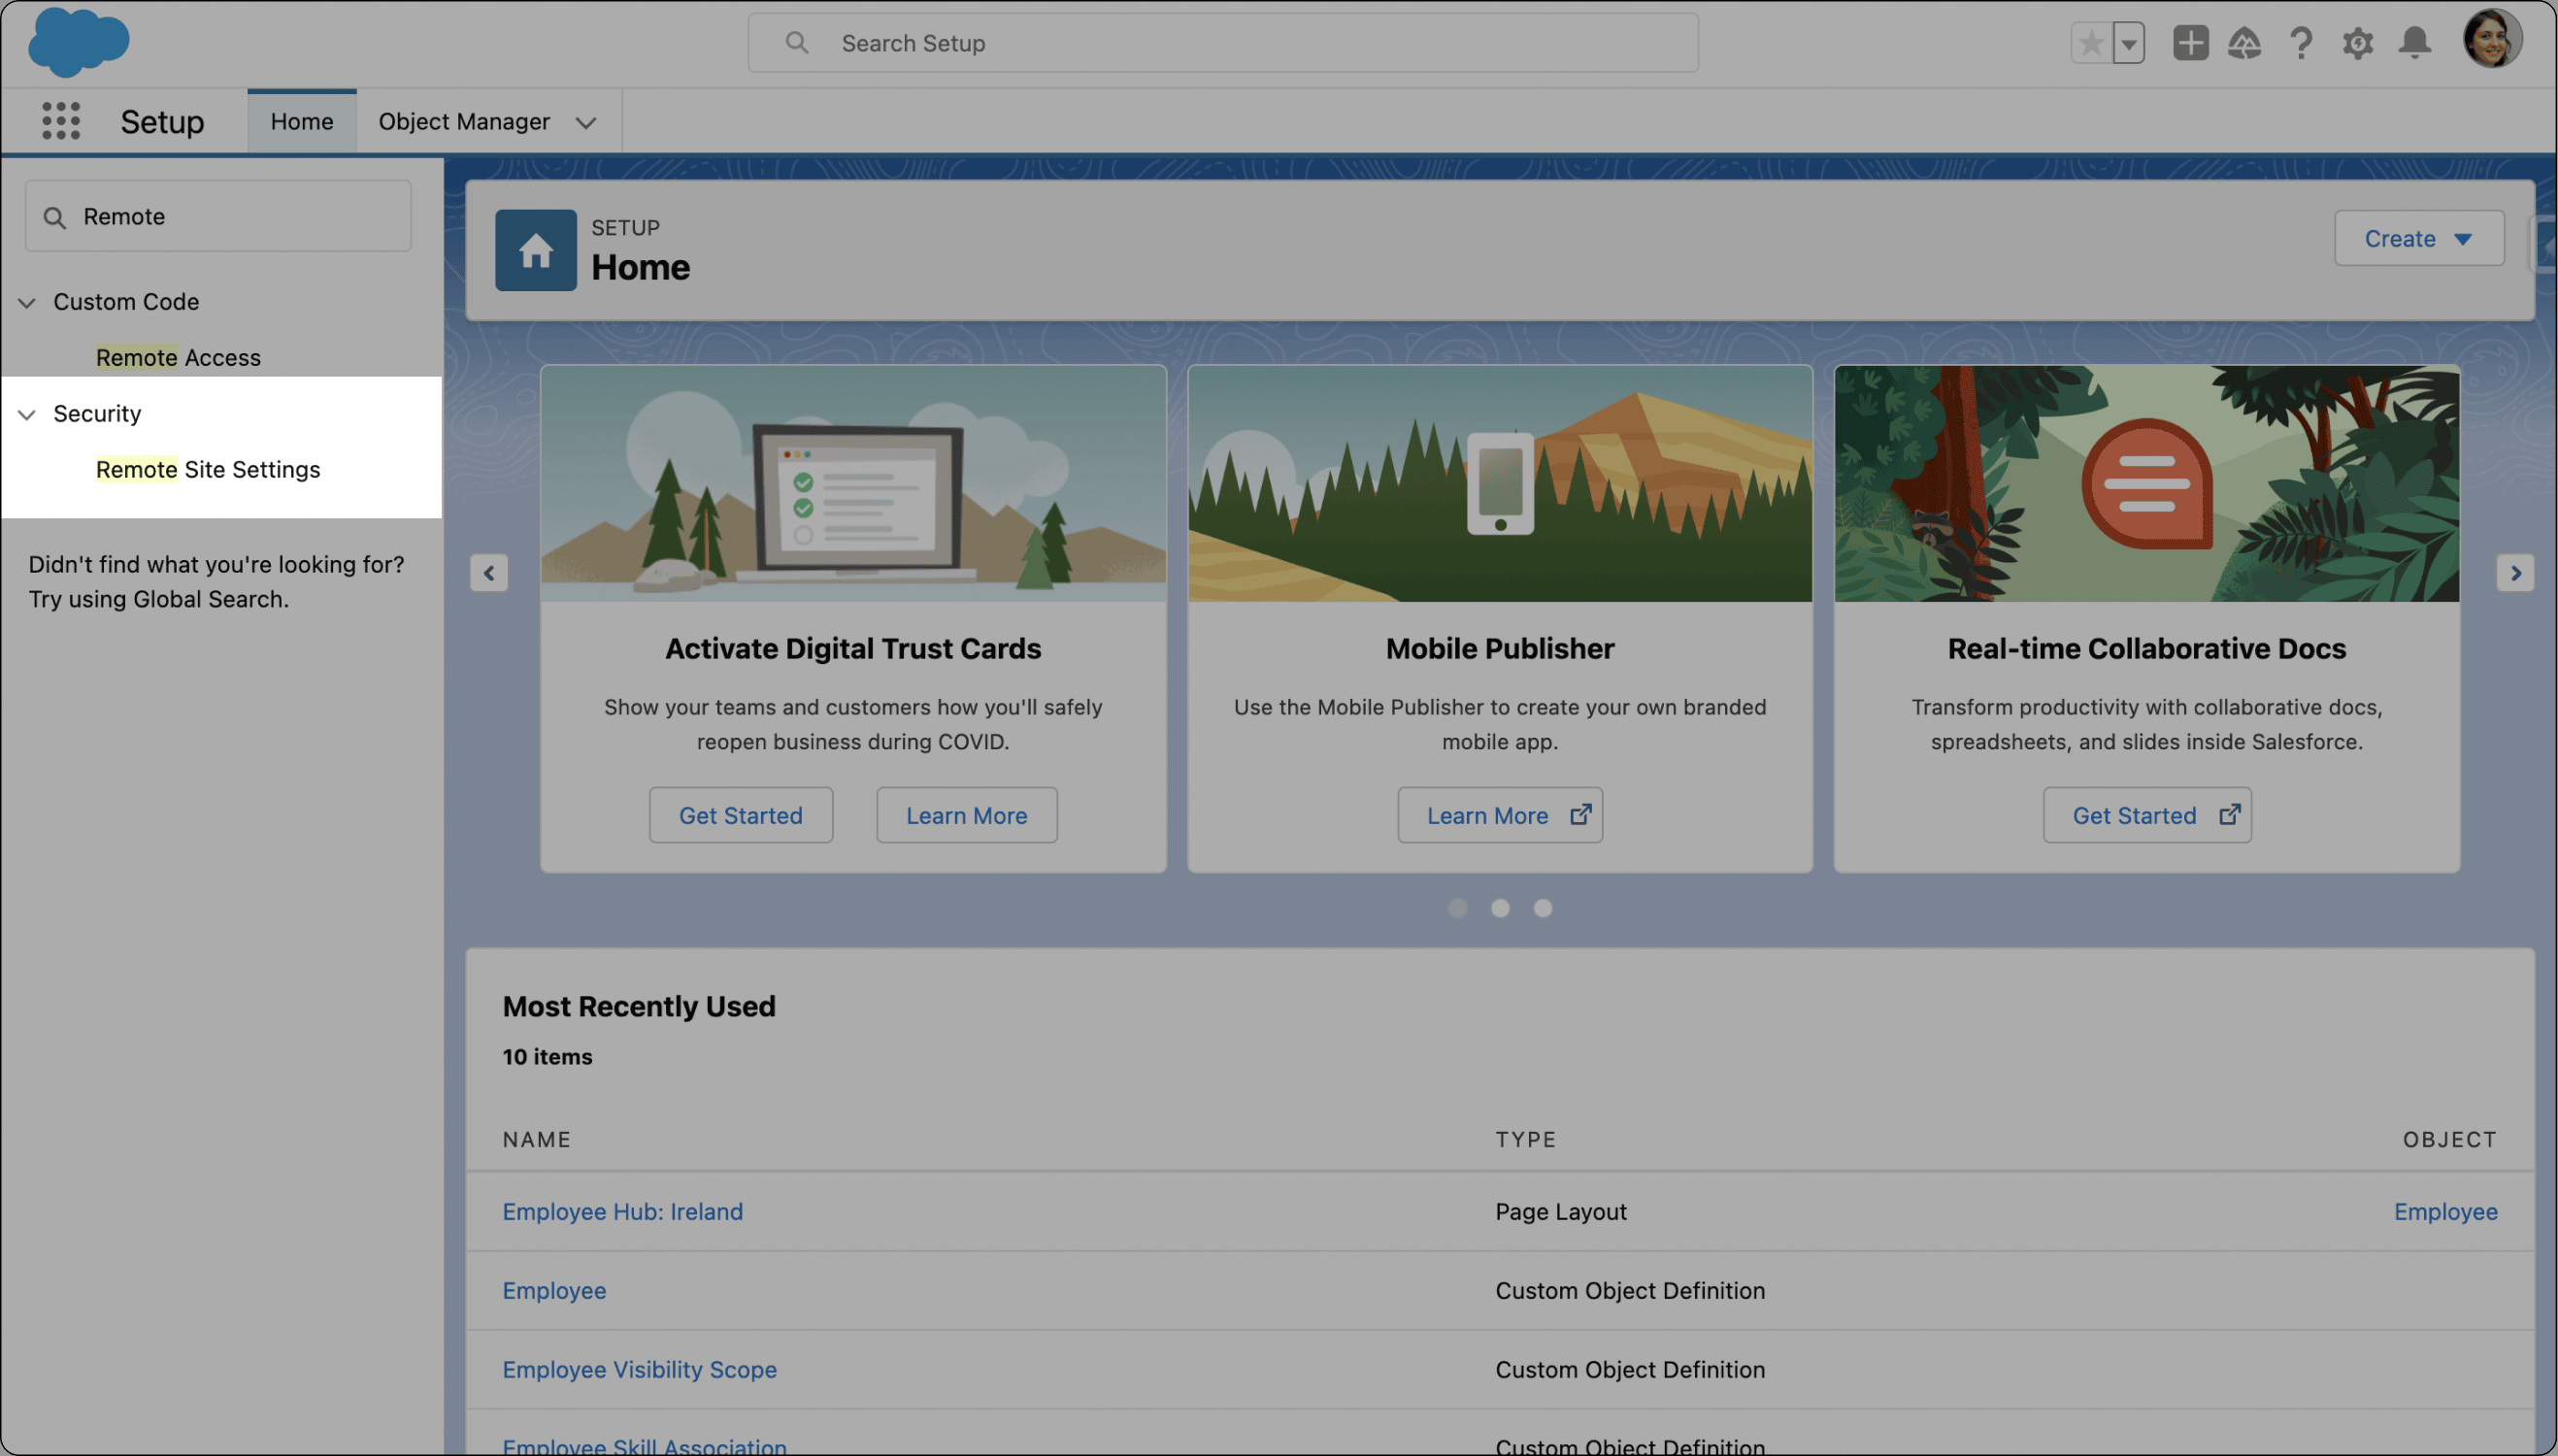
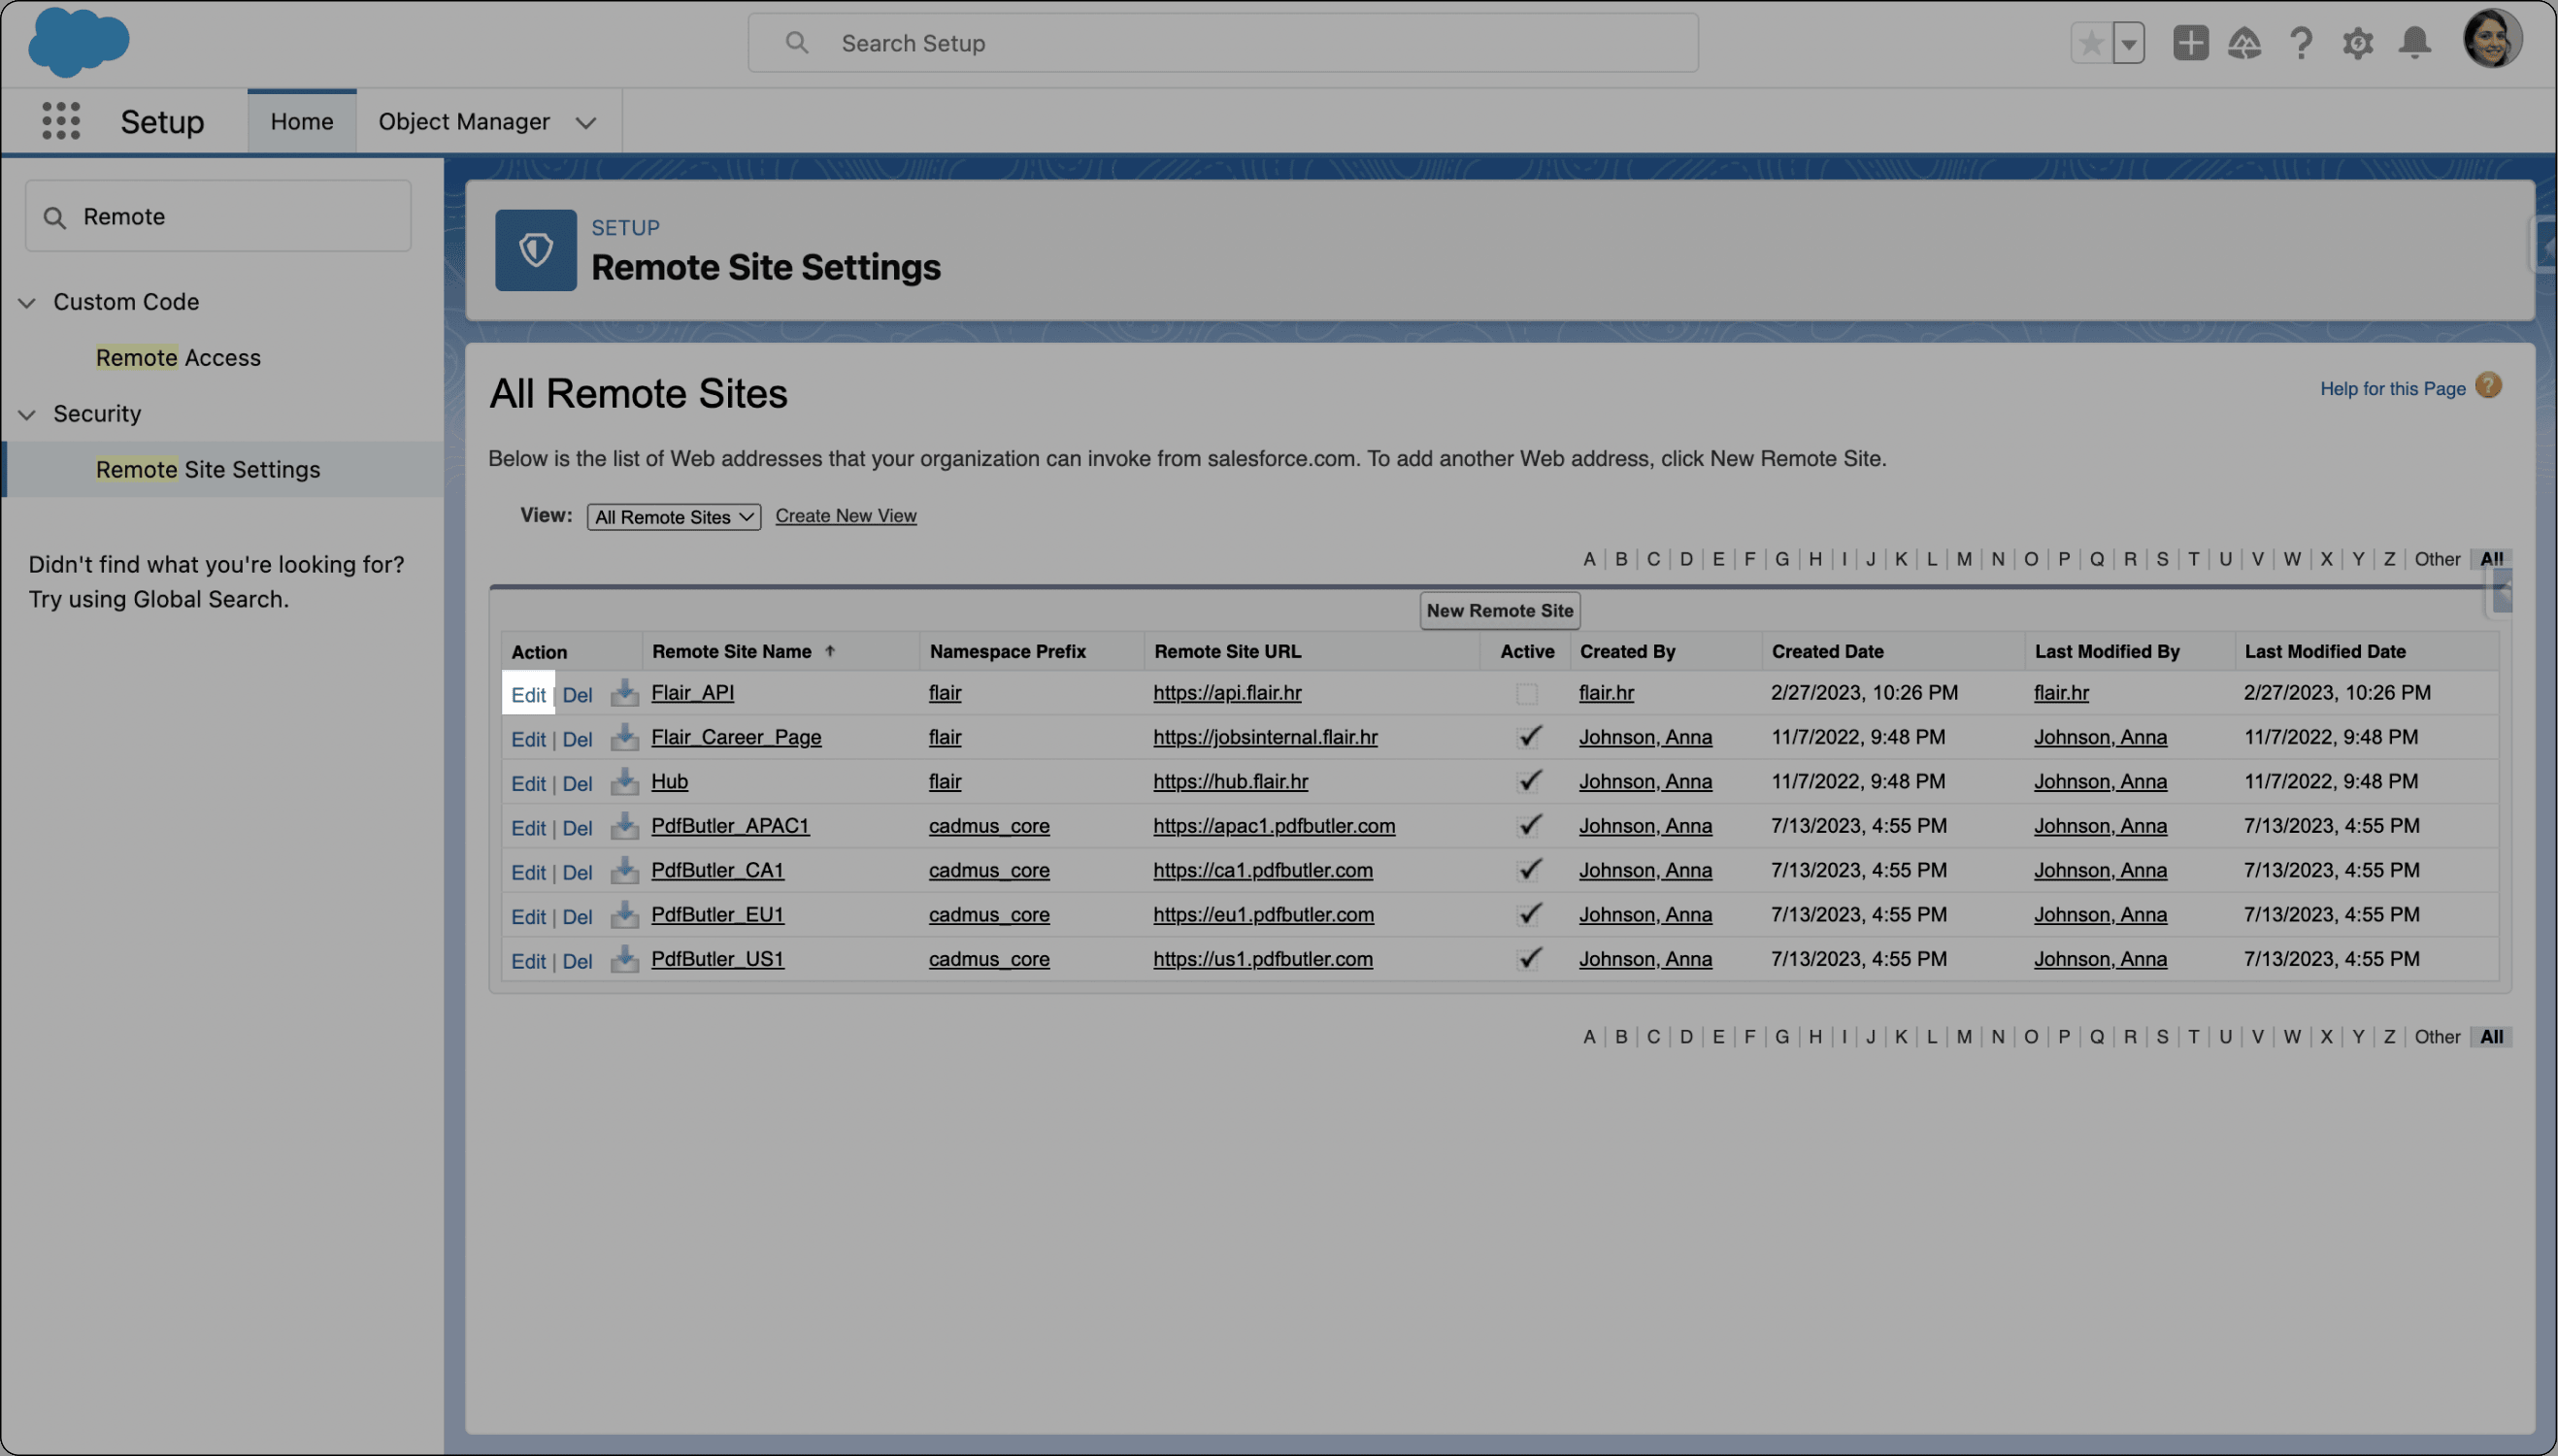
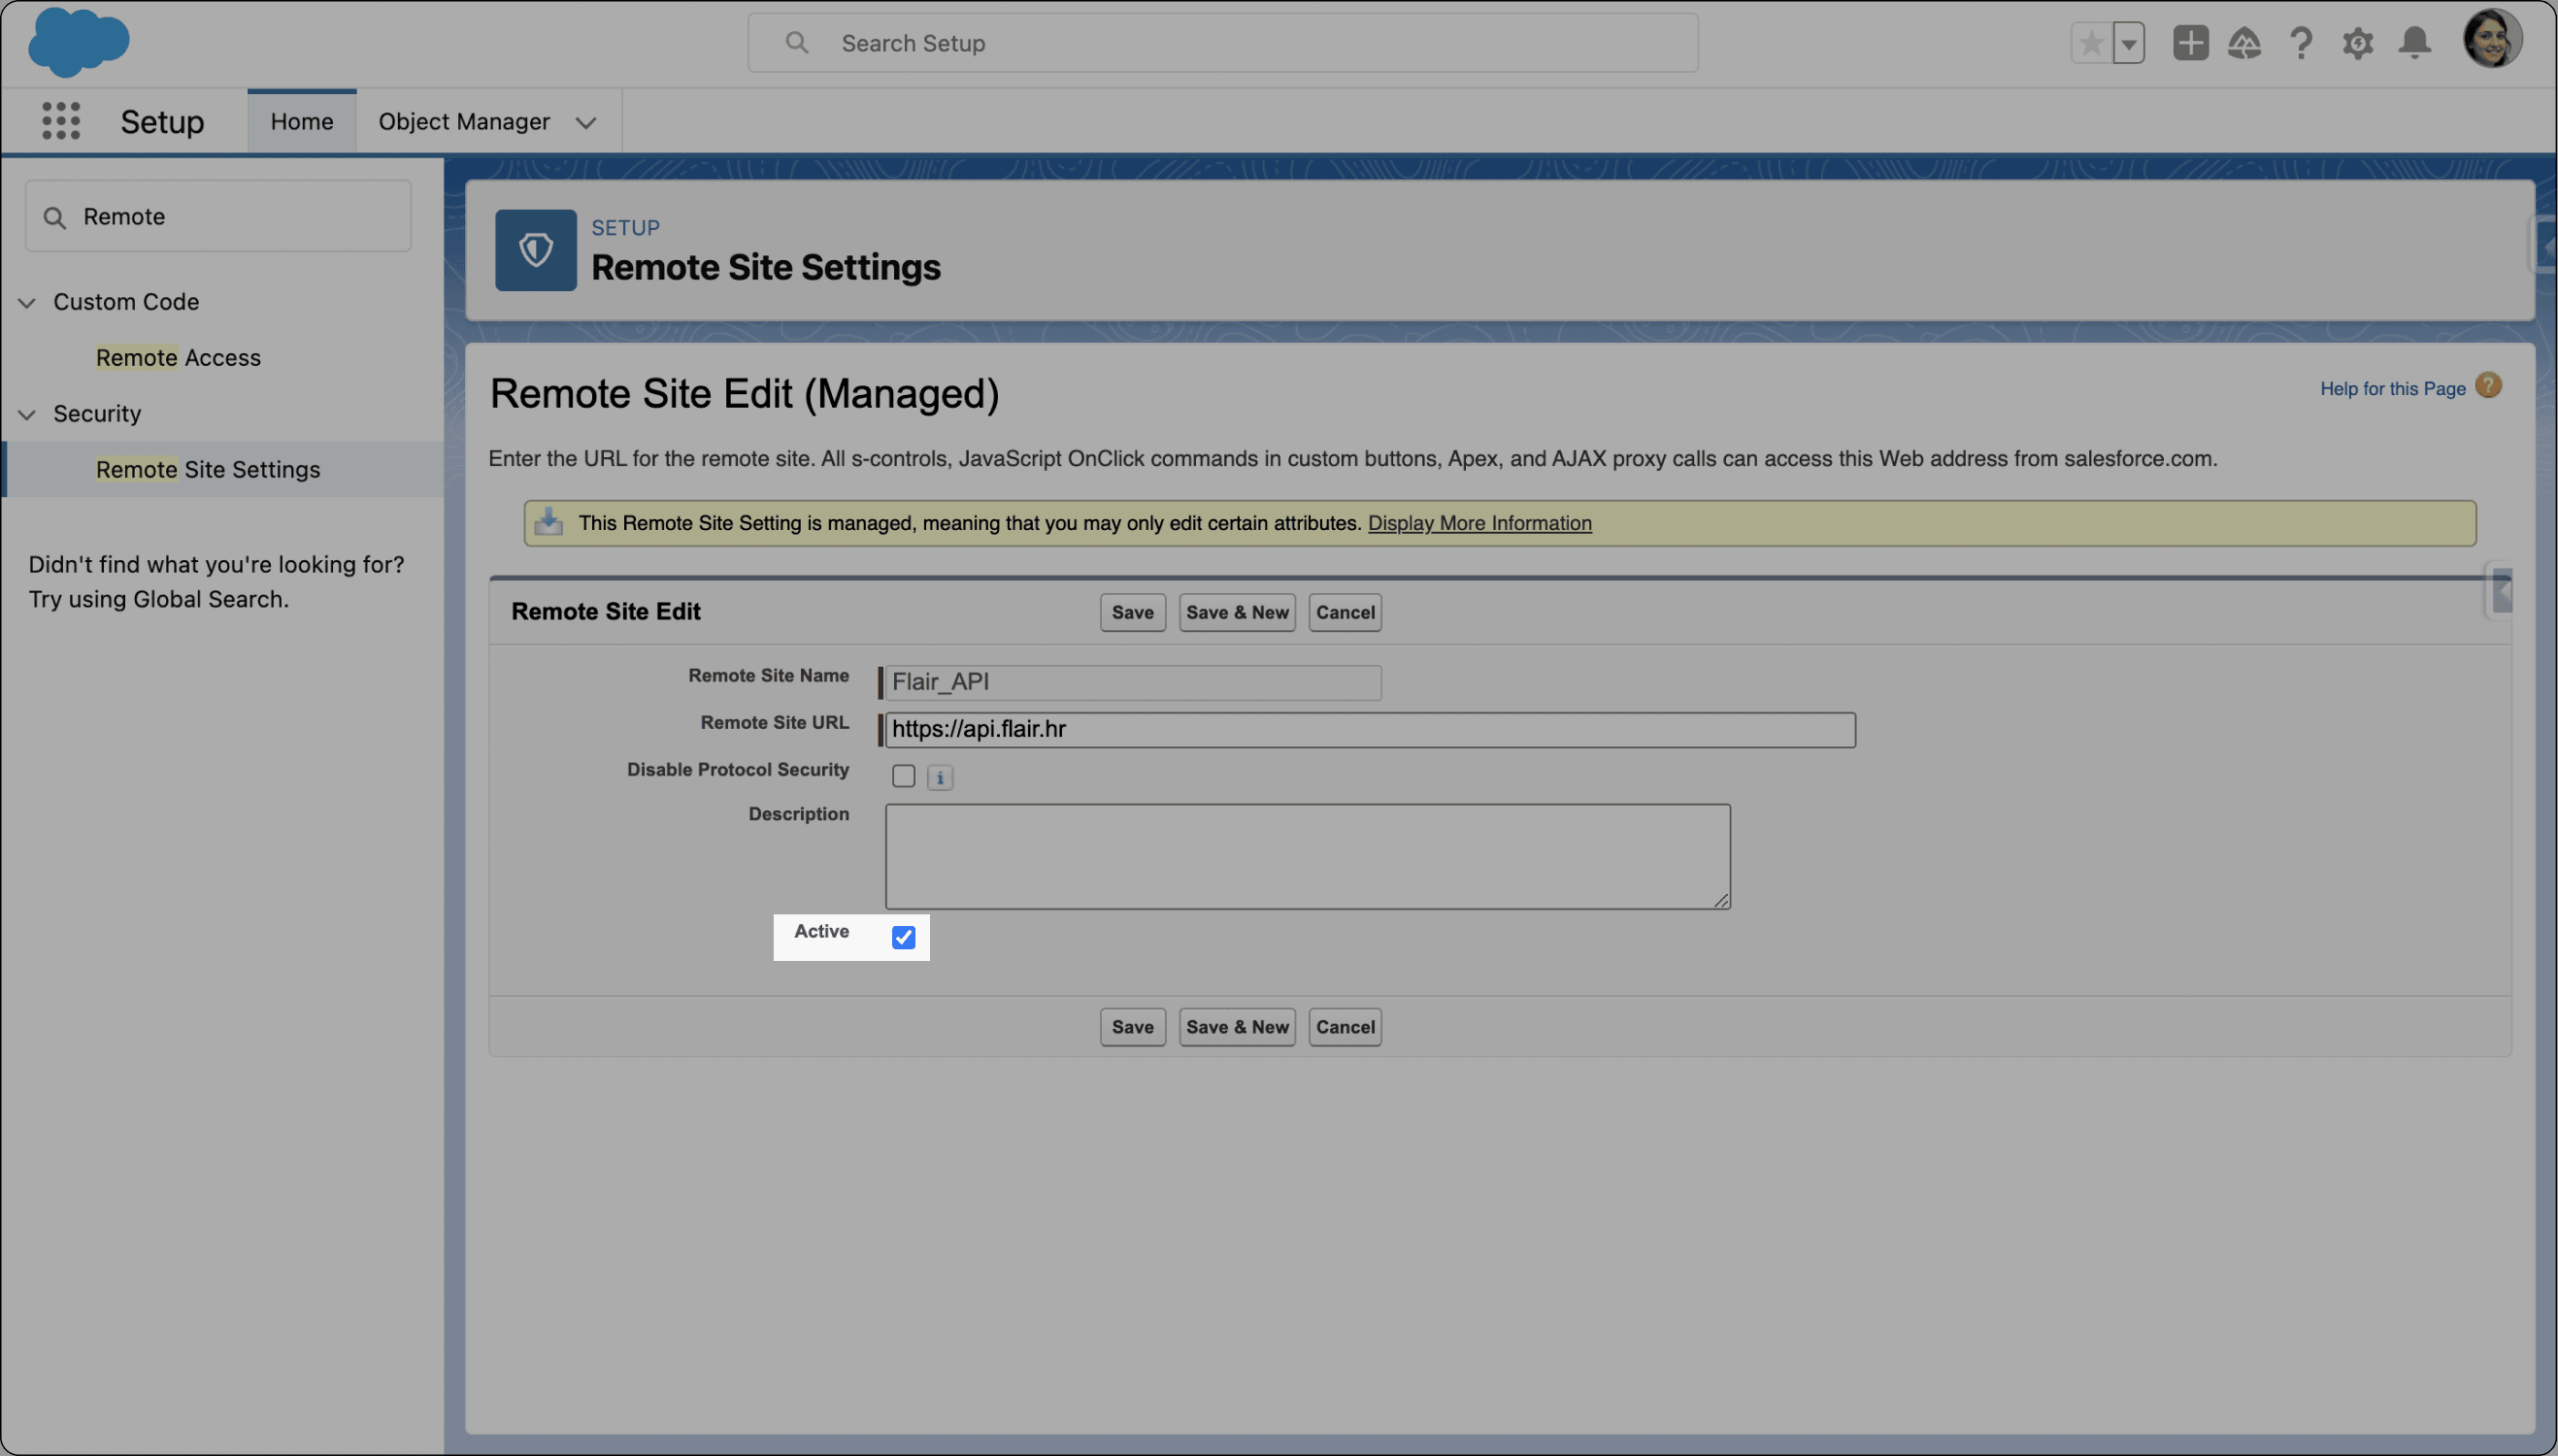
Activate the flair API remote site when flair Recruiting, the Employee Hub, or license management cannot connect to flair services.
-
In Salesforce Setup, enter
Remotein Quick Find. -
Open Remote Site Settings.
-
Find the remote site for the flair API.
-
Next to Flair_API, click Edit.
-
Select Active.
-
Click Save.
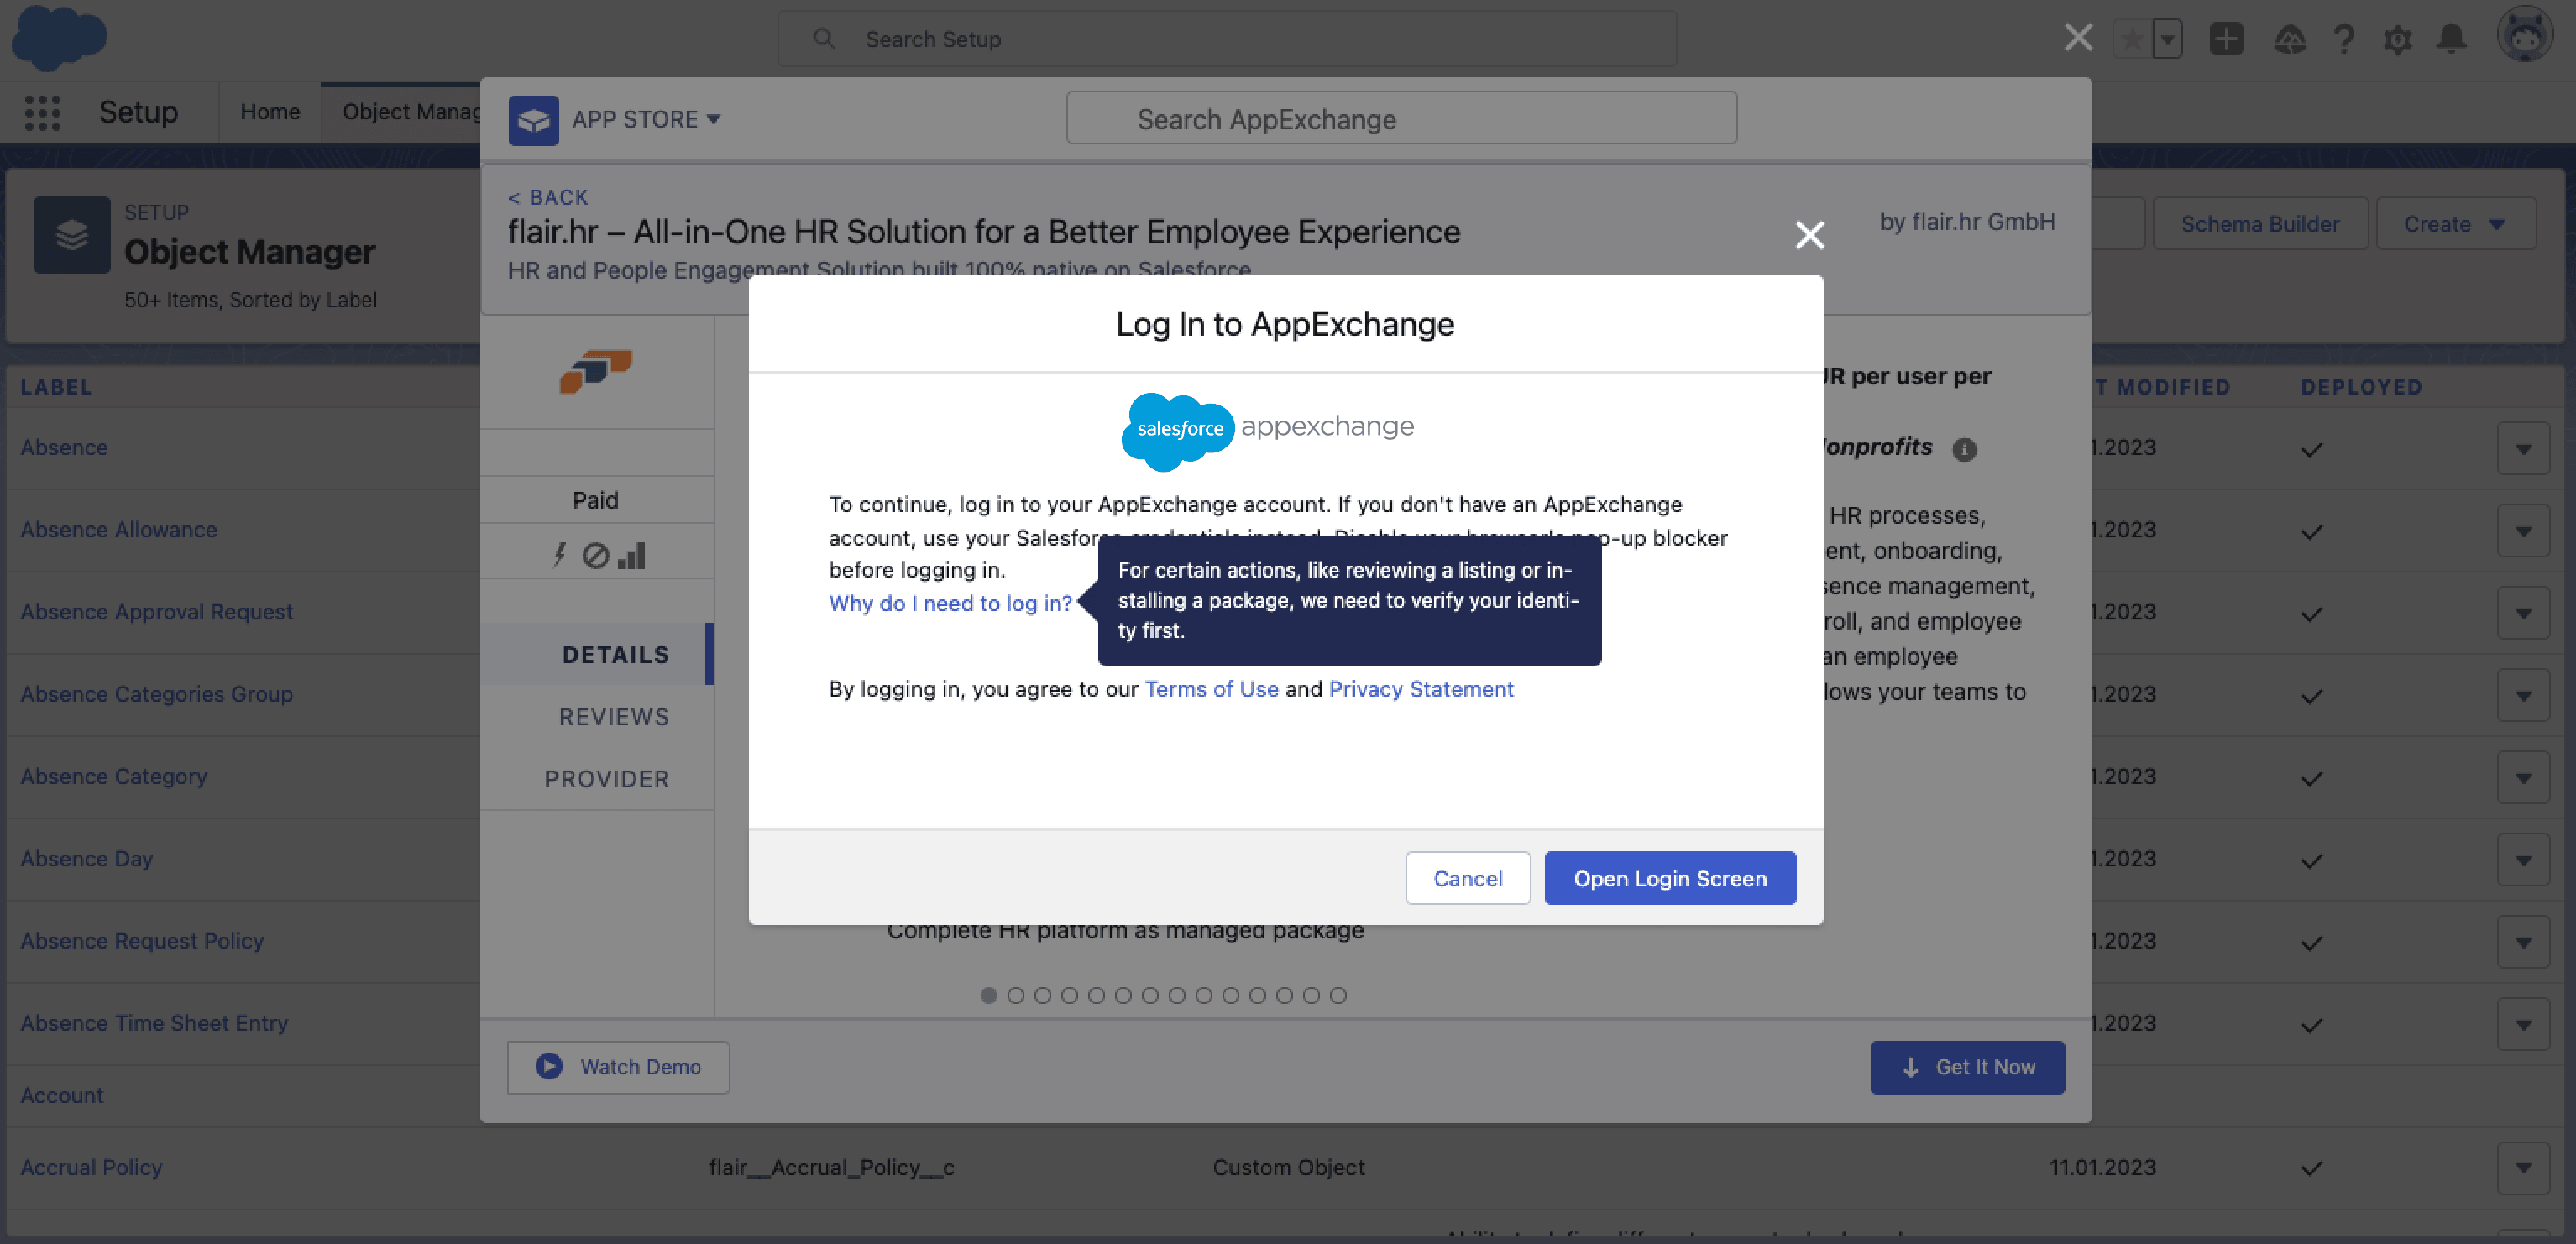
Salesforce does not authorize the installation
If an in-organization AppExchange flow shows an authorization error, start the flow from the AppExchange portal.
-
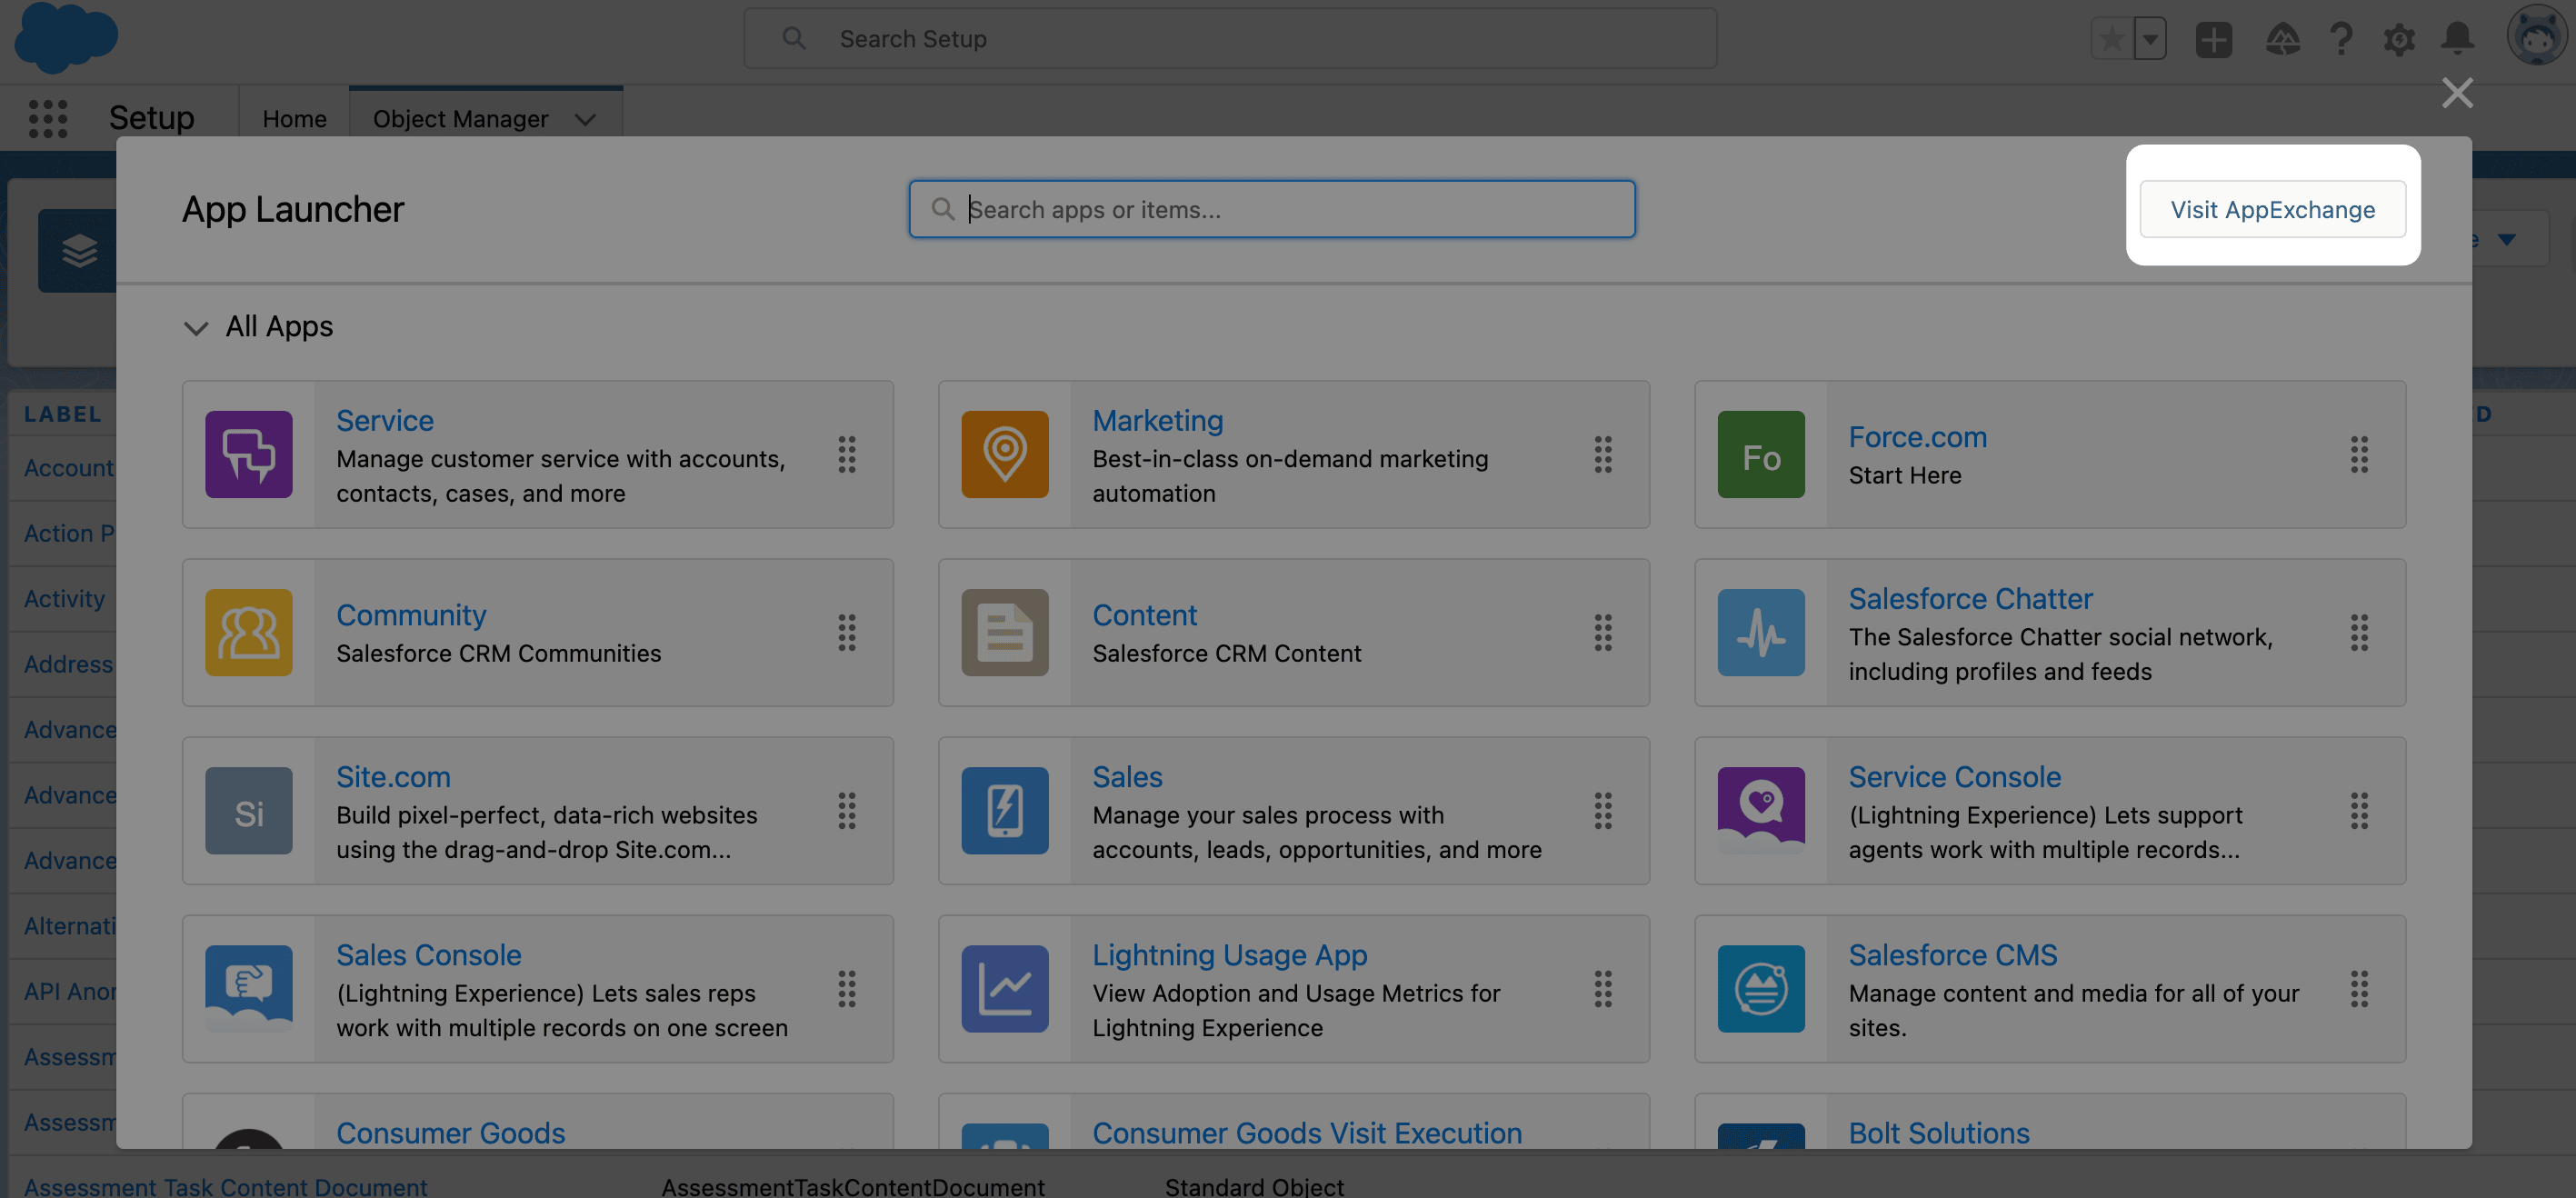
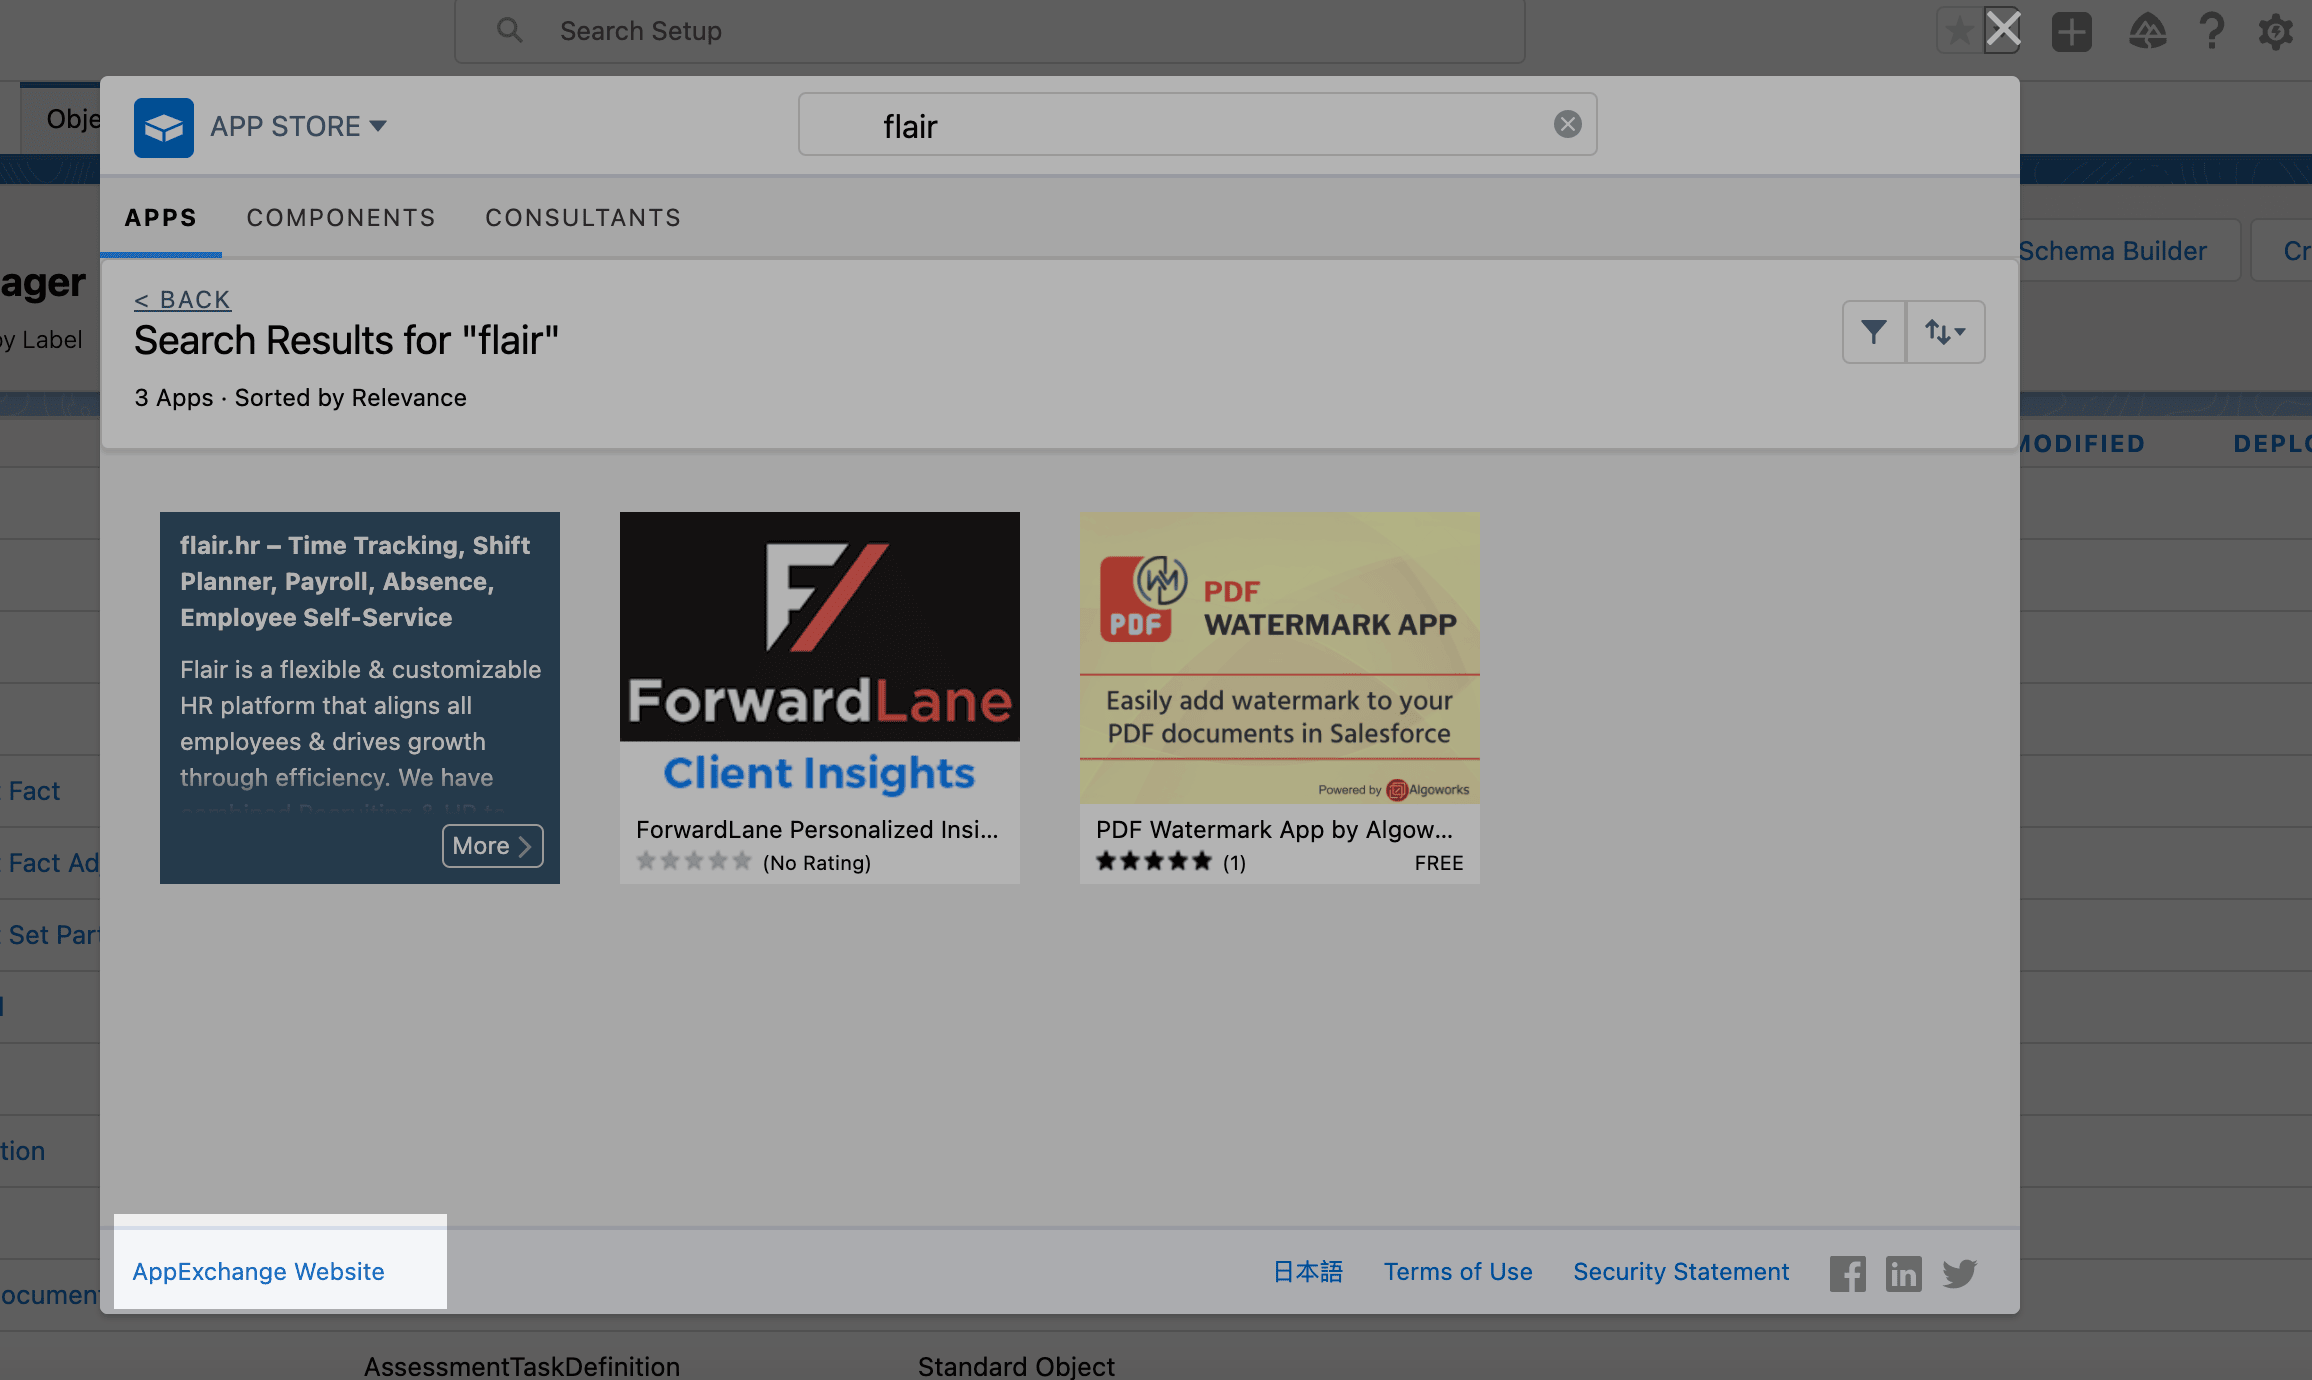
In the App Launcher (⋮⋮ grid icon), click Visit AppExchange.
-
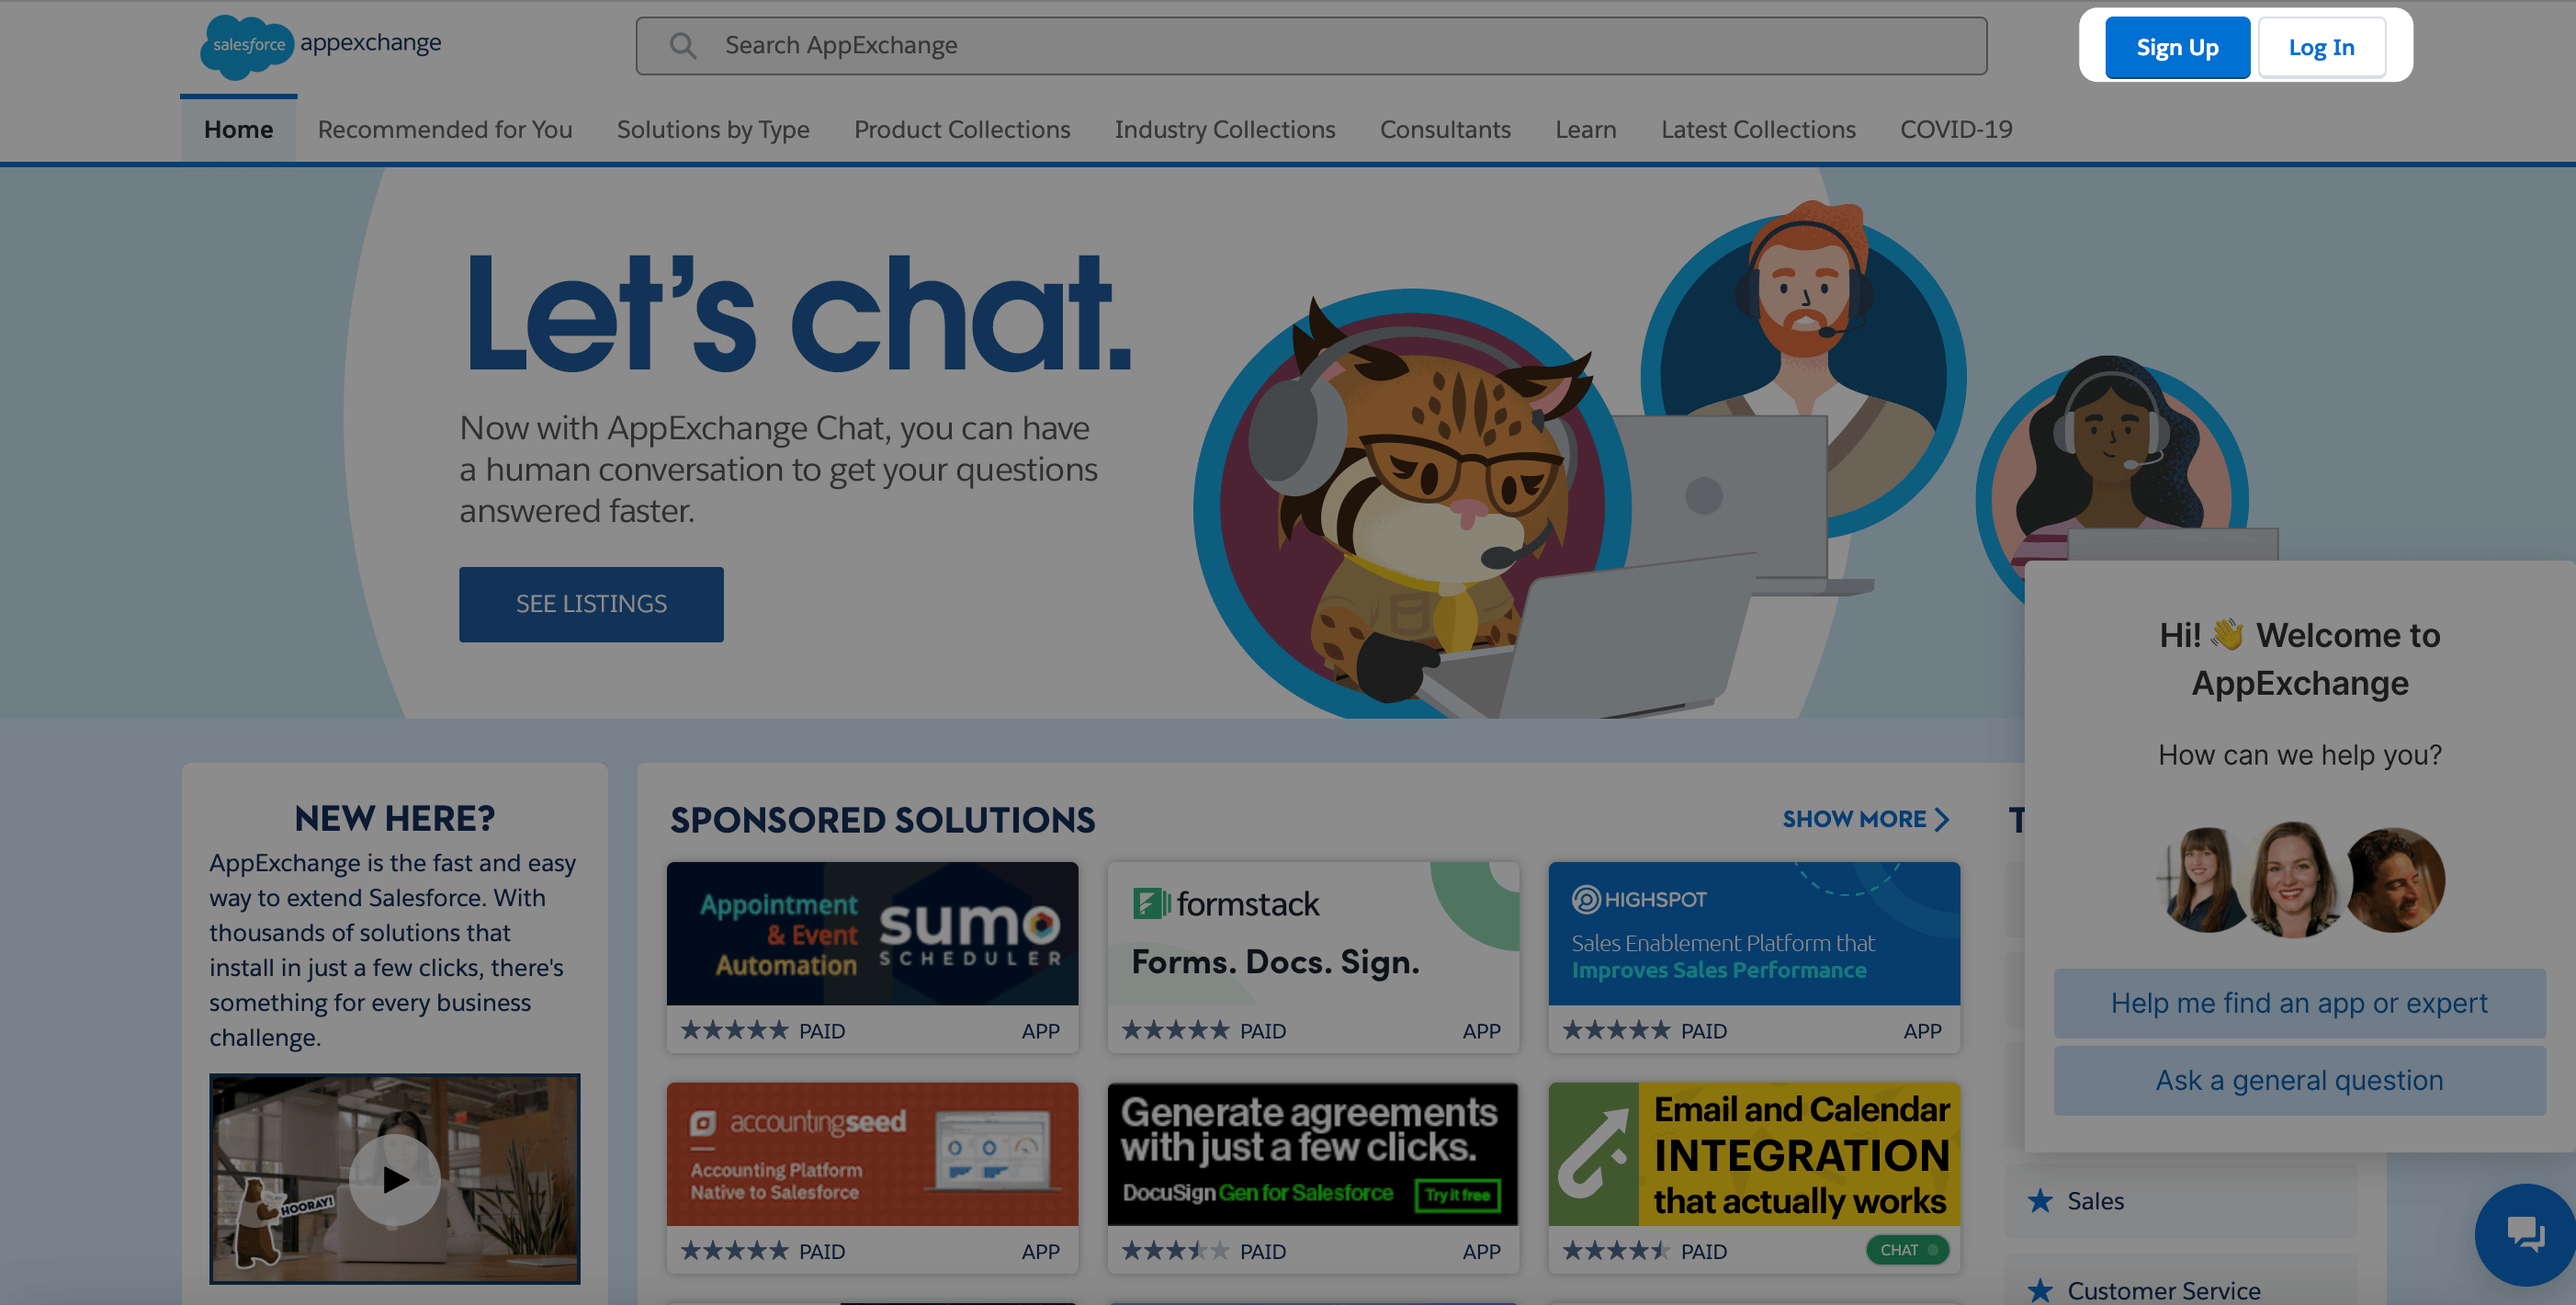
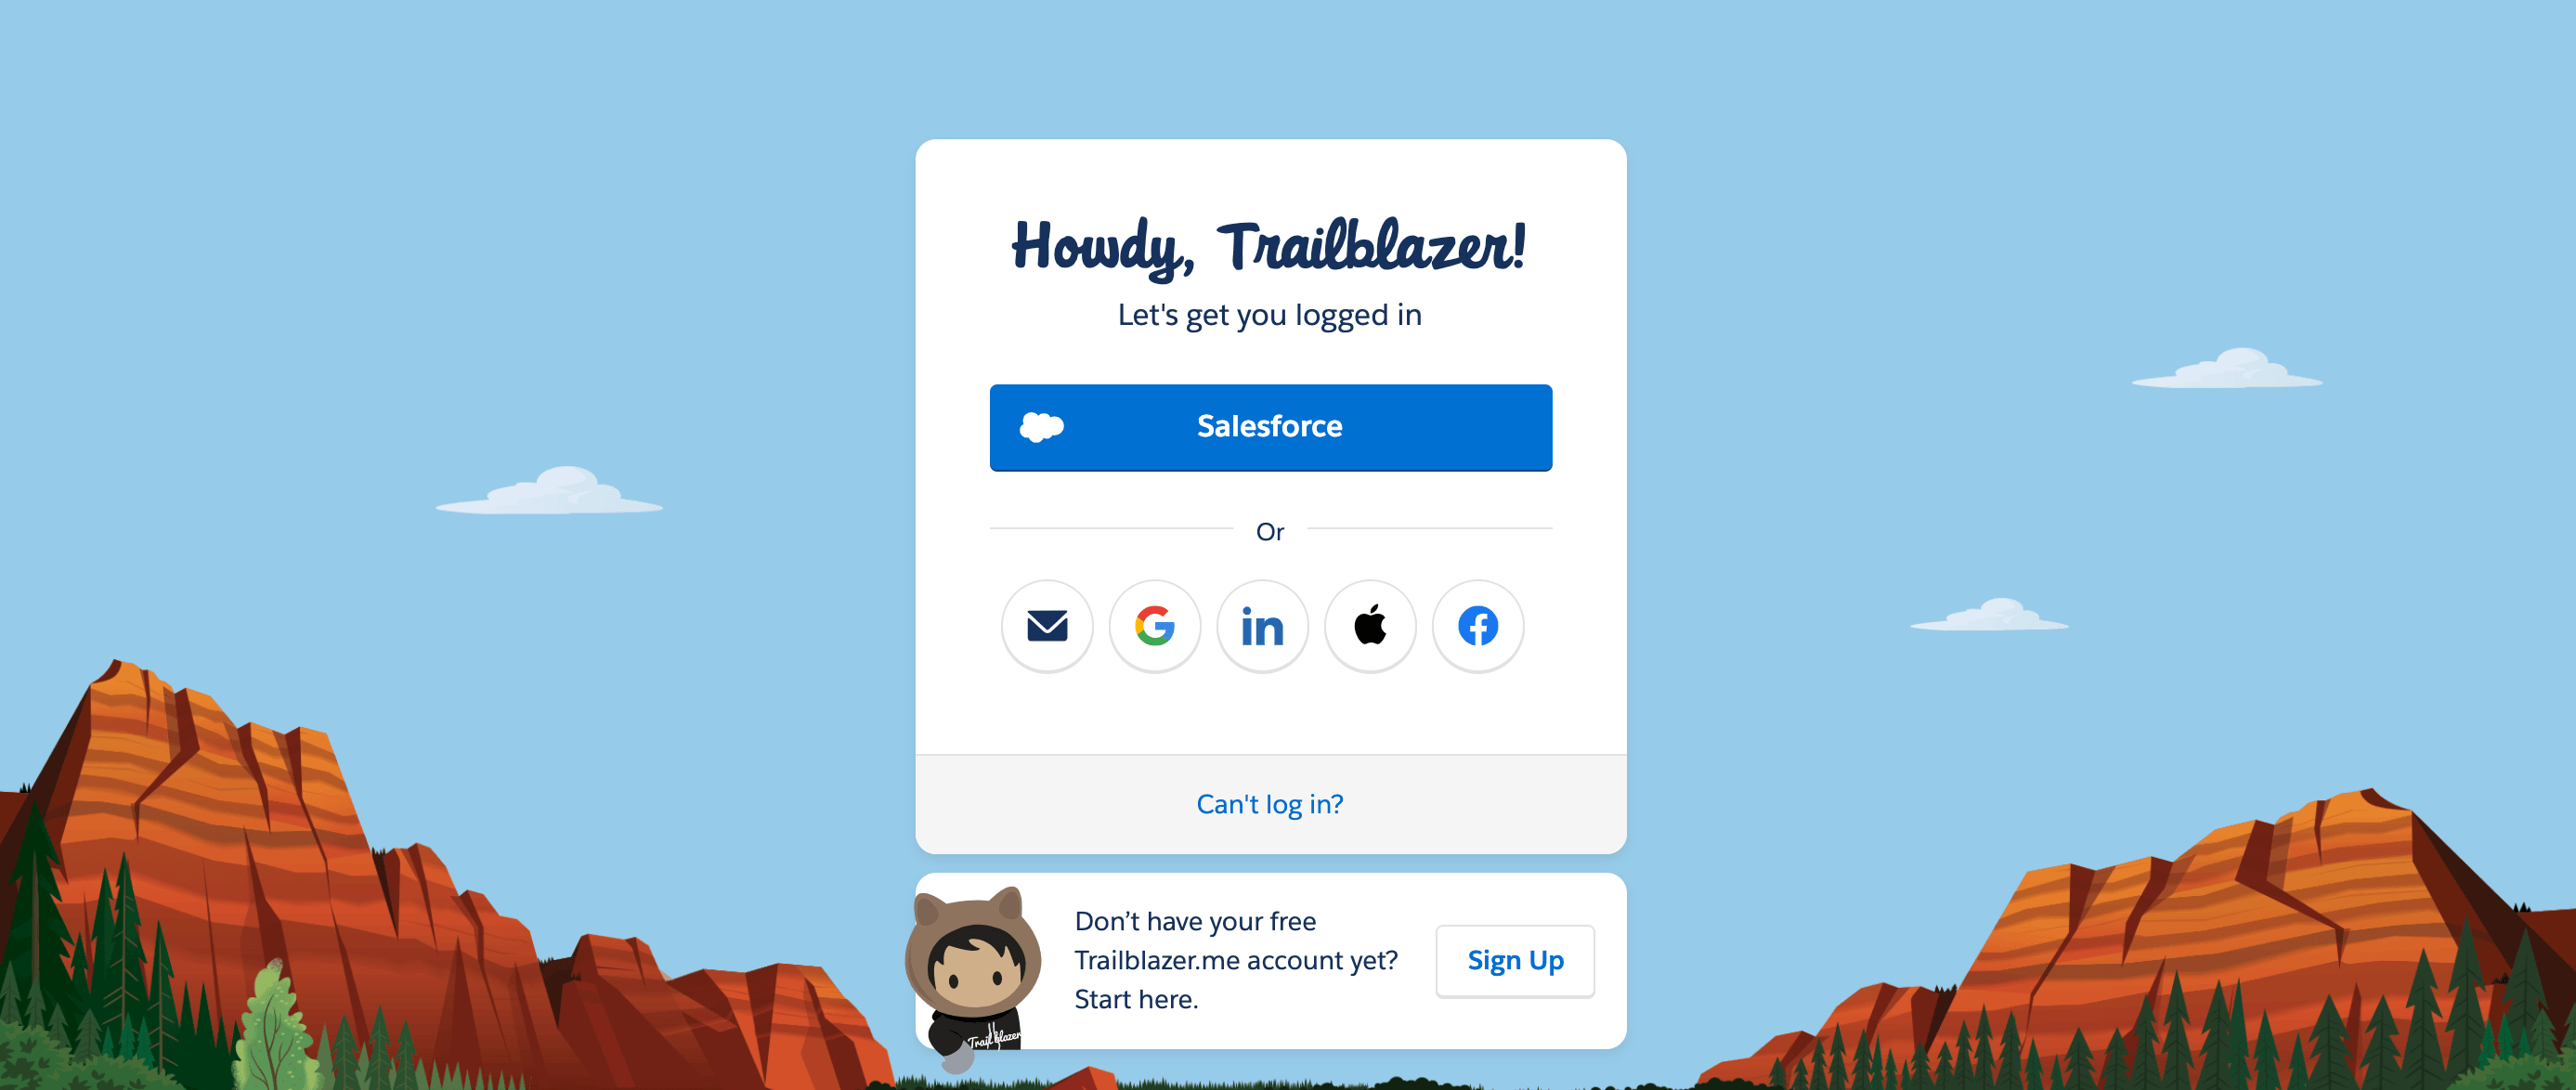
Sign in to your Trailblazer account or click Sign Up.
-
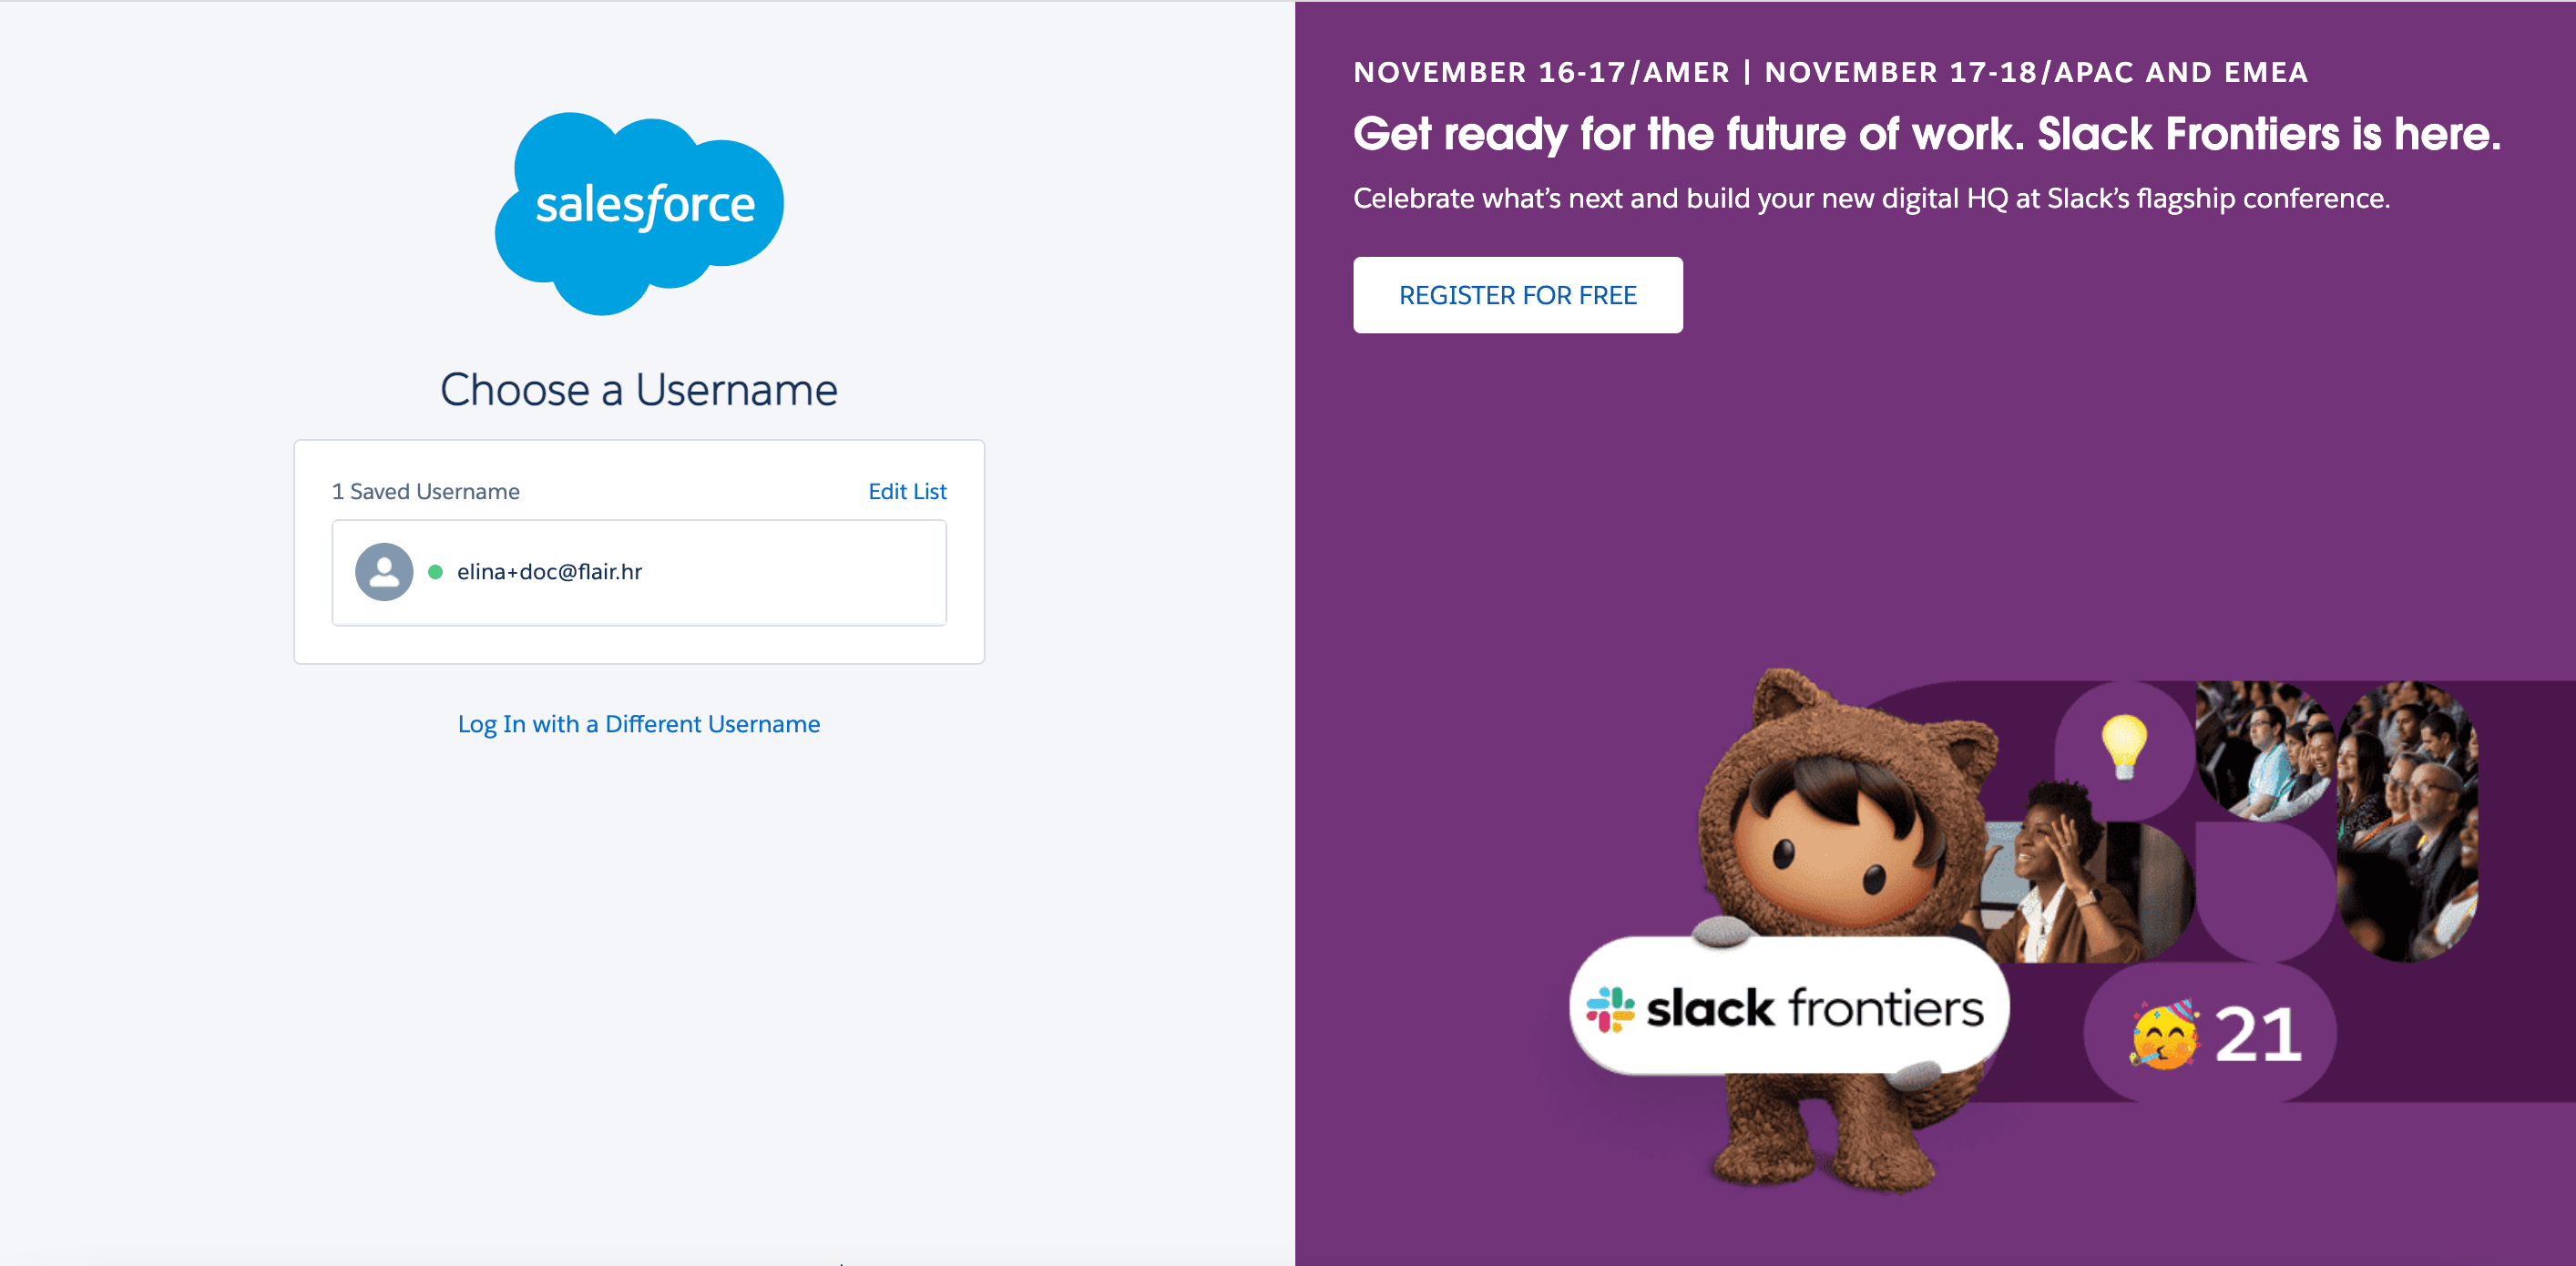
Select a username from the organization where you want to install the package.
-
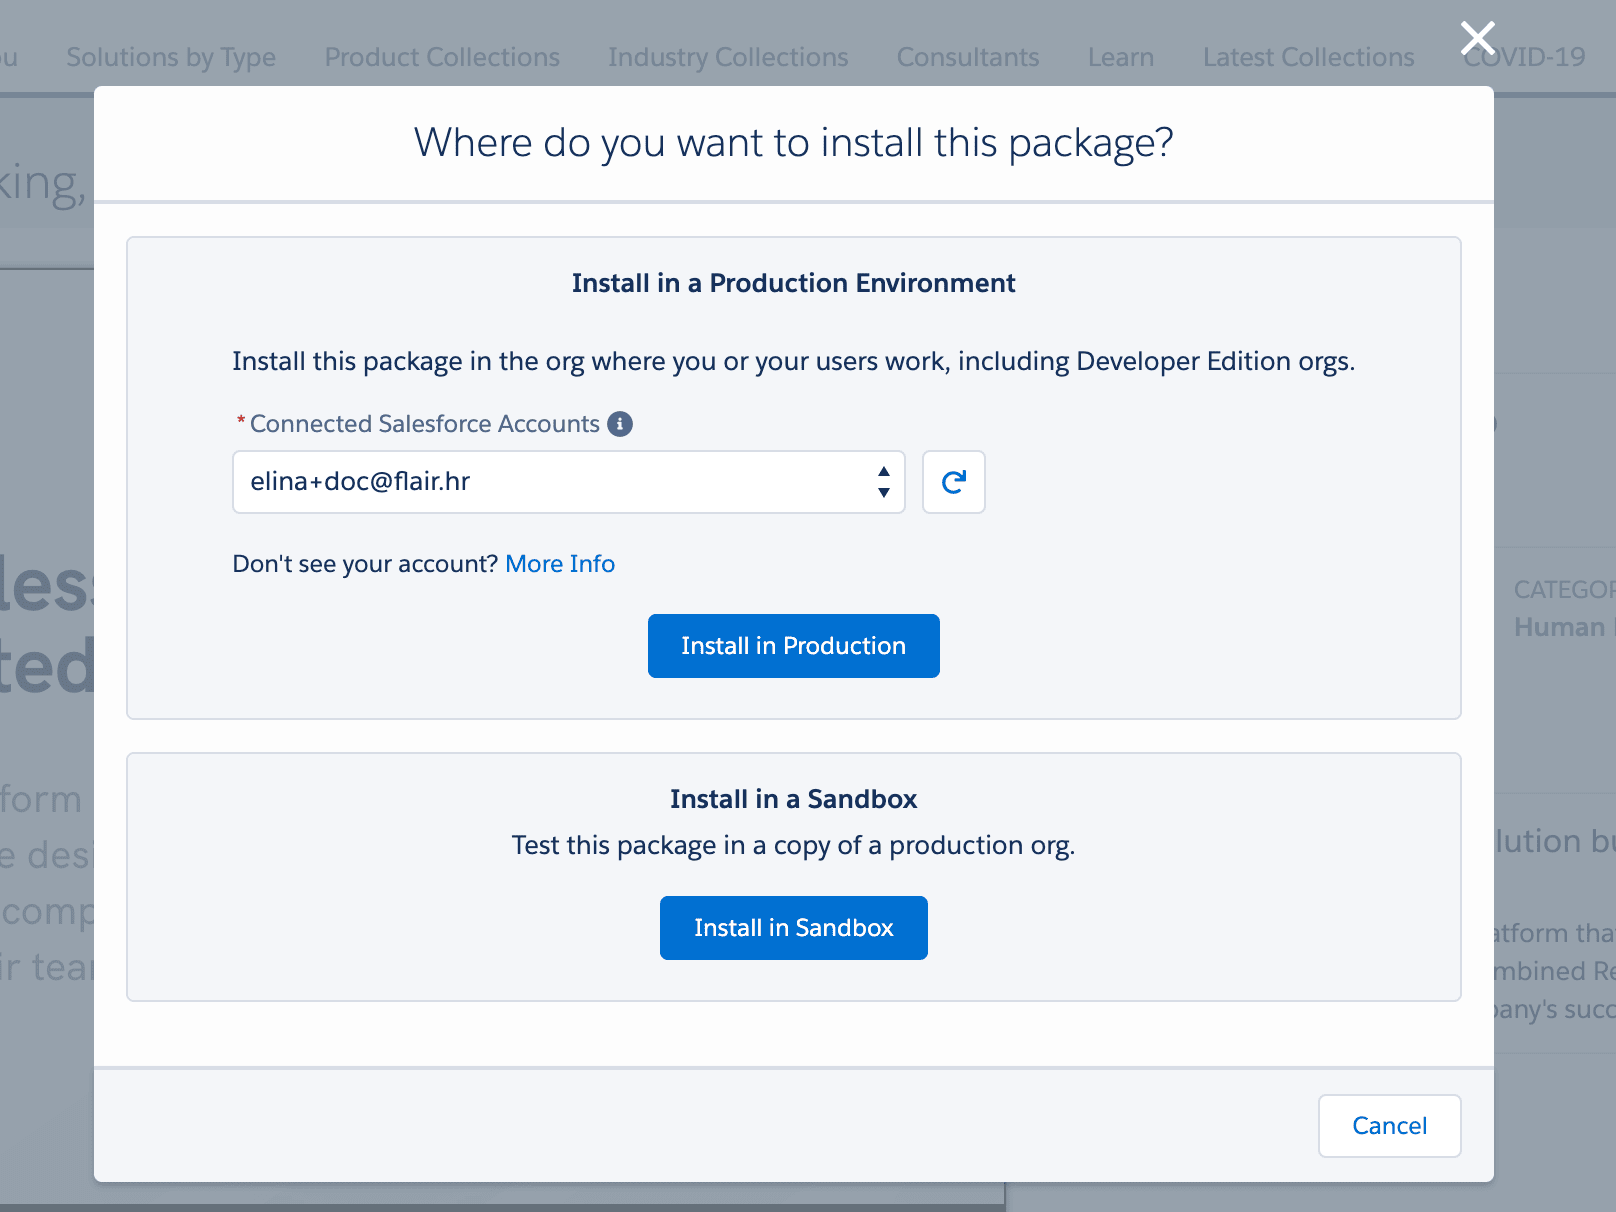
Select the production organization or Sandbox.
-
Continue the package installation.
Installation fails with a Chatter error
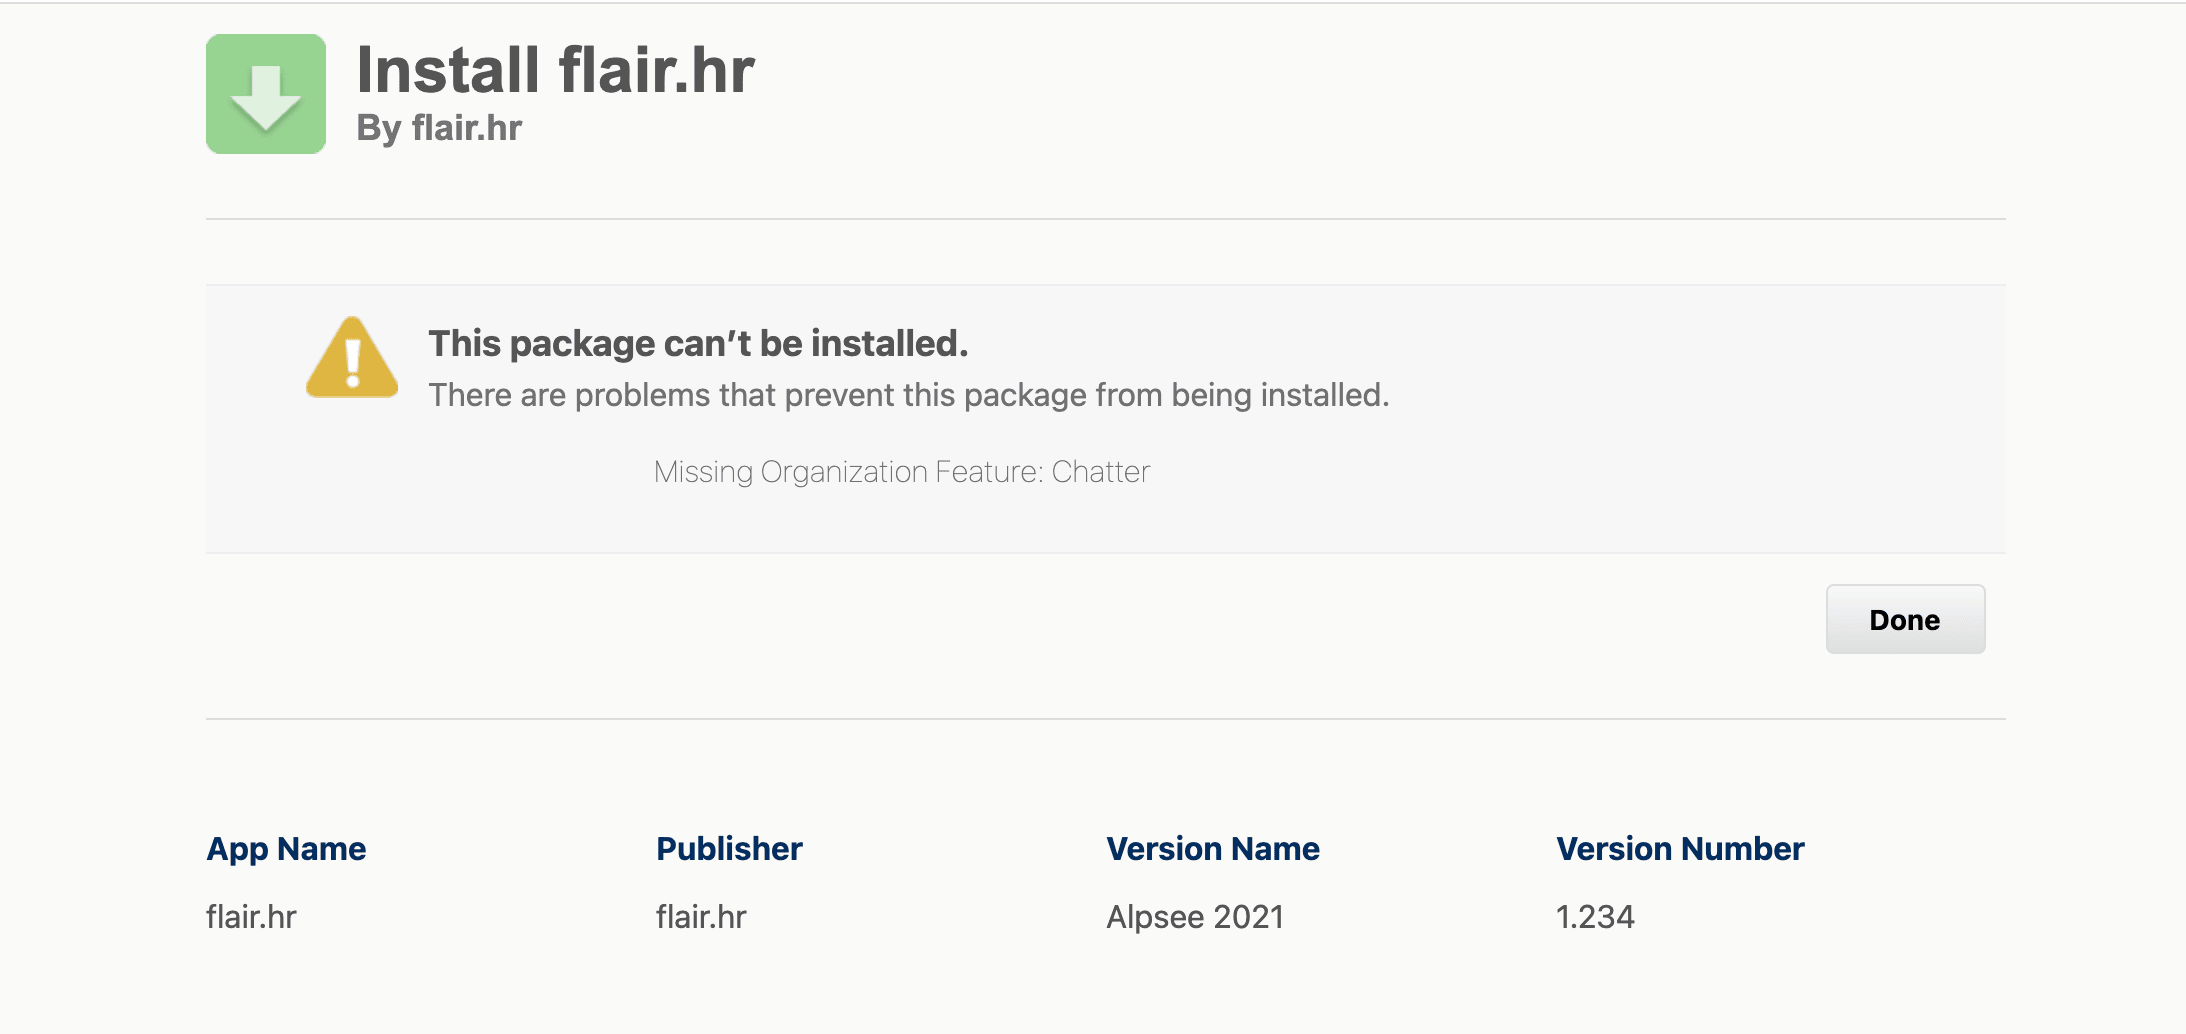
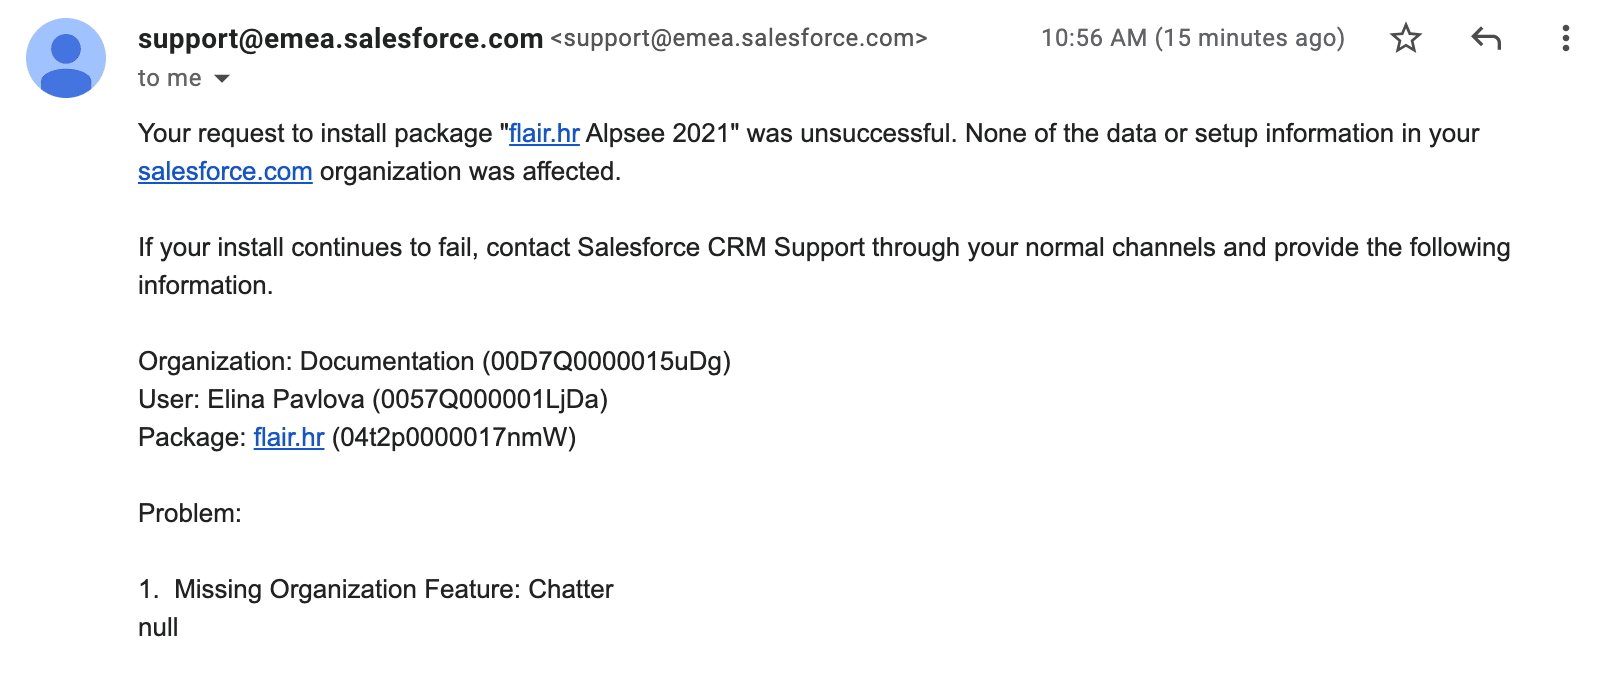
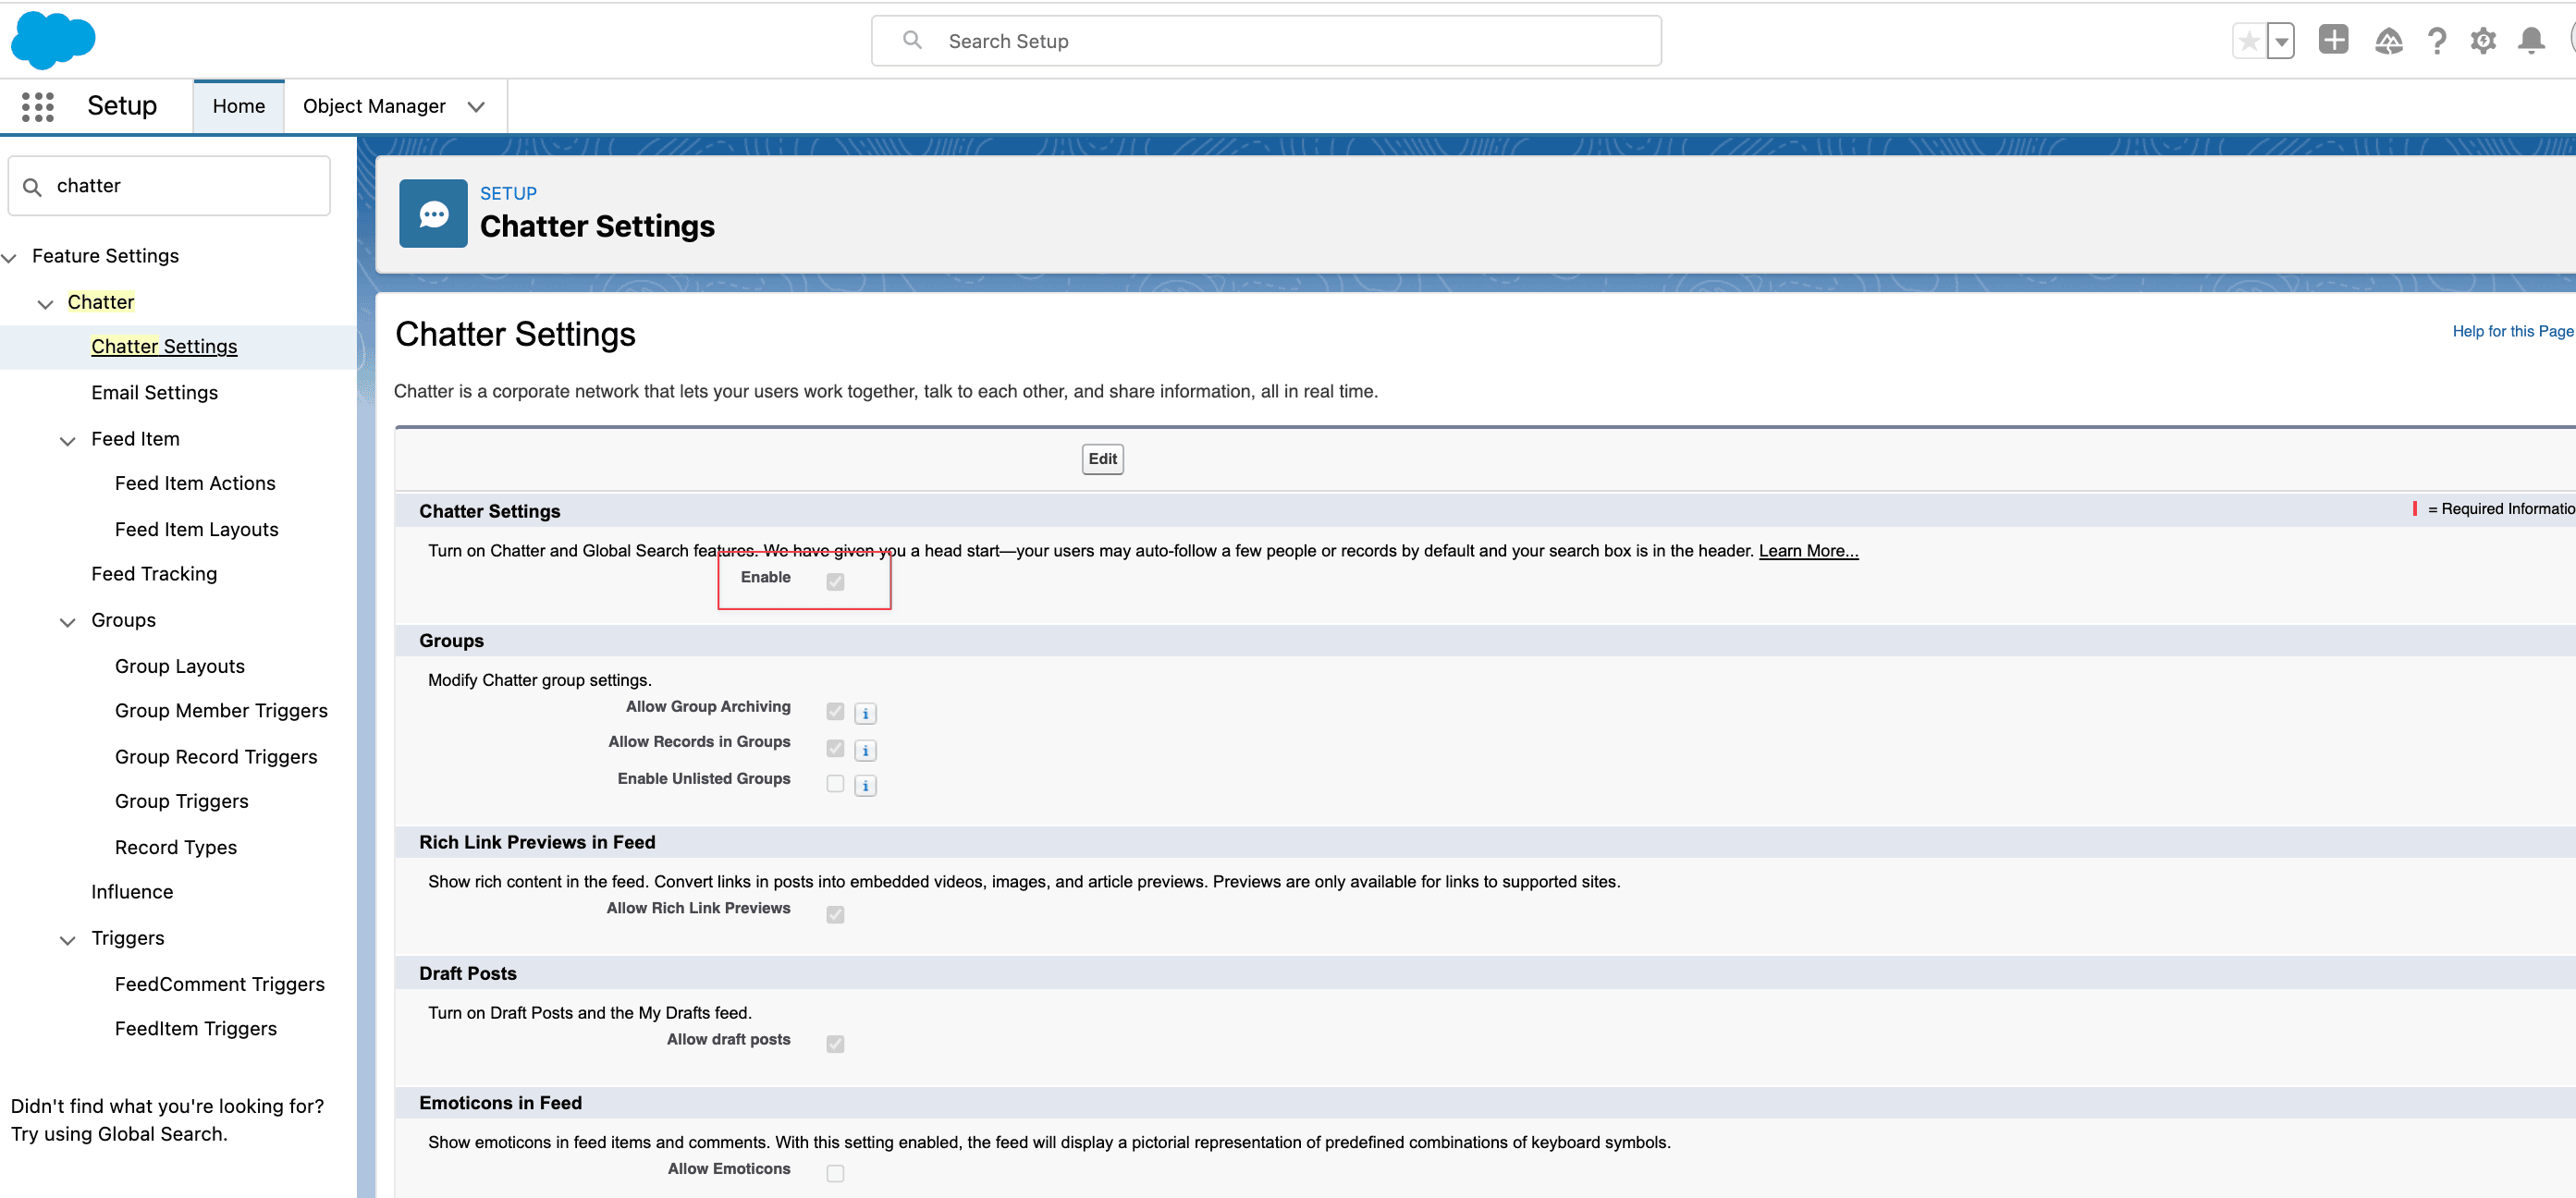
The installation can fail with Missing Organization Feature: Chatter null.
-
In Salesforce Setup, open Chatter Settings.
-
Select Enable.
-
Click Save.
-
Run the flair package installation again.
Installation fails on the Parent Target Field
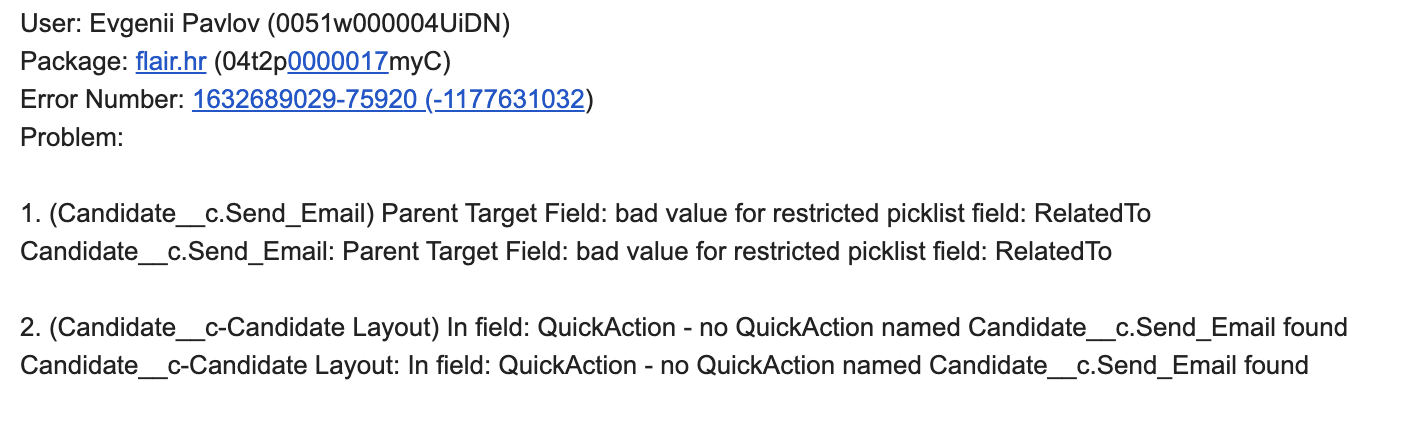
A bad value error for the Parent Target Field can occur when Salesforce email deliverability is set to System email only.
-
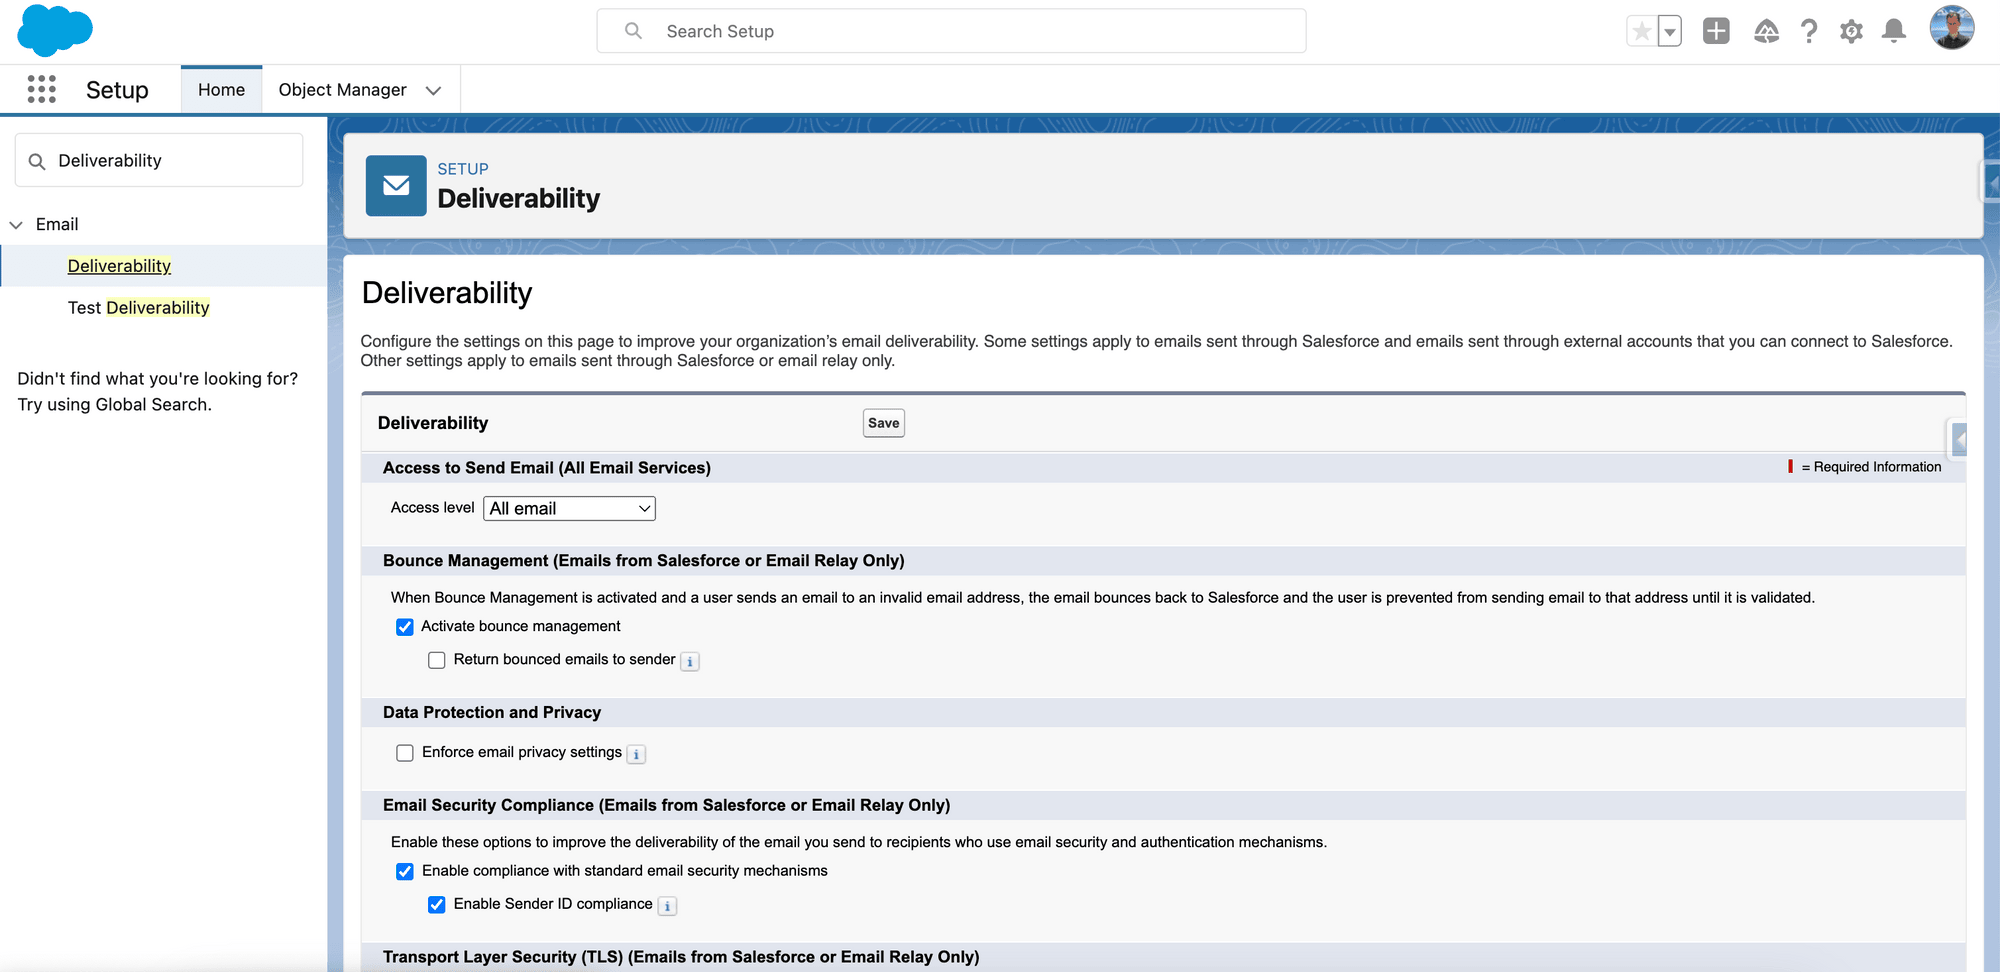
In Salesforce Setup, enter
Deliverabilityin Quick Find. -
Open Deliverability.
-
Set Access Level to All email.
-
Click Save.
-
In Salesforce Setup, enter
Enhanced Emailin Quick Find. -
Open Enhanced Email.
-
Click Enable. Enhanced Email does not resolve the installation error, but it is required to use the functionality after installation.