Configure advanced career portal settings
Configure the Salesforce-side labels, application fields, API connection, and error handling for an existing flair career portal.
Salesforce Admins and HR Admins in Salesforce.
Before you begin
- Create and design your career portal before configuring these advanced settings.
- Make sure you have access to Salesforce Setup for section labels and custom fields.
Rename job sections on the career page
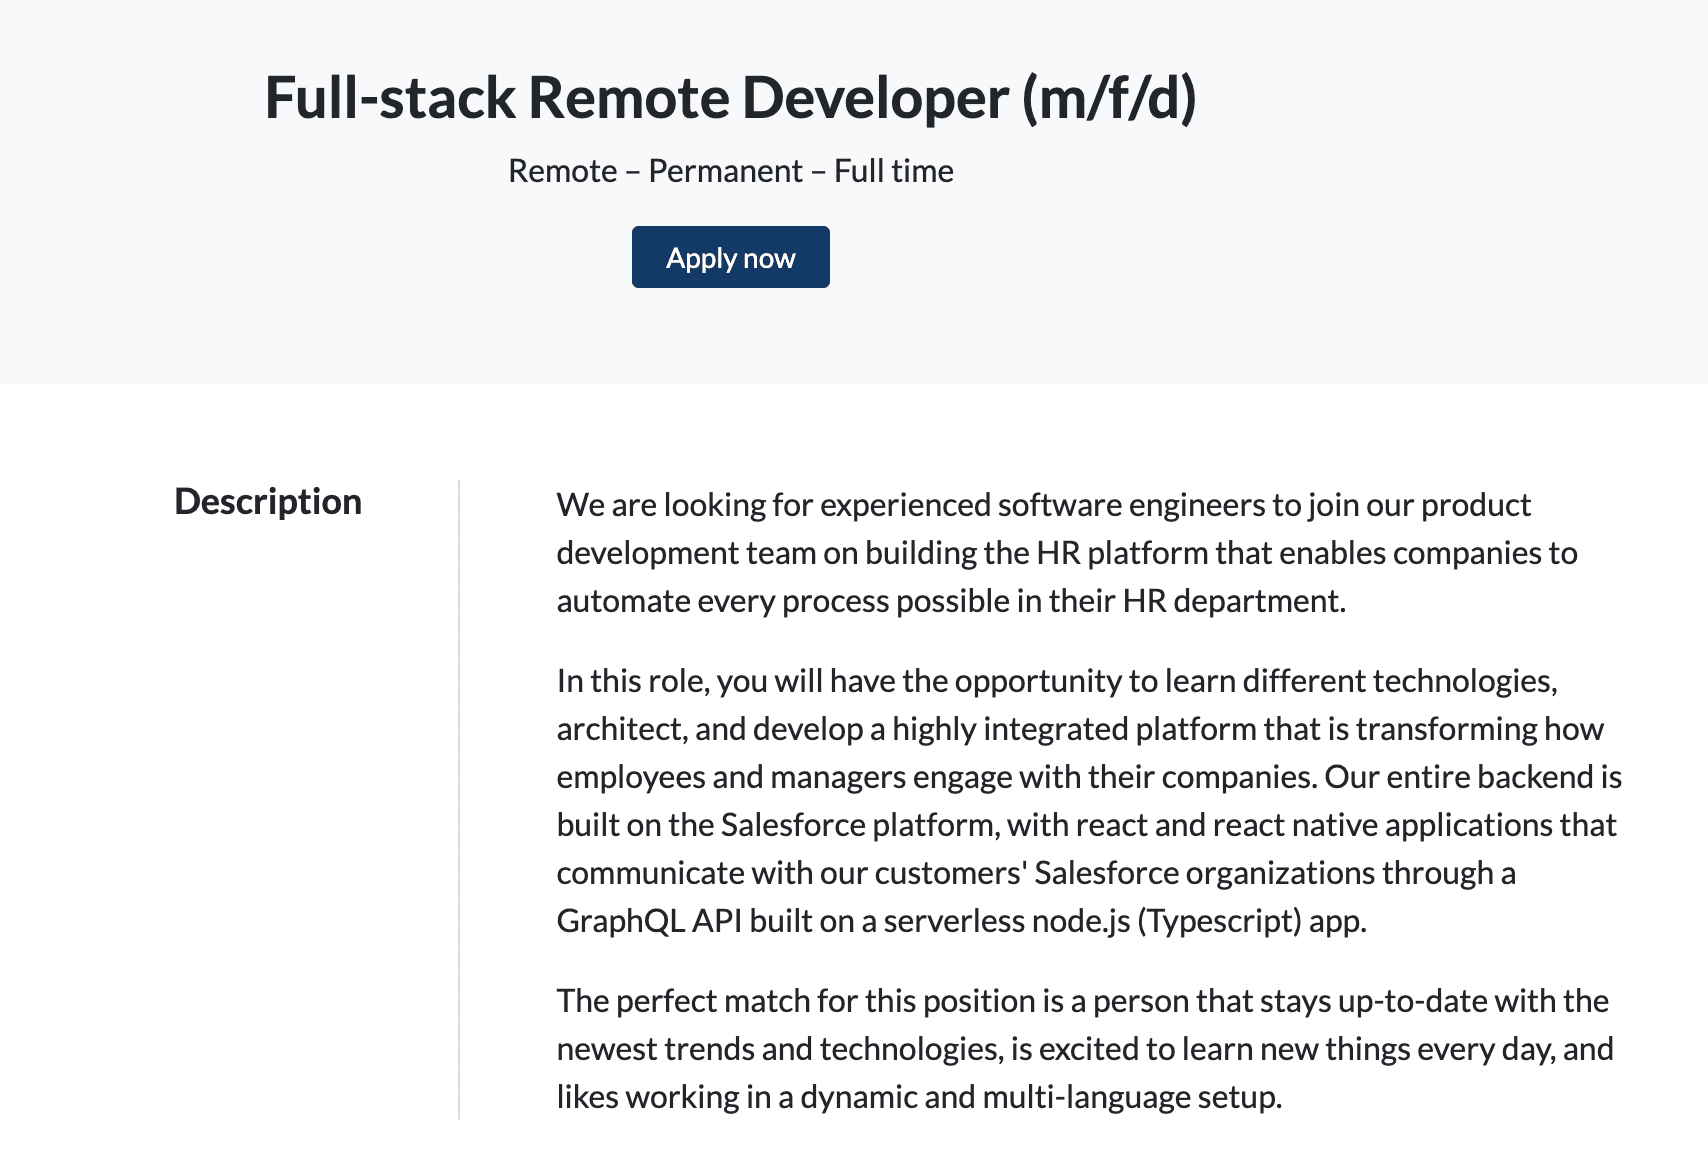
By default, each job has Job Description, Responsibilities, Requirements, and Benefits sections. Use field label overrides to match these headings to your brand language.
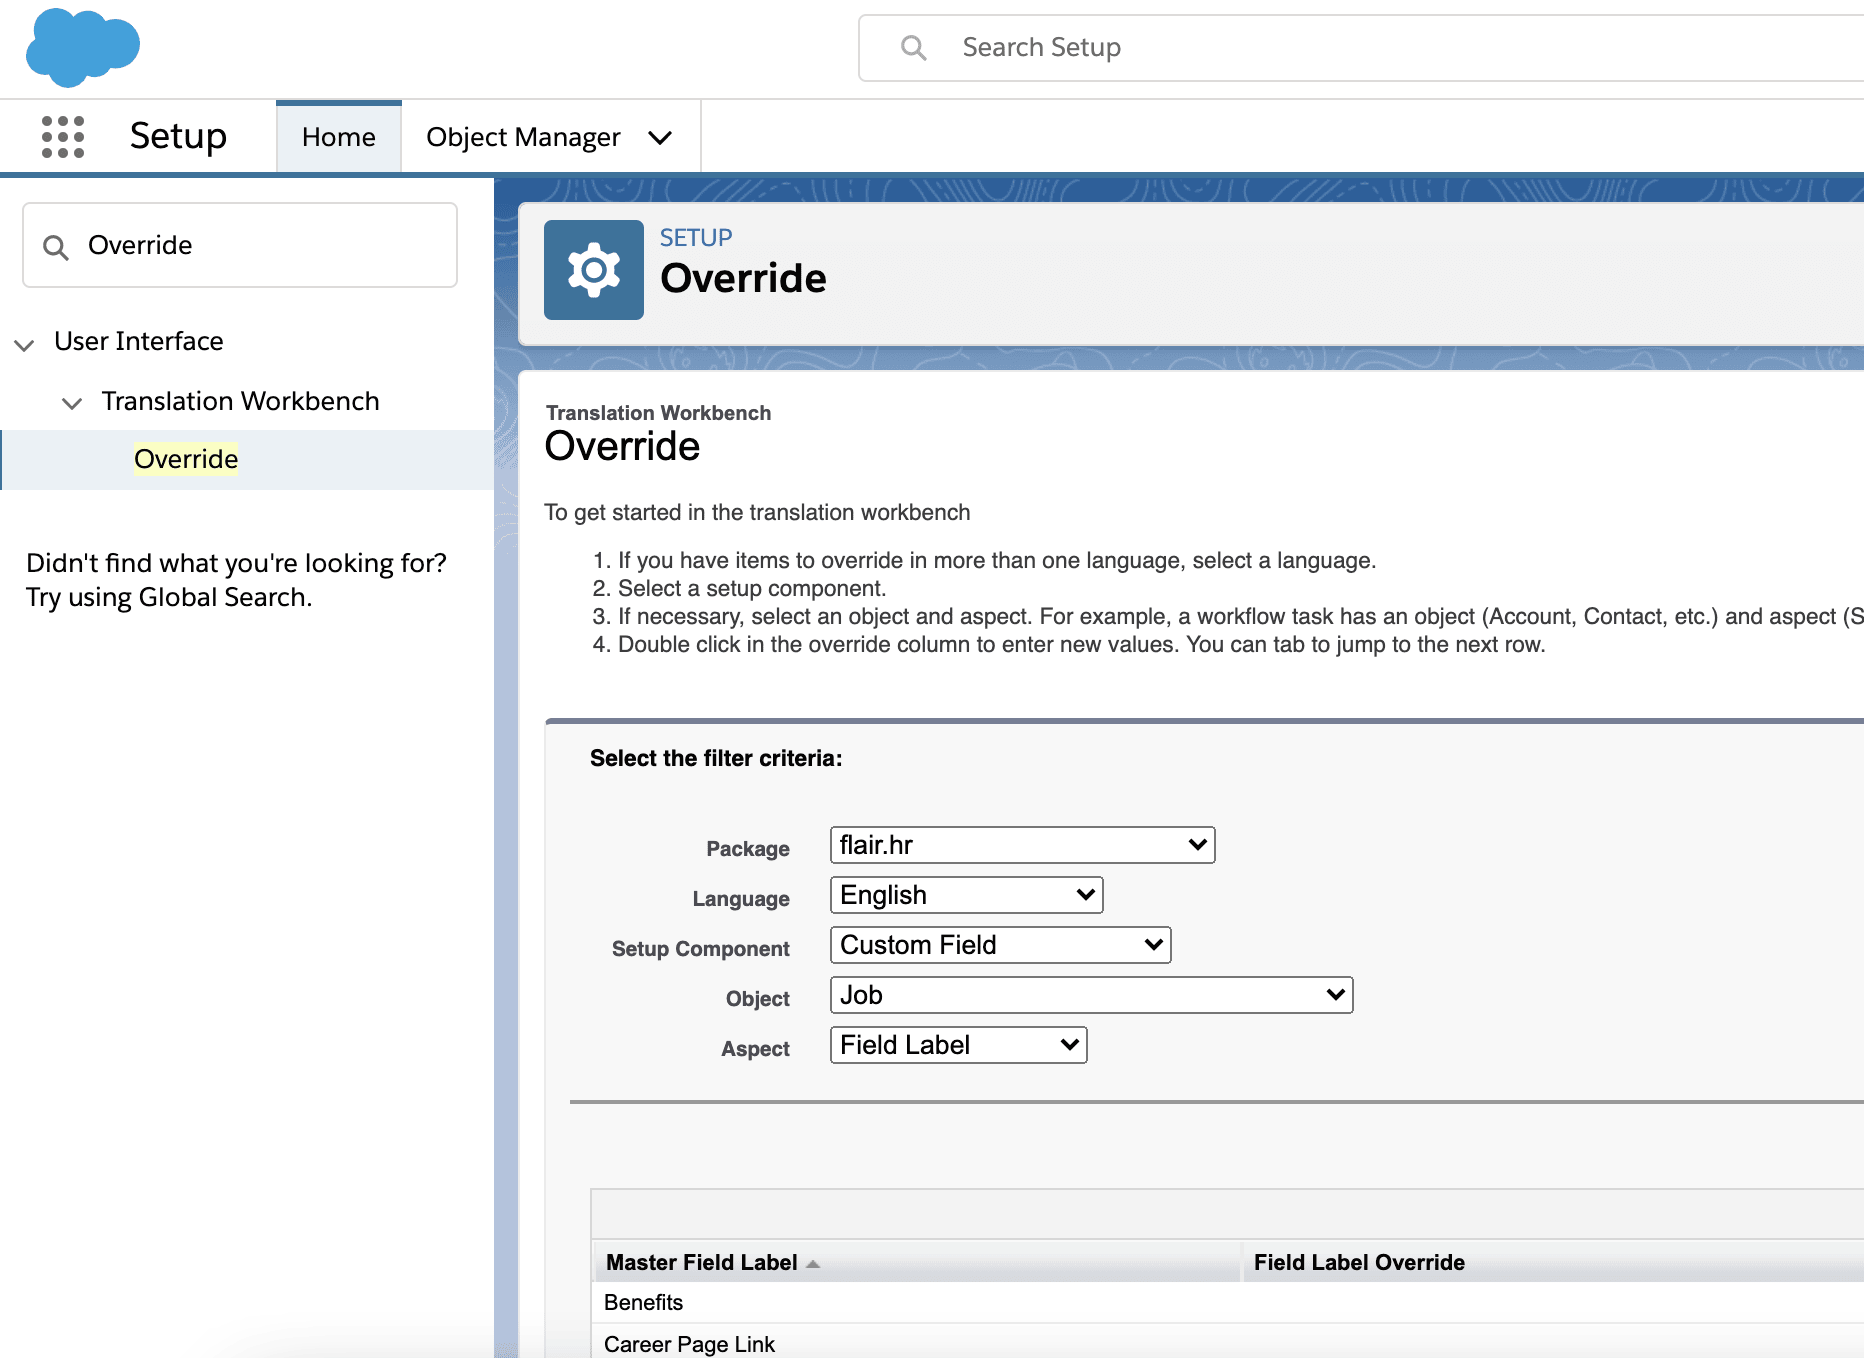
- In Salesforce Setup, enter
Overridein Quick Find. - Select the flair.hr package.
- Select the language of the career page you want to edit.
- Set Setup Component to Custom Field.
- Set Object to Job.
- Set Aspect to Field Label.
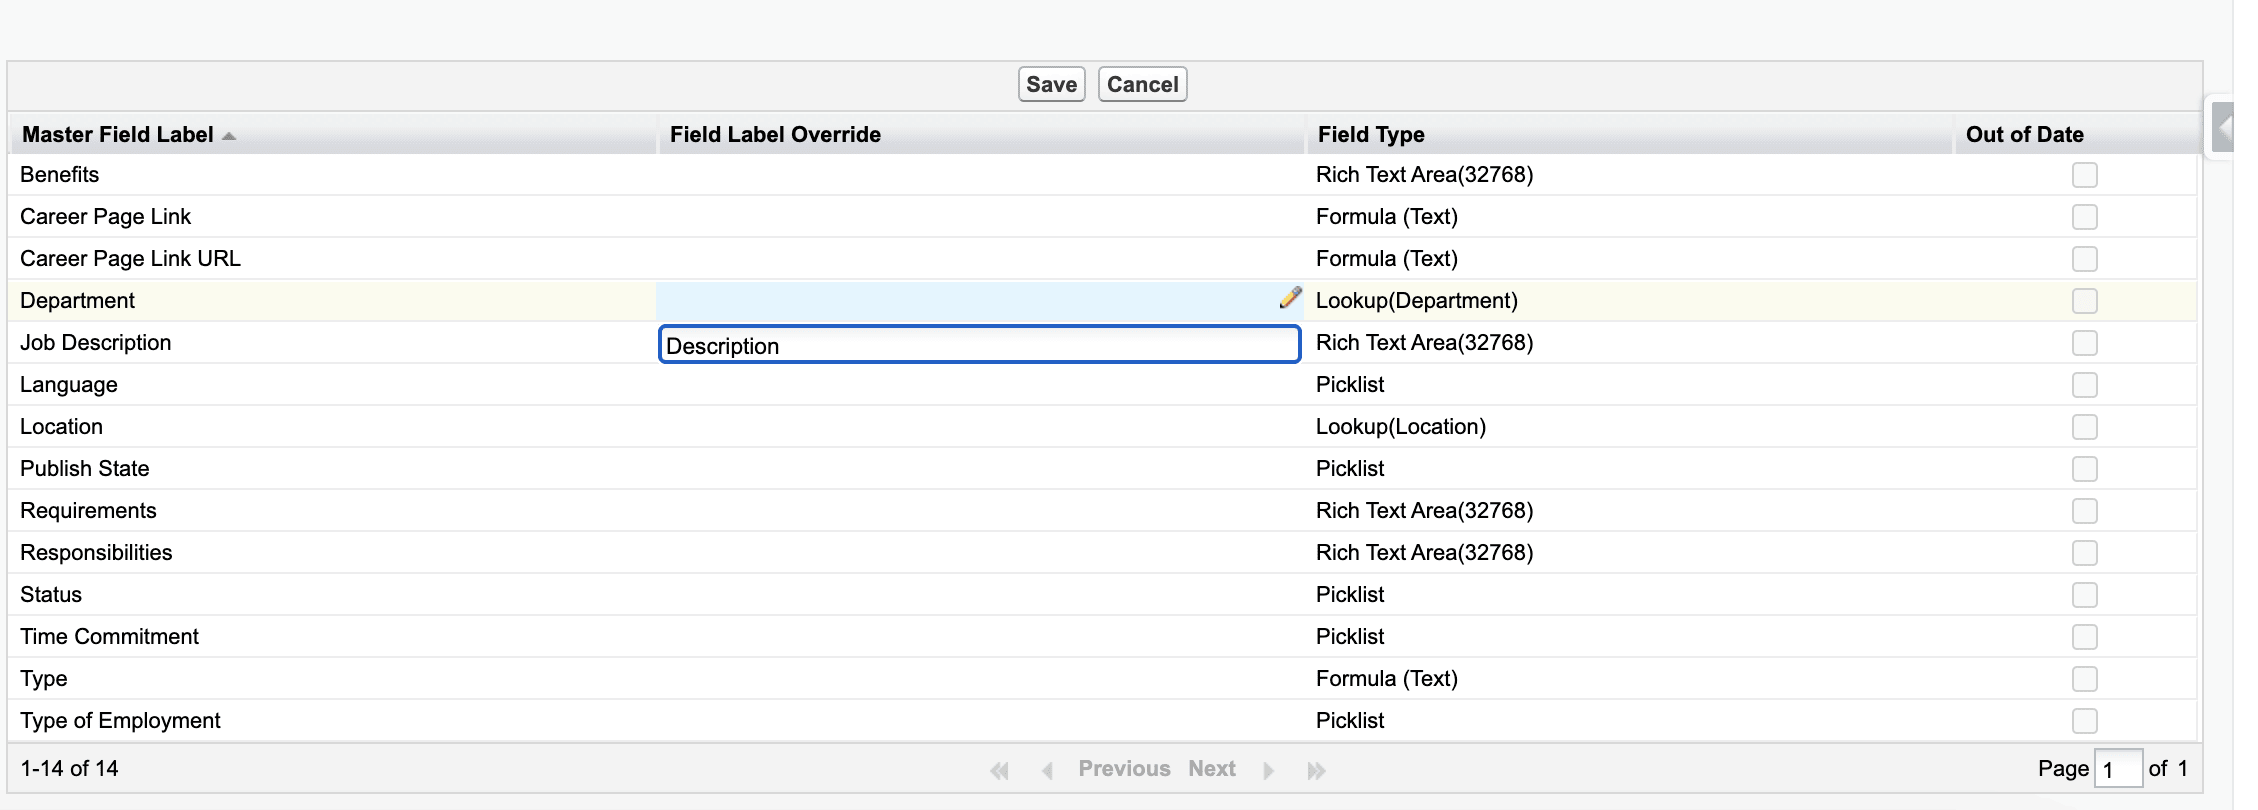
- Under Master Field Label, find the job section you want to rename.
- Enter the new heading in the corresponding Field Label Override field.
- Click Save. The new heading appears on the career page.
Hide a career portal from search engines
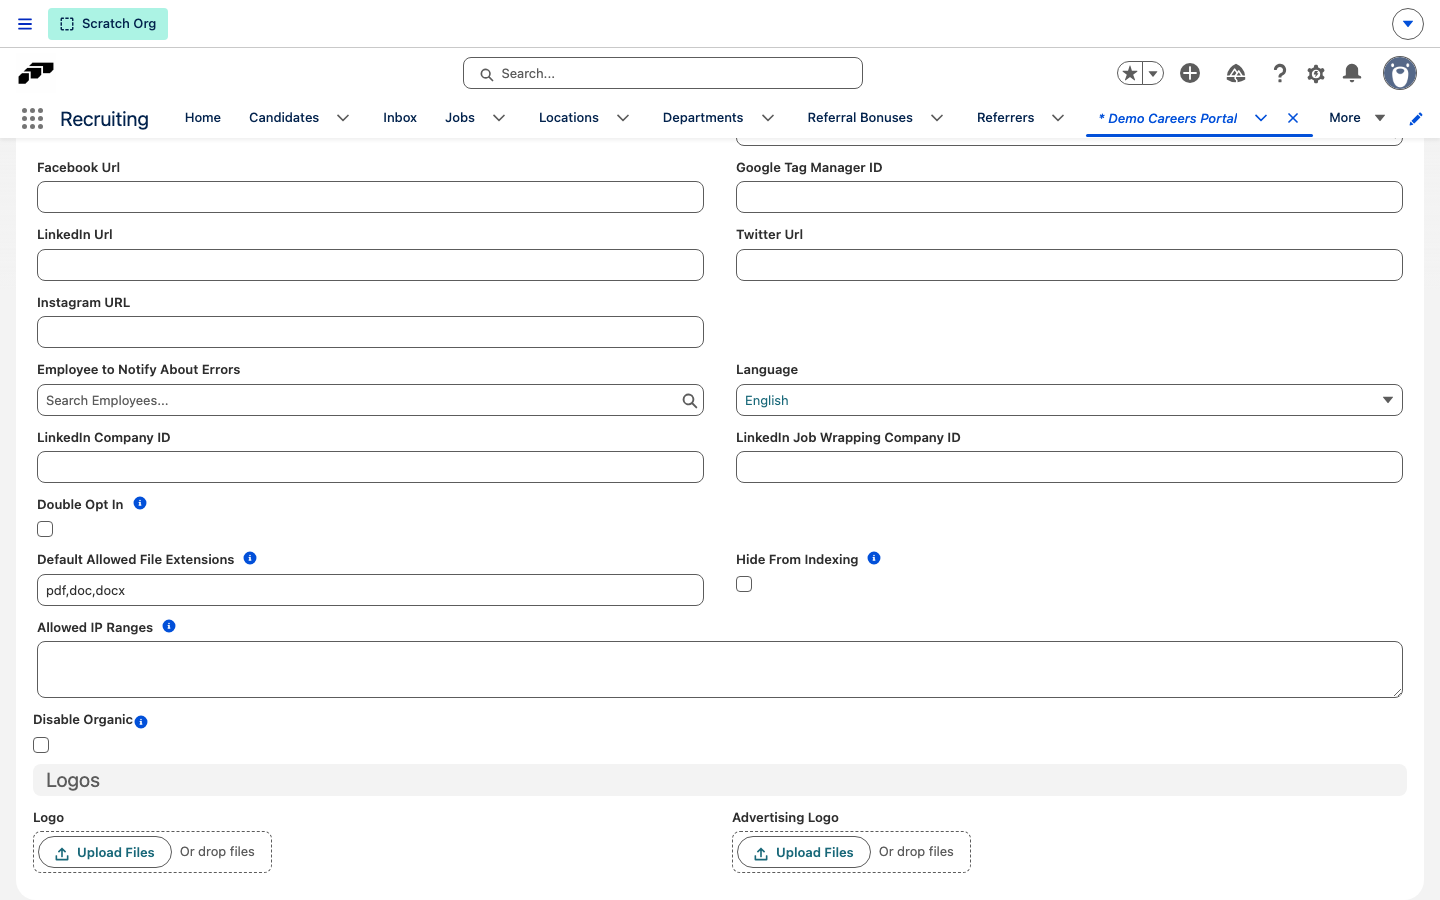
flair serves matching robots.txt and agents.txt files for each career portal. Enable Hide From Indexing on the portal to have both files disallow crawling for that portal's pages.
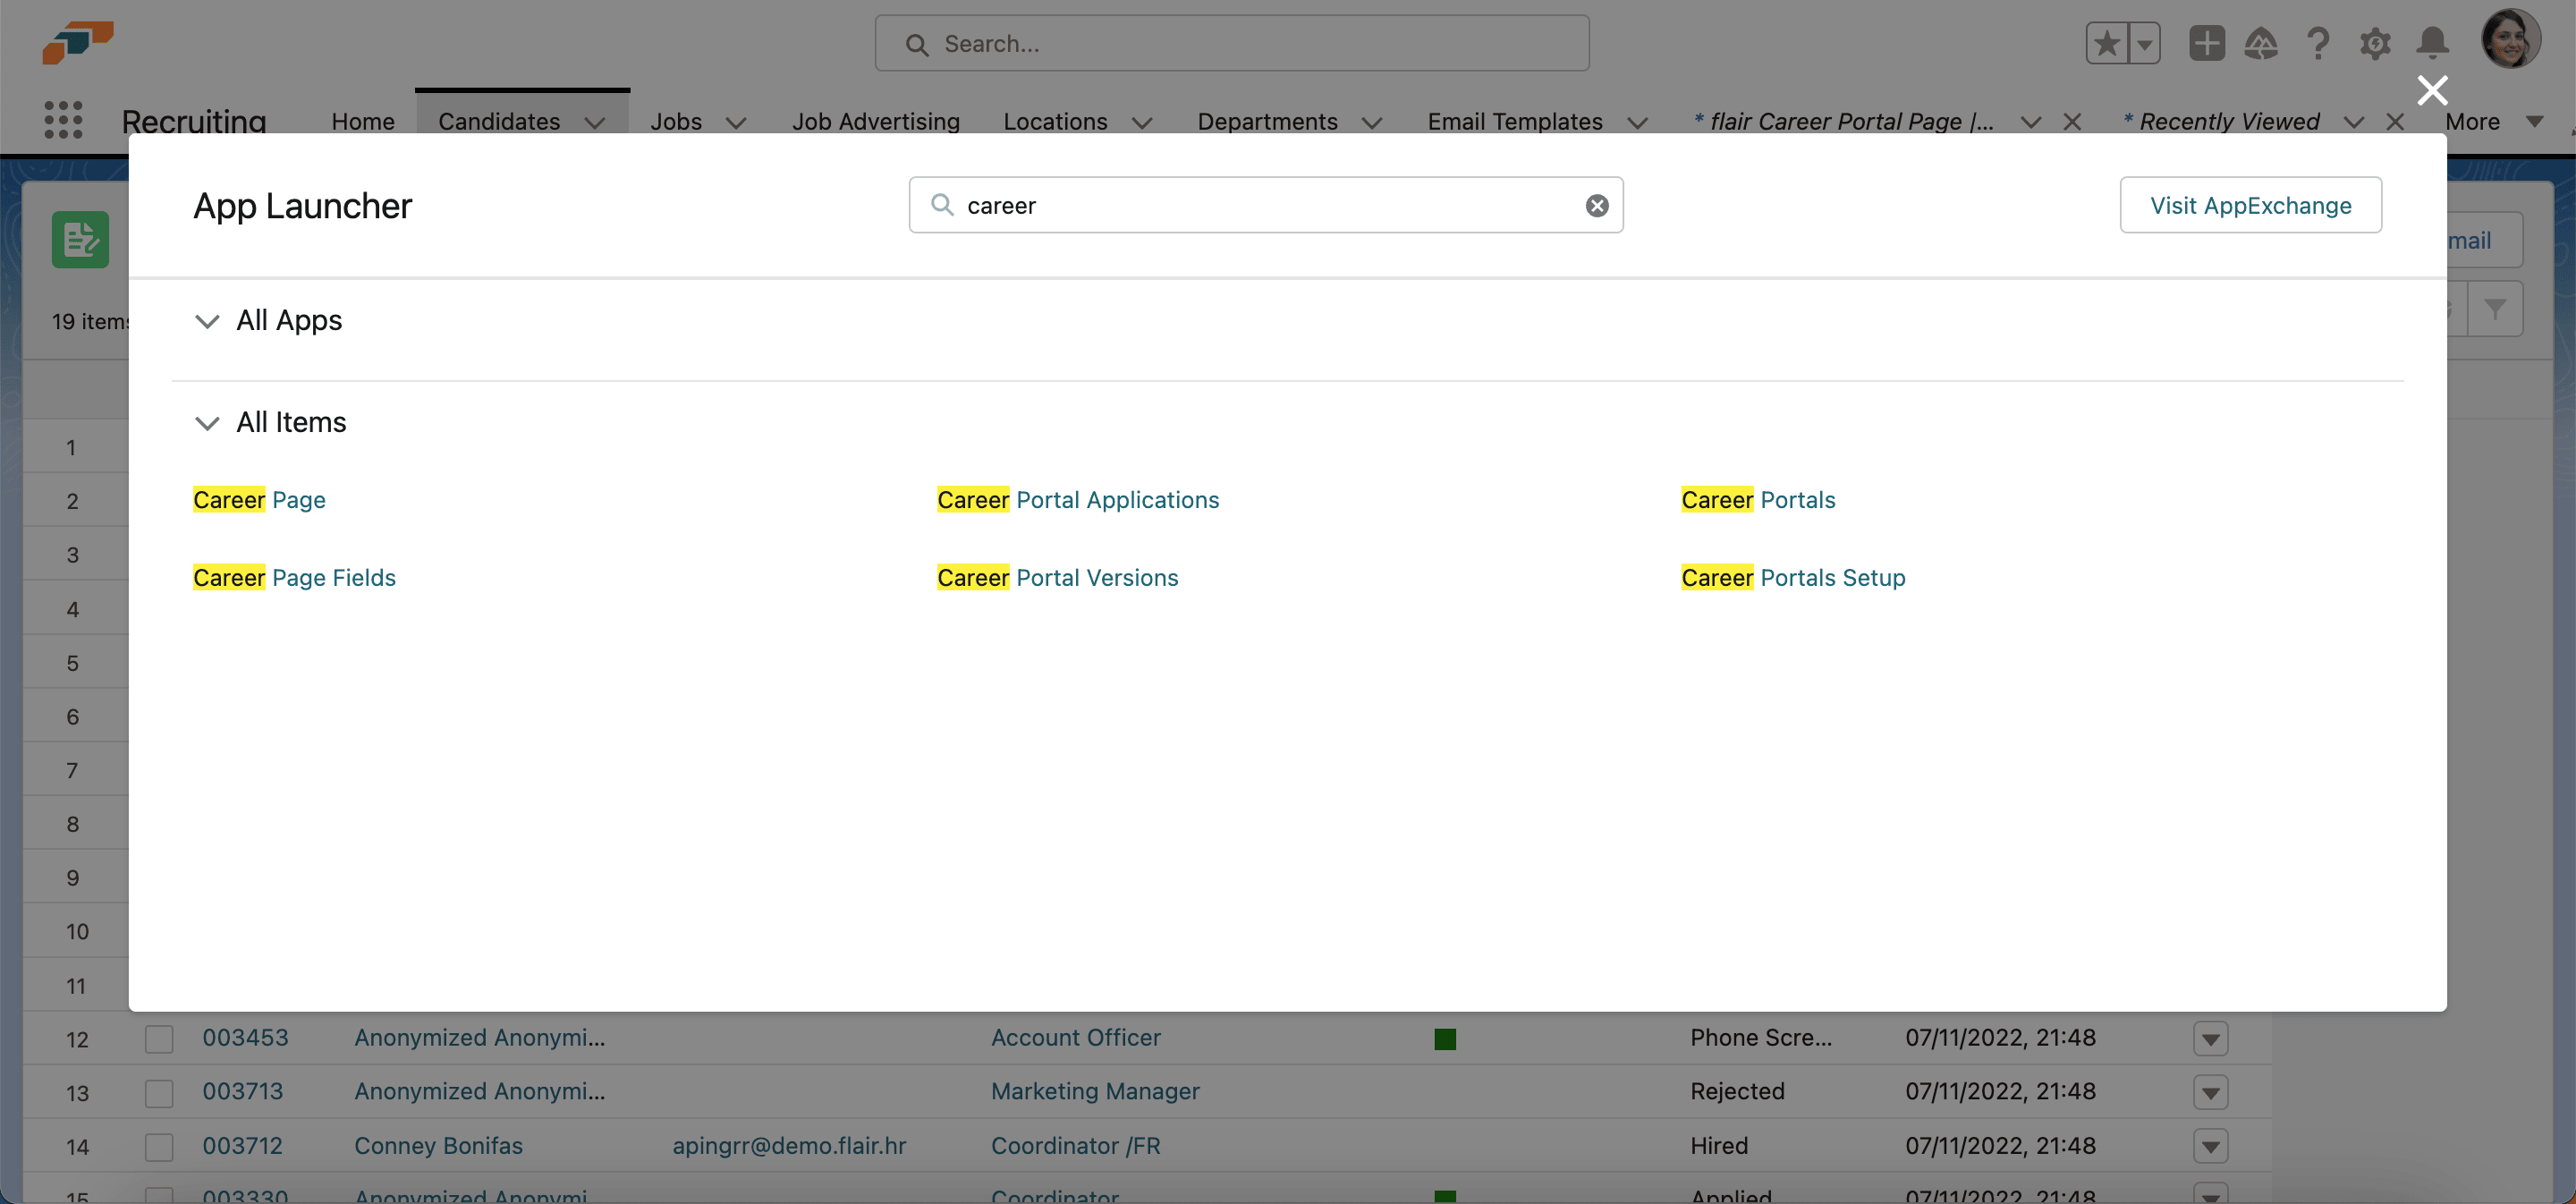
- From the App Launcher (⋮⋮ grid icon), search for
career. - Open Career Portals and select the portal.
- Under Settings, select Hide From Indexing.
- Click Save. The portal's
robots.txtandagents.txtnow returnDisallow: /for all crawlers, including AI agents; clear the checkbox to return toAllow: /.
Disallow is a request that future crawls honor. It does not remove pages a search engine already indexed, and flair caches robots.txt and agents.txt for up to an hour, so the change is not immediate.
Add custom fields and picklists
Create a field on the Candidate object when the standard career portal fields don't collect the information you need. This example creates a picklist.
Define the field
- In the flair Recruiting app, open Candidates.
- From the setup cog menu, select Edit Object.
- In the Salesforce Object Manager, open Fields & Relationships.
- Click New.
- Select the field type.
- Click Next.
- Enter a value in Field Name.
- For a picklist, select Enter values, with each value separated by a new line.
- Enter each option on a separate line.
Set access and add the field to jobs
- Click Next.
- Select the user profiles that can edit the field.
- Click Next.
- Select the page layouts that include the field.
- Click Save. The field appears under Career Page Fields next to Additional Information.
- Set the field to Mandatory or Optional for new jobs.
- To add the field to an existing published job, unpublish that job.
- Republish the job. The custom field appears on its application form.
Connect your website with the Recruiting API
Update the authorization and endpoint when connecting your website to a flair career portal through the Recruiting API.
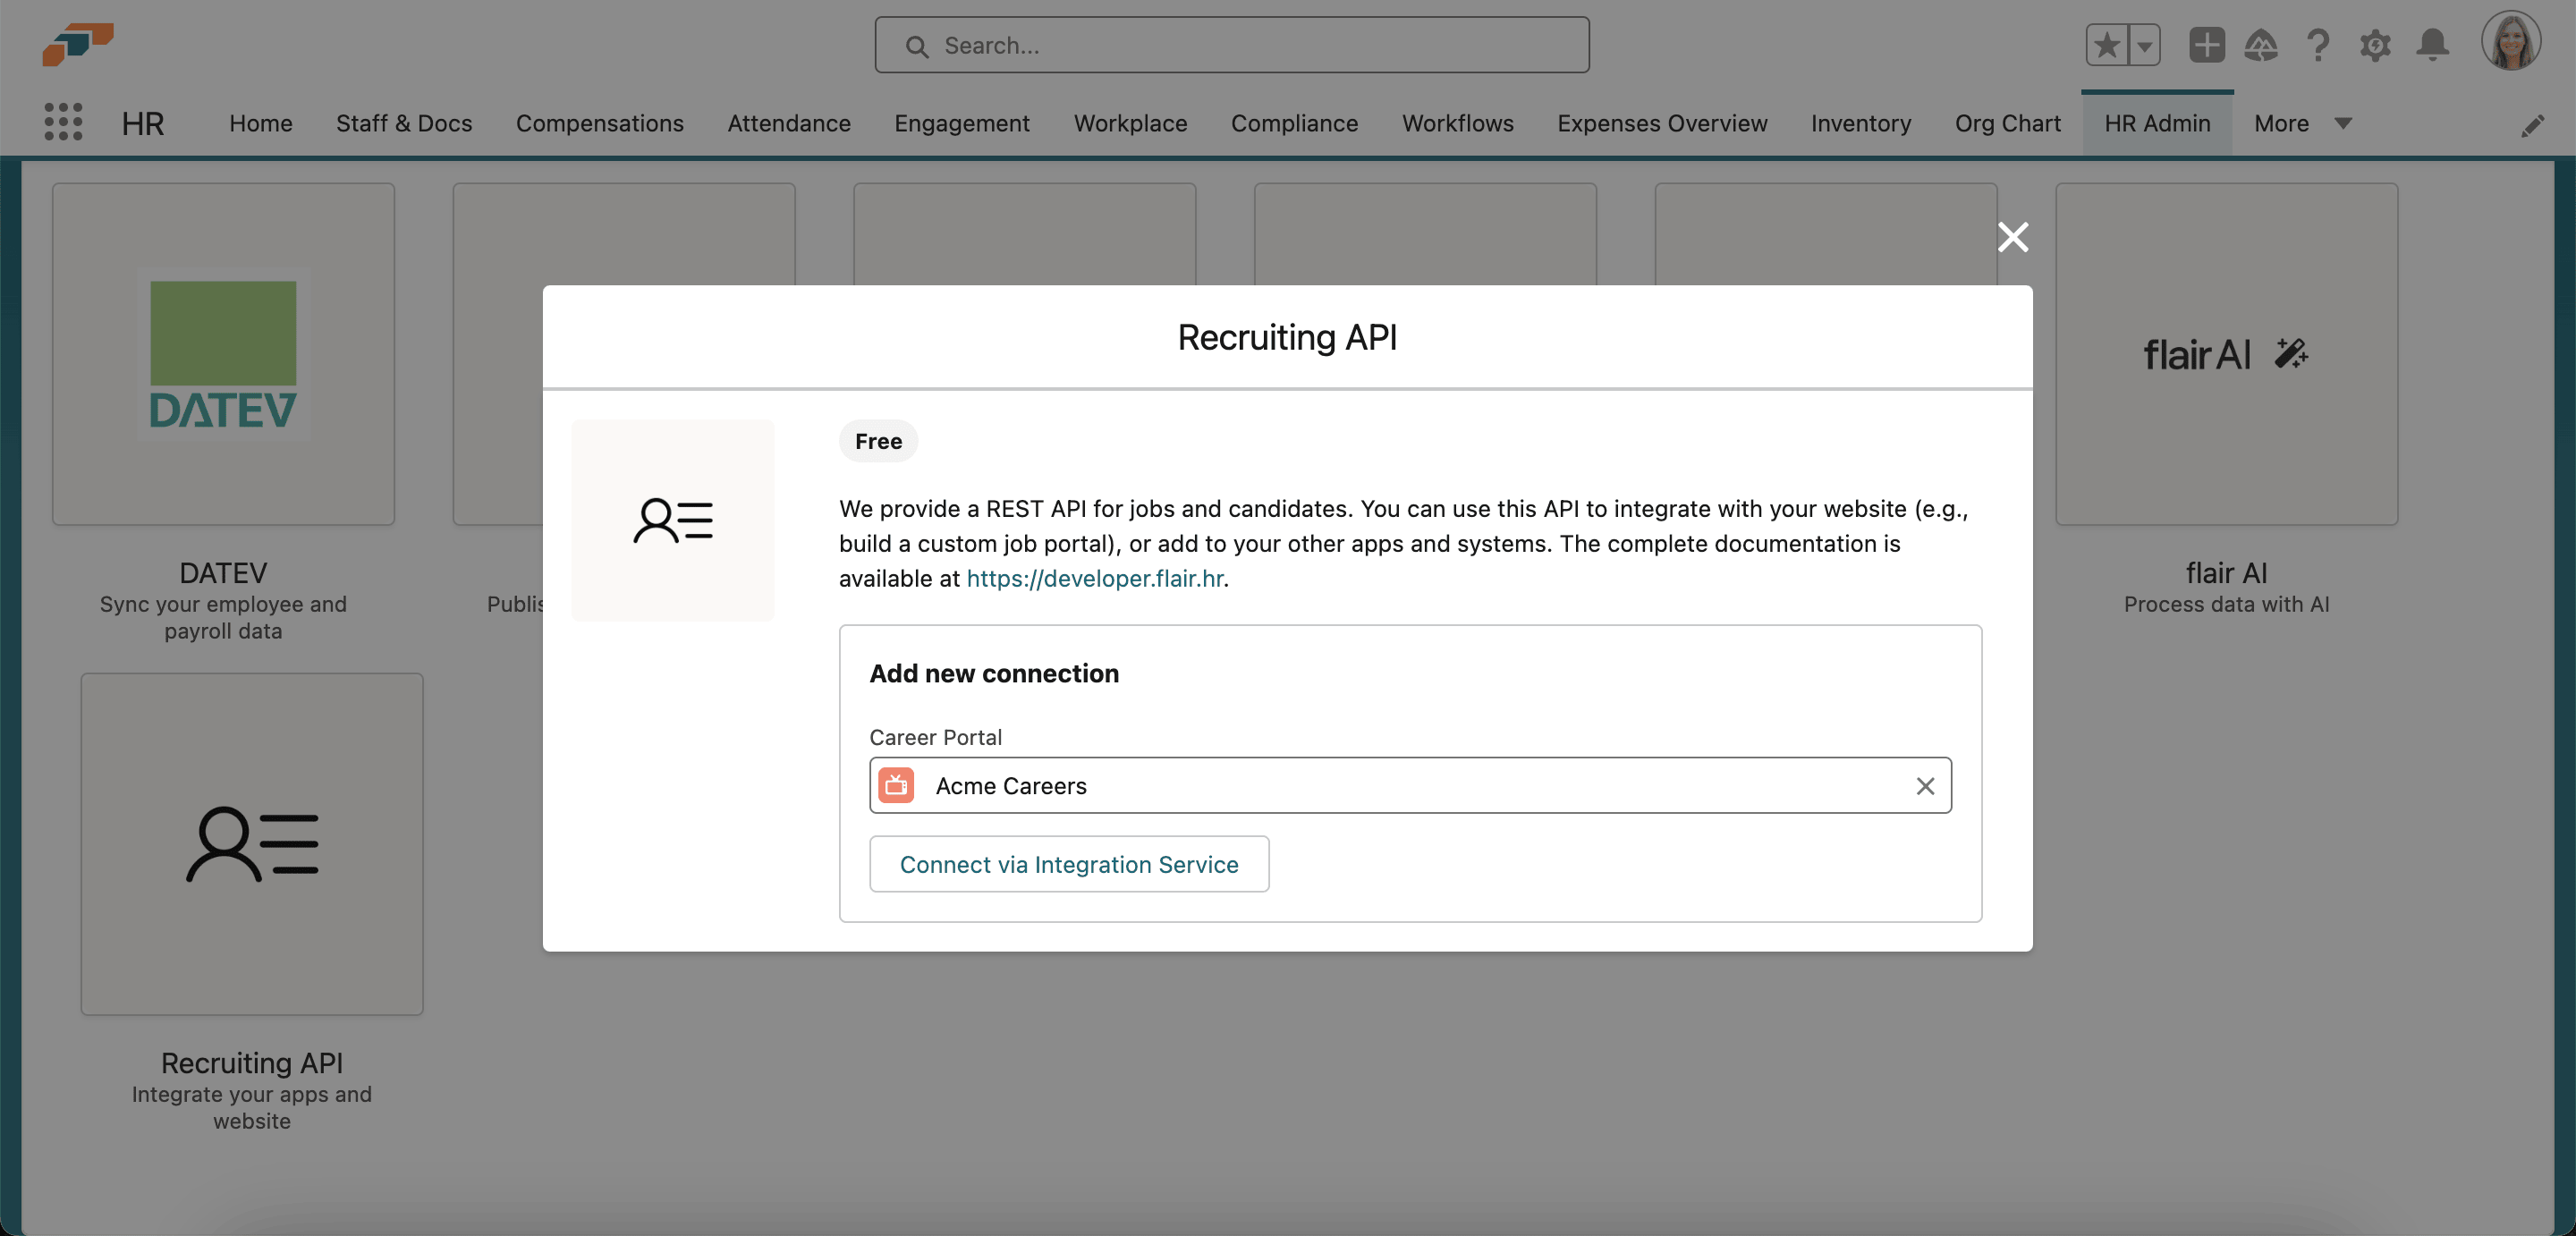
- In the flair HR app, open HR Admin.
- Open the Integrations tab.
- Select Recruiting API.
- Optional: Select the career portal you want to connect. Leave the field empty to link all jobs.
- Click Connect via Integration Service.
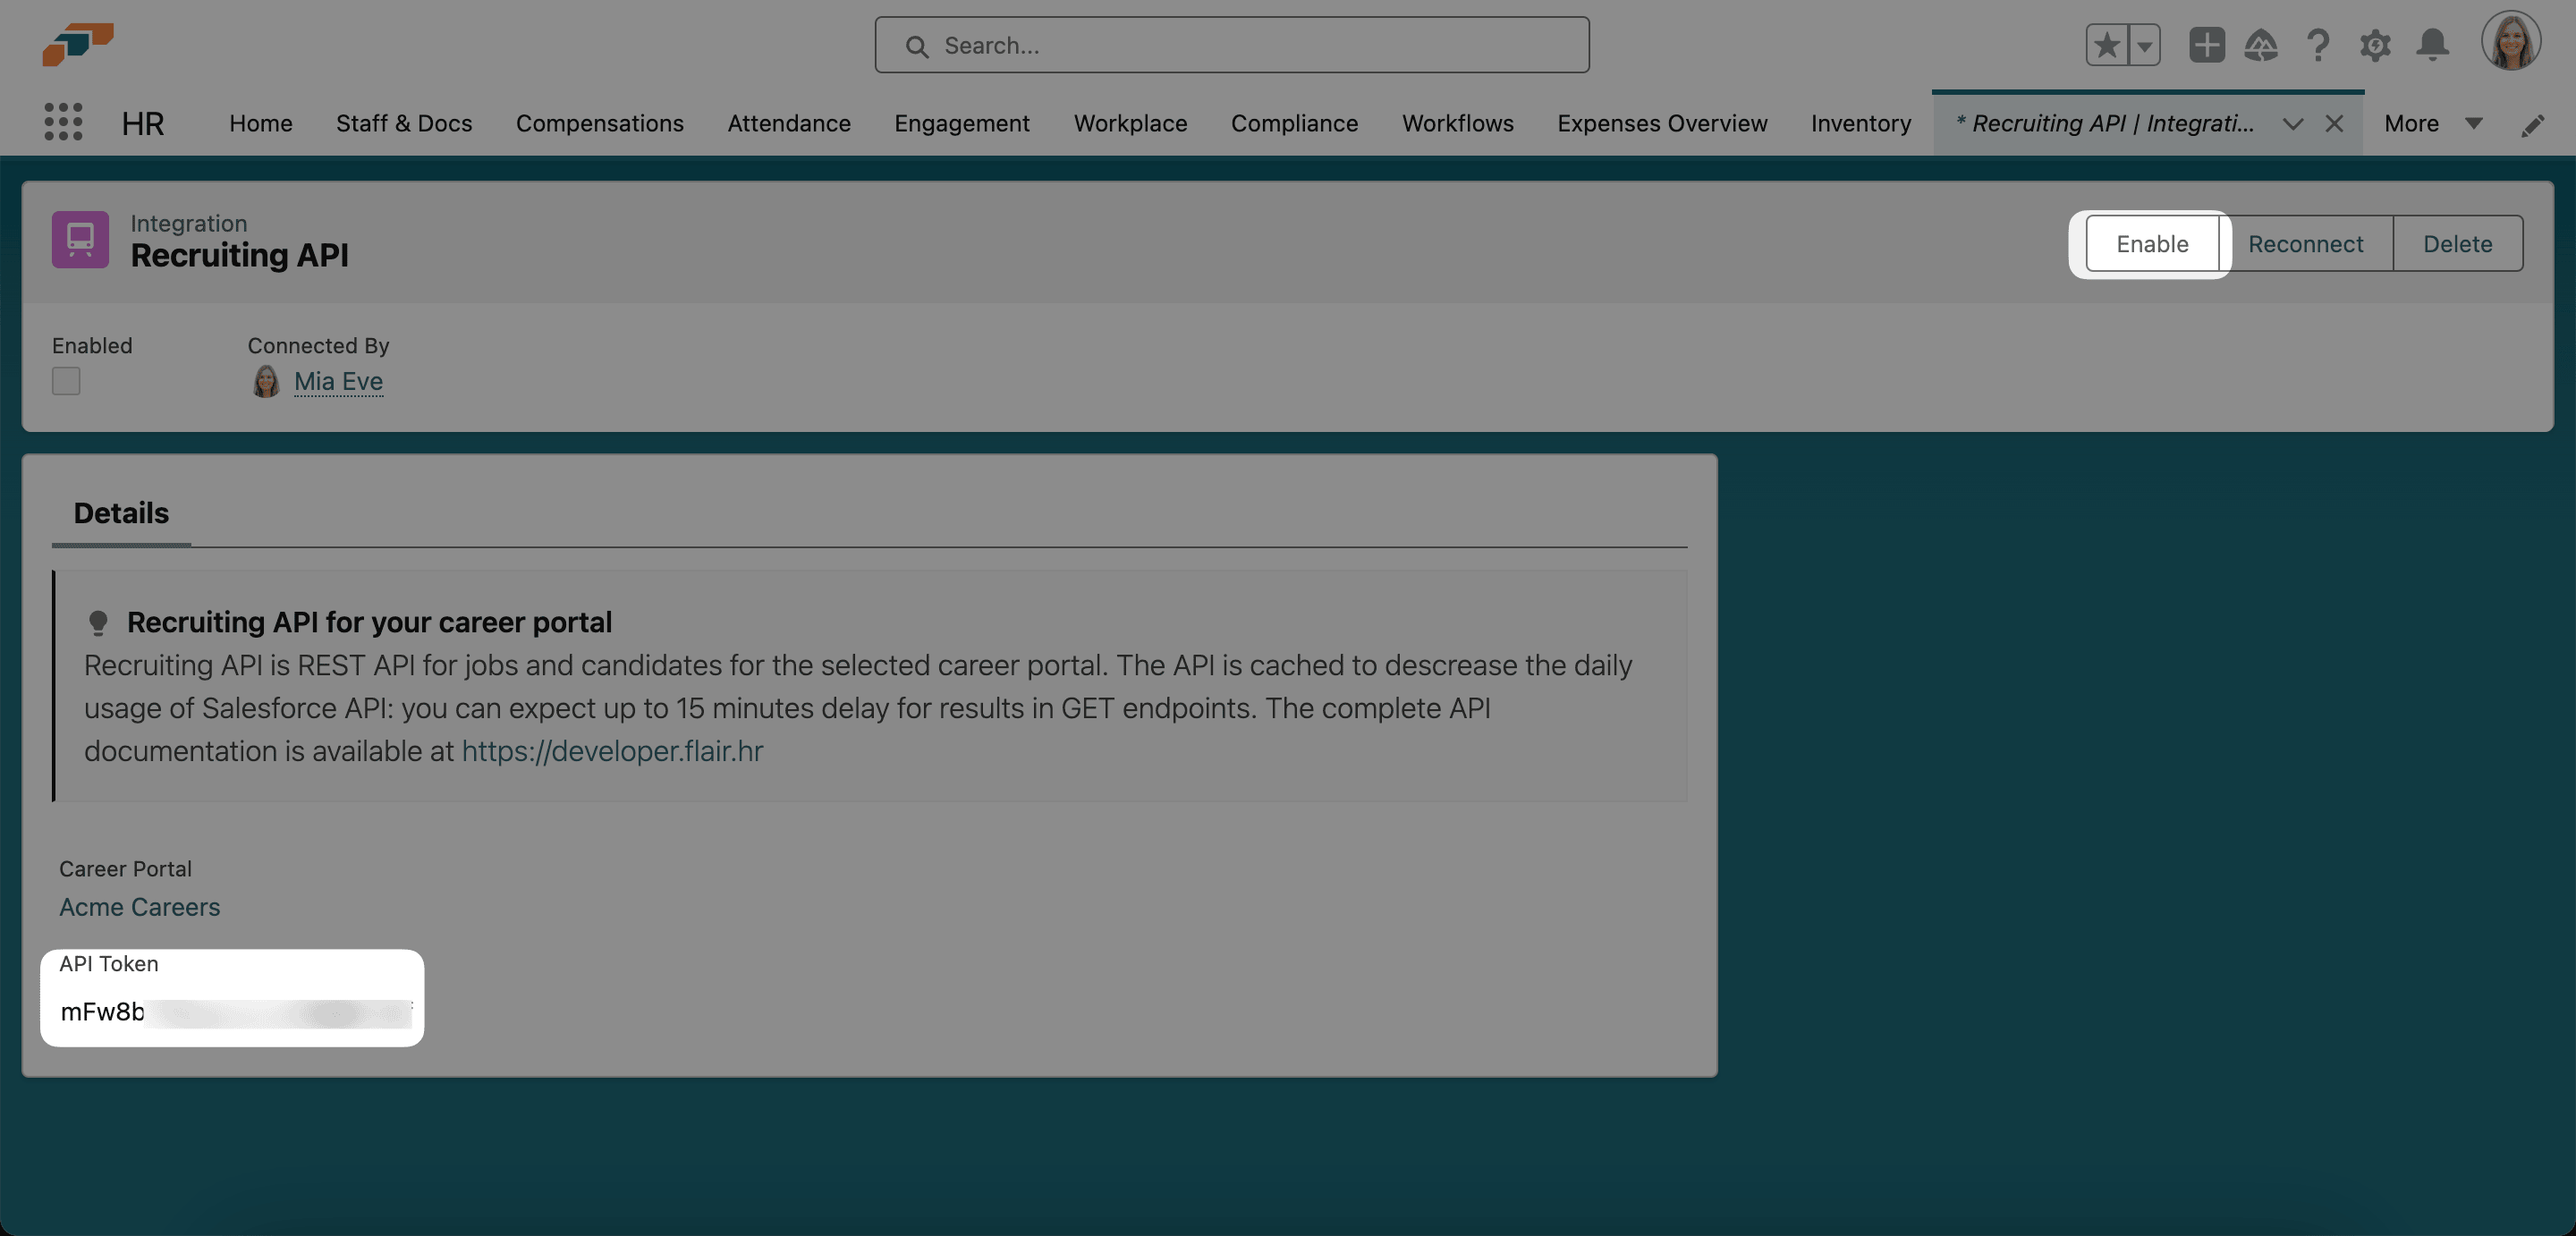
- On the Recruiting API page, click Enable.
- Copy the API Token.
- In your website backend, change the endpoint from
https://jobs-api.flair.hr/v1/tohttps://api.flair.hr/recruiting. - Use the copied API token for authorization.
For endpoint details, see Get all open positions.
Troubleshooting
Error notifications go to the wrong person
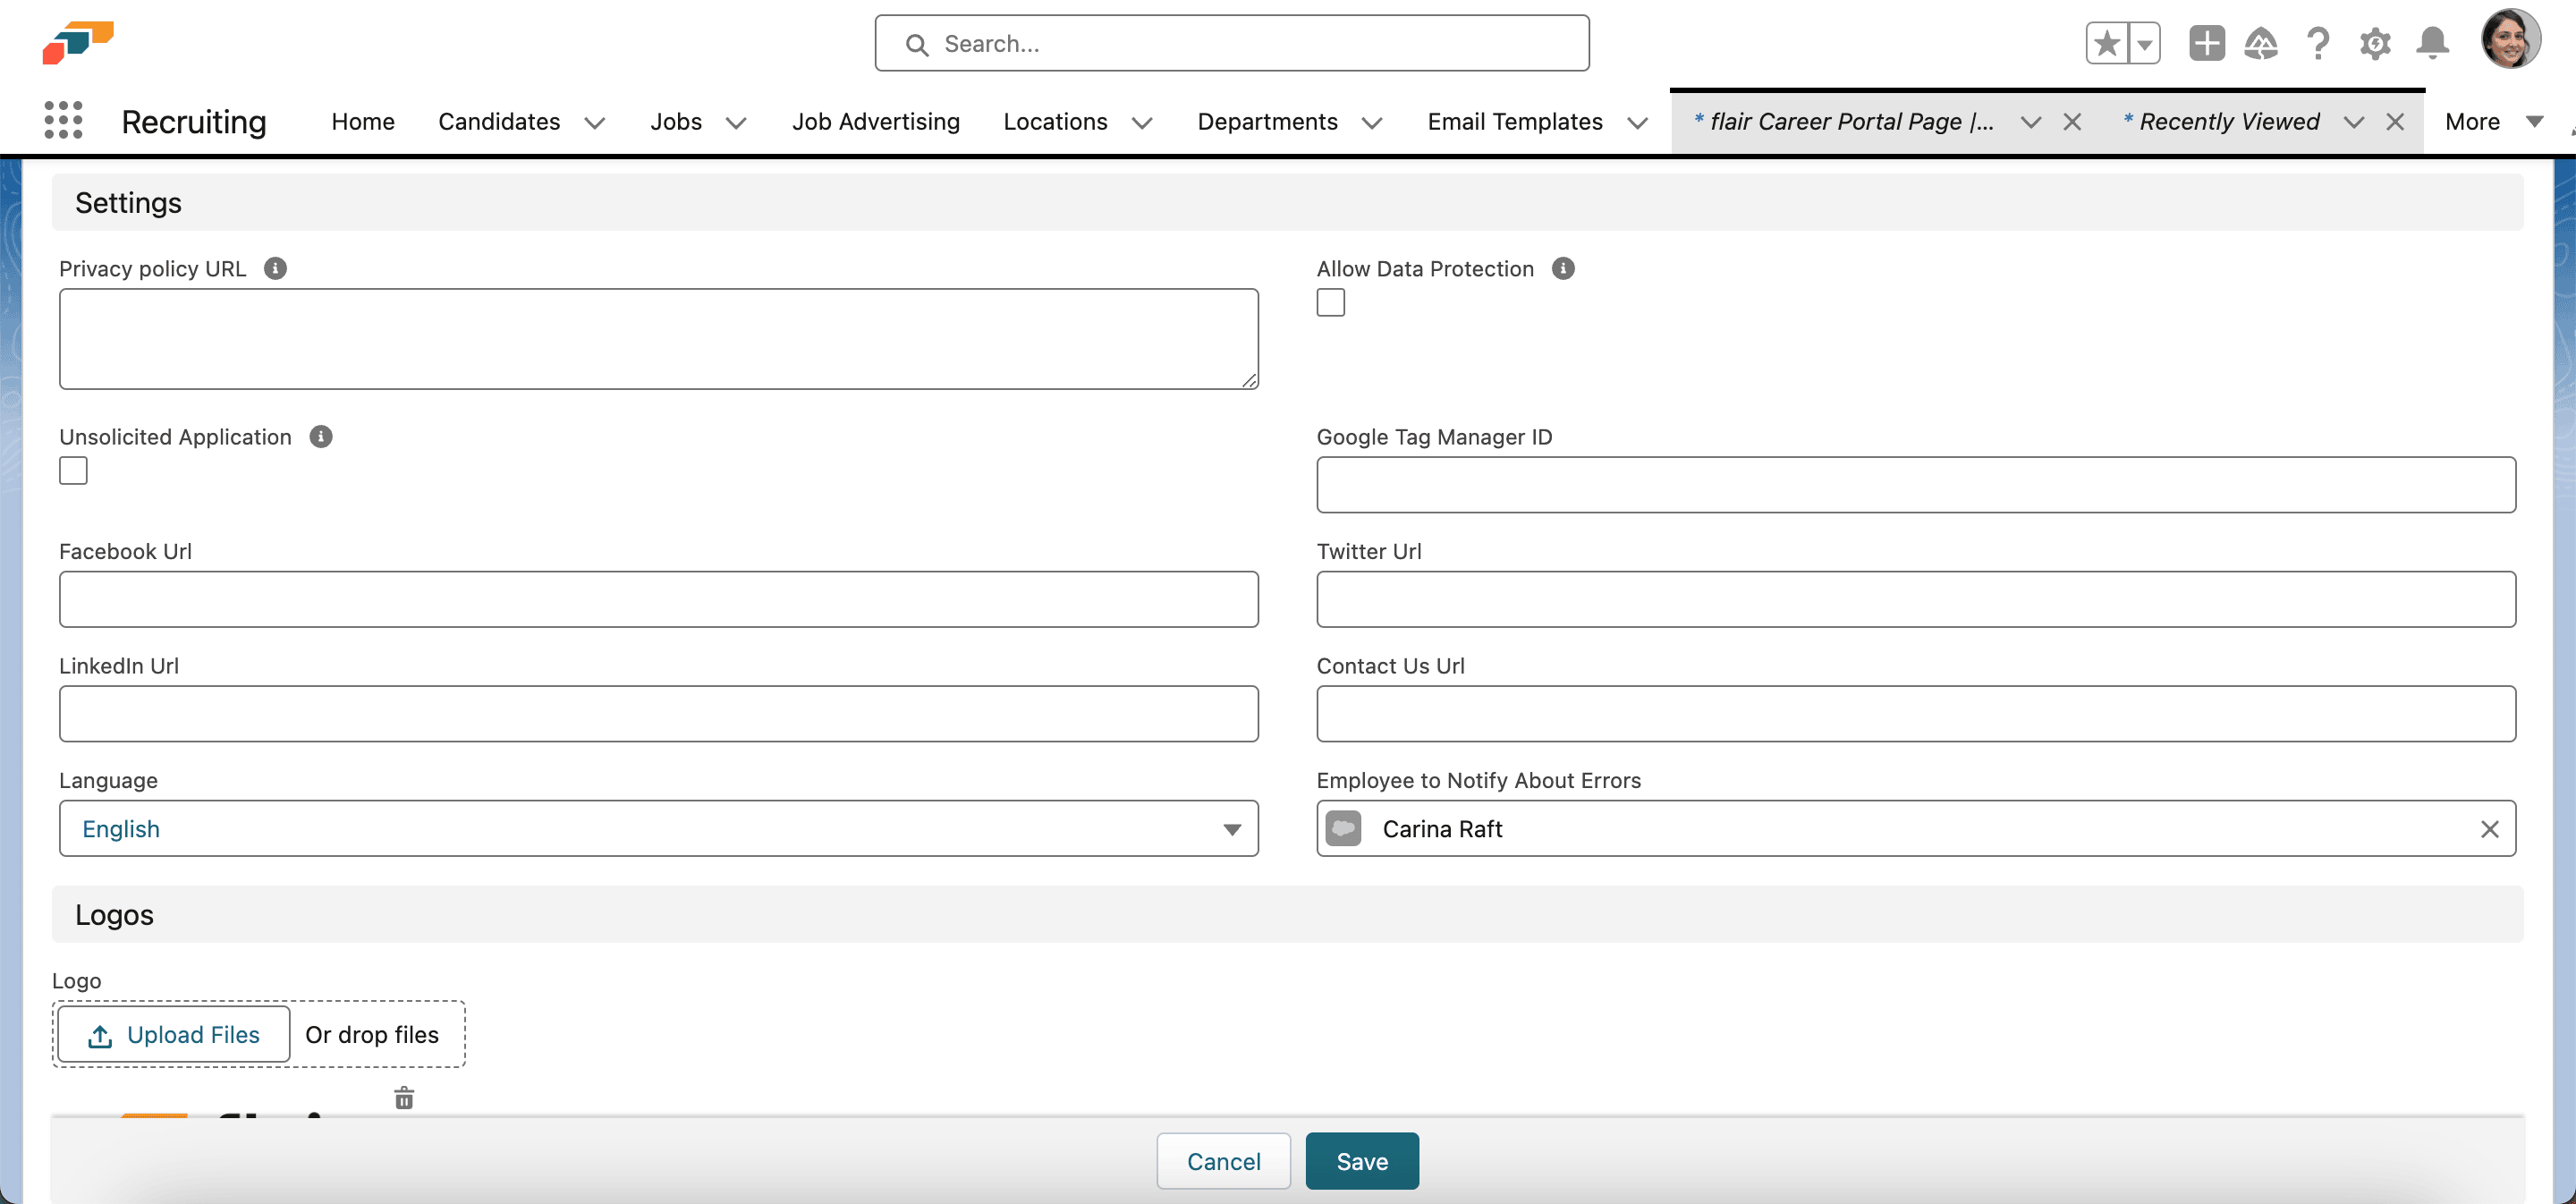
The integration user receives application error notifications by default. Choose another employee when a different person should investigate these errors.
- In flair Recruiting, open Career Portal Setup.
- Select the career portal.
- Open the Details tab.
- Under Settings, open Employee to Notify About Errors.
- Select an employee. That employee receives an email when an application error occurs on this portal.
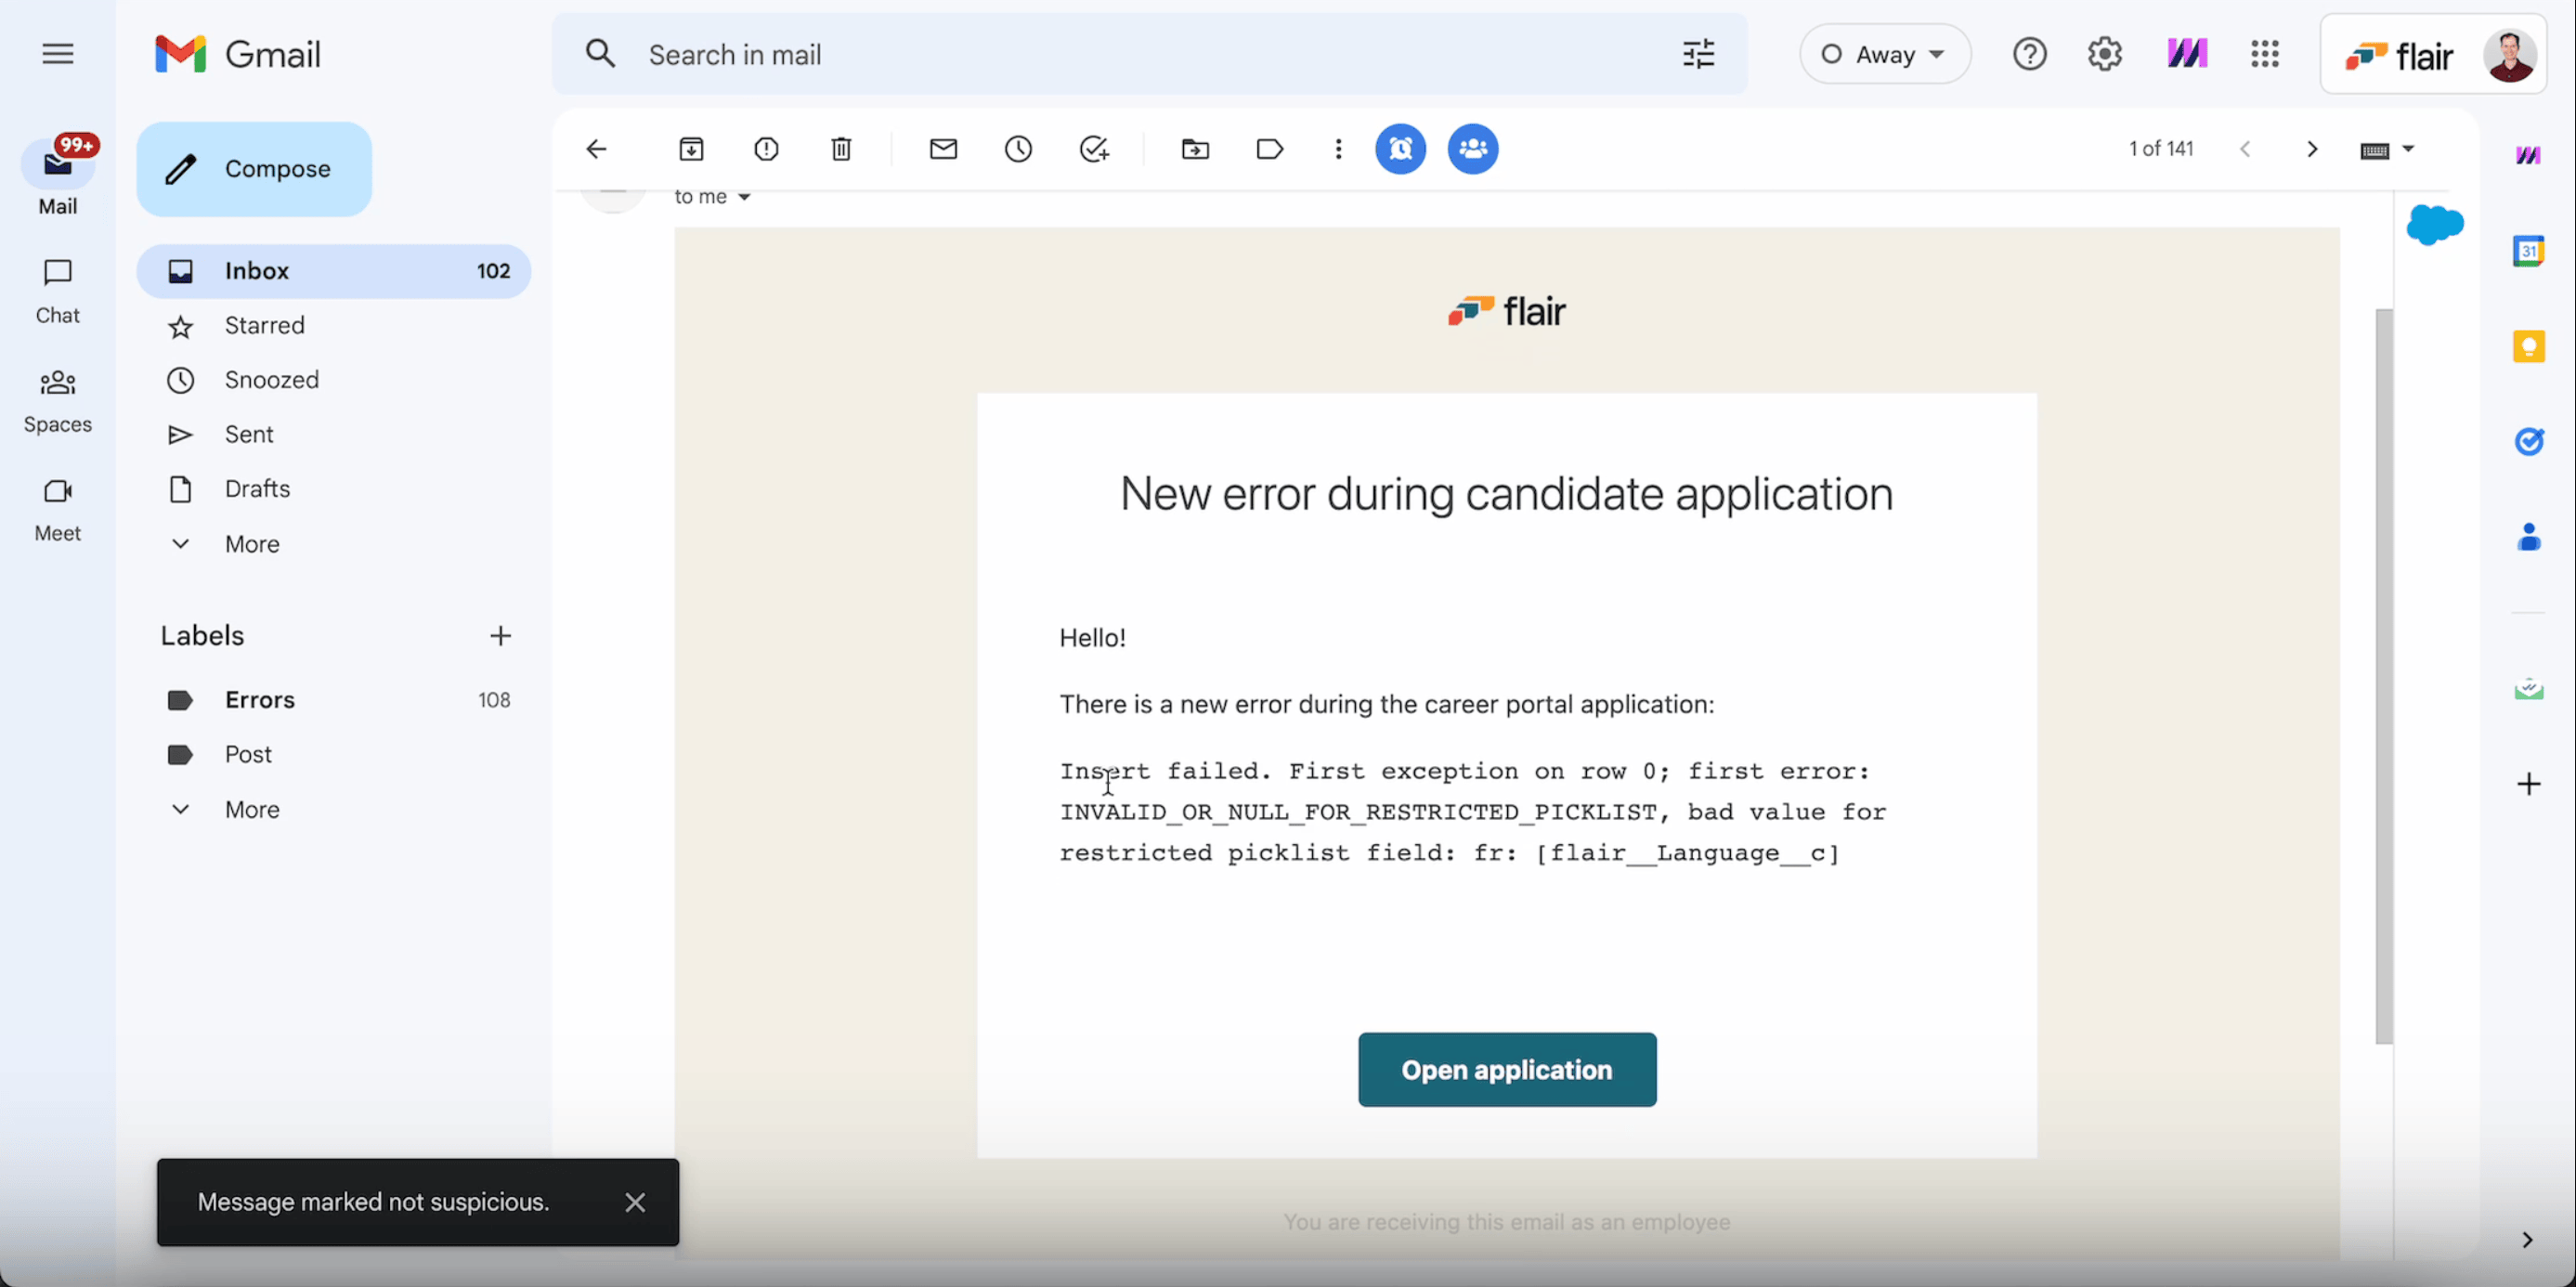
- From an error email, click Open Application to review the affected application.
A career portal disappeared
flair automatically deletes a career portal once its connection to Salesforce has been inactive for more than 40 days, checked weekly. An inactive connection means the portal's Salesforce authorization has already stopped working, so the portal could no longer serve jobs or accept applications.
To restore a deleted portal, reconnect it to Salesforce.
An application doesn't create a candidate
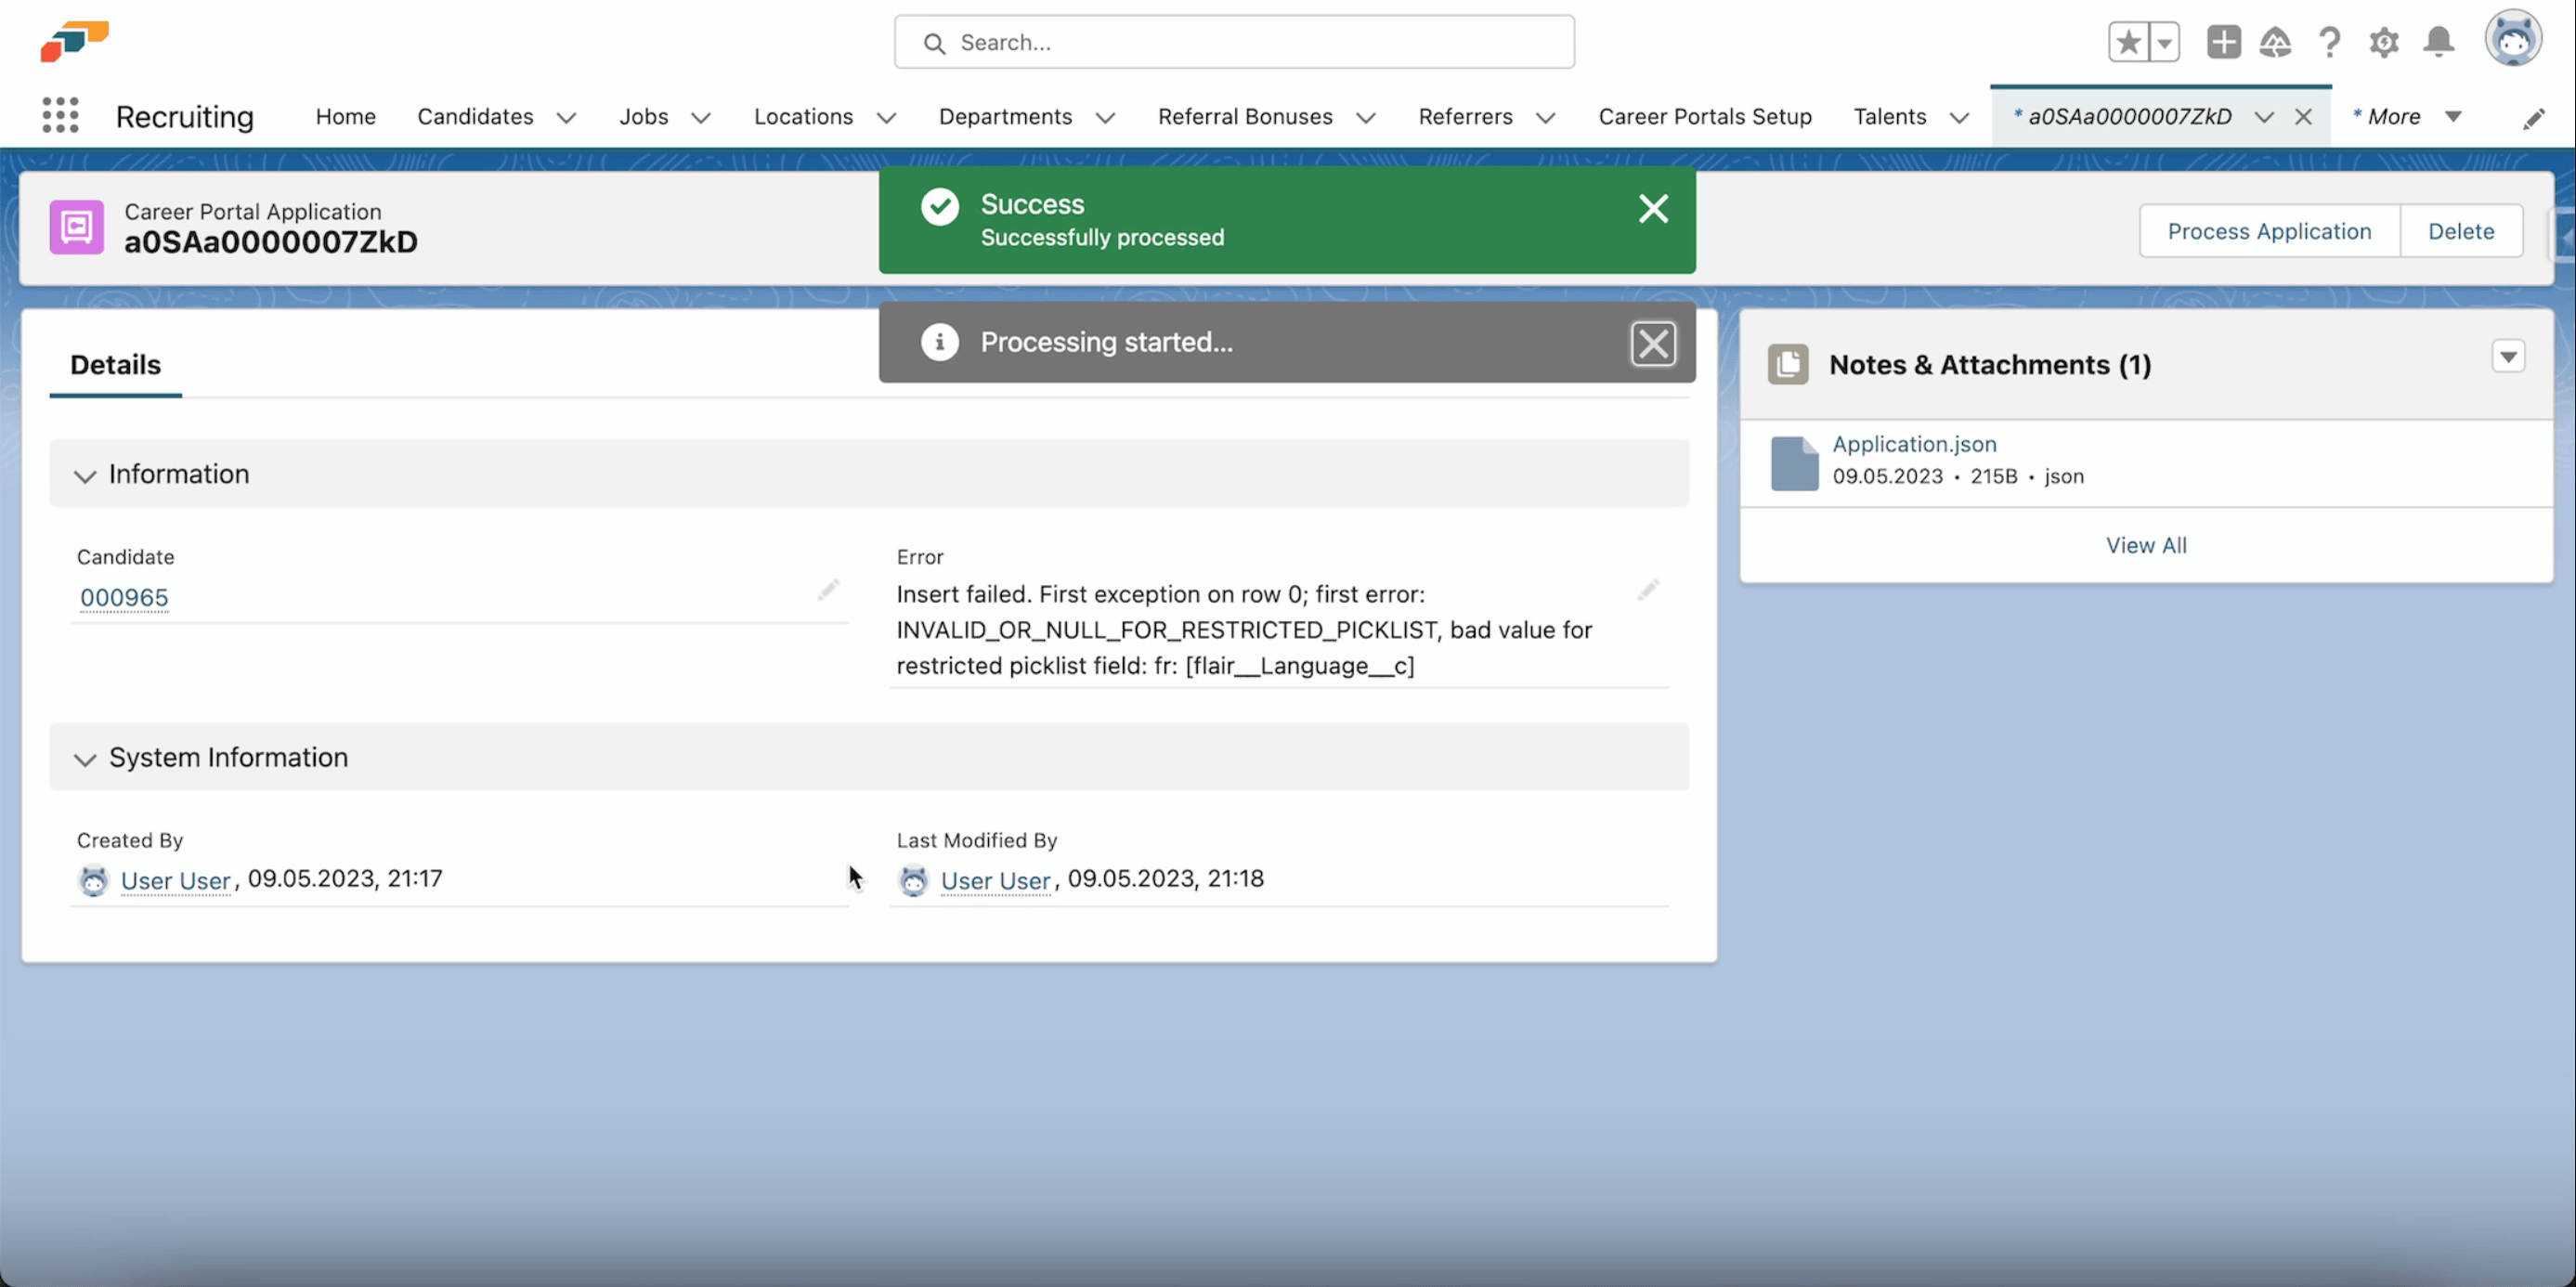
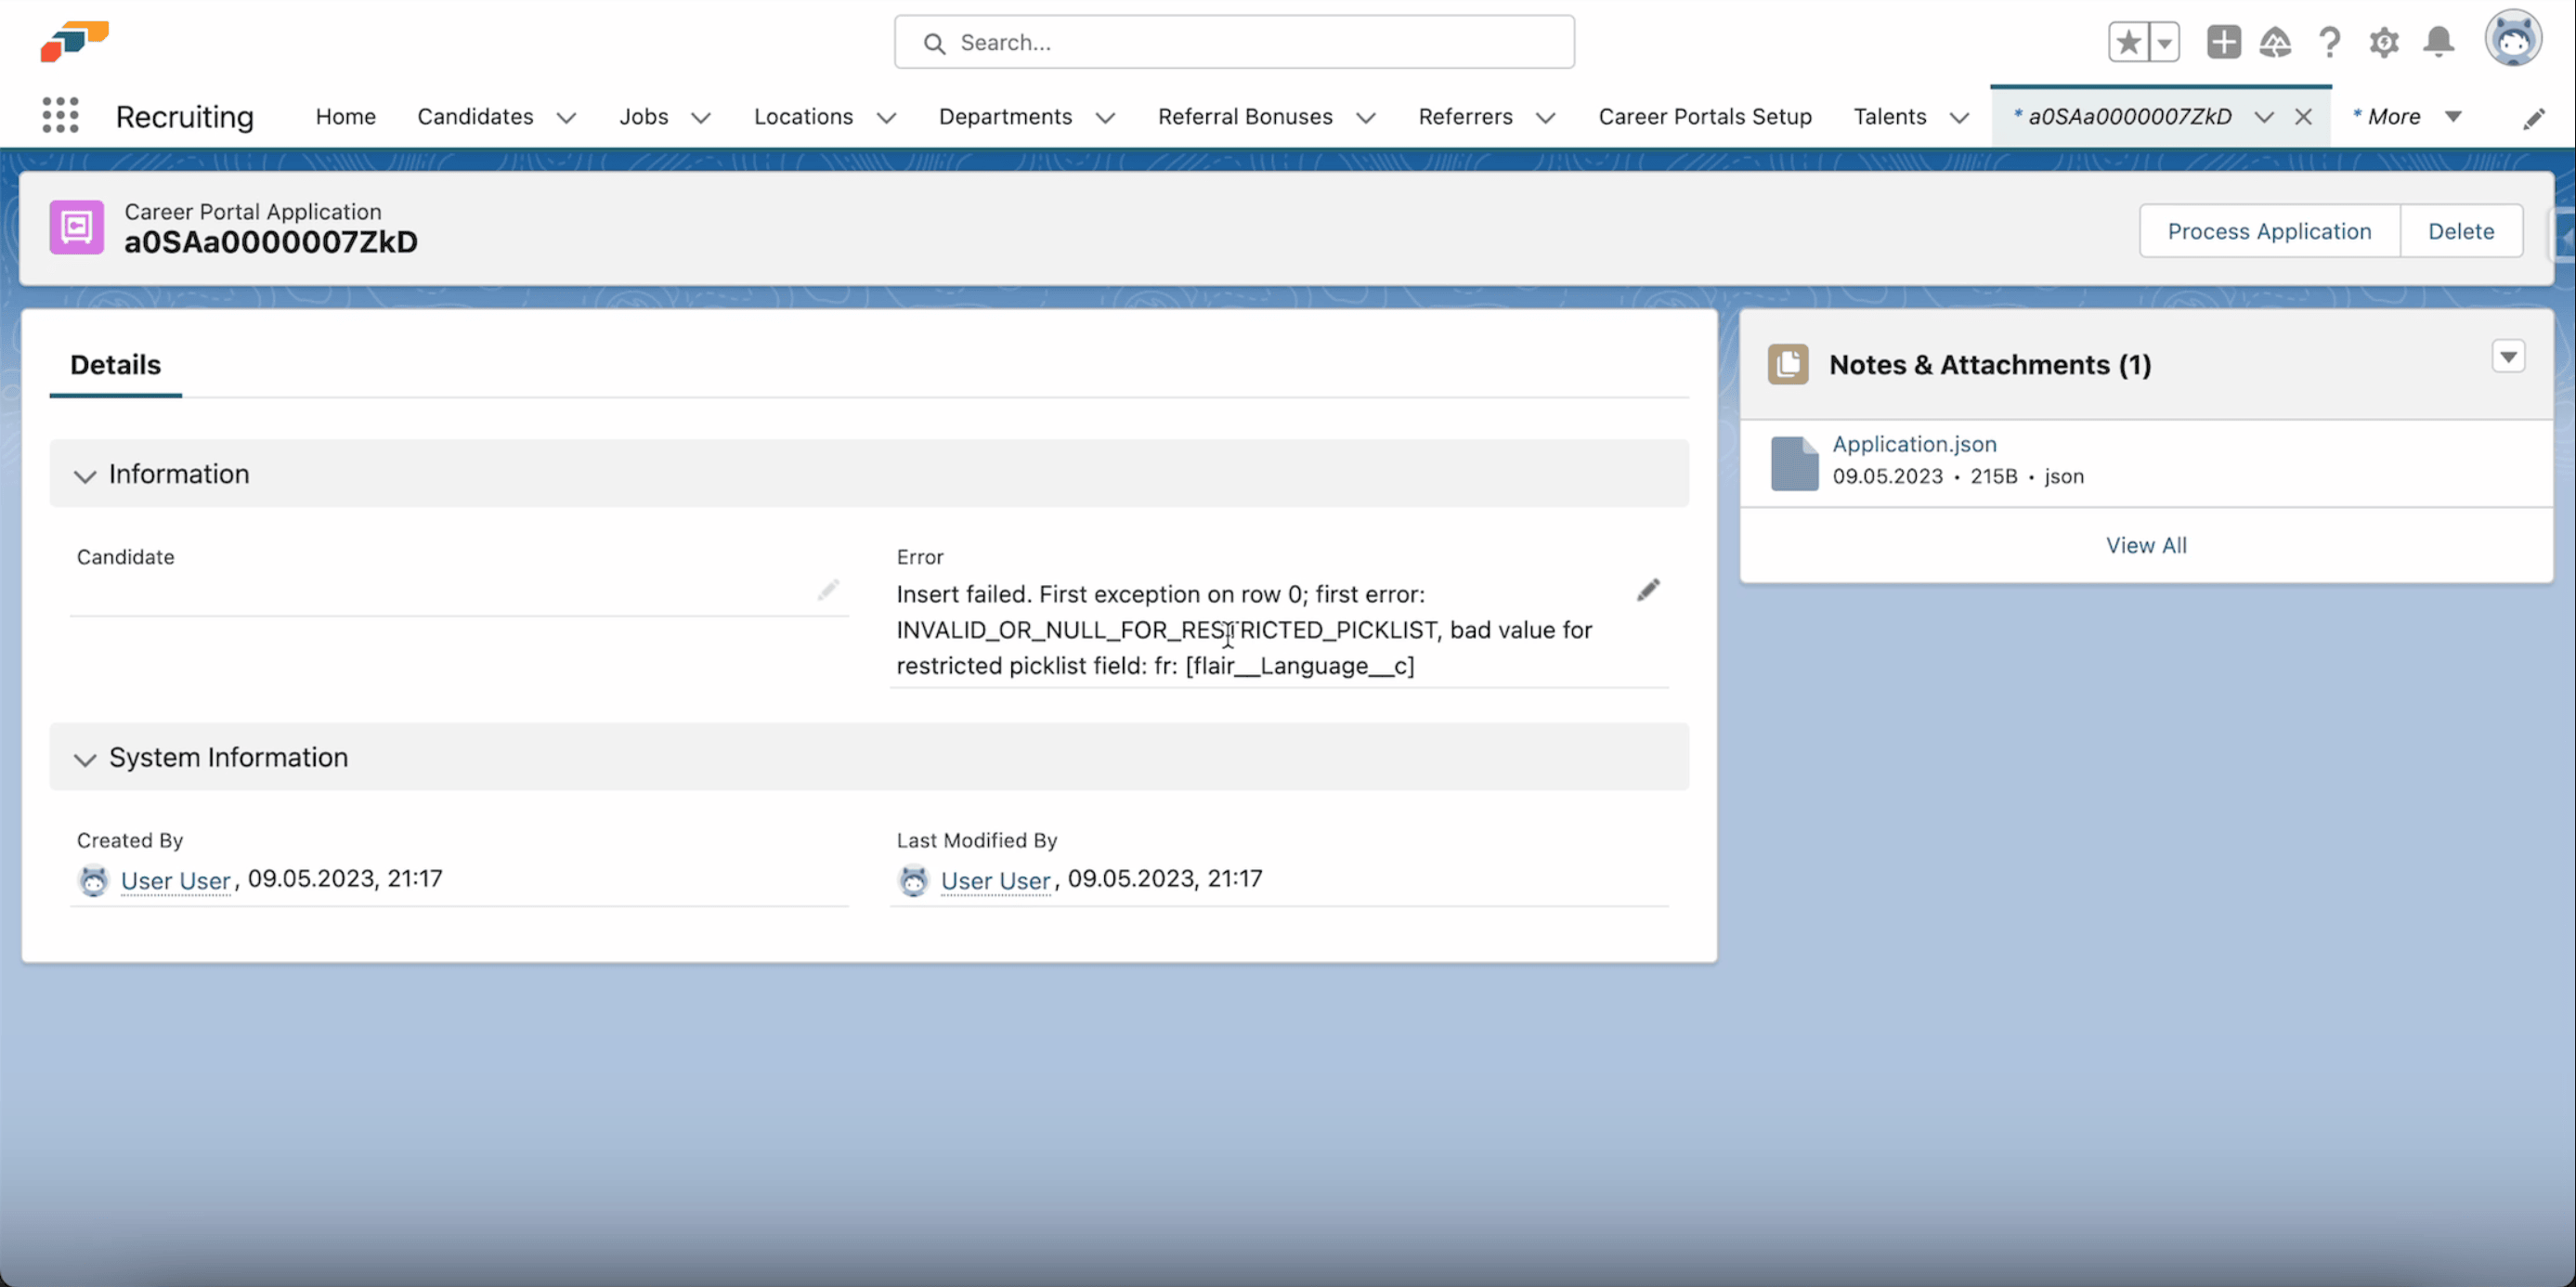
Review the stored application error and correct its invalid value before processing the application again. For example, an inactive value such as fr can cause an error for the restricted flair__Language__c picklist.
- In the App Launcher (⋮⋮ grid icon), open Career Portal Applications.
- Open the affected application.
- Review the error information.
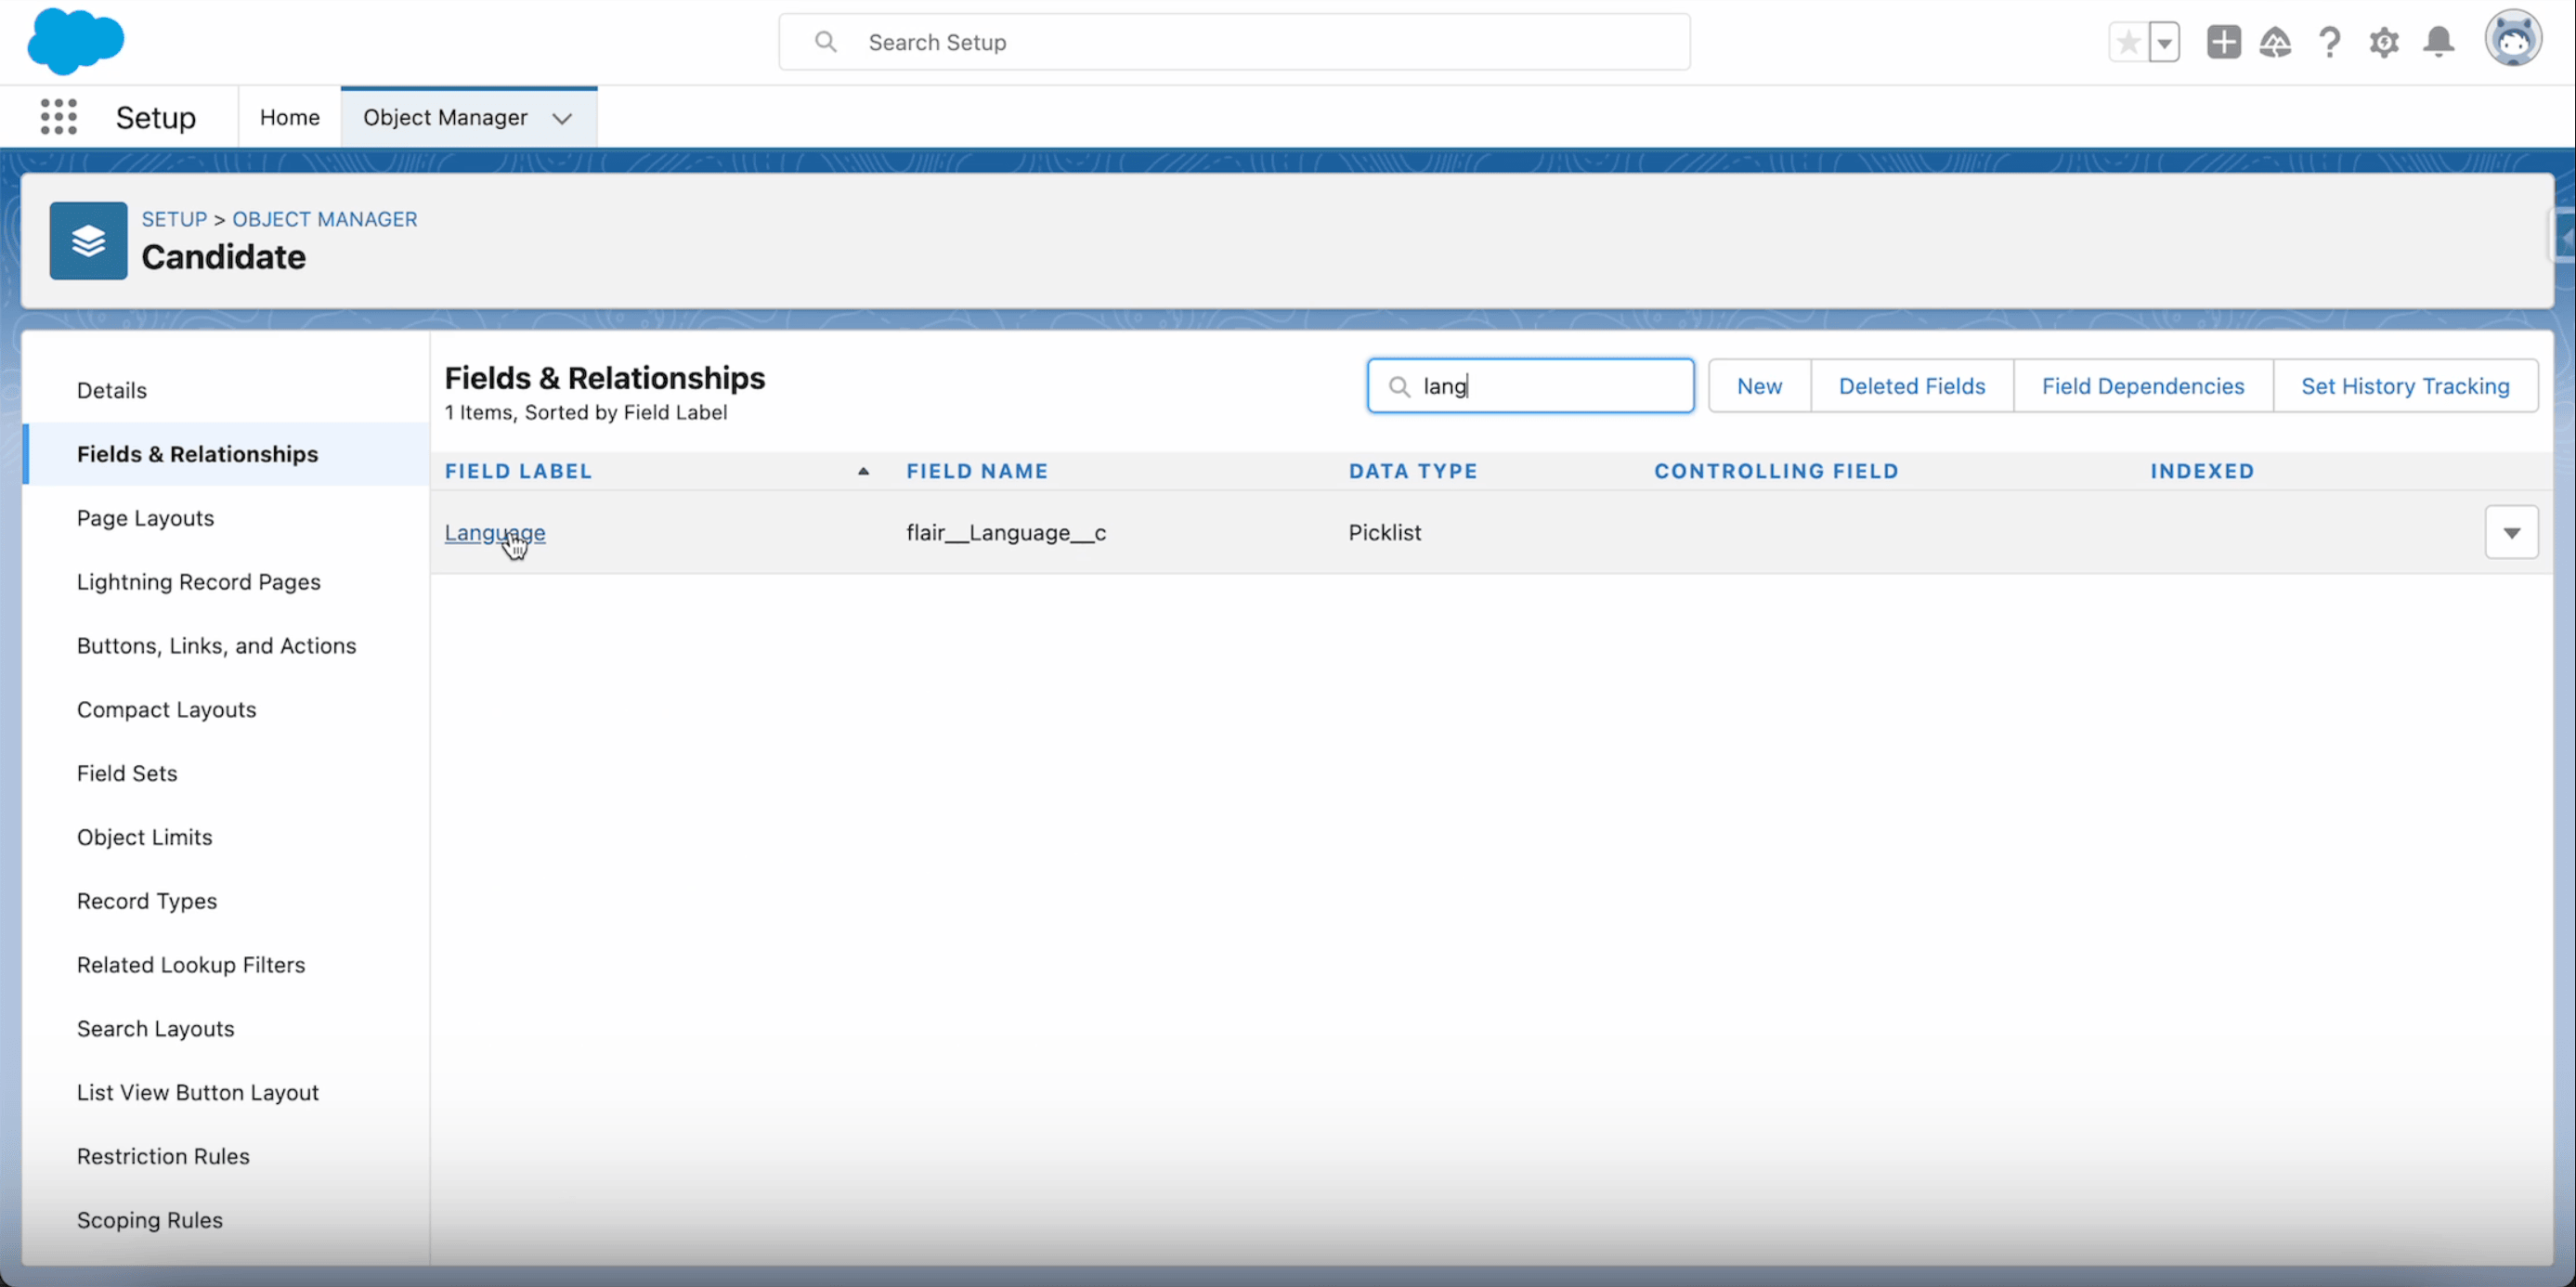
- In Setup → Object Manager, open the Candidate object.
- On Fields & Relationships, open the field named in the error.
- Under Values, find the invalid entry in Inactive Values.
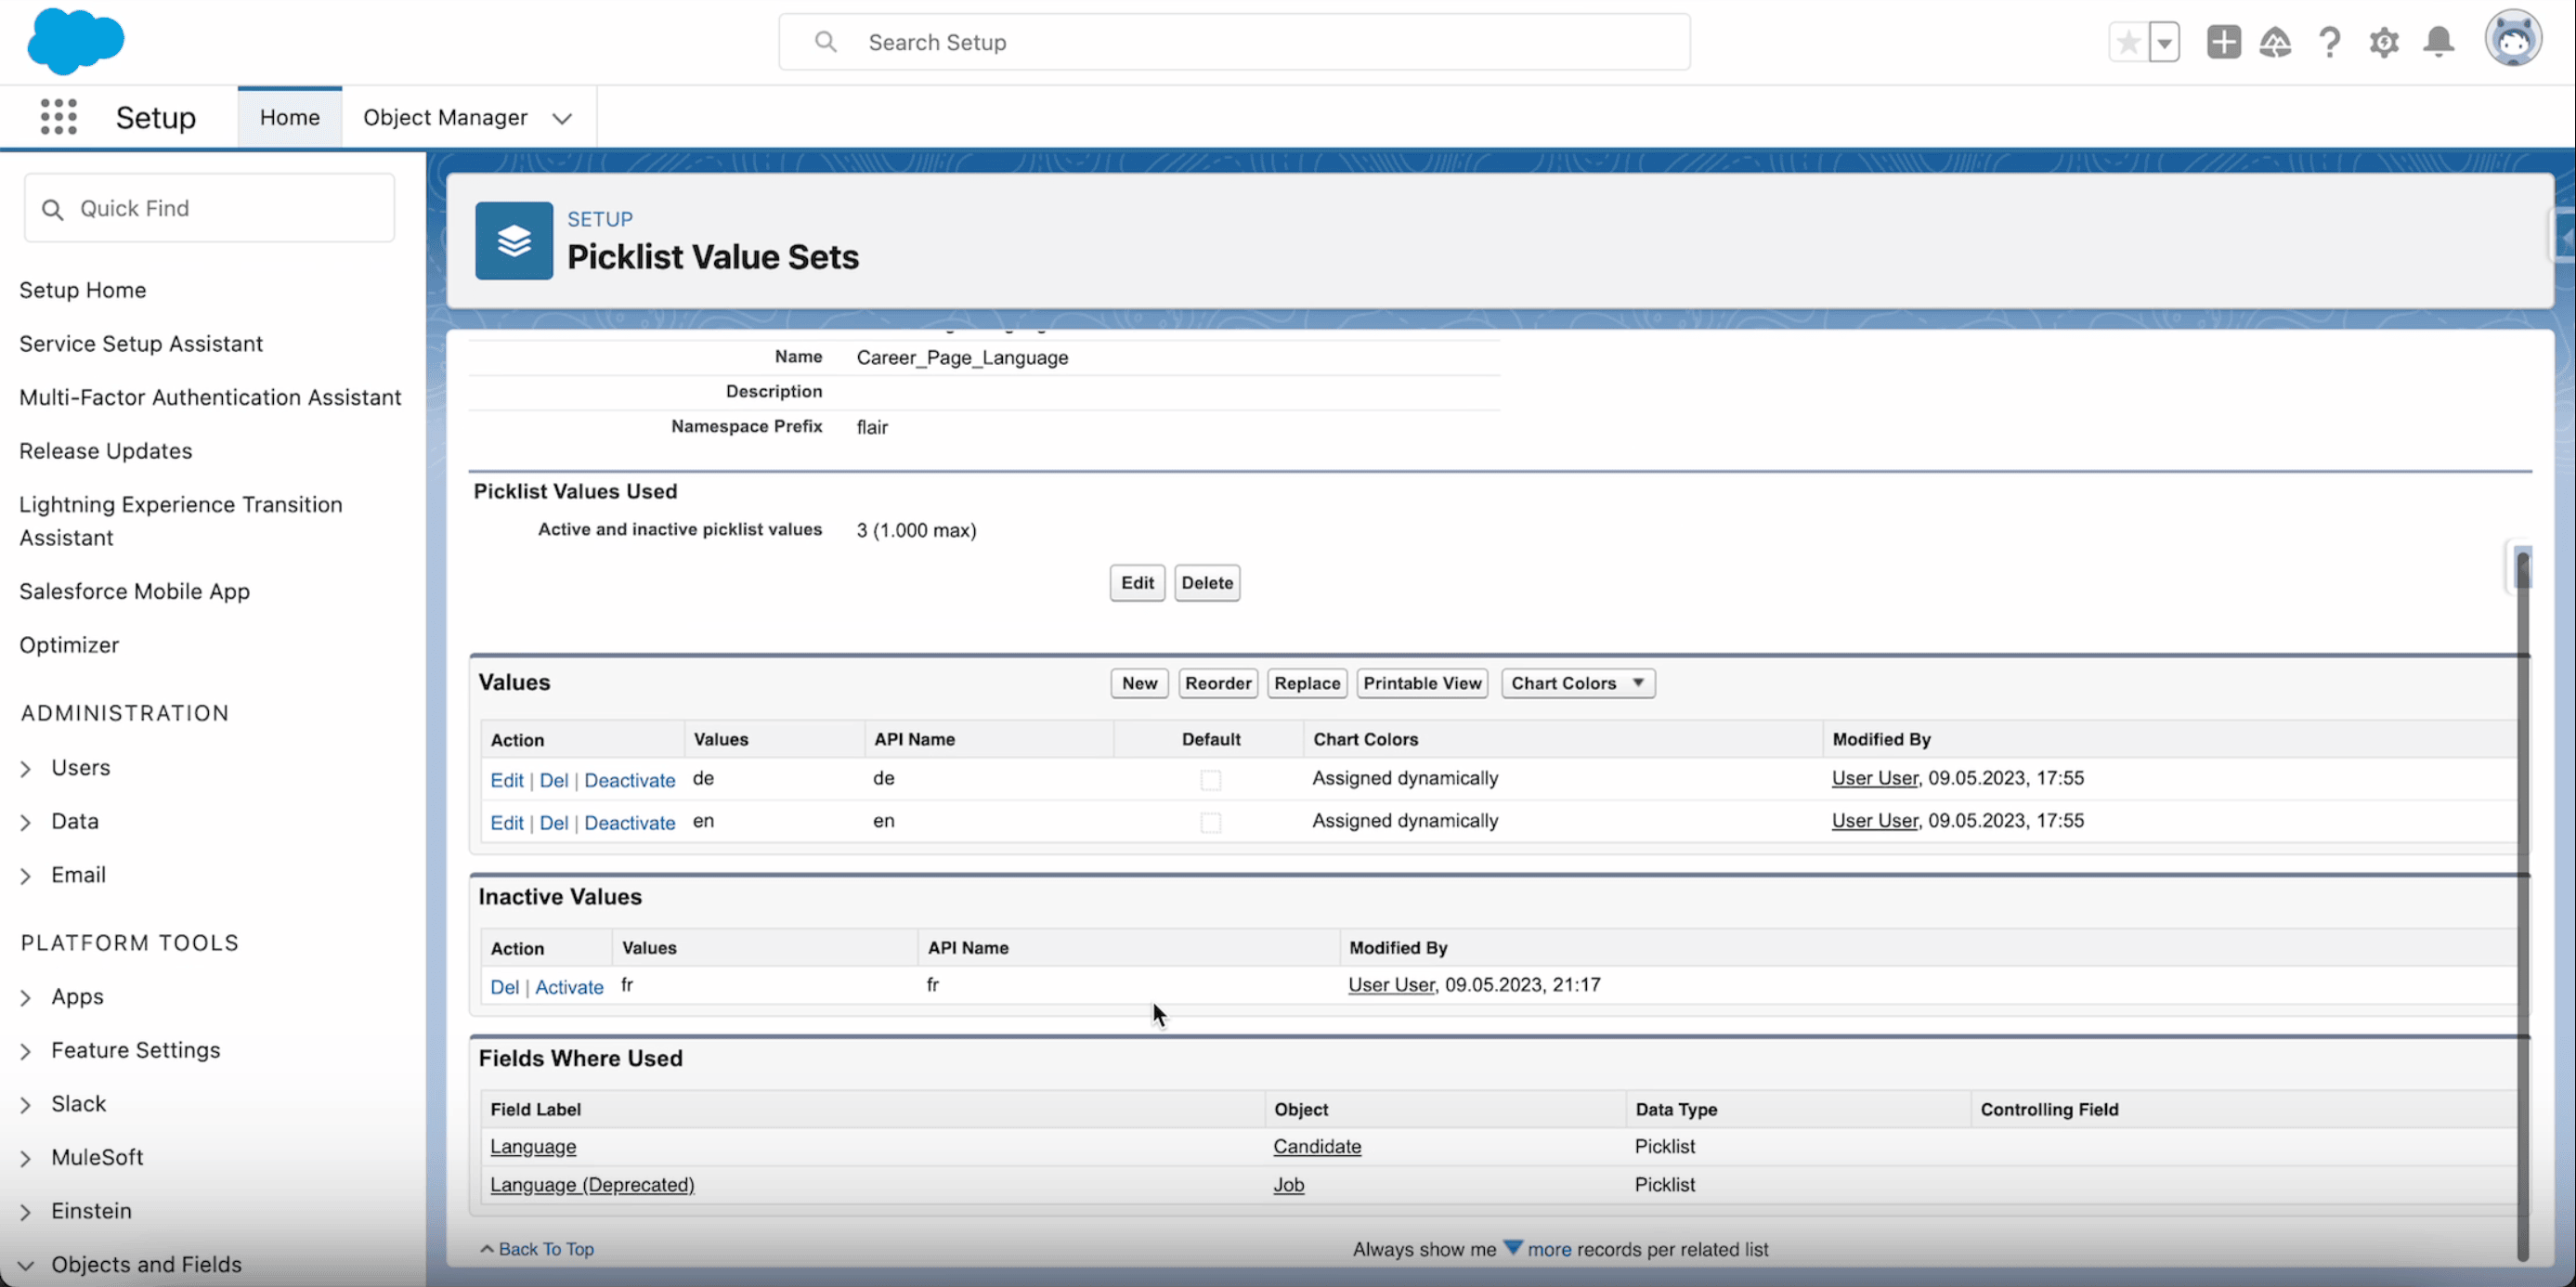
- Click Activate.
- Return to the affected record in Career Portal Applications.
- Click Process Application. flair processes the application and creates the candidate.