Restrict Recruiting Document visibility
Set the Recruiting Document object to Private so only users with access to a candidate can see that candidate's CVs and attachments. This change protects documents in record views and global search results.
Salesforce Admins who manage organization-wide sharing defaults in Salesforce Setup. This change is required for every existing flair organization.
Before you begin
- Confirm that you can edit Sharing Settings in Salesforce.
- Plan to apply this change even if your organization does not use entity-based Visibility Scopes.
New flair organizations already use Private access. Existing organizations can still have the previous Public Read/Write default and must change it manually.
Set Recruiting Document access to Private
-
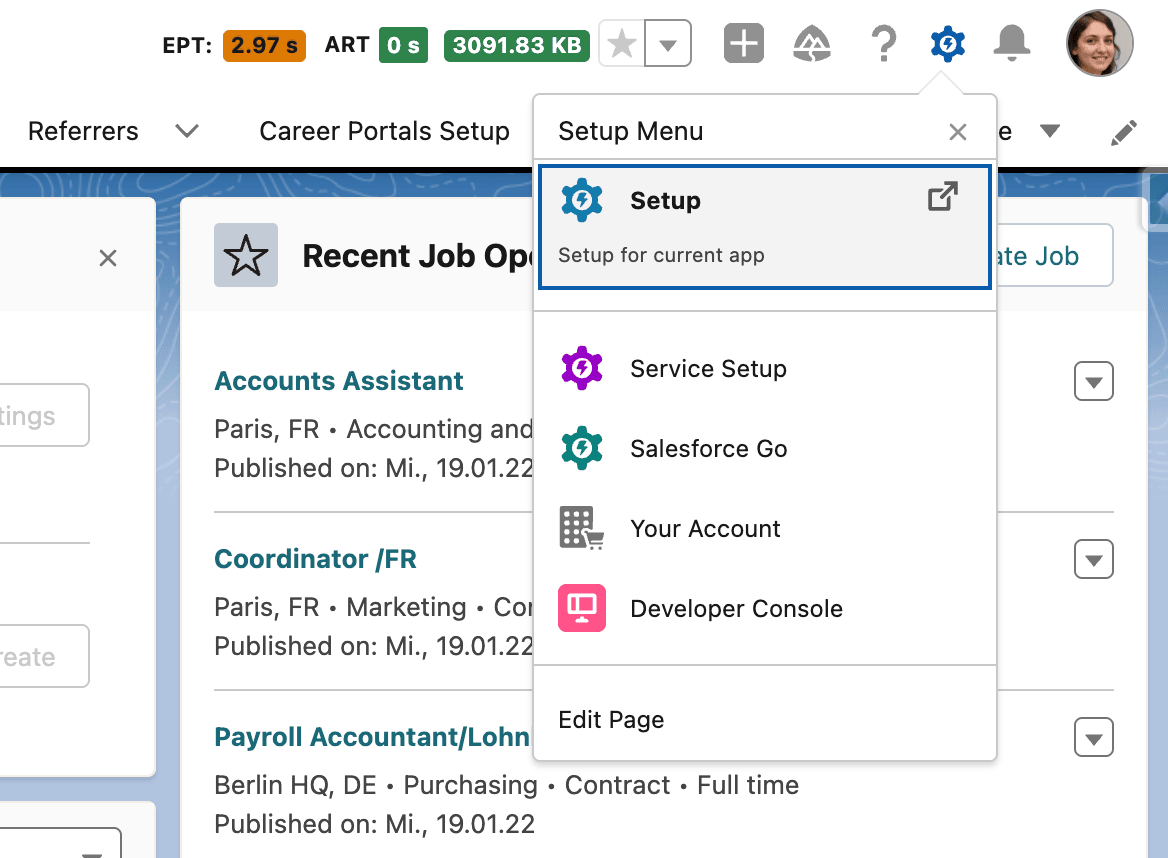
In Salesforce, click the setup gear, and select Setup.
-
In Quick Find, enter
Sharing Settings.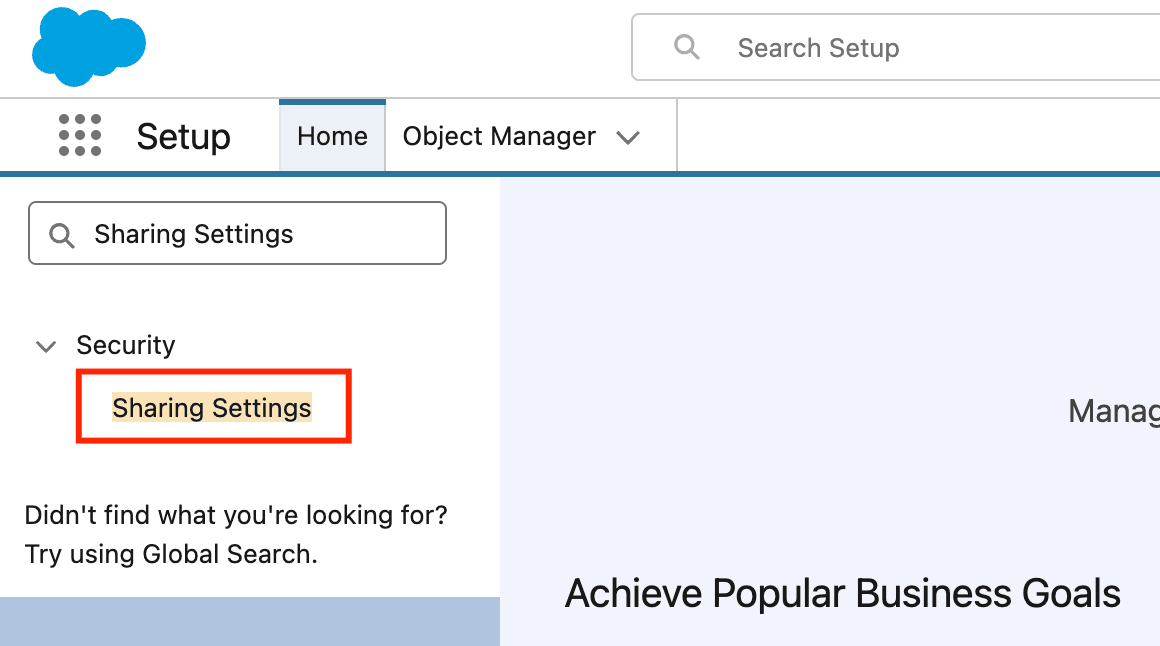
-
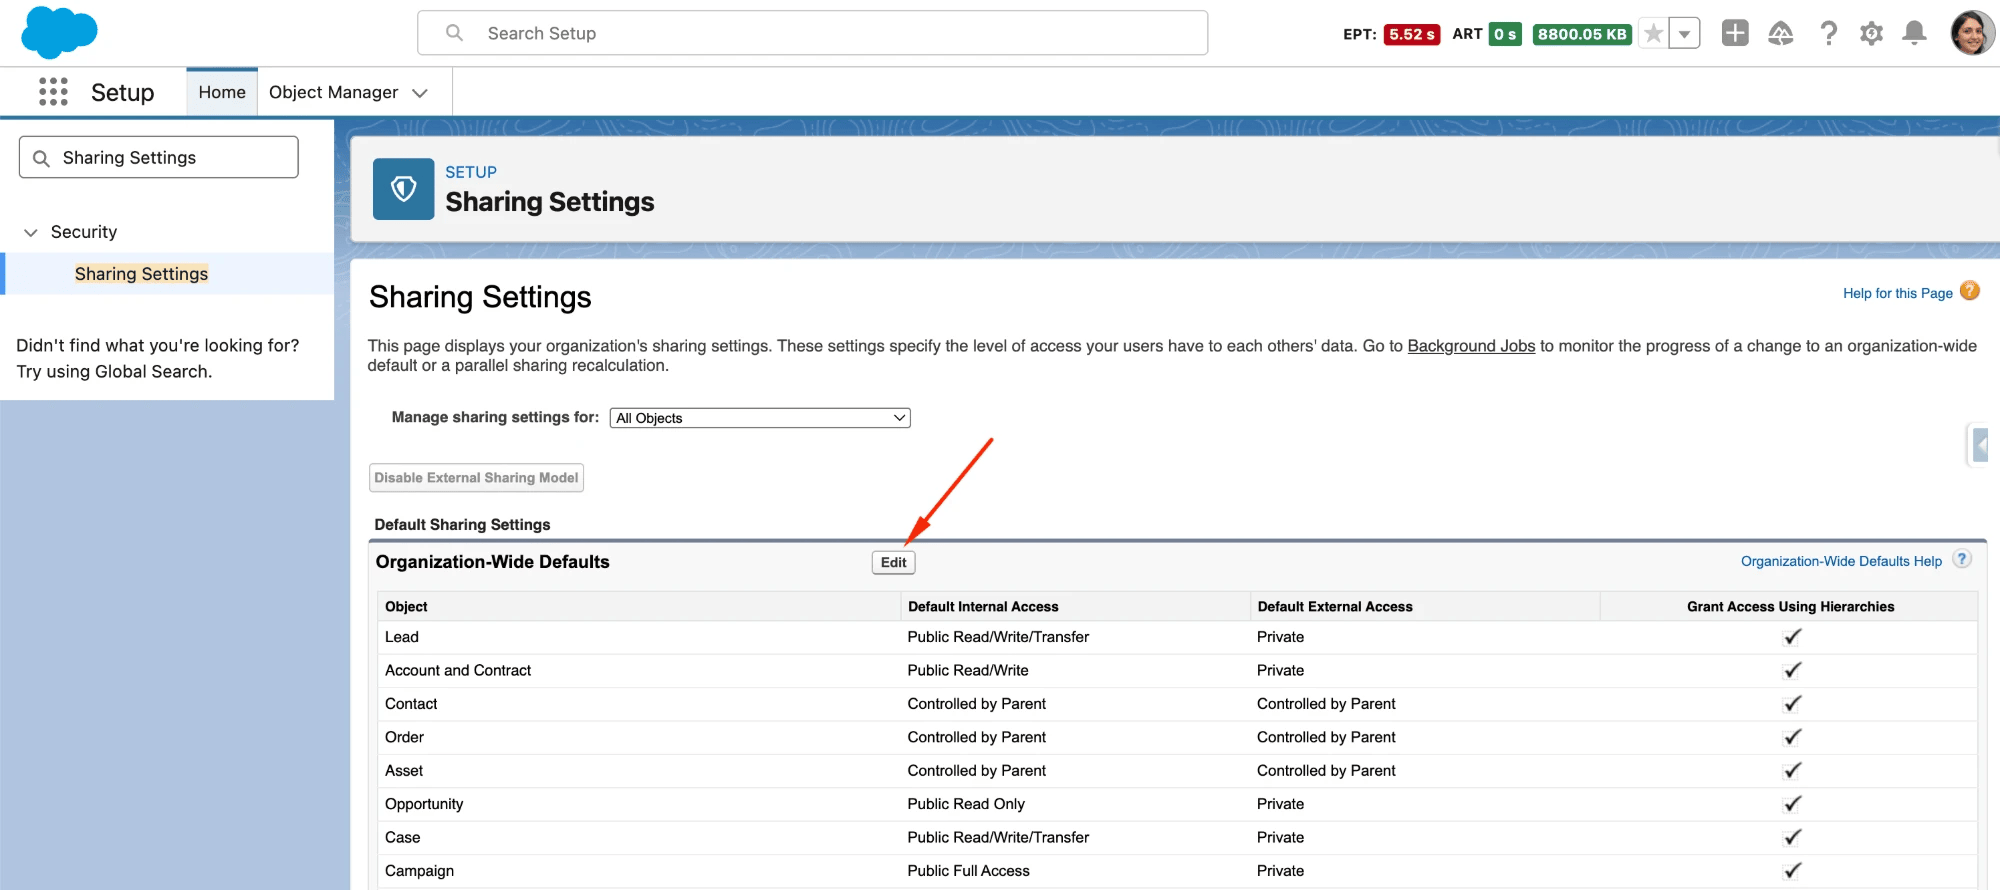
Open Sharing Settings.
-
Next to Organization-Wide Defaults, click Edit.
-
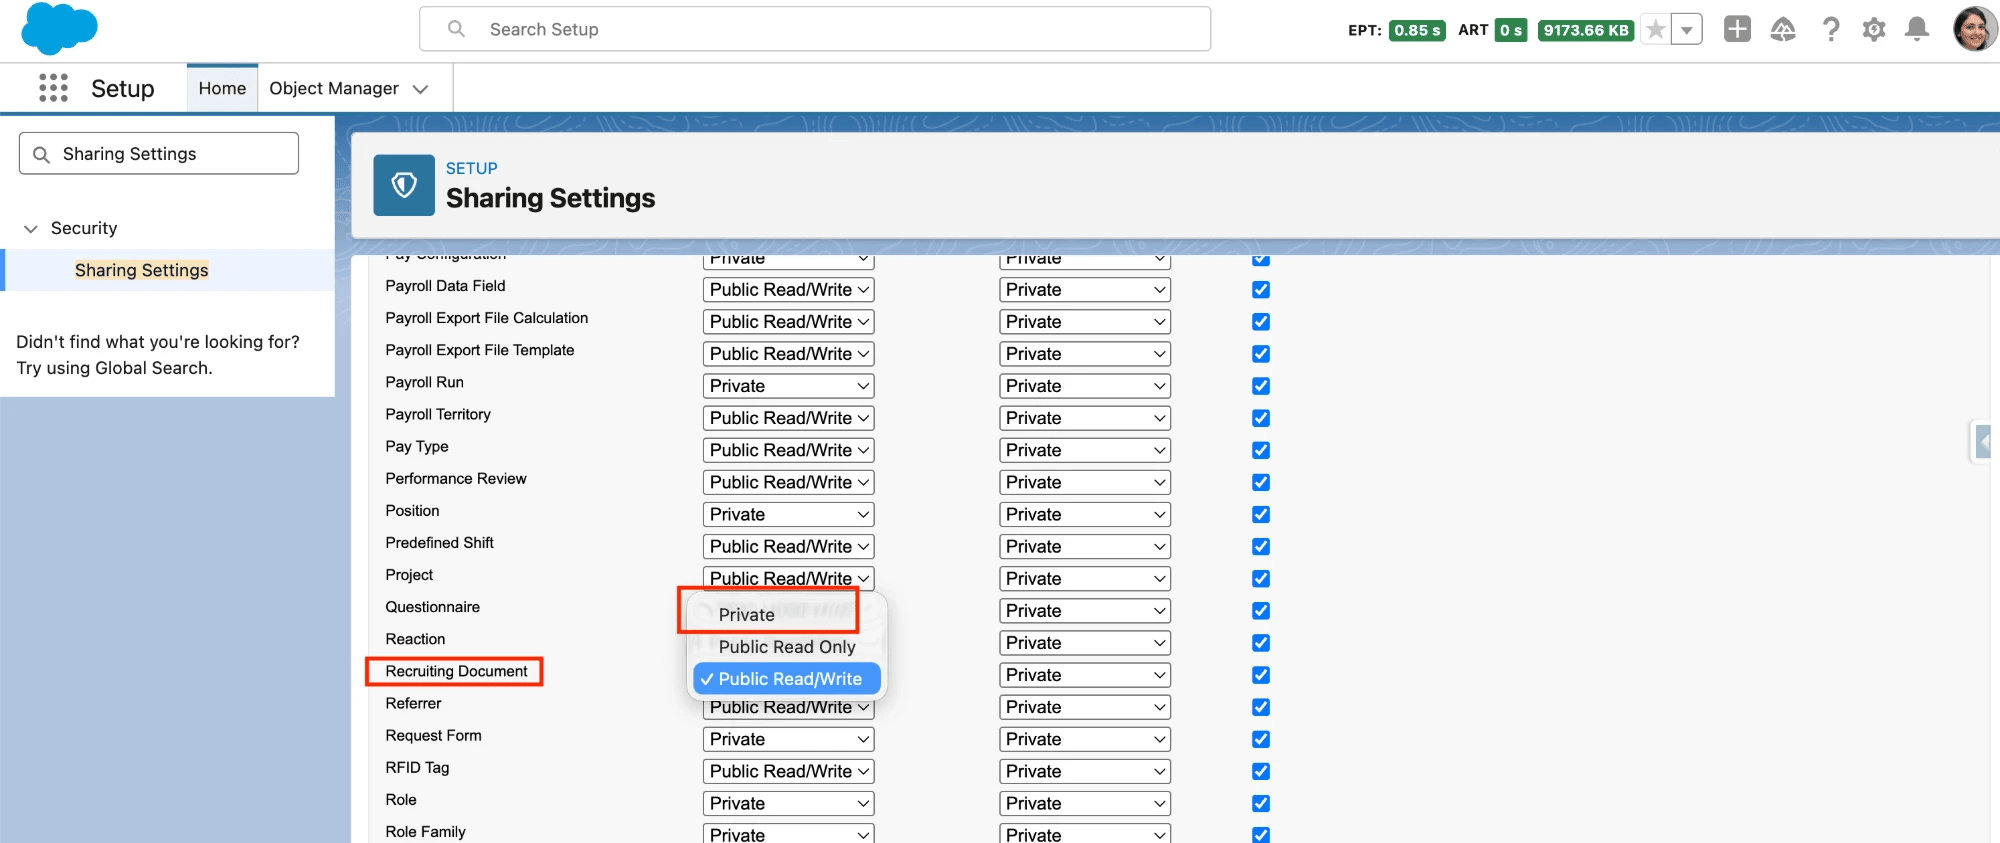
In the Recruiting Document row, set Default Internal Access to Private.
-
Set Default External Access to Private.
-
Click Save. The restricted access takes effect without a sharing recalculation.
Review how document access changes
Users with View All or Modify All access to Recruiting Document, including users with Flair Manager or Flair Recruiter, continue to see every document. The change affects users without this broad access.
If your organization uses entity-based Visibility Scopes, flair extends candidate access to the candidate's Recruiting Documents. New documents are shared automatically after you set the default to Private. flair shares existing documents during the next flair update.
Apply sharing to existing documents now
Run the backfill when you cannot wait for the next flair update, such as after a large candidate import.
-
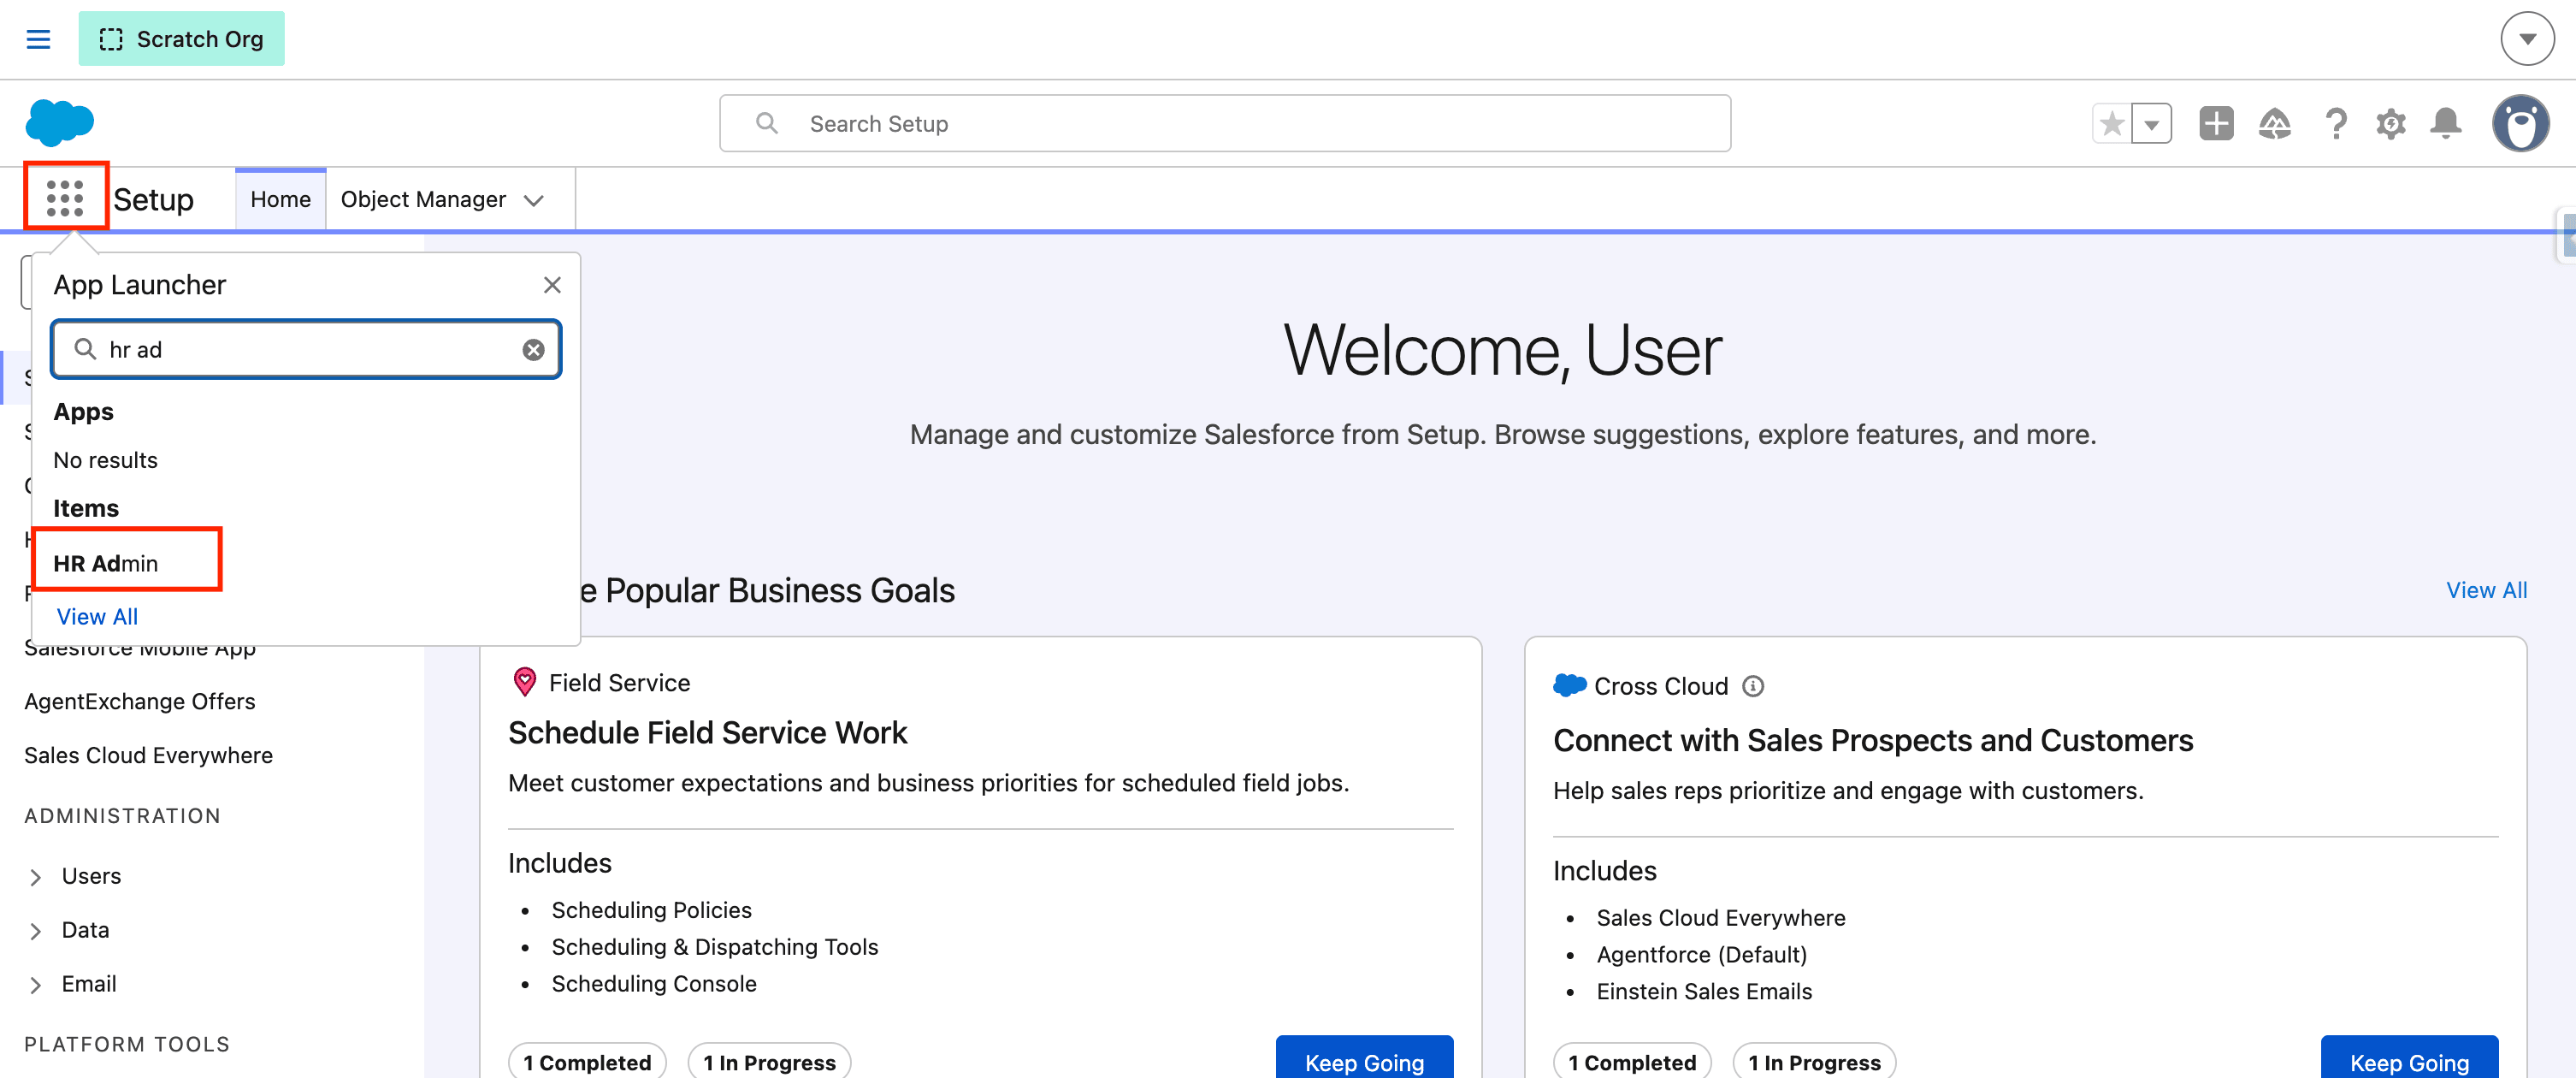
From the App Launcher (⋮⋮ grid icon), open HR Admin.
-
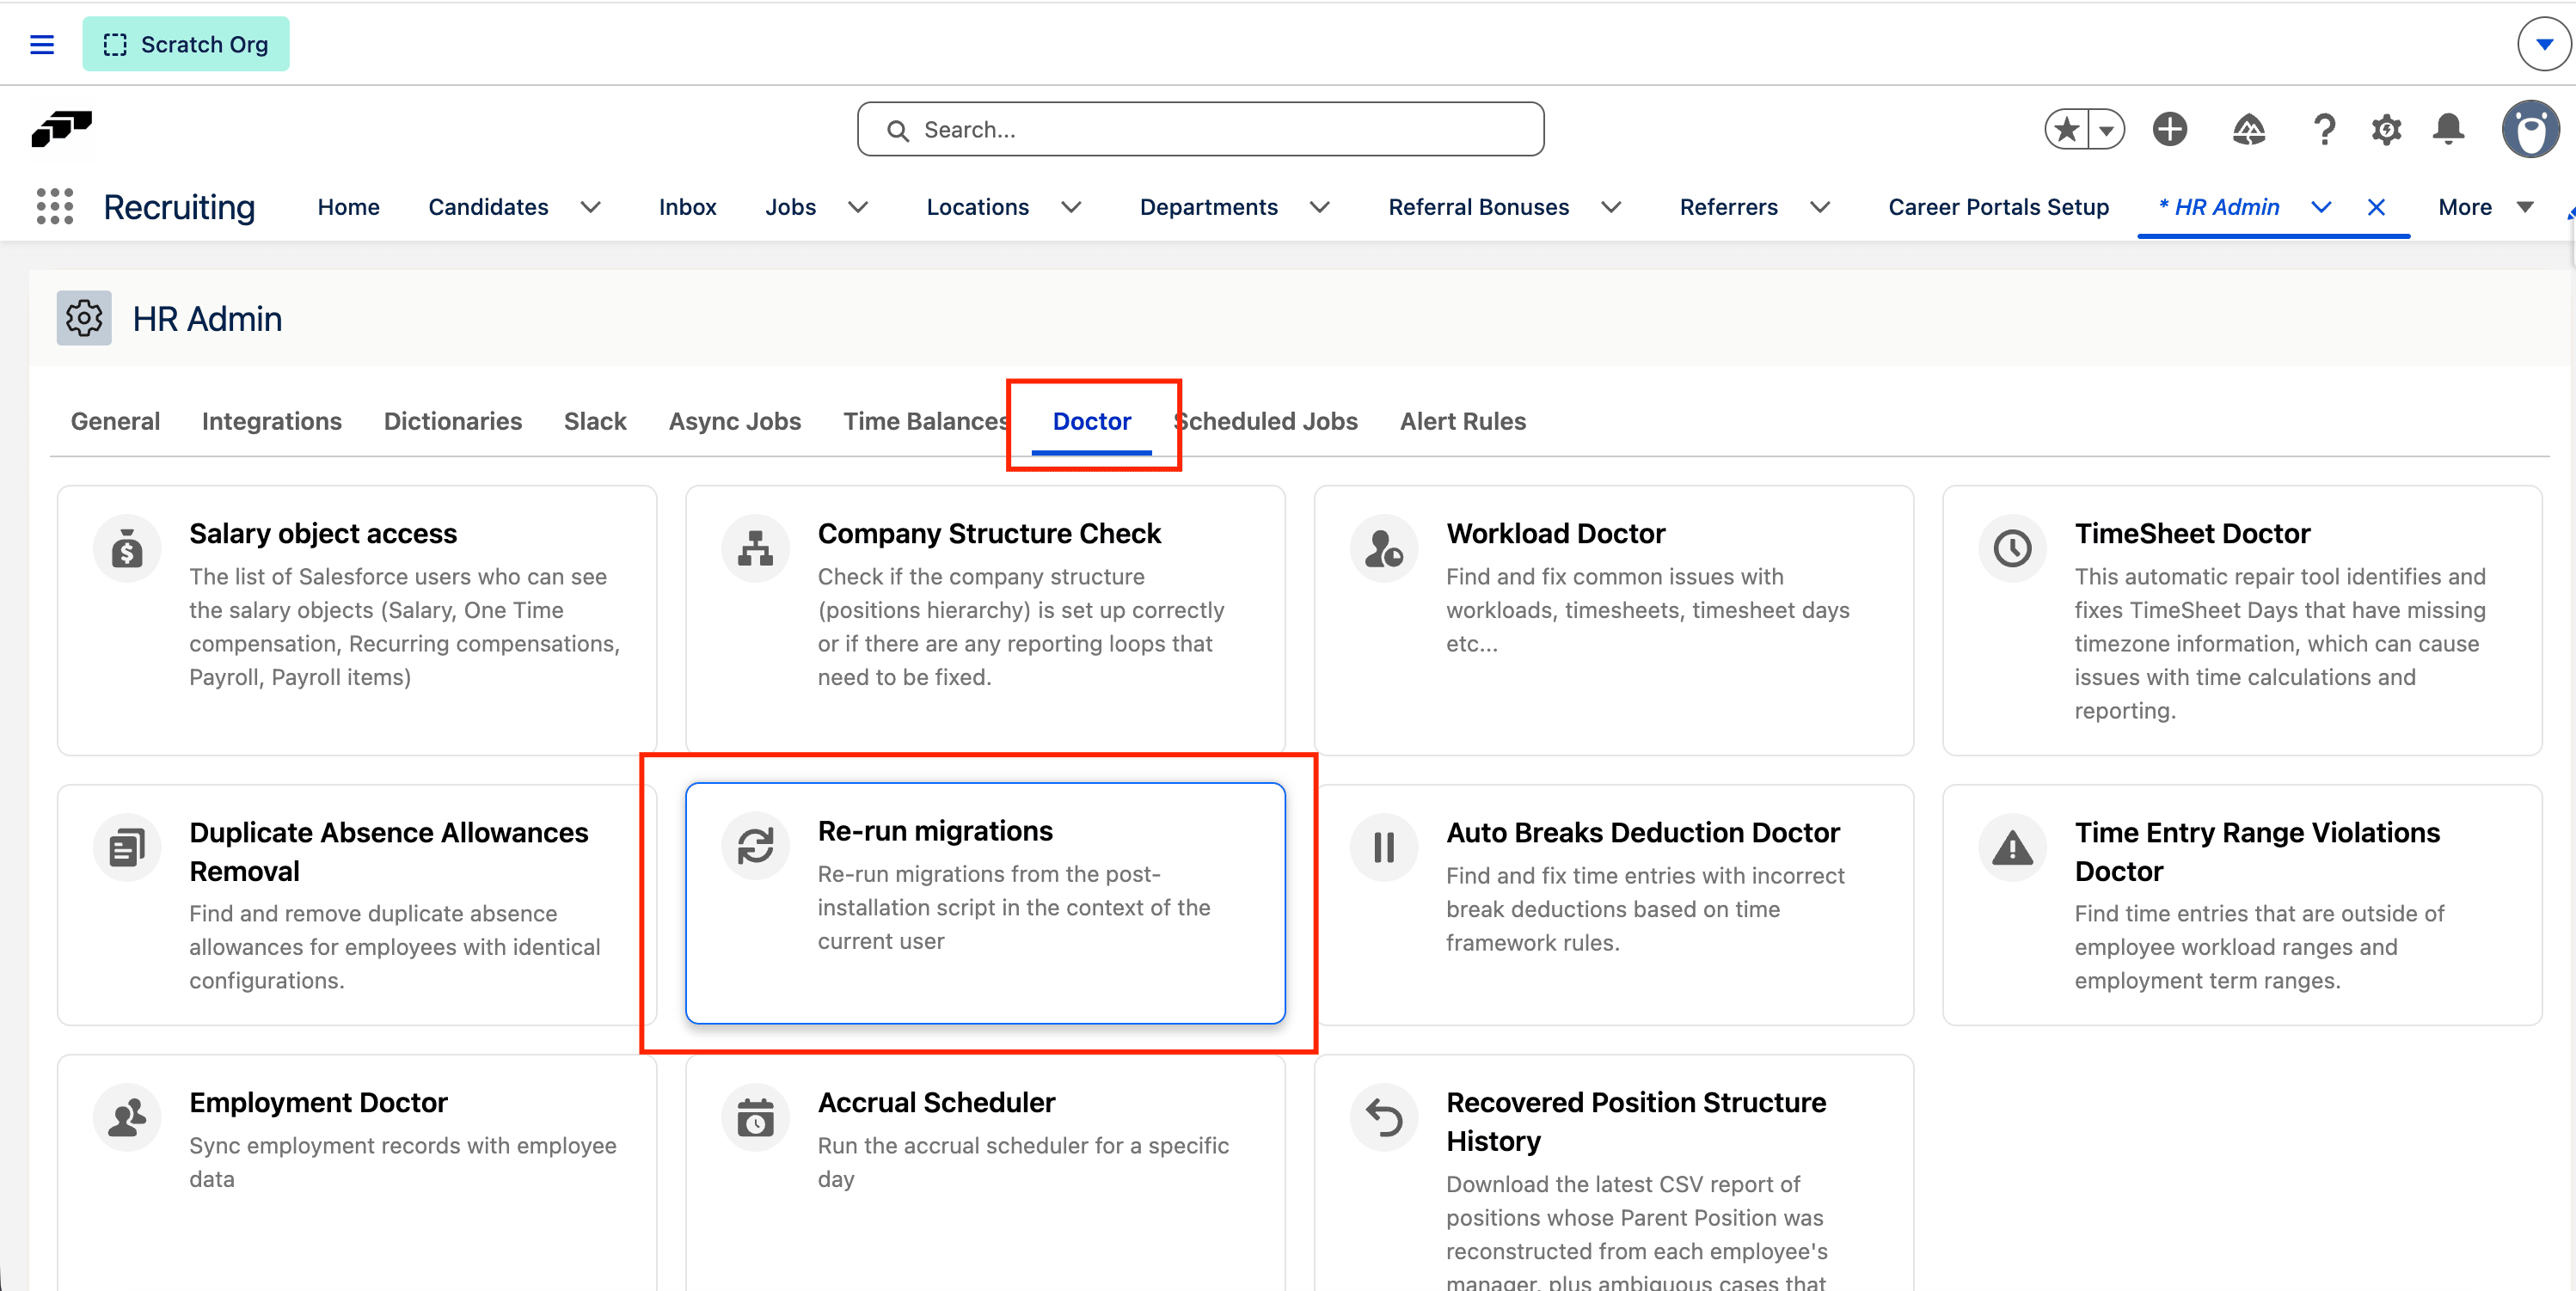
Open Doctor → Re-run migrations.
-
Under Migration, select
flair.RecruitingDocSharingBackfillMigration.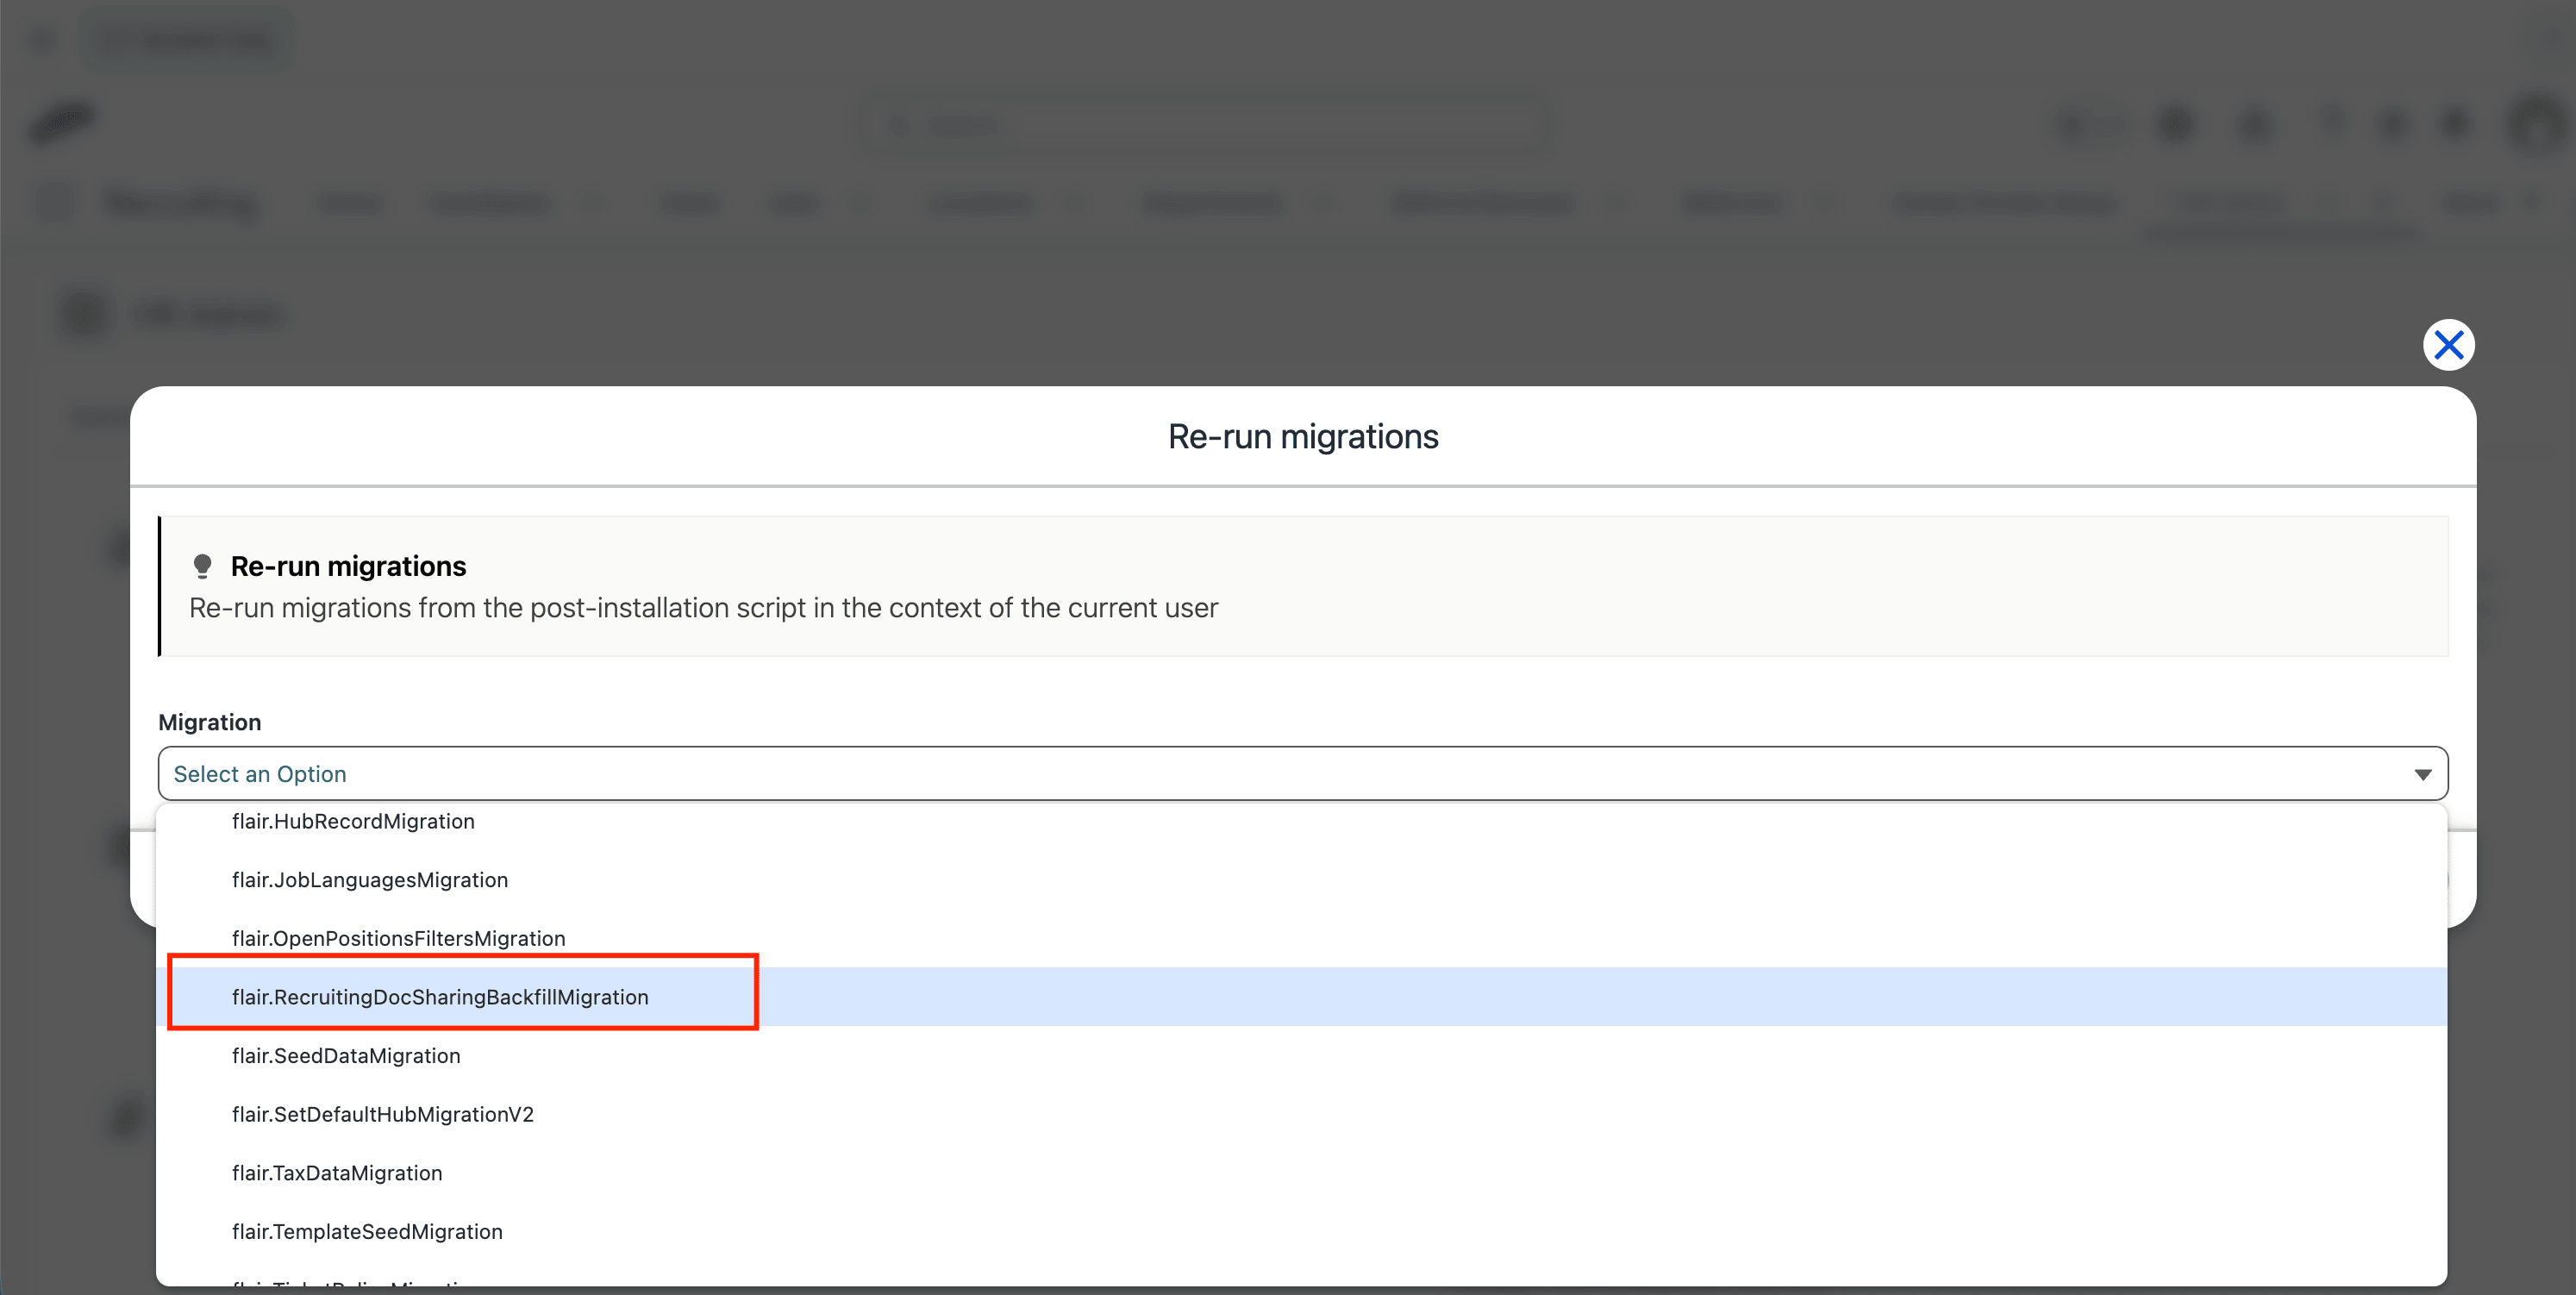
-
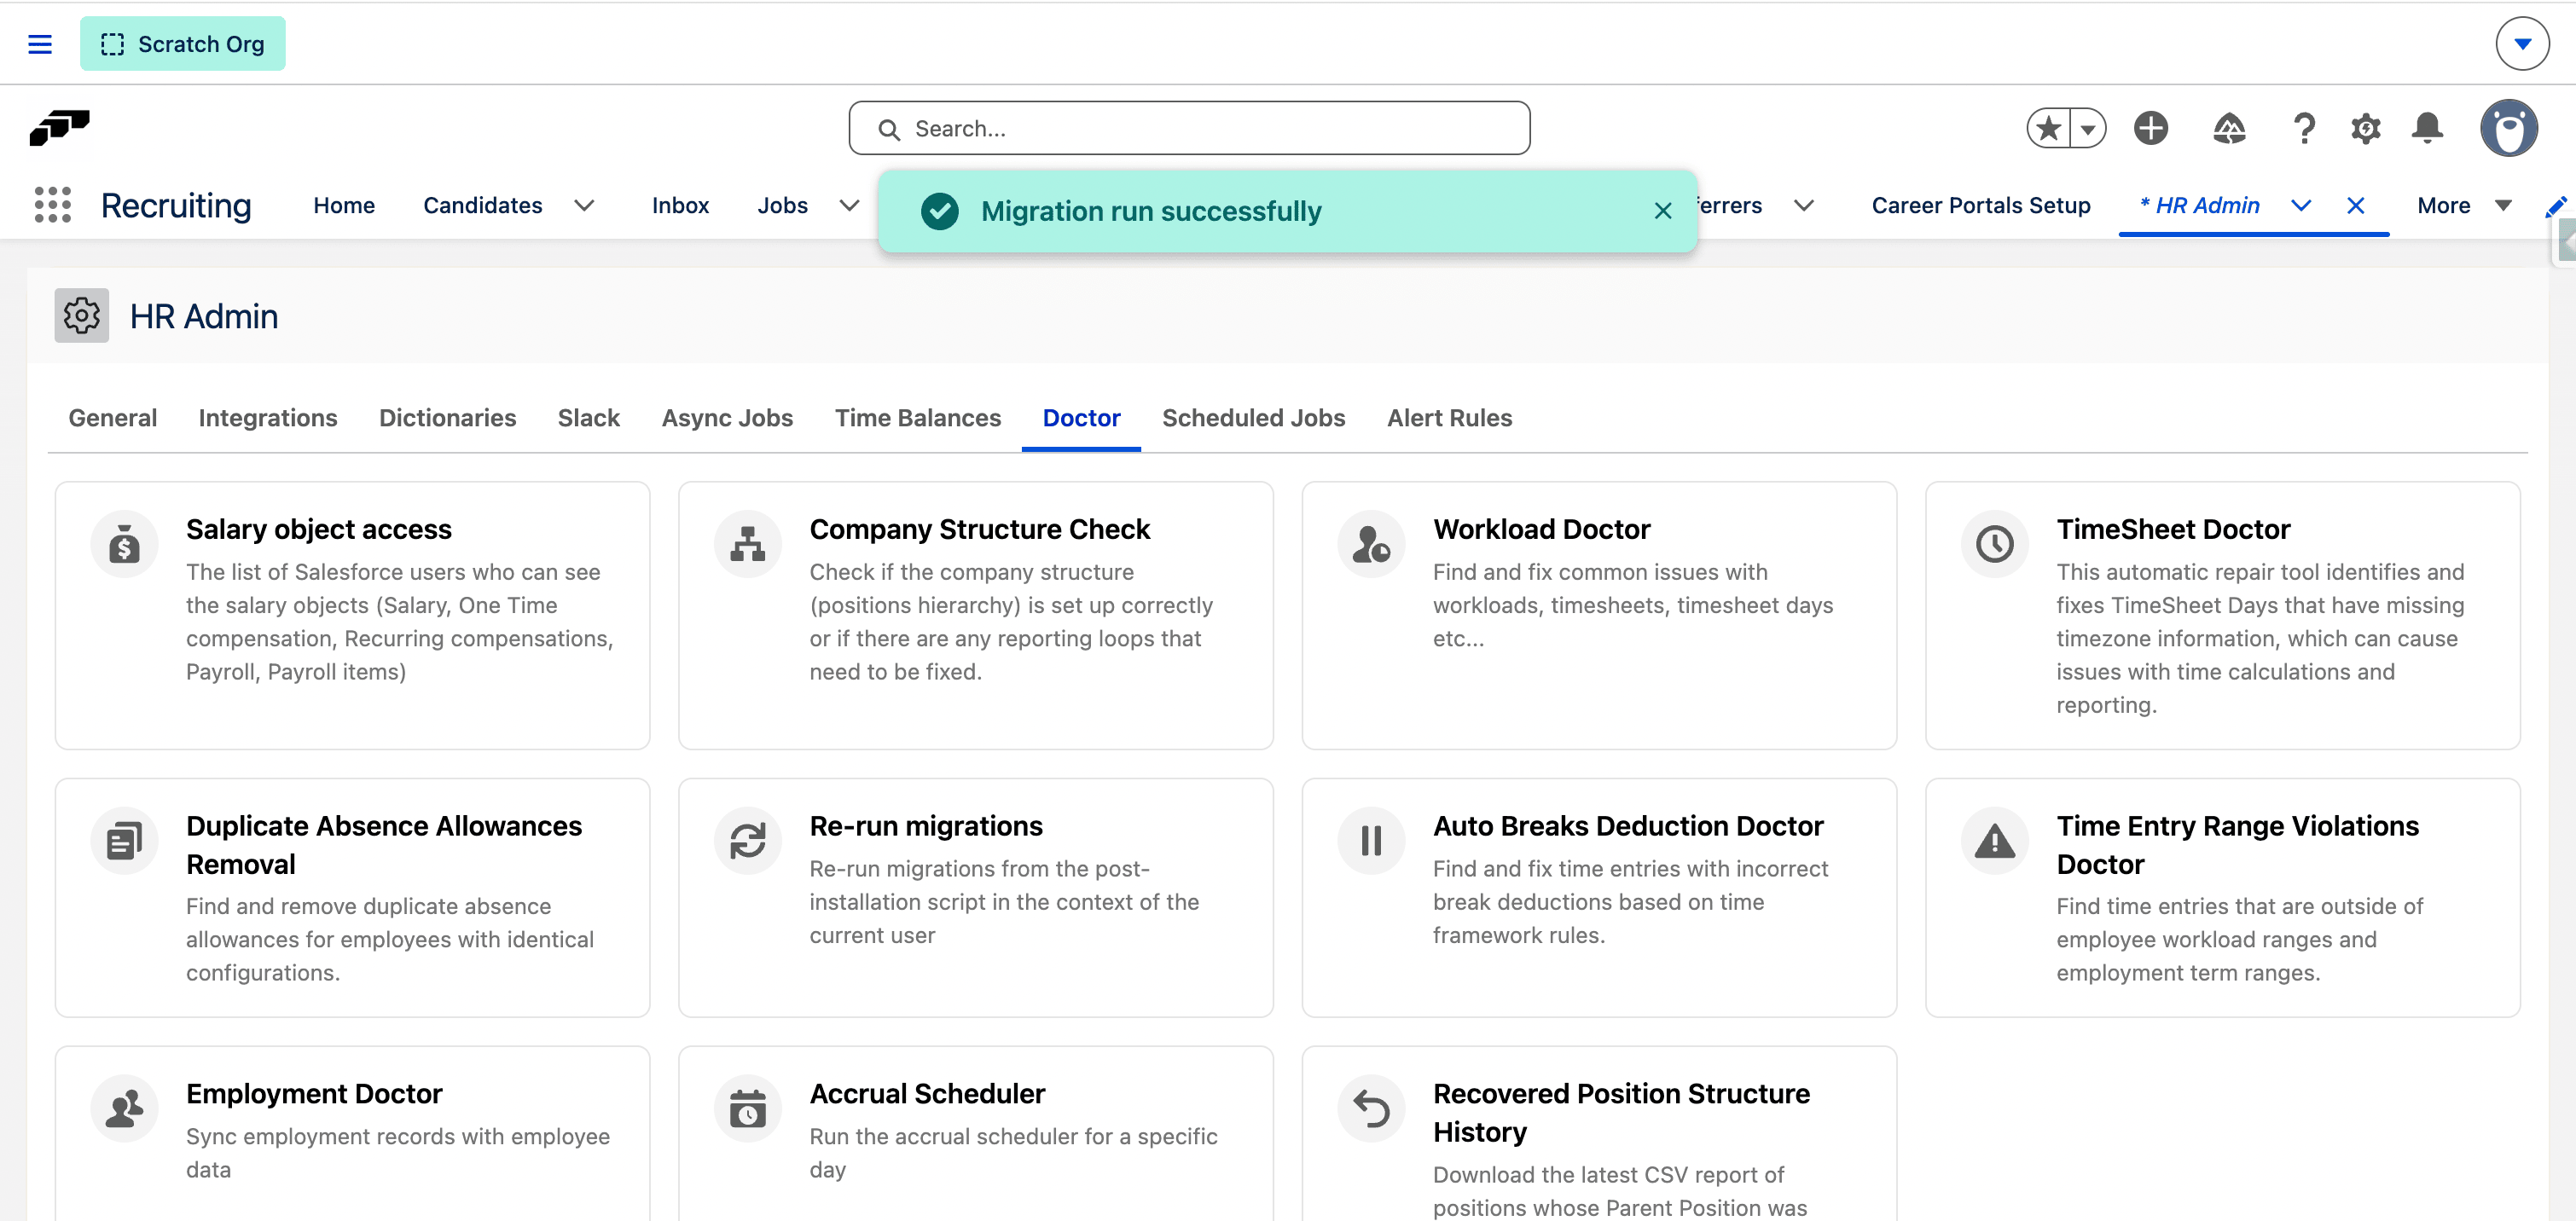
Run the migration. The message Migration run successfully confirms the backfill.
The migration affects existing documents only and has no effect until the Recruiting Document organization-wide default is Private.