Set up a recruiting email address
Create Salesforce email services for new applications and existing candidate conversations. flair can reply to applicants, create candidate records, notify a context user, and store incoming or BCC'd messages.
Salesforce Admins who manage Email Services in Salesforce Setup. Recruiters use the resulting address in the flair Recruiting app.
Before you begin
- Confirm that you can create Salesforce Email Services and select an Apex class.
- Choose the Salesforce context user who receives new-application notifications.
- If you want a public recruiting address, confirm that you can configure forwarding in Gmail or Outlook.
Create the new-candidate email service
-
In Salesforce Setup, enter
Email Servicesin Quick Find. -
Open Email Services.
-
Click New Email Service.
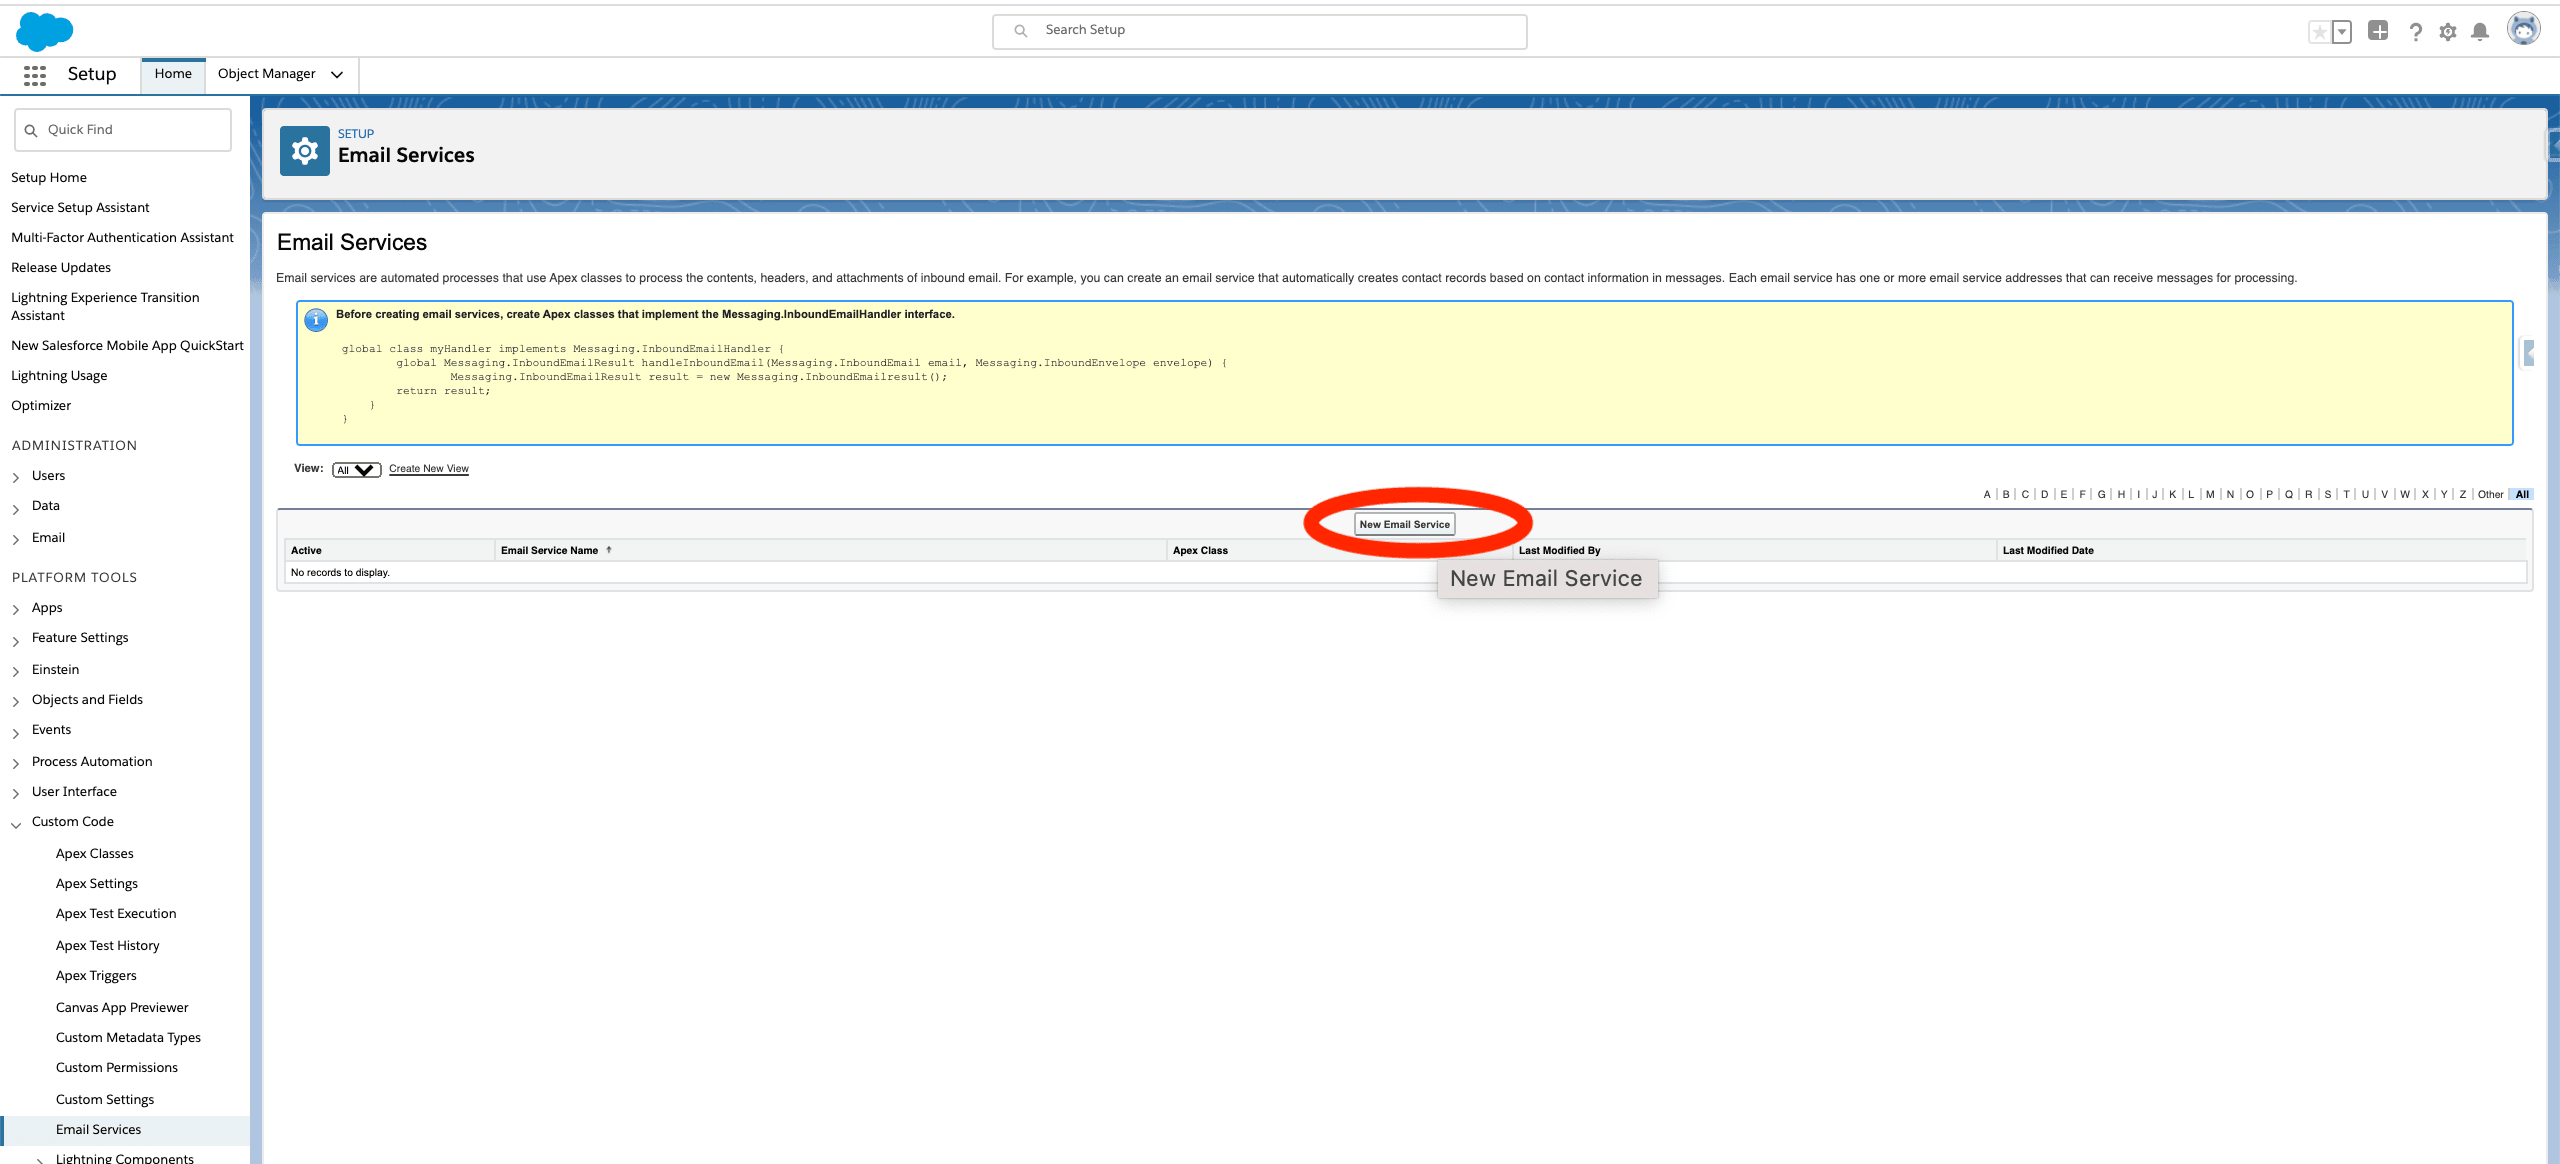
-
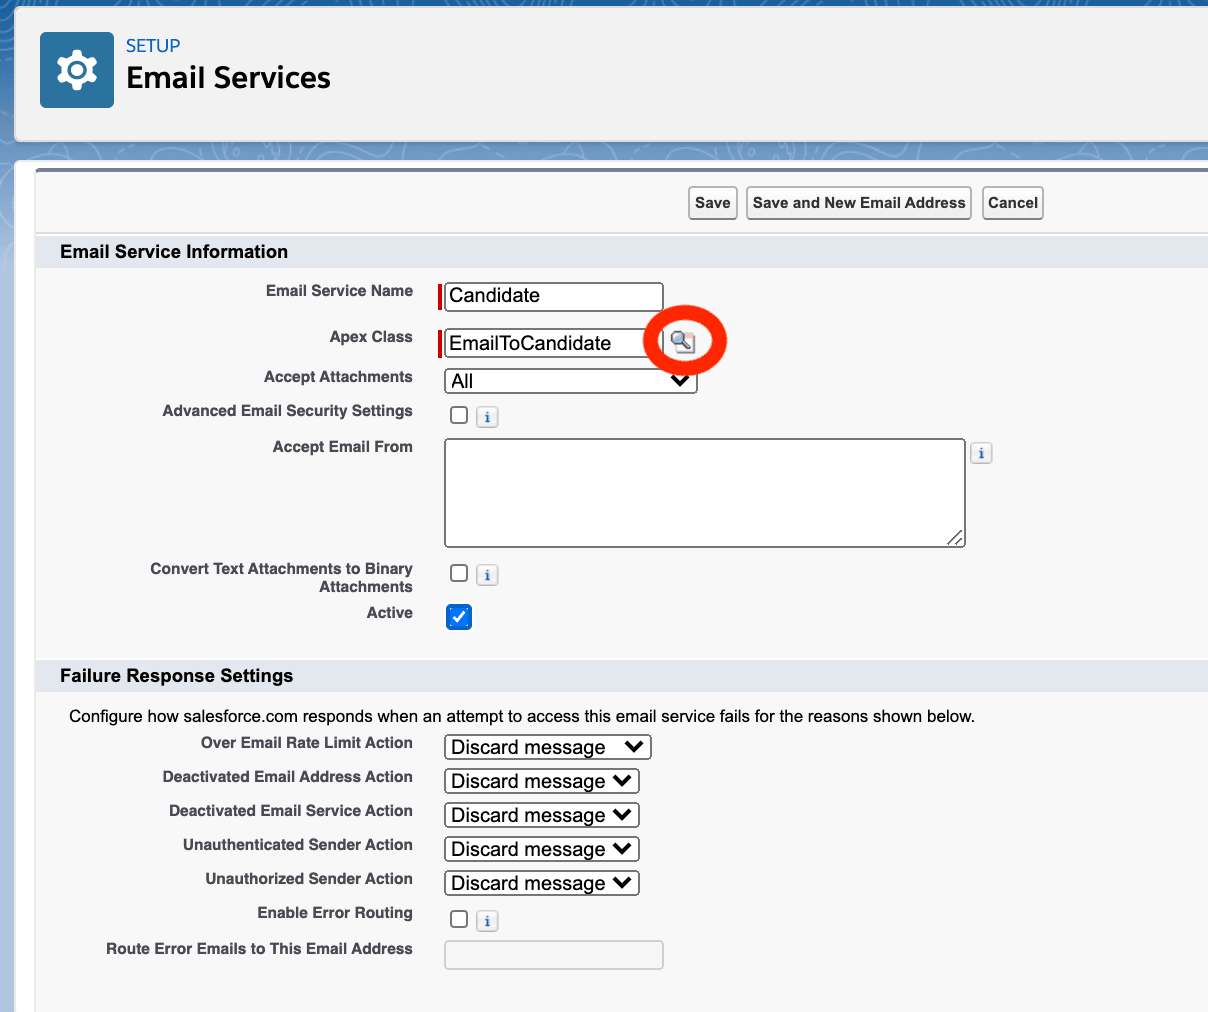
In Email Service Name, enter
Candidate. -
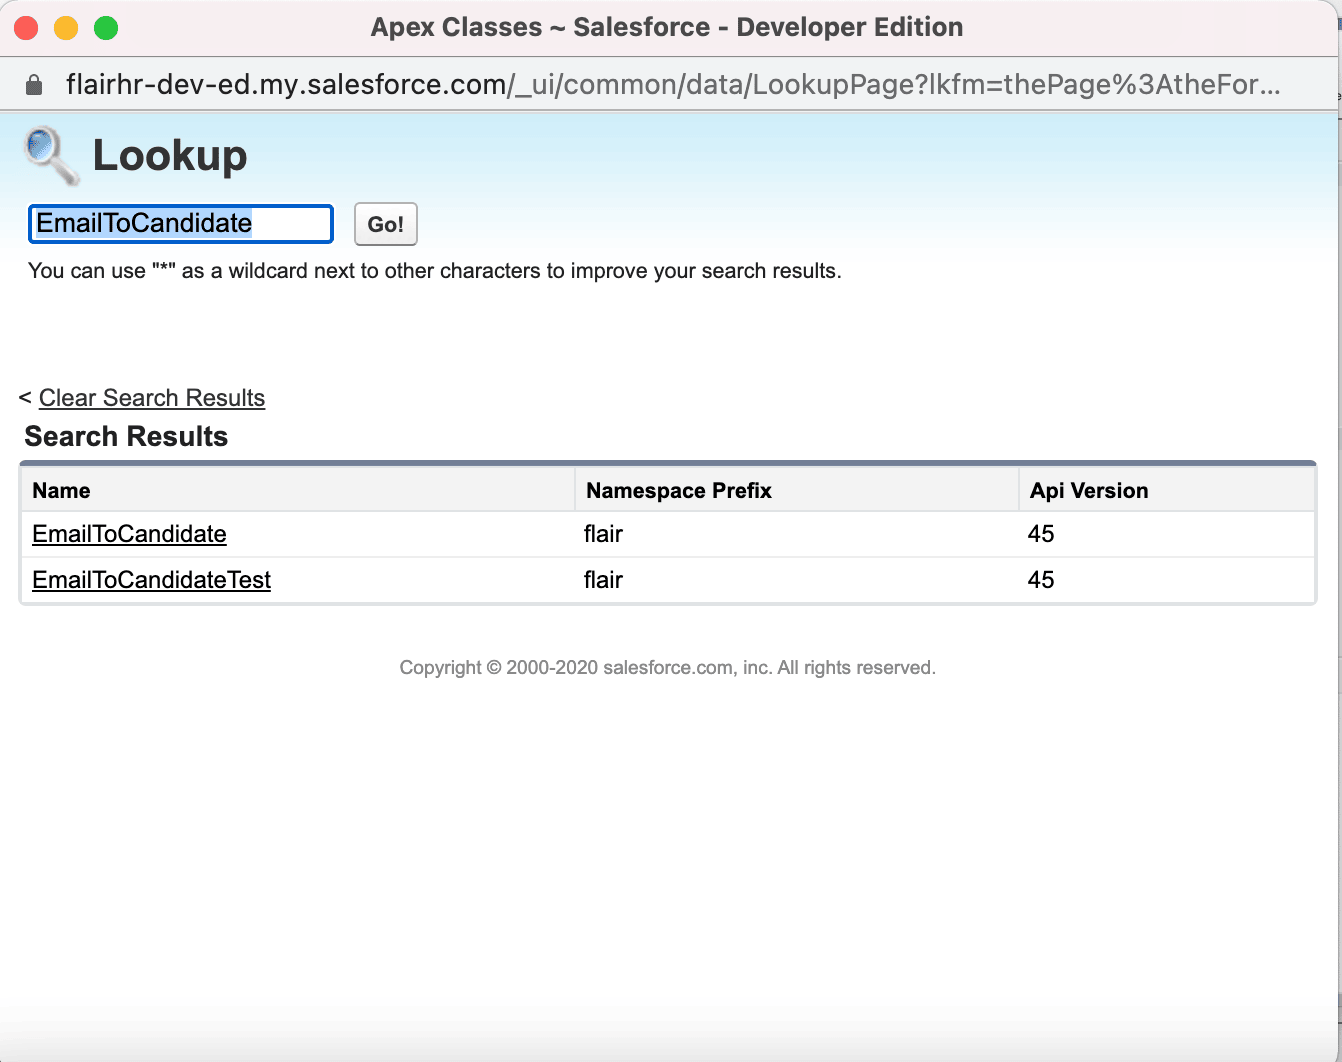
In Apex Class, select
EmailToCandidate. -
Select Active.
-
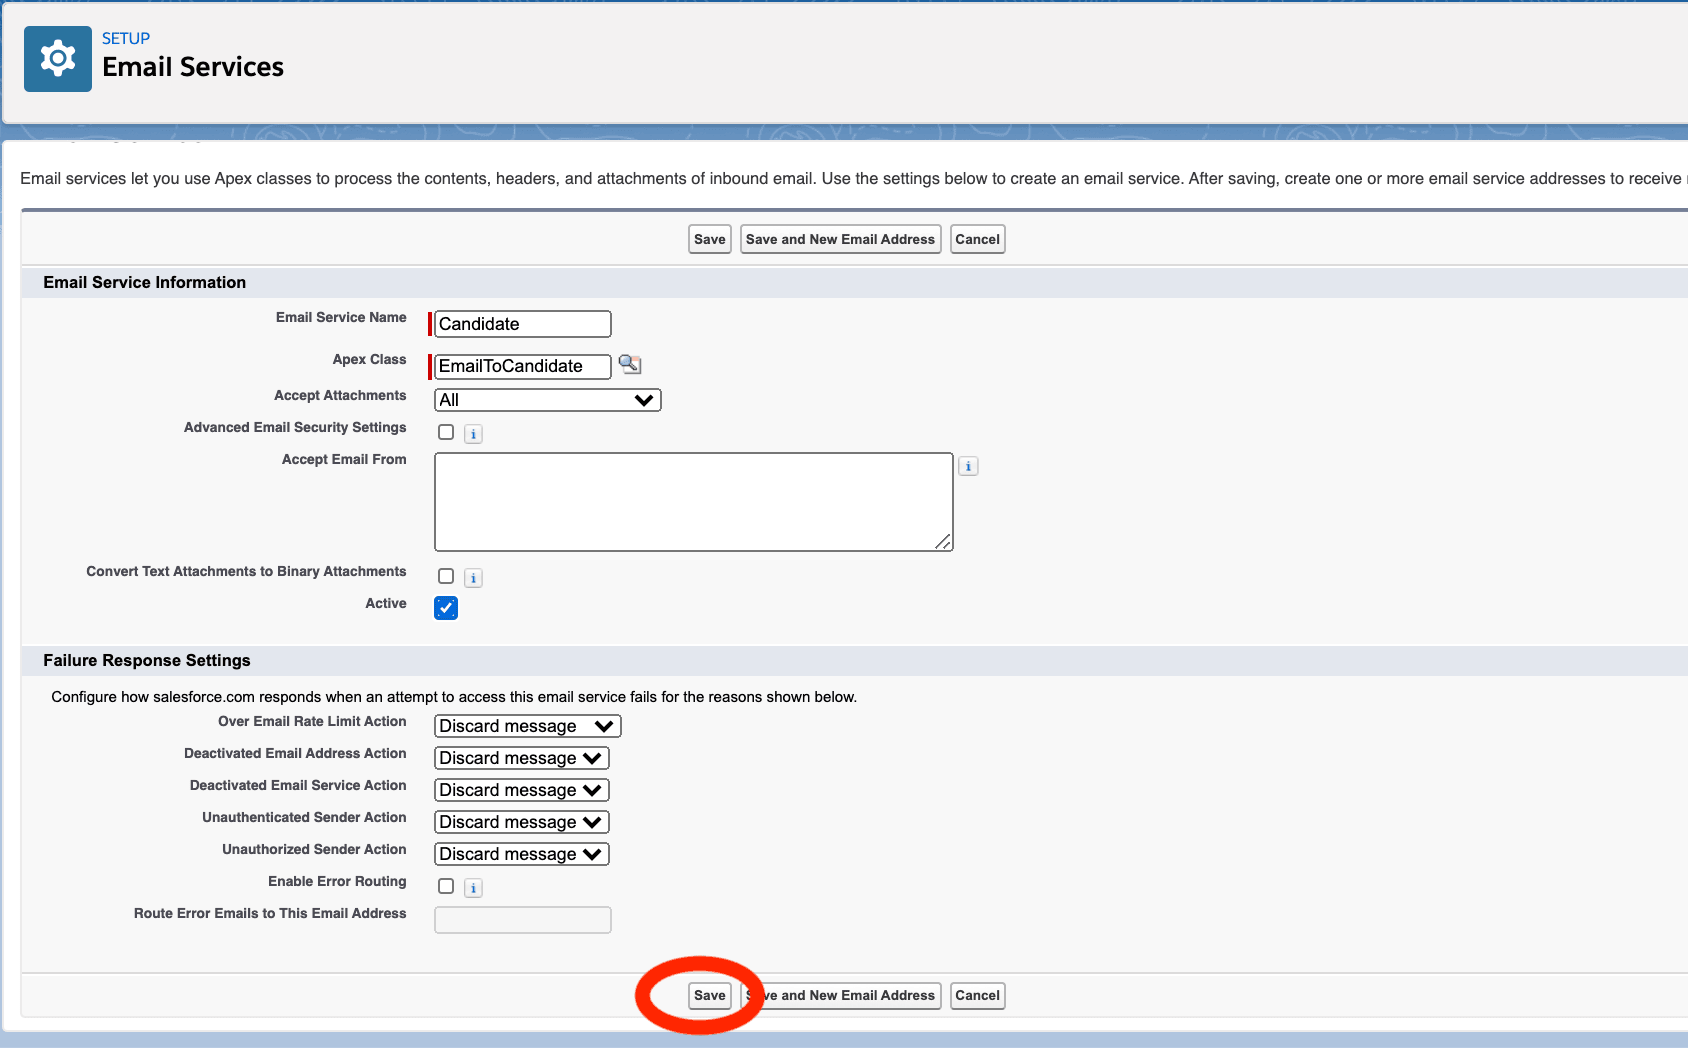
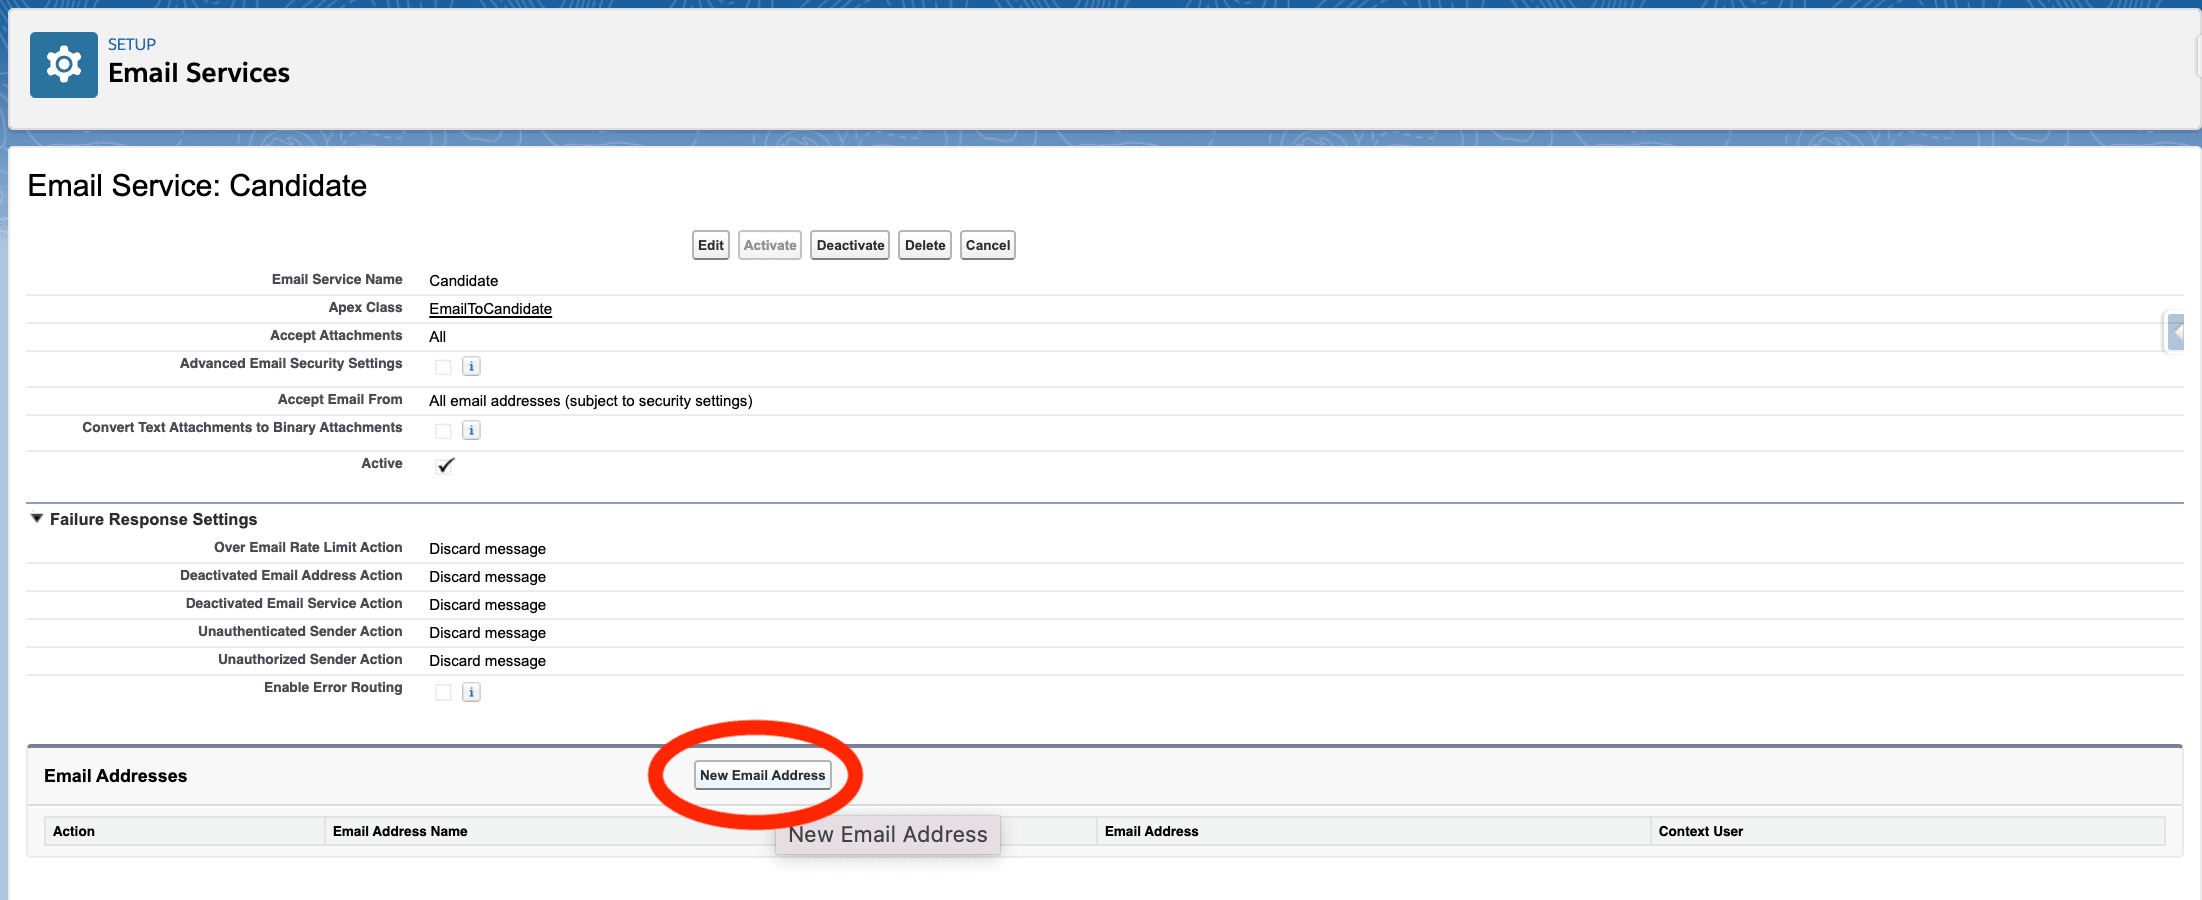
Click Save. Salesforce opens Email Service: Candidate.
Configure the new-candidate service address
-
On Email Service: Candidate, click New Email Address.
-
In Email Address Name, enter a recognizable name.
-
In Email Address, enter the local part before the
@symbol, such asjobs. Salesforce generates the rest of the address. -
In Context User, select the Salesforce user who receives new-application notifications.
-
To verify the context user's email, open the Salesforce profile menu and select Settings.
-
In Quick Find, enter
Personal Information, and confirm the email address.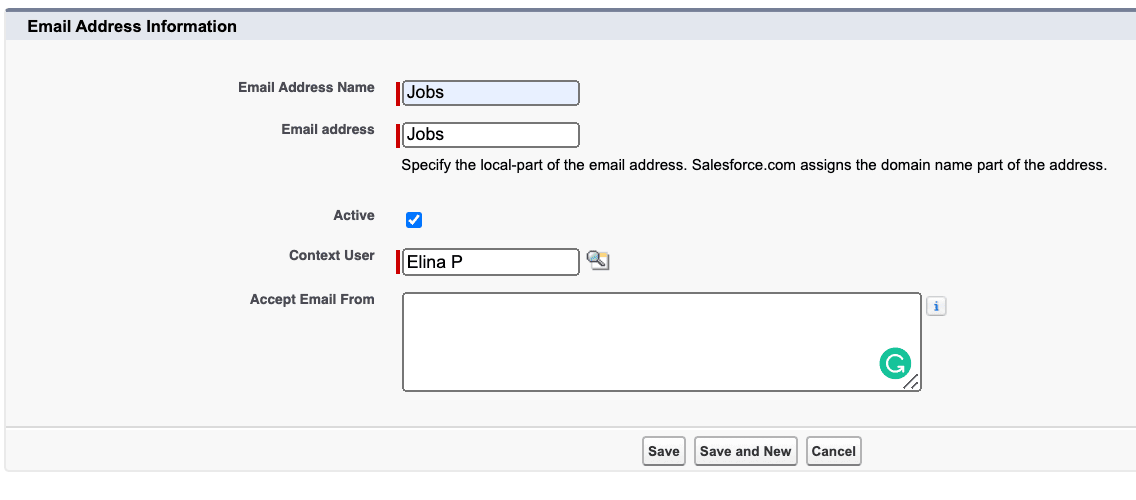
-
Return to the email service address.
-
Click Save. The address appears in the service's email-address list.

Test a new application email
-
Send an email to the generated Salesforce email service address.

-
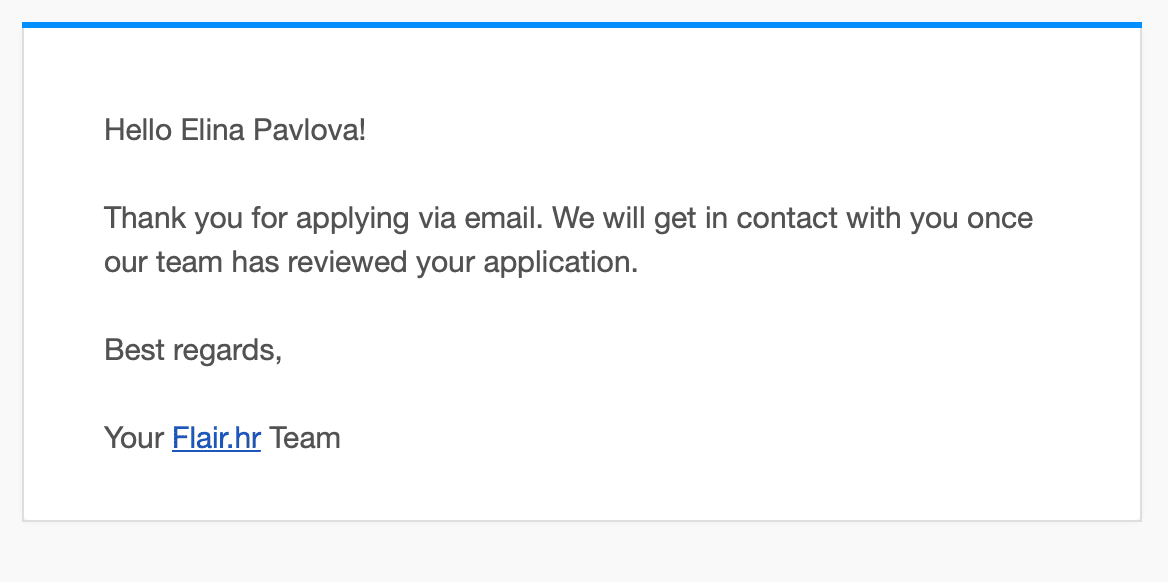
Confirm that the sender receives the automatic candidate reply.
-
Confirm that the selected Context User receives a notification.

-
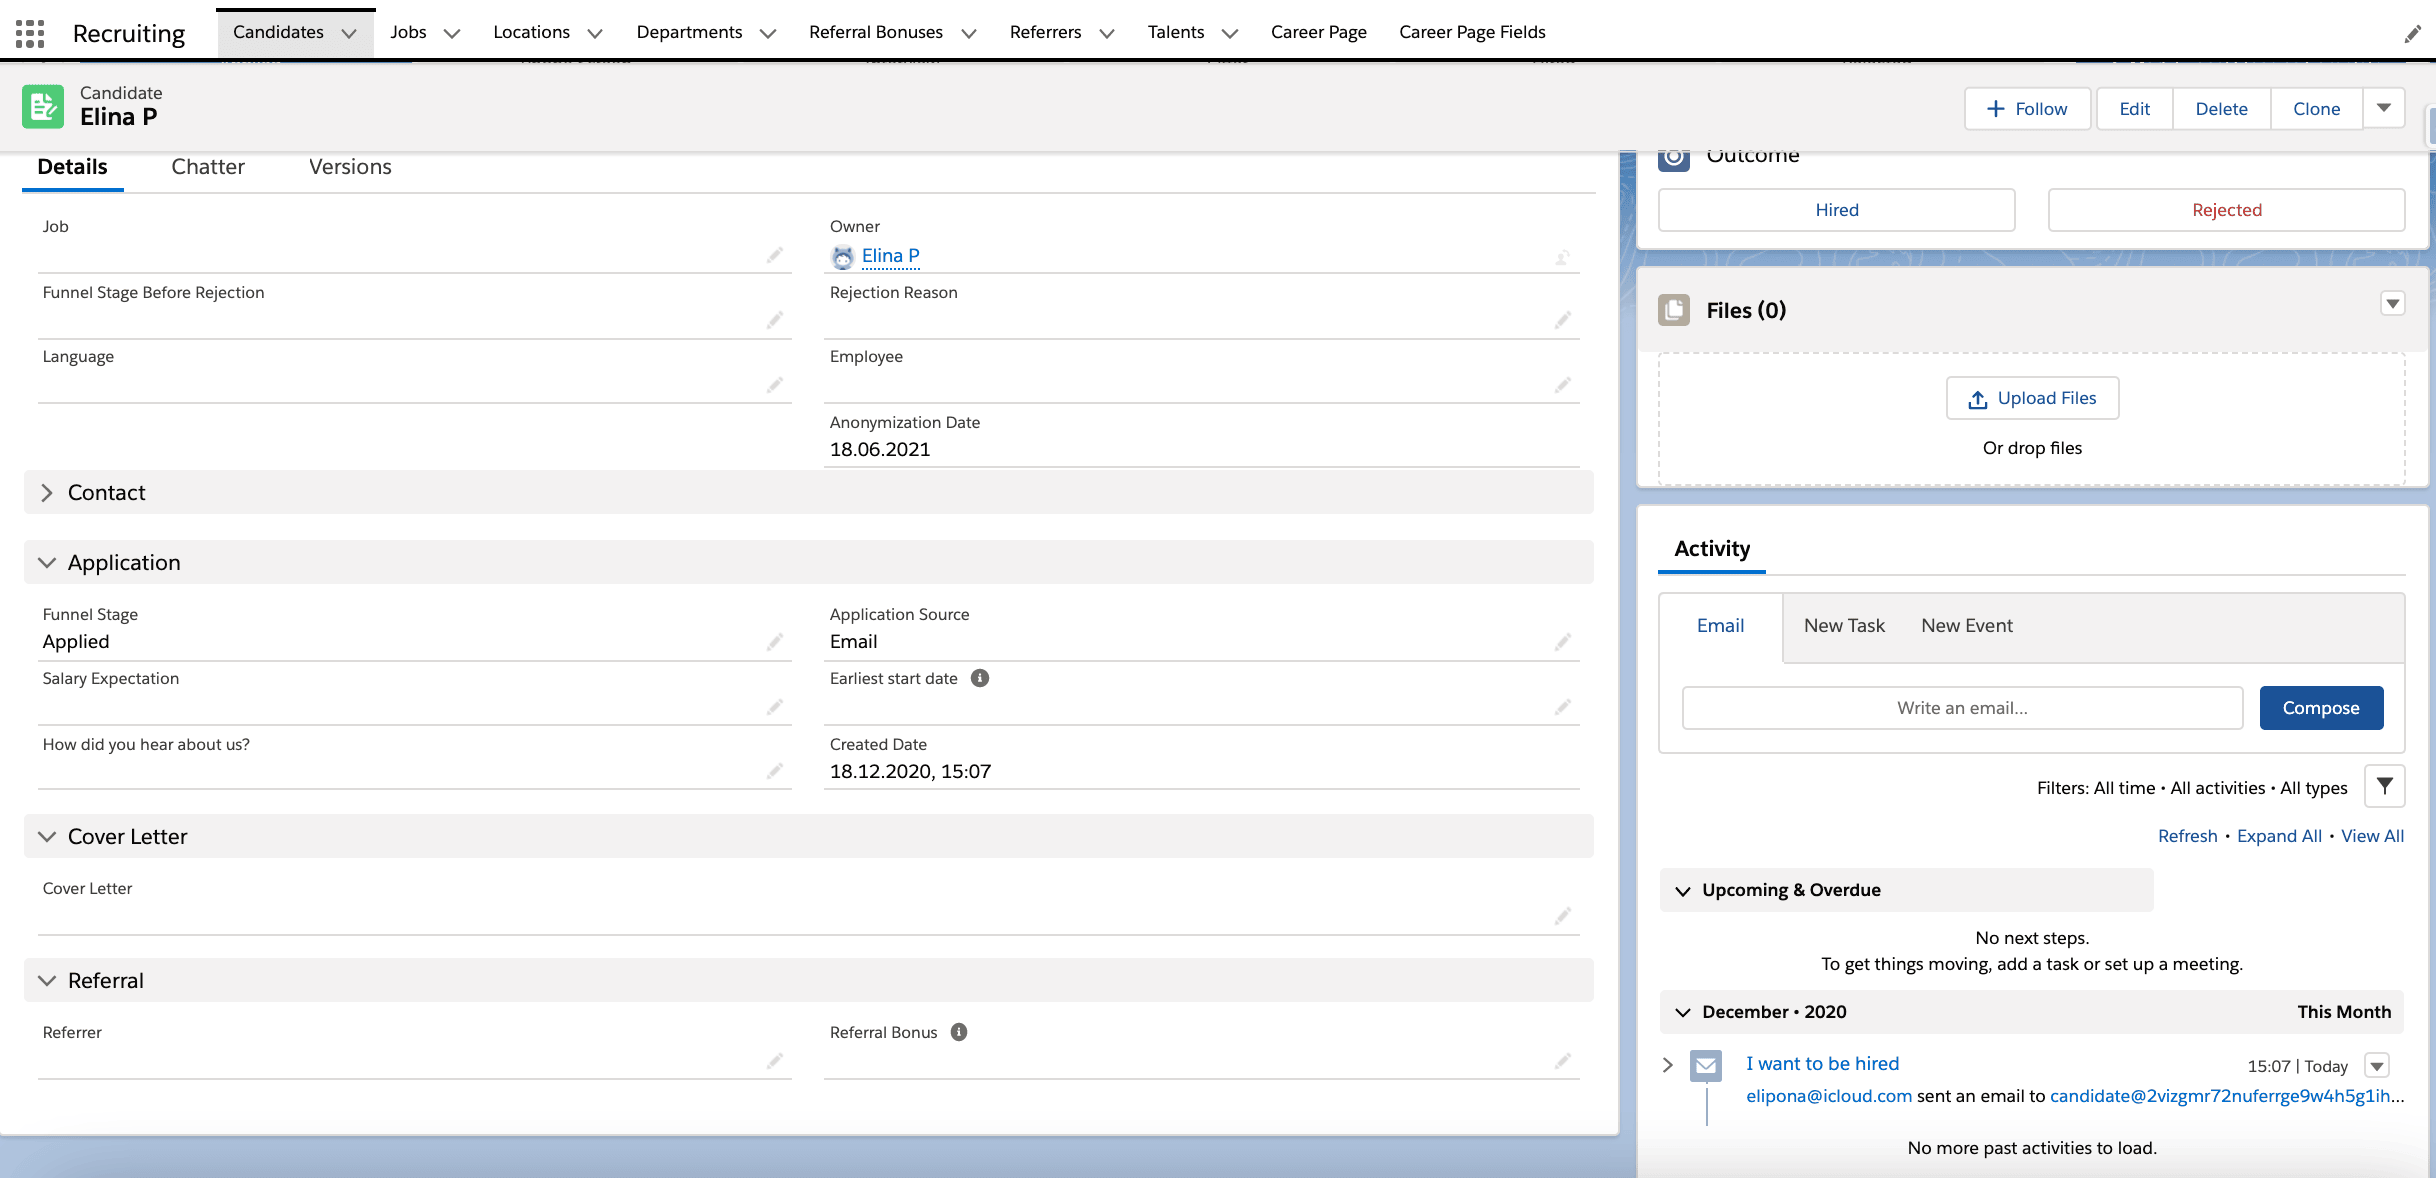
In the flair Recruiting app, open Candidates, and confirm that flair created the candidate record.
Track emails for existing candidates
Create a separate Salesforce email service to store incoming and BCC'd messages in an existing candidate's Activity history.
Create the email service
-
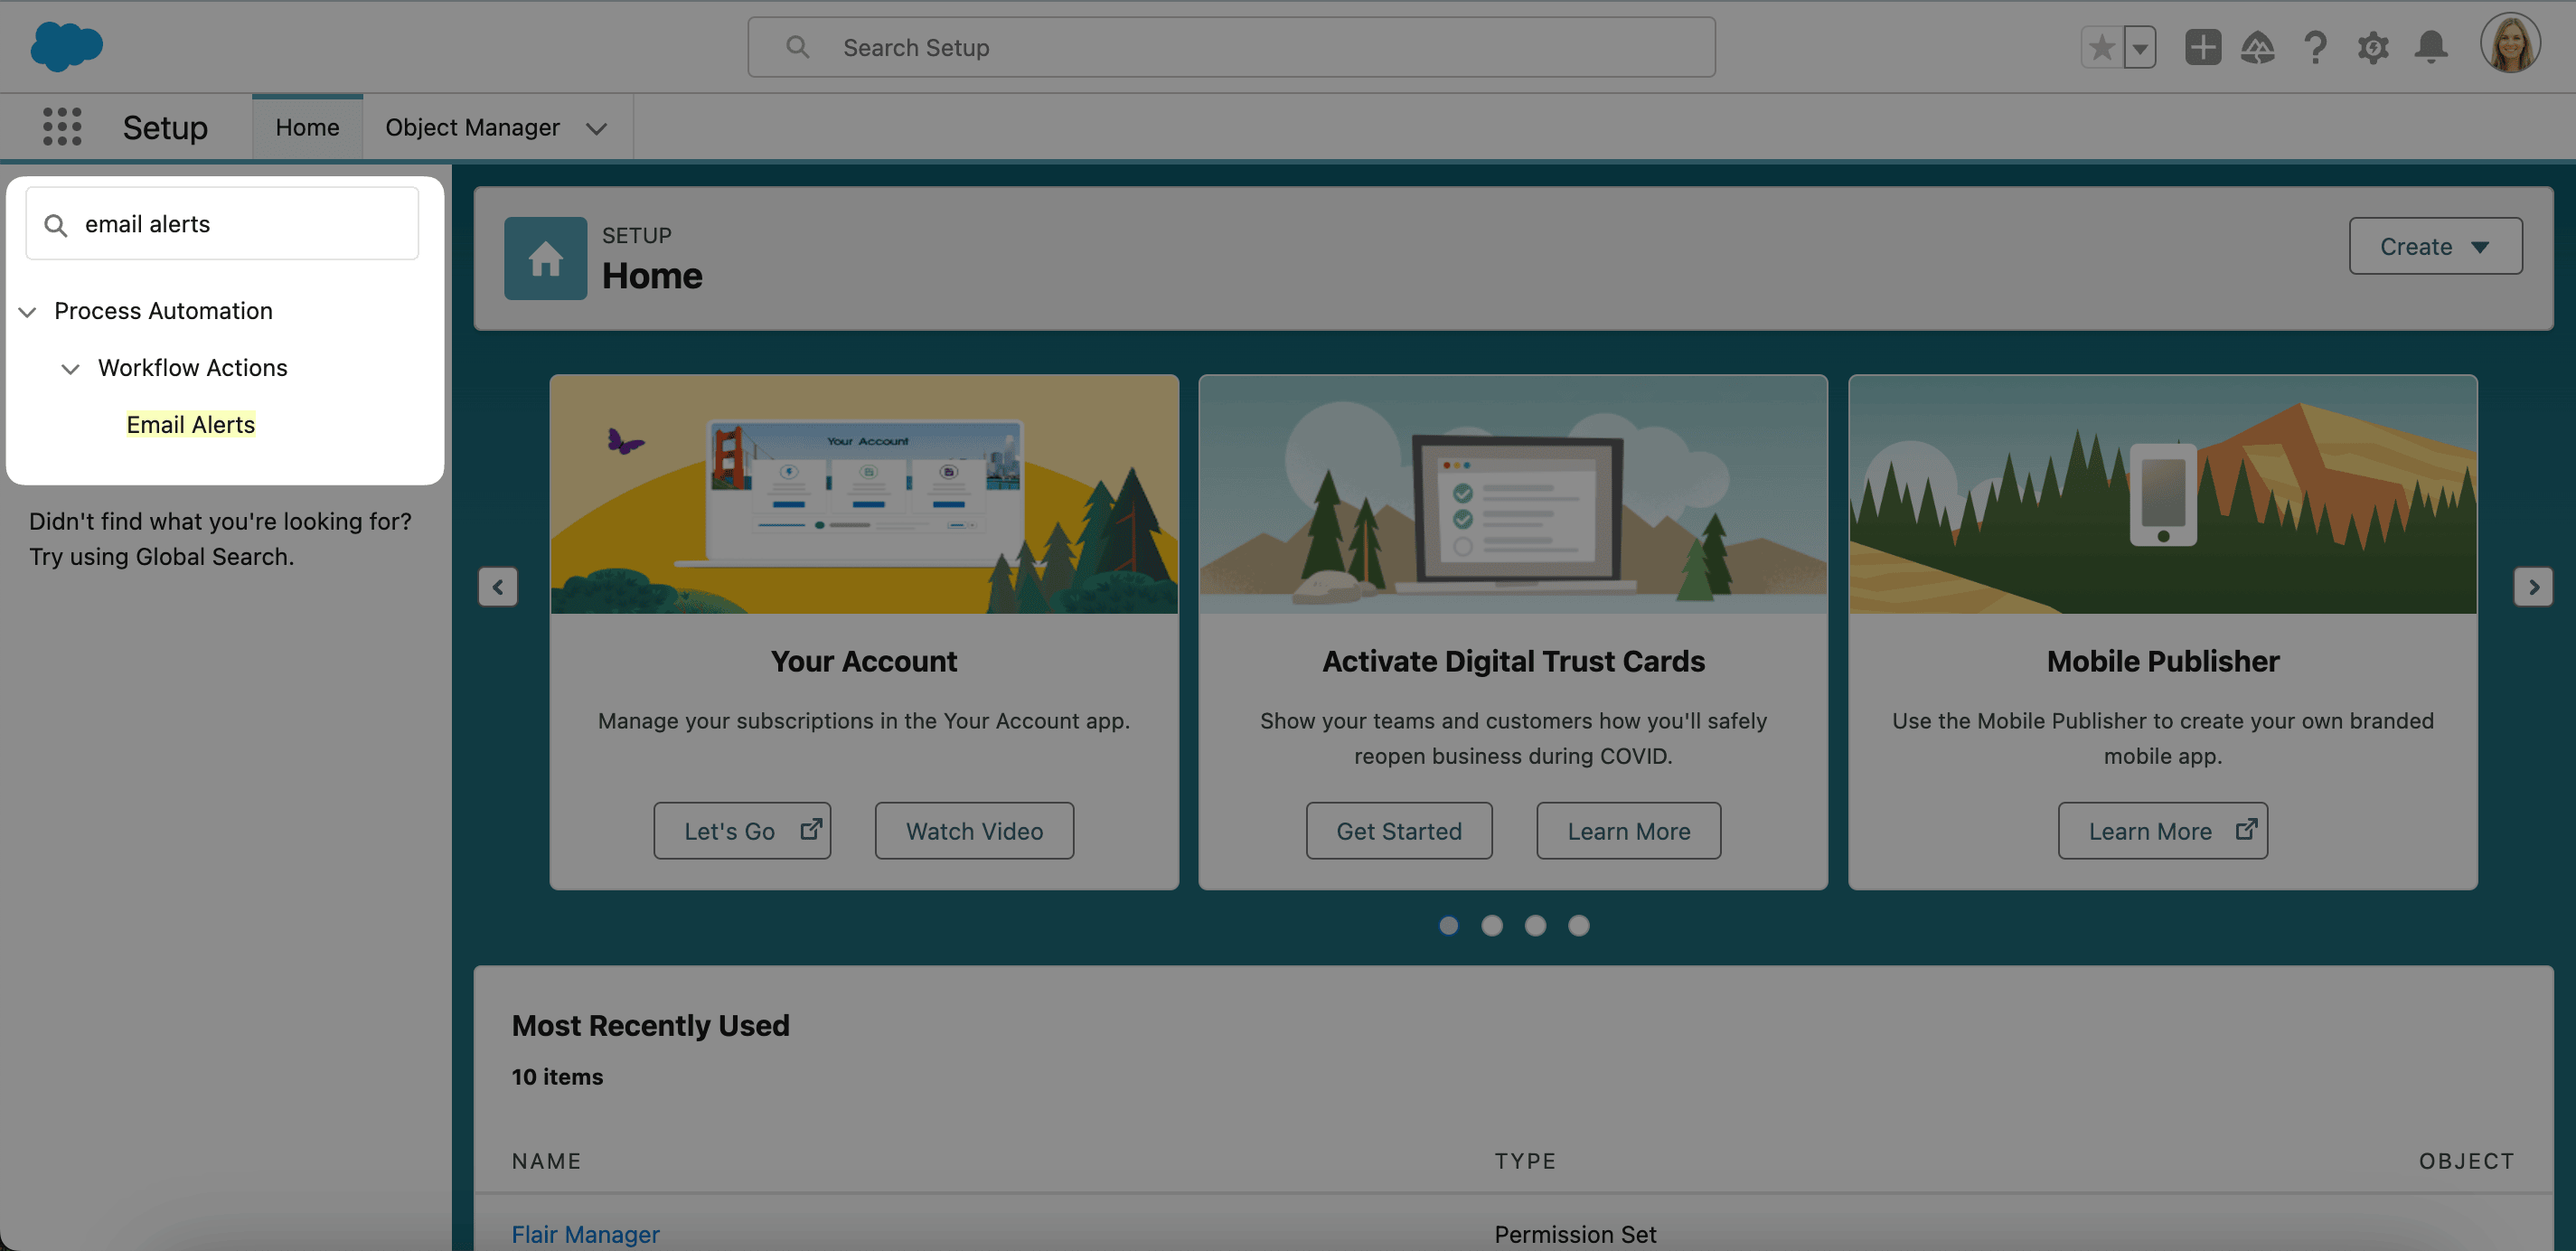
In Salesforce Setup, enter
Email Servicesin Quick Find. -
Open Email Services.
-
Click New Email Service.
-
In Email Service Name, enter a recognizable name.
-
Next to Apex Class, click the lookup icon.
-
In the search bar, enter
Email. -
Select
EmailToExistingCandidateAndTalent. -
Click Save. Salesforce creates the email service.
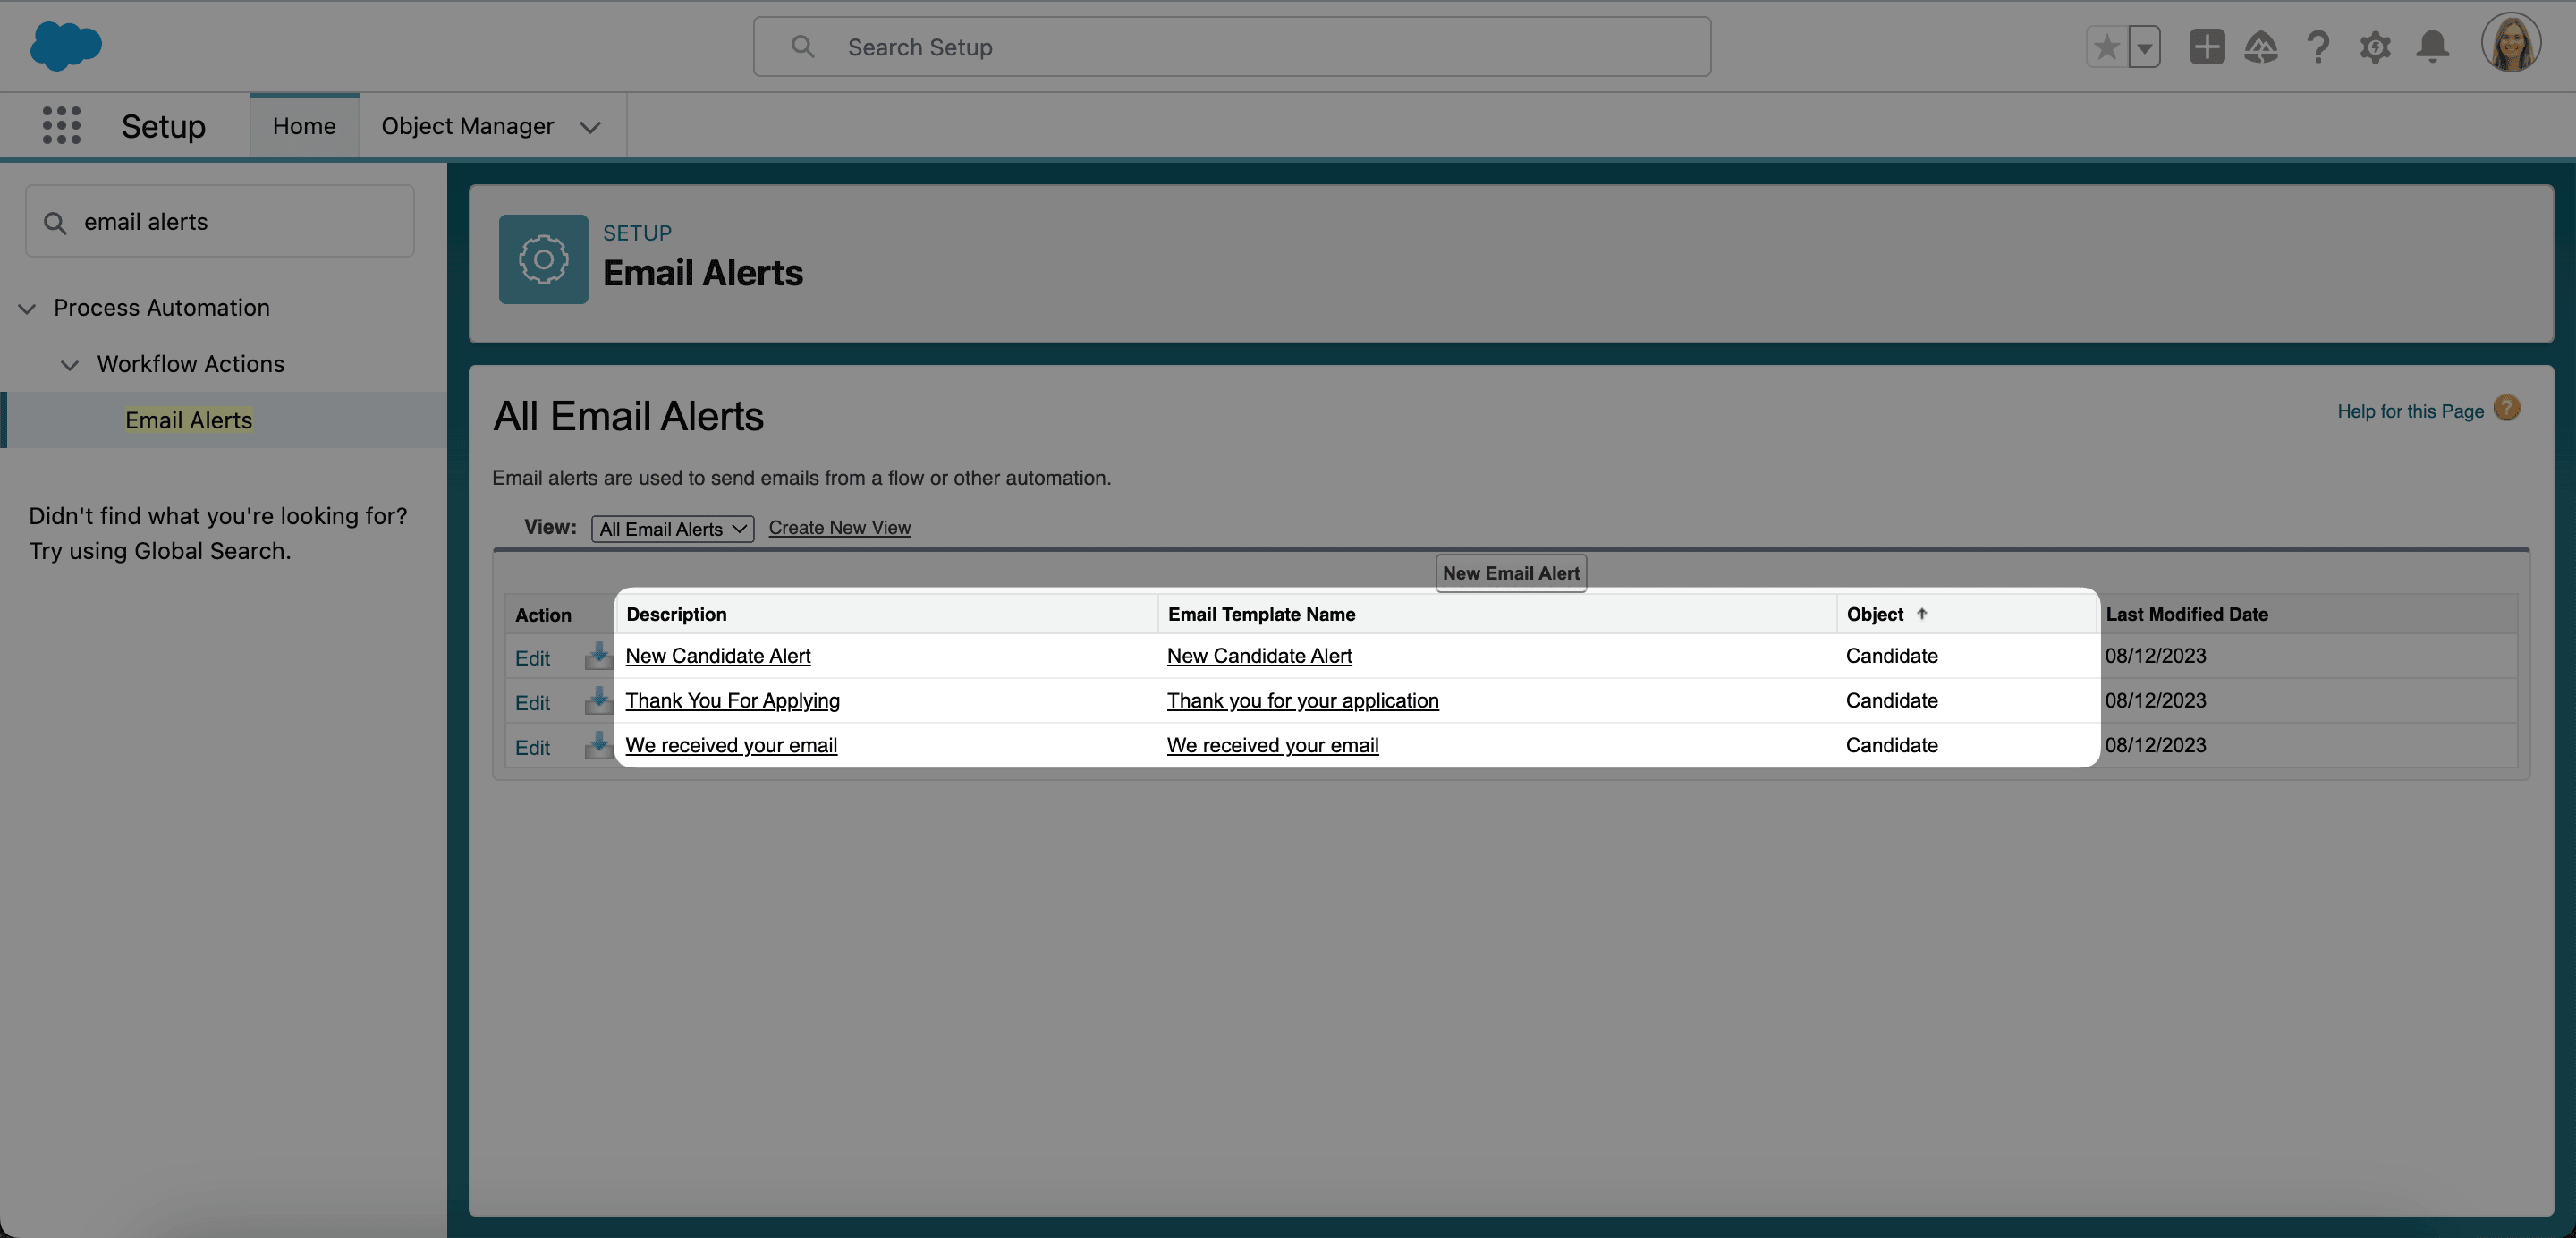
Configure the service address
-
On the email service, click Edit.
-
Click New Email Address.
-
In Email Address Name, enter a recognizable name.
-
In Email Address, enter the local part before the
@symbol.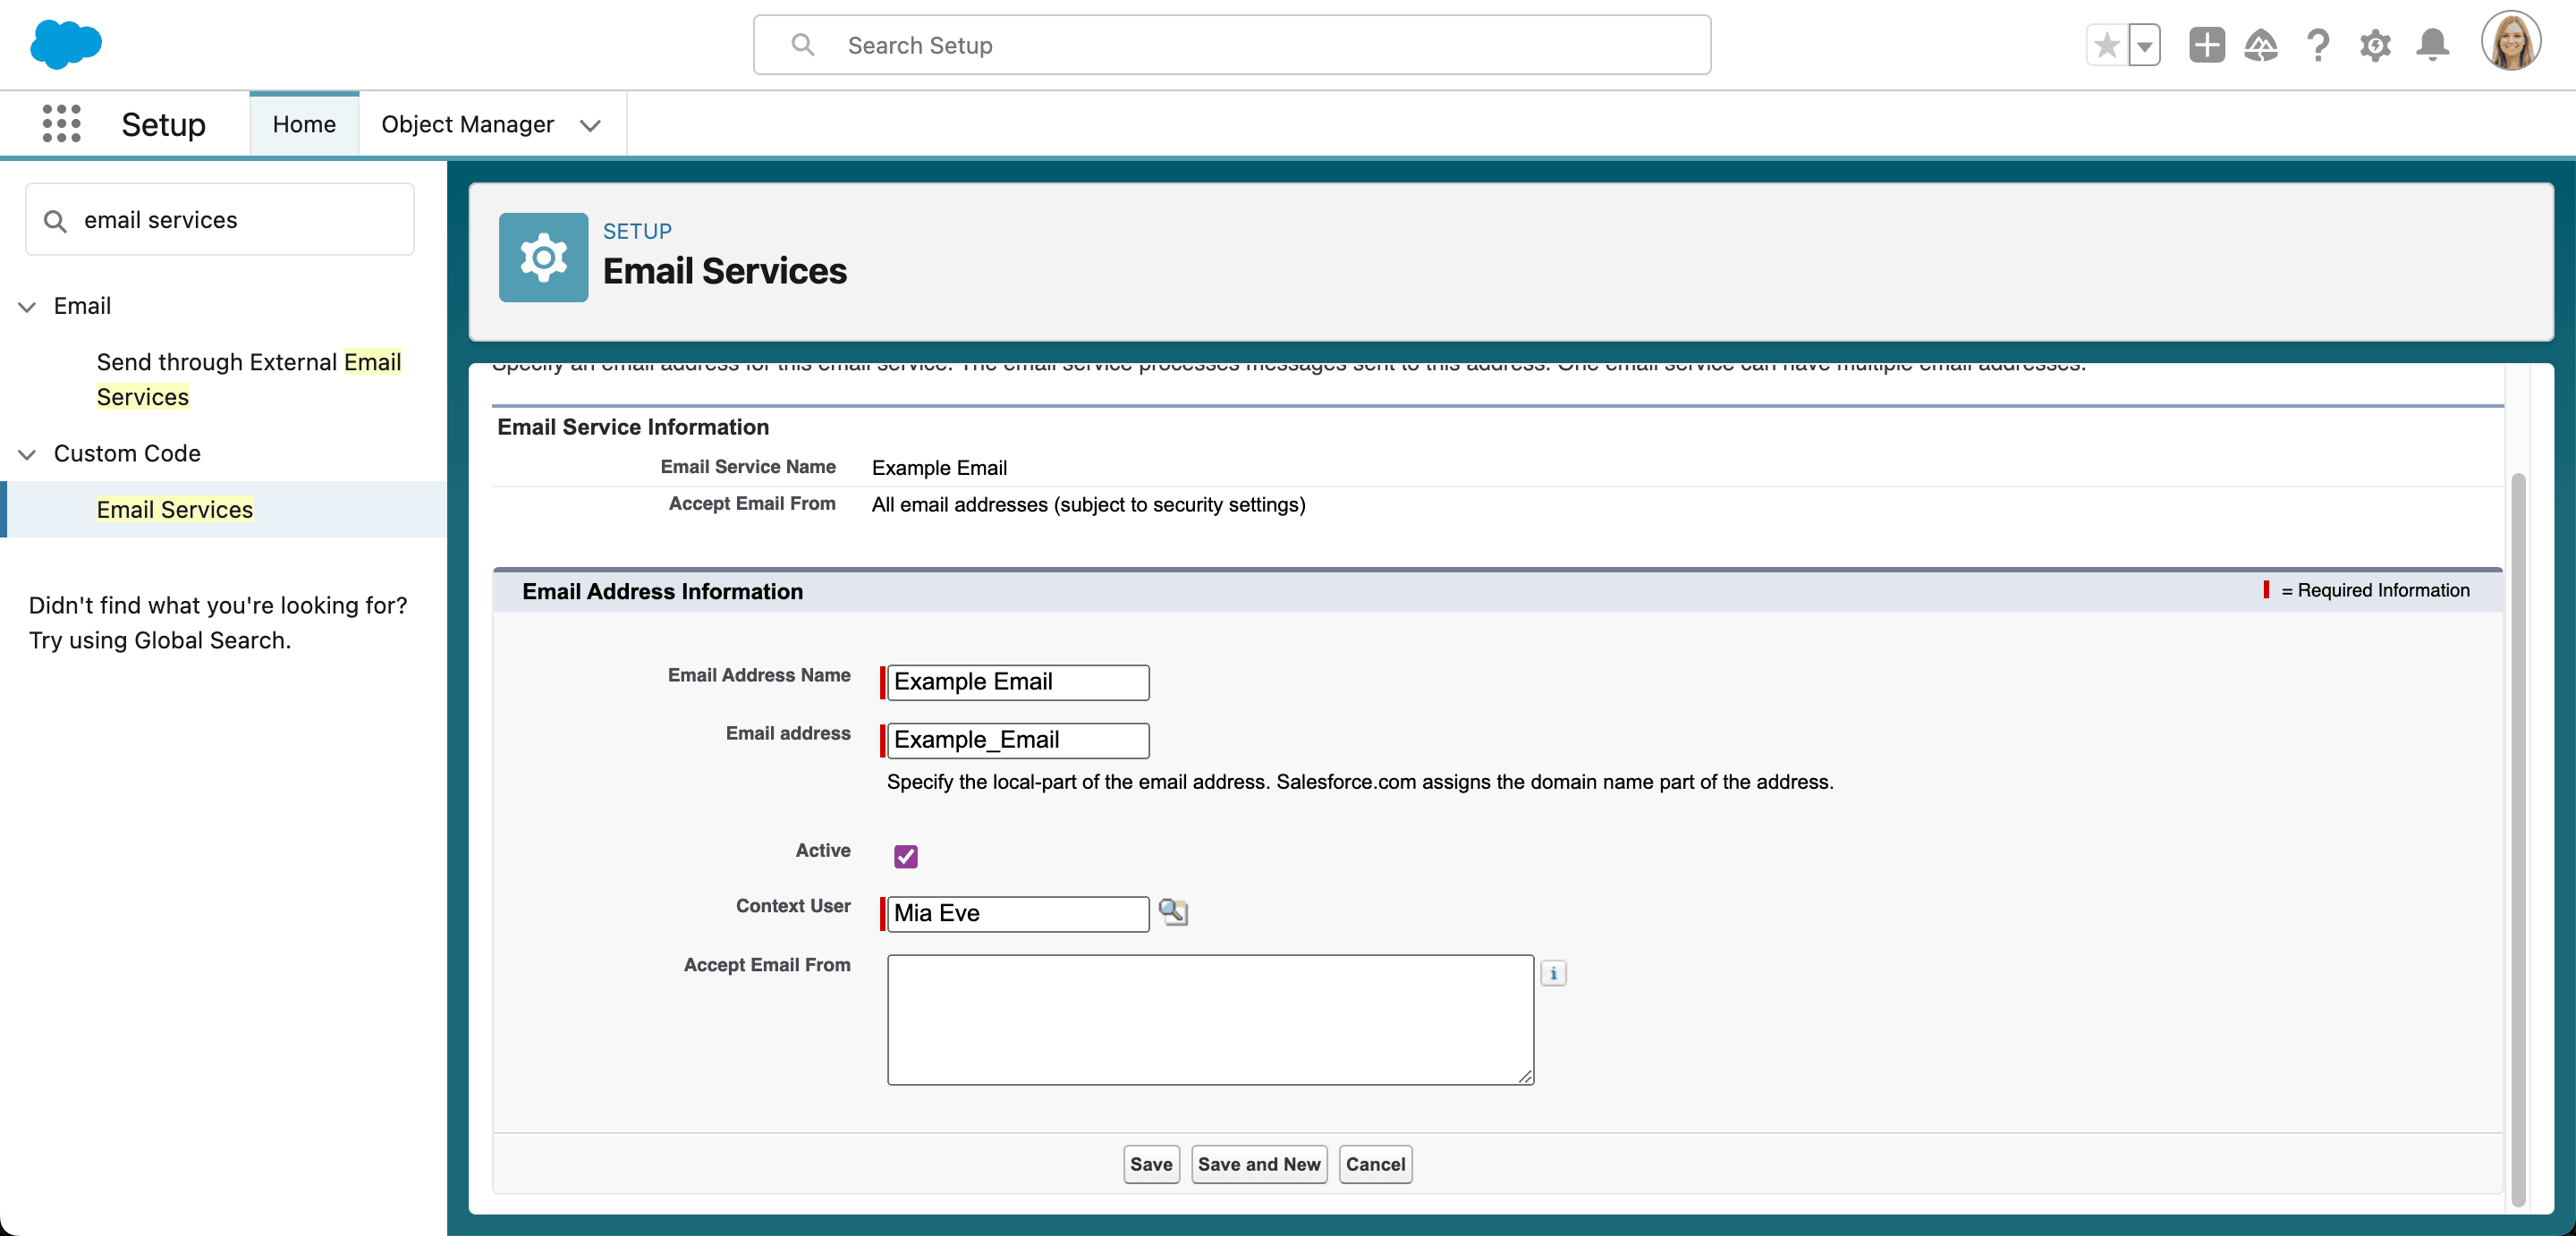
-
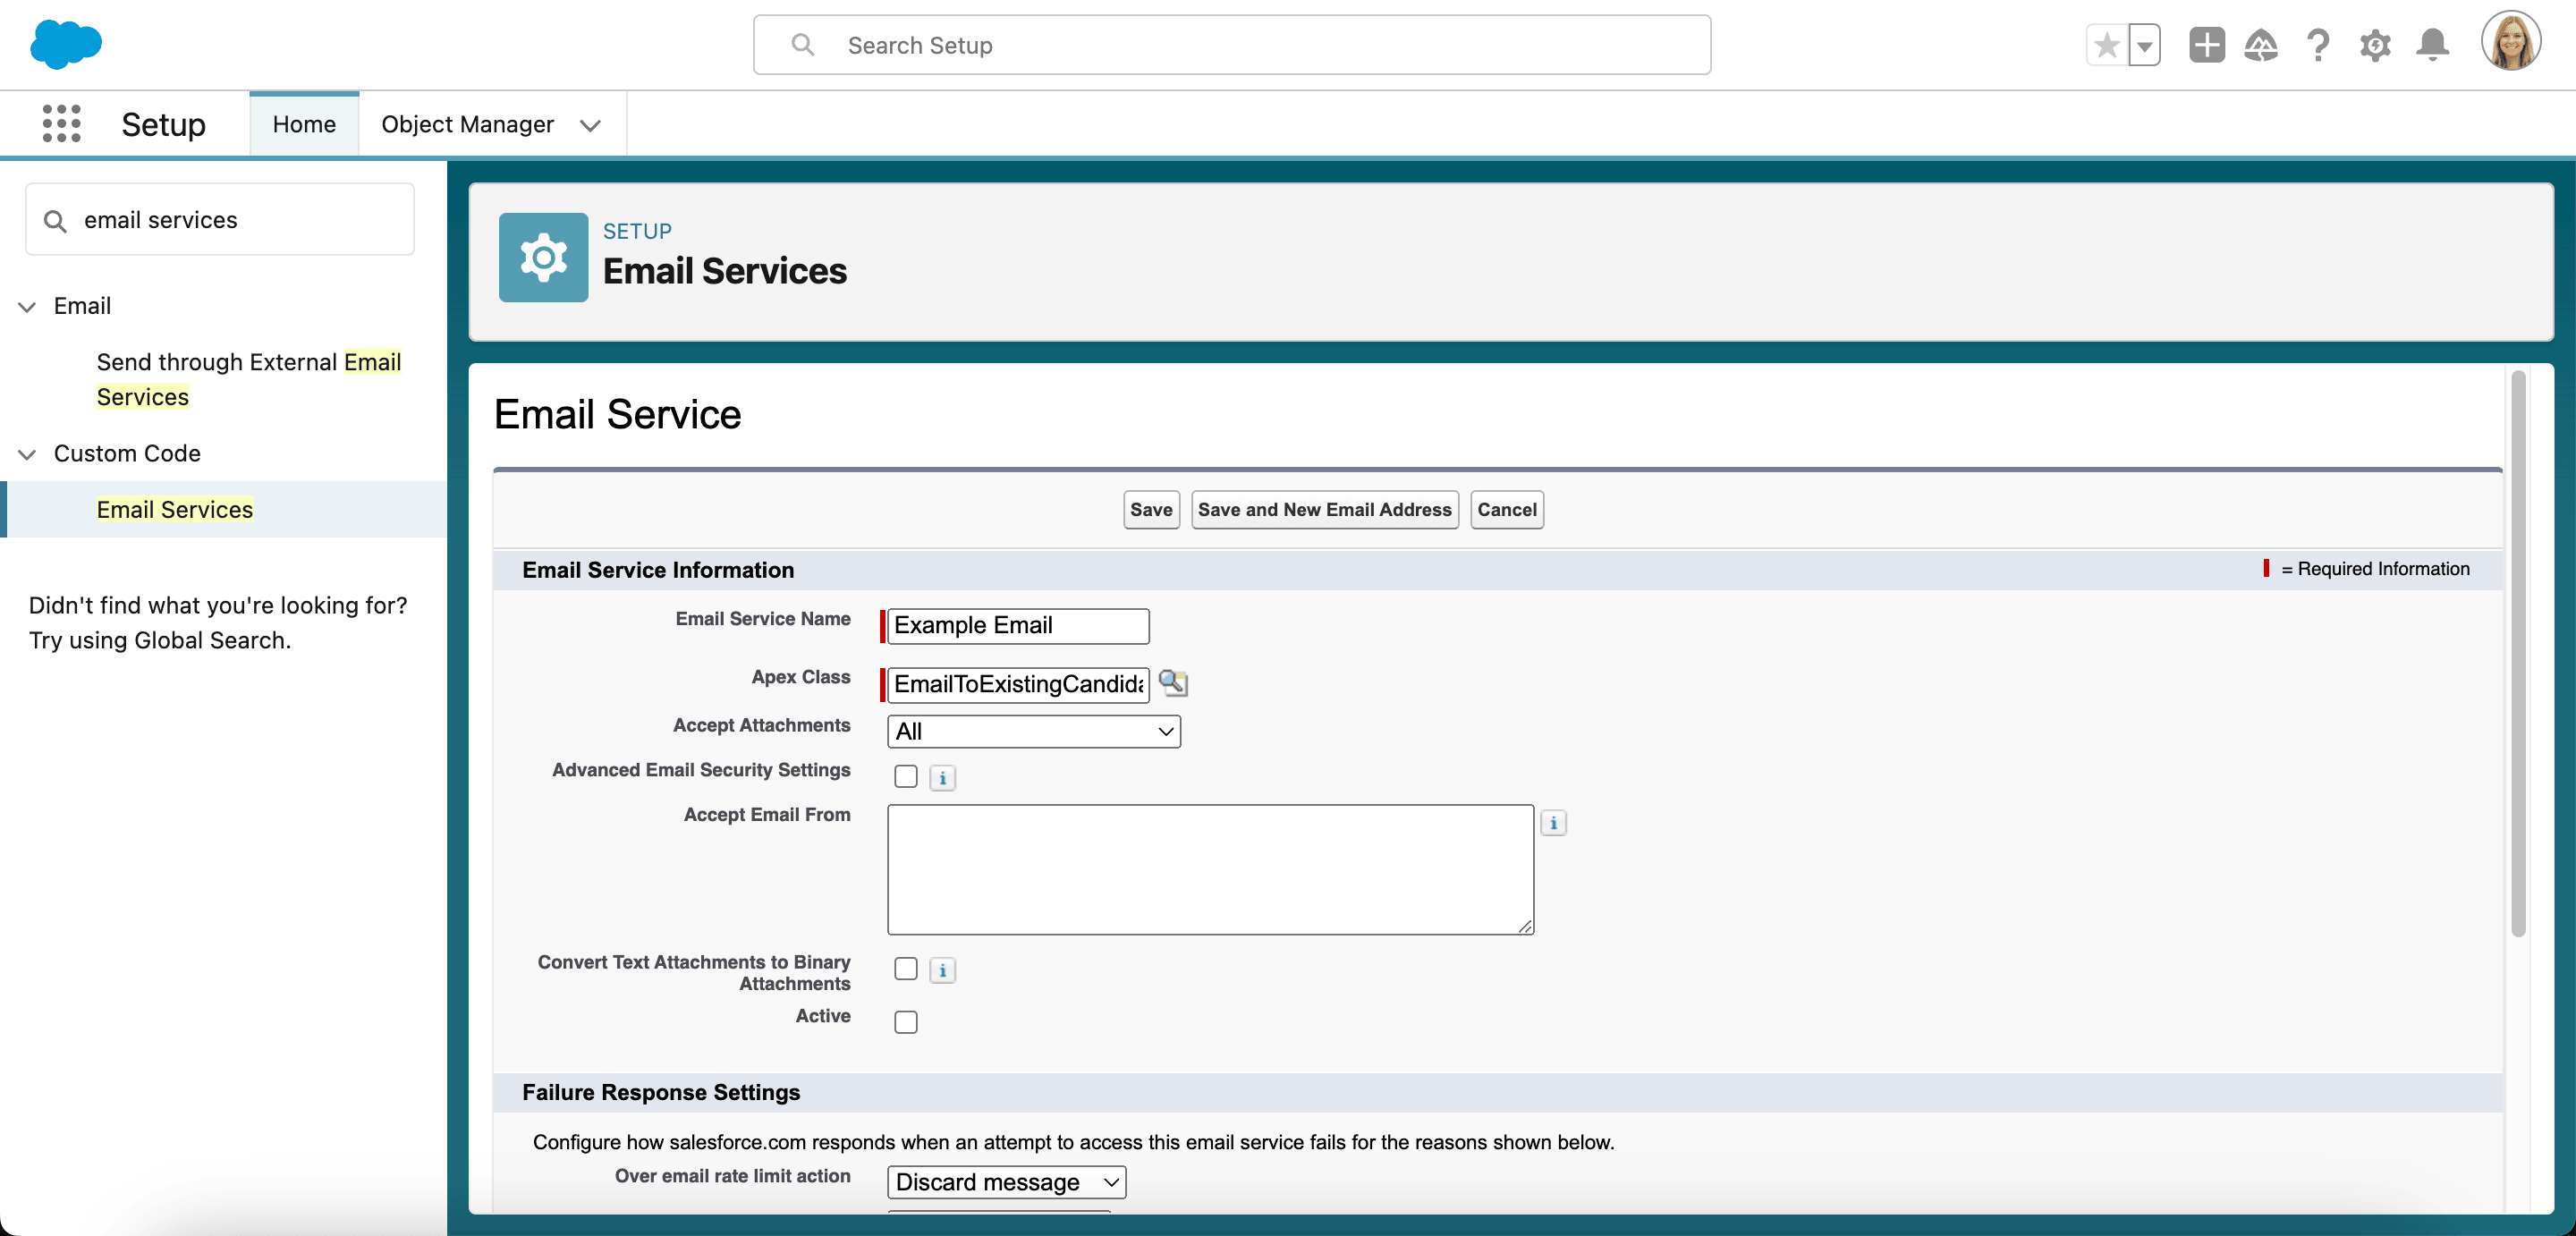
Optional: In Accept Attachments, select the attachments that the service accepts.
-
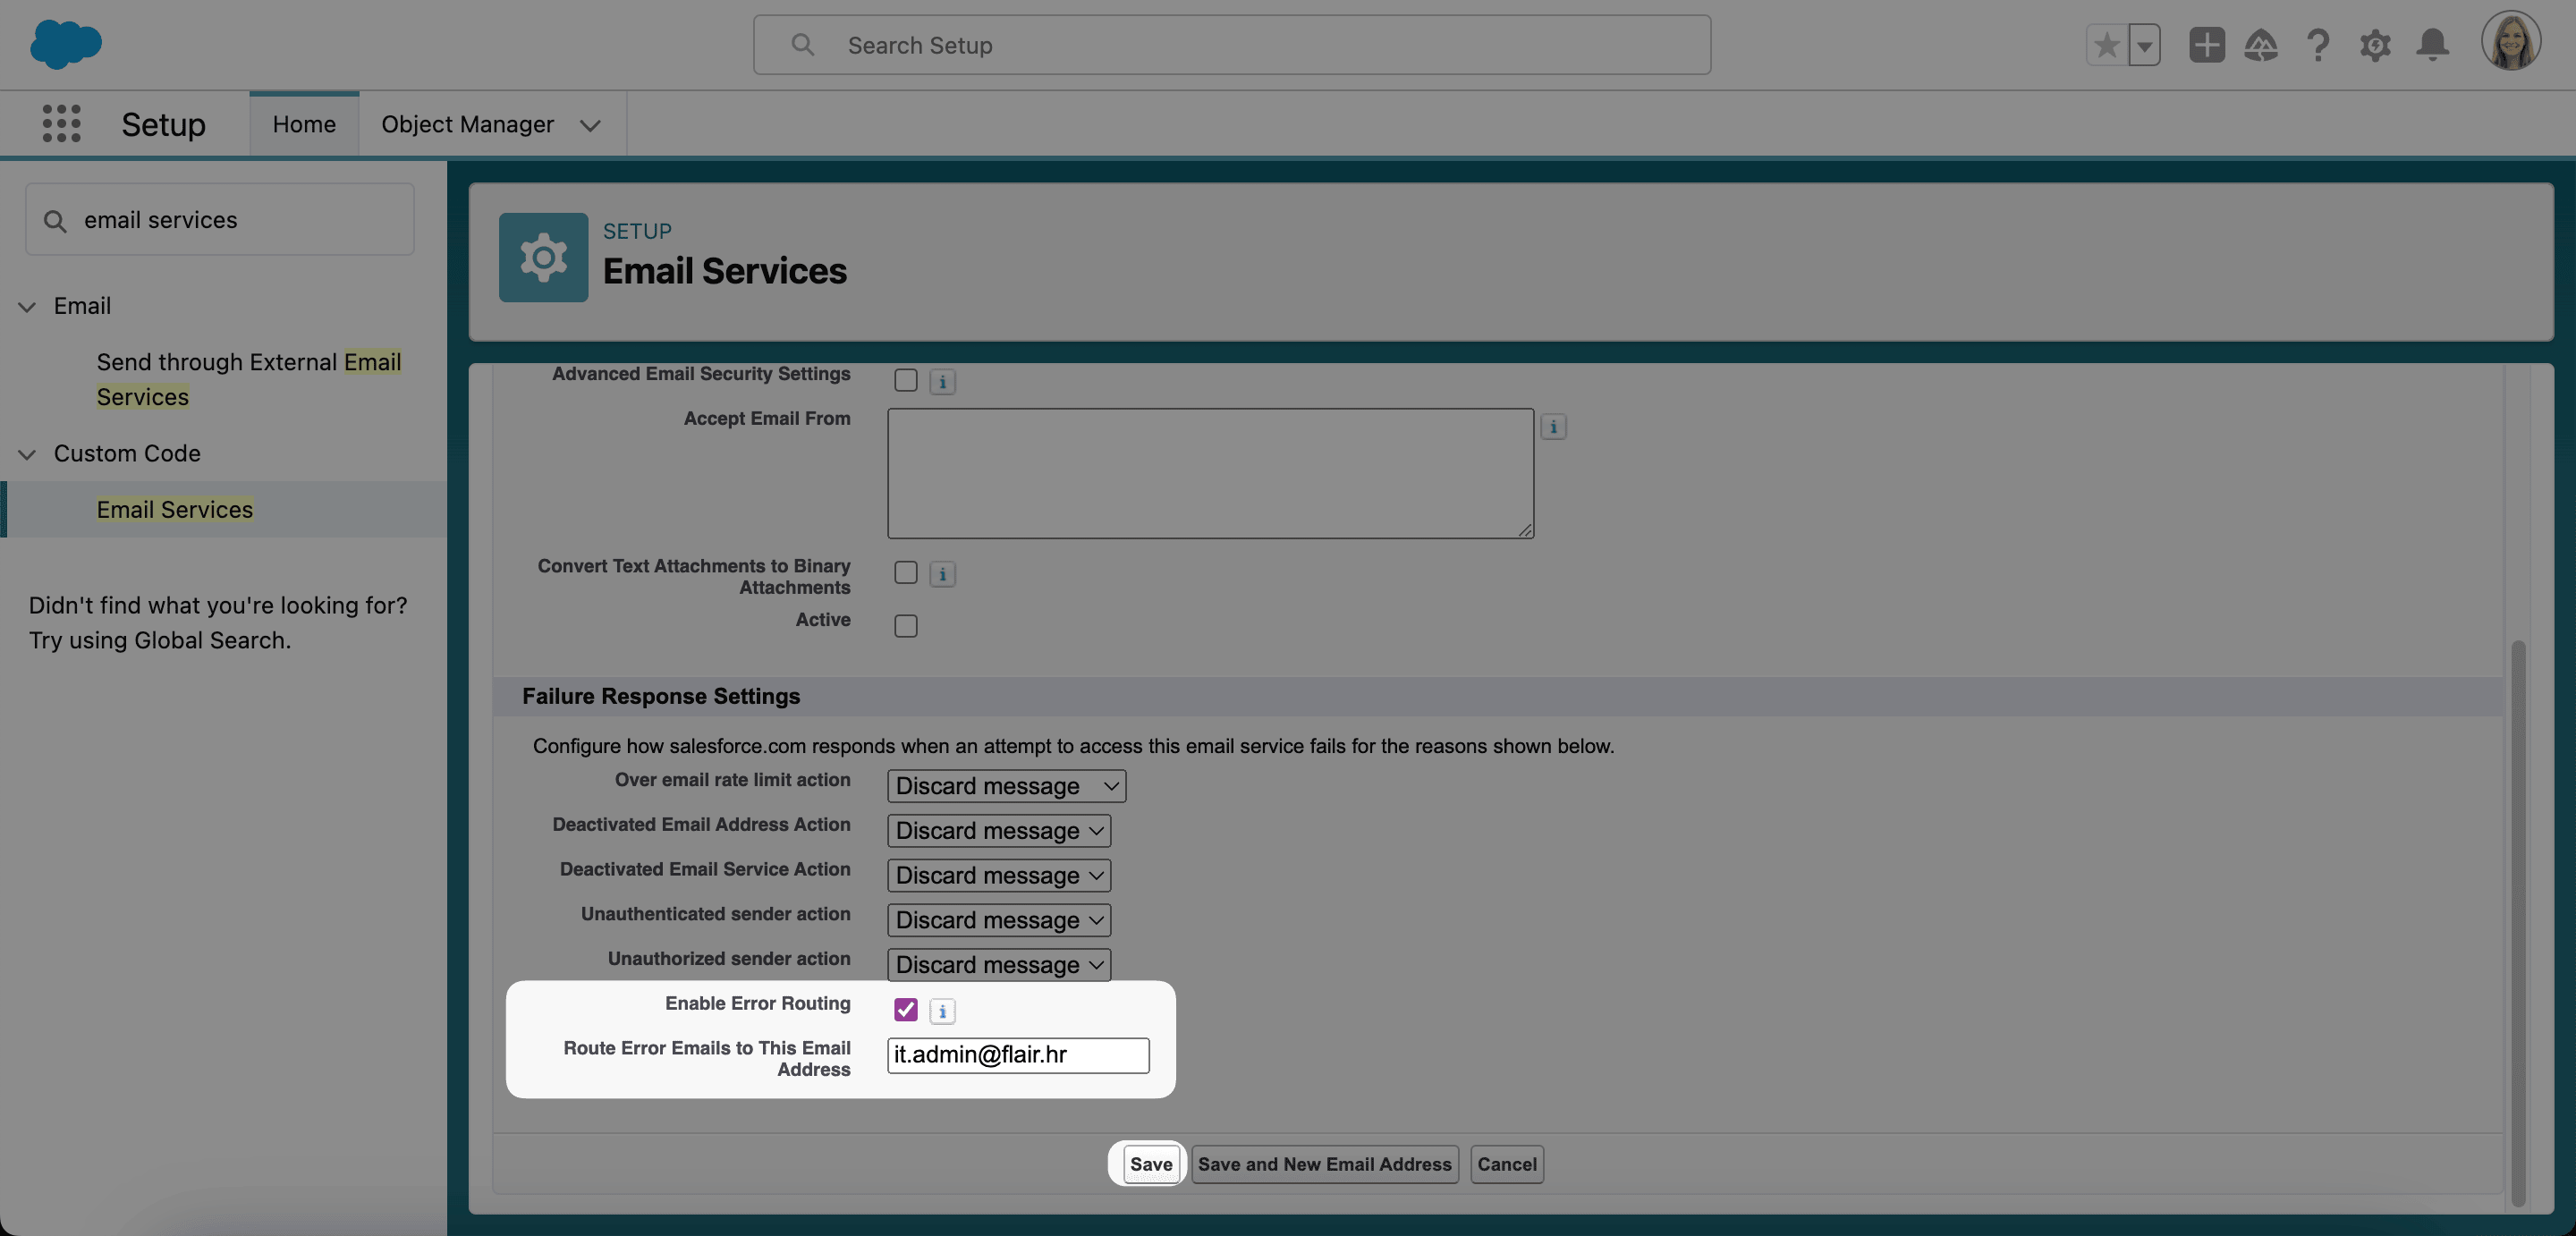
Optional: Select Enable Error Routing to send processing errors to a specific address.
-
Optional: Enter the error-routing address. Without error routing, Salesforce notifies the message sender.
-
Click Save.
-
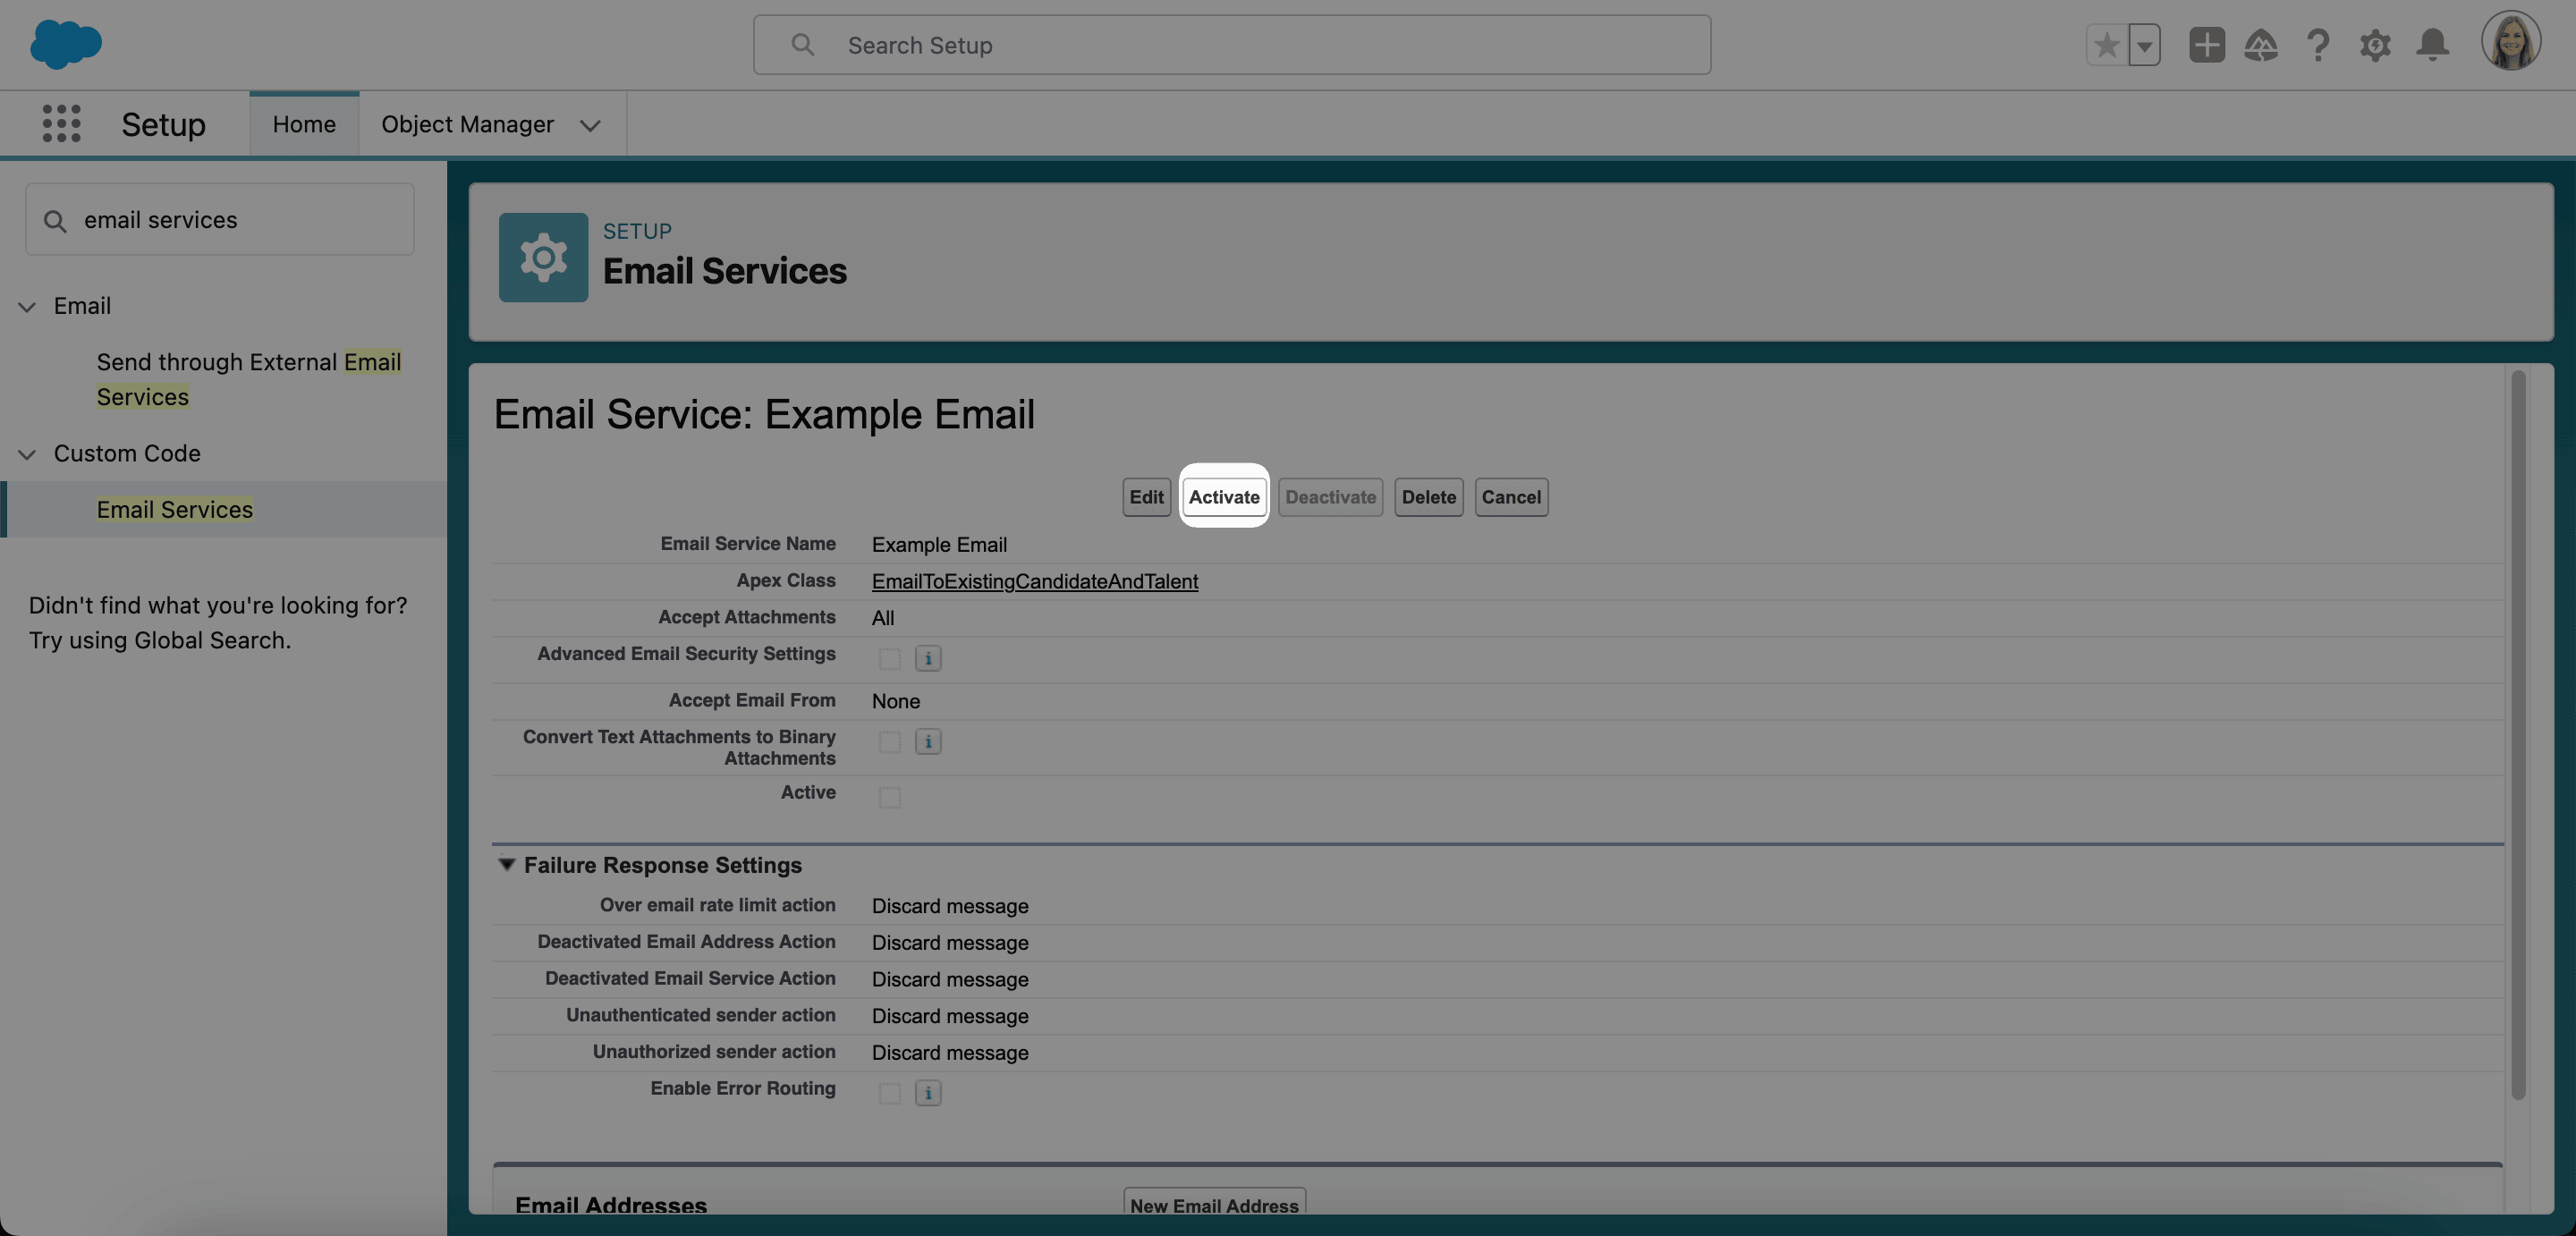
Click Activate. The email service starts processing messages.
View tracked email threads
-
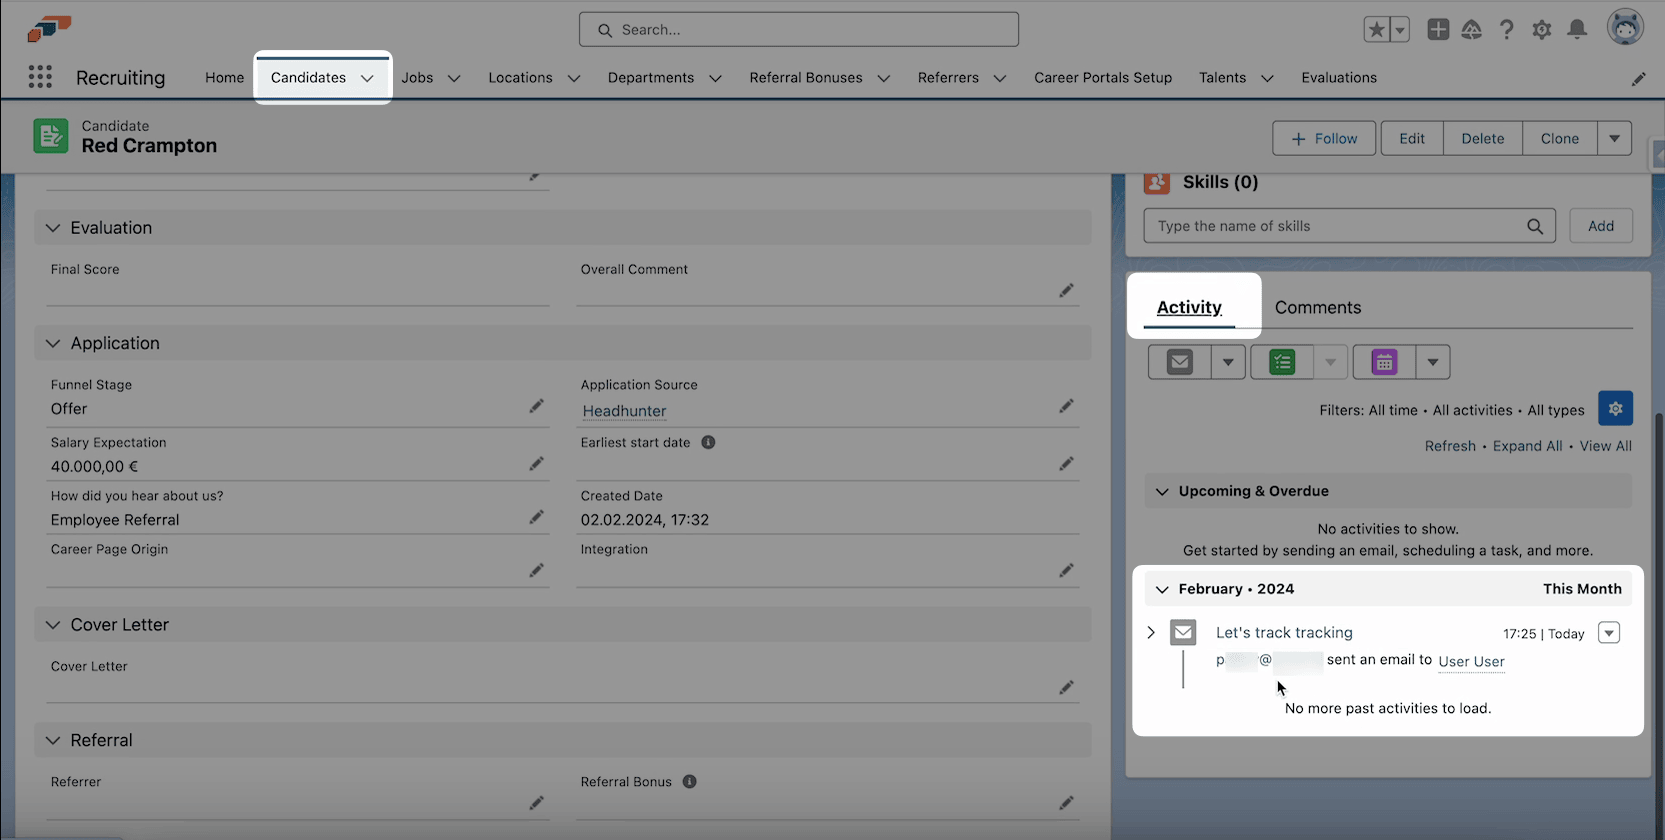
In the flair Recruiting app, open the candidate record.
-
Under Activity, click the > icon to expand a tracked email.
-
To record an outgoing message, add the service address to BCC when you email the candidate. The message appears under Activity.
Change the sender for recruiting emails
The new-candidate service uses the address configured on Email Service: Candidate when it sends the automatic applicant reply. Choose one of these methods:
- Edit the address on Email Service: Candidate.
- Set up an organization-wide email address and use it for candidate notifications.
Forward Gmail or Outlook messages
Forward a public recruiting inbox to the Salesforce email service address so flair captures candidate replies.
Forward messages from Gmail
- In Gmail, open Settings → See all settings → Forwarding and POP/IMAP.
- Click Add a forwarding address.
- Enter the Salesforce email service address.
- Confirm the address from the verification email.
- Choose whether to forward every message or create a filter for selected messages.
Forward messages from Outlook
- In Outlook, open Settings → Mail → Forwarding.
- Enable forwarding.
- Enter the Salesforce email service address.
- Optional: Select Keep a copy of forwarded messages.
- Save the changes.
To improve deliverability, configure DKIM for Salesforce email.